Difference between revisions of "Shieldbearer Guide"
From SpiralKnights
(→Shields In PVP) |
Snarbylord (Talk | contribs) m (→Shields In PVP) |
||
| (33 intermediate revisions by 13 users not shown) | |||
| Line 21: | Line 21: | ||
Blocking is generally the fastest and most reliable means of avoiding damage when you see an enemy winding up for an attack. Additionally, dodging often requires moving farther away from an enemy, so blocking can be important for penetrating a hail of ranged attacks or staying close enough to an enemy to easily counter-attack. In some cases, you may find yourself without space to dodge, and blocking will be your only option. | Blocking is generally the fastest and most reliable means of avoiding damage when you see an enemy winding up for an attack. Additionally, dodging often requires moving farther away from an enemy, so blocking can be important for penetrating a hail of ranged attacks or staying close enough to an enemy to easily counter-attack. In some cases, you may find yourself without space to dodge, and blocking will be your only option. | ||
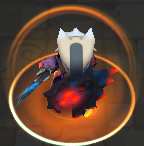
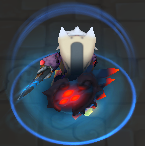
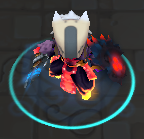
| − | But though your shield can save you from perils varied and grave, the shield has its own health rating, which decreases each time it blocks damage or a status. The shield's current health is indicated by the color of the dome of light that appears while the shield is raised: | + | But though your shield can save you from perils varied and grave, the shield has its own health rating, which decreases each time it blocks damage or a status. The shield's current health is indicated by the color of the dome of light that appears while the shield is raised or by the Shield Health Bar at the top-left of the screen: |
| + | |||
| + | [[File:Shield_Health.png|center|frame|Top: Full Health. Bottom: Moderate Damage.]] | ||
<center><gallery perrrow=4 caption="Shield Health"> | <center><gallery perrrow=4 caption="Shield Health"> | ||
| − | |||
| − | |||
| − | |||
File:Shield_orange.png|Heavy Damage | File:Shield_orange.png|Heavy Damage | ||
| + | File:Shield_yellow.png|Moderate Damage | ||
| + | File:Shield_green.png|Slight Damage | ||
| + | File:Shield_blue.png|Full Health | ||
</gallery></center> | </gallery></center> | ||
[[File:Shield_red.png|left|frame|Broken Shield]] | [[File:Shield_red.png|left|frame|Broken Shield]] | ||
| Line 38: | Line 40: | ||
== Shield Statistics == | == Shield Statistics == | ||
[[File:Equipment-Horned_Owlite_Shield_Stats.png|right]] | [[File:Equipment-Horned_Owlite_Shield_Stats.png|right]] | ||
| − | Shields have several statistics that affect how well they perform. Holding your mouse cursor over a shield in your arsenal will show a window similar to the one at the right. | + | Shields have several statistics that affect how well they perform. Holding your mouse cursor over a shield in your arsenal will show a window similar to the one at the right. None of a shield's stats provides any direct benefit to you; the damage you take when your shield is lowered (or broken) is completely unaffected by the type or level of your equipped shield. A shield's stats only protect the shield. |
| − | + | Each Shield has a base Health bar which represents how much punishment a shield can endure before breaking; the higher the health, the more you can endure overall. | |
| − | + | Each Shield have a set statistics against certain types of [[Damage]], these are Normal, Piercing, Elemental, and Shadow. Shields also come with the benefit of Immunity to whatever Status it resists; much like the statistics on the right have Immunity to both [[Fire]] and [[Shock]] damage that would otherwise inflict pure-damage to the Shield's health. An example is [[Fire]] will do a set amount of damage to a Shield without Fire Resistance and will not ignite you unless it makes direct contact with the Knight. | |
| − | + | To continue the subject of Defenses, Shield's work completely different compared to Knight [[Defense]]: | |
| + | |||
| + | The bar on the right represents a Horned Owlite Shield at its base level. Excluding the first bar, Horned Owlite Shield has 1.7 Normal Defense and 2.1 Elemental Defense. How do we calculate how much damage will be excluded from the base attack? Well, each unit (excluding the first one) is equal to 1.9 - 2.1 Damage Reduction from a source of damage. So, Horned Owlite Shield at the base level would negate 3.4 Normal Damage and 4.2 Elemental Damage. | ||
| + | |||
| + | Here's an example: Working with pure values, let's say the Horned Owlite Shield has 100 Health and an incoming [[Rocket Puppy]] bullet does 40 Damage (20 Normal Damage and 20 Elemental Damage) out of that 100, Horned Owlite Shield has 3.4 Normal Defense and 4.2 Elemental Defense, this means that together, the damage would be decreased from 40 Damage to 32.4 Damage. So how does statuses play into this, let's replace that Gun Puppy with a [[Slush Puppy]], the Freeze-Varaint of the Gun Puppy does the same damage except with a chance of Status, there's two variables when blocking a bullet: | ||
| + | |||
| + | -The Attack doesn't have Status attached and does Base Damage (40) | ||
| + | -The Attack does have Status attached and does Base Damage + Extra Damage (65+) | ||
| + | |||
| + | Because the Horned Owlite Shield doesn't have immunity to Freeze, the damage increases by a moderate amount. If it was instead a [[Red Rover]], the Fire-Variant of the Gun Puppy, you would only see the first variable due to the immunity of the Fire-Status. | ||
| + | |||
| + | Naturally, it's helpful to tailor your shield selection to the enemies you will be facing--but this requires that you acquire multiple shields. | ||
A scant few shields also have [[abilities]], which provide passive bonuses as long as the shield is equipped. At present, the only known shields with abilities are: | A scant few shields also have [[abilities]], which provide passive bonuses as long as the shield is equipped. At present, the only known shields with abilities are: | ||
| Line 62: | Line 75: | ||
** Trapping enemies in corners, or other locations where you can beat on them more easily | ** Trapping enemies in corners, or other locations where you can beat on them more easily | ||
** Moving enemies away from traps or other hazards, so you don't accidentally damage yourself while attacking them | ** Moving enemies away from traps or other hazards, so you don't accidentally damage yourself while attacking them | ||
| + | ** Pushing [[Jelly#Blast_Cube|blast cubes]] into other enemies before they explode | ||
It is important to note that momentum does NOT transfer: bumping one enemy into another will never move the second enemy. Thus, if you ever find yourself trapped in a mob of enemies two layers deep, you will not be able to move them by shield bumping, and will need to rely on the knockback of your regular attacks to escape. | It is important to note that momentum does NOT transfer: bumping one enemy into another will never move the second enemy. Thus, if you ever find yourself trapped in a mob of enemies two layers deep, you will not be able to move them by shield bumping, and will need to rely on the knockback of your regular attacks to escape. | ||
As with all knockback effects, shield bumping can make it harder for your allies to attack an enemy or to avoid its attacks. You should usually avoid bumping enemies towards nearby allies, or bumping enemies that an ally is preparing to attack (though there are always some exceptions). Shield bumping can also separate you from an enemy you were hoping to attack yourself, so you may want to back up a couple steps before blocking if you intend to counter-attack. | As with all knockback effects, shield bumping can make it harder for your allies to attack an enemy or to avoid its attacks. You should usually avoid bumping enemies towards nearby allies, or bumping enemies that an ally is preparing to attack (though there are always some exceptions). Shield bumping can also separate you from an enemy you were hoping to attack yourself, so you may want to back up a couple steps before blocking if you intend to counter-attack. | ||
| + | |||
| + | The [[Ironclaw Munitions Factory]] has very thin purple and orange walls. These walls block attacks, but it is possible to shield bump an enemy on the other side. | ||
| + | |||
| + | |||
| + | == Shield Bash == | ||
| + | |||
| + | A technique which can be utilized by any Knight with a shield to launch themselves shield-first in the direction they're facing. Any enemies in the Knight's way will get lightly damaged, knocked back, and be inflicted with minor [[Stun]]; the amount of damage inflicted increases with better shields. Shield Bashing can only be used if the Shield is at full health, and performing a bash will drain half of the Shield's health. | ||
| + | |||
| + | The Shield Bash can be used to push enemies - especially large ones - around more reliably than Shield Bumping, as they get pushed in the direction the Knight is moving and the stun allows for a player to get more hits in before the monster can attack; however Knights are not invulnerable while performing the move and may still get damaged if the monster attacks while getting pushed. | ||
| + | |||
| + | There are currently two variants of the shield bash which are unique to a specific line of Shields: | ||
| + | |||
| + | *The ''Basic'' Shield Bash inflicts [[Stun]] and hits only once. These are used by every shield unless stated otherwise. | ||
| + | *The ''[[Tortodrone]]'' Shield Bash inflicts [[Stun]] and hits twice, the second hit preforming a much larger radius of damage. These are limited to shields crafted via the [[Mysterious Alchemy Machine]]. | ||
| + | |||
| + | {{SKDamageTableTest|Shield Bash| | ||
| + | {{SKDamageRow|☆☆☆☆☆|6 - 7 |7 - ? |? - ? | 6 - 5|5 - ? |5 - 4}} | ||
| + | {{SKDamageRow|★☆☆☆☆|7 - 9 |? - ? |11 - ? |10 - 9|9 - ? |8}} | ||
| + | {{SKDamageRow|★★☆☆☆|16 - 18|20 - 23|23 - 26|25 - 23|22 - ? |19 - 17}} | ||
| + | {{SKDamageRow|★★★☆☆|17 - 20|22 - 24|25 - 26|28 - 31|29 - 26|25 - 23}} | ||
| + | {{SKDamageRow|★★★★☆|19 - 20|23 - 26|48 - 46|47 - 49|50 - 63|67 - 66}} | ||
| + | {{SKDamageRow|★★★★★|21 - 22|25 - 28|50 - 49|50 - 51|55 - 67|71 - 74}} | ||
| + | }} | ||
| + | *[[Consumables#Ability Boosters|Damage Boosters]] affect Shield Bash damage as well as weapon damage. Damage Bonuses do not. | ||
| + | *The Damage dealt has no scaling and is unaffected by leveling. | ||
== Advanced Techniques == | == Advanced Techniques == | ||
| − | [[File:Calibur_3_hits_canceled.gif|frame|Shield Canceling Demonstration]] | + | [[File:Calibur_3_hits_canceled.gif|frame|A knight showing a Shield Canceling Demonstration]] |
=== Shield Canceling === | === Shield Canceling === | ||
One of the most useful techniques, especially with swords. This technique is based on holding your shield as soon as you attack with your sword, this will cause an animation cancellation in your attack, making your attack not only finishing quicker, but also having the chance of shield bumping or blocking an enemy's attack. | One of the most useful techniques, especially with swords. This technique is based on holding your shield as soon as you attack with your sword, this will cause an animation cancellation in your attack, making your attack not only finishing quicker, but also having the chance of shield bumping or blocking an enemy's attack. | ||
| Line 77: | Line 116: | ||
*''Understand that applying this technique with a proper timing will make you not only attack quicker than your actual sword combo, but you will also shield bump while staying in the same place!'' | *''Understand that applying this technique with a proper timing will make you not only attack quicker than your actual sword combo, but you will also shield bump while staying in the same place!'' | ||
| − | Though shield canceling does not change the maximum length of your combo, your first attack after blocking will always be your weapon's opening attack. For example, the [[Brandish]] normally performs a 3-hit combo where the first attack is made standing still, the second is made with a step forward, and the final attack has a step with increased sweep and damage. If you shield cancel the first attack and then continue attacking, you will perform the first attack twice, followed by the normal finisher--effectively replacing the second attack of the combo with a copy of the first attack. | + | Though shield canceling does not change the maximum length of your combo, your first attack after blocking will always be your weapon's opening attack. For example, the [[Brandish]] normally performs a 3-hit combo where the first attack is made standing still, the second is made with a step forward, and the final attack has a step with increased sweep and damage. If you shield cancel the first attack and then continue attacking, you will perform the first attack twice, followed by the normal finisher--effectively replacing the second attack of the combo with a copy of the first attack. The [[Warmaster Rocket Hammer]] and it's predecessors have a swipe, a dash then another swipe normally so they can make a three-hit combo by attacking, then shield cancelling, then continuing to attack. If you're quick enough, you'll have a three swing combo. |
Notice the animation at the right shows the same attack three times, instead of the normal 3-hit combo. This gives up the extra damage you would normally deal on the finisher and still forces a pause in your combo after the third slash, but it allows you to stay in one place while attacking with a weapon that would normally propel you forward, and may not leave you vulnerable for as long as a normal finisher. | Notice the animation at the right shows the same attack three times, instead of the normal 3-hit combo. This gives up the extra damage you would normally deal on the finisher and still forces a pause in your combo after the third slash, but it allows you to stay in one place while attacking with a weapon that would normally propel you forward, and may not leave you vulnerable for as long as a normal finisher. | ||
| Line 88: | Line 127: | ||
This works with all types of weapons, and when performed with a sword or gun allows you to skip the regular attack you would normally make before beginning to charge. | This works with all types of weapons, and when performed with a sword or gun allows you to skip the regular attack you would normally make before beginning to charge. | ||
| + | ==The Inventory== | ||
| + | |||
| + | ===General Purpose Shields=== | ||
| + | The General Purpose shields are shields that can provide at least a moderate source of defense in any situation. These shields do not provide any sort of offensive or defensive boost, they just merely keep the user safe. | ||
| + | |||
| + | {{item|Aegis}} {{defense|normal}}/{{defense|piercing}} | ||
| + | :The Aegis serves as the standard shield of the Spiral Order. It has great normal defense and decent piercing defense. It is favored by both beginner and veteran players because of its adequate defense skills and the fact that the recipe for the Aegis and its preceding items can be obtained through missions. | ||
| + | |||
| + | {{item|Heater Shield}} {{defense|normal}}/{{defense|elemental}}, {{status|freeze}} | ||
| + | :The other potential upgrade from the [[Mighty Defender]], the Heater Shield trades the piercing defense for Elemental defense and Freeze Resistance. It may arguably be one of the best trade-offs to have occured, but a sturdy shield nonetheless. | ||
| + | |||
| + | {{item|Omega Shell}} {{defense|normal}} | ||
| + | :The Omega Shell only has normal defense without any resistances to status, but it has the highest health of all shields. The Omega Shell does nothing that other shields already do better, but it works well where other shields are not: there is no level the Omega Shield is disadvantaged in. | ||
| + | |||
| + | ===Heavy Shields=== | ||
| + | The "Heavy" shields, or plate shields have superb normal defense, stun resistance, and are massive in appearance. | ||
| + | |||
| + | {{item|Ancient Plate Shield}} {{defense|normal}} | ||
| + | :The Ancient Plate Shield has the best normal defense in the game, and sports a green, mossy theme. It can be obtained via Brinks for 30 [[Token#Boss_Tokens|Almirian Seals]]. | ||
| + | |||
| + | {{item|Ironmight Plate Shield}} {{defense|normal}}/{{defense|piercing}}, {{status|stun}} | ||
| + | :The Ironmight Plate Shield has, like the [[Aegis]], both normal and piercing defense. Unlike the Aegis however, the shield can hold back the stun status and then some. | ||
| + | |||
| + | {{item|Volcanic Plate Shield}} {{defense|normal}}, {{status|fire}}{{status|stun}} | ||
| + | :The Volcanic Plate Shield, being the sidegrade to the Ironmight, trades off the special defense for fire resist on top of stun, making it a good choice for melee encounters in fire-themed stratum. | ||
| + | |||
| + | ===Specialized Shields=== | ||
| + | The shields in this category are meant for fairly situational use. Meaning, there are a limited amount of places or monsters the shield would be recommended for use against. All of these shields though have split defense. | ||
| + | |||
| + | {{item|Dragon Scale Shield}} {{defense|piercing}}/{{defense|elemental}}, {{status|poison}}{{status|fire}} | ||
| + | :The Dragon Scale Shield provides Piercing and Elemental defense, as well as Poison and Fire Resistance. The only place in the game where all of the potential of this shield can be fully utilized: Compound 42. It seems that anywhere else from there, other shields can outperform the DSS easily. | ||
| + | |||
| + | {{item|Grey Owlite Shield}} {{defense|normal}}/{{defense|elemental}}, {{status|fire}}{{status|shock}} | ||
| + | :The Grey Owlite Shield provides Normal and Elemental defense, with a skew towards the latter. It has resistance to both shock and fire, making it effective in both FSC and Ironclaw Munitions Factory, as it has a natural advantage against various types of gun puppies. | ||
| + | |||
| + | {{item|Dread Skelly Shield}} {{defense|normal}}/{{defense|shadow}}, {{status|poison}}{{status|freeze}} | ||
| + | :The Dread Skelly Shield protects the wielder against normal and shadow defense at all times. It also provides poison and freeze resistance, making it ideal for Candlestick Keeps and the Second Arena of the Gauntlet. | ||
| + | |||
| + | {{item|Royal Jelly Shield}} {{defense|piercing}}/{{defense|normal}}, {{status|sleep}}{{status|stun}} | ||
| + | :The Royal Jelly Shield was obviously designed to defend against the boss stratum it's named after. It does however, have significant defense against Beasts, as it is a piercing shield. It uniquely carries sleep resistance, allowing it to be useful in the [[Starlight Cradle]]. | ||
| + | |||
| + | {{item|Crest of Almire}} {{defense|normal}}/{{defense|shadow}}, {{status|fire}}{{status|shock}} | ||
| + | :The Crest of Almire would nearly be considered a reskin of the Grey Owlite Shield, if not for the change in Elemental to Shadow defense. Its predecessor, the [[Blackened Crest]] must be bought from [[Brinks]] for 30 [[Token#Boss_Tokens|Almirian Seals]]. | ||
| + | |||
| + | ===Tortodrone Shields=== | ||
| + | Tortodrone Shields are only craftable from the [[Mysterious Alchemy Machine]], with ingredients obtained from [[Tortodrone]]s. All Tortodrone shields deal double damage and have a special animation when [[Shield Bash]]ing, but give the wielder a Movement Speed Decrease: Low. | ||
| + | |||
| + | {{item|Omegaward}} {{defense|normal}}/{{defense|elemental}}, {{status|fire}}{{status|freeze}} | ||
| + | :The Omegaward is a sidegrade with identical stats to the Grey Owlite Shield, but trades its shock resist for freeze. | ||
| + | |||
| + | {{item|Savage Tortoise}} {{defense|normal}}/{{defense|piercing}}, {{status|freeze}}{{status|poison}} | ||
| + | :As a sidegrade to the Royal Jelly Shield, the Savage Tortoise retains the same defense, but instead protects against Shock and Poison instead of Stun and Sleep. It works well against Quicksilvers and Toxigels. | ||
| + | |||
| + | {{item|Grand Tortoise}} {{defense|normal}}, {{status|stun}} | ||
| + | :Apart from the aforementioned special shield bash and movement penalty, the Grand Tortoise is identical in stats to the Ancient Plate Shield | ||
| + | |||
| + | {{item|Gorgomega}} {{defense|normal}}/{{defense|shadow}}, {{status|stun}}{{status|freeze}} | ||
| + | :The Gorgomega is a sidegrade of the Dread Skelly Shield with Stun resistance instead of Poison. This means that it is one of the very few shields that can stand up to T3 Elite difficulty [[Silversap]]s, as well as being the only Shadow-defense shield providing stun resist: useful for Trojans and their entourage. It excels in [[Heart of Ice]]. | ||
| + | |||
| + | ===Booster Shields=== | ||
| + | The booster shields are those that provide a passive boost in stats to the user. | ||
| + | |||
| + | {{item|Barbarous Thorn Shield}} (and its predecessors) {{defense|normal}}/{{defense|piercing}} | ||
| + | :The Bristling Buckler line of shields provide a damage increase to all swords. As it upgrades, the bonus will grow, into eventually, a medium bonus. The BTS can provide defense against slimes and beasts. | ||
| + | |||
| + | {{item|Swiftstrike Buckler}} {{defense|normal}} | ||
| + | :The Swiftstrike provides ASI: High to all weapons (bombs included) despite its description. However, because it is a 3* shield, it cannot take very much punishment in Tier 3. | ||
| + | |||
| + | {{item|Scarlet Shield}} {{defense|normal}} | ||
| + | :The Scarlet Shield provides a health bonus to the wielder. This health bonus is minor and does not scale, so as the shield is 3* it is not very effective in Tier 3. | ||
| + | |||
| + | ===Promotional Shields=== | ||
| + | Promotional Shields are shields that are only obtainable from Prize Boxes. While the majority of them are reskins of existing shields like the [[The Bitter End]] and the [[Node Slime Wall]]s, some promotional shields have unique stats. | ||
| + | |||
| + | {{item|Power Mitt}} {{defense|normal}}/{{defense|elemental}}, {{status|fire}} | ||
| + | :The Power Mitt is essentially an alternate version of the Heater Shield that provides protection against Fire instead of Freeze. It is more general purpose and can handle most fire attacks better than the Owlite Shield, but isn't as well-rounded as the Volcanic Plate. | ||
| + | |||
| + | {{item|Celestial Shield}} {{defense|piercing}}/{{defense|shadow}} | ||
| + | :The Celestial Shield provides defense against Shadow and Piercing damage in equal amounts. It is the only shield other than the Dragon Scale Shield to have no normal defense, and thus it breaks faster when hit by melee strikes. This specific combination of defense types allows it to perform well in UGWW and Heart of Ice. | ||
== Shields In PVP == | == Shields In PVP == | ||
| − | In player-versus-player, equipped shields might end up taking a minor | + | In player-versus-player, equipped shields might end up taking a minor role, for a few reasons: |
'''Blast Network''': | '''Blast Network''': | ||
| − | While | + | While playing Blast Network, shields do not function, just as weapons and armour of any type, and are shown at the player's back, similarly to Haven. |
| − | shields do not function, just as weapons and | + | |
| − | armour of any type, and are shown at the | + | |
| − | player's back, | + | |
| − | + | ||
| − | + | ||
| − | + | ||
| − | + | ||
| − | + | ||
| − | + | ||
| − | + | ||
| − | ''' | + | '''Lockdown''': Lockdown substitutes your shield for a specialized module. One of these is the Guardian Shield, the only ''true'' shield in Lockdown, which has a high resistance to all types of damage and generates a huge shield that appears after one second, protecting and healing any friendly knight inside. It gives a health bonus of +10, grants a low sword attack speed increase and bomb charge time reduction, although it also has a low decrease to gun attack speed. Shield-bumping with the Guardian Shield is not possible. |
{{guides}} | {{guides}} | ||
| + | [[Category:Guides (Player Made)]] | ||
Latest revision as of 02:42, 28 June 2017
| |
The topic of this article or section is subject to personal opinion, and does not represent any one absolute truth. |
| If you disagree, discuss your concerns on the the talk page before editing. |
| |
|
|
Introduction
No matter what weapons you bring with you into the Clockworks, you can (and should) equip a Shield. Shields are among the most powerful and versatile tools in Spiral Knights, and their proper use is key to survival for all knights. Some knights may be swordmasters, gunslingers, or bombers, but everyone should master their shield.
The Basics
Holding your block button will reduce your movement speed but raise your shield. While raised, your shield negates essentially all damage and status effects that you would otherwise sustain (even weird stuff you wouldn't expect a shield to block, such as spike traps or breath attacks, though it will not block damage from fire once you have started burning).
The direction you are facing is irrelevant; shields are omnidirectional. Shields do not prevent you from being knocked back. You will be momentarily immobilized whenever something impacts your shield, and in the case of melee attacks, the attacker may be pushed away.
Blocking is generally the fastest and most reliable means of avoiding damage when you see an enemy winding up for an attack. Additionally, dodging often requires moving farther away from an enemy, so blocking can be important for penetrating a hail of ranged attacks or staying close enough to an enemy to easily counter-attack. In some cases, you may find yourself without space to dodge, and blocking will be your only option.
But though your shield can save you from perils varied and grave, the shield has its own health rating, which decreases each time it blocks damage or a status. The shield's current health is indicated by the color of the dome of light that appears while the shield is raised or by the Shield Health Bar at the top-left of the screen:
- Shield Health
Shields quickly regenerate health if they go a few seconds without blocking anything, but if they take too much damage without a rest, they will break. A broken shield is disabled for approximately 8 seconds, during which time it can still be raised (which will still reduce your movement speed), but shows only a red aura around your feet (see left) instead of the usual light dome, and provides no defense at all!
After 8 seconds, your shield turns orange and can once again block damage and statuses, and will quickly regenerate to maximum health if it doesn't immediately take damage again. You will see a brief cyan flash around your feet when your shield recovers, even if you are not blocking at the time (see right).
If your shield breaks, your ability to protect yourself is severely diminished, and it is usually wise to retreat while it recovers (if possible). When fighting monsters that are too fast or too well-positioned for you to avoid them for 8 seconds, extreme care should be taken not to let your shield break in the first place. For example, if you attract the attention of several turrets at once in an Arena or Danger Room, you should try to dodge as many attacks as possible (rather than blocking them) until you have defeated enough turrets in one part of the room to create a relative "safe zone" to which you can retreat if necessary.
Shield Statistics
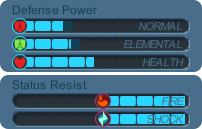
Shields have several statistics that affect how well they perform. Holding your mouse cursor over a shield in your arsenal will show a window similar to the one at the right. None of a shield's stats provides any direct benefit to you; the damage you take when your shield is lowered (or broken) is completely unaffected by the type or level of your equipped shield. A shield's stats only protect the shield.
Each Shield has a base Health bar which represents how much punishment a shield can endure before breaking; the higher the health, the more you can endure overall.
Each Shield have a set statistics against certain types of Damage, these are Normal, Piercing, Elemental, and Shadow. Shields also come with the benefit of Immunity to whatever Status it resists; much like the statistics on the right have Immunity to both Fire and Shock damage that would otherwise inflict pure-damage to the Shield's health. An example is Fire will do a set amount of damage to a Shield without Fire Resistance and will not ignite you unless it makes direct contact with the Knight.
To continue the subject of Defenses, Shield's work completely different compared to Knight Defense:
The bar on the right represents a Horned Owlite Shield at its base level. Excluding the first bar, Horned Owlite Shield has 1.7 Normal Defense and 2.1 Elemental Defense. How do we calculate how much damage will be excluded from the base attack? Well, each unit (excluding the first one) is equal to 1.9 - 2.1 Damage Reduction from a source of damage. So, Horned Owlite Shield at the base level would negate 3.4 Normal Damage and 4.2 Elemental Damage.
Here's an example: Working with pure values, let's say the Horned Owlite Shield has 100 Health and an incoming Rocket Puppy bullet does 40 Damage (20 Normal Damage and 20 Elemental Damage) out of that 100, Horned Owlite Shield has 3.4 Normal Defense and 4.2 Elemental Defense, this means that together, the damage would be decreased from 40 Damage to 32.4 Damage. So how does statuses play into this, let's replace that Gun Puppy with a Slush Puppy, the Freeze-Varaint of the Gun Puppy does the same damage except with a chance of Status, there's two variables when blocking a bullet:
-The Attack doesn't have Status attached and does Base Damage (40) -The Attack does have Status attached and does Base Damage + Extra Damage (65+)
Because the Horned Owlite Shield doesn't have immunity to Freeze, the damage increases by a moderate amount. If it was instead a Red Rover, the Fire-Variant of the Gun Puppy, you would only see the first variable due to the immunity of the Fire-Status.
Naturally, it's helpful to tailor your shield selection to the enemies you will be facing--but this requires that you acquire multiple shields.
A scant few shields also have abilities, which provide passive bonuses as long as the shield is equipped. At present, the only known shields with abilities are:
-
 Bristling Buckler (and its upgrades)
-
 Swiftstrike Buckler
-
 Scarlet Shield
Shield Bumping
An important secondary function of shields is their ability to push opponents around. At the moment you raise your shield, enemies that are very close to you are knocked away (raising your shield and then walking into enemies will not move them).
Since shield bumping only works at the moment your shield is raised, you need to lower your shield before you can bump. Nontheless, shield bumping is a powerful and versatile technique that can be used for:
- Defense (knocking an enemy away before it attacks you)
- Forcing your way through a "wall" of enemies, or escaping when surrounded
- Herding enemies into favorable locations, such as:
- Grouping enemies together for area attacks
- Separating enemies so they cannot support each other
- Trapping enemies in corners, or other locations where you can beat on them more easily
- Moving enemies away from traps or other hazards, so you don't accidentally damage yourself while attacking them
- Pushing blast cubes into other enemies before they explode
It is important to note that momentum does NOT transfer: bumping one enemy into another will never move the second enemy. Thus, if you ever find yourself trapped in a mob of enemies two layers deep, you will not be able to move them by shield bumping, and will need to rely on the knockback of your regular attacks to escape.
As with all knockback effects, shield bumping can make it harder for your allies to attack an enemy or to avoid its attacks. You should usually avoid bumping enemies towards nearby allies, or bumping enemies that an ally is preparing to attack (though there are always some exceptions). Shield bumping can also separate you from an enemy you were hoping to attack yourself, so you may want to back up a couple steps before blocking if you intend to counter-attack.
The Ironclaw Munitions Factory has very thin purple and orange walls. These walls block attacks, but it is possible to shield bump an enemy on the other side.
Shield Bash
A technique which can be utilized by any Knight with a shield to launch themselves shield-first in the direction they're facing. Any enemies in the Knight's way will get lightly damaged, knocked back, and be inflicted with minor Stun; the amount of damage inflicted increases with better shields. Shield Bashing can only be used if the Shield is at full health, and performing a bash will drain half of the Shield's health.
The Shield Bash can be used to push enemies - especially large ones - around more reliably than Shield Bumping, as they get pushed in the direction the Knight is moving and the stun allows for a player to get more hits in before the monster can attack; however Knights are not invulnerable while performing the move and may still get damaged if the monster attacks while getting pushed.
There are currently two variants of the shield bash which are unique to a specific line of Shields:
- The Basic Shield Bash inflicts Stun and hits only once. These are used by every shield unless stated otherwise.
- The Tortodrone Shield Bash inflicts Stun and hits twice, the second hit preforming a much larger radius of damage. These are limited to shields crafted via the Mysterious Alchemy Machine.
| Shield Bash's Damage Table | ||||||
|---|---|---|---|---|---|---|
| Stratum 1 | Stratum 2 | Stratum 3 | Stratum 4 | Stratum 5 | Stratum 6 | |
| ☆☆☆☆☆ | 6 - 7 | 7 - ? | ? - ? | 6 - 5 | 5 - ? | 5 - 4 |
| ★☆☆☆☆ | 7 - 9 | ? - ? | 11 - ? | 10 - 9 | 9 - ? | 8 |
| ★★☆☆☆ | 16 - 18 | 20 - 23 | 23 - 26 | 25 - 23 | 22 - ? | 19 - 17 |
| ★★★☆☆ | 17 - 20 | 22 - 24 | 25 - 26 | 28 - 31 | 29 - 26 | 25 - 23 |
| ★★★★☆ | 19 - 20 | 23 - 26 | 48 - 46 | 47 - 49 | 50 - 63 | 67 - 66 |
| ★★★★★ | 21 - 22 | 25 - 28 | 50 - 49 | 50 - 51 | 55 - 67 | 71 - 74 |
- Damage Boosters affect Shield Bash damage as well as weapon damage. Damage Bonuses do not.
- The Damage dealt has no scaling and is unaffected by leveling.
Advanced Techniques
Shield Canceling
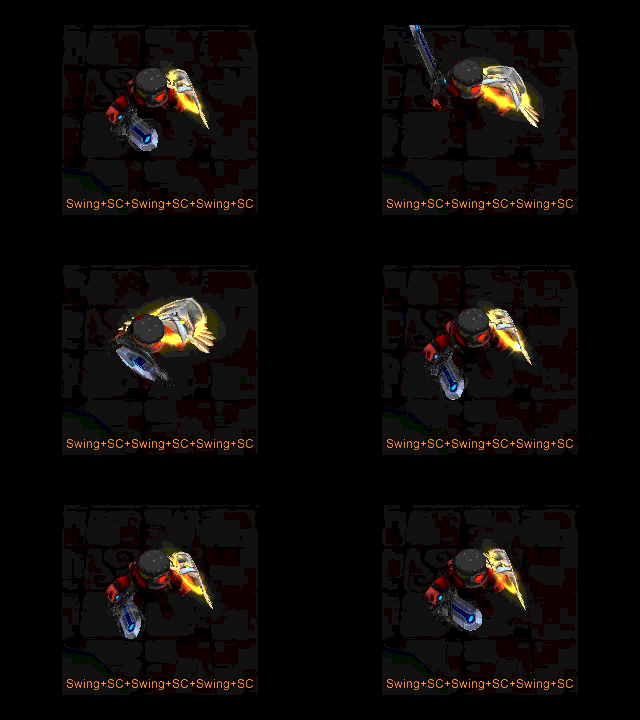
One of the most useful techniques, especially with swords. This technique is based on holding your shield as soon as you attack with your sword, this will cause an animation cancellation in your attack, making your attack not only finishing quicker, but also having the chance of shield bumping or blocking an enemy's attack.
In the animation on the right, a knight demonstates shield canceling with his Cold Iron Vanquisher. After attacking, he quickly raises his shield; as soon as the attack animation is interrupted, he begins the next attack. If timed perfectly, the shield shouldn't show; despite this, it still causes a shield bump (see above) if an enemy is close enough.
- Understand that applying this technique with a proper timing will make you not only attack quicker than your actual sword combo, but you will also shield bump while staying in the same place!
Though shield canceling does not change the maximum length of your combo, your first attack after blocking will always be your weapon's opening attack. For example, the Brandish normally performs a 3-hit combo where the first attack is made standing still, the second is made with a step forward, and the final attack has a step with increased sweep and damage. If you shield cancel the first attack and then continue attacking, you will perform the first attack twice, followed by the normal finisher--effectively replacing the second attack of the combo with a copy of the first attack. The Warmaster Rocket Hammer and it's predecessors have a swipe, a dash then another swipe normally so they can make a three-hit combo by attacking, then shield cancelling, then continuing to attack. If you're quick enough, you'll have a three swing combo.
Notice the animation at the right shows the same attack three times, instead of the normal 3-hit combo. This gives up the extra damage you would normally deal on the finisher and still forces a pause in your combo after the third slash, but it allows you to stay in one place while attacking with a weapon that would normally propel you forward, and may not leave you vulnerable for as long as a normal finisher.
Shield Charge
This technique is basically a way to start your charged attack directly from shielding. Begin holding the attack button (as you would to charge an attack) while your shield is raised, then lower your shield a moment later (not instantly). If you time it correctly, you will begin charging an attack with your weapon as soon as your shield is lowered.
The minimum time you need to hold attack before releasing shield in order for this technique to work seems to be around half a second; there doesn't seem to be a maximum.
This works with all types of weapons, and when performed with a sword or gun allows you to skip the regular attack you would normally make before beginning to charge.
The Inventory
General Purpose Shields
The General Purpose shields are shields that can provide at least a moderate source of defense in any situation. These shields do not provide any sort of offensive or defensive boost, they just merely keep the user safe.
-
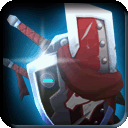 Aegis
Aegis  /
/
- The Aegis serves as the standard shield of the Spiral Order. It has great normal defense and decent piercing defense. It is favored by both beginner and veteran players because of its adequate defense skills and the fact that the recipe for the Aegis and its preceding items can be obtained through missions.
- The other potential upgrade from the Mighty Defender, the Heater Shield trades the piercing defense for Elemental defense and Freeze Resistance. It may arguably be one of the best trade-offs to have occured, but a sturdy shield nonetheless.
- The Omega Shell only has normal defense without any resistances to status, but it has the highest health of all shields. The Omega Shell does nothing that other shields already do better, but it works well where other shields are not: there is no level the Omega Shield is disadvantaged in.
Heavy Shields
The "Heavy" shields, or plate shields have superb normal defense, stun resistance, and are massive in appearance.
- The Ancient Plate Shield has the best normal defense in the game, and sports a green, mossy theme. It can be obtained via Brinks for 30 Almirian Seals.
- The Ironmight Plate Shield has, like the Aegis, both normal and piercing defense. Unlike the Aegis however, the shield can hold back the stun status and then some.
- The Volcanic Plate Shield, being the sidegrade to the Ironmight, trades off the special defense for fire resist on top of stun, making it a good choice for melee encounters in fire-themed stratum.
Specialized Shields
The shields in this category are meant for fairly situational use. Meaning, there are a limited amount of places or monsters the shield would be recommended for use against. All of these shields though have split defense.
- The Dragon Scale Shield provides Piercing and Elemental defense, as well as Poison and Fire Resistance. The only place in the game where all of the potential of this shield can be fully utilized: Compound 42. It seems that anywhere else from there, other shields can outperform the DSS easily.
- The Grey Owlite Shield provides Normal and Elemental defense, with a skew towards the latter. It has resistance to both shock and fire, making it effective in both FSC and Ironclaw Munitions Factory, as it has a natural advantage against various types of gun puppies.
- The Dread Skelly Shield protects the wielder against normal and shadow defense at all times. It also provides poison and freeze resistance, making it ideal for Candlestick Keeps and the Second Arena of the Gauntlet.
- The Royal Jelly Shield was obviously designed to defend against the boss stratum it's named after. It does however, have significant defense against Beasts, as it is a piercing shield. It uniquely carries sleep resistance, allowing it to be useful in the Starlight Cradle.
- The Crest of Almire would nearly be considered a reskin of the Grey Owlite Shield, if not for the change in Elemental to Shadow defense. Its predecessor, the Blackened Crest must be bought from Brinks for 30 Almirian Seals.
Tortodrone Shields
Tortodrone Shields are only craftable from the Mysterious Alchemy Machine, with ingredients obtained from Tortodrones. All Tortodrone shields deal double damage and have a special animation when Shield Bashing, but give the wielder a Movement Speed Decrease: Low.
-
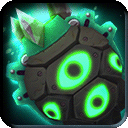 Omegaward
  /
/ ,
, 

- The Omegaward is a sidegrade with identical stats to the Grey Owlite Shield, but trades its shock resist for freeze.
- As a sidegrade to the Royal Jelly Shield, the Savage Tortoise retains the same defense, but instead protects against Shock and Poison instead of Stun and Sleep. It works well against Quicksilvers and Toxigels.
- Apart from the aforementioned special shield bash and movement penalty, the Grand Tortoise is identical in stats to the Ancient Plate Shield
-
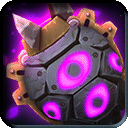 Gorgomega
  /
/ ,
, 

- The Gorgomega is a sidegrade of the Dread Skelly Shield with Stun resistance instead of Poison. This means that it is one of the very few shields that can stand up to T3 Elite difficulty Silversaps, as well as being the only Shadow-defense shield providing stun resist: useful for Trojans and their entourage. It excels in Heart of Ice.
Booster Shields
The booster shields are those that provide a passive boost in stats to the user.
-
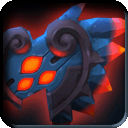 Barbarous Thorn Shield (and its predecessors)
  /
/
- The Bristling Buckler line of shields provide a damage increase to all swords. As it upgrades, the bonus will grow, into eventually, a medium bonus. The BTS can provide defense against slimes and beasts.
- The Swiftstrike provides ASI: High to all weapons (bombs included) despite its description. However, because it is a 3* shield, it cannot take very much punishment in Tier 3.
- The Scarlet Shield provides a health bonus to the wielder. This health bonus is minor and does not scale, so as the shield is 3* it is not very effective in Tier 3.
Promotional Shields
Promotional Shields are shields that are only obtainable from Prize Boxes. While the majority of them are reskins of existing shields like the The Bitter End and the Node Slime Walls, some promotional shields have unique stats.
-
 Power Mitt
  /
/ ,
, 
- The Power Mitt is essentially an alternate version of the Heater Shield that provides protection against Fire instead of Freeze. It is more general purpose and can handle most fire attacks better than the Owlite Shield, but isn't as well-rounded as the Volcanic Plate.
- The Celestial Shield provides defense against Shadow and Piercing damage in equal amounts. It is the only shield other than the Dragon Scale Shield to have no normal defense, and thus it breaks faster when hit by melee strikes. This specific combination of defense types allows it to perform well in UGWW and Heart of Ice.
Shields In PVP
In player-versus-player, equipped shields might end up taking a minor role, for a few reasons:
Blast Network: While playing Blast Network, shields do not function, just as weapons and armour of any type, and are shown at the player's back, similarly to Haven.
Lockdown: Lockdown substitutes your shield for a specialized module. One of these is the Guardian Shield, the only true shield in Lockdown, which has a high resistance to all types of damage and generates a huge shield that appears after one second, protecting and healing any friendly knight inside. It gives a health bonus of +10, grants a low sword attack speed increase and bomb charge time reduction, although it also has a low decrease to gun attack speed. Shield-bumping with the Guardian Shield is not possible.
| |
|---|
| Starting Out | New Player Briefing | User interface | Useful Links |
| |
| |
| |

