Difference between revisions of "User:Eek5/Shard Bombs"
From SpiralKnights
m (shard bomb info) |
m (→Zero Damage Bombs) |
||
| Line 58: | Line 58: | ||
==Zero Damage Bombs== | ==Zero Damage Bombs== | ||
Sometimes the shard bombs do no damage at all. | Sometimes the shard bombs do no damage at all. | ||
| − | * [http://www.youtube.com/watch?v=UozQhWZ7RJQ Invincible Gremlin] {{EeksEquipSmall|Shocking Salt Bomb}} | + | * [http://www.youtube.com/watch?v=UozQhWZ7RJQ Invincible Gremlin Mender] {{EeksEquipSmall|Shocking Salt Bomb}} |
| + | * [http://youtu.be/68EK26K9E80 Tank Slag] {{EeksEquipSmall|Deadly Crystal Bomb}} | ||
==Bombing Over Gaps/Short Walls== | ==Bombing Over Gaps/Short Walls== | ||
Revision as of 12:00, 13 August 2012
| |
The topic of this article or section is subject to personal opinion, and does not represent any one absolute truth. |
| If you disagree, discuss your concerns on the the talk page before editing. |
| |
|
|
Shard Bomb Mechanics
Charge
The shard bombs share charge times with the Blast Bomb series.
| None | Low | Medium | High | V. High | Ultra | Max | |
| Shard Bombs | 2200 | 2040 | 1866 | 1701 | 1545 | 1400 | 1225 |
* Time in milliseconds
Fuse & Explosion
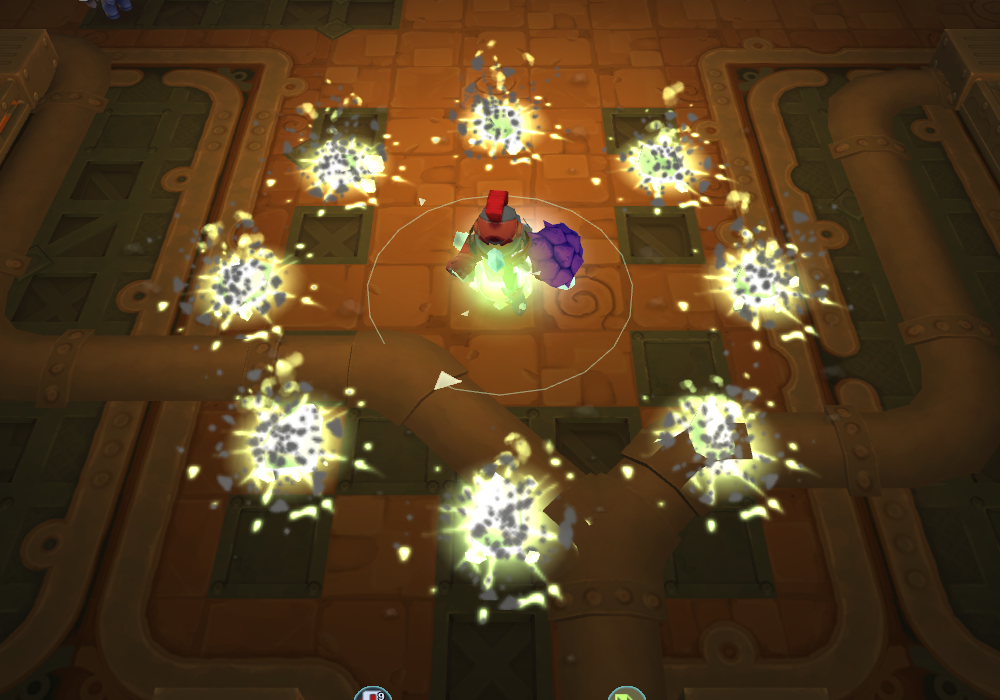
The shard bombs have a two-stage explosion, both of which have knock back. The displayed radius on the fuse is that of the first explosion. The initial fuse is 1.8 seconds long and when it goes off it sends out 8 additional shards at 45 degree angles. These shards have a fuse of 2.5 seconds.
The first explosion behaves similarly to blast bomb, dealing damage to any unit inside of its radius and knocking the unit back. Most enemies will be knocked back as far as the outer-ring of shards, setting them up for a combo attack assuming they don't move.
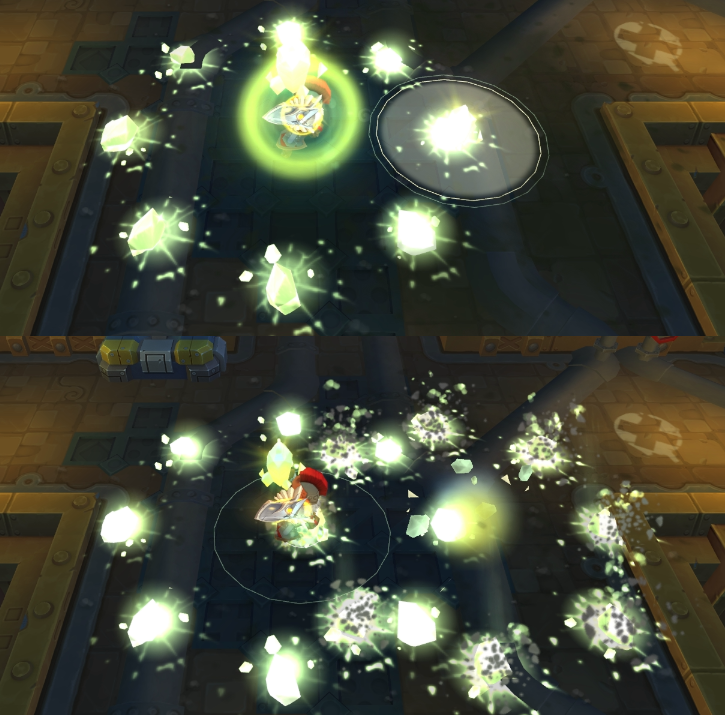
![]() Note: The delay allows enemies to get knocked back towards the center of the explosion if they continue to move towards the player standing where the bomb was dropped
Note: The delay allows enemies to get knocked back towards the center of the explosion if they continue to move towards the player standing where the bomb was dropped
Latency
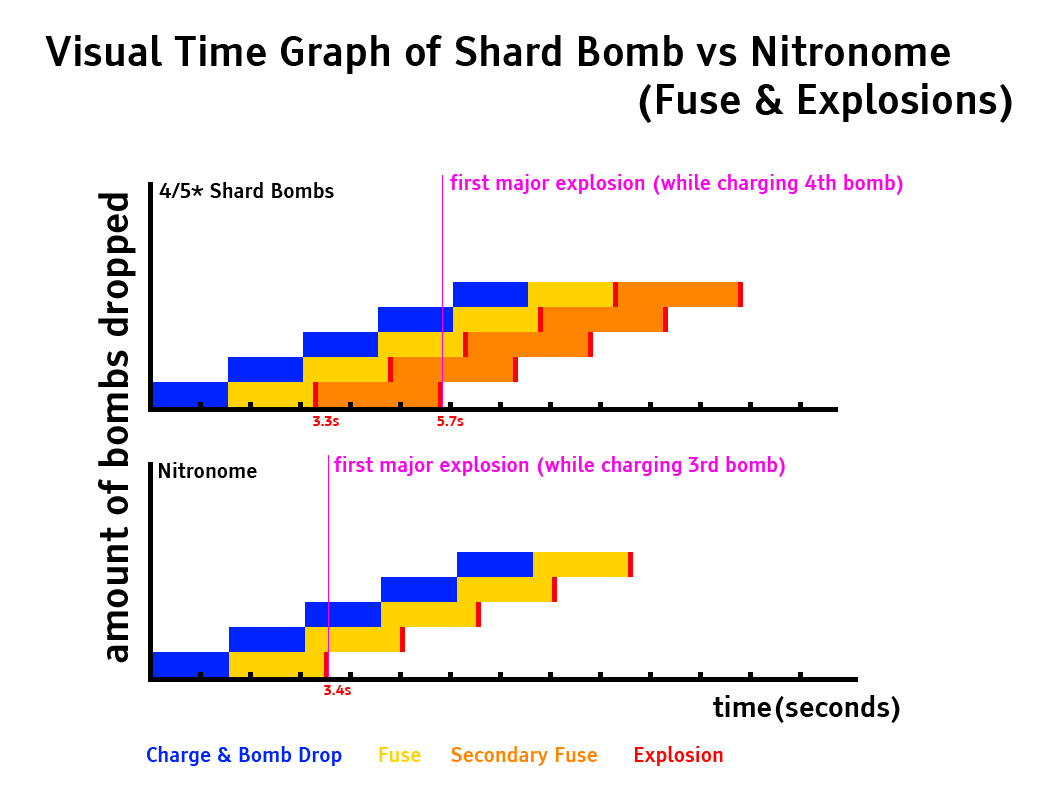
It takes 5.7 seconds from charge to explosion for a player with maximum charge time reduction. Because the charge time is only 1.225 seconds, a player "spamming" the bomb as fast as possible will be charging their fourth bomb by the time the main payload of the first bomb goes off. When holding a fully charged bomb, the player must anticipate where an enemy will be 4.3 seconds from the bomb drop to hit it with the main payload of the shard bombs. This double fuse is 115% longer than that of the Nitronome.
Usage
Combo
Because of the long double-fuse, pre-bomb placement is very tricky. One strategy that works is to knock back enemies with the first explosion which takes the guesswork out of aiming the secondary ring, however, enemies will move in or out of the second ring and can either get knocked back in unintended directions or sneak into the dead-zone of the bomb. This strategy only works against small numbers of enemies because of the smaller initial radius.
Spamming
For larger groups of enemies, placing as many bombs as possible seems to work the best. The optimal placement for shard bombs is to have the rings overlap. A good rule of thumb is to place the second bomb one "square unit" away from the outer radius of the fuse indicator. This will overlap the 8 shards in a way that minimizes any dead zones. One of the biggest issues of spamming the shard bomb is that both the initial and secondary explosions knock enemies back and when dropping shard bombs as quickly as possible, explosions from 3 bombs back will be going off which can be difficult to anticipate.
Videos
- Jelly Farm


- Lumbers, Retrodes, Scuttelbots

- D14 RJP Slimes vs Dark Retribution, Big Angry Bomb, Nitronome, Shocking Salt Bomb


- Gremlin Deconstruction Zones

- Jelly King

Bugs and Quirks
Zero Damage Bombs
Sometimes the shard bombs do no damage at all.
Bombing Over Gaps/Short Walls
You can't.
Disappearing Shards
They disappear when hitting obstacles all the time.
Bombing Corners
Very tricky.


