Difference between revisions of "User:Eek5/Shard Bombs"
From SpiralKnights
m (→Zero Damage Bombs) |
m (→Videos) |
||
| Line 67: | Line 67: | ||
= Videos = | = Videos = | ||
| + | =={{EeksEquip|Shocking Salt Bomb}}== | ||
* [http://youtu.be/iTUtqoxUdOM Jelly Farm] {{EeksEquipSmall|Heavy Dark Matter Bomb}}{{EeksEquipSmall|Shocking Salt Bomb}} | * [http://youtu.be/iTUtqoxUdOM Jelly Farm] {{EeksEquipSmall|Heavy Dark Matter Bomb}}{{EeksEquipSmall|Shocking Salt Bomb}} | ||
| − | |||
* [http://www.youtube.com/watch?v=IZl7kx73oi8 D14 RJP Slimes vs Dark Retribution, Big Angry Bomb, Nitronome, Shocking Salt Bomb] {{EeksEquipSmall|Dark Retribution}}{{EeksEquipSmall|Nitronome}}{{EeksEquipSmall|Big Angry Bomb}}{{EeksEquipSmall|Shocking Salt Bomb}} | * [http://www.youtube.com/watch?v=IZl7kx73oi8 D14 RJP Slimes vs Dark Retribution, Big Angry Bomb, Nitronome, Shocking Salt Bomb] {{EeksEquipSmall|Dark Retribution}}{{EeksEquipSmall|Nitronome}}{{EeksEquipSmall|Big Angry Bomb}}{{EeksEquipSmall|Shocking Salt Bomb}} | ||
* [http://www.youtube.com/watch?v=xYtPfZNvJKo Gremlin Deconstruction Zones] {{EeksEquipSmall|Shocking Salt Bomb}} | * [http://www.youtube.com/watch?v=xYtPfZNvJKo Gremlin Deconstruction Zones] {{EeksEquipSmall|Shocking Salt Bomb}} | ||
* [http://www.youtube.com/watch?v=SfrSiGIP1d4 Jelly King] {{EeksEquipSmall|Shocking Salt Bomb}} | * [http://www.youtube.com/watch?v=SfrSiGIP1d4 Jelly King] {{EeksEquipSmall|Shocking Salt Bomb}} | ||
| + | =={{EeksEquip|Deadly Crystal Bomb}}== | ||
| + | * [http://www.youtube.com/watch?v=xkXwmI0sYuI Zombies in Firestorm Citadel] {{EeksEquipSmall|Deadly Crystal Bomb}} | ||
| + | * [http://www.youtube.com/watch?v=5qeoiNSkveY Lumbers, Retrodes, Scuttelbots] {{EeksEquipSmall|Deadly Crystal Bomb}} | ||
| + | =={{EeksEquip|Scintillating Sun Shards}}== | ||
| + | * [http://www.youtube.com/watch?v=Zs1du2EQjXM Greavers] {{EeksEquipSmall|Scintillating Sun Shards}} | ||
= Bugs, Quirks and Criticism = | = Bugs, Quirks and Criticism = | ||
Revision as of 02:57, 15 August 2012
| |
The topic of this article or section is subject to personal opinion, and does not represent any one absolute truth. |
| If you disagree, discuss your concerns on the the talk page before editing. |
| |
|
|
Shard Bomb Mechanics
Charge
The shard bombs share charge times with the Blast Bomb series.
| None | Low | Medium | High | V. High | Ultra | Max | |
| Shard Bombs | 2200 | 2050 | 1870 | 1700 | 1550 | 1400 | 1225 |
* Time in milliseconds
Fuse & Explosion
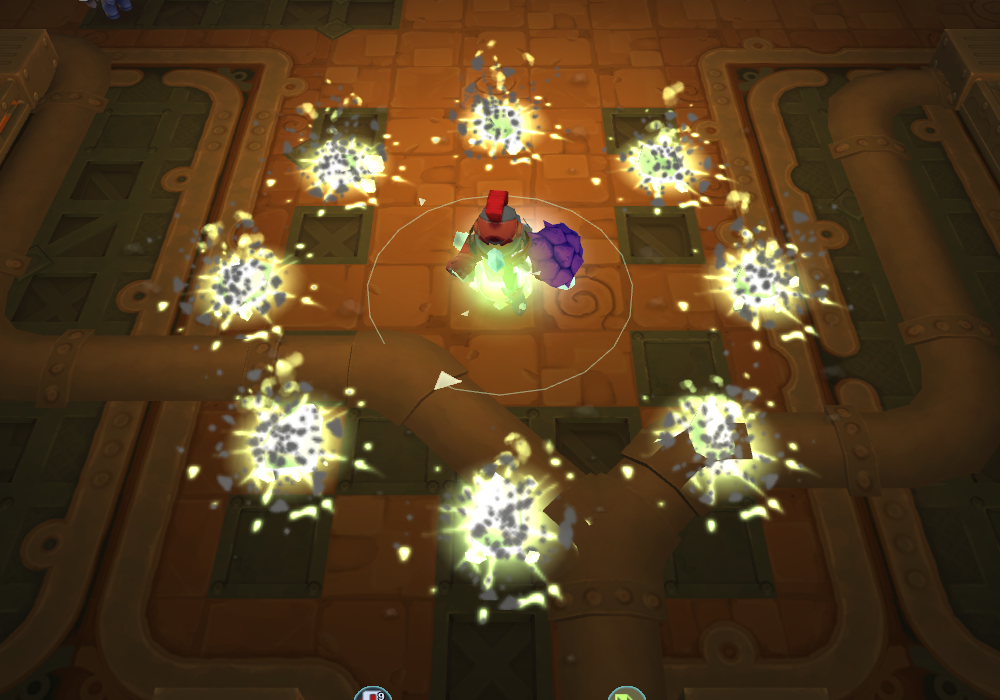
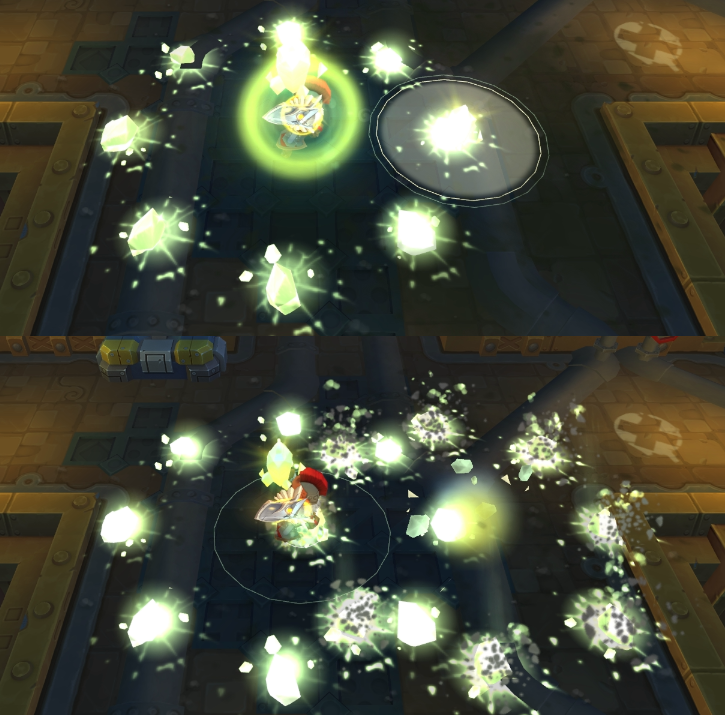
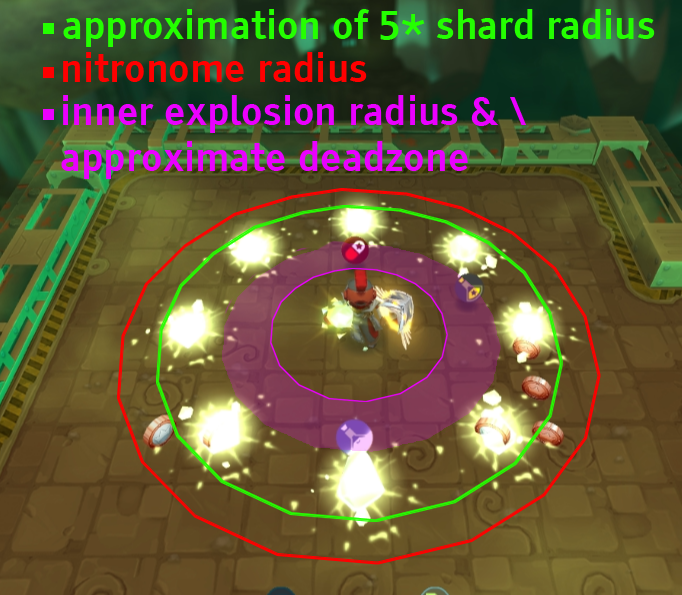
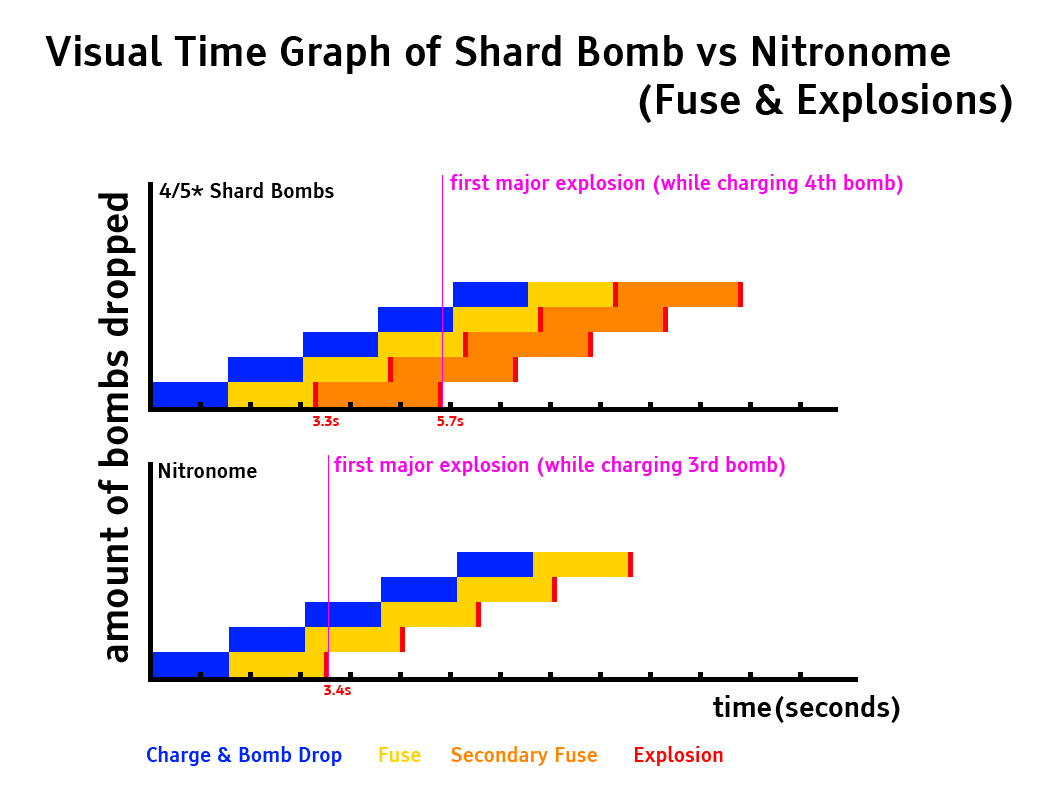
The shard bombs have a two-stage explosion, both of which have knock back. The displayed radius on the fuse is that of the first explosion. The initial fuse is 1.8 seconds long and when it goes off it sends out 8 additional shards at 45 degree angles. These shards have a fuse of 2.5 seconds.
The first explosion behaves similarly to blast bomb, dealing damage to any unit inside of its radius and knocking the unit back. Most enemies will be knocked back as far as the outer-ring of shards, setting them up for a combo attack assuming they don't move.
![]() Note: The 2.5 second stage-two fuse allows enough time for enemies to move inside the outer shard ring and get pushed inward.
Note: The 2.5 second stage-two fuse allows enough time for enemies to move inside the outer shard ring and get pushed inward.
Latency
It takes 5.7 seconds from charge to explosion for a player with maximum charge time reduction. Because the charge time is only 1.225 seconds, a player "spamming" the bomb as fast as possible will be charging their fourth bomb by the time the main payload of the first bomb goes off. When holding a fully charged bomb, the player must anticipate where an enemy will be 4.3 seconds from the bomb drop to hit it with the main payload of the shard bombs. The inner fuse is 0.1 seconds shorter than the Nitronome but the double fuse is 115% longer.
![]() Snipe Fun Fact: In the time it takes to drop a shard bomb and have the outer-ring explode, a player with maximum charge time reduction can charge and drop 3 nitronomes, 2 of which will deal damage before the shard bomb's outer explosion goes off.
Snipe Fun Fact: In the time it takes to drop a shard bomb and have the outer-ring explode, a player with maximum charge time reduction can charge and drop 3 nitronomes, 2 of which will deal damage before the shard bomb's outer explosion goes off.
Status Bombs
Shocking Salt Bomb and Scintillating Sun Shards paths both have a fair chance of causing moderate shock and stun, respectively, at the cost of dealing 10.5% less damage per shard. The initial explosion deals damage equivalent to each bomb's non-status dealing counterpart.
Status is application is similar to bombs such as the firecracker where enemies hit by the explosion have a chance to proc status. This applies to both the initial explosion and the secondary explosions. Note: Stun can make dodging attacks difficult.
Usage
Combo
Because of the long double-fuse, pre-bomb placement is very tricky. One strategy that works is to knock back enemies with the first explosion which takes the guesswork out of aiming the secondary ring, however, enemies will move in or out of the second ring and can either get knocked back in unintended directions or sneak into the dead-zone of the bomb. This strategy only works against small numbers of enemies because of the smaller initial radius.
Spamming
For larger groups of enemies, placing as many bombs as possible seems to work the best. The optimal placement for shard bombs is to have the rings overlap. A good rule of thumb is to place the second bomb one "square unit" away from the outer radius of the fuse indicator. This will overlap the 8 shards in a way that minimizes any dead zones. One of the biggest issues of spamming the shard bomb is that both the initial and secondary explosions knock enemies back and when dropping shard bombs as quickly as possible, explosions from 3 bombs back will be going off which can be difficult to anticipate.
General Placement
Shard units should be placed at least one "square unit" away from any obstacles (walls, low walls, boxes, etc) such that the entire initial radius is in "open" space. While this does not guarantee that shards on the blocked side of the bomb will appear it will at least give shards a chance to stack up against the short-side.
Placing the bomb down against a wall or obstacle will completely block 3 shards.
Videos
 Shocking Salt Bomb
- Jelly Farm


- D14 RJP Slimes vs Dark Retribution, Big Angry Bomb, Nitronome, Shocking Salt Bomb


- Gremlin Deconstruction Zones

- Jelly King

 Deadly Crystal Bomb
 Scintillating Sun Shards
Bugs, Quirks and Criticism
Zero Damage Bombs
Sometimes the shard bombs do no damage at all.
Bombing Over Gaps/Short Walls
This bomb does not work over gaps, short walls, or over open corners. This seems to be a compromise for allowing "short-side" (partially obscured/blocked) shards to group up before they reach their maximum distance. Unfortunately this mechanic does not always work and shards on the short-side don't always consistently appear.
Disappearing Shards
When the full outer radius is obscured by walls (short or regular) or obstacles, shards are able to group up at the edge of the hard boundary, however, the shard behavior isn't always consistent. Sometimes all 3 short-side shards can appear grouped together and sometimes they will completely disappear.
![]() Note: It is possible for blocks and enemies to prevent shards from appearing.
Note: It is possible for blocks and enemies to prevent shards from appearing.
Double hits only dealing single shard damage
Large Deadzone
One of the issues of the two-stage bomb is that by the time the outer-ring explosion goes off, there is a large hole in the center where enemies can move to and take zero damage. This dead zone is approximately 48% of the total area inside the full radius of the bomb. For stationary targets, there is a zone between the inner and outer explosions where enemies will take no damage at all. This applies to both the 4* and 5* versions of shard bombs.
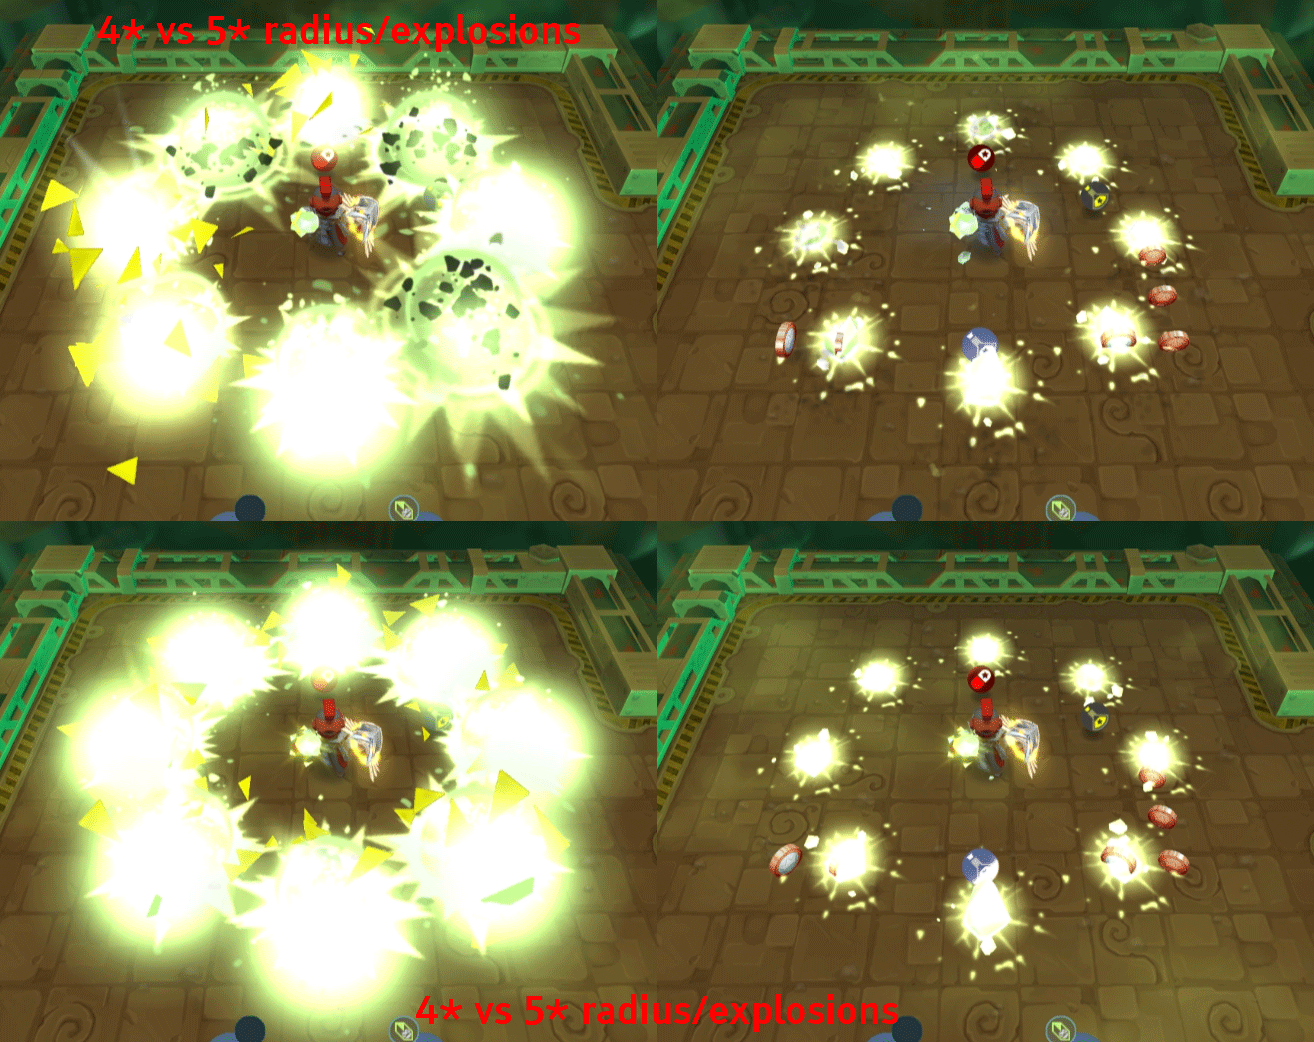
No Mechanical Change from 4 to 5-star
Aside from small cosmetic changes with bomb models, the 4 and 5-star versions of shard bombs all behave identically and differ only in damage. Other bombs receive other benefits such as increased radii to differentiate from 4 and 5 star variants but this mechanical difference is absent in shard bombs. Increasing the inside radius as well as the radius of each shard explosion would decrease the dead zone on 5-star shard bombs while allowing for more frequent double shard hits as well as reducing the amount of misses per bomb.
