Difference between revisions of "Costume"
From SpiralKnights
(moved that to a better spot) |
(→List of Permanent Costumes: putting things into a cleaner table. Some pics are out of date, give them a while to fix themselves. FIX: usage of frosty scale icons in several places.) |
||
| Line 12: | Line 12: | ||
==List of Permanent Costumes== | ==List of Permanent Costumes== | ||
| − | This list is a specialized list of costumes that tries to condense recolors to form (a.k.a shape). It is not a list of every individual item. Each costume in this list likely has one or more color variations - go to that costume's page for more details. | + | This list is a specialized list of costumes that tries to condense recolors to form (a.k.a shape). It is not a list of every individual item. Each costume in this list likely has one or more color variations - go to that costume's page for more details. It's a balance between naming patterns, shapes, groups, and colors. |
| − | + | In general, if the costume is facing straight in the example image, then it has two or more color variations. These other costumes are otherwise the same as the one in the example image, with the same description, accessory slots, shape, pattern, and so on. The exception to this rule are costumes that have [[Costumes#List of Expiring Costumes|expiring versions]]. | |
| − | + | The images as well as most text in this list are links - clicking on them will take you to a page with more information about that item. This table is ''generally'' sorted by default using Date/Order of Release. Other color variations released "later" do not factor into the DoR order - only the first form made available does. For example: "storm" and "raging" Avenger helms just fall under Avenger, even though they were released separately. | |
| − | + | ||
| − | + | ||
| − | + | ||
| − | {{ | + | {{CostumeList/start}} |
| − | + | ||
| − | + | ||
| − | + | ||
| − | + | ||
| − | {{ | + | {{CostumeList |
| − | + | | icon = Prime Bombhead Mask | |
| − | + | | general name = [[Bombhead Mask]] | |
| − | + | | group = [[Costumes (Groups)#Bomb|Bomb]] | |
| − | + | | type = Head | |
| − | + | | example = Bombhead Mask | |
| + | }} | ||
| − | {{ | + | {{CostumeList |
| − | + | | icon = Chapeau of the Black Rose | |
| − | + | | general name = [[Chapeau]] | |
| − | + | | group = [[Rose Regalia]] | |
| − | + | | type = Head | |
| − | + | | example = Chapeau | |
| + | }} | ||
| − | {{ | + | {{CostumeList |
| − | + | | icon = Tabard of the Black Rose | |
| − | + | | general name = [[Tabard]] | |
| − | + | | group = [[Rose Regalia]] | |
| − | + | | type = Body | |
| − | + | | example = Tabard | |
| + | }} | ||
| − | {{ | + | {{CostumeList |
| − | + | | icon = Cool Stranger Hat | |
| − | + | | general name = [[Stranger Hat]] | |
| − | + | | group = [[Costumes (Groups)#Explorer|Explorer]] | |
| − | + | | type = Head | |
| − | + | | example = Stranger Hat | |
| + | }} | ||
| − | {{ | + | {{CostumeList |
| − | + | | icon = Sniped Stranger Hat | |
| − | + | | general name = [[Stranger Hat]] | |
| − | + | | group = [[Costumes (Groups)#Explorer|Explorer]] | |
| − | + | | type = Head | |
| − | + | | example = Sniped Stranger Hat | |
| + | }} | ||
| − | {{ | + | {{CostumeList |
| − | + | | icon = Steam Knight Mask | |
| − | + | | general name = [[Steam Knight Mask]] | |
| − | + | | group = [[Costumes (Groups)#Steam|Steam]] | |
| − | + | | type = Head | |
| − | + | | example = Steam Knight Mask | |
| + | }} | ||
| − | {{ | + | {{CostumeList |
| − | + | | icon = Plasmatech Demo Suit | |
| − | + | | general name = [[Plasmatech Demo Suit]] | |
| − | + | | group = [[Costumes (Groups)#Bomb|Bomb]] | |
| − | + | | type = Body | |
| − | + | | example = Plasmatech Demo Suit | |
| + | }} | ||
| − | {{ | + | {{CostumeList |
| − | + | | icon = Authentic Frankenzom Mask | |
| − | + | | general name = [[Frankenzom Mask]] | |
| − | + | | group = [[Costumes (Groups)#Dark Harvest|Dark Harvest]] | |
| − | + | | type = Head | |
| − | + | | example = Authentic Frankenzom Mask | |
| + | }} | ||
| − | {{ | + | {{CostumeList |
| − | + | | icon = Authentic Phantom Mask | |
| − | + | | general name = [[Phantom Mask]] | |
| − | + | | group = [[Costumes (Groups)#Dark Harvest|Dark Harvest]] | |
| − | + | | type = Head | |
| − | + | | example = Authentic Phantom Mask | |
| + | }} | ||
| − | {{ | + | {{CostumeList |
| − | + | | icon = Authentic Spookat Mask | |
| − | + | | general name = [[Spookat Mask]] | |
| − | + | | group = [[Costumes (Groups)#Dark Harvest|Dark Harvest]] | |
| − | + | | type = Head | |
| − | + | | example = Authentic Spookat Mask | |
| + | }} | ||
| − | {{ | + | {{CostumeList |
| − | + | | icon = Metal Sonic Mask | |
| − | + | | general name = [[Metal Sonic Mask]] | |
| − | + | | group = [[Costumes (Groups)#Sega|Sega]] | |
| − | + | | type = Head | |
| − | + | | example = Metal Sonic Mask | |
| + | }} | ||
| − | {{ | + | {{CostumeList |
| − | + | | icon = Metal Sonic Suit | |
| − | + | | general name = [[Metal Sonic Suit]] | |
| − | + | | group = [[Costumes (Groups)#Sega|Sega]] | |
| − | + | | type = Body | |
| − | + | | example = Metal Sonic Suit | |
| + | }} | ||
| − | {{ | + | {{CostumeList |
| − | + | | icon = Prismatic Frosted Helm | |
| − | + | | general name = [[Frosted Helm]] | |
| − | + | | group = [[Costumes (Groups)#Anniversary|Anniversary]] | |
| − | + | | type = Head | |
| − | + | | example = Prismatic Frosted Helm | |
| + | }} | ||
| − | {{ | + | {{CostumeList |
| − | + | | icon = Heavenly Guardian Helm | |
| − | + | | general name = [[Heavenly Guardian Helm]] | |
| − | + | | group = [[Costumes (Groups)#Guardians Armor|Guardians Armor]] | |
| − | + | | type = Head | |
| − | + | | example = Heavenly Guardian Helm | |
| + | }} | ||
| − | {{ | + | {{CostumeList |
| − | + | | icon = Heavenly Guardian Armor | |
| − | + | | general name = [[Heavenly Guardian Armor]] | |
| − | + | | group = [[Costumes (Groups)#Guardians Armor|Guardians Armor]] | |
| − | + | | type = Body | |
| − | + | | example = Heavenly Guardian Armor | |
| + | }} | ||
| − | {{ | + | {{CostumeList |
| − | + | | icon = Infernal Guardian Helm | |
| − | + | | general name = [[Infernal Guardian Helm]] | |
| − | + | | group = [[Costumes (Groups)#Guardians Armor|Guardians Armor]] | |
| − | + | | type = Head | |
| − | + | | example = Infernal Guardian Helm | |
| + | }} | ||
| − | {{ | + | {{CostumeList |
| − | + | | icon = Infernal Guardian Armor | |
| − | + | | general name = [[Infernal Guardian Armor]] | |
| − | + | | group = [[Costumes (Groups)#Guardians Armor|Guardians Armor]] | |
| − | + | | type = Body | |
| − | + | | example = Infernal Guardian Armor | |
| + | }} | ||
| − | {{ | + | {{CostumeList |
| − | + | | icon = Frosty Fur Cap | |
| − | + | | general name = [[Fur Cap (Costume)|Fur Cap]] | |
| − | + | | group = [[Costumes (Recolors)|Recolors]] | |
| − | + | | type = Head | |
| − | + | | example = Fur Cap | |
| + | }} | ||
| − | {{ | + | {{CostumeList |
| − | + | | icon = Frosty Fur Coat | |
| − | + | | general name = [[Fur Coat (Costume)|Fur Coat]] | |
| − | + | | group = [[Costumes (Recolors)|Recolors]] | |
| − | + | | type = Body | |
| − | + | | example = Fur Coat | |
| + | }} | ||
| − | {{ | + | {{CostumeList |
| − | + | | icon = Frosty Hood | |
| − | + | | general name = [[Hood (Costume)|Hood]] | |
| − | + | | group = [[Costumes (Recolors)|Recolors]] | |
| − | + | | type = Head | |
| − | + | | example = Hood | |
| + | }} | ||
| − | {{ | + | {{CostumeList |
| − | + | | icon = Frosty Cloak | |
| − | + | | general name = [[Cloak (Costume)|Cloak]] | |
| − | + | | group = [[Costumes (Recolors)|Recolors]] | |
| − | + | | type = Body | |
| − | + | | example = Cloak | |
| + | }} | ||
| − | {{ | + | {{CostumeList |
| − | + | | icon = Frosty Pith Helm | |
| − | + | | general name = [[Pith Helm (Costume)|Pith Helm]] | |
| − | + | | group = [[Costumes (Recolors)|Recolors]] | |
| − | + | | type = Head | |
| − | + | | example = Pith Helm | |
| + | }} | ||
| − | {{ | + | {{CostumeList |
| − | + | | icon = Frosty Brigandine | |
| − | + | | general name = [[Brigandine (Costume)|Brigandine]] | |
| − | + | | group = [[Costumes (Recolors)|Recolors]] | |
| − | + | | type = Body | |
| − | + | | example = Brigandine | |
| + | }} | ||
| − | {{ | + | {{CostumeList |
| − | + | | icon = Frosty Plate Helm | |
| − | + | | general name = [[Plate Helm (Costume)|Plate Helm]] | |
| − | + | | group = [[Costumes (Recolors)|Recolors]] | |
| − | + | | type = Head | |
| − | + | | example = Plate Helm | |
| + | }} | ||
| − | {{ | + | {{CostumeList |
| − | + | | icon = Frosty Plate Mail | |
| − | + | | general name = [[Plate Mail (Costume)|Plate Mail]] | |
| − | + | | group = [[Costumes (Recolors)|Recolors]] | |
| − | + | | type = Body | |
| − | + | | example = Plate Mail | |
| + | }} | ||
| − | {{ | + | {{CostumeList |
| − | + | | icon = Frosty Sallet | |
| − | + | | general name = [[Sallet (Costume)|Sallet]] | |
| − | + | | group = [[Costumes (Recolors)|Recolors]] | |
| − | + | | type = Head | |
| − | + | | example = Sallet | |
| + | }} | ||
| − | {{ | + | {{CostumeList |
| − | + | | icon = Frosty Cuirass | |
| − | + | | general name = [[Cuirass (Costume)|Cuirass]] | |
| − | + | | group = [[Costumes (Recolors)|Recolors]] | |
| − | + | | type = Body | |
| − | + | | example = Cuirass | |
| + | }} | ||
| − | {{ | + | {{CostumeList |
| − | + | | icon = Frosty Scale Helm | |
| − | + | | general name = [[Scale Helm (Costume)|Scale Helm]] | |
| − | + | | group = [[Costumes (Recolors)|Recolors]] | |
| − | + | | type = Head | |
| − | + | | example = Scale Helm | |
| + | }} | ||
| − | {{ | + | {{CostumeList |
| − | + | | icon = Frosty Scale Mail | |
| − | + | | general name = [[Scale Mail (Costume)|Scale Mail]] | |
| − | + | | group = [[Costumes (Recolors)|Recolors]] | |
| − | + | | type = Body | |
| − | + | | example = Scale Mail | |
| + | }} | ||
| − | {{ | + | {{CostumeList |
| − | + | | icon = Frosty Tailed Helm | |
| − | + | | general name = [[Tailed Helm (Costume)|Tailed Helm]] | |
| − | + | | group = [[Costumes (Recolors)|Recolors]] | |
| − | + | | type = Head | |
| − | + | | example = Tailed Helm | |
| + | }} | ||
| − | {{ | + | {{CostumeList |
| − | + | | icon = Frosty Culet | |
| − | + | | general name = [[Culet (Costume)|Culet]] | |
| − | + | | group = [[Costumes (Recolors)|Recolors]] | |
| − | + | | type = Body | |
| − | + | | example = Culet | |
| + | }} | ||
| − | {{ | + | {{CostumeList |
| − | + | | icon = Frosty Winged Helm | |
| − | + | | general name = [[Winged Helm (Costume)|Winged Helm]] | |
| − | + | | group = [[Costumes (Recolors)|Recolors]] | |
| − | + | | type = Head | |
| − | + | | example = Winged Helm | |
| + | }} | ||
| − | {{ | + | {{CostumeList |
| − | + | | icon = Frosty Raiment | |
| − | + | | general name = [[Raiment (Costume)|Raiment]] | |
| − | + | | group = [[Costumes (Recolors)|Recolors]] | |
| − | + | | type = Body | |
| − | + | | example = Raiment | |
| + | }} | ||
| − | {{ | + | {{CostumeList |
| − | + | | icon = Frosty Crescent Helm | |
| − | + | | general name = [[Crescent Helm (Costume)|Crescent Helm]] | |
| − | + | | group = [[Costumes (Recolors)|Recolors]] | |
| − | + | | type = Head | |
| − | + | | example = Crescent Helm | |
| + | }} | ||
| − | {{ | + | {{CostumeList |
| − | + | | icon = Frosty Flak Jacket | |
| − | + | | general name = [[Flak Jacket (Costume)|Flak Jacket]] | |
| − | + | | group = [[Costumes (Recolors)|Recolors]] | |
| − | + | | type = Body | |
| − | + | | example = Flak Jacket | |
| + | }} | ||
| − | {{ | + | {{CostumeList |
| − | + | | icon = Frosty Round Helm | |
| − | + | | general name = [[Round Helm (Costume)|Round Helm]] | |
| − | + | | group = [[Costumes (Recolors)|Recolors]] | |
| − | + | | type = Head | |
| − | + | | example = Round Helm | |
| + | }} | ||
| − | {{ | + | {{CostumeList |
| − | + | | icon = Frosty Draped Armor | |
| − | + | | general name = [[Draped Armor (Costume)|Draped Armor]] | |
| − | + | | group = [[Costumes (Recolors)|Recolors]] | |
| − | + | | type = Body | |
| − | + | | example = Draped Armor | |
| + | }} | ||
| − | {{ | + | {{CostumeList |
| − | + | | icon = Imperial Tricorne | |
| − | + | | general name = [[Imperial Tricorne]] | |
| − | + | | group = [[Costumes (Groups)#Steam|Steam]] | |
| − | + | | type = Head | |
| − | + | | example = Imperial Tricorne | |
| + | }} | ||
| − | {{ | + | {{CostumeList |
| − | + | | icon = Medieval War Helm | |
| − | + | | general name = [[Medieval War Helm]] | |
| − | + | | group = [[Costumes (Groups)#Steam|Steam]] | |
| − | + | | type = Head | |
| − | + | | example = Medieval War Helm | |
| + | }} | ||
| − | {{ | + | {{CostumeList |
| − | + | | icon = Shogun Helmet | |
| − | + | | general name = [[Shogun Helmet]] | |
| − | + | | group = [[Costumes (Groups)#Steam|Steam]] | |
| − | + | | type = Head | |
| − | + | | example = Shogun Helmet | |
| + | }} | ||
| − | {{ | + | {{CostumeList |
| − | + | | icon = Impostoclaus Hat | |
| − | + | | general name = [[Impostoclaus Hat]] | |
| − | + | | group = [[Costumes (Groups)#Winterfest|Winterfest]] | |
| − | + | | type = Head | |
| − | + | | example = Impostoclaus Hat | |
| + | }} | ||
| − | {{ | + | {{CostumeList |
| − | + | | icon = Winterfest Coat | |
| − | + | | general name = [[Winterfest Coat]] | |
| − | + | | group = [[Costumes (Groups)#Winterfest|Winterfest]] | |
| − | + | | type = Body | |
| − | + | | example = Winterfest Coat | |
| + | }} | ||
| − | {{ | + | {{CostumeList |
| − | + | | icon = Humbug Hat | |
| − | + | | general name = [[Humbug Hat]] | |
| − | + | | group = [[Costumes (Groups)#Winterfest|Winterfest]] | |
| − | + | | type = Head | |
| − | + | | example = Humbug Hat | |
| + | }} | ||
| − | {{ | + | {{CostumeList |
| − | + | | icon = Forever Love Puppy Mask | |
| − | + | | general name = [[Forever Love Puppy Mask]] | |
| − | + | | group = [[Costumes (Groups)#Disguise|Disguise]] | |
| − | + | | type = Head | |
| − | + | | example = Forever Love Puppy Mask | |
| + | }} | ||
| − | {{ | + | {{CostumeList |
| − | + | | icon = Storm Avenger Helm | |
| − | + | | general name = [[Avenger Helm]] | |
| − | + | | group = [[Costumes (Groups)#Weather|Weather]] | |
| − | + | | type = Head | |
| − | + | | example = Avenger Helm | |
| + | }} | ||
| − | {{ | + | {{CostumeList |
| − | + | | icon = Storm Crusader Helm | |
| − | + | | general name = [[Crusader Helm (Costume)|Crusader Helm]] | |
| − | + | | group = [[Costumes (Groups)#Weather|Weather]] | |
| − | + | | type = Head | |
| − | + | | example = Crusader Helm | |
| + | }} | ||
| − | {{ | + | {{CostumeList |
| − | + | | icon = Storm Champion Helm | |
| − | + | | general name = [[Champion Helm]] | |
| − | + | | group = [[Costumes (Groups)#Weather|Weather]] | |
| − | + | | type = Head | |
| − | + | | example = Champion Helm | |
| + | }} | ||
| − | {{ | + | {{CostumeList |
| − | + | | icon = Storm Dragon Helm | |
| − | + | | general name = [[Dragon Helm (Costume)|Dragon Helm]] | |
| − | + | | group = [[Costumes (Groups)#Weather|Weather]] | |
| − | + | | type = Head | |
| − | + | | example = Dragon Helm | |
| + | }} | ||
| − | {{ | + | {{CostumeList |
| − | + | | icon = Storm Warrior Helm | |
| − | + | | general name = [[Warrior Helm|Warrior Helm]] | |
| − | + | | group = [[Costumes (Groups)#Weather|Weather]] | |
| − | + | | type = Head | |
| − | + | | example = Warrior Helm | |
| + | }} | ||
| − | {{ | + | {{CostumeList |
| − | + | | icon = Thunderous Plate Mail | |
| − | + | | general name = [[Plate Mail (Costume)#Other|Plate Mail (Weather)]] | |
| − | + | | group = [[Costumes (Groups)#Weather|Weather]] | |
| − | + | | type = Body | |
| − | + | | example = Plate Mail (Weather) | |
| + | }} | ||
| − | {{ | + | {{CostumeList |
| − | + | | icon = Storm Rider Mantle | |
| − | + | | general name = [[Rider Mantle]] | |
| − | + | | group = [[Costumes (Groups)#Weather|Weather]] | |
| − | + | | type = Body | |
| − | + | | example = Rider Mantle | |
| + | }} | ||
| − | {{ | + | {{CostumeList |
| − | + | | icon = White Battle Chef Hat | |
| − | + | | general name = [[Battle Chef Hat]] | |
| − | + | | group = [[Costumes (Groups)#Battle Chef|Battle Chef]] | |
| − | + | | type = Head | |
| − | + | | example = Battle Chef Hat | |
| + | }} | ||
| − | {{ | + | {{CostumeList |
| − | + | | icon = White Battle Chef Coat | |
| − | + | | general name = [[Battle Chef Coat]] | |
| − | + | | group = [[Costumes (Groups)#Battle Chef|Battle Chef]] | |
| − | + | | type = Body | |
| − | + | | example = Battle Chef Coat | |
| + | }} | ||
| − | {{ | + | {{CostumeList |
| − | + | | icon = Dangerous Diablo Helm | |
| − | + | | general name = [[Diablo Helm]] | |
| − | + | | group = [[Costumes (Groups)#Knight Groups|Knight Groups]] | |
| − | + | | type = Head | |
| − | + | | example = Diablo Helm | |
| + | }} | ||
| − | {{ | + | {{CostumeList |
| − | + | | icon = Dangerous Grim Mask | |
| − | + | | general name = [[Grim Mask]] | |
| − | + | | group = [[Costumes (Groups)#Knight Groups|Knight Groups]] | |
| − | + | | type = Head | |
| − | + | | example = Grim Mask | |
| + | }} | ||
| − | {{ | + | {{CostumeList |
| − | + | | icon = Dangerous Oni Helm | |
| − | + | | general name = [[Oni Helm]] | |
| − | + | | group = [[Costumes (Groups)#Knight Groups|Knight Groups]] | |
| − | + | | type = Head | |
| − | + | | example = Oni Helm | |
| + | }} | ||
| − | {{ | + | {{CostumeList |
| − | + | | icon = Dangerous Hound Coat | |
| − | + | | general name = [[Dangerous Hound Coat]] | |
| − | + | | group = [[Costumes (Groups)#Knight Groups|Knight Groups]] | |
| − | + | | type = Body | |
| − | + | | example = Dangerous Hound Coat | |
| + | }} | ||
| − | {{ | + | {{CostumeList |
| − | + | | icon = Obsidian Hood of Devotion | |
| − | + | | general name = [[Obsidian Hood]] | |
| − | + | | group = [[Costumes (Groups)#Apocrean|Apocrean]] | |
| − | + | | type = Head | |
| − | + | | example = Obsidian Hood | |
| + | }} | ||
| − | {{ | + | {{CostumeList |
| − | + | | icon = Obsidian Mantle of Devotion | |
| − | + | | general name = [[Obsidian Mantle]] | |
| − | + | | group = [[Costumes (Groups)#Apocrean|Apocrean]] | |
| − | + | | type = Body | |
| − | + | | example = Obsidian Mantle | |
| + | }} | ||
| − | {{ | + | {{CostumeList |
| − | + | | icon = Obsidian Mantle of Devotion | |
| − | + | | general name = [[Obsidian Mantle]] | |
| − | + | | group = [[Costumes (Groups)#Apocrean|Apocrean]] | |
| − | + | | type = Body | |
| − | + | | example = Obsidian Mantle | |
| + | }} | ||
| − | {{ | + | {{CostumeList |
| − | + | | icon = Iron Dragon Armor | |
| − | + | | general name = [[Dragon Armor]] | |
| − | + | | group = [[Costumes (Groups)#Steam|Steam]] | |
| − | + | | type = Body | |
| − | + | | example = Dragon Armor | |
| + | }} | ||
| − | {{ | + | {{CostumeList |
| − | + | | icon = Iron Wolf Helm | |
| − | + | | general name = [[Wolf Helm]] | |
| − | + | | group = [[Costumes (Groups)#Steam|Steam]] | |
| − | + | | type = Head | |
| − | + | | example = Wolf Helm | |
| + | }} | ||
| − | {{ | + | {{CostumeList |
| − | + | | icon = Iron Wolf Armor | |
| − | + | | general name = [[Wolf Armor]] | |
| − | + | | group = [[Costumes (Groups)#Steam|Steam]] | |
| − | + | | type = Body | |
| − | + | | example = Wolf Armor | |
| + | }} | ||
| − | {{ | + | {{CostumeList |
| − | + | | icon = Polar Twilight Wolf Hood | |
| − | + | | general name = [[Polar Wolf Hood]] | |
| − | + | | group = [[Costumes (Groups)#Winterfest|Winterfest]] | |
| − | + | | type = Head | |
| − | + | | example = Polar Wolf Hood | |
| + | }} | ||
| − | {{ | + | {{CostumeList |
| − | + | | icon = Polar Twilight Wolf Coat | |
| − | + | | general name = [[Polar Wolf Coat]] | |
| − | + | | group = [[Costumes (Groups)#Winterfest|Winterfest]] | |
| − | + | | type = Body | |
| − | + | | example = Polar Wolf Coat | |
| + | }} | ||
| − | {{ | + | {{CostumeList |
| − | + | | icon = Frosty Scale Helm | |
| − | + | | general name = [[Warden Helm]] | |
| − | + | | group = [[Costumes (Groups)#Colossal|Colossal]] | |
| − | + | | type = Head | |
| − | + | | example = Warden Helm | |
| + | }} | ||
| − | {{ | + | {{CostumeList |
| − | + | | icon = Frosty Scale Mail | |
| − | + | | general name = [[Warden Armor]] | |
| − | + | | group = [[Costumes (Groups)#Colossal|Colossal]] | |
| − | + | | type = Body | |
| − | + | | example = Warden Armor | |
| + | }} | ||
| − | {{ | + | {{CostumeList |
| − | + | | icon = Celestial Nav Helm | |
| − | + | | general name = [[Celestial Nav Helm]] | |
| − | + | | group = [[Costumes (Groups)#Equinox|Equinox]] | |
| − | + | | type = Head | |
| − | + | | example = Celestial Nav Helm | |
| + | }} | ||
| − | {{ | + | {{CostumeList |
| − | + | | icon = Celestial Nav Suit | |
| − | + | | general name = [[Celestial Nav Suit]] | |
| − | + | | group = [[Costumes (Groups)#Equinox|Equinox]] | |
| − | + | | type = Body | |
| − | + | | example = Celestial Nav Suit | |
| + | }} | ||
| − | {{ | + | {{CostumeList |
| − | + | | icon = Galactic Guardian Helm | |
| − | + | | general name = [[Galactic Guardian Helm]] | |
| − | + | | group = [[Costumes (Groups)#Equinox|Equinox]] | |
| − | + | | type = Head | |
| − | + | | example = Galactic Guardian Helm | |
| + | }} | ||
| − | {{ | + | {{CostumeList |
| − | + | | icon = Galactic Guardian Vest | |
| − | + | | general name = [[Galactic Guardian Vest]] | |
| − | + | | group = [[Costumes (Groups)#Equinox|Equinox]] | |
| − | + | | type = Body | |
| − | + | | example = Galactic Guardian Vest | |
| + | }} | ||
| − | {{ | + | {{CostumeList |
| − | + | | icon = Frosty Scale Helm | |
| − | + | | general name = [[Field Cap]] | |
| − | + | | group = [[Costumes (Groups)#Anniversary|Anniversary]] | |
| − | + | | type = Head | |
| − | + | | example = Field Cap | |
| + | }} | ||
| − | {{ | + | {{CostumeList |
| − | + | | icon = Frosty Scale Helm | |
| − | + | | general name = [[Plumed Cap]] | |
| − | + | | group = [[Costumes (Groups)#Anniversary|Anniversary]] | |
| − | + | | type = Head | |
| − | + | | example = Plumed Cap | |
| + | }} | ||
| − | {{ | + | {{CostumeList |
| − | + | | icon = Frosty Scale Helm | |
| − | + | | general name = [[Stately Cap]] | |
| − | + | | group = [[Costumes (Groups)#Anniversary|Anniversary]] | |
| − | + | | type = Head | |
| − | + | | example = Stately Cap | |
| + | }} | ||
| − | {{ | + | {{CostumeList |
| − | + | | icon = Frosty Scale Mail | |
| − | + | | general name = [[Splash Sarong]] | |
| − | + | | group = [[Costumes (Groups)#Splash|Splash]] | |
| − | + | | type = Body | |
| − | + | | example = Splash Sarong | |
| + | }} | ||
| − | {{ | + | {{CostumeList |
| − | + | | icon = Frosty Scale Mail | |
| − | + | | general name = [[Splash Trunks]] | |
| − | + | | group = [[Costumes (Groups)#Splash|Splash]] | |
| − | + | | type = Body | |
| − | + | | example = Splash Trunks | |
| + | }} | ||
| − | {{ | + | {{CostumeList |
| − | + | | icon = Frosty Scale Mail | |
| − | + | | general name = [[Node Slime Mask]] | |
| − | + | | group = [[Costumes (Groups)#Slime|Slime]] | |
| − | + | | type = Head | |
| − | + | | example = Node Slime Mask | |
| + | }} | ||
| − | {{ | + | {{CostumeList |
| − | + | | icon = Frosty Scale Mail | |
| − | + | | general name = [[Node Slime Guards]] | |
| − | + | | group = [[Costumes (Groups)#Slime|Slime]] | |
| − | + | | type = Body | |
| − | + | | example = Node Slime Guards | |
| + | }} | ||
| − | {{ | + | {{CostumeList |
| − | + | | icon = Frosty Scale Mail | |
| − | + | | general name = [[Gremlin Helmet]] | |
| − | + | | group = [[Costumes (Groups)#Gremlin|Gremlin]] | |
| − | + | | type = Head | |
| − | + | | example = Gremlin Helmet | |
| + | }} | ||
| − | {{ | + | {{CostumeList |
| − | + | | icon = Frosty Scale Mail | |
| − | + | | general name = [[Gremlin Suit]] | |
| − | + | | group = [[Costumes (Groups)#Gremlin|Gremlin]] | |
| − | + | | type = Body | |
| − | + | | example = Gremlin Suit | |
| + | }} | ||
| − | {{ | + | {{CostumeList |
| − | + | | icon = Gatecrasher Helm | |
| − | + | | general name = [[Gatecrasher Helm]] | |
| − | + | | group = [[Costumes (Groups)#Supply Depot|Supply Depot]] | |
| − | + | | type = Head | |
| − | + | | example = Gatecrasher Helm | |
| + | }} | ||
| − | {{ | + | {{CostumeList |
| − | + | | icon = Frosty Scale Mail | |
| − | + | | general name = [[Gun Pup Helm]] | |
| − | + | | group = [[Costumes (Groups)#Construct|Construct]] | |
| − | + | | type = Head | |
| − | + | | example = Gun Pup Helm | |
| + | }} | ||
| − | {{ | + | {{CostumeList |
| − | + | | icon = Frosty Scale Mail | |
| − | + | | general name = [[Mecha Helm]] | |
| − | + | | group = [[Costumes (Groups)#Construct|Construct]] | |
| − | + | | type = Head | |
| − | + | | example = Mecha Helm | |
| + | }} | ||
| − | {{ | + | {{CostumeList |
| − | + | | icon = Frosty Scale Mail | |
| − | + | | general name = [[Mecha Suit]] | |
| − | + | | group = [[Costumes (Groups)#Construct|Construct]] | |
| − | + | | type = Body | |
| − | + | | example = Mecha Suit | |
| + | }} | ||
| − | {{ | + | {{CostumeList |
| − | + | | icon = Wild Kat Suit | |
| − | + | | general name = [[Kat Suit]] | |
| − | + | | group = [[Costumes (Groups)#Undead|Undead]] | |
| − | + | | type = Body | |
| + | | example = Kat Suit | ||
| + | }} | ||
| − | {{ | + | {{CostumeList |
| − | + | | icon = Authentic Scarab Mask | |
| − | + | | general name = [[Scarab Mask]] | |
| − | + | | group = [[Costumes (Groups)#Dark Harvest|Dark Harvest]] | |
| − | + | | type = Head | |
| + | | example = Authentic Scarab Mask | ||
| + | }} | ||
| − | {{ | + | {{CostumeList |
| − | + | | icon = Hazardous Hedge Coat | |
| − | + | | general name = [[Hazardous Hedge Coat]] | |
| − | + | | group = [[Costumes (Groups)#Knight Groups|Knight Groups]] | |
| − | + | | type = Body | |
| + | | example = Hazardous Hedge Coat | ||
| + | }} | ||
| − | {{ | + | {{Table/End}} |
| − | + | ||
| − | + | ||
| − | + | ||
| − | + | ||
| − | + | ||
| − | + | ||
| − | + | ||
| − | + | ||
| − | + | ||
| − | + | ||
| − | + | ||
| − | + | ||
| − | + | ||
| − | + | ||
| − | + | ||
| − | + | ||
| − | + | ||
| − | + | ||
| − | + | ||
| − | + | ||
| − | + | ||
| − | + | ||
| − | + | ||
| − | + | ||
| − | + | ||
| − | + | ||
| − | + | ||
| − | + | ||
| − | + | ||
| − | + | ||
| − | + | ||
| − | + | ||
| − | + | ||
| − | + | ||
| − | + | ||
| − | + | ||
| − | + | ||
| − | + | ||
| − | + | ||
| − | + | ||
| − | + | ||
| − | + | ||
| − | + | ||
| − | + | ||
| − | + | ||
| − | + | ||
| − | + | ||
| − | + | ||
| − | + | ||
| − | + | ||
| − | + | ||
| − | + | ||
| − | + | ||
| − | + | ||
| − | }} | + | |
==List of Expiring Costumes== | ==List of Expiring Costumes== | ||
Revision as of 10:11, 30 October 2014

A Costume is an aesthetic item. It does not have combat statistics like Helms, Armors, or other gear. Currently, costumes only come in the form of "helms" and "armors". These can be "equipped as helmet costume" or "equipped as armor costume" from your arsenal - they're in the ![]() arsenal tab. Armors and helms with combat statistics can be equipped as costumes from their own arsenal tabs (if they are equipped as costumes, they don't factor into your combat abilities). Costumes have no effect on your abilities in the field. Like armors and helms, many of them have accessory slots.
arsenal tab. Armors and helms with combat statistics can be equipped as costumes from their own arsenal tabs (if they are equipped as costumes, they don't factor into your combat abilities). Costumes have no effect on your abilities in the field. Like armors and helms, many of them have accessory slots.
Once a Costume is bound it cannot be unbound.
Costumes are often introduced to the game in commemoration of an event. Some of them expire (because celebrations come and go), but most of them last forever. There are many costume sets as well as single helms (or "hats") and armors. Many costumes come in collections of varying colors, such as the Field Cap, or "forms," such as the Scale Helm vs. the Iron Dragon Helm. It can be difficult to find what you're looking for due to this variety, or if you're not sure what something is called, so here are a few pages that organize what's available:
- For a list of costumes that are available in sets, see: Costume Sets.
- For a list of costumes by group type, see: Costumes (Groups).
- For a list of costumes by recolor (a specific family of Color Style), see: Costumes (Recolors).
- For a compressed list of all costumes (alphabetical), see: Category:Costume items.
List of Permanent Costumes
This list is a specialized list of costumes that tries to condense recolors to form (a.k.a shape). It is not a list of every individual item. Each costume in this list likely has one or more color variations - go to that costume's page for more details. It's a balance between naming patterns, shapes, groups, and colors.
In general, if the costume is facing straight in the example image, then it has two or more color variations. These other costumes are otherwise the same as the one in the example image, with the same description, accessory slots, shape, pattern, and so on. The exception to this rule are costumes that have expiring versions.
The images as well as most text in this list are links - clicking on them will take you to a page with more information about that item. This table is generally sorted by default using Date/Order of Release. Other color variations released "later" do not factor into the DoR order - only the first form made available does. For example: "storm" and "raging" Avenger helms just fall under Avenger, even though they were released separately.
|- align="center" valign="middle"
|style="background: #c7dbea; padding:3px; border-radius: 5px; height:100px;" align= |
|style="background: #c7dbea; padding:3px; border-radius: 5px;" | [[File:{{{name}}}-Equipped.png|100px|center|link={{{name}}}]]
|style="background: #c7dbea; padding:3px; border-radius: 5px;" | {{{slot}}}
|style="background: #c7dbea; padding:3px; border-radius: 5px;" align="center" | Head
|style="background: #c7dbea; padding:3px; border-radius: 5px;" align="center" | Bomb
|style="background: #c7dbea; padding:3px; border-radius: 5px;" align="left" valign="top" | Pending
|- align="center" valign="middle"
|style="background: #c7dbea; padding:3px; border-radius: 5px; height:100px;" align= |
|style="background: #c7dbea; padding:3px; border-radius: 5px;" | [[File:{{{name}}}-Equipped.png|100px|center|link={{{name}}}]]
|style="background: #c7dbea; padding:3px; border-radius: 5px;" | {{{slot}}}
|style="background: #c7dbea; padding:3px; border-radius: 5px;" align="center" | Head
|style="background: #c7dbea; padding:3px; border-radius: 5px;" align="center" | Rose Regalia
|style="background: #c7dbea; padding:3px; border-radius: 5px;" align="left" valign="top" | Pending
|- align="center" valign="middle"
|style="background: #c7dbea; padding:3px; border-radius: 5px; height:100px;" align= |
|style="background: #c7dbea; padding:3px; border-radius: 5px;" | [[File:{{{name}}}-Equipped.png|100px|center|link={{{name}}}]]
|style="background: #c7dbea; padding:3px; border-radius: 5px;" | {{{slot}}}
|style="background: #c7dbea; padding:3px; border-radius: 5px;" align="center" | Body
|style="background: #c7dbea; padding:3px; border-radius: 5px;" align="center" | Rose Regalia
|style="background: #c7dbea; padding:3px; border-radius: 5px;" align="left" valign="top" | Pending
|- align="center" valign="middle"
|style="background: #c7dbea; padding:3px; border-radius: 5px; height:100px;" align= |
|style="background: #c7dbea; padding:3px; border-radius: 5px;" | [[File:{{{name}}}-Equipped.png|100px|center|link={{{name}}}]]
|style="background: #c7dbea; padding:3px; border-radius: 5px;" | {{{slot}}}
|style="background: #c7dbea; padding:3px; border-radius: 5px;" align="center" | Head
|style="background: #c7dbea; padding:3px; border-radius: 5px;" align="center" | Explorer
|style="background: #c7dbea; padding:3px; border-radius: 5px;" align="left" valign="top" | Pending
|- align="center" valign="middle"
|style="background: #c7dbea; padding:3px; border-radius: 5px; height:100px;" align= |
|style="background: #c7dbea; padding:3px; border-radius: 5px;" | [[File:{{{name}}}-Equipped.png|100px|center|link={{{name}}}]]
|style="background: #c7dbea; padding:3px; border-radius: 5px;" | {{{slot}}}
|style="background: #c7dbea; padding:3px; border-radius: 5px;" align="center" | Head
|style="background: #c7dbea; padding:3px; border-radius: 5px;" align="center" | Steam
|style="background: #c7dbea; padding:3px; border-radius: 5px;" align="left" valign="top" | Pending
|- align="center" valign="middle"
|style="background: #c7dbea; padding:3px; border-radius: 5px; height:100px;" align= |
|style="background: #c7dbea; padding:3px; border-radius: 5px;" | [[File:{{{name}}}-Equipped.png|100px|center|link={{{name}}}]]
|style="background: #c7dbea; padding:3px; border-radius: 5px;" | {{{slot}}}
|style="background: #c7dbea; padding:3px; border-radius: 5px;" align="center" | Body
|style="background: #c7dbea; padding:3px; border-radius: 5px;" align="center" | Bomb
|style="background: #c7dbea; padding:3px; border-radius: 5px;" align="left" valign="top" | Pending
|- align="center" valign="middle"
|style="background: #c7dbea; padding:3px; border-radius: 5px; height:100px;" align= |
|style="background: #c7dbea; padding:3px; border-radius: 5px;" | [[File:{{{name}}}-Equipped.png|100px|center|link={{{name}}}]]
|style="background: #c7dbea; padding:3px; border-radius: 5px;" | {{{slot}}}
|style="background: #c7dbea; padding:3px; border-radius: 5px;" align="center" | Head
|style="background: #c7dbea; padding:3px; border-radius: 5px;" align="center" | Dark Harvest
|style="background: #c7dbea; padding:3px; border-radius: 5px;" align="left" valign="top" | Pending
|- align="center" valign="middle"
|style="background: #c7dbea; padding:3px; border-radius: 5px; height:100px;" align= |
|style="background: #c7dbea; padding:3px; border-radius: 5px;" | [[File:{{{name}}}-Equipped.png|100px|center|link={{{name}}}]]
|style="background: #c7dbea; padding:3px; border-radius: 5px;" | {{{slot}}}
|style="background: #c7dbea; padding:3px; border-radius: 5px;" align="center" | Head
|style="background: #c7dbea; padding:3px; border-radius: 5px;" align="center" | Sega
|style="background: #c7dbea; padding:3px; border-radius: 5px;" align="left" valign="top" | Pending
|- align="center" valign="middle"
|style="background: #c7dbea; padding:3px; border-radius: 5px; height:100px;" align= |
|style="background: #c7dbea; padding:3px; border-radius: 5px;" | [[File:{{{name}}}-Equipped.png|100px|center|link={{{name}}}]]
|style="background: #c7dbea; padding:3px; border-radius: 5px;" | {{{slot}}}
|style="background: #c7dbea; padding:3px; border-radius: 5px;" align="center" | Body
|style="background: #c7dbea; padding:3px; border-radius: 5px;" align="center" | Sega
|style="background: #c7dbea; padding:3px; border-radius: 5px;" align="left" valign="top" | Pending
|- align="center" valign="middle"
|style="background: #c7dbea; padding:3px; border-radius: 5px; height:100px;" align= |
|style="background: #c7dbea; padding:3px; border-radius: 5px;" | [[File:{{{name}}}-Equipped.png|100px|center|link={{{name}}}]]
|style="background: #c7dbea; padding:3px; border-radius: 5px;" | {{{slot}}}
|style="background: #c7dbea; padding:3px; border-radius: 5px;" align="center" | Head
|style="background: #c7dbea; padding:3px; border-radius: 5px;" align="center" | Anniversary
|style="background: #c7dbea; padding:3px; border-radius: 5px;" align="left" valign="top" | Pending
|- align="center" valign="middle"
|style="background: #c7dbea; padding:3px; border-radius: 5px; height:100px;" align= |
|style="background: #c7dbea; padding:3px; border-radius: 5px;" | [[File:{{{name}}}-Equipped.png|100px|center|link={{{name}}}]]
|style="background: #c7dbea; padding:3px; border-radius: 5px;" | {{{slot}}}
|style="background: #c7dbea; padding:3px; border-radius: 5px;" align="center" | Head
|style="background: #c7dbea; padding:3px; border-radius: 5px;" align="center" | Guardians Armor
|style="background: #c7dbea; padding:3px; border-radius: 5px;" align="left" valign="top" | Pending
|- align="center" valign="middle"
|style="background: #c7dbea; padding:3px; border-radius: 5px; height:100px;" align= |
|style="background: #c7dbea; padding:3px; border-radius: 5px;" | [[File:{{{name}}}-Equipped.png|100px|center|link={{{name}}}]]
|style="background: #c7dbea; padding:3px; border-radius: 5px;" | {{{slot}}}
|style="background: #c7dbea; padding:3px; border-radius: 5px;" align="center" | Body
|style="background: #c7dbea; padding:3px; border-radius: 5px;" align="center" | Guardians Armor
|style="background: #c7dbea; padding:3px; border-radius: 5px;" align="left" valign="top" | Pending
|- align="center" valign="middle"
|style="background: #c7dbea; padding:3px; border-radius: 5px; height:100px;" align= |
|style="background: #c7dbea; padding:3px; border-radius: 5px;" | [[File:{{{name}}}-Equipped.png|100px|center|link={{{name}}}]]
|style="background: #c7dbea; padding:3px; border-radius: 5px;" | {{{slot}}}
|style="background: #c7dbea; padding:3px; border-radius: 5px;" align="center" | Head
|style="background: #c7dbea; padding:3px; border-radius: 5px;" align="center" | Recolors
|style="background: #c7dbea; padding:3px; border-radius: 5px;" align="left" valign="top" | Pending
|- align="center" valign="middle"
|style="background: #c7dbea; padding:3px; border-radius: 5px; height:100px;" align= |
|style="background: #c7dbea; padding:3px; border-radius: 5px;" | [[File:{{{name}}}-Equipped.png|100px|center|link={{{name}}}]]
|style="background: #c7dbea; padding:3px; border-radius: 5px;" | {{{slot}}}
|style="background: #c7dbea; padding:3px; border-radius: 5px;" align="center" | Body
|style="background: #c7dbea; padding:3px; border-radius: 5px;" align="center" | Recolors
|style="background: #c7dbea; padding:3px; border-radius: 5px;" align="left" valign="top" | Pending
|- align="center" valign="middle"
|style="background: #c7dbea; padding:3px; border-radius: 5px; height:100px;" align= |
|style="background: #c7dbea; padding:3px; border-radius: 5px;" | [[File:{{{name}}}-Equipped.png|100px|center|link={{{name}}}]]
|style="background: #c7dbea; padding:3px; border-radius: 5px;" | {{{slot}}}
|style="background: #c7dbea; padding:3px; border-radius: 5px;" align="center" | Head
|style="background: #c7dbea; padding:3px; border-radius: 5px;" align="center" | Steam
|style="background: #c7dbea; padding:3px; border-radius: 5px;" align="left" valign="top" | Pending
|- align="center" valign="middle"
|style="background: #c7dbea; padding:3px; border-radius: 5px; height:100px;" align= |
|style="background: #c7dbea; padding:3px; border-radius: 5px;" | [[File:{{{name}}}-Equipped.png|100px|center|link={{{name}}}]]
|style="background: #c7dbea; padding:3px; border-radius: 5px;" | {{{slot}}}
|style="background: #c7dbea; padding:3px; border-radius: 5px;" align="center" | Head
|style="background: #c7dbea; padding:3px; border-radius: 5px;" align="center" | Winterfest
|style="background: #c7dbea; padding:3px; border-radius: 5px;" align="left" valign="top" | Pending
|- align="center" valign="middle"
|style="background: #c7dbea; padding:3px; border-radius: 5px; height:100px;" align= |
|style="background: #c7dbea; padding:3px; border-radius: 5px;" | [[File:{{{name}}}-Equipped.png|100px|center|link={{{name}}}]]
|style="background: #c7dbea; padding:3px; border-radius: 5px;" | {{{slot}}}
|style="background: #c7dbea; padding:3px; border-radius: 5px;" align="center" | Body
|style="background: #c7dbea; padding:3px; border-radius: 5px;" align="center" | Winterfest
|style="background: #c7dbea; padding:3px; border-radius: 5px;" align="left" valign="top" | Pending
|- align="center" valign="middle"
|style="background: #c7dbea; padding:3px; border-radius: 5px; height:100px;" align= |
|style="background: #c7dbea; padding:3px; border-radius: 5px;" | [[File:{{{name}}}-Equipped.png|100px|center|link={{{name}}}]]
|style="background: #c7dbea; padding:3px; border-radius: 5px;" | {{{slot}}}
|style="background: #c7dbea; padding:3px; border-radius: 5px;" align="center" | Head
|style="background: #c7dbea; padding:3px; border-radius: 5px;" align="center" | Winterfest
|style="background: #c7dbea; padding:3px; border-radius: 5px;" align="left" valign="top" | Pending
|- align="center" valign="middle"
|style="background: #c7dbea; padding:3px; border-radius: 5px; height:100px;" align= |
|style="background: #c7dbea; padding:3px; border-radius: 5px;" | [[File:{{{name}}}-Equipped.png|100px|center|link={{{name}}}]]
|style="background: #c7dbea; padding:3px; border-radius: 5px;" | {{{slot}}}
|style="background: #c7dbea; padding:3px; border-radius: 5px;" align="center" | Head
|style="background: #c7dbea; padding:3px; border-radius: 5px;" align="center" | Disguise
|style="background: #c7dbea; padding:3px; border-radius: 5px;" align="left" valign="top" | Pending
|- align="center" valign="middle"
|style="background: #c7dbea; padding:3px; border-radius: 5px; height:100px;" align= |
|style="background: #c7dbea; padding:3px; border-radius: 5px;" | [[File:{{{name}}}-Equipped.png|100px|center|link={{{name}}}]]
|style="background: #c7dbea; padding:3px; border-radius: 5px;" | {{{slot}}}
|style="background: #c7dbea; padding:3px; border-radius: 5px;" align="center" | Head
|style="background: #c7dbea; padding:3px; border-radius: 5px;" align="center" | Weather
|style="background: #c7dbea; padding:3px; border-radius: 5px;" align="left" valign="top" | Pending
|- align="center" valign="middle"
|style="background: #c7dbea; padding:3px; border-radius: 5px; height:100px;" align= |
|style="background: #c7dbea; padding:3px; border-radius: 5px;" | [[File:{{{name}}}-Equipped.png|100px|center|link={{{name}}}]]
|style="background: #c7dbea; padding:3px; border-radius: 5px;" | {{{slot}}}
|style="background: #c7dbea; padding:3px; border-radius: 5px;" align="center" | Body
|style="background: #c7dbea; padding:3px; border-radius: 5px;" align="center" | Weather
|style="background: #c7dbea; padding:3px; border-radius: 5px;" align="left" valign="top" | Pending
|- align="center" valign="middle"
|style="background: #c7dbea; padding:3px; border-radius: 5px; height:100px;" align= |
|style="background: #c7dbea; padding:3px; border-radius: 5px;" | [[File:{{{name}}}-Equipped.png|100px|center|link={{{name}}}]]
|style="background: #c7dbea; padding:3px; border-radius: 5px;" | {{{slot}}}
|style="background: #c7dbea; padding:3px; border-radius: 5px;" align="center" | Head
|style="background: #c7dbea; padding:3px; border-radius: 5px;" align="center" | Battle Chef
|style="background: #c7dbea; padding:3px; border-radius: 5px;" align="left" valign="top" | Pending
|- align="center" valign="middle"
|style="background: #c7dbea; padding:3px; border-radius: 5px; height:100px;" align= |
|style="background: #c7dbea; padding:3px; border-radius: 5px;" | [[File:{{{name}}}-Equipped.png|100px|center|link={{{name}}}]]
|style="background: #c7dbea; padding:3px; border-radius: 5px;" | {{{slot}}}
|style="background: #c7dbea; padding:3px; border-radius: 5px;" align="center" | Body
|style="background: #c7dbea; padding:3px; border-radius: 5px;" align="center" | Battle Chef
|style="background: #c7dbea; padding:3px; border-radius: 5px;" align="left" valign="top" | Pending
|- align="center" valign="middle"
|style="background: #c7dbea; padding:3px; border-radius: 5px; height:100px;" align= |
|style="background: #c7dbea; padding:3px; border-radius: 5px;" | [[File:{{{name}}}-Equipped.png|100px|center|link={{{name}}}]]
|style="background: #c7dbea; padding:3px; border-radius: 5px;" | {{{slot}}}
|style="background: #c7dbea; padding:3px; border-radius: 5px;" align="center" | Head
|style="background: #c7dbea; padding:3px; border-radius: 5px;" align="center" | Knight Groups
|style="background: #c7dbea; padding:3px; border-radius: 5px;" align="left" valign="top" | Pending
|- align="center" valign="middle"
|style="background: #c7dbea; padding:3px; border-radius: 5px; height:100px;" align= |
|style="background: #c7dbea; padding:3px; border-radius: 5px;" | [[File:{{{name}}}-Equipped.png|100px|center|link={{{name}}}]]
|style="background: #c7dbea; padding:3px; border-radius: 5px;" | {{{slot}}}
|style="background: #c7dbea; padding:3px; border-radius: 5px;" align="center" | Body
|style="background: #c7dbea; padding:3px; border-radius: 5px;" align="center" | Knight Groups
|style="background: #c7dbea; padding:3px; border-radius: 5px;" align="left" valign="top" | Pending
|- align="center" valign="middle"
|style="background: #c7dbea; padding:3px; border-radius: 5px; height:100px;" align= |
|style="background: #c7dbea; padding:3px; border-radius: 5px;" | [[File:{{{name}}}-Equipped.png|100px|center|link={{{name}}}]]
|style="background: #c7dbea; padding:3px; border-radius: 5px;" | {{{slot}}}
|style="background: #c7dbea; padding:3px; border-radius: 5px;" align="center" | Head
|style="background: #c7dbea; padding:3px; border-radius: 5px;" align="center" | Apocrean
|style="background: #c7dbea; padding:3px; border-radius: 5px;" align="left" valign="top" | Pending
|- align="center" valign="middle"
|style="background: #c7dbea; padding:3px; border-radius: 5px; height:100px;" align= |
|style="background: #c7dbea; padding:3px; border-radius: 5px;" | [[File:{{{name}}}-Equipped.png|100px|center|link={{{name}}}]]
|style="background: #c7dbea; padding:3px; border-radius: 5px;" | {{{slot}}}
|style="background: #c7dbea; padding:3px; border-radius: 5px;" align="center" | Body
|style="background: #c7dbea; padding:3px; border-radius: 5px;" align="center" | Steam
|style="background: #c7dbea; padding:3px; border-radius: 5px;" align="left" valign="top" | Pending
|- align="center" valign="middle"
|style="background: #c7dbea; padding:3px; border-radius: 5px; height:100px;" align= |
|style="background: #c7dbea; padding:3px; border-radius: 5px;" | [[File:{{{name}}}-Equipped.png|100px|center|link={{{name}}}]]
|style="background: #c7dbea; padding:3px; border-radius: 5px;" | {{{slot}}}
|style="background: #c7dbea; padding:3px; border-radius: 5px;" align="center" | Head
|style="background: #c7dbea; padding:3px; border-radius: 5px;" align="center" | Steam
|style="background: #c7dbea; padding:3px; border-radius: 5px;" align="left" valign="top" | Pending
|- align="center" valign="middle"
|style="background: #c7dbea; padding:3px; border-radius: 5px; height:100px;" align= |
|style="background: #c7dbea; padding:3px; border-radius: 5px;" | [[File:{{{name}}}-Equipped.png|100px|center|link={{{name}}}]]
|style="background: #c7dbea; padding:3px; border-radius: 5px;" | {{{slot}}}
|style="background: #c7dbea; padding:3px; border-radius: 5px;" align="center" | Body
|style="background: #c7dbea; padding:3px; border-radius: 5px;" align="center" | Steam
|style="background: #c7dbea; padding:3px; border-radius: 5px;" align="left" valign="top" | Pending
|- align="center" valign="middle"
|style="background: #c7dbea; padding:3px; border-radius: 5px; height:100px;" align= |
|style="background: #c7dbea; padding:3px; border-radius: 5px;" | [[File:{{{name}}}-Equipped.png|100px|center|link={{{name}}}]]
|style="background: #c7dbea; padding:3px; border-radius: 5px;" | {{{slot}}}
|style="background: #c7dbea; padding:3px; border-radius: 5px;" align="center" | Head
|style="background: #c7dbea; padding:3px; border-radius: 5px;" align="center" | Winterfest
|style="background: #c7dbea; padding:3px; border-radius: 5px;" align="left" valign="top" | Pending
|- align="center" valign="middle"
|style="background: #c7dbea; padding:3px; border-radius: 5px; height:100px;" align= |
|style="background: #c7dbea; padding:3px; border-radius: 5px;" | [[File:{{{name}}}-Equipped.png|100px|center|link={{{name}}}]]
|style="background: #c7dbea; padding:3px; border-radius: 5px;" | {{{slot}}}
|style="background: #c7dbea; padding:3px; border-radius: 5px;" align="center" | Body
|style="background: #c7dbea; padding:3px; border-radius: 5px;" align="center" | Winterfest
|style="background: #c7dbea; padding:3px; border-radius: 5px;" align="left" valign="top" | Pending
|- align="center" valign="middle"
|style="background: #c7dbea; padding:3px; border-radius: 5px; height:100px;" align= |
|style="background: #c7dbea; padding:3px; border-radius: 5px;" | [[File:{{{name}}}-Equipped.png|100px|center|link={{{name}}}]]
|style="background: #c7dbea; padding:3px; border-radius: 5px;" | {{{slot}}}
|style="background: #c7dbea; padding:3px; border-radius: 5px;" align="center" | Head
|style="background: #c7dbea; padding:3px; border-radius: 5px;" align="center" | Colossal
|style="background: #c7dbea; padding:3px; border-radius: 5px;" align="left" valign="top" | Pending
|- align="center" valign="middle"
|style="background: #c7dbea; padding:3px; border-radius: 5px; height:100px;" align= |
|style="background: #c7dbea; padding:3px; border-radius: 5px;" | [[File:{{{name}}}-Equipped.png|100px|center|link={{{name}}}]]
|style="background: #c7dbea; padding:3px; border-radius: 5px;" | {{{slot}}}
|style="background: #c7dbea; padding:3px; border-radius: 5px;" align="center" | Body
|style="background: #c7dbea; padding:3px; border-radius: 5px;" align="center" | Colossal
|style="background: #c7dbea; padding:3px; border-radius: 5px;" align="left" valign="top" | Pending
|- align="center" valign="middle"
|style="background: #c7dbea; padding:3px; border-radius: 5px; height:100px;" align= |
|style="background: #c7dbea; padding:3px; border-radius: 5px;" | [[File:{{{name}}}-Equipped.png|100px|center|link={{{name}}}]]
|style="background: #c7dbea; padding:3px; border-radius: 5px;" | {{{slot}}}
|style="background: #c7dbea; padding:3px; border-radius: 5px;" align="center" | Head
|style="background: #c7dbea; padding:3px; border-radius: 5px;" align="center" | Equinox
|style="background: #c7dbea; padding:3px; border-radius: 5px;" align="left" valign="top" | Pending
|- align="center" valign="middle"
|style="background: #c7dbea; padding:3px; border-radius: 5px; height:100px;" align= |
|style="background: #c7dbea; padding:3px; border-radius: 5px;" | [[File:{{{name}}}-Equipped.png|100px|center|link={{{name}}}]]
|style="background: #c7dbea; padding:3px; border-radius: 5px;" | {{{slot}}}
|style="background: #c7dbea; padding:3px; border-radius: 5px;" align="center" | Body
|style="background: #c7dbea; padding:3px; border-radius: 5px;" align="center" | Equinox
|style="background: #c7dbea; padding:3px; border-radius: 5px;" align="left" valign="top" | Pending
|- align="center" valign="middle"
|style="background: #c7dbea; padding:3px; border-radius: 5px; height:100px;" align= |
|style="background: #c7dbea; padding:3px; border-radius: 5px;" | [[File:{{{name}}}-Equipped.png|100px|center|link={{{name}}}]]
|style="background: #c7dbea; padding:3px; border-radius: 5px;" | {{{slot}}}
|style="background: #c7dbea; padding:3px; border-radius: 5px;" align="center" | Head
|style="background: #c7dbea; padding:3px; border-radius: 5px;" align="center" | Anniversary
|style="background: #c7dbea; padding:3px; border-radius: 5px;" align="left" valign="top" | Pending
|- align="center" valign="middle"
|style="background: #c7dbea; padding:3px; border-radius: 5px; height:100px;" align= |
|style="background: #c7dbea; padding:3px; border-radius: 5px;" | [[File:{{{name}}}-Equipped.png|100px|center|link={{{name}}}]]
|style="background: #c7dbea; padding:3px; border-radius: 5px;" | {{{slot}}}
|style="background: #c7dbea; padding:3px; border-radius: 5px;" align="center" | Head
|style="background: #c7dbea; padding:3px; border-radius: 5px;" align="center" | Anniversary
|style="background: #c7dbea; padding:3px; border-radius: 5px;" align="left" valign="top" | Pending
|- align="center" valign="middle"
|style="background: #c7dbea; padding:3px; border-radius: 5px; height:100px;" align= |
|style="background: #c7dbea; padding:3px; border-radius: 5px;" | [[File:{{{name}}}-Equipped.png|100px|center|link={{{name}}}]]
|style="background: #c7dbea; padding:3px; border-radius: 5px;" | {{{slot}}}
|style="background: #c7dbea; padding:3px; border-radius: 5px;" align="center" | Body
|style="background: #c7dbea; padding:3px; border-radius: 5px;" align="center" | Splash
|style="background: #c7dbea; padding:3px; border-radius: 5px;" align="left" valign="top" | Pending
|- align="center" valign="middle"
|style="background: #c7dbea; padding:3px; border-radius: 5px; height:100px;" align= |
|style="background: #c7dbea; padding:3px; border-radius: 5px;" | [[File:{{{name}}}-Equipped.png|100px|center|link={{{name}}}]]
|style="background: #c7dbea; padding:3px; border-radius: 5px;" | {{{slot}}}
|style="background: #c7dbea; padding:3px; border-radius: 5px;" align="center" | Head
|style="background: #c7dbea; padding:3px; border-radius: 5px;" align="center" | Slime
|style="background: #c7dbea; padding:3px; border-radius: 5px;" align="left" valign="top" | Pending
|- align="center" valign="middle"
|style="background: #c7dbea; padding:3px; border-radius: 5px; height:100px;" align= |
|style="background: #c7dbea; padding:3px; border-radius: 5px;" | [[File:{{{name}}}-Equipped.png|100px|center|link={{{name}}}]]
|style="background: #c7dbea; padding:3px; border-radius: 5px;" | {{{slot}}}
|style="background: #c7dbea; padding:3px; border-radius: 5px;" align="center" | Body
|style="background: #c7dbea; padding:3px; border-radius: 5px;" align="center" | Slime
|style="background: #c7dbea; padding:3px; border-radius: 5px;" align="left" valign="top" | Pending
|- align="center" valign="middle"
|style="background: #c7dbea; padding:3px; border-radius: 5px; height:100px;" align= |
|style="background: #c7dbea; padding:3px; border-radius: 5px;" | [[File:{{{name}}}-Equipped.png|100px|center|link={{{name}}}]]
|style="background: #c7dbea; padding:3px; border-radius: 5px;" | {{{slot}}}
|style="background: #c7dbea; padding:3px; border-radius: 5px;" align="center" | Head
|style="background: #c7dbea; padding:3px; border-radius: 5px;" align="center" | Gremlin
|style="background: #c7dbea; padding:3px; border-radius: 5px;" align="left" valign="top" | Pending
|- align="center" valign="middle"
|style="background: #c7dbea; padding:3px; border-radius: 5px; height:100px;" align= |
|style="background: #c7dbea; padding:3px; border-radius: 5px;" | [[File:{{{name}}}-Equipped.png|100px|center|link={{{name}}}]]
|style="background: #c7dbea; padding:3px; border-radius: 5px;" | {{{slot}}}
|style="background: #c7dbea; padding:3px; border-radius: 5px;" align="center" | Body
|style="background: #c7dbea; padding:3px; border-radius: 5px;" align="center" | Gremlin
|style="background: #c7dbea; padding:3px; border-radius: 5px;" align="left" valign="top" | Pending
|- align="center" valign="middle"
|style="background: #c7dbea; padding:3px; border-radius: 5px; height:100px;" align= |
|style="background: #c7dbea; padding:3px; border-radius: 5px;" | [[File:{{{name}}}-Equipped.png|100px|center|link={{{name}}}]]
|style="background: #c7dbea; padding:3px; border-radius: 5px;" | {{{slot}}}
|style="background: #c7dbea; padding:3px; border-radius: 5px;" align="center" | Head
|style="background: #c7dbea; padding:3px; border-radius: 5px;" align="center" | Supply Depot
|style="background: #c7dbea; padding:3px; border-radius: 5px;" align="left" valign="top" | Pending
|- align="center" valign="middle"
|style="background: #c7dbea; padding:3px; border-radius: 5px; height:100px;" align= |
|style="background: #c7dbea; padding:3px; border-radius: 5px;" | [[File:{{{name}}}-Equipped.png|100px|center|link={{{name}}}]]
|style="background: #c7dbea; padding:3px; border-radius: 5px;" | {{{slot}}}
|style="background: #c7dbea; padding:3px; border-radius: 5px;" align="center" | Head
|style="background: #c7dbea; padding:3px; border-radius: 5px;" align="center" | Construct
|style="background: #c7dbea; padding:3px; border-radius: 5px;" align="left" valign="top" | Pending
|- align="center" valign="middle"
|style="background: #c7dbea; padding:3px; border-radius: 5px; height:100px;" align= |
|style="background: #c7dbea; padding:3px; border-radius: 5px;" | [[File:{{{name}}}-Equipped.png|100px|center|link={{{name}}}]]
|style="background: #c7dbea; padding:3px; border-radius: 5px;" | {{{slot}}}
|style="background: #c7dbea; padding:3px; border-radius: 5px;" align="center" | Body
|style="background: #c7dbea; padding:3px; border-radius: 5px;" align="center" | Undead
|style="background: #c7dbea; padding:3px; border-radius: 5px;" align="left" valign="top" | Pending
|- align="center" valign="middle"
|style="background: #c7dbea; padding:3px; border-radius: 5px; height:100px;" align= |
|style="background: #c7dbea; padding:3px; border-radius: 5px;" | [[File:{{{name}}}-Equipped.png|100px|center|link={{{name}}}]]
|style="background: #c7dbea; padding:3px; border-radius: 5px;" | {{{slot}}}
|style="background: #c7dbea; padding:3px; border-radius: 5px;" align="center" | Head
|style="background: #c7dbea; padding:3px; border-radius: 5px;" align="center" | Dark Harvest
|style="background: #c7dbea; padding:3px; border-radius: 5px;" align="left" valign="top" | Pending
|- align="center" valign="middle"
|style="background: #c7dbea; padding:3px; border-radius: 5px; height:100px;" align= |
|style="background: #c7dbea; padding:3px; border-radius: 5px;" | [[File:{{{name}}}-Equipped.png|100px|center|link={{{name}}}]]
|style="background: #c7dbea; padding:3px; border-radius: 5px;" | {{{slot}}}
|style="background: #c7dbea; padding:3px; border-radius: 5px;" align="center" | Body
|style="background: #c7dbea; padding:3px; border-radius: 5px;" align="center" | Knight Groups
|style="background: #c7dbea; padding:3px; border-radius: 5px;" align="left" valign="top" | Pending
|}
List of Expiring Costumes
| ||||||||||||||||||||||||||||||||||||||||||||||||||||||||||||||||||||||||||||||||||||||||||||||||||||
|
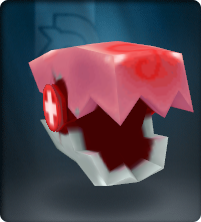
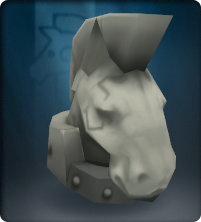
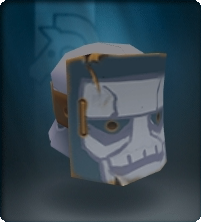
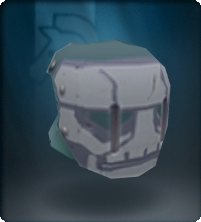
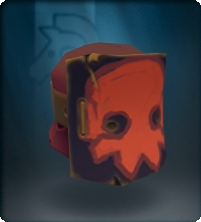
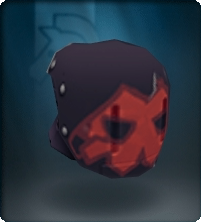
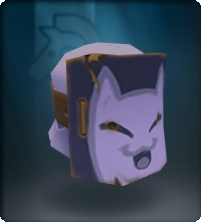

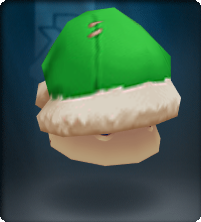
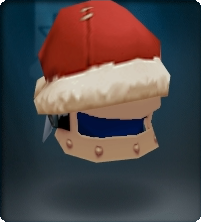

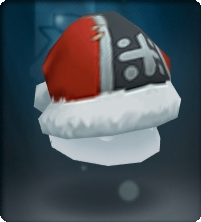
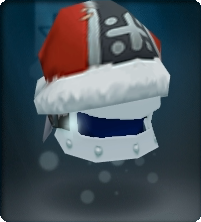
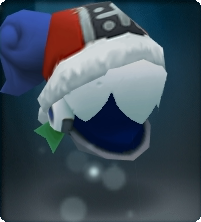
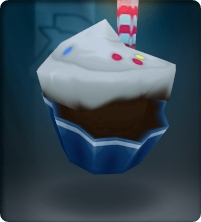
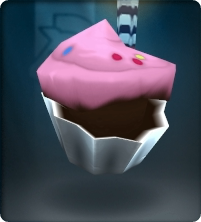
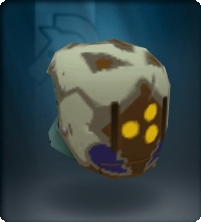
Trivia
- Logically, no expiring costume has accessory slots.
- There are costumes that are obsolete. For a list of these items (not all items in this list are "costumes", see individual pages for details), see Category:Obsolete.
- Game Masters wear costumes on occasion. For a list of these items (not all items in this list are "costumes", see individual pages for details), see Category:Staff Exclusive.