Exploration
From SpiralKnights
One of the tasks for knights is exploration of the Clockworks by joining in parties going down through gates. While in the Clockworks, knights will encounter many interesting things.
Monsters
Monsters are the denizens that reside within the ever-changing halls of the Clockworks. There are currently six "families" of monsters found within the Clockworks; Beasts, Fiends, Undead, Constructs, Gremlins and Slimes. Each family (besides Gremlins) has at least two different "species" with varying methods of attacks.
Treasure Boxes
A lucky find! Treasure boxes always contain goodies such as coins, tokens, heat, pickups or, on rare occasions, tier-based equipment for the knight to loot. They come in red and green varieties, with the red ones being more rewarding (and less often found) than the green ones.
Items
Consumables
Pickups
Materials & Other Items
Map Features
When exploring within the Clockworks, knights may encounter a range of obstacles. Often, it is necessary to remove these to advance and finish the level.
Breakable Blocks
These basic blocks can be broken by a single damaging attack of any kind.
Stone Blocks
Stone blocks must be hit three times to be destroyed. A Rock Jelly Cube has a chance of spawning in place of a Stone Block when hit.
Unbreakable Blocks
Blocks that cannot be broken by regular attacks. However, all Unbreakable blocks connected to a Ghost Block can be removed.
Crystal Blocks
Crystal Blocks come in various colors. When hit, all connected Crystal Blocks of the same color will shatter. A single Crystal Block on its own is often hiding a switch, needed to advance in the level.
Ghost Blocks
Blue, light-emitting blocks. Breakable Blocks, Stone Blocks, Unbreakable blocks, Crystal Blocks, Bushes, Explosive blocks, Timed Explosive blocks, Monster cages and Treasure Chests connected to the Ghost block will get removed.
Buttons
Buttons cause certain actions to occur when pressed. Multiple buttons may need to be pressed to perform a single action. There are four types of buttons:
- Target-colored, the most common type of button - can be stepped on and will remain pressed indefinitely. Some can be found hidden under breakable blocks or Crystal Blocks.
- Party Button - A large unique button adorned with a red circle with a white silhouette of three characters. All members of the team must be standing on the button to activate it. Party buttons may trigger a wave of enemies, open and/or close a gate, or both.
- Pressure plate - A pressure plate opens a nearby gate. Often a Heavy Statue must be retrieved and placed on it to keep it pressed, and multiple pressure plates require all the Heavy Statues to be retrieved. A Knight may stand on the button to open the gate, but will not be able to proceed in the level until the Statue is retrieved, as there will be a Party Button on the other side of the gate.
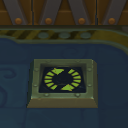
- A button marked with a Munitions icon will deactivate any nearby active missile launchers when pressed. Found exclusively in the Ironclaw Munitions Factory and the Grand Arsenal
Switches
Switches need to be hit with a weapon, projectile, or a thrown item. Switches fall into three categories:
- Indefinite - These switches need only be hit once, and their effect is permanent. They are colored red when inactive and green when active.
- Alternating - Often comes in groups. Hitting any one of these switches will change all of them. These are often used to raise and lower large numbers of gates simultaneously, or change the direction of retraction for a row of consecutive spiked floors. They are colored purple and yellow.
- Timed - Hitting a Timed Switch causes something to happen that will reset after a short period of time. When the action has been reset, a knight may hit the switch again to activate the action again, and may repeatedly do so until the action has been completed. Timed switches are also purple and yellow.
Gates
Gates allow knights access to new areas. There are four types of gates:
- Switch/button gates - are the most common kind of gate. They are opened (and sometimes closed) by the activation of a switch or button.
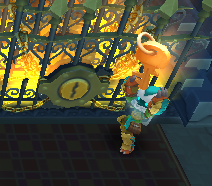
- Golden Key gates - Golden Key gates require a Knight to find and use a matching Golden key to unlock it.
- Energy gates - See Extra Energy Features.
- Monster gates - Monster gates are marked with frowning eyes and a purple glow. They will open when all the Monsters in the area have been defeated.
Pots
Pots can be used to hit switches out of reach, or slightly damage a monster from long range. Pots come in three variants:
- Clay pot - The most common type of pot; these pots are always present on top of a Respawn Pad if a Knight is presented with a switch outside of Sword range.
- Fire pot - Fire pots will set hit monsters or players alight and will set alight any oil slicks it hits.
- Oil pot - Oil jars will leave oil slicks on the floor when they break.
Force Fields
Force fields can crossed by players, but not by Monsters. Attacks performed through a forcefield will not do damage. A Force Field will turn purple - preventing them from going through it - if a Knight is carrying an item (such as a Heavy Statue).
A variant of the Force Field only allows Knights to travel through it in one direction. This variant can most commonly be found at the beginning of a level in the Clockworks.
Note that Tier 3 Wolvers can burrow past Force Fields.
Healing Pad
A variant of the Respawn Pad which heals Knights. They resemble a Respawn Pad but have a Heart located in the center. They can be found in the Advanced Training Hall, Subtowns, in between Arenas and before Bosses, and a slow healing equivalent can be found in the Firestorm Citadel.
Plants
Plants can be found on almost any level with grass, but are found in abundance in Aurora Isles, Starlight Cradle and Jigsaw Valley levels. They can be destroyed with a sword, at the maximum range of a gun, or a bomb. When destroyed, they have a chance of dropping a 1-50 crown coin or a Heart.
Bush
Bushes are found in most levels with grass, but are found in abundance in Wolver Dens. When destroyed, they have a very small chance of dropping a 1 crown coin.
Ember
Embers are almost-instantly regenerating objects that can be carried by knights and thrown at candles in Candlestick Keep levels to light them. Like other thrown objects, they are dropped if the knight holding it is damaged and deal very minor damage to monsters when thrown at them.
Candles
Candles have to be lit using nearby Embers to keep the constant threat of the dreaded Grimalkin at bay.
There are two variations: Golden candles which emit Orange light, which go out after 30 seconds and must be relit, and blue candles emitting blue-flames which will remain lit.
Candles are found in:
- Candlestick Keep levels
- Graveyards in some Scenario Rooms
- Shroud of the Apocrea: The Grasping Plateau
It is advised for Knights to fight in the light of the candles, to avoid the risk of taking a large amount of unshieldable damage from the Grimalkin.
Monster Cages
Monster cages will release a random monster once broken. Most commonly found in the Gloaming Wildwoods as well as Perimeter Promenade II and Scarlet Fortress Cravat Hall I-II.
![]() Information below is based on lack of information and might be incorrect. Most monsters have been witnessed. The following have not been reported in any tier:
Information below is based on lack of information and might be incorrect. Most monsters have been witnessed. The following have not been reported in any tier:
 Drone (Wisps, Shankles of any kind)
 Lost Souls of any kind
Empty Rockets
Breakable blocks in the shape of rockets. Empty Rockets must be hit twice to be broken.
They are found primarily in:
Steel Hedgehogs
Massive caltrop-shaped obstacles similar in function to breakable blocks. They need to be hit three times to be broken. They are found primarily in the Grand Arsenal.
Beast Bells
Beast Bells stun beasts in a certain radius. When hit, they have a cool-down time of about 10 seconds before they can be hit again. Beast Bells can only be found in Gloaming Wildwoods.
Grim Totems
Grim Totems can resurrect nearby Zombies. They cannot be destroyed, but if they can be reached they can be carried to another location to allow for easier Zombie slaying.
Swarm Portal
A Swarm Portal can recreate nearby members of the swarm and slow Knights down by constantly stunning them. They cannot be defeated, but enough damage will temporarily shrink it to a minimal, non-threatening size.
Cursed Sprite
A Nature Sprite which bears the mark of the Curse symbol adorns a pinkish coloration on its skin and appears exclusively in the Charred Court. A total of eight Sprites are imprisoned in various rooms around the level and at least six must be picked up, carried, and placed onto the Sprite Well to advance in the level. Once purified, they become non-interactive NPCs and cannot be picked up.
Note: The remaining two can instead be splashed with Water Pots to be purified.
Sprite Well
A green circle of nature adorned with various small flowers, again found exclusively in the Charred Court of the Firestorm Citadel. At least six sprites must be retrieved around the level and brought back to the Well to be rejuvenated from their Curse. Doing so will allow the two nearby Water Wells to spawn Water Orbs, which are needed to clear the path of Shadow Fire to the Elevator.
Standing in the Sprite Well can cure a Knight's status ailments.
Water Pot
Also sometimes called "Water Globes", are globs of water which are spawned by any provided Water Wells from the Charred Court onwards. They are of paramount importance to Knights by being the sole way of clearing out Shadow Fire and extinguishing the glowing orbs surrounding Lord Vanaduke while he is being fought. If a knight is splashed with a Water Orb, either against a wall or when clearing Shadow Fire, it cures any active status ailments. Water Orbs can be found in:
- Grand Arsenal (There are two Water Orbs and are used to find a key, opening a door with one treasure block inside, guarded by two Gun Puppies and two Thwackers of the higher tier (or simply stronger if on T3). However, the Water Orbs here will not respawn.)
- Firestorm Citadel
- Compound 42
- Shroud of the Apocrea: The Grasping Plateau
Map Hazards
While exploring the various levels of the Clockworks, knights may encounter dangers besides monsters. Many of these hazards can only be found in appropriately themed levels, but others like floor spikes can be found in levels of any theme. Knights will take damage and sometimes status effects by venturing into certain hazards.
Elemental Grates
Elemental grates, sometimes called "Status Traps", are floor hazards found in the Clockworks. The type of floor grate depend on the theme of the level - fire grates are found in Blast Furnaces, poison grates in Wasteworks, freeze grates in Cooling Chambers, and shock grates in Power Complex levels. Each grate inflicts damage and a Status effect depending on the type of grate.
Floor Spikes
Floor spikes are one of the most common hazards encountered by knights. The spike areas always run in a perpetual cycle: spikes out, spikes in, and then they glow purple just before coming back out. When the spikes are out, they should be avoided at all costs, especially in Tier 3. They inflict piercing damage and will often break the shield of a knight that ventures onto them. When the spikes are withdrawn, however, they can be walked on safely.
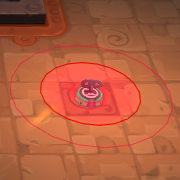
Respawn Pad
Respawning Pads are black nonsolid blocks which most commonly respawn certain blocks, however they can also respawn objects and monsters. If the item or monster it spawns is either destroyed or removed with a Ghost Block, it will respawn again in a short amount of time.
If a knight is standing on the respawning block when it spawns a Block or Monster, the knight will take minor damage and it will not spawn. If shielded, the shield will instead take minor damage.
Explosive Blocks
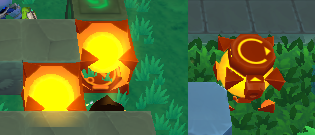
Explosive blocks are, as the name suggests, blocks that explode when they take any damaging hit. If Knights stand too close to these blocks when they explode, they will take damage. The explosions can also damage monsters, so use the environment to your advantage.
Note: It is possible to detonate an Explosive Block using your sword. A knight can stand 1 square away from the block and then hit it to detonate it. Heavy swords can detonate Explosive Blocks up to 1 and a half squares away.
Timed Explosive Blocks
These explosive blocks go off 3 seconds after they are activated, and will detonate other Timed or Explosive blocks. A knight or monster within range when the timer hits 0 will take damage.
Red Searchlights
Similar to normal Searchlights found in the entire Clockworks but these have a red light in the focus, if a knight walks through the red light, a series of missiles fall from above. Fortunately, these Searchlights are found only in the Camp Crimson of the Rank Mission: The Collector and D26 of the 10-1 Rank Mission Crimson Chaos.
Unused Rockets
When hit, they will explode after a few seconds and can damage Knights within a 2-floor tile radius. They do not damage nearby Empty Rockets. They are found in:
Missiles
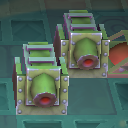
Missile launchers, including the Roarmulus Twins. They occasionally fire missiles in the direction they are facing. Usually they appear in groups and can be deactivated by pressing a button. The missiles deal Normal damage. They can be found in:
Brambles
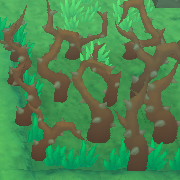
Brambles are mostly found on grassy levels and are in fixed positions. Brambles pose most of a threat when an enemy is knocked into the middle of a patch of them, in which case ranged attacks are needed to reach them. Monster drops have a bad habit of hiding in the middle of this hazard. Knights who venture into the brambles will take damage. Brambles can be safely traversed using your shield. They also come in the form of poison brambles, which are marked with a distinctive purple hue and will poison knights who walk into them. Brambles can be found in places as:
Barbed Wire
Similar to Brambles, Barbed Wires have been placed likely by Gremlins in determined zones to create difficulties to the knights. They aren't really common in the game and can be seen in:
- Grand Arsenal
- Compounds levels
Barbed Steel Hedgehogs
Similar to Steel Hedgehogs, except coming into contact with one will inflict damage. Unlike their non-barbed counterparts, they only need to be hit once to be broken.
Mines
A hidden bomb that is activated by a Knight walking nearby. The bomb is invisible, but it's marked by distinctive tiles of a darker hue. Its fuse length is similar to that of Gremlin Demo bomb. Can only be found in the Grand Arsenal.
Misery Block
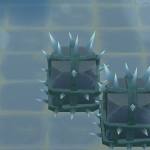
Also known as "spikey block"s, these hazards are nasty rocks covered in painful spines. These are encountered in rather nasty areas such as Grinchlin Assault during Winterfest or fiendish arenas during March of the Tortodrones. They are usually clustered together to form terrible, impassable barriers. These blocks cannot be destroyed, but if they are attached to a ghost block, they will disappear.
Orbital Chain
A chain of harmful orbs orbits a fixed point. These deal damage and can inflict status. As of release 2015-02-11, several of these chains have new art.
Shadow Fire
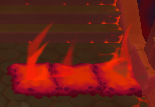
Solid blocks of fire. Unlike Fire grates, Shadow Fire is a constant hazard and should be avoided at all costs. Knights cannot walk through it nor send any attacks through it, but enemies can. Oilers and Toxoils walking through a block of Shadow Fire will catch fire. Shadow Fires are found in:
Shadow Fire blocks can be removed by throwing a Water Pot on it, if available.
Wheel Launcher
Main article: Wheel Launcher
Wheel Launchers are large catapult contraptions protected at the front with a shield adorning the former Kingdom of Almire's crest. It must be damaged from the side or behind, or bypassing the shield from the front with various Handguns and the Brandish-line charge attacks. The Wheels they spawn deal large amounts of Normal damage and with powerful knock-back capable of crushing knights and enemies alike. However, they can be blocked with any provided Grim Totems and Heavy statues.
It is interesting to note that they take minimal damage from Piercing attacks and critical damage from Elemental attacks, suggesting they belong to the Construct family despite the fact they do not officially belong to any Monster Family.
Healing Totem
Encountered in fiendish March of the Tortodrones associated areas, these structures heal enemies.
Extra Energy Features
The Clockworks also are home to some added features that can be accessed by paying an additional energy fee.
Energy Gates
Energy Gates function and look similar to a locked gate, with the exception that they cost 3 Energy, rather than a key, to open. When approaching a gate, a bubble will appear next to your character denoting the Energy cost. To open the gate, press the Action button, and then to confirm the exchange, press the Action button again.
Behind Energy Gates usually lie a plethora of high-yield treasure boxes. Others may lead to Danger rooms or alternate routes through a level.
Mecha Knights
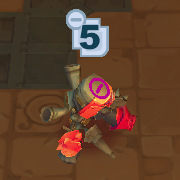
These friendly Mecha Knights require 5 energy for activation. Just like the mecha knights made found in Mecha Knight Kits, they will help kill enemy monsters until either they themselves die or you finish the level. They are unable to take the elevator and their service to knights would be terminated at the end of each level. They are sometimes found in:
- Deconstruction Zones
- Grand Arsenal
- Ironclaw Munitions Factory
- Ghosts in the Machine: Dry Dock
- Compounds levels in Scenario Rooms
As they are classified as Monsters, (albeit friendly ones) they are unaffected by traps of any kind and are healed by sources that would normally heal monsters.
Mecha Turrets
Main article: Mecha Turret
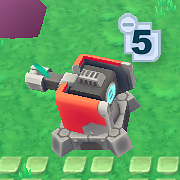
Found inactive in Jelly Farm II levels and already activated in the Grand Arsenal, friendly Mecha Turrets require 5 energy for activation. Once a Mecha Turret is activated, it will damage enemy monsters near and far with its powerful laser beam. Like Gun Puppies, Mecha Turrets have frontal sight detection and can rotate 360 degrees. Unlike Gun Puppies though, they have an immensely long range and are of paramount usefulness to knights if used properly. They are found primarily in:
- Aurora Isles: The Jelly Farm II
- Deconstruction Zones
- Grand Arsenal
- Save Winterfest
Scenario Rooms
Main article: Scenario Rooms
Found in certain levels throughout the Clockworks, these unique rooms offer stories and tips on the Clockworks themselves.
See Also
Other links
- Deutscher Artikel: Erforschen
- Artículo en español: Exploración
- Article en français: Exploration
