Ghosts in the Machine
From SpiralKnights
Contents
Description
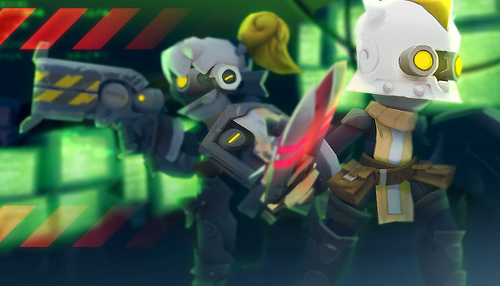
Warning: This is a Dangerous Mission! Desna and her Recon Rangers are an elite team tasked with recovering intel from some of the most dangerous levels of the Clockworks. Joining them could lead to great rewards, but it is guaranteed to be a perilous journey!
Spiral HQ has received a distress call from a derelict facility deep within the Clockworks. The distress call came in the form of a digital message saying only 'save us.' Believing it to be a potential trap, Spiral HQ has deployed Desna's Recon Rangers to investigate the facility and assist anyone who may have sent the message.
Monsters
Specific monster strategies can be found on the monsters' pages.
Dry Dock
Monsters:

 Surging Bombie

 Frankenzom

 Static Deadnaught

 Shocking Howlitzer (Rarely)
 Rocket Puppy (Rarely)

 Sparky

 Volt Knight

 Voltrode

 Electreant (Rarely)

 Surgebot
Iron Hulk
Monsters:

 Surging Bombie

 Frankenzom

 Static Deadnaught

 Sparky

 Volt Knight

 Voltrode

 Surgebot

 The Big Iron (Boss)
Recommended Equipment
In short, the monsters are constructs and undead with a shock theme, and there are numerous shock traps. Elemental weapons are highly effective against these monsters. In some places, crowd control weapons such as Shivermist Buster are desirable. The perfect armor would protect against normal, elemental, shadow, and shock.
First Level: Dry Dock
The Dry Dock consists of three parts: a tight initial battle, a deconstruction zone, and an arena-like final battle.
The initial battle is subdivided by a series of barriers and gates for the party to open. There are numerous traps, shock wisps, and sparky projectiles. There is not much room to maneuver, so dodging the traps and enemies — particularly the Volt Knights — can be difficult. The party can somewhat control the flow of enemies by opening barriers and gates only after immediate threats have been destroyed.
The deconstruction zone occupies most of the Dry Dock. Unlike typical deconstruction zones, there are no gremlins. Most enemies are constructs, including numerous Volt Knights. There are scattered graves, out of each of which a few zombies erupt. There are four statues, that the party must move to pads in a certain corner of the deconstruction zone. Sometimes a statue is trapped, in that monsters spawn when the party first touches the statue.
Once the four statues have been placed on their pads, the party may proceed to the final battle of the level. There are three waves of mixed constructs and undead. At the beginning of the first and second waves, totems appear that resurrect zombies and bombies. The third wave contains a Static Dreadnaught as well as four sparkies in the four corners.
Second Level: Iron Hulk
The second floor has a amazing amount of traps and ultimately contain the boss the The Big Iron. After pressing the beginning party button, there is some obstacle courses you must face with ultimate cautiousness. After that, you come across 2 paths, one on the right and one of the left and one path in the middle. The path in the middle obviously leads to the boss the Big Iron but is blocked by 2 locked gates that both need a key. The right and left paths both leads to arenas that contain the keys.
East Side
The right path leads to a load of electric Zombies, some traps and a Sparky, which can be easily defeated. Then you will come across a screen that can be interacted with that says: "They are planning to ambush you ahead. MEDICAL SUPPLIES AVAILABLE HERE." This area is an arena filled with Golden Storm Wisps. This arena is going to cause a problem because if not careful, even a little bit, you will get hit by the wisps and the shock will interrupt everything as well as damage you. There is also one totem on the right and one totem on top. The first wave consists of Frankenzoms and Electric Bombies on the right side as well as the top. On the left appears a Volt Knight and 2 Surgebots. Make sure you kill the Volt Knight and Surge Bots first before luring the undead out of the totem's reach and slaying them. The second wave consists of 2 Volt Knights on the bottom, some undead on the right and top. Kill the 2 Knights first and like the last wave, proceed to lure and kill the undead. The third and final wave consists of one Volt Knight in the right corner, 2 Volt Knights in the left area, many undead in the right area, and a smaller number of undead in the top as well as a Static Deadnaught. Again kill the Volt Knights first, then proceed very carefully to the Deadnaught and kill it with utmost caution! Then kill the rest of the undead. PLEASE WHEN FIGHTING THE ARENA, WATCH OUT FOR THE STORM WISPS, FOR THEY WILL RUIN EVERYTHING! After the arena, it unlocks a room that has one key and what it appears of 4 health boxes. But do not be fooled, for when you hit open the boxes, electric monsters are revealed, making them act like Monster Cages. This confirms what the screen said of: "They are planning to ambush you ahead." When getting out of the arena, you will encounter some electric monster blocking your way as well as a respawned Sparky. Then take the key and unlock one of the doors.
West Side
The left path, like the right path, leads to a load of Frankenzoms and some individual electric monsters. Eventually you come across a arena that has Golden Storm Wisps patrolling the perimeter of the arena, about 6 electric bombie spawners in the North and a one slow spinning electric whirler in the middle that sweeps the whole arena. The first wave consists of one Sparky in the North, 2 Voltrodes flanking it and a Voltrode in the left bottom. This wave is simple by killing the Sparky first and then the Voltrodes. It's the bombies that pose the real problem. They spawn fast and their constant explosions make a peril for whoever's attacking. Plus, 5-7 electric rockets fall in the Southern area. The rockets can easily be dodged or blocked. The next wave consists of 2 Volt Knights and 2 Voltrodes on the left area as well as 6-8 electric rockets falling in the South area. This is when you need to move to the right area and pick them off one by one. Also be wary of the giant whirly ball. The third and final wave consists of a Static Deadnuaught, 2 Sparkys and 2 Volt Knights all in the North area. Plus, 7-9 rockets falls in the South area. The most dangerous one, the Sparkys and Bombies pose a serious threat. It is suggested that the Sparkys are cautiously killed first and then the Volt Knights and finally the Deadnaught.
Boss Fight
The Big Iron battle is organized into three phases.
For the first phase spawner that alternates between Volt Knight, Voltrode, and Surgebots appears in the floor. 2 wire tentacles will appear and attack the player(s) constantly. The boss will also fire 2 laser beams in random directions commonly. When beginning the battle, it is wise to have a player use a shield on the spawner and prevent the monsters from spawning, however, staying in place will make the player vulnerable to the beams and tentacles. The Big Iron has a shield constant at all times until the boss shoots out 3 laser rounds already, in which its shield breaks down and leaves a opportunity to attack it. When the boss is still invincible, you should concentrate on attacking monsters coming out of the spawner, dodging lasers and attacking tentacles. When the tentacle comes out of the ground, you can attack it and if you damage one enough, it will not appear for the rest of the current phase until another phase starts and new tentacles appear. When the boss is damaged enough, it closes its eyes and opens them again, activating phase two.
In the second phase, two spawners are active and four tentacles will constantly attack the player. The Battle pod can now shoot 4 random laser beams in each laser round. It is extremely unwise to block the spawners using the shield because there are more lasers and tentacles. Damaging each tentacle enough will ensure the tentacles does not reappear for the rest of the second phase. Always keep the spawning monsters off you! After 4 laser rounds, the Big Iron will be vulnerable and if damaged enough, it will move to the Phase Three.
In the final phase, the boss's eyes will have the danger sign in them. This time the boss will have 6 wires and 6-8 random lasers. This can pose a problem because whenever the boss shoots the lasers, you usually get a small amount of space to dodge the lasers, but in that small amount of space, the tentacles will attack and sometimes push you into the lasers. The monsters also have a opportunity to attack you, so that is when killing off these tentacles is really important. When one tentacle is killed, it will never come back. After 5 laser rounds, the shield will break and you can attack. When the monster is damaged enough, the boss will die.
Third Level: Cargo Bay
The third level is purely a treasure level, with numerous treasure boxes and no monsters. Knights can change their equipment anywhere in this level, so that the heat earned can be applied to any item at the elevator.
