Difference between revisions of "Save Winterfest!/Loadout"
From SpiralKnights
Knishtra52 (Talk | contribs) (Created page with '{{Guide/Loadout |mission = Save Winterfest! |intro = ??? |helmet = * ??? |armor = * ??? |shield = * ??? |weapon = * ??? |trinket = * ??? |sprite = * ??? }}') |
(i just "organized" the information from the main page (Save Winterfest!) and bring it here) |
||
| Line 1: | Line 1: | ||
| − | {{ | + | This [[loadout]] guide is for {{mission|Save Winterfest!}}. It is one of many [[:Category:Guides (Player Made)|guides made by players]]. As such, contents of this page are [[:Category:Opinion|opinionated]]. |
| − | + | __NOTOC__ | |
| − | | | + | ==Loadout== |
| + | {{Note-Loadout}} | ||
| + | <br> | ||
| + | {{showhide|state=uncollapsed|First option|content= | ||
| + | ===Goal: Speedy Token Farm=== | ||
| + | *Depth 9 | ||
| + | *Elite Difficulty | ||
| − | + | The following loadout allows maximum speed and immunity to being frozen by Freeze Grates. It considers carrying Red presents in shallower depths, sacrificing 4 tokens per present in exchange for freeze grate immunity and, if all goes well, faster overall token accumulation because the player does not have to wait for freeze grates. The grates will still damage you, but they will never inflict freeze with these mission conditions and this loadout. | |
| − | + | ||
| − | + | It is also generally less "annoying" to play with this loadout. | |
| − | + | ||
| − | + | Freeze Grates on Elite difficulty in deeper depths will freeze the player, even with this loadout. | |
| − | + | <br><br> | |
| − | | | + | [[File:Icon-helmet.png|25px|link=Weapon]] Suggested [[Helmet|Helmet(s)]]:<br> |
| − | * | + | *{{equip|Black Kat Cowl}}: While perhaps rather difficult to obtain, this item's innate Movement Speed Increase and Freeze resistance make it an excellent helmet for speedy present delivery. |
| + | <br> | ||
| + | [[File:Icon-armor.png|25px|link=Weapon]] Suggested [[Armor]]:<br> | ||
| + | *{{equip|Black Kat Raiment}}: While perhaps rather difficult to obtain, this item's innate Movement Speed Increase and Freeze resistance make it an excellent armor for speedy present delivery. | ||
| + | <br> | ||
| + | [[File:Icon-shield.png|25px|link=Shield]] Suggested [[Shield|Shield(s)]]:<br> | ||
| + | *{{equip|Heater Shield}}: This sturdy shield is easy to obtain. It will take hits from most things in the level, especially the Grinchlins. It will tend to survive freeze traps more, and it is a cost effective option if the player also wants to take on the {{mission|Grinchlin Assault!}} | ||
| + | *{{equip|Dread Skelly Shield}}: This sturdy shield is easy to obtain. It will take hits from most things in the level, especially the fiends. | ||
| + | <br> | ||
| + | [[File:Icon-sword.png|25px|link=Weapon]] Suggested [[Weapon|Weapon(s)]]:<br> | ||
| + | *{{equip|Final Flourish}}: This sword is easy to obtain. Its fast attack speed makes it a great tool for quickly dispatching the fiends in this level. It will take care of Grinchlins as well. | ||
| + | *{{equip|Sentenza}} | ||
| + | *{{equip|Gilded Griffin}}: While fairly difficult to obtain, the fast attack speed of these handguns make them ideal for clearing pathways. Sentenza is better at damaging Grinchlins, while Griffin is better at dealing with Fiends. Any fast handgun will do really, as a handgun's function in this level should be to clear obstacles and make {{Monster|Layoafer}}s move out of your way from a distance. {{Monster|Humbug}}s will also be deterred if they are damaged at all, so speed over power is key for this strategy. | ||
| + | <br> | ||
| + | [[File:Icon-trinket.png|25px|link=Trinket]] Suggested [[Trinket|Trinket(s)]]:<br> | ||
| + | *{{equip|Sizzling Hearthstone Pendant}}: This trinket gives a little more [[Freeze]] resistance. Just enough to completely ignore Freeze Grates up to Elite difficulty in depth 9, as long as other equipment is worn with it. | ||
| + | *{{equip|Radiant Crystal Pin}}: Optional. This trinket's elemental resistance helps reduce some damage from various hazards. Can have a heart pendant etc. instead. | ||
| + | <br> | ||
| + | [[File:Icon-battle sprite.png|25px|link=Battle Sprite]] Suggested [[Battle Sprite|Battle Sprite(s)]]:<br> | ||
| + | *[[File:Battle Sprite-Seraphynx-T3-icon.png|36px|link=Seraphynx]] [[Seraphynx]]: Using this sprite's #3 ability, [[Angelic Aura]] or any ultimate variant, is a great way to just ignore hazards. The [[Maskeraith]]'s [[Shadow Cloak (Battle Sprite Ability)|Shadow Cloak]] falls short here, because the cloak breaks too easily to be of much use, especially when you want to be dashing as much as possible. | ||
| + | *[[File:Swift Steps.png|36px|link=Swift Steps]] [[Perk|Swift Steps]] perk: This lets your knight move a lot faster, which helps deliver presents more quickly. | ||
| + | <br> | ||
| + | }} | ||
| − | | | + | {{showhide|state=uncollapsed|Second option|content= |
| − | * | + | ===Goal: Humbug Hat=== |
| − | + | *Depth 24 (deepest possible for this mission) | |
| − | |sprite | + | *Elite Difficulty (best drop conditions) |
| − | * | + | <br> |
| + | [[File:Icon-helmet.png|25px|link=Weapon]] Suggested [[Helmet|Helmet(s)]]:<br> | ||
| + | *{{equip|Bombastic Demo Helm}}: This item's innate elemental defense and freeze resistance are great for this mission. | ||
| + | <br> | ||
| + | [[File:Icon-armor.png|25px|link=Weapon]] Suggested [[Armor]]:<br> | ||
| + | *{{equip|Bombastic Demo Suit}}: This item's innate elemental defense and freeze resistance are great for this mission. | ||
| + | <br> | ||
| + | [[File:Icon-shield.png|25px|link=Shield]] Suggested [[Shield|Shield(s)]]:<br> | ||
| + | *{{equip|Heater Shield}}: This sturdy shield is easy to obtain. It will take hits from most things in the level, especially the Grinchlins. It will tend to survive freeze traps more, and it is a cost effective option if the player also wants to take on the {{mission|Grinchlin Assault!}} | ||
| + | *{{equip|Dread Skelly Shield}}: This sturdy shield is easy to obtain. It will take hits from most things in the level, especially the fiends. | ||
| + | <br> | ||
| + | [[File:Icon-sword.png|25px|link=Weapon]] Suggested [[Weapon|Weapon(s)]]:<br> | ||
| + | *{{equip|Dark Briar Barrage}}: Will easily dispatch fiends as well as Grinchlins. | ||
| + | *{{equip|Final Flourish}}: Will swiftly pick off any monsters who manage to survive barrage bursts. | ||
| + | <br> | ||
| + | [[File:Icon-trinket.png|25px|link=Trinket]] Suggested [[Trinket|Trinket(s)]]:<br> | ||
| + | *{{equip|Elite Bomb Focus Module}}: The below helmet and armor cover damage. If you don't want to mess around with variants, wear these trinkets to reduce bomb charge time. | ||
| + | <br> | ||
| + | [[File:Icon-battle sprite.png|25px|link=Battle Sprite]] Suggested [[Battle Sprite|Battle Sprite(s)]]:<br> | ||
| + | *[[File:Battle Sprite-Seraphynx-T3-icon.png|36px|link=Seraphynx]] [[Seraphynx]]: Using this sprite's #3 ability, [[Angelic Aura]] or any ultimate variant, is a great way to just ignore hazards. The [[Valkyrian Aura]] variant aids with charging weapons, and so will help with charging bombs. | ||
| + | *[[File:Swift Steps.png|36px|link=Swift Steps]] [[Perk|Swift Steps]] perk: This lets your knight move a lot faster, which helps get around for various reasons. | ||
| + | <br> | ||
}} | }} | ||
| + | |||
| + | ==See Also== | ||
| + | *[[Template:Loadout/Glass Cannon|"Glass Cannon" loadout]] | ||
| + | {{guides}} | ||
| + | [[Category:Loadouts]] | ||
Latest revision as of 23:05, 26 April 2020
This loadout guide is for ![]() Event Mission: Save Winterfest!. It is one of many guides made by players. As such, contents of this page are opinionated.
Event Mission: Save Winterfest!. It is one of many guides made by players. As such, contents of this page are opinionated.
Loadout
Goal: Speedy Token Farm
- Depth 9
- Elite Difficulty
The following loadout allows maximum speed and immunity to being frozen by Freeze Grates. It considers carrying Red presents in shallower depths, sacrificing 4 tokens per present in exchange for freeze grate immunity and, if all goes well, faster overall token accumulation because the player does not have to wait for freeze grates. The grates will still damage you, but they will never inflict freeze with these mission conditions and this loadout.
It is also generally less "annoying" to play with this loadout.
Freeze Grates on Elite difficulty in deeper depths will freeze the player, even with this loadout.
![]() Suggested Helmet(s):
Suggested Helmet(s):
 Black Kat Cowl: While perhaps rather difficult to obtain, this item's innate Movement Speed Increase and Freeze resistance make it an excellent helmet for speedy present delivery.
![]() Suggested Armor:
Suggested Armor:
 Black Kat Raiment: While perhaps rather difficult to obtain, this item's innate Movement Speed Increase and Freeze resistance make it an excellent armor for speedy present delivery.
![]() Suggested Shield(s):
Suggested Shield(s):
 Heater Shield: This sturdy shield is easy to obtain. It will take hits from most things in the level, especially the Grinchlins. It will tend to survive freeze traps more, and it is a cost effective option if the player also wants to take on the
  Event Dangerous Mission: Grinchlin Assault!
 Dread Skelly Shield: This sturdy shield is easy to obtain. It will take hits from most things in the level, especially the fiends.
![]() Suggested Weapon(s):
Suggested Weapon(s):
 Final Flourish: This sword is easy to obtain. Its fast attack speed makes it a great tool for quickly dispatching the fiends in this level. It will take care of Grinchlins as well.
 Sentenza
 Gilded Griffin: While fairly difficult to obtain, the fast attack speed of these handguns make them ideal for clearing pathways. Sentenza is better at damaging Grinchlins, while Griffin is better at dealing with Fiends. Any fast handgun will do really, as a handgun's function in this level should be to clear obstacles and make
 Layoafers move out of your way from a distance.
  Humbugs will also be deterred if they are damaged at all, so speed over power is key for this strategy.
![]() Suggested Trinket(s):
Suggested Trinket(s):
 Sizzling Hearthstone Pendant: This trinket gives a little more Freeze resistance. Just enough to completely ignore Freeze Grates up to Elite difficulty in depth 9, as long as other equipment is worn with it.
 Radiant Crystal Pin: Optional. This trinket's elemental resistance helps reduce some damage from various hazards. Can have a heart pendant etc. instead.
![]() Suggested Battle Sprite(s):
Suggested Battle Sprite(s):
 Seraphynx: Using this sprite's #3 ability, Angelic Aura or any ultimate variant, is a great way to just ignore hazards. The Maskeraith's Shadow Cloak falls short here, because the cloak breaks too easily to be of much use, especially when you want to be dashing as much as possible.
 Swift Steps perk: This lets your knight move a lot faster, which helps deliver presents more quickly.
Goal: Humbug Hat
- Depth 24 (deepest possible for this mission)
- Elite Difficulty (best drop conditions)
![]() Suggested Helmet(s):
Suggested Helmet(s):
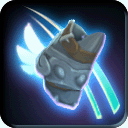
 Bombastic Demo Helm: This item's innate elemental defense and freeze resistance are great for this mission.
![]() Suggested Armor:
Suggested Armor:
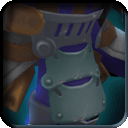 Bombastic Demo Suit: This item's innate elemental defense and freeze resistance are great for this mission.
![]() Suggested Shield(s):
Suggested Shield(s):
- Heater Shield: This sturdy shield is easy to obtain. It will take hits from most things in the level, especially the Grinchlins. It will tend to survive freeze traps more, and it is a cost effective option if the player also wants to take on the Event Dangerous Mission: Grinchlin Assault!
- Dread Skelly Shield: This sturdy shield is easy to obtain. It will take hits from most things in the level, especially the fiends.
![]() Suggested Weapon(s):
Suggested Weapon(s):
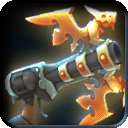
 Dark Briar Barrage: Will easily dispatch fiends as well as Grinchlins.
- Final Flourish: Will swiftly pick off any monsters who manage to survive barrage bursts.
![]() Suggested Trinket(s):
Suggested Trinket(s):
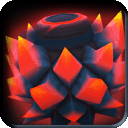
 Elite Bomb Focus Module: The below helmet and armor cover damage. If you don't want to mess around with variants, wear these trinkets to reduce bomb charge time.
![]() Suggested Battle Sprite(s):
Suggested Battle Sprite(s):
- Seraphynx: Using this sprite's #3 ability, Angelic Aura or any ultimate variant, is a great way to just ignore hazards. The Valkyrian Aura variant aids with charging weapons, and so will help with charging bombs.
- Swift Steps perk: This lets your knight move a lot faster, which helps get around for various reasons.
See Also
| |
|---|
| Starting Out | New Player Briefing | User interface | Useful Links |
| |
| |
| |