Difference between revisions of "Scenario Room"
From SpiralKnights
UltraBen1353 (Talk | contribs) |
m |
||
| (62 intermediate revisions by 15 users not shown) | |||
| Line 1: | Line 1: | ||
| − | + | A {{PAGENAME}} is a special room in the [[Clockworks]] that offer a little story and atmosphere, hints of a larger story, or a special bonus to those that discover them. Note that certain ones can also be found in [[missions]] as well, though they tend to be a bit different than those encountered in the [[arcade]]. Some scenario rooms are rarer than others. | |
| − | + | == List == | |
| − | + | {{GeographyList/Start}} | |
| − | + | ||
| − | + | ||
| − | + | ||
| − | + | ||
| − | + | ||
| − | {{ | + | {{GeographyList |
| − | | | + | |map = no |
| − | | | + | |area file = Scenario Room-Candlestick Keep 1 |
| − | + | |parent = Candlestick Keep | |
| − | | | + | |segment = Scenario Room |
| − | | | + | |number = 1 |
| − | | | + | |notes = This room has been encountered in tier 2 and 3. |
| − | + | There are two fallen Knights in a gated room with a [[Carnavon]]. | |
| − | + | ||
| − | + | ||
| − | + | ||
| − | + | ||
| − | + | ||
| − | {{ | + | {{Exploration/Showhide |
| − | | | + | |title = {{module|Recon}} |
| − | | | + | |content = |
| − | | | + | {{InfoBubble |
| − | | | + | |intro = |
| − | | | + | |content = The candle's going out! They are coming! Curse Kalem for going after that treasure. |
| + | }} | ||
| + | }} | ||
| + | }} | ||
| − | {{ | + | {{GeographyList |
| − | | | + | |area file = Library |
| − | | | + | |parent = Candlestick Keep |
| − | | | + | |segment = Scenario Room |
| − | | | + | |5 = {{location|Candlestick Keep|Cold Shadows|1.3}} |
| − | | | + | |number = 2 |
| + | |notes = This room can always be encountered in {{mission|An Occurrence at Owlite Keep}}: ''The Forgotten Library'' | ||
| − | {{ | + | {{Dialogue/Showhide |
| − | | | + | |title = Owlite Tome Text |
| − | | | + | |content = {{:Owlite tome text Dialogue/The Forgotten Library}} |
| − | + | }} | |
| − | + | }} | |
| − | + | ||
| − | {{Scenario Room | + | {{GeographyList |
| − | | | + | |area file = Scenario Room-Clockworks 1 |
| − | | | + | |parent = Clockwork Tunnels |
| − | | | + | |segment = Scenario Room |
| − | | | + | |number = 1 |
| − | | | + | |letter = A |
| + | |notes = This room can be encountered at any tier. | ||
| + | A [[Geo Knight]] with a monitor is studying the affects of minerals have that attract certain types of monsters. There is also an [[Ice Cube]] whose name is Hubert. The monsters that the Geo Knight studies are [[Wolver]]s, [[Jelly|Jelly Cubes]], [[Scuttlebot]]s, [[Mender#Ironclaw Mender|Ironclaw Menders]], [[Devilite#Yesman|Yesmen]] and [[Spookat]]s. | ||
| − | {{ | + | {{Dialogue/Showhide |
| − | | | + | |title = Geo Knight |
| − | | | + | |content = Don't mind Hubert, he's been de-spiked. |
| − | + | }} | |
| − | + | ||
| − | + | ||
| − | {{ | + | {{Exploration/Showhide |
| − | | | + | |title = {{module|Information}} |
| − | | | + | |content = |
| − | | | + | {{InfoBubble |
| − | | | + | |intro = Minerals |
| − | | | + | |content = Certain types of monsters seem to be attracted to different combinations of minerals found down here in the Clockworks |
| + | }} | ||
| + | }} | ||
| − | + | }} | |
| − | + | ||
| − | + | ||
| − | + | ||
| − | + | ||
| − | + | ||
| − | {{Scenario Room | + | {{GeographyList |
| − | | | + | |area file = Scenario Room-Clockworks 2 |
| − | | | + | |parent = Clockwork Tunnels |
| − | | | + | |segment = Scenario Room |
| − | | | + | |number = 2 |
| − | | | + | |letter = A |
| + | |5 = {{location|Blast Furnace||1.2}}<br>and<br>{{location|Cooling Chamber|Wild Path}} | ||
| + | |notes = This room can be encountered at any tier. | ||
| − | + | Three [[Geo Knight]]s from [[Spiral HQ]] set up a campsite around a mineral room. | |
| − | + | ||
| − | + | ||
| − | + | ||
| − | + | ||
| − | + | ||
| − | {{ | + | {{Dialogue/Showhide |
| − | | | + | |title = Dialogues |
| − | | | + | |content = |
| − | + | *Spiral HQ wants us to have these minerals back to Haven. | |
| − | + | *Just a few more tests... | |
| − | + | }} | |
| − | + | }} | |
| − | + | ||
| − | + | ||
| − | + | ||
| − | + | ||
| − | + | ||
| − | {{ | + | {{GeographyList |
| − | | | + | |map = no |
| − | | | + | |area file = Scenario Room-Clockworks 4 |
| − | | | + | |parent = Clockwork Tunnels |
| − | | | + | |segment = Scenario Room |
| − | | | + | |5 = {{location|Cooling Chamber||1.2}} |
| + | |number = 3 | ||
| + | |letter = A | ||
| + | |notes = This room has been encountered in tier 2. | ||
| − | + | A campfire with 4 knights. It looks like the knights are on their first expedition in the [[Clockworks]]. | |
| − | + | }} | |
| − | + | ||
| − | + | ||
| − | + | ||
| − | + | ||
| − | {{Scenario Room | + | {{GeographyList |
| − | | | + | |map = no |
| − | | | + | |area file = Scenario Room-Clockworks 5 |
| − | | | + | |parent = Clockwork Tunnels |
| − | | | + | |segment = Scenario Room |
| − | | | + | |5 = {{location|Wasteworks|Wild Path}},<br>and<br>{{location|Blast Furnace||1.2}} |
| + | |number = 4 | ||
| + | |letter = A | ||
| + | |notes = This room has been encountered in tier 2 and 3. | ||
| − | + | A campfire with a frightened knight in a corner. The containers are empty and one of them have been overturned. It is possible some monsters have attacked the place. | |
| − | + | ||
| − | + | ||
| − | + | ||
| − | + | ||
| − | + | ||
| − | {{ | + | {{Dialogue/Showhide |
| − | | | + | |title = Knight |
| − | | | + | |content = They... They got everyone except me. I just hid in the corner |
| − | + | }} | |
| − | + | ||
| − | + | ||
| − | + | }} | |
| − | + | ||
| − | + | ||
| − | + | ||
| − | + | ||
| − | + | ||
| − | {{Scenario Room | + | {{GeographyList |
| − | | | + | |map = no |
| − | | | + | |area file = Scenario Room-Clockworks 14 |
| − | | | + | |map file = Map-Clockwork Tunnels-Scenario Room4A |
| − | | | + | |parent = Clockwork Tunnels |
| − | | | + | |segment = Scenario Room |
| + | |number = 4 | ||
| + | |letter = B | ||
| + | |notes = This room has been encountered in tier 3. | ||
| − | + | A campfire with a frightened knight in a corner. The containers are empty and one of them have been overturned. It is possible some monsters have attacked the place. | |
| − | + | ||
| − | + | ||
| − | + | ||
| − | + | ||
| − | + | ||
| − | {{ | + | {{Dialogue/Showhide |
| − | | | + | |title = Knight |
| − | | | + | |content = They... They got everyone except me. I just hid in the corner |
| − | + | }} | |
| − | + | ||
| − | + | ||
| − | + | }} | |
| − | + | ||
| − | + | ||
| − | + | ||
| − | + | ||
| − | + | ||
| − | {{Scenario Room | + | {{GeographyList |
| − | | | + | |map = no |
| − | | | + | |area file = Scenario Room-Clockworks 10 |
| − | | | + | |parent = Clockwork Tunnels |
| − | | | + | |segment = Scenario Room |
| − | | | + | |5 = {{location|Cooling Chamber||1.2}} |
| + | |number = 5 | ||
| + | |letter = A | ||
| + | |notes = This room has been encountered in tier 1 and 2. | ||
| − | + | A campfire with a resting knight between two party buttons. Standing in the area will refill your knight's [[health]]. | |
| − | + | }} | |
| − | + | ||
| − | + | ||
| − | + | ||
| − | + | ||
| − | {{Scenario Room | + | {{GeographyList |
| − | | | + | |map = no |
| − | | | + | |area file = Scenario Room-Clockworks 3 |
| − | | | + | |parent = Clockwork Tunnels |
| − | | | + | |segment = Scenario Room |
| − | | | + | |5 = {{location|Cooling Chamber|Wild Path}},<br><br>{{location|Wasteworks|Infernal Passage}},<br><br>and {{location|Power Complex||1.2}} |
| + | |number = 6 | ||
| + | |letter = A | ||
| + | |notes = This room has been encountered in tier 3. | ||
| − | + | A bridge that is or is not being repaired - or destroyed. Some [[Knocker]]s, [[Thwacker]]s and [[Mender]]s will spawn as the player passes through the room. | |
| − | + | }} | |
| − | + | ||
| − | + | ||
| − | + | ||
| − | + | ||
| − | {{Scenario Room | + | {{GeographyList |
| − | | | + | |map = no |
| − | | | + | |area file = Scenario Room-Clockworks 6 |
| − | | | + | |parent = Clockwork Tunnels |
| − | | | + | |segment = Scenario Room |
| − | | | + | |5 = {{location|Blast Furnace||1.2}},<br><br>{{location|Cooling Chamber||1.2}},<br><br>and {{location|Power Complex||1.2}} |
| + | |number = 7 | ||
| + | |letter = A | ||
| + | |notes = This room has been encountered in tier 1 and 3. | ||
| − | + | A giant metal beam that's been driven down the path. | |
| − | + | }} | |
| − | + | ||
| − | + | ||
| − | + | ||
| − | + | ||
| − | {{Scenario Room | + | {{GeographyList |
| − | | | + | |map = no |
| − | | | + | |area file = Scenario Room-Clockworks 13 |
| − | | | + | |parent = Clockwork Tunnels |
| − | | | + | |segment = Scenario Room |
| − | | | + | |5 = {{location|Wasteworks||1.2}}<br>and<br>{{location|Power Complex||1.2}} |
| + | |number = 8 | ||
| + | |letter = A | ||
| + | |notes = This room has been encountered in tier 3. | ||
| − | + | A broken bridge or hallway. It doesn't look like work will continue on that section. | |
| − | + | }} | |
| − | + | ||
| − | + | ||
| − | + | ||
| − | + | ||
| − | {{ | + | {{GeographyList |
| − | | | + | |map = no |
| − | | | + | |area file = Scenario Room-Clockworks 7 |
| − | | | + | |parent = Clockwork Tunnels |
| − | | | + | |segment = Scenario Room |
| − | | | + | |5 = {{location|Power Complex|Infernal Passage}} |
| + | |number = 9 | ||
| + | |letter = A | ||
| + | |notes = This room has been encountered in tier 2. | ||
| − | {{Scenario Room | + | A possible [[Gremlin]] workshop of some sort. A [[Thwacker]] spawns at the corner table in the top right, and hitting the switch in the middle spawns 2 friendly [[Mecha Knight]]s from the empty areas in the top of the room. [[Scuttlebot]]s will also spawn from the destroyed grey blocks. |
| − | | | + | }} |
| − | | | + | |
| − | | | + | {{GeographyList |
| − | | | + | |map = no |
| − | | | + | |area file = Scenario Room-Clockworks 8 |
| + | |parent = Clockwork Tunnels | ||
| + | |segment = Scenario Room | ||
| + | |5 = {{location|Wasteworks|Slimeway}} | ||
| + | |number = 10 | ||
| + | |letter = A | ||
| + | |notes = This room has been encountered in tier 2. | ||
| + | |||
| + | A slimy area with some tubes and poison traps. [[Toxigel]]s may appear in the area. | ||
| + | }} | ||
| + | |||
| + | {{GeographyList | ||
| + | |map = no | ||
| + | |area file = Scenario Room-Clockworks 9 | ||
| + | |parent = Clockwork Tunnels | ||
| + | |segment = Scenario Room | ||
| + | |5 = {{location|Cooling Chamber||1.2}} | ||
| + | |number = 11 | ||
| + | |letter = A | ||
| + | |notes = This room has been encountered in tier 3. | ||
| + | |||
| + | A possible storage area of some sort. The grey blocks reveal hidden [[Scuttlebot]]s and [[Treasure Box]]es can be found at the end of the room. | ||
| + | }} | ||
| + | |||
| + | {{GeographyList | ||
| + | |map = no | ||
| + | |area file = Scenario Room-Clockworks 12 | ||
| + | |parent = Clockwork Tunnels | ||
| + | |segment = Scenario Room | ||
| + | |5 = {{location|Cooling Chamber||1.2}} | ||
| + | |number = 12 | ||
| + | |letter = A | ||
| + | |notes = This room has been encountered in tier 2. | ||
| + | |||
| + | A room with a large cooling fan in the center surrounded by [[Crystal Block]]s. Breaking some of the blocks will spawn [[Ice Cube]]s. When cleaning some space, two dead [[Gremlin]] bodies can be found lying on the ground. | ||
| + | }} | ||
| + | |||
| + | {{GeographyList | ||
| + | |map = no | ||
| + | |area file = Scenario Room-Clockworks 19 | ||
| + | |parent = Clockwork Tunnels | ||
| + | |segment = Scenario Room | ||
| + | |5 = {{location|Cooling Chamber|Mechanized Mile}} | ||
| + | |number = 13 | ||
| + | |letter = A | ||
| + | |notes = This room has been encountered in tier 3. | ||
| + | |||
| + | A storage room of some kind. [[Gremlin]]s hang around the area. Some of the blocks are hidden [[Monster Cage|monster cages]], which seem to only spawn [[Scuttlebot]]s here. | ||
| + | }} | ||
| + | |||
| + | {{GeographyList | ||
| + | |map = no | ||
| + | |area file = Scenario Room-Clockworks 16 | ||
| + | |parent = Clockwork Tunnels | ||
| + | |segment = Scenario Room | ||
| + | |5 = {{location|Wasteworks|Infernal Passage}},<br>and<br>{{location|Blast Furnace||1.2}} | ||
| + | |number = 14 | ||
| + | |letter = A | ||
| + | |notes = This room has been encountered in tier 3. | ||
| + | |||
| + | An unmoving [[Tortodrone]] can be seen on a lower platform, next to some ruined constructs. | ||
| + | }} | ||
| + | |||
| + | {{GeographyList | ||
| + | |map = no | ||
| + | |area file = Scenario Room-Clockworks 18 | ||
| + | |map file = Map-Clockwork Tunnels-Scenario Room14A | ||
| + | |parent = Clockwork Tunnels | ||
| + | |segment = Scenario Room | ||
| + | |5 = {{location|Wasteworks|Infernal Passage}} | ||
| + | |number = 14 | ||
| + | |letter = B | ||
| + | |notes = This room has been encountered in tier 3. | ||
| + | |||
| + | An unmoving [[Tortodrone]] seems to have been altered by [[fiend]]s. The Tortodrone is surrounded by [[Dark Matter]] crystals and has dark purple shards protruding from the top of its body. | ||
| + | |||
| + | A [[Pit Boss]] and two [[Yesman|Yesmen]] spawns upon entering the area. | ||
| + | }} | ||
| + | |||
| + | {{GeographyList | ||
| + | |map = no | ||
| + | |area file = Scenario Room-Clockworks 17 | ||
| + | |parent = Clockwork Tunnels | ||
| + | |segment = Scenario Room | ||
| + | |5 = {{location|Clockwork Tunnels|Gremlin Grounds}} | ||
| + | |number = 15 | ||
| + | |letter = A | ||
| + | |notes = This room has been encountered in tier 1. | ||
| + | |||
| + | An unmoving [[Tortodrone]] can be seen next to some grass. | ||
| + | |||
| + | }} | ||
| + | |||
| + | {{GeographyList | ||
| + | |parent = Clockwork Tunnels | ||
| + | |segment = Scenario Room | ||
| + | |5 = {{location|Cooling Chamber||1.2}} | ||
| + | |number = 16 | ||
| + | |notes = This room has been encountered in tier 3. | ||
| + | |||
| + | Some Knights and [[Recon Ranger]]s seems to have set a camping around an unmoving [[Tortodrone]] to rest and collect samples of the stratum. Two [[Mecha Turret]]s are active helping to keep the area safe. One of the Knights have a [[Pulsar]] and one of the Recon Rangers have a [[Robo Wrecker]]. | ||
| + | |||
| + | {{Dialogue/Showhide | ||
| + | |title = Dialogues | ||
| + | |content = | ||
| + | *We're resting here for a while before we journey deeper into the Clockworks. | ||
| + | *Preparation is your best tool for survival in the Clockworks. | ||
| + | *I keep a sword around for close encounters. | ||
| + | *I always carry a blaster, never know when it might come in handy. | ||
| + | *Don't forget your shield, it will save your life! | ||
| + | *Did you see something out there? | ||
| + | *Just a few more tests... | ||
| + | *Well met! | ||
| + | }} | ||
| + | }} | ||
| + | |||
| + | {{GeographyList | ||
| + | |map = no | ||
| + | |area file = Scenario Room-Clockworks 11 | ||
| + | |parent = Clockwork Tunnels | ||
| + | |segment = Scenario Room | ||
| + | |5 = {{location|Clockwork Tunnels||1.2}}. | ||
| + | |number = 17 | ||
| + | |letter = A | ||
| + | |notes = This room has been encountered in tier 1 and 2. | ||
| + | |||
| + | A room with [[Gremlin]] tools. The room looks like it's under construction. | ||
| + | }} | ||
| + | |||
| + | {{GeographyList | ||
| + | |map = no | ||
| + | |area file = Scenario Room-Clockworks 15 | ||
| + | |parent = Clockwork Tunnels | ||
| + | |segment = Scenario Room | ||
| + | |5 = {{location|Cooling Chamber||1.2}} | ||
| + | |number = 18 | ||
| + | |letter = A | ||
| + | |notes = This room has been encountered in tier 2. | ||
| + | |||
| + | A construction site for the [[Roarmulus Twin]]. The button opens the gates and spawns 2 [[Gun Puppy|Gun Puppies]]. Behind them are 2 [[Treasure Box]]es surrounded by {{exploration|Rocket Block}}s found in the {{location|Ironclaw Munitions Factory||1.2}}. | ||
| + | }} | ||
| + | |||
| + | {{GeographyList | ||
| + | |area file = Area-Plan of Attack-Power Grid | ||
| + | |parent = Clockwork Tunnels | ||
| + | |segment = Scenario Room | ||
| + | |5 = {{location|Power Complex|Gremlin Grounds}} | ||
| + | |number = 18 | ||
| + | |letter = B | ||
| + | |notes = This variant is always encountered in the {{mission|Plan of Attack}}: ''Power Grid'' | ||
| + | |||
| + | A construction site for the [[Roarmulus Twin]]. | ||
| + | |||
| + | This scenario have [[:File:Area-Plan of Attack-Power Grid-2.png|this area]] at the top of the map, touching the screen will show this: | ||
| + | {{Dialogue/Showhide | ||
| + | |title = | ||
| + | |content = {{InfoBubble | ||
| + | |intro = Gremlin Schematics | ||
| + | |content = The monitor shows readouts coming from a prototype of a massive war machine labeled "Project R". | ||
| + | }} | ||
| + | }} | ||
| + | }} | ||
| + | |||
| + | {{GeographyList | ||
| + | |area file = Terminal Meltdown Fuel Depot Entrance | ||
| + | |parent = Clockwork Tunnels | ||
| + | |segment = Scenario Room | ||
| + | |5 = {{location|Blast Furnace|Slimeway}} | ||
| + | |number = 19 | ||
| + | |letter = A | ||
| + | |notes = This room can always be encountered in {{mission|Terminal Meltdown}}: ''Red Alert'' | ||
| + | |||
| + | After pressing the button, a siren alarm will sound. The same alarm as the one before fighting against the [[Roarmulus Twins]]. | ||
| + | }} | ||
| + | |||
| + | {{GeographyList | ||
| + | |map = no | ||
| + | |area file = Scenario Room-Ruined Compound 1 | ||
| + | |parent = Compound | ||
| + | |segment = Scenario Room | ||
| + | |5 = {{location|Ruined Compound|Ravenous Warrens|1.3}} | ||
| + | |number = 1 | ||
| + | |notes = This room has been encountered in tier 3. | ||
| + | |||
| + | An abandoned mini lab likely used by [[Gremlin]]s; there is a deactivated [[Mecha Knight]] in a corner and a piece of a [[Retrode]]'s arm on the floor. With futher inspection if the player goes to the left to the passage and goes near the gated area in the back reveals that the pipes leaded from the unknown chemicals in the tubes were once being used on a [[Gremlin]] who is dead and may have been left to die or died becuase of the experiments that were being taken place. | ||
| + | }} | ||
| + | |||
| + | {{GeographyList | ||
| + | |parent = Compound | ||
| + | |segment = Scenario Room | ||
| + | |5 = {{location|Frozen Compound|Creeping Colony}} | ||
| + | |number = 2 | ||
| + | |notes = This room has been encountered in tier 3. | ||
| + | |||
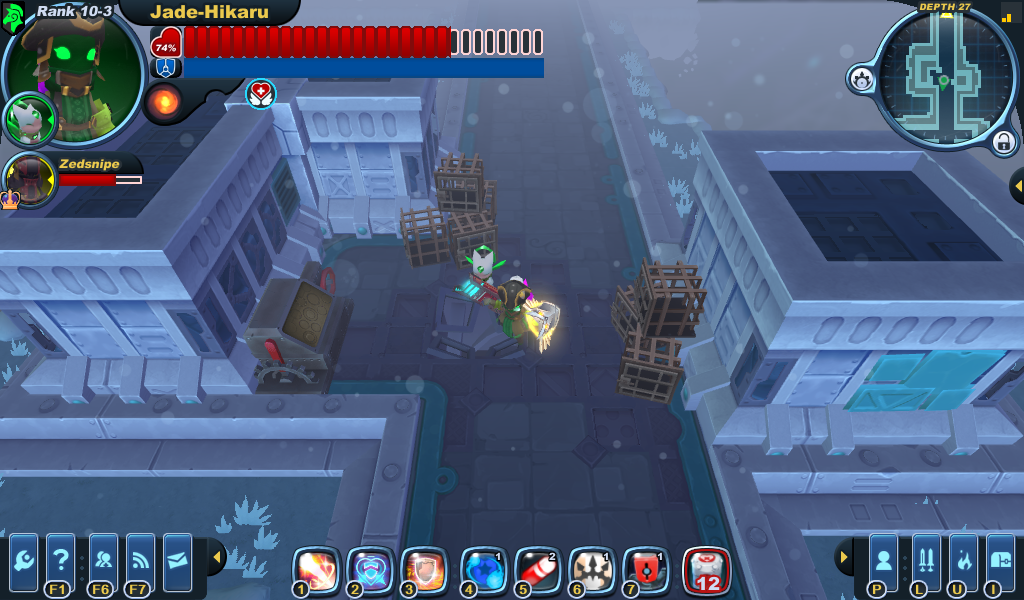
| + | An abandoned [[Gremlin]] panel with some small cages. | ||
| + | }} | ||
| + | |||
| + | {{GeographyList | ||
| + | |map = no | ||
| + | |area file = Scenario Room-Compound 1 | ||
| + | |parent = Compound | ||
| + | |segment = Scenario Room | ||
| + | |5 = Any level from<br>{{location|Compound||1.2}} | ||
| + | |number = 3 | ||
| + | |notes = This room has been encountered in tier 3. | ||
| + | |||
| + | A gremlin pillbox with dead [[gremlin]]s and mortars. The dead [[mender]] has a note that says: ''The others must never know. Silence them. -H''. After reading it a [[Ghostmane Stalker]] appears. | ||
| + | |||
| + | For more views of this room check [[:File:Spiral 2013-08-15 11-52-48.png|this]] and [[:File:Spiral 2013-08-15 11-53-34.png|this]] files. | ||
| + | }} | ||
| + | |||
| + | {{GeographyList | ||
| + | |map = no | ||
| + | |area file = Scenario Room-Compound 5 | ||
| + | |parent = Compound | ||
| + | |segment = Scenario Room | ||
| + | |5 = Any level from<br>{{location|Compound||1.2}} | ||
| + | |number = 4 | ||
| + | |notes = This room has been encountered in tier 2 and 3. | ||
| + | |||
| + | A statue of a [[Mecha knight]] with mismatched limbs. The [[Energy Mecha Knight]]s in the area can be activated for the usual price of 5 [[energy]], a potential combat bonus. | ||
| + | |||
| + | To see this room in a [[freeze]] theme check [[:File:Scenario Room-Compound 2.png|this]] and [[:File:Scenario Room-Compound 2 knight activation, closer view.png|this]] files. | ||
| + | }} | ||
| + | |||
| + | {{GeographyList | ||
| + | |map = no | ||
| + | |area file = Scenario Room-Compound 3 | ||
| + | |parent = Compound | ||
| + | |segment = Scenario Room | ||
| + | |5 = {{location|Blighted Compound|Ravenous Warrens}} | ||
| + | |number = 5 | ||
| + | |notes = This room has been encountered in tier 3. | ||
| + | |||
| + | A [[Tortodrone]] rests high on a cliff, surrounded by animated twilight lights. There are some [[Treasure Box|treasure boxes]] to the right. | ||
| + | }} | ||
| + | |||
| + | {{GeographyList | ||
| + | |map = no | ||
| + | |area file = Scenario Room-Compound 4 | ||
| + | |parent = Compound | ||
| + | |segment = Scenario Room | ||
| + | |5 = {{location|Shocked Compound|Chittering Burrows}} | ||
| + | |number = 6 | ||
| + | |notes = This room has been encountered in tier 2. | ||
| + | |||
| + | A [[Tortodrone]] rests on a platform. There are some [[Treasure Box|treasure boxes]]. | ||
| + | }} | ||
| + | |||
| + | {{GeographyList | ||
| + | |map = no | ||
| + | |area file = Scenario Room-DevilishDrudgery 1 | ||
| + | |parent = Devilish Drudgery | ||
| + | |segment = Scenario Room | ||
| + | |5 = {{location|Devilish Drudgery|Overtime, Every Time|1.3}},<br><br> {{location|Devilish Drudgery|Hiring Freeze|1.3}},<br><br> and {{location|Devilish Drudgery|Everybody's Fired|1.3}} | ||
| + | |number = 1 | ||
| + | |notes = This room can be encountered at any tier. | ||
| + | |||
| + | Placing the 5 statues on the 5 buttons completes the ritual. Some of the possible spawns after completing the ritual include: [[Crowns]], Fiend-related drops (like {{mat|Mug of Misery}}), five [[Silkwing]]s, [[Devilite]]s and [[Pit Boss|Pit Bosses]], or a [[Trojan]] (as can be seen [[:File:Scenario Room-devildrudgery1.2summonedtrojan.png|here]]). | ||
| + | |||
| + | The sparkling book pile reads: ''5 Ways to Appease your Pit Boss.'' | ||
| + | }} | ||
| + | |||
| + | {{GeographyList | ||
| + | |map = no | ||
| + | |area file = Scenario Room-DevilishDrudgery 3 | ||
| + | |parent = Devilish Drudgery | ||
| + | |segment = Scenario Room | ||
| + | |5 = Any level from<br>{{location|Devilish Drudgery||1.2}} | ||
| + | |number = 2 | ||
| + | |notes = This room has been encountered in tier 2. | ||
| + | |||
| + | A suspicious looking fiend activity. Several fiends, particularly [[Devilite]]s or [[Gorgo]]s, can spawn, ready to glower at any knights passing through. | ||
| + | |||
| + | Fiendish Self-Help book reads: ''How do draw infernal symbols''. | ||
| + | |||
| + | Board reads: ''A Notice to All Employees: Due to continual under-performance, there will be no paid holidays or free coffee in the break room''. No wonder they're so angry! | ||
| + | }} | ||
| + | |||
| + | {{GeographyList | ||
| + | |map = no | ||
| + | |area file = Scenario Room-DevilishDrudgery 2 | ||
| + | |parent = Devilish Drudgery | ||
| + | |segment = Scenario Room | ||
| + | |5 = {{location|Devilish Drudgery|Overtime, Every Time|1.3}}<br>and<br>{{location|Devilish Drudgery|Toxic Workplace|1.3}} | ||
| + | |number = 3 | ||
| + | |letter = A | ||
| + | |notes = This room has been encountered in tier 2 and 3. | ||
| + | |||
| + | A suspicious looking fiend activity. Several [[devilite]]s spawn with a [[silkwing]], ready to glower at any knights passing through. They seem to be shoving [[Dark Matter]] into a stitched-together [[Tortodrone]]. The button near the top lowers the gate. | ||
| + | |||
| + | A closer look at the tortodrone can be seen [[:File:Scenario Room-devildrudgery2.2closertortodrone.png|here]]. | ||
| + | |||
| + | To check this room in a different theme check [https://forums.spiralknights.com/en/node/85284#comment-767999 this] and [https://forums.spiralknights.com/en/node/86971#comment-769486 this] forum's comment. | ||
| + | }} | ||
| + | |||
| + | {{GeographyList | ||
| + | |map = no | ||
| + | |area file = Scenario Room-DevilishDrudgery 4 | ||
| + | |parent = Devilish Drudgery | ||
| + | |segment = Scenario Room | ||
| + | |5 = {{location|Devilish Drudgery|Wired for Synergy|1.3}} | ||
| + | |number = 3 | ||
| + | |letter = B | ||
| + | |notes = This room has been encountered in tier 2 and 3. | ||
| + | |||
| + | A suspicious looking fiend activity. Several [[devilite]]s spawn with a [[silkwing]], ready to glower at any knights passing through. The button near the top lowers the gate. | ||
| + | }} | ||
| + | |||
| + | {{GeographyList | ||
| + | |parent = Devilish Drudgery | ||
| + | |segment = Scenario Room | ||
| + | |5 = {{location|Devilish Drudgery|Overtime, Every Time|1.3}} | ||
| + | |number = 5 | ||
| + | |notes = This area only appears during the [[March of the Tortodrones]] event. This room has been encountered in tier 3. | ||
| + | |||
| + | A party button waits beyond aesthetic piles of [[Dark Matter|dark matter]]. The area features a single {{exploration|Vortex Block}}. Several monsters spawn to fight, including [[Devilite]]s, [[Trojan]]s, and [[Howlitzer]]s. | ||
| + | |||
| + | The [[March of the Tortodrones#Gameplay|bulk glyph]] reward for this area seems to be rather small. | ||
| + | |||
| + | }} | ||
| + | |||
| + | {{GeographyList | ||
| + | |area file = Area-Work for Idle Hands-Devilish Drudgery | ||
| + | |parent = Devilish Drudgery | ||
| + | |segment = Scenario Room | ||
| + | |5 = {{location|Devilish Drudgery|Overtime, Every Time|1.3}} | ||
| + | |number = 6 | ||
| + | |notes = This room can always be encountered in {{mission|Work for Idle Hands}}: ''Devilish Drudgery'' | ||
| + | }} | ||
| + | |||
| + | {{GeographyList | ||
| + | |area file = Area-Whipping and Mishandling-Sol'Fork Downtown | ||
| + | |parent = Devilish Drudgery | ||
| + | |segment = Scenario Room | ||
| + | |5 = {{location|Devilish Drudgery|Everybody's Fired|1.3}} | ||
| + | |number = 7 | ||
| + | |notes = This room can always be encountered in {{mission|Whipping and Mishandling}}: ''Sol'Fork Downtown'' | ||
| + | |||
| + | {{Dialogue/Showhide | ||
| + | |title = Dialogues | ||
| + | |content = | ||
| + | Geo Knights: | ||
| + | *Good data is like a good pudding, you can never have too much of it. | ||
| + | *I'm collecting samples from all over this stratum. | ||
| + | *Just a few more tests... | ||
| + | |||
| + | Knights guarding the doors: | ||
| + | *Be safe out there, Knight. | ||
| + | *I'm here keeping watch. You never know when monsters might attack. | ||
| + | |||
| + | Knight at the right side with Recon armor: | ||
| + | *I know it was here somewhere... | ||
| + | }} | ||
| + | }} | ||
| + | |||
| + | {{GeographyList | ||
| + | |map = no | ||
| + | |area file = Scenario Room-Graveyard 1 | ||
| + | |parent = Graveyard | ||
| + | |segment = Scenario Room | ||
| + | |5 = {{location|Graveyard|Where Monsters Fear to Tread|1.3}} | ||
| + | |number = 1 | ||
| + | |letter = A | ||
| + | |notes = This room has been encountered in tier 2 and 3. | ||
| + | |||
| + | This room resembles a mausoleum. The information module mentions [[Torin]] from the {{mission|Shadowplay}}. | ||
| + | |||
| + | {{Exploration/Showhide | ||
| + | |title = {{module|Information}} | ||
| + | |content = | ||
| + | {{InfoBubble | ||
| + | |intro = Weathered Tomb | ||
| + | |content = A fading inscription reads: Here lies Torin, knight of Almire. | ||
| + | }} | ||
| + | }} | ||
| + | |||
| + | }} | ||
| + | |||
| + | {{GeographyList | ||
| + | |map = no | ||
| + | |map file = Map-Graveyard-Scenario Room1A | ||
| + | |parent = Graveyard | ||
| + | |segment = Scenario Room | ||
| + | |5 = {{location|Graveyard|Where Monsters Fear to Tread|1.3}} | ||
| + | |number = 1 | ||
| + | |letter = B | ||
| + | |notes = This room has been encountered in tier 2 and 3. | ||
| + | |||
| + | This room resembles a mausoleum. This variation includes {{exploration|Shadow Fire}}. The information module mentions [[Torin]] from the {{mission|Shadowplay}}. | ||
| + | |||
| + | {{Exploration/Showhide | ||
| + | |title = {{module|Information}} | ||
| + | |content = | ||
| + | {{InfoBubble | ||
| + | |intro = Weathered Tomb | ||
| + | |content = A fading inscription reads: Here lies Torin, knight of Almire. | ||
| + | }} | ||
| + | }} | ||
| + | |||
| + | }} | ||
| + | |||
| + | {{GeographyList | ||
| + | |map = no | ||
| + | |area file = Scenario Room-Graveyard 2 | ||
| + | |parent = Graveyard | ||
| + | |segment = Scenario Room | ||
| + | |5 = {{location|Graveyard|Where Monsters Fear to Tread|1.3}} | ||
| + | |number = 2 | ||
| + | |letter = A | ||
| + | |notes = This room has been encountered in tier 3. | ||
| + | |||
| + | A shining spark on the ground. Stepping off the grass onto dirt will cause damage (roughly half a bar of [[health]]) and inflict [[poison]]. You cannot activate the sparkling tile if you continue to shield through. | ||
| + | |||
| + | Drops a {{token|Grim Spark|16px}} upon interaction. | ||
| + | }} | ||
| + | |||
| + | {{GeographyList | ||
| + | |map = no | ||
| + | |area file = Scenario Room-Graveyard 4 | ||
| + | |map file = Map-Graveyard-Scenario Room2A | ||
| + | |parent = Graveyard | ||
| + | |segment = Scenario Room | ||
| + | |5 = {{location|Graveyard|Where Monsters Fear to Tread|1.3}} | ||
| + | |number = 2 | ||
| + | |letter = B | ||
| + | |notes = This room has been encountered in tier 2. | ||
| + | |||
| + | A poisonous mist that may be miasma. It [[poison]]s anyone who tries to walk through it. | ||
| + | }} | ||
| + | |||
| + | {{GeographyList | ||
| + | |map = no | ||
| + | |area file = Scenario Room-Graveyard 3 | ||
| + | |parent = Graveyard | ||
| + | |segment = Scenario Room | ||
| + | |5 = {{location|Graveyard|Where Monsters Fear to Tread|1.3}} | ||
| + | |number = 3 | ||
| + | |letter = A | ||
| + | |notes = This room has been encountered in tier 2. | ||
| + | |||
| + | A knight sitting down exhausted with 4 [[:File:Exploration-Candle (Blue).png|candles]]. There are 4 re-spawning [[Dust Zombie]]s hidden in the dirt piles. The zombies can't enter the area where the candles are lit but their [[stun]] breath still works. | ||
| + | |||
| + | {{Dialogue/Showhide | ||
| + | |title = Knight | ||
| + | |content = No, there are just too many... I can no longer fight them. All that's left is the light from these candles. Without it I... | ||
| + | }} | ||
| + | |||
| + | }} | ||
| + | |||
| + | {{GeographyList | ||
| + | |map = no | ||
| + | |area file = Scenario Room-Graveyard 7 | ||
| + | |map file = Map-Graveyard-Scenario Room3A | ||
| + | |parent = Graveyard | ||
| + | |segment = Scenario Room | ||
| + | |5 = {{location|Graveyard|Where Monsters Fear to Tread|1.3}} | ||
| + | |number = 3 | ||
| + | |letter = B | ||
| + | |notes = This room has been encountered in tier 3. | ||
| + | |||
| + | Similar to the previous but the knight is dead and the candles are unlit. The zombies are not restricted from entering between the candles. Nothing happens when the knight is examined. | ||
| + | }} | ||
| + | |||
| + | {{GeographyList | ||
| + | |map = no | ||
| + | |area file = Scenario Room-Graveyard 5 | ||
| + | |parent = Graveyard | ||
| + | |segment = Scenario Room | ||
| + | |5 = {{location|Graveyard|Where Monsters Fear to Tread|1.3}} | ||
| + | |number = 4 | ||
| + | |letter = A | ||
| + | |notes = This room has been encountered in tier 2 and 3. | ||
| + | |||
| + | A big coffin with chains on the sides. [[Dust Zombie]]s may spawn upon interaction. | ||
| + | }} | ||
| + | |||
| + | {{GeographyList | ||
| + | |map = no | ||
| + | |area file = Scenario Room-Graveyard 6 | ||
| + | |map file = Map-Graveyard-Scenario Room4A | ||
| + | |parent = Graveyard | ||
| + | |segment = Scenario Room | ||
| + | |5 = {{location|Graveyard|Where Monsters Fear to Tread|1.3}} | ||
| + | |number = 4 | ||
| + | |letter = B | ||
| + | |notes = This room has been encountered in tier 3. | ||
| + | |||
| + | Similar to the previous room except that the coffin is gone. | ||
| + | }} | ||
| + | |||
| + | {{GeographyList | ||
| + | |parent = Graveyard | ||
| + | |segment = Scenario Room | ||
| + | |5 = {{location|Graveyard|Where Monsters Fear to Tread|1.3}} | ||
| + | |number = 5 | ||
| + | |notes = This room has been encountered in tier 2. | ||
| + | |||
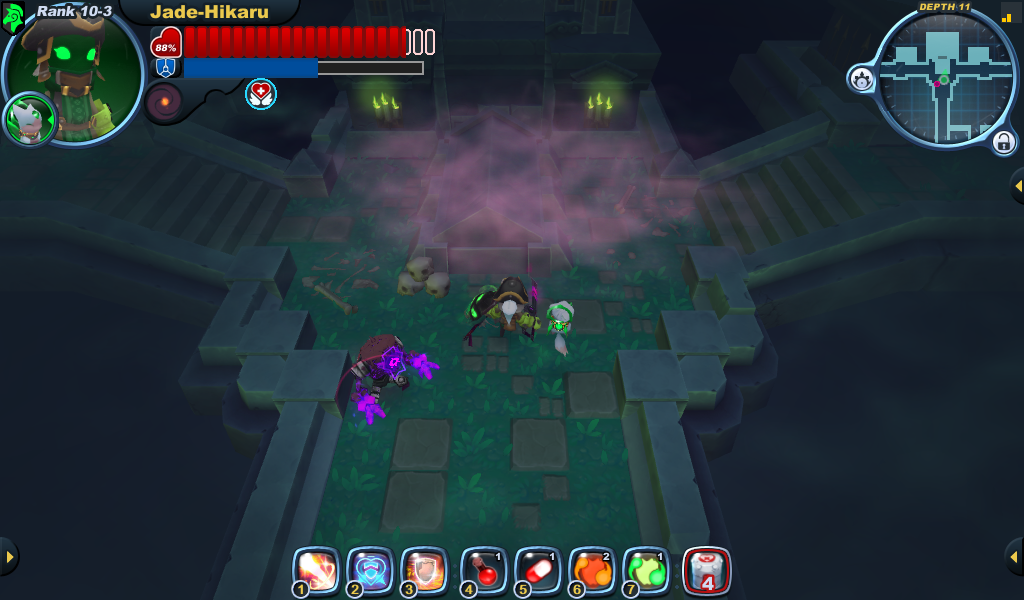
| + | A single big coffin with purple miasma above in the middle of the area. A [[Carnavon]] appears when you get near. | ||
| + | }} | ||
| + | |||
| + | {{GeographyList | ||
| + | |area file = Scenario Room-Lichenous Lair 1 | ||
| + | |parent = Lichenous Lair | ||
| + | |segment = Scenario Room | ||
| + | |5 = {{location|Lichenous Lair|Fiery Fusion|1.3}}<br>and<br>{{location|Lichenous Lair|Shocking Synthesis|1.3}} | ||
| + | |number = 1 | ||
| + | |letter = A | ||
| + | |notes = This room has been encountered in tier 2. | ||
| + | |||
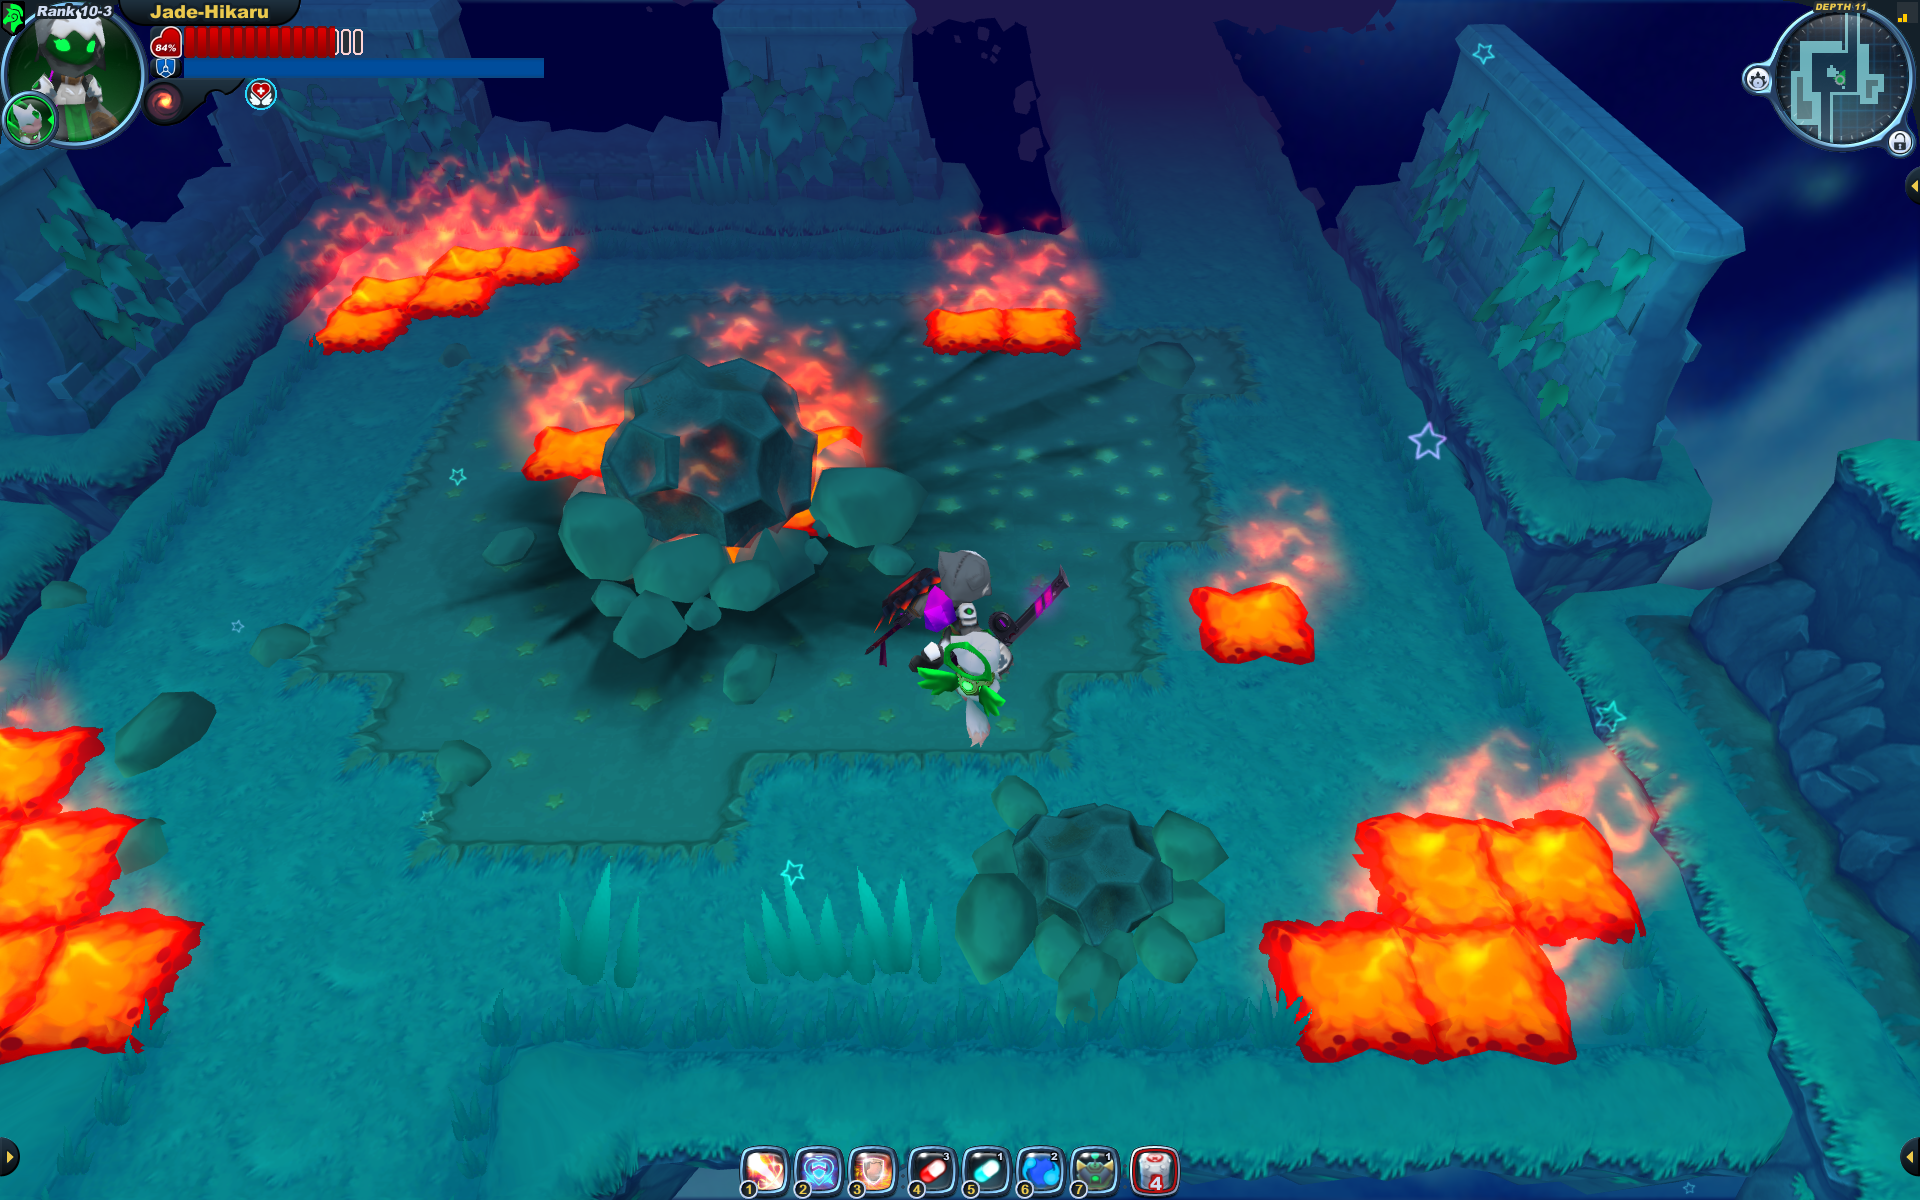
| + | A meteor of some sort that has crash landed into the Clockworks. Upon approaching the meteor, several waves of [[Lichen]]s will spawn. It have {{exploration|Shadow Fire}}. | ||
| + | }} | ||
| + | |||
| + | {{GeographyList | ||
| + | |area file = Area-Alien Ooze-Field Research Site | ||
| + | |parent = Lichenous Lair | ||
| + | |segment = Scenario Room | ||
| + | |5 = {{location|Lichenous Lair|Prognosis: Symbiosis|1.3}} | ||
| + | |number = 1 | ||
| + | |letter = B | ||
| + | |notes = This variant is always encountered in the {{mission|Alien Ooze}}: ''Field Research Site'' | ||
| + | |||
| + | {{Dialogue/Showhide | ||
| + | |title = Dialogues | ||
| + | |content = | ||
| + | The two Knights standing: | ||
| + | *We're cut off! Please help us defeat those lichens! | ||
| + | *I din't ask for this. | ||
| + | *Don't know how long before our forcefield gives out... | ||
| + | *We were studying that meteorite when those lichens appeared! | ||
| + | |||
| + | The one Knight shaking: | ||
| + | *They came from the darkness. There was no time to react. | ||
| + | |||
| + | The two Knights near the Treasure Boxes: | ||
| + | *Thanks for rescuing our team! | ||
| + | *Thanks for your help! | ||
| + | *We were securing the elevator when the door shut behind us. | ||
| + | }} | ||
| + | }} | ||
| + | |||
| + | {{GeographyList | ||
| + | |parent = Lichenous Lair | ||
| + | |segment = Scenario Room | ||
| + | |5 = Any level from<br>{{location|Lichenous Lair||1.2}} | ||
| + | |number = 2 | ||
| + | |notes = This room has been encountered in tier 2. | ||
| + | |||
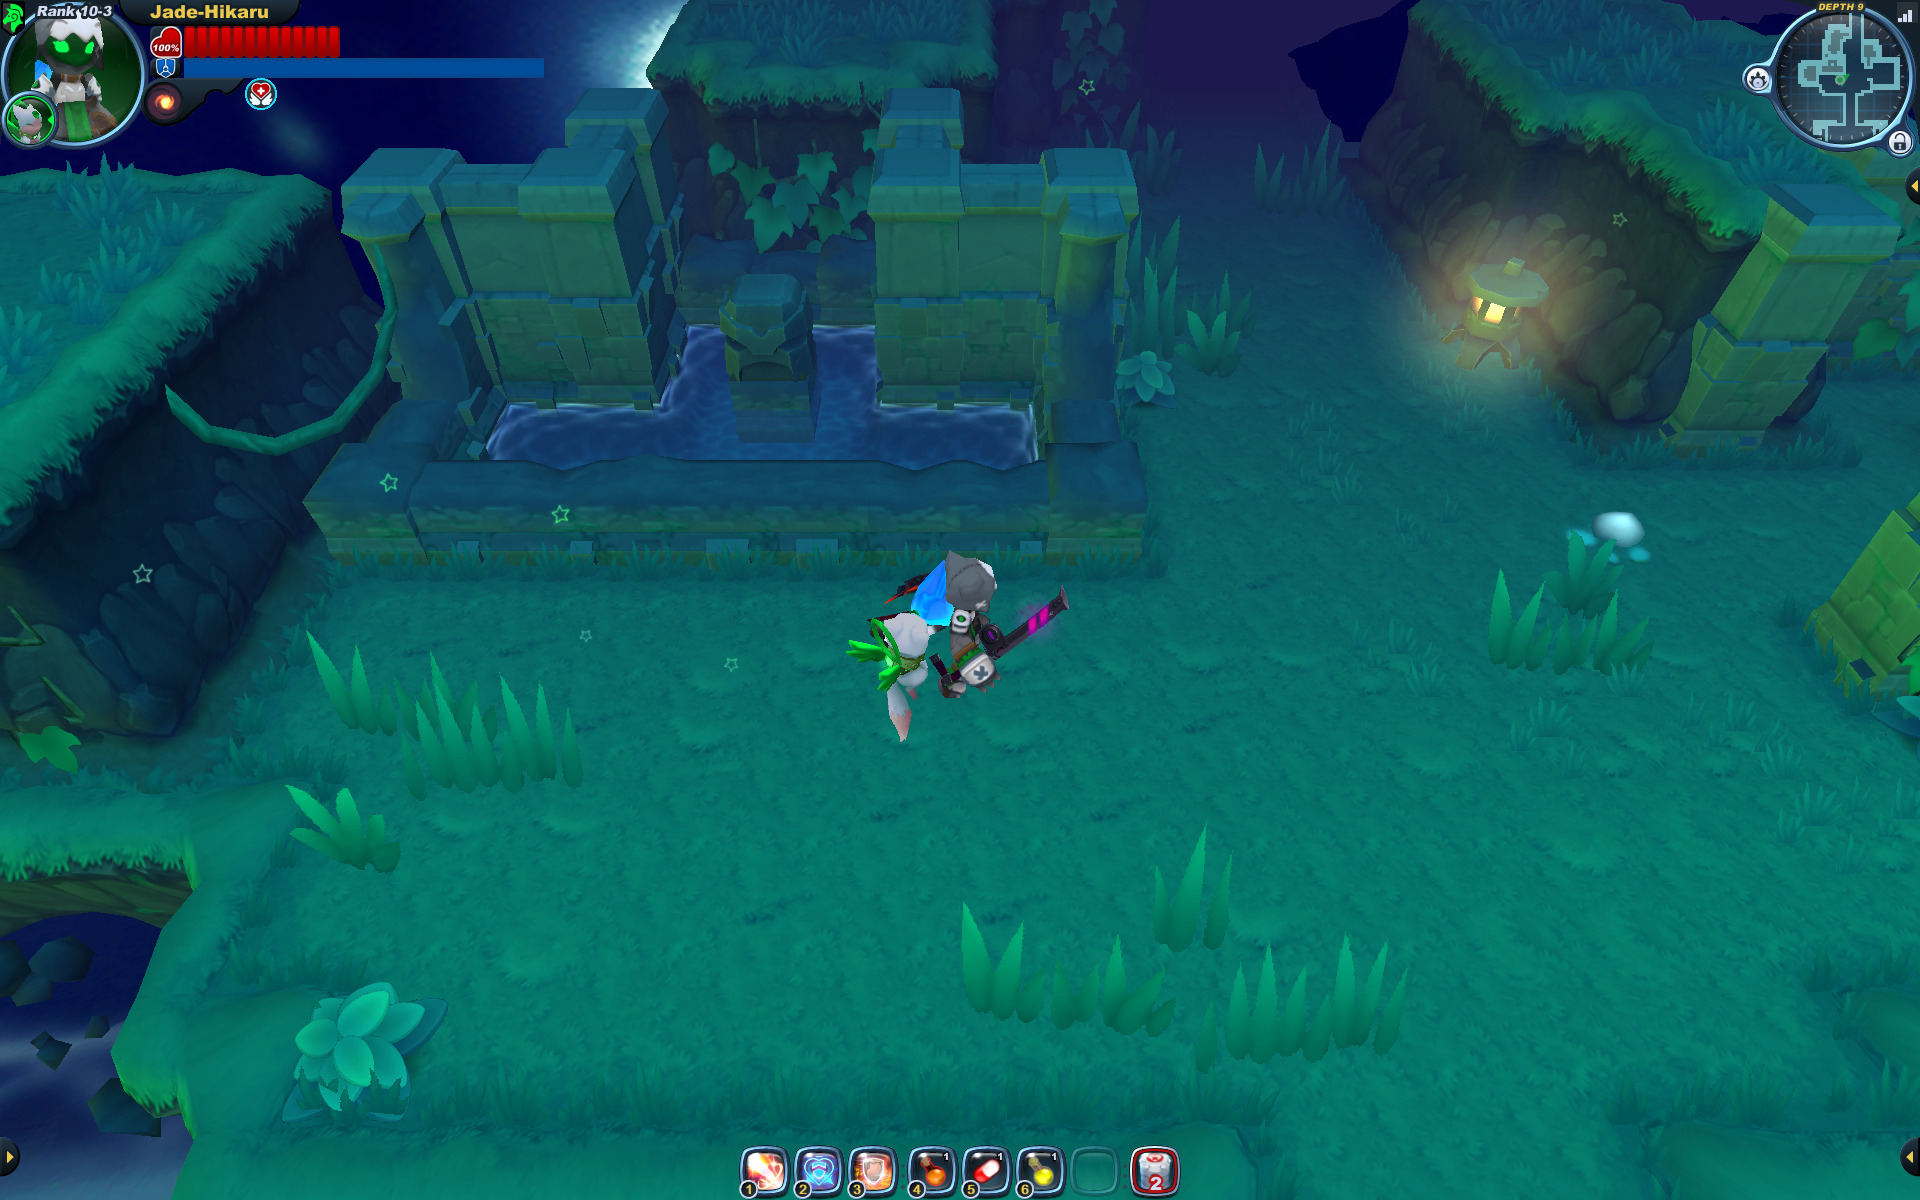
| + | A fountain with a totem on the middle. Shoot at the fountain with your gun or with a vial to get [[crowns]]. [[Lichen]]s will sometimes spawn instead of crowns. | ||
| + | |||
| + | Wolver Den have a variation of this scenario, the fountain its the same but instead of Lichen, [[Wolver]]s will spawn. | ||
| + | }} | ||
| + | |||
| + | {{GeographyList | ||
| + | |area file = Area-Time Enough at Last-Eternal Study | ||
| + | |parent = Scarlet Fortress | ||
| + | |segment = Scenario Room | ||
| + | |5 = {{location|Scarlet Fortress|Grim Gallery|1.3}} | ||
| + | |number = 1 | ||
| + | |notes = This room can always be encountered in {{mission|Time Enough at Last}}: ''Eternal Study'' | ||
| + | |||
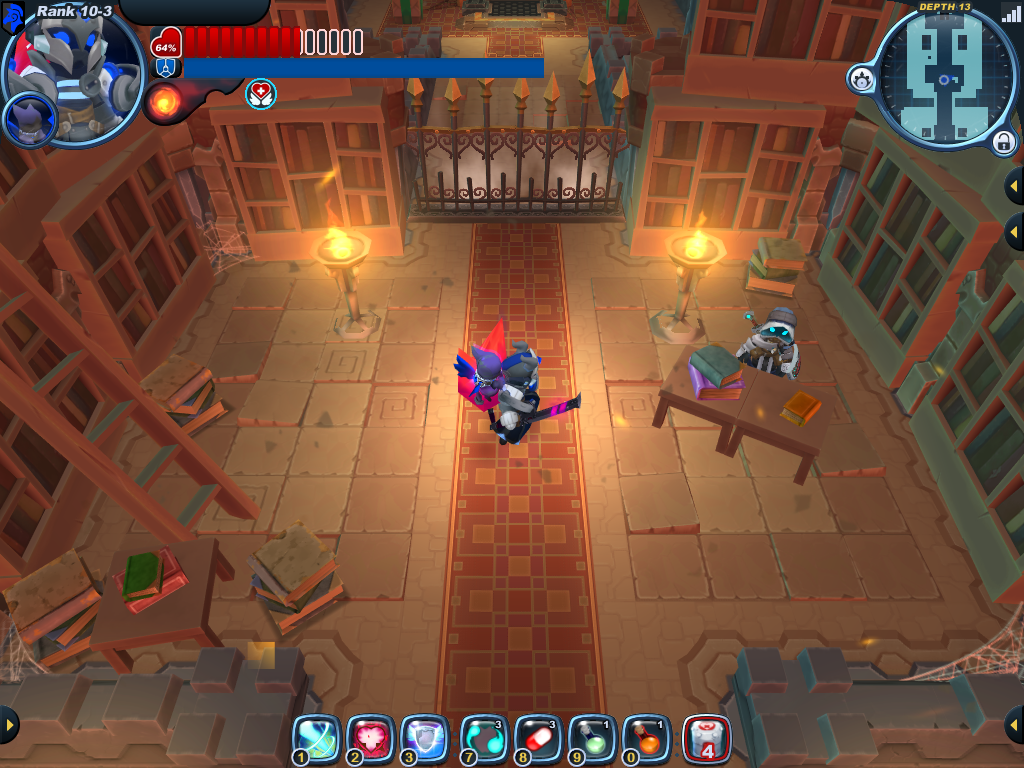
| + | [[Edger]] is really happy in this library. | ||
| + | |||
| + | {{Dialogue/Showhide | ||
| + | |title = Dialogue | ||
| + | |content = {{:Edger Dialogue/Time Enough at Last}} | ||
| + | }} | ||
| + | }} | ||
| + | |||
| + | {{GeographyList | ||
| + | |map = no | ||
| + | |area file = Scenario Room-Wolver Den 2 | ||
| + | |parent = Wolver Den | ||
| + | |segment = Scenario Room | ||
| + | |5 = {{location|Wolver Den|Pack Brutality|1.3}}<br>and<br>{{location|Wolver Den|Ashes to Ash Tails|1.3}} | ||
| + | |number = | ||
| + | |notes = This room has been encountered in tier 3. | ||
| + | |||
| + | A giant sword on the ground surrounded by statues and boxes. | ||
| + | |||
| + | {{Dialogue/Showhide | ||
| + | |title = | ||
| + | |content = ''Etched within the side of the blade appears to be some kind of map of the stars.'' | ||
| + | }} | ||
| + | }} | ||
| + | |||
| + | {{GeographyList | ||
| + | |map = no | ||
| + | |area file = Scenario Room-Wolver Den 5 | ||
| + | |parent = Wolver Den | ||
| + | |segment = Scenario Room | ||
| + | |5 = {{location|Wolver Den|Ashes to Ash Tails|1.3}}<br>and<br>{{location|Wolver Den|High Voltail|1.3}} | ||
| + | |number = | ||
| + | |notes = This room has been encountered in tier 1 and 2. | ||
| + | |||
| + | A campsite near the exit elevator. The campfire is still burning. Lots of unusable containers, 3 treasure boxes, a heart box, and two pickup items. | ||
| + | }} | ||
| + | |||
| + | {{GeographyList | ||
| + | |map = no | ||
| + | |area file = Scenario Room-Wolver Den 7 | ||
| + | |parent = Wolver Den | ||
| + | |segment = Scenario Room | ||
| + | |5 = {{location|Wolver Den|Frosty Fury|1.3}} | ||
| + | |number = | ||
| + | |notes = This room has been encountered in tier 2. | ||
| + | |||
| + | A lonely campsite. Could they have possibly abandoned the camp, or did something worse happen? | ||
| + | }} | ||
| + | |||
| + | {{GeographyList | ||
| + | |map = no | ||
| + | |area file = Scenario Room-Wolver Den 8 | ||
| + | |parent = Wolver Den | ||
| + | |segment = Scenario Room | ||
| + | |5 = {{location|Wolver Den|Ashes to Ash Tails|1.3}},<br><br>{{location|Wolver Den|Pack Brutality|1.3}},<br><br>and {{location|Wolver Den|Raving Rabids|1.3}} | ||
| + | |number = | ||
| + | |notes = This room has been encountered in tier 1 and 2. | ||
| + | |||
| + | A camp with some recruits. Each recruit says a variety of things when interacting with. | ||
| + | }} | ||
| + | |||
| + | {{GeographyList | ||
| + | |map = no | ||
| + | |area file = Scenario Room-Wolver Den 6 | ||
| + | |parent = Wolver Den | ||
| + | |segment = Scenario Room | ||
| + | |5 = {{location|Wolver Den|Ashes to Ash Tails|1.3}}<br>and<br>{{location|Wolver Den|Frosty Fury|1.3}} | ||
| + | |number = | ||
| + | |notes = This room has been encountered in tier 1. | ||
| + | |||
| + | 1 large Gun Puppy statue accompanied by 2 smaller Gun Puppy statues, with one pool on the left and right side. <!--- Sonomi maybe? ---> | ||
| + | }} | ||
| + | |||
| + | {{GeographyList | ||
| + | |map = no | ||
| + | |area file = Scenario Room-Wolver Den 1 | ||
| + | |parent = Wolver Den | ||
| + | |segment = Scenario Room | ||
| + | |5 = {{location|Wolver Den|Raving Rabids|1.3}},<br><br>{{location|Wolver Den|Frosty Fury|1.3}},<br><br> and {{location|Wolver Den|Ashes to Ash Tails|1.3}} | ||
| + | |number = | ||
| + | |notes = This room has been encountered in tier 2 and 3. | ||
| + | |||
| + | An ancient structure of some sort. | ||
| + | }} | ||
| + | |||
| + | {{GeographyList | ||
| + | |map = no | ||
| + | |area file = Scenario Room-Wolver Den 3 | ||
| + | |parent = Wolver Den | ||
| + | |segment = Scenario Room | ||
| + | |5 = Any level from<br>{{location|Wolver Den||1.2}} | ||
| + | |number = | ||
| + | |notes = This room has been encountered in tier 2 and 3. | ||
| + | |||
| + | A fountain with a totem on the middle. Shoot at the fountain with your gun or with a vial to get [[crowns]]. [[Wolver]]s will sometimes spawn instead of crowns. | ||
| + | |||
| + | Lichenous Lair have a variation of this scenario, the fountain its the same but instead of Wolvers, [[Lichen]]s will spawn. | ||
| + | }} | ||
| + | |||
| + | {{GeographyList | ||
| + | |map = no | ||
| + | |area file = Scenario Room-Wolver Den 4 | ||
| + | |parent = Wolver Den | ||
| + | |segment = Scenario Room | ||
| + | |5 = {{location|Wolver Den|Ashes to Ash Tails|1.3}}<br>and<br>{{location|Wolver Den|Frosty Fury|1.3}} | ||
| + | |number = | ||
| + | |notes = This room has been encountered in tier 2. | ||
| + | |||
| + | A [[Snipe]] meadow with [[Treasure Box|treasure boxes]] and invisible [[Health|heart pads]]. | ||
| + | }} | ||
| + | |||
| + | {{GeographyList | ||
| + | |map = no | ||
| + | |area file = Scenario Room-Wolver Den 11 | ||
| + | |parent = Wolver Den | ||
| + | |segment = Scenario Room | ||
| + | |5 = {{location|Wolver Den|Pack Brutality|1.3}}<br>and<br>{{location|Wolver Den|High Voltail|1.3}} | ||
| + | |number = | ||
| + | |notes = This room has been encountered in tier 1 and 2. | ||
| + | |||
| + | A sort of wishing well between two pillars. Interacting with the well will cause [[crowns]] and [[heat]] to appear. This can be done a few times. | ||
| + | }} | ||
| + | |||
| + | {{GeographyList | ||
| + | |map = no | ||
| + | |area file = Scenario Room-Wolver Den 9 | ||
| + | |parent = Wolver Den | ||
| + | |segment = Scenario Room | ||
| + | |5 = {{location|Wolver Den|High Voltail|1.3}} | ||
| + | |number = | ||
| + | |letter = A | ||
| + | |notes = This room has been encountered in tier 2. | ||
| + | |||
| + | A place with a fossilized [[Tortodrone]], a water feature, and 4 treasure boxes. Maybe the Tortodrone was abandoned by someone, or simply died. | ||
| + | |||
| + | }} | ||
| + | |||
| + | {{GeographyList | ||
| + | |map = no | ||
| + | |area file = Scenario Room-Wolver Den 9.1 | ||
| + | |parent = Wolver Den | ||
| + | |segment = Scenario Room | ||
| + | |5 = {{location|Wolver Den|Frosty Fury|1.3}} | ||
| + | |number = | ||
| + | |letter = B | ||
| + | |notes = This room has been encountered in tier 3. | ||
| + | |||
| + | A place with a fossilized [[Tortodrone]], a water feature, and 4 treasure boxes. | ||
| + | }} | ||
| + | |||
| + | {{GeographyList | ||
| + | |map = no | ||
| + | |area file = Scenario Room-Wolver Den 10 | ||
| + | |parent = Wolver Den | ||
| + | |segment = Scenario Room | ||
| + | |5 = {{location|Wolver Den|Frosty Fury|1.3}} | ||
| + | |number = | ||
| + | |notes = This room has been encountered in tier 3. | ||
| + | |||
| + | A valley-like area with an unmoving [[Tortodrone]] on a pillar to the left. This one have 5 [[Treasure Box]]es on the right. | ||
| + | }} | ||
| − | |||
| − | |||
{{Table/End}} | {{Table/End}} | ||
| − | [[ | + | == See Also == |
| + | {{exploration see also}} | ||
| + | |||
| + | [[Category:Geography]] | ||
| + | [[Category:Exploration]] | ||
Latest revision as of 20:13, 6 August 2020
A Scenario Room is a special room in the Clockworks that offer a little story and atmosphere, hints of a larger story, or a special bonus to those that discover them. Note that certain ones can also be found in missions as well, though they tend to be a bit different than those encountered in the arcade. Some scenario rooms are rarer than others.
List
| Map | Visual | Location | Level &/or Segment | Notes | ||||||||||||||||
| N/A | 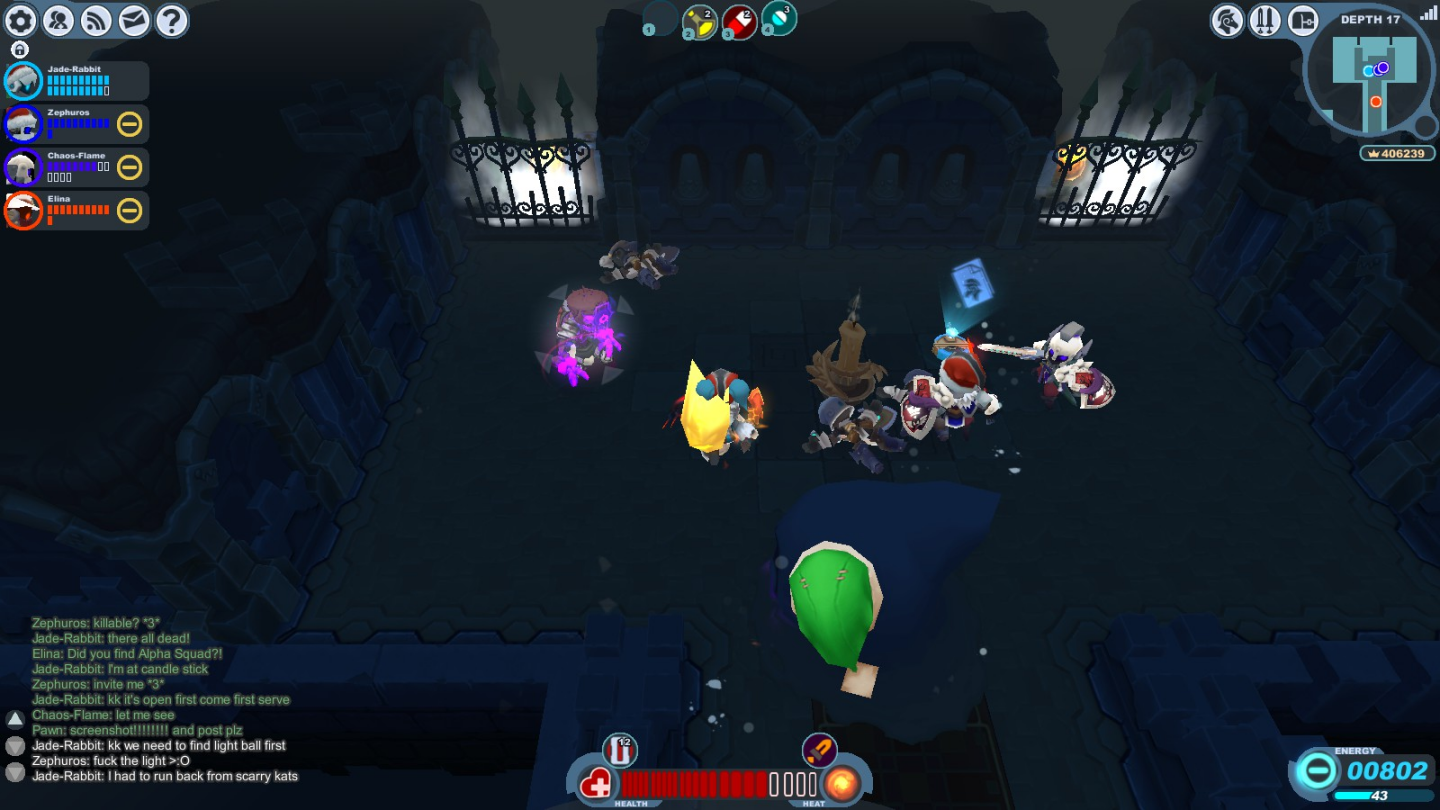
|
Candlestick Keep | "Scenario Room" Segment | Notes:
This room has been encountered in tier 2 and 3. There are two fallen Knights in a gated room with a Carnavon. | ||||||||||||||||

|
|
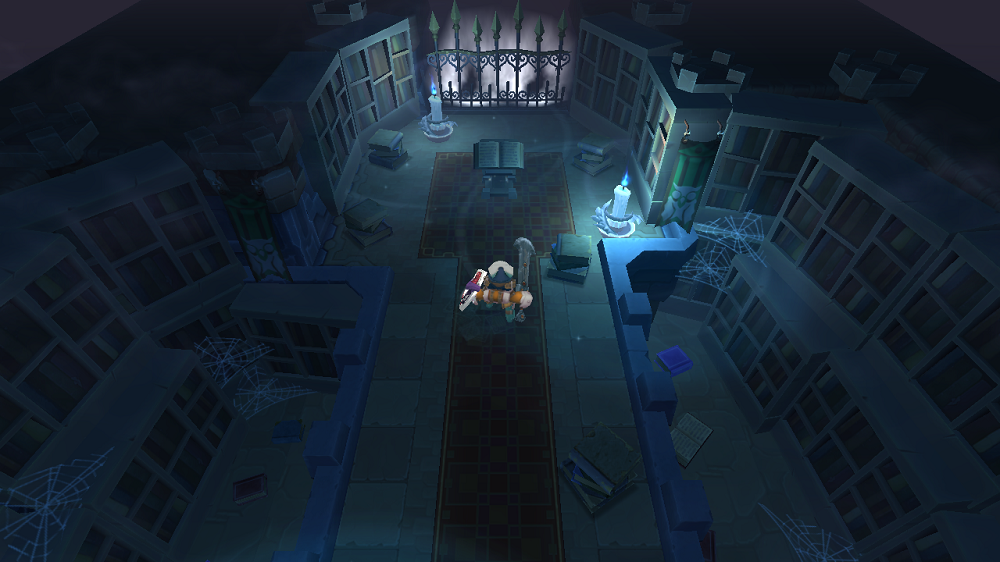
Candlestick Keep | Cold Shadows | Notes:
This room can always be encountered in 9-1
| ||||||||||||||||

|
|
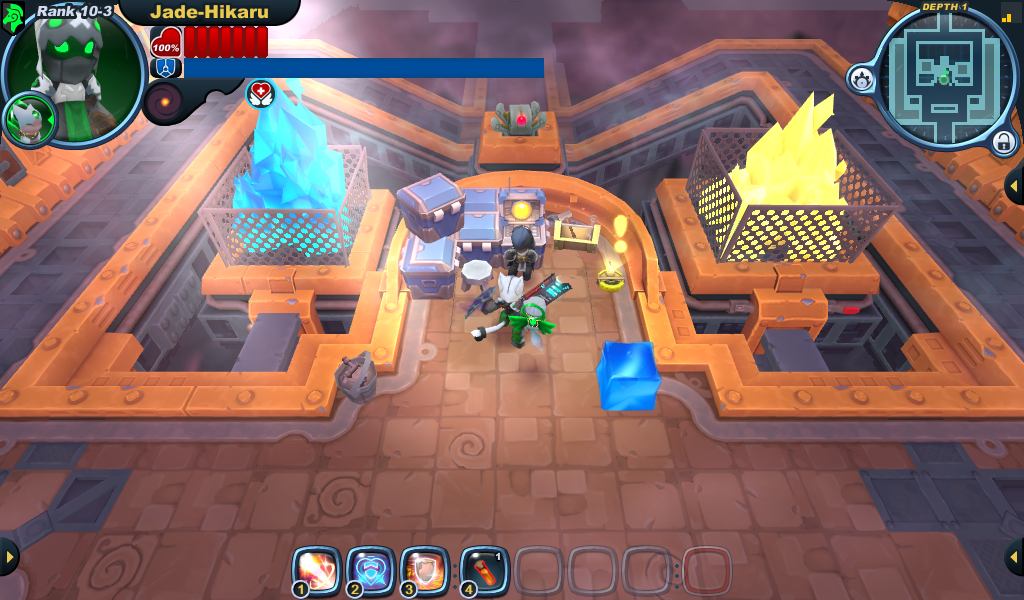
Clockwork Tunnels | "Scenario Room" Segment | Notes:
This room can be encountered at any tier. A Geo Knight with a monitor is studying the affects of minerals have that attract certain types of monsters. There is also an Ice Cube whose name is Hubert. The monsters that the Geo Knight studies are Wolvers, Jelly Cubes, Scuttlebots, Ironclaw Menders, Yesmen and Spookats. | ||||||||||||||||
| |
|
Clockwork Tunnels | Blast Furnace and Cooling Chamber: Wild Path |
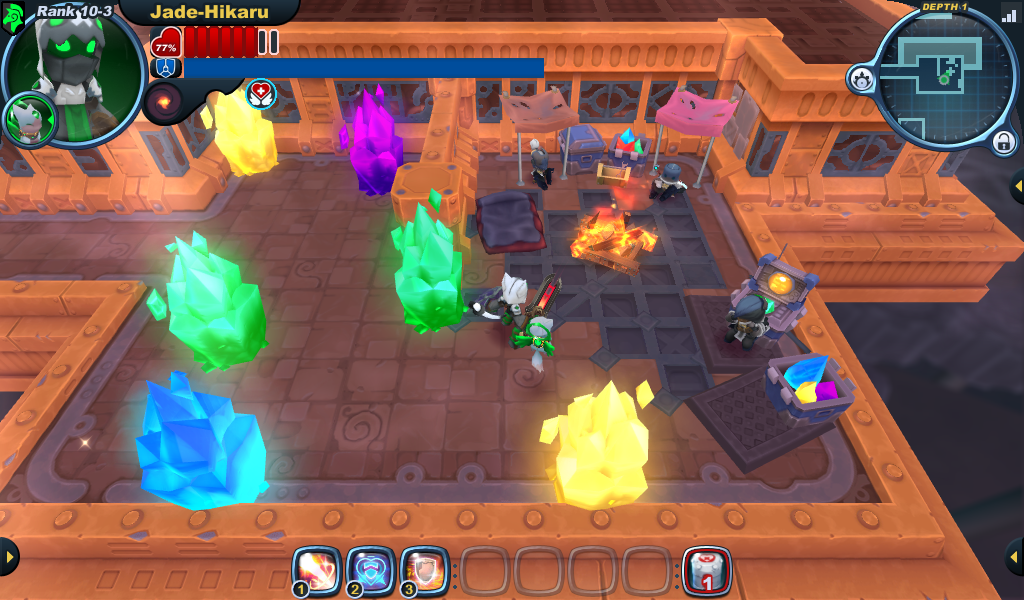
Notes:
This room can be encountered at any tier. Three Geo Knights from Spiral HQ set up a campsite around a mineral room. | ||||||||||||||||
| N/A | 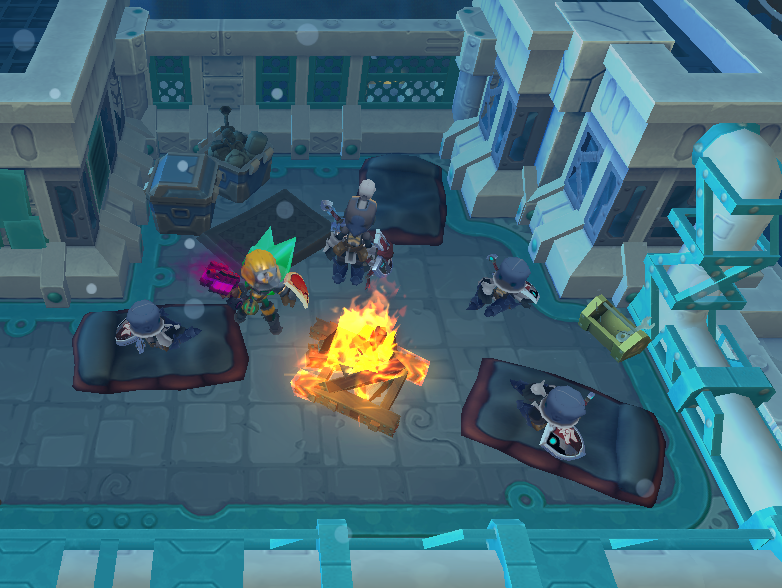
|
Clockwork Tunnels | Cooling Chamber | Notes:
This room has been encountered in tier 2. A campfire with 4 knights. It looks like the knights are on their first expedition in the Clockworks. | ||||||||||||||||
| N/A | 
|
Clockwork Tunnels | Wasteworks: Wild Path, and Blast Furnace |
Notes:
This room has been encountered in tier 2 and 3. A campfire with a frightened knight in a corner. The containers are empty and one of them have been overturned. It is possible some monsters have attacked the place. | ||||||||||||||||
| N/A | 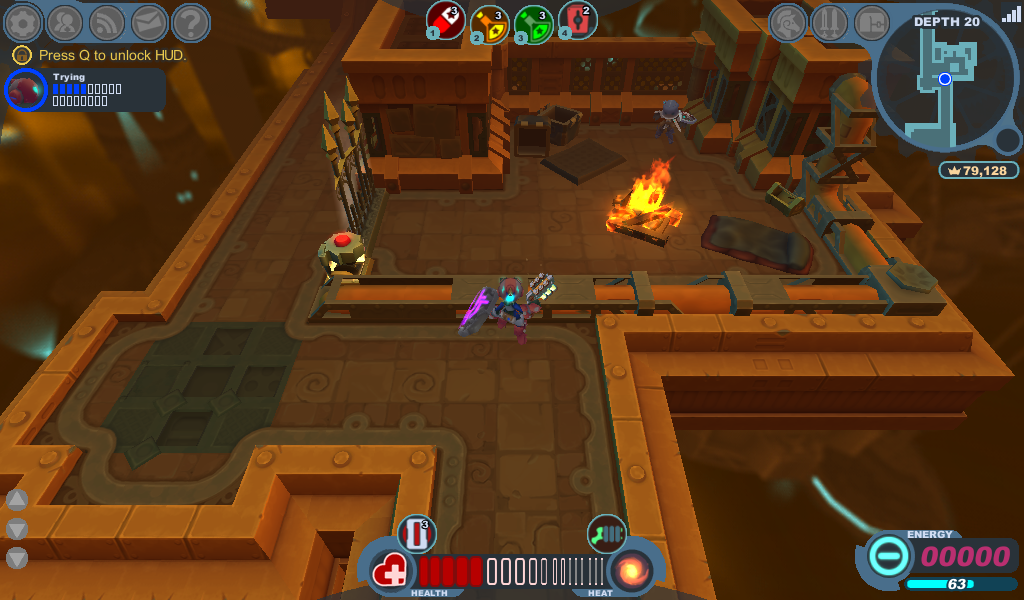
|
Clockwork Tunnels | "Scenario Room" Segment | Notes:
This room has been encountered in tier 3. A campfire with a frightened knight in a corner. The containers are empty and one of them have been overturned. It is possible some monsters have attacked the place. | ||||||||||||||||
| N/A | 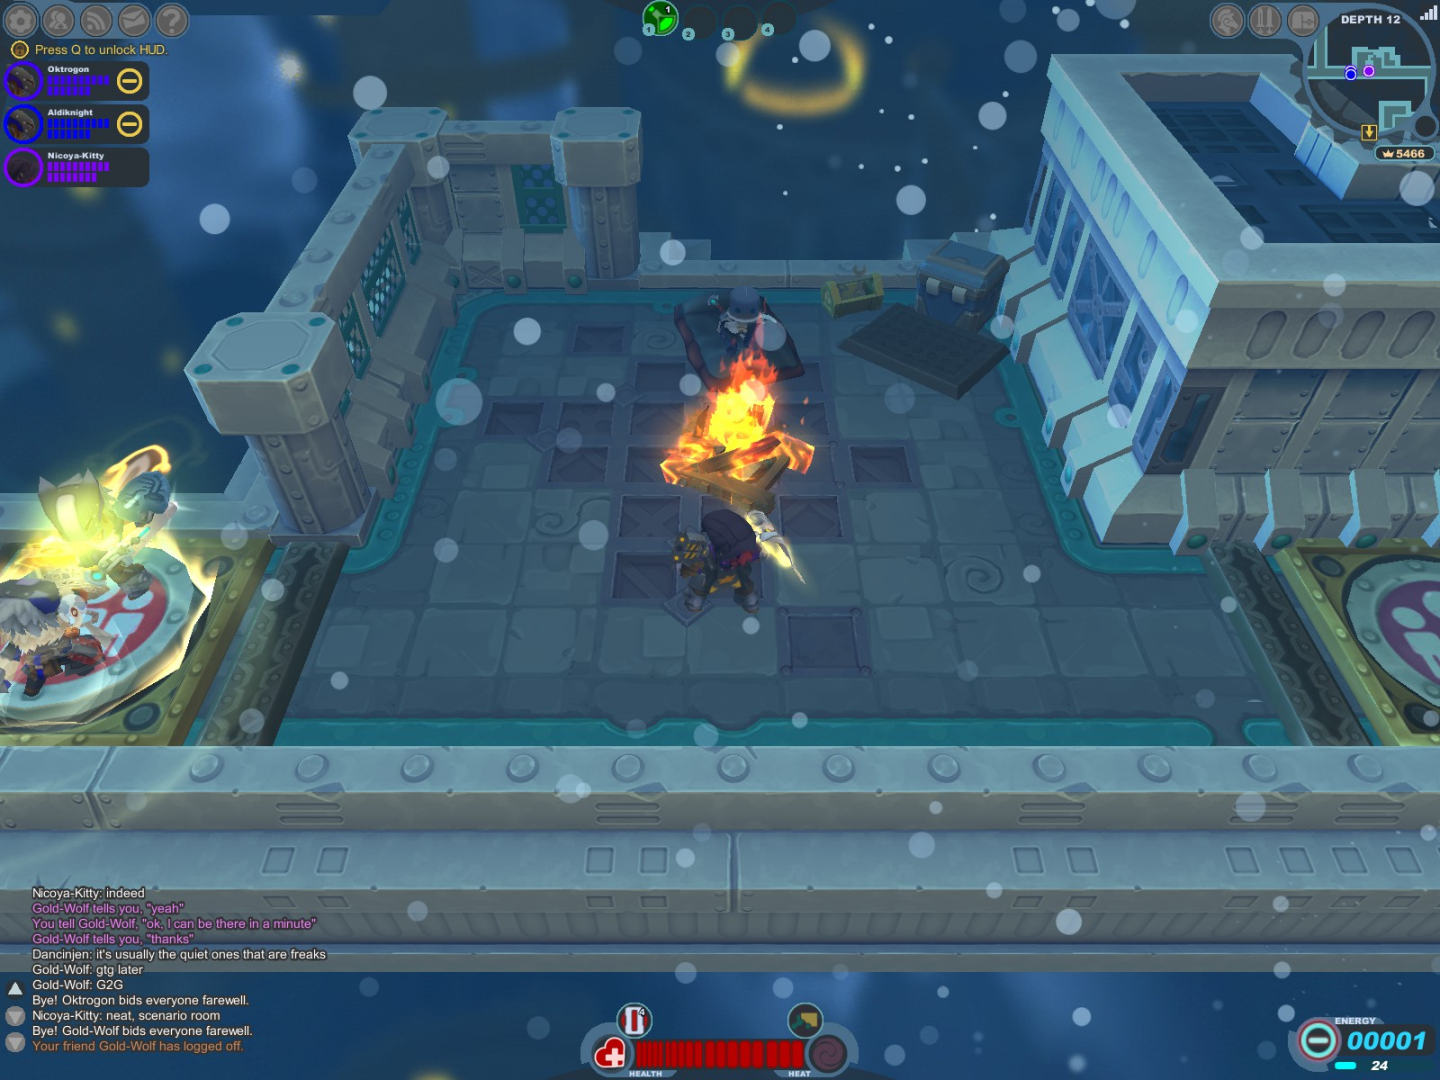
|
Clockwork Tunnels | Cooling Chamber | Notes:
This room has been encountered in tier 1 and 2. A campfire with a resting knight between two party buttons. Standing in the area will refill your knight's health. | ||||||||||||||||
| N/A | 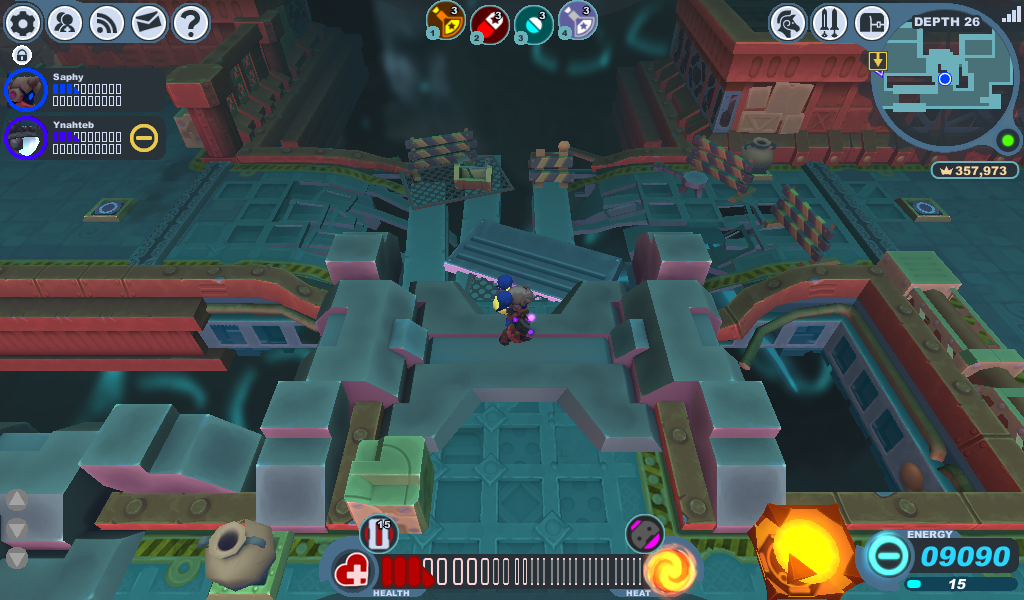
|
Clockwork Tunnels | Cooling Chamber: Wild Path, Wasteworks: Infernal Passage, and Power Complex |
Notes:
This room has been encountered in tier 3. A bridge that is or is not being repaired - or destroyed. Some Knockers, Thwackers and Menders will spawn as the player passes through the room. | ||||||||||||||||
| N/A | 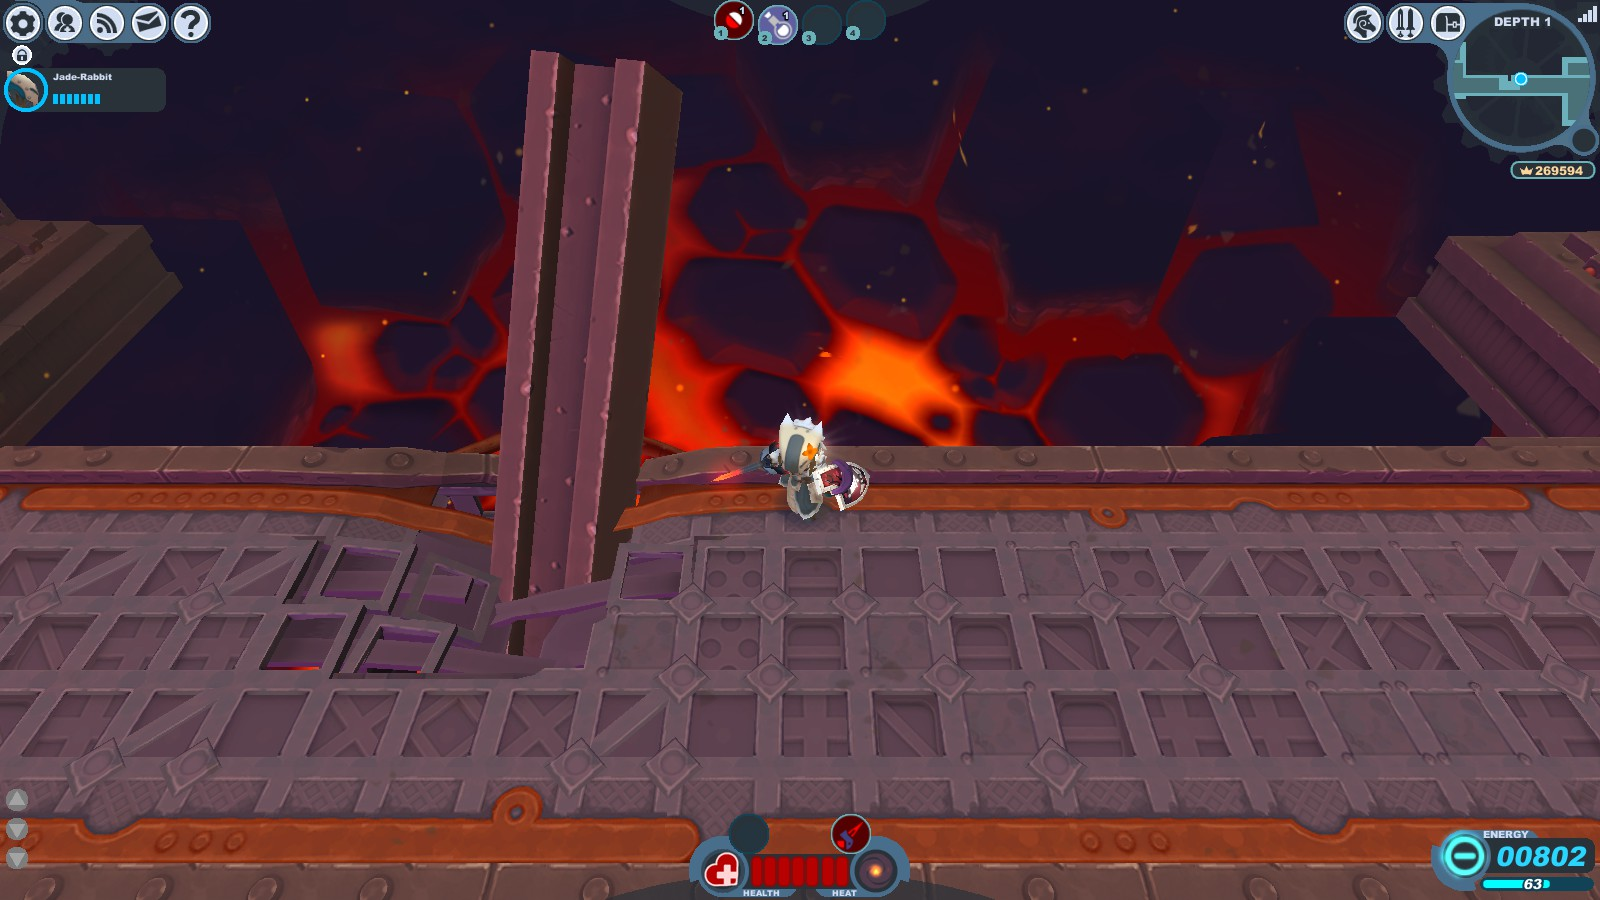
|
Clockwork Tunnels | Blast Furnace, Cooling Chamber, and Power Complex |
Notes:
This room has been encountered in tier 1 and 3. A giant metal beam that's been driven down the path. | ||||||||||||||||
| N/A | 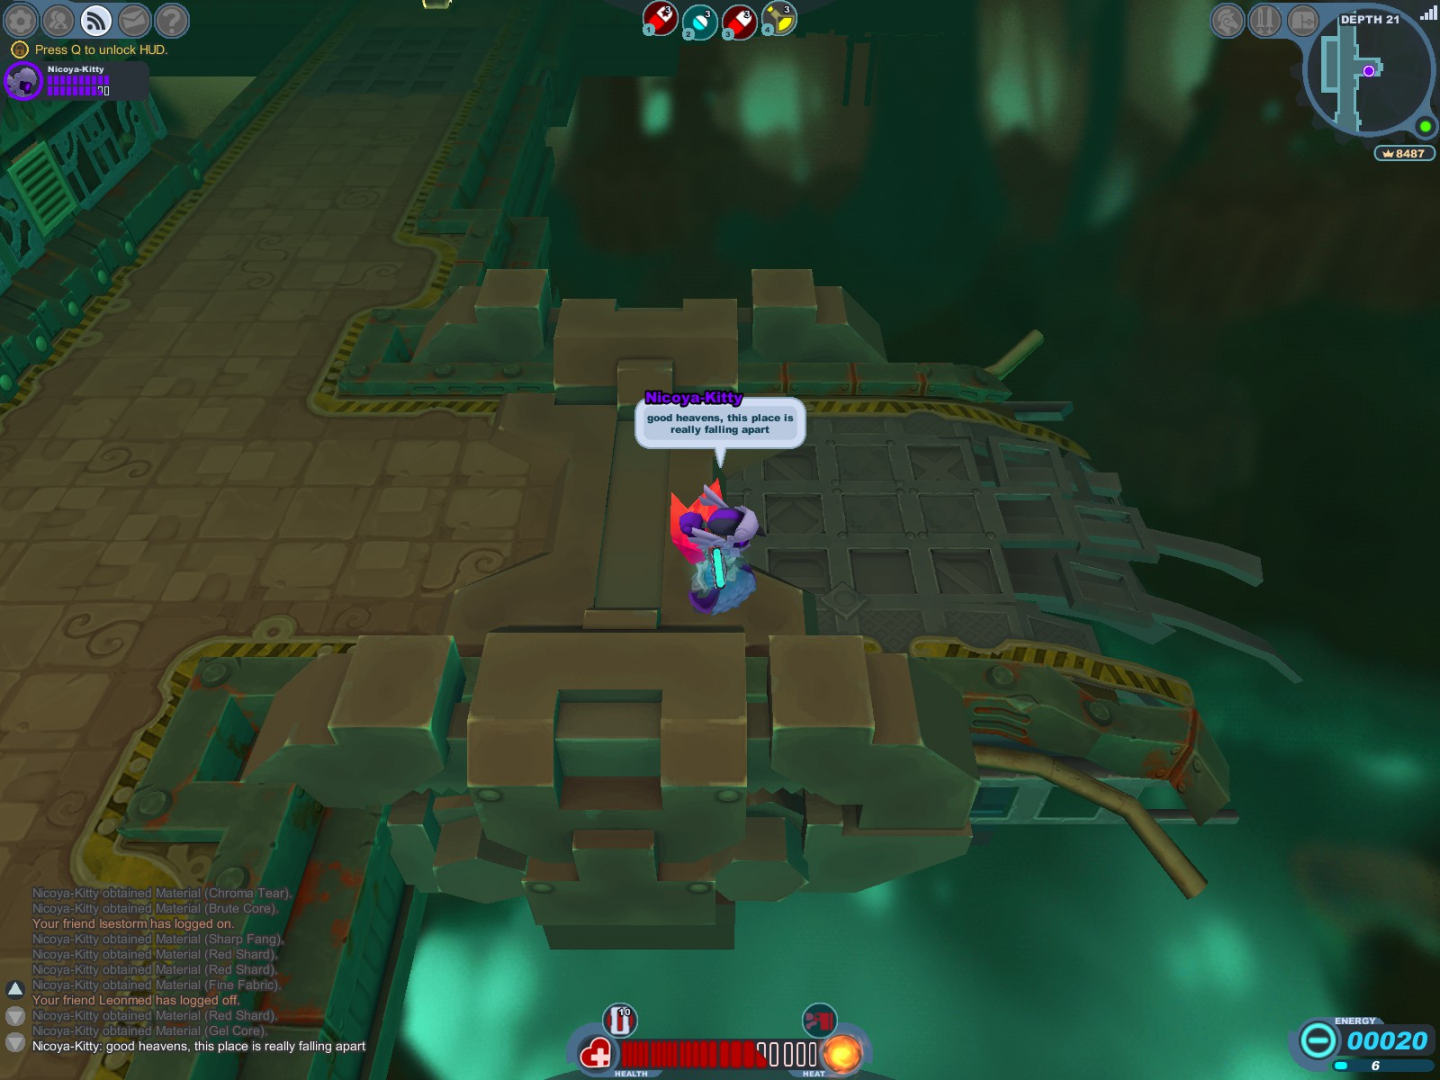
|
Clockwork Tunnels | Wasteworks and Power Complex |
Notes:
This room has been encountered in tier 3. A broken bridge or hallway. It doesn't look like work will continue on that section. | ||||||||||||||||
| N/A | 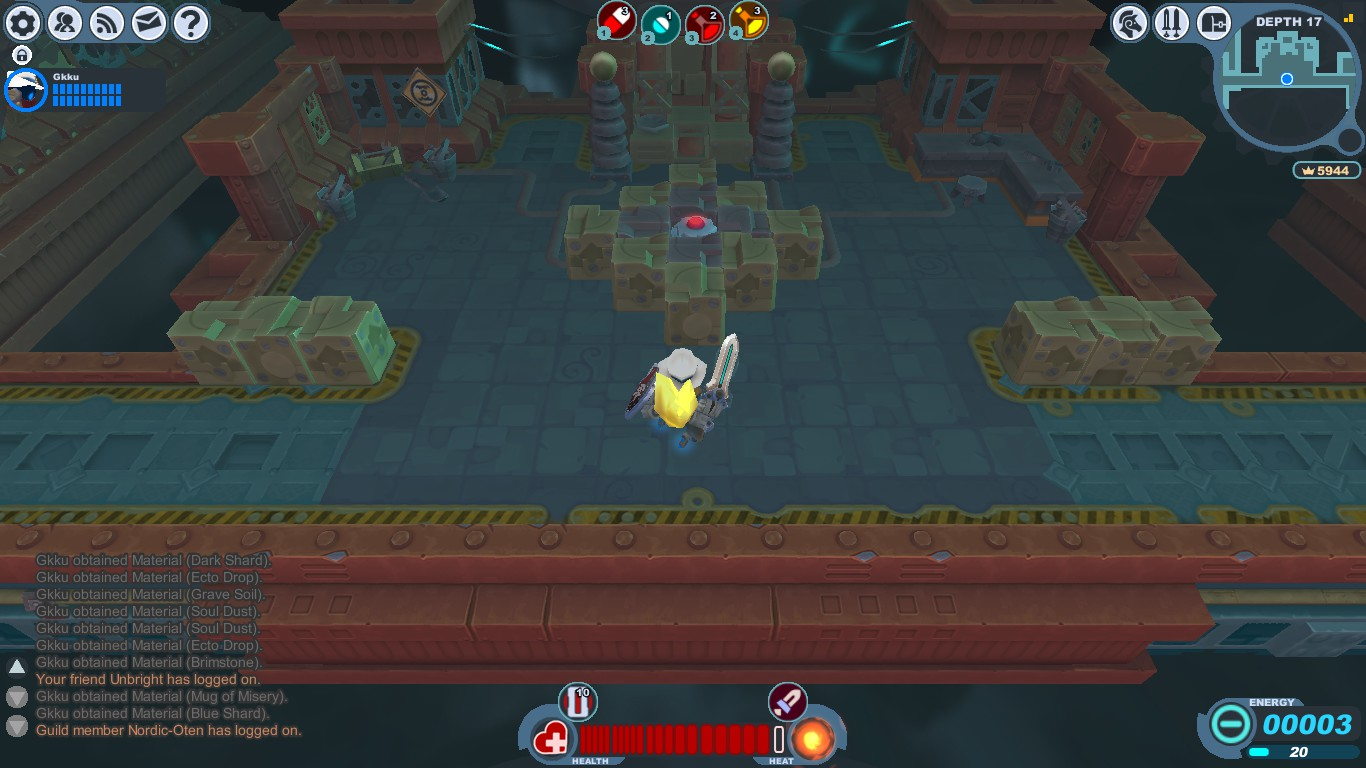
|
Clockwork Tunnels | Power Complex: Infernal Passage | Notes:
This room has been encountered in tier 2. A possible Gremlin workshop of some sort. A Thwacker spawns at the corner table in the top right, and hitting the switch in the middle spawns 2 friendly Mecha Knights from the empty areas in the top of the room. Scuttlebots will also spawn from the destroyed grey blocks. | ||||||||||||||||
| N/A | 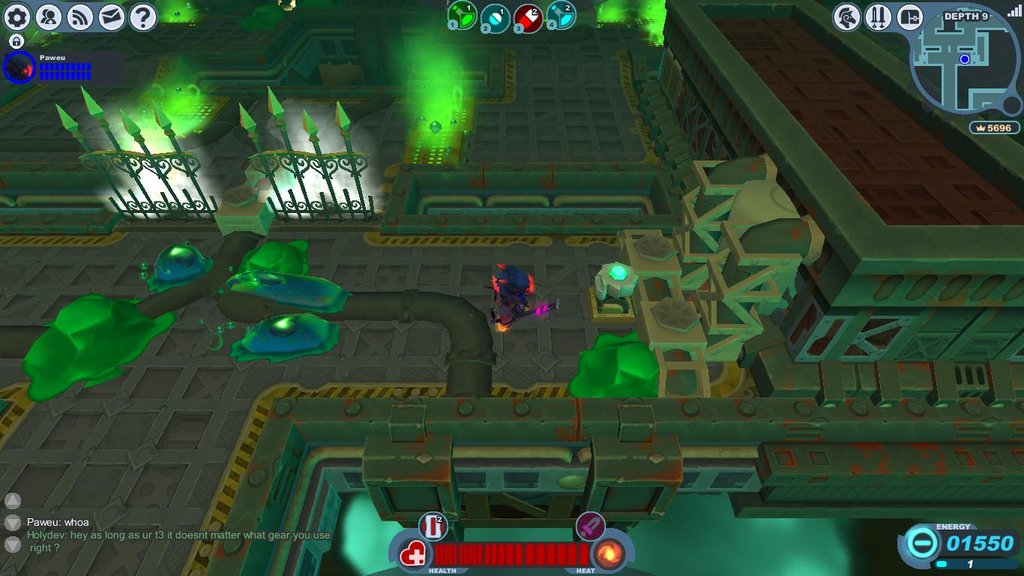
|
Clockwork Tunnels | Wasteworks: Slimeway | Notes:
This room has been encountered in tier 2. A slimy area with some tubes and poison traps. Toxigels may appear in the area. | ||||||||||||||||
| N/A | 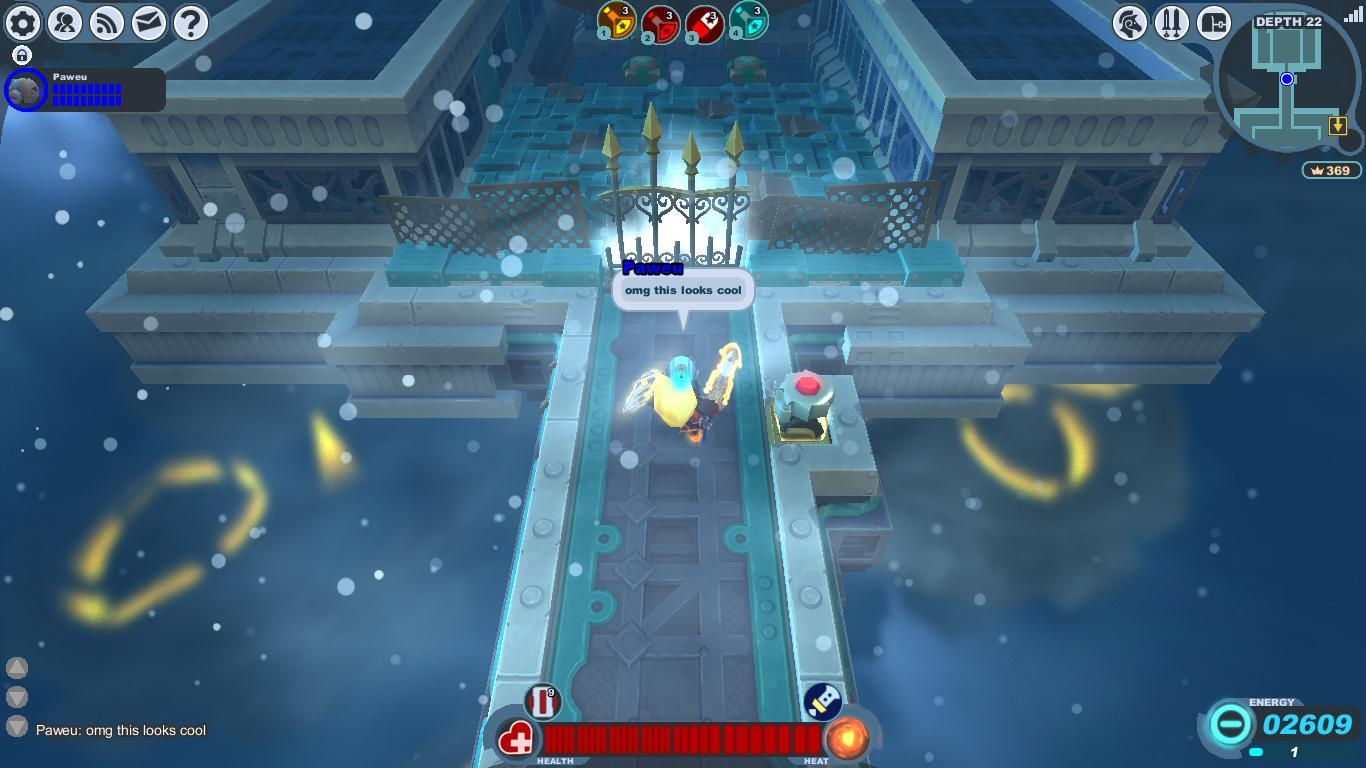
|
Clockwork Tunnels | Cooling Chamber | Notes:
This room has been encountered in tier 3. A possible storage area of some sort. The grey blocks reveal hidden Scuttlebots and Treasure Boxes can be found at the end of the room. | ||||||||||||||||
| N/A | 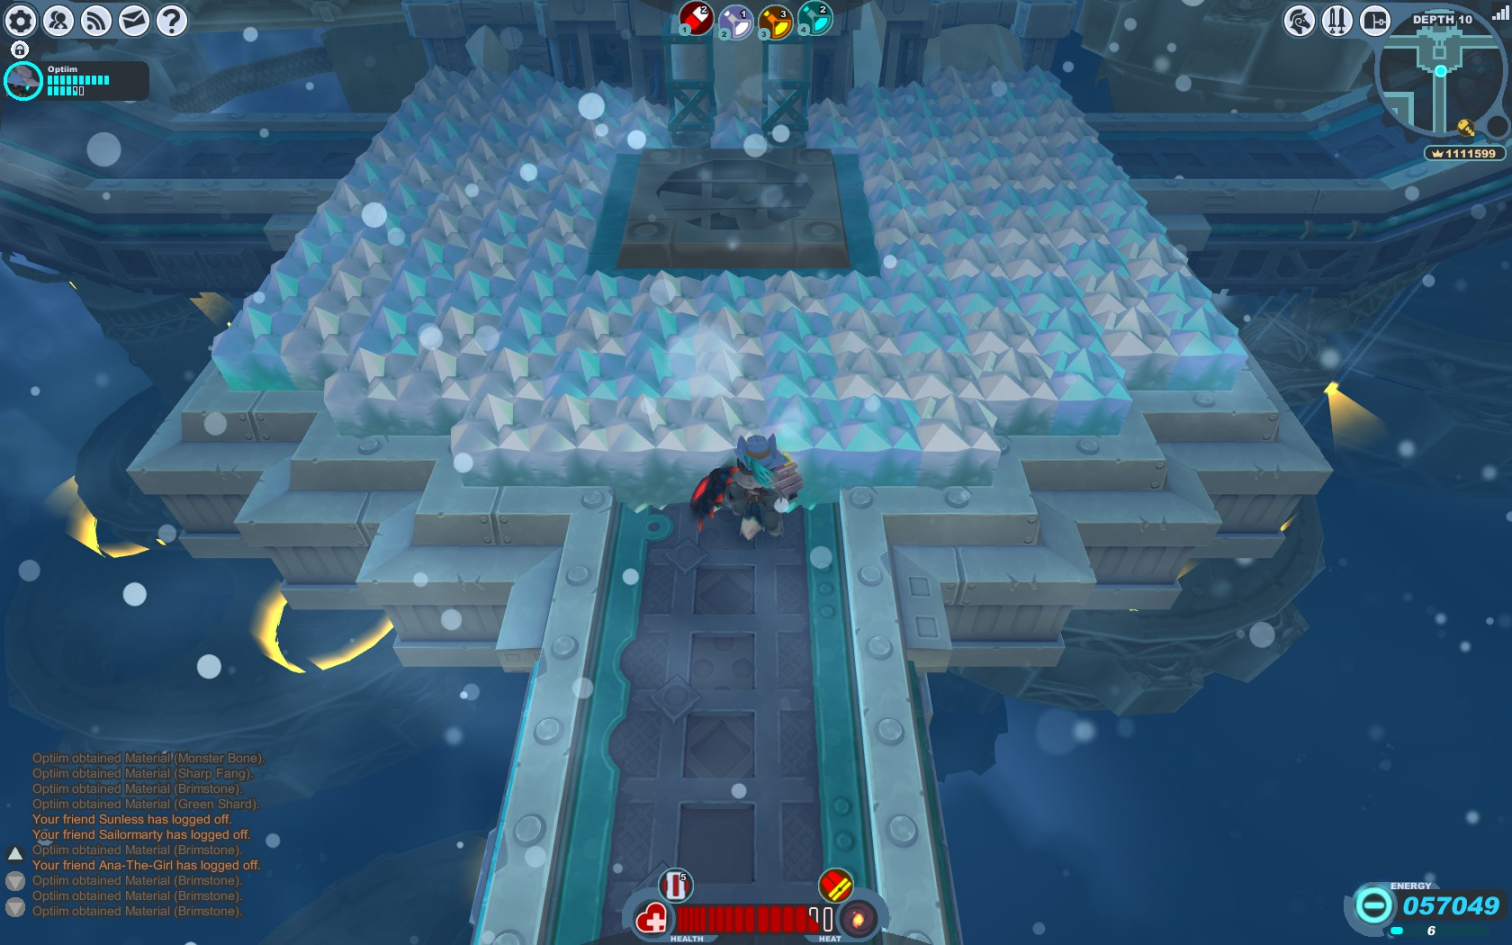
|
Clockwork Tunnels | Cooling Chamber | Notes:
This room has been encountered in tier 2. A room with a large cooling fan in the center surrounded by Crystal Blocks. Breaking some of the blocks will spawn Ice Cubes. When cleaning some space, two dead Gremlin bodies can be found lying on the ground. | ||||||||||||||||
| N/A | 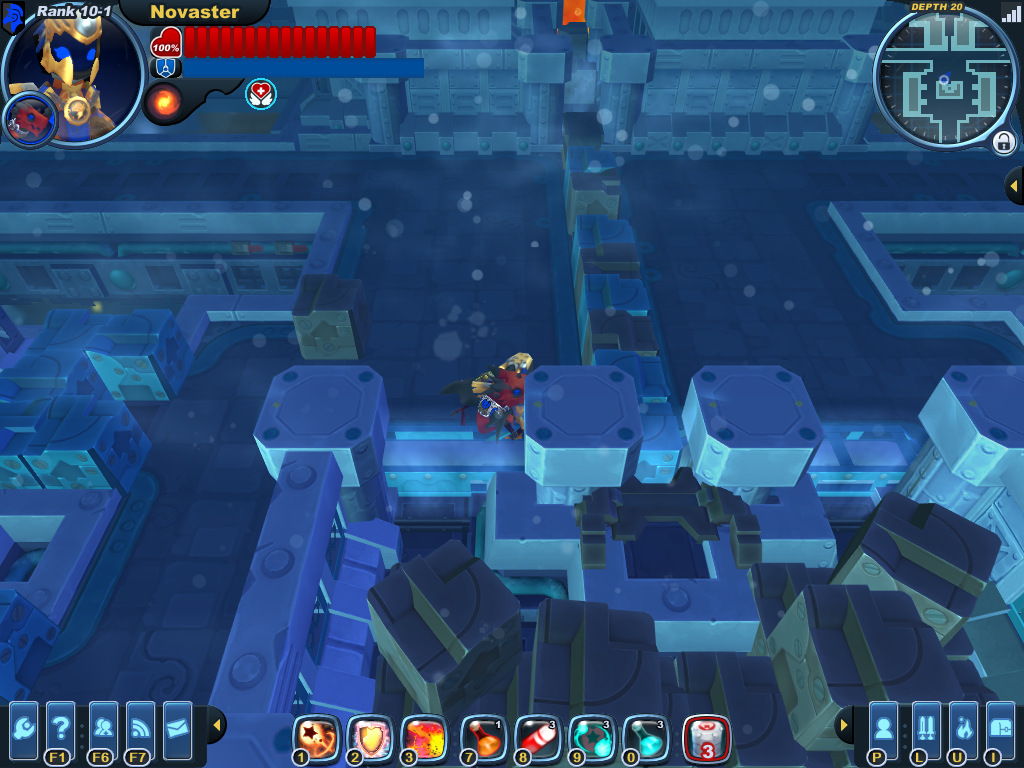
|
Clockwork Tunnels | Cooling Chamber: Mechanized Mile | Notes:
This room has been encountered in tier 3. A storage room of some kind. Gremlins hang around the area. Some of the blocks are hidden monster cages, which seem to only spawn Scuttlebots here. | ||||||||||||||||
| N/A | 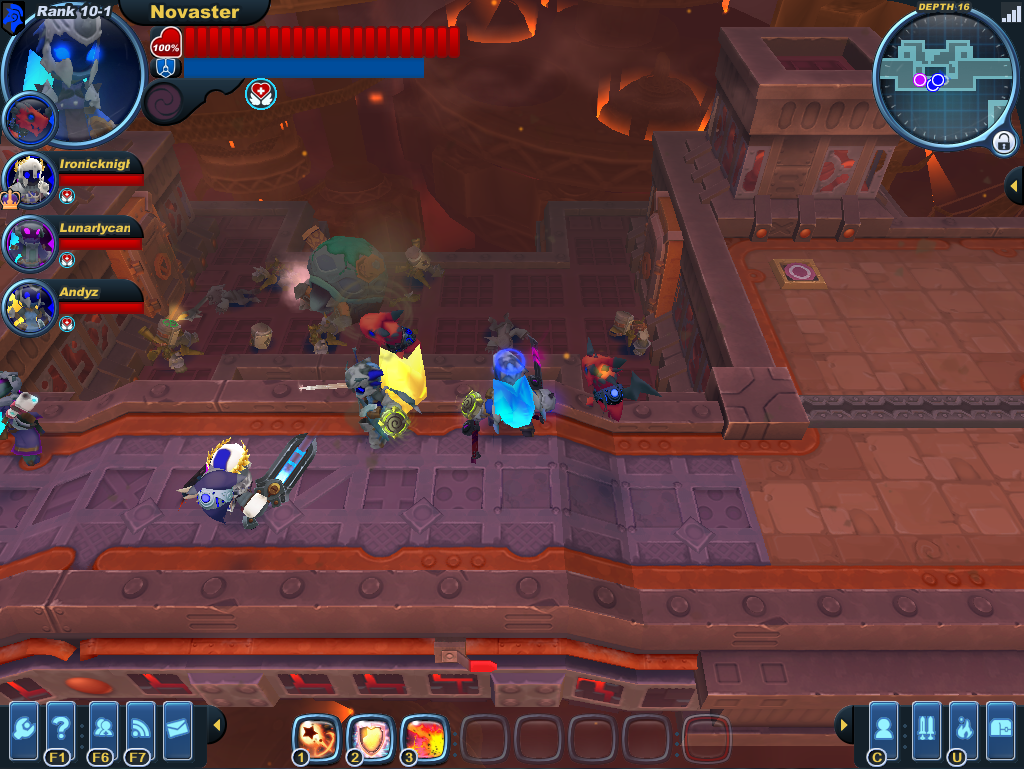
|
Clockwork Tunnels | Wasteworks: Infernal Passage, and Blast Furnace |
Notes:
This room has been encountered in tier 3. An unmoving Tortodrone can be seen on a lower platform, next to some ruined constructs. | ||||||||||||||||
| N/A | 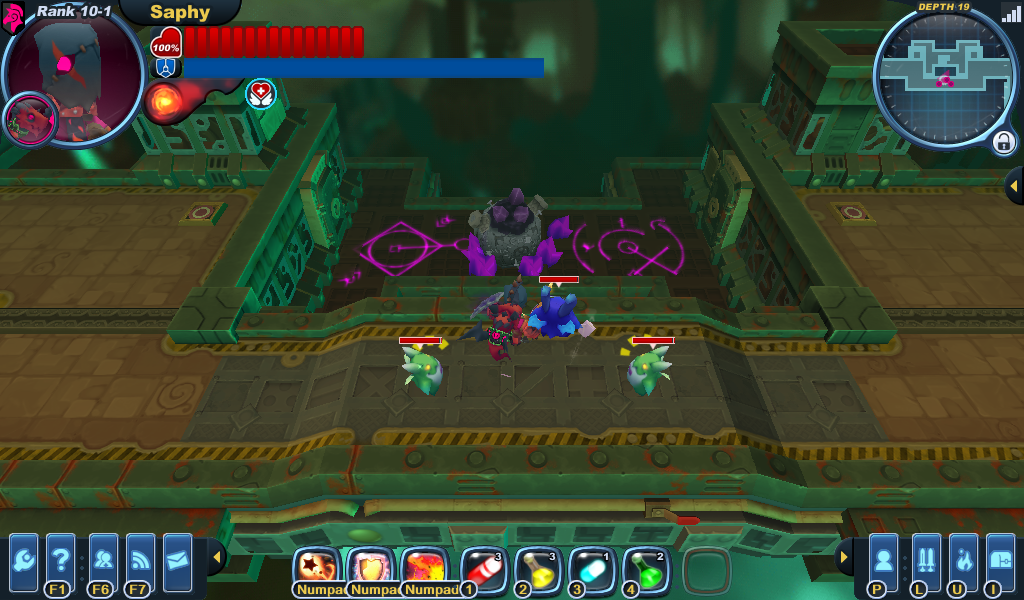
|
Clockwork Tunnels | Wasteworks: Infernal Passage | Notes:
This room has been encountered in tier 3. An unmoving Tortodrone seems to have been altered by fiends. The Tortodrone is surrounded by Dark Matter crystals and has dark purple shards protruding from the top of its body. | ||||||||||||||||
| N/A | 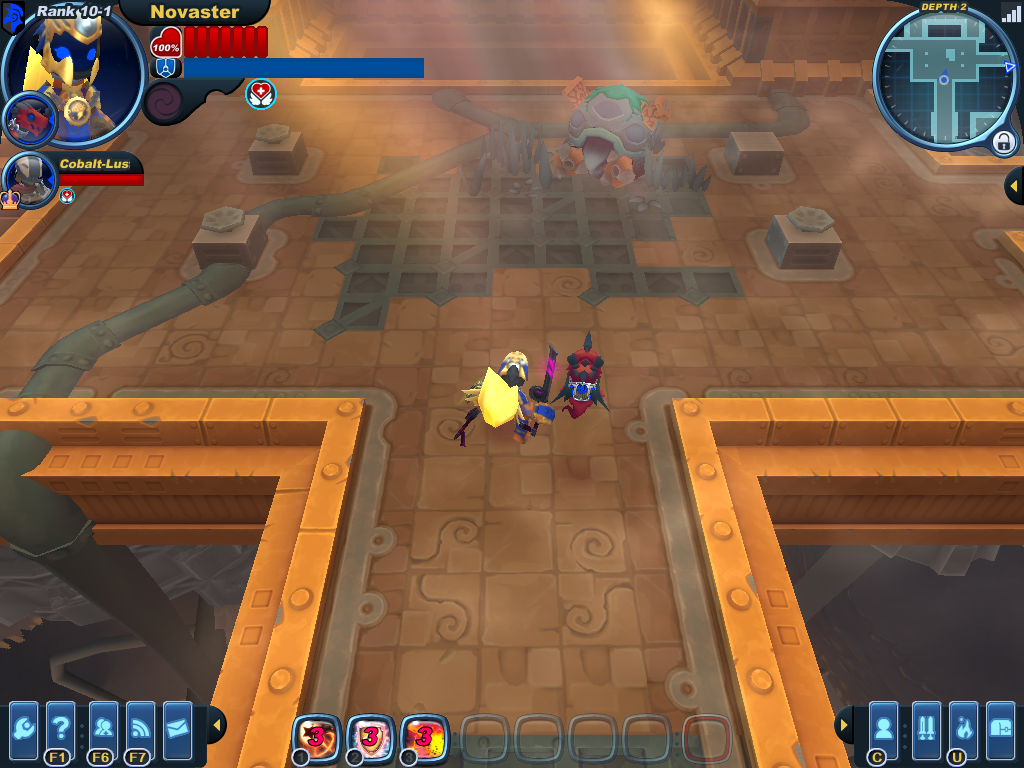
|
Clockwork Tunnels | Clockwork Tunnels: Gremlin Grounds | Notes:
This room has been encountered in tier 1. An unmoving Tortodrone can be seen next to some grass. | ||||||||||||||||

|
|
Clockwork Tunnels | Cooling Chamber | Notes:
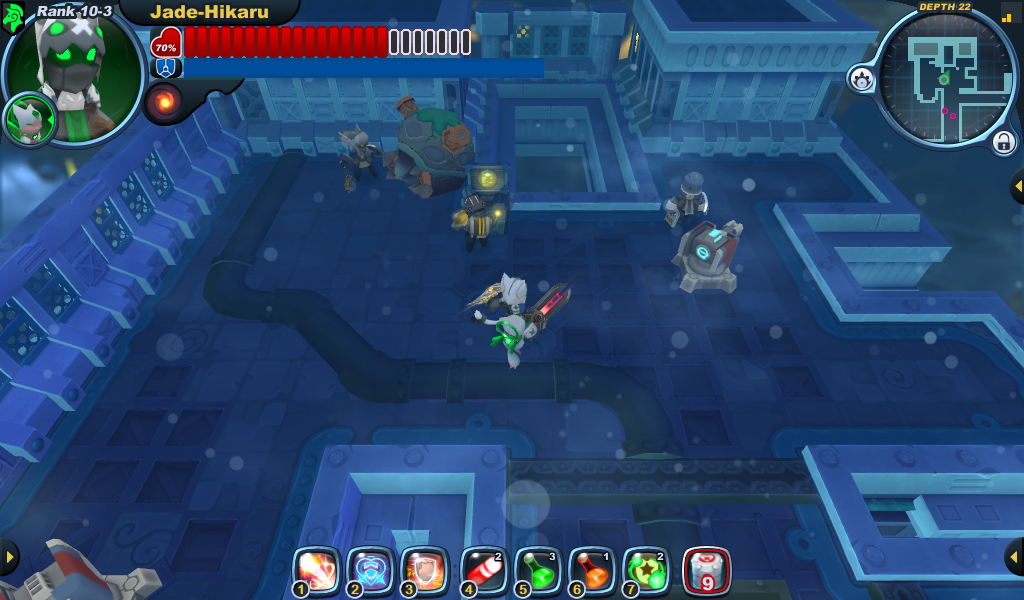
This room has been encountered in tier 3. Some Knights and Recon Rangers seems to have set a camping around an unmoving Tortodrone to rest and collect samples of the stratum. Two Mecha Turrets are active helping to keep the area safe. One of the Knights have a Pulsar and one of the Recon Rangers have a Robo Wrecker.
| ||||||||||||||||
| N/A | 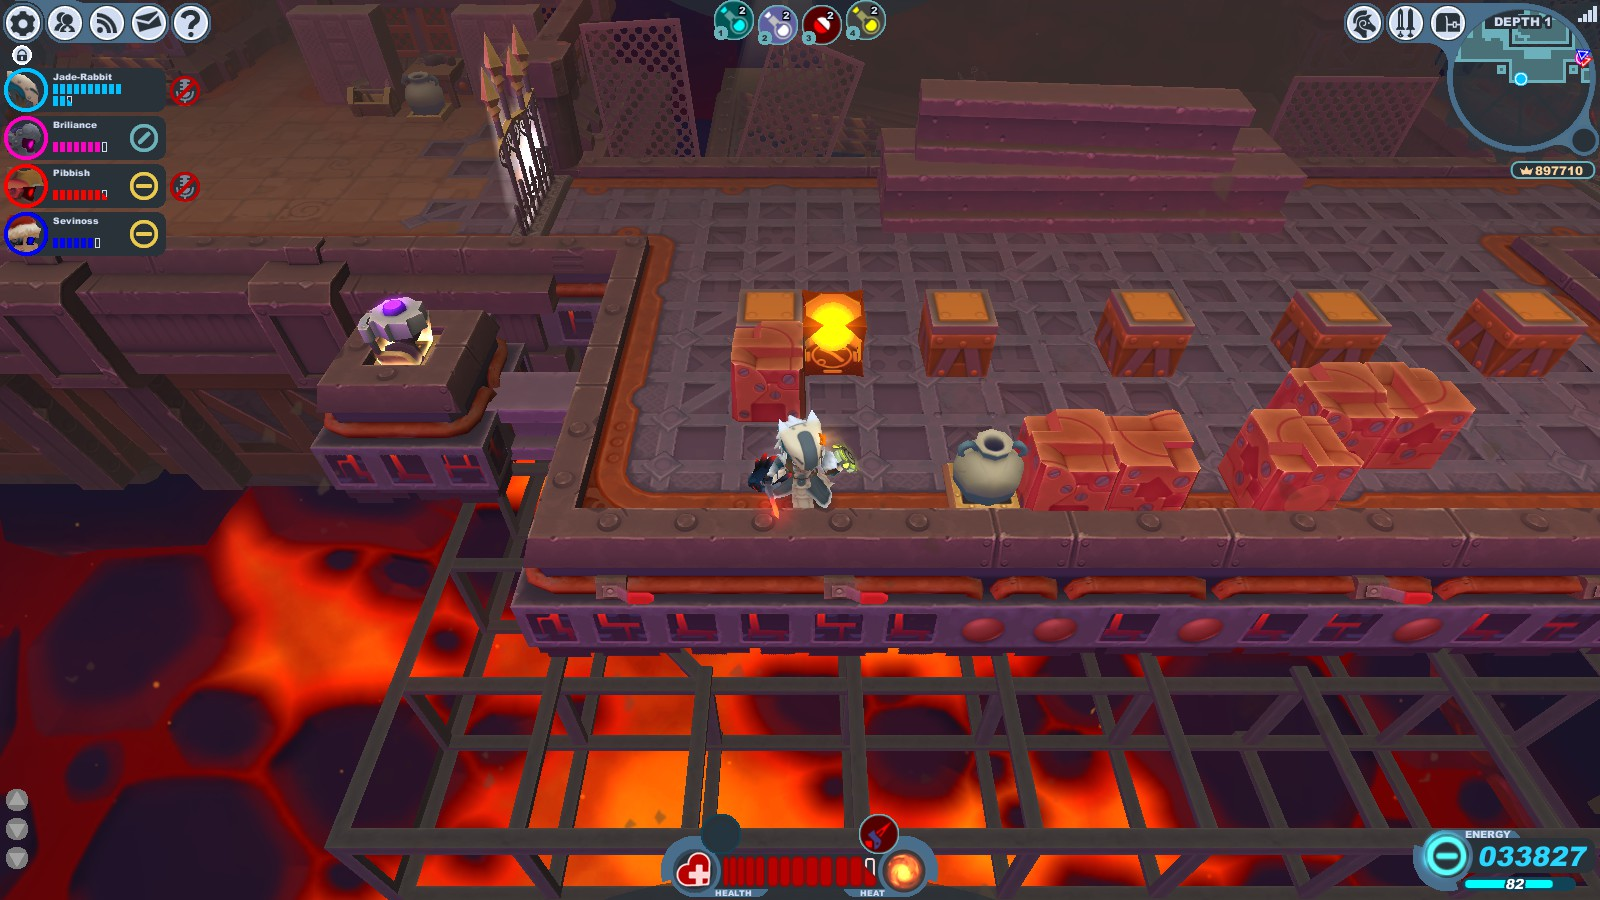
|
Clockwork Tunnels | Clockwork Tunnels. | Notes:
This room has been encountered in tier 1 and 2. A room with Gremlin tools. The room looks like it's under construction. | ||||||||||||||||
| N/A | 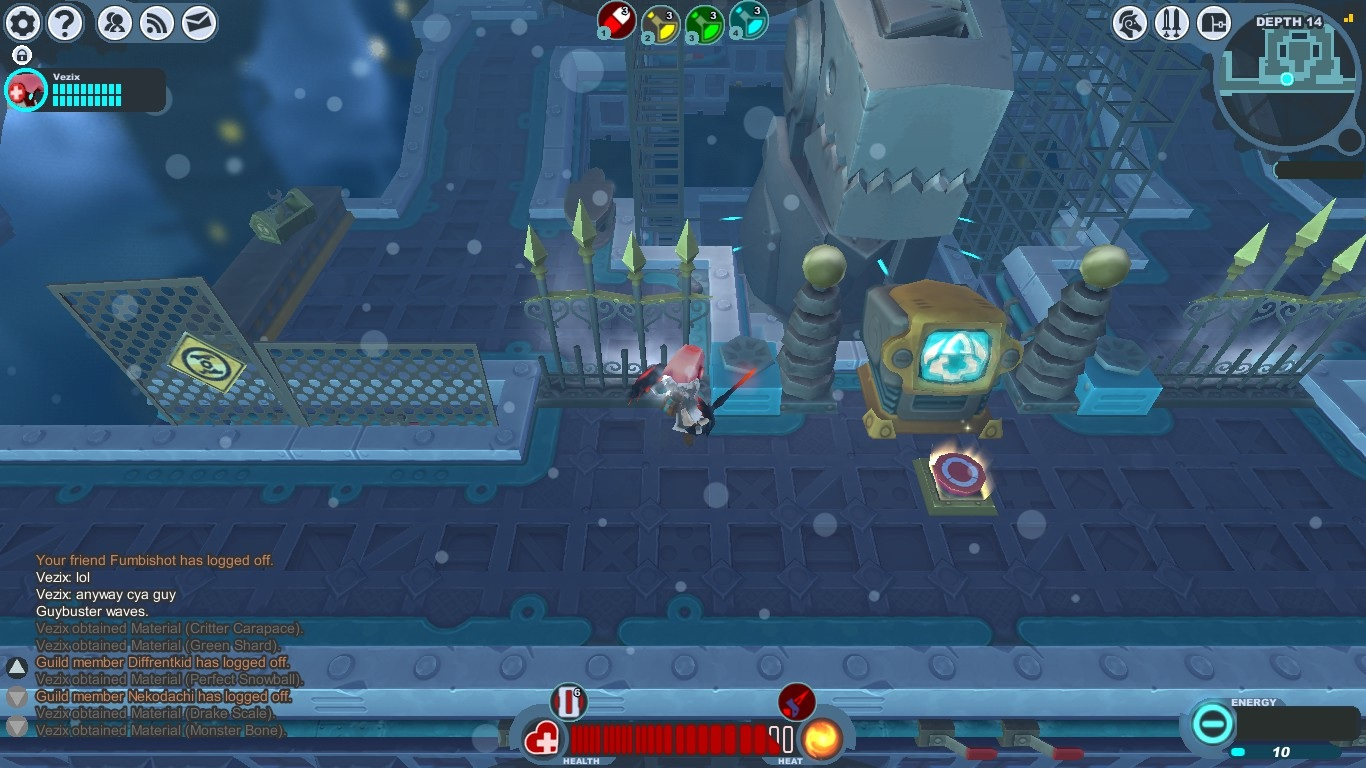
|
Clockwork Tunnels | Cooling Chamber | Notes:
This room has been encountered in tier 2. A construction site for the Roarmulus Twin. The button opens the gates and spawns 2 Gun Puppies. Behind them are 2 Treasure Boxes surrounded by Rocket Blocks found in the Ironclaw Munitions Factory. | ||||||||||||||||

|
|
Clockwork Tunnels | Power Complex: Gremlin Grounds | Notes:
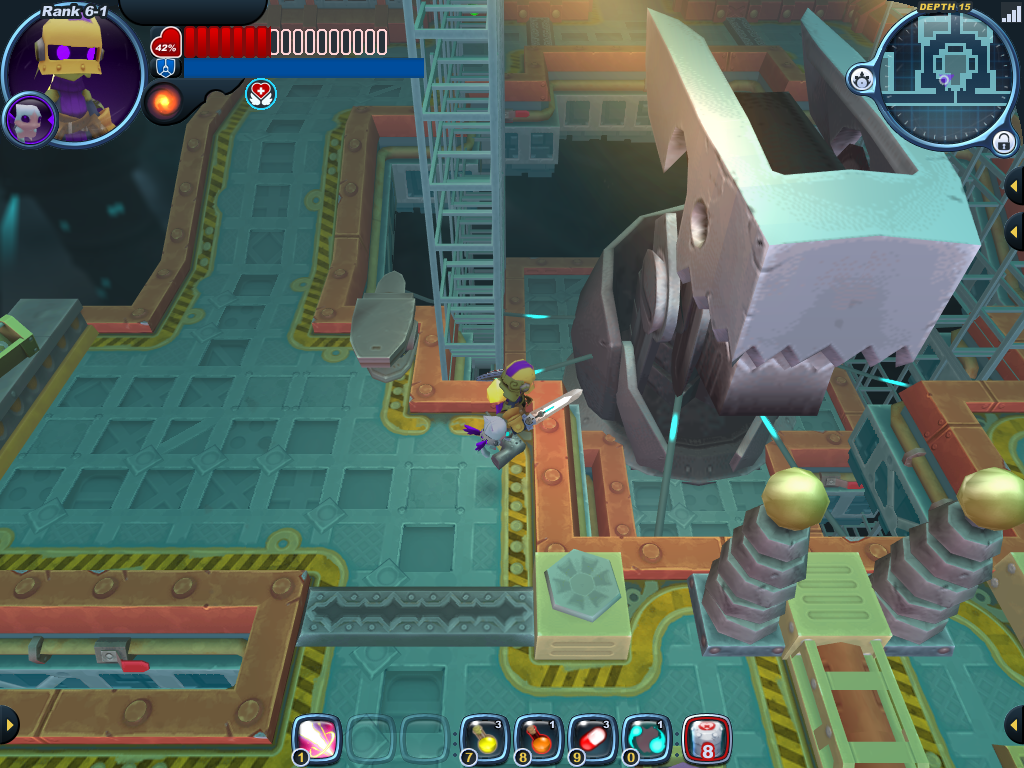
This variant is always encountered in the 6-1 A construction site for the Roarmulus Twin. This scenario have this area at the top of the map, touching the screen will show this: | ||||||||||||||||

|
|
Clockwork Tunnels | Blast Furnace: Slimeway | Notes:
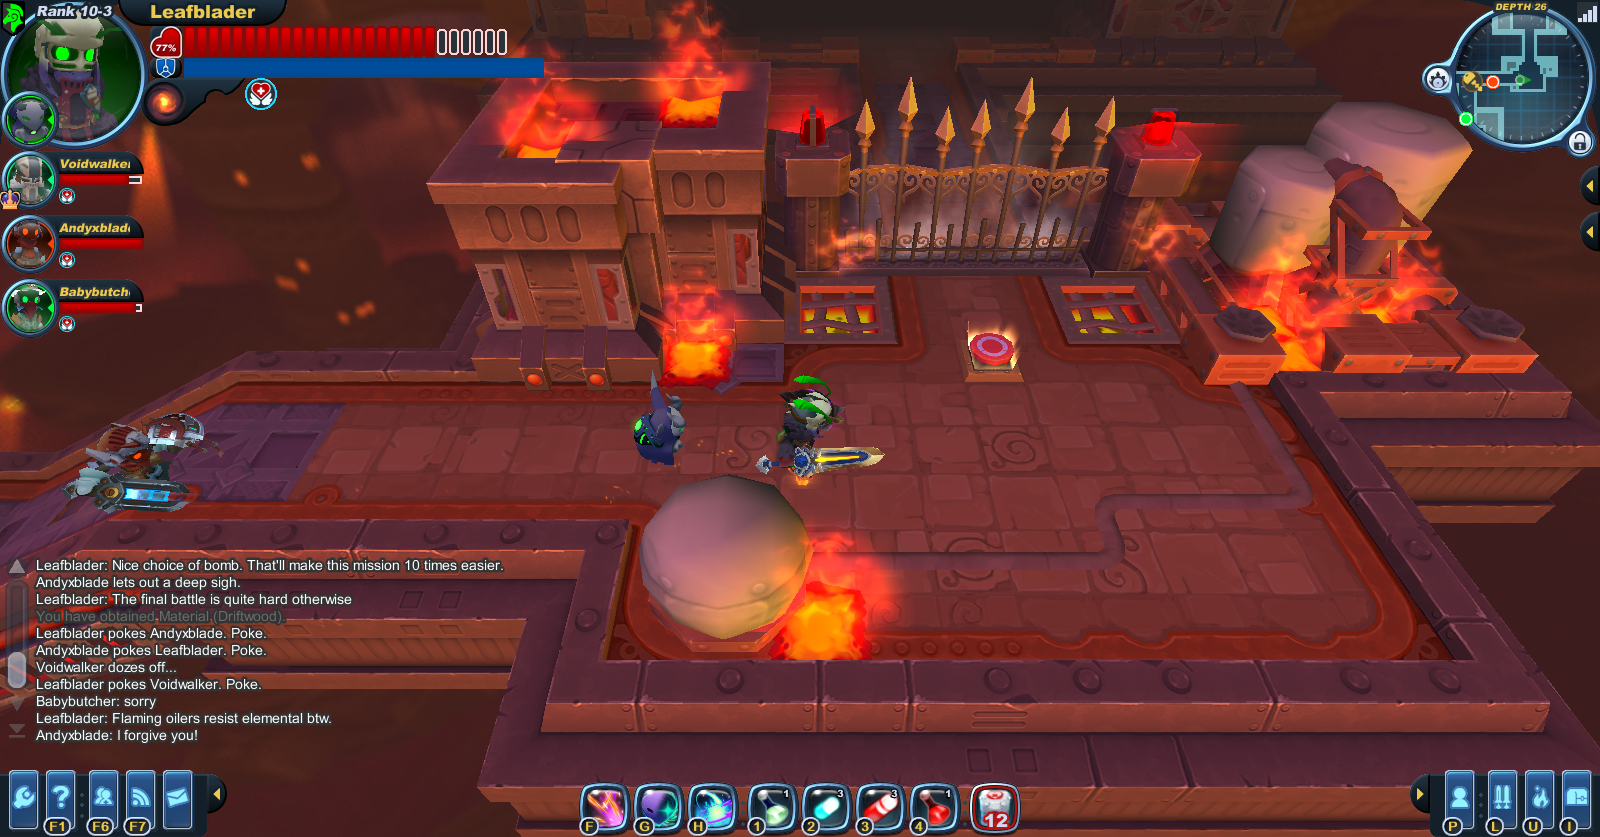
This room can always be encountered in 9-2 After pressing the button, a siren alarm will sound. The same alarm as the one before fighting against the Roarmulus Twins. | ||||||||||||||||
| N/A | 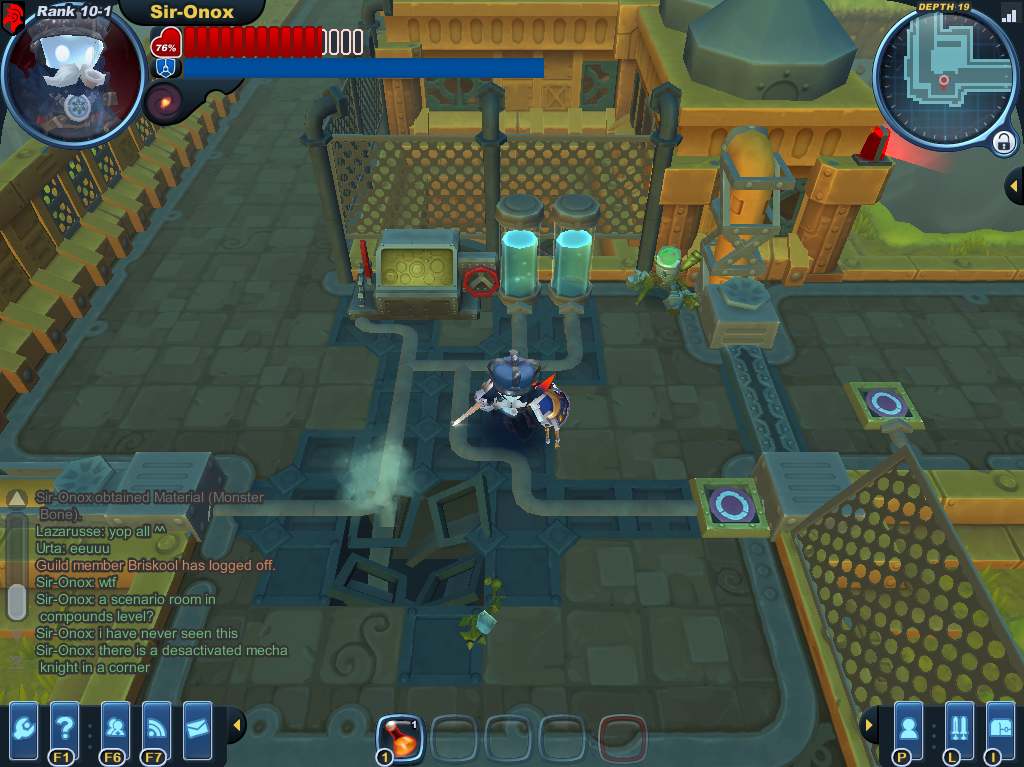
|
Compound | Ravenous Warrens | Notes:
This room has been encountered in tier 3. An abandoned mini lab likely used by Gremlins; there is a deactivated Mecha Knight in a corner and a piece of a Retrode's arm on the floor. With futher inspection if the player goes to the left to the passage and goes near the gated area in the back reveals that the pipes leaded from the unknown chemicals in the tubes were once being used on a Gremlin who is dead and may have been left to die or died becuase of the experiments that were being taken place. | ||||||||||||||||

|
|
Compound | Frozen Compound: Creeping Colony | Notes:
This room has been encountered in tier 3. An abandoned Gremlin panel with some small cages. | ||||||||||||||||
| N/A | 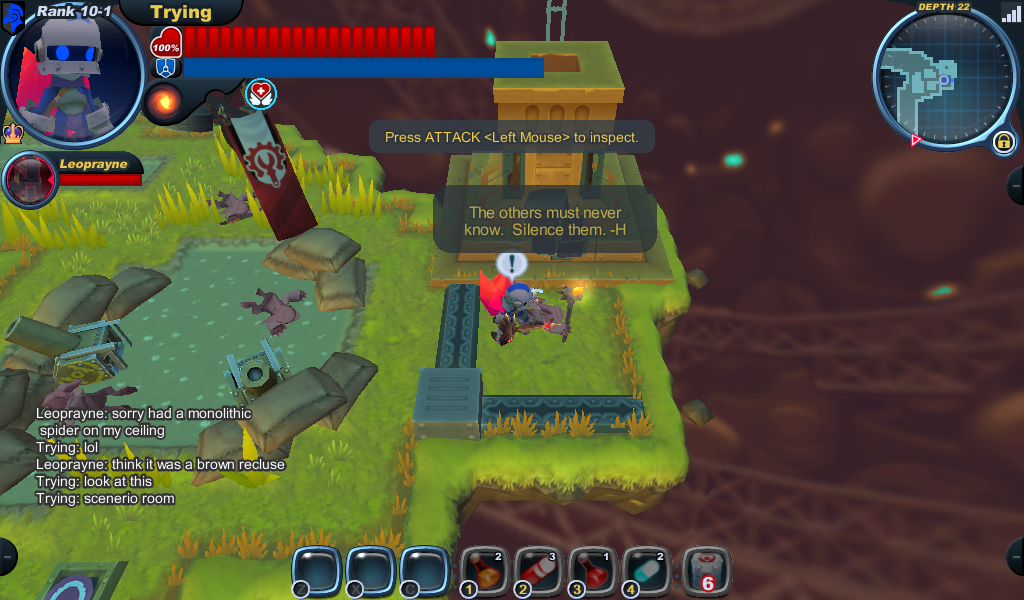
|
Compound | Any level from Compound |
Notes:
This room has been encountered in tier 3. A gremlin pillbox with dead gremlins and mortars. The dead mender has a note that says: The others must never know. Silence them. -H. After reading it a Ghostmane Stalker appears. | ||||||||||||||||
| N/A | 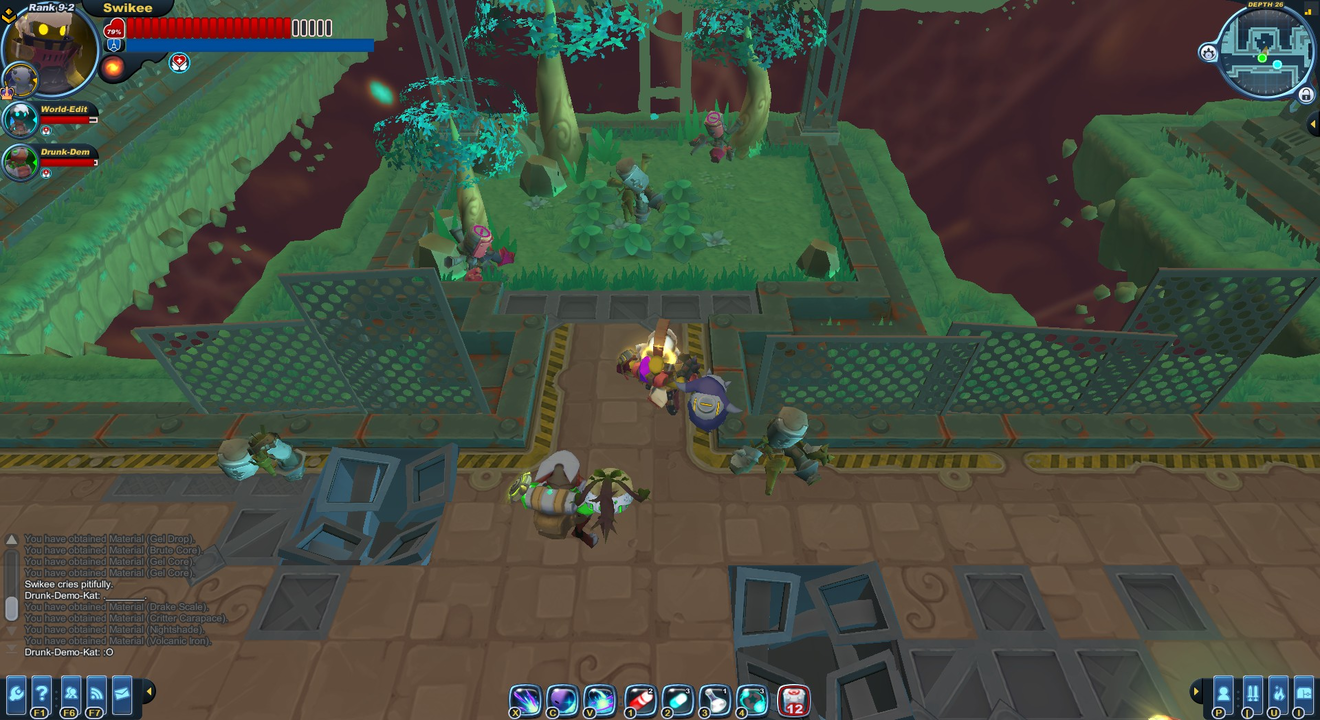
|
Compound | Any level from Compound |
Notes:
This room has been encountered in tier 2 and 3. A statue of a Mecha knight with mismatched limbs. The Energy Mecha Knights in the area can be activated for the usual price of 5 energy, a potential combat bonus. To see this room in a freeze theme check this and this files. | ||||||||||||||||
| N/A | 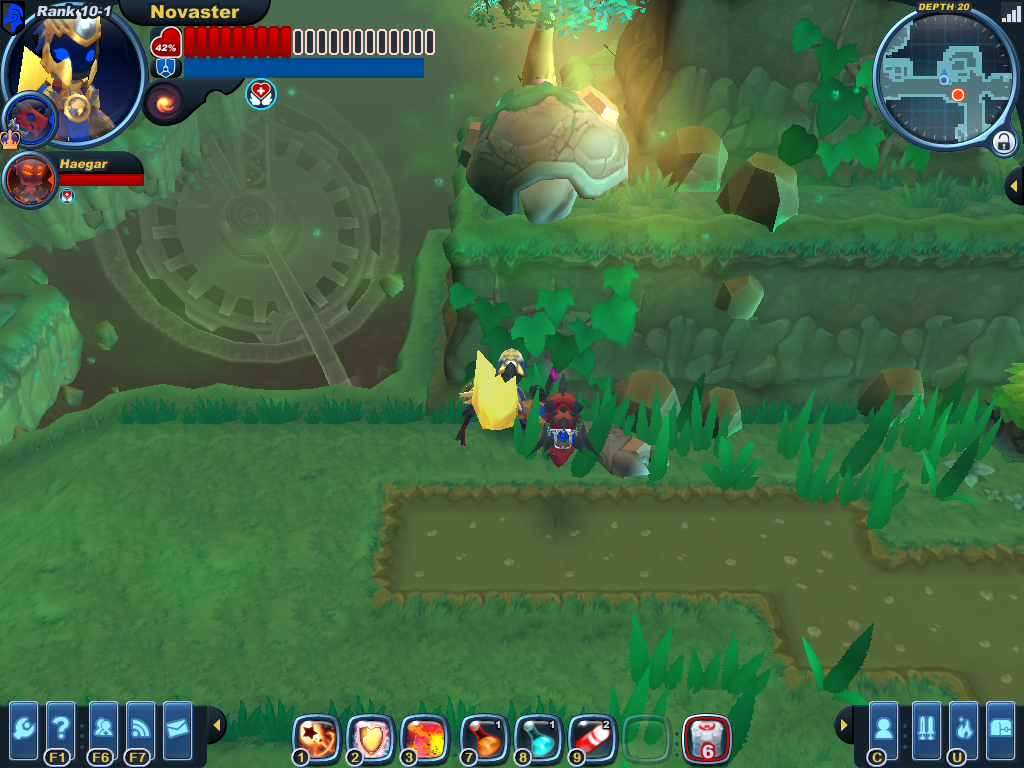
|
Compound | Blighted Compound: Ravenous Warrens | Notes:
This room has been encountered in tier 3. A Tortodrone rests high on a cliff, surrounded by animated twilight lights. There are some treasure boxes to the right. | ||||||||||||||||
| N/A | 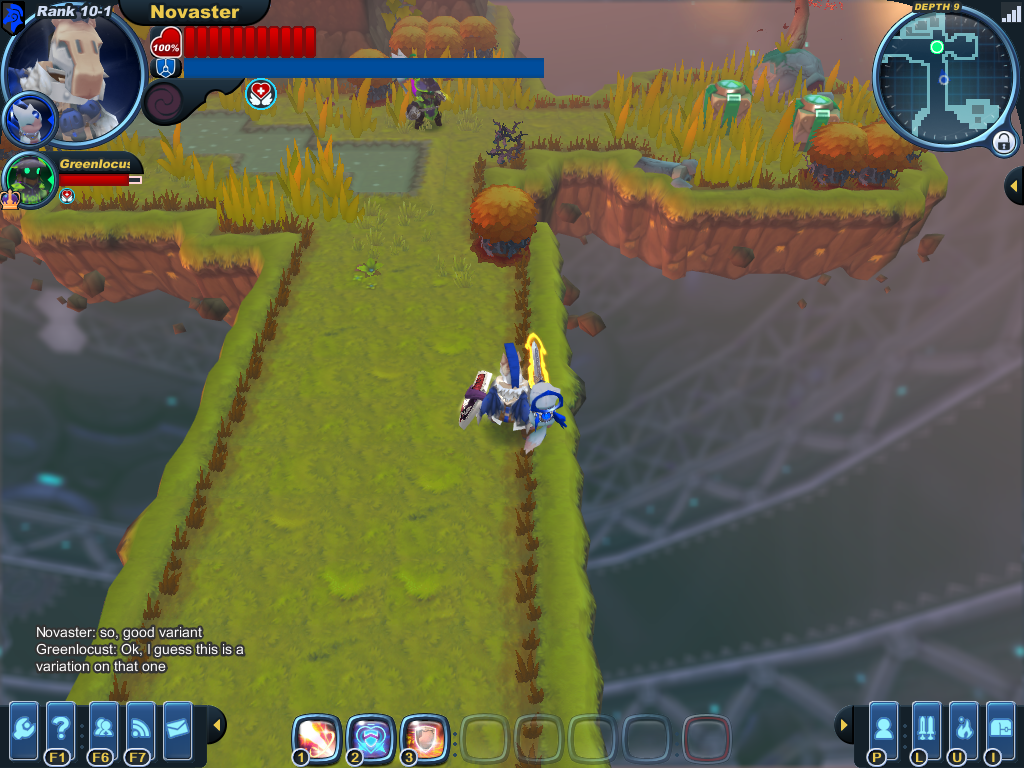
|
Compound | Shocked Compound: Chittering Burrows | Notes:
This room has been encountered in tier 2. A Tortodrone rests on a platform. There are some treasure boxes. | ||||||||||||||||
| N/A | 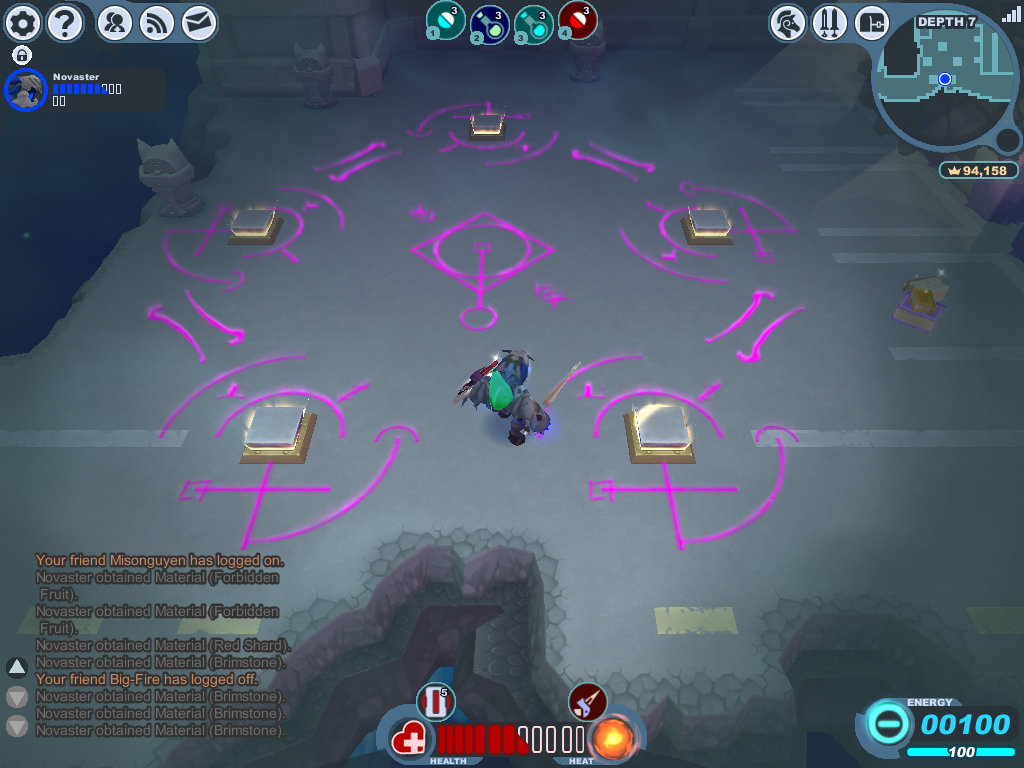
|
Devilish Drudgery | Overtime, Every Time, Hiring Freeze, and Everybody's Fired |
Notes:
This room can be encountered at any tier. Placing the 5 statues on the 5 buttons completes the ritual. Some of the possible spawns after completing the ritual include: Crowns, Fiend-related drops (like The sparkling book pile reads: 5 Ways to Appease your Pit Boss. | ||||||||||||||||
| N/A | 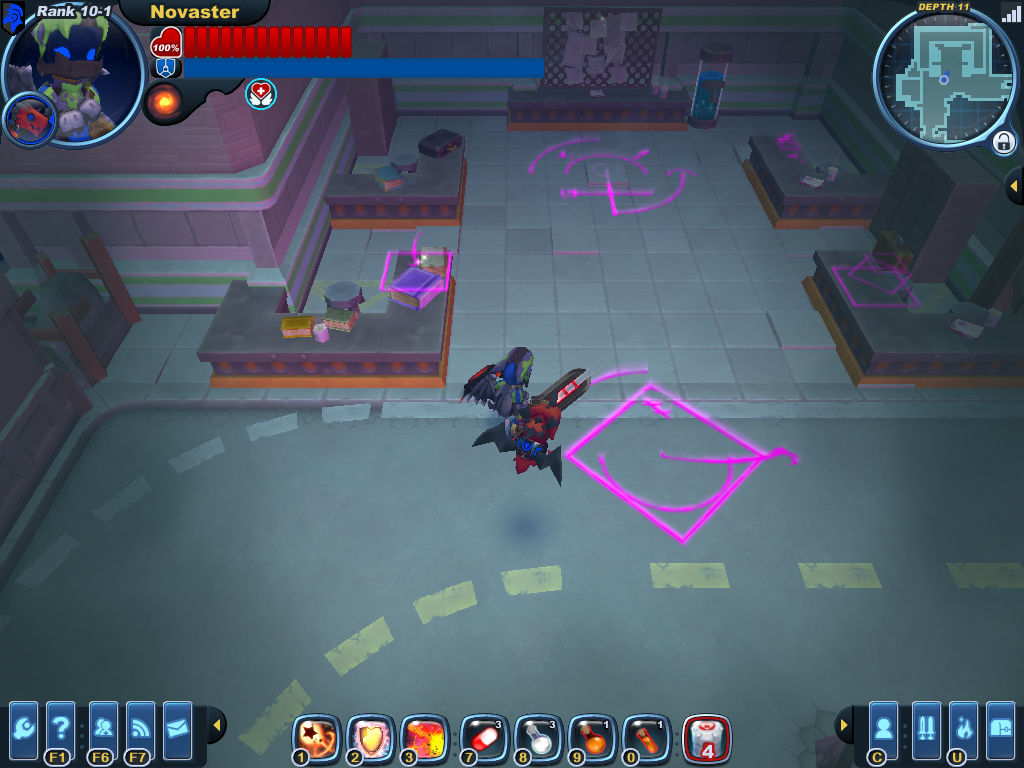
|
Devilish Drudgery | Any level from Devilish Drudgery |
Notes:
This room has been encountered in tier 2. A suspicious looking fiend activity. Several fiends, particularly Devilites or Gorgos, can spawn, ready to glower at any knights passing through. Fiendish Self-Help book reads: How do draw infernal symbols. Board reads: A Notice to All Employees: Due to continual under-performance, there will be no paid holidays or free coffee in the break room. No wonder they're so angry! | ||||||||||||||||
| N/A | 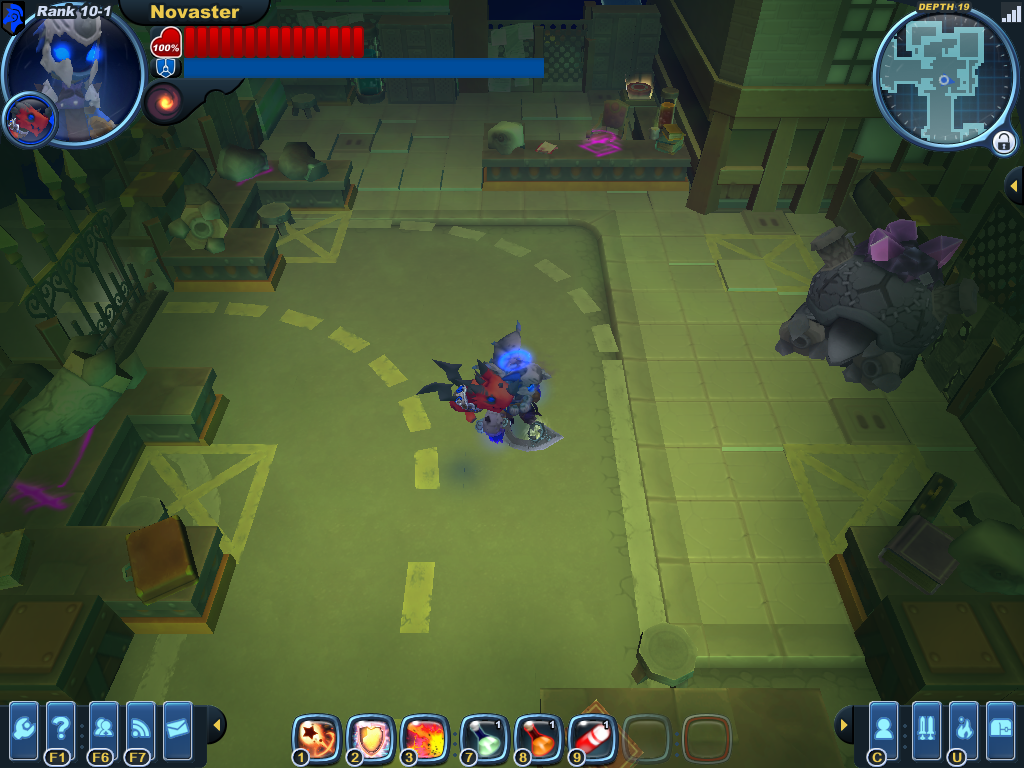
|
Devilish Drudgery | Overtime, Every Time and Toxic Workplace |
Notes:
This room has been encountered in tier 2 and 3. A suspicious looking fiend activity. Several devilites spawn with a silkwing, ready to glower at any knights passing through. They seem to be shoving Dark Matter into a stitched-together Tortodrone. The button near the top lowers the gate. A closer look at the tortodrone can be seen here. To check this room in a different theme check this and this forum's comment. | ||||||||||||||||
| N/A | 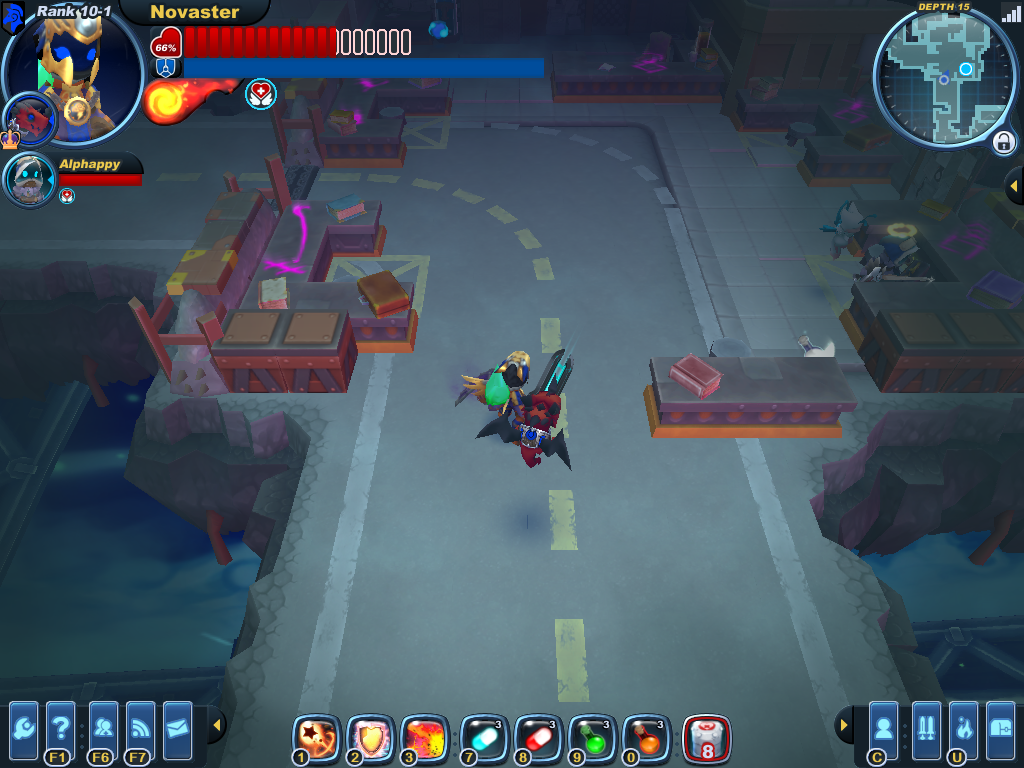
|
Devilish Drudgery | Wired for Synergy | Notes:
This room has been encountered in tier 2 and 3. A suspicious looking fiend activity. Several devilites spawn with a silkwing, ready to glower at any knights passing through. The button near the top lowers the gate. | ||||||||||||||||

|
|
Devilish Drudgery | Overtime, Every Time | Notes:
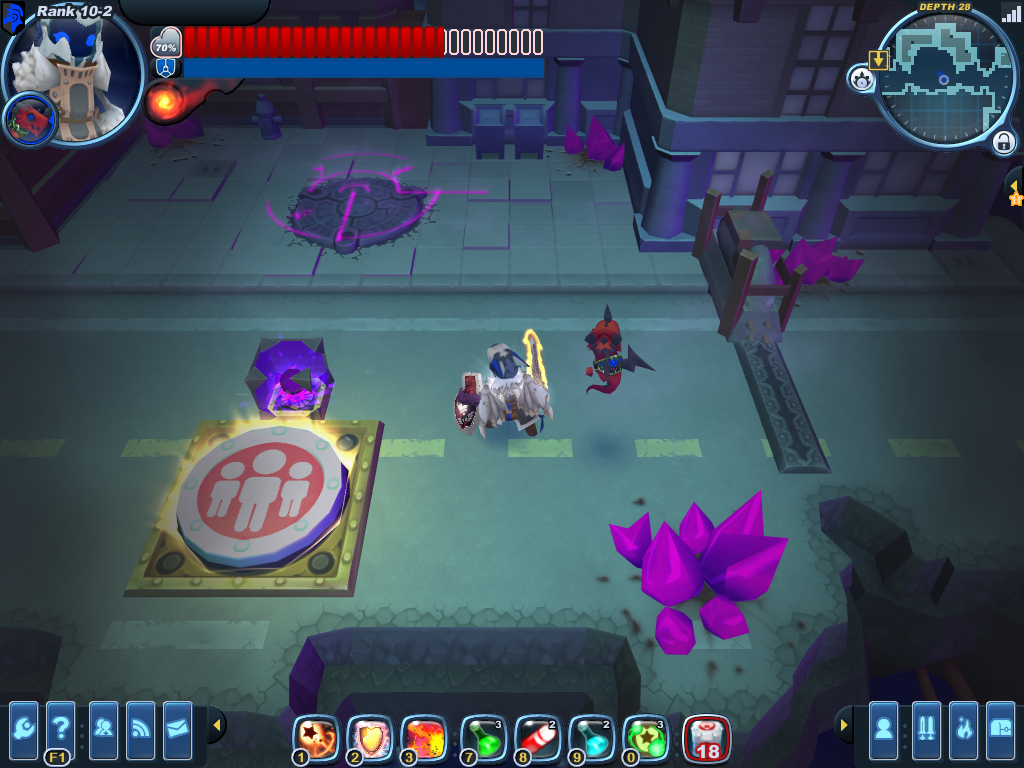
This area only appears during the March of the Tortodrones event. This room has been encountered in tier 3. A party button waits beyond aesthetic piles of dark matter. The area features a single Vortex Block. Several monsters spawn to fight, including Devilites, Trojans, and Howlitzers. The bulk glyph reward for this area seems to be rather small. | ||||||||||||||||

|
|
Devilish Drudgery | Overtime, Every Time | Notes:
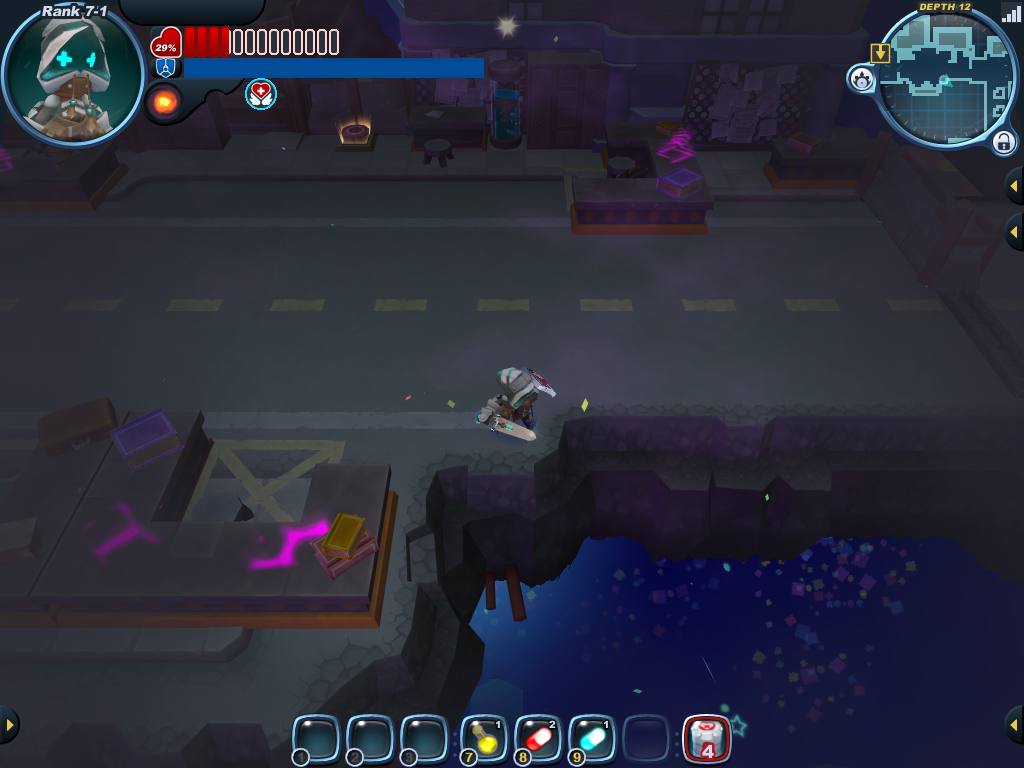
This room can always be encountered in 5-1 | ||||||||||||||||

|
|
Devilish Drudgery | Everybody's Fired | Notes:
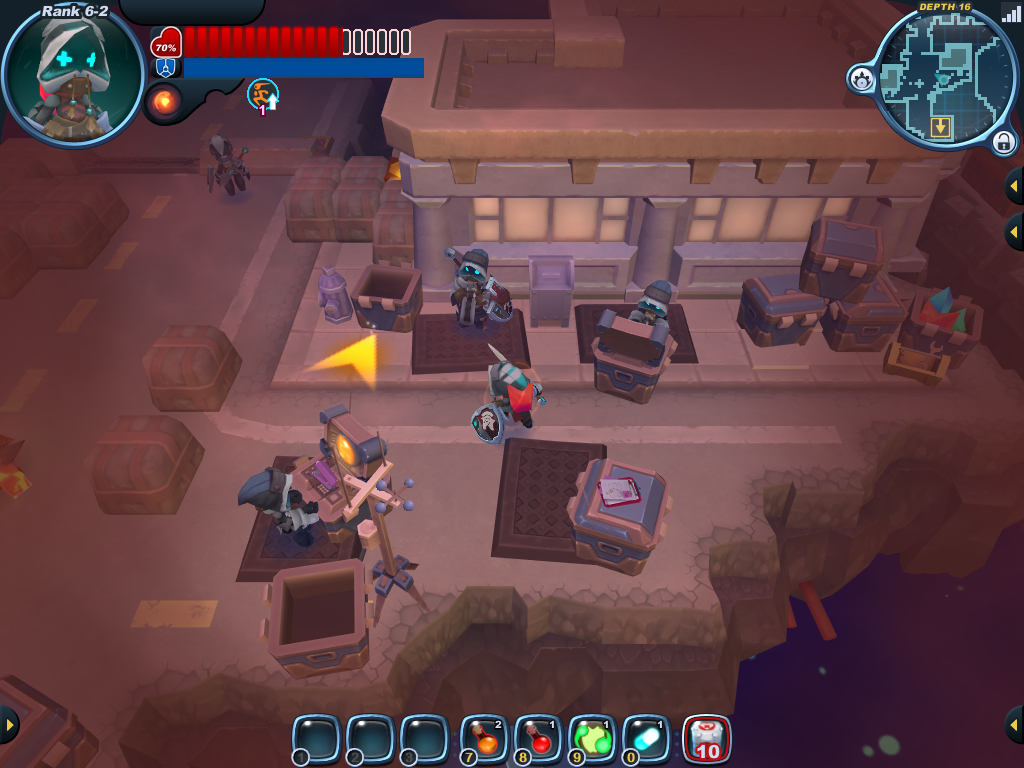
This room can always be encountered in 6-2 Geo Knights:
Knights guarding the doors:
Knight at the right side with Recon armor:
| ||||||||||||||||
| N/A | 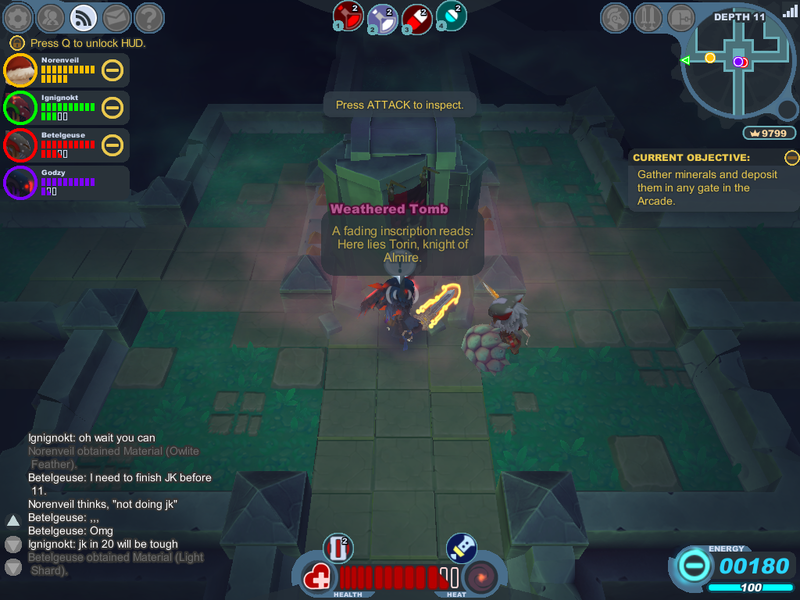
|
Graveyard | Where Monsters Fear to Tread | Notes:
This room has been encountered in tier 2 and 3. This room resembles a mausoleum. The information module mentions Torin from the 10-2 | ||||||||||||||||
| N/A | 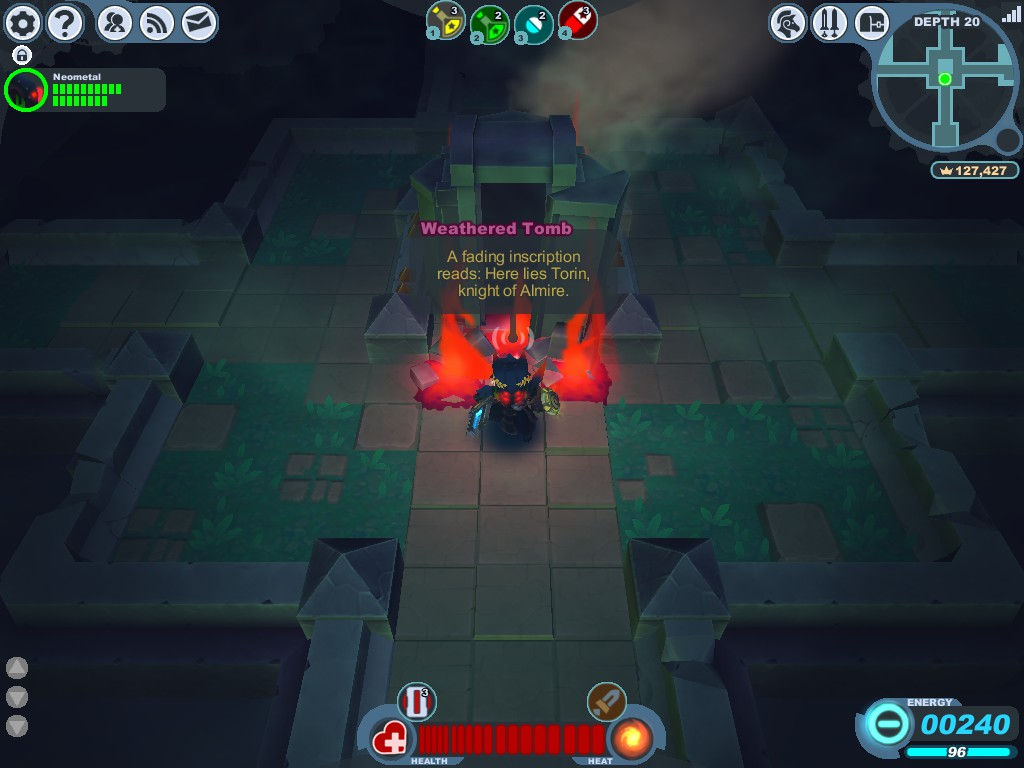
|
Graveyard | Where Monsters Fear to Tread | Notes:
This room has been encountered in tier 2 and 3. This room resembles a mausoleum. This variation includes Shadow Fire. The information module mentions Torin from the 10-2 | ||||||||||||||||
| N/A | 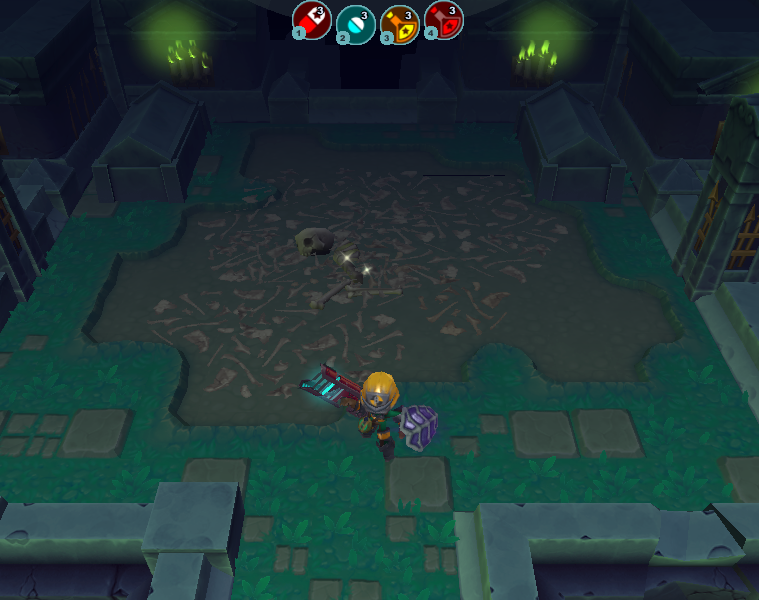
|
Graveyard | Where Monsters Fear to Tread | Notes:
This room has been encountered in tier 3. A shining spark on the ground. Stepping off the grass onto dirt will cause damage (roughly half a bar of health) and inflict poison. You cannot activate the sparkling tile if you continue to shield through. Drops a | ||||||||||||||||
| N/A | 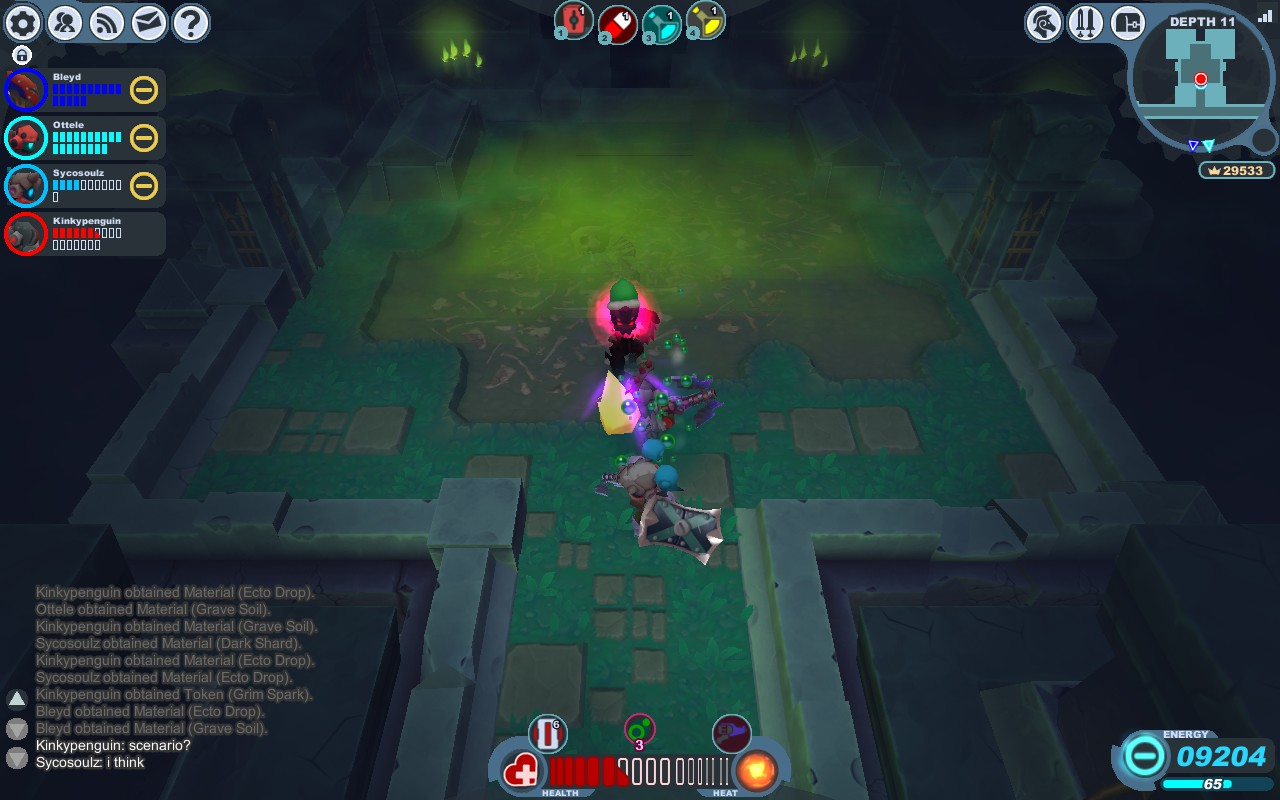
|
Graveyard | Where Monsters Fear to Tread | Notes:
This room has been encountered in tier 2. A poisonous mist that may be miasma. It poisons anyone who tries to walk through it. | ||||||||||||||||
| N/A | 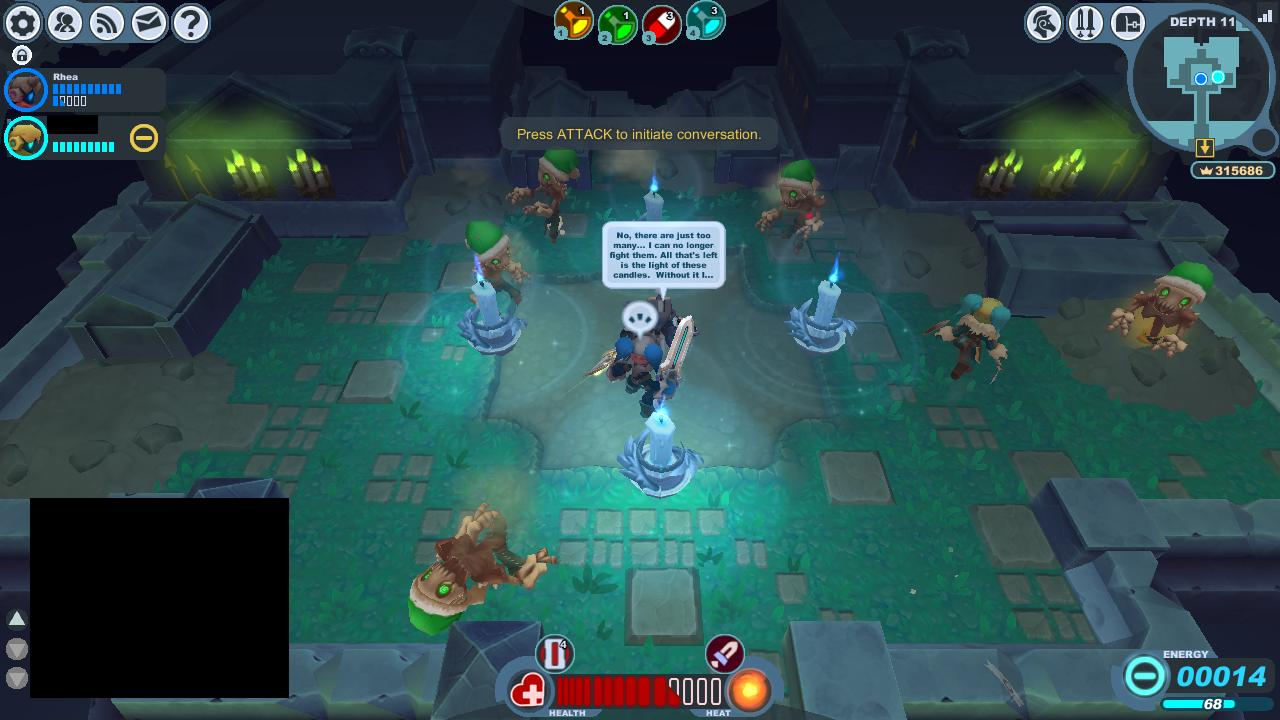
|
Graveyard | Where Monsters Fear to Tread | Notes:
This room has been encountered in tier 2. A knight sitting down exhausted with 4 candles. There are 4 re-spawning Dust Zombies hidden in the dirt piles. The zombies can't enter the area where the candles are lit but their stun breath still works. | ||||||||||||||||
| N/A | 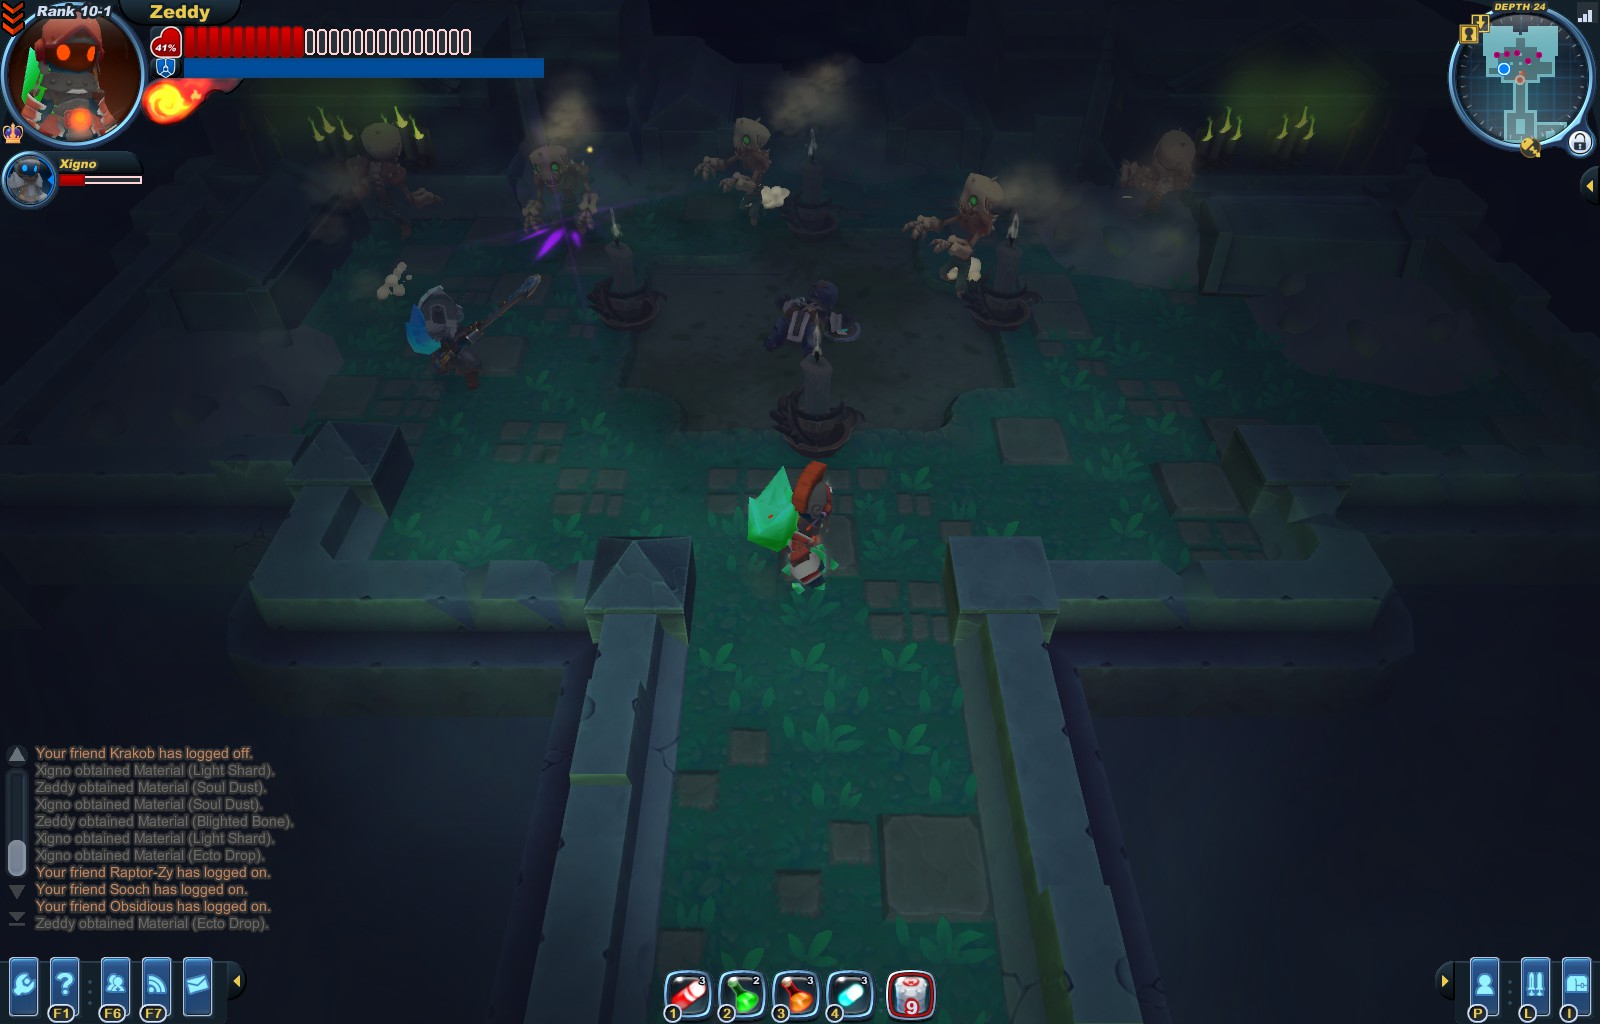
|
Graveyard | Where Monsters Fear to Tread | Notes:
This room has been encountered in tier 3. Similar to the previous but the knight is dead and the candles are unlit. The zombies are not restricted from entering between the candles. Nothing happens when the knight is examined. | ||||||||||||||||
| N/A | 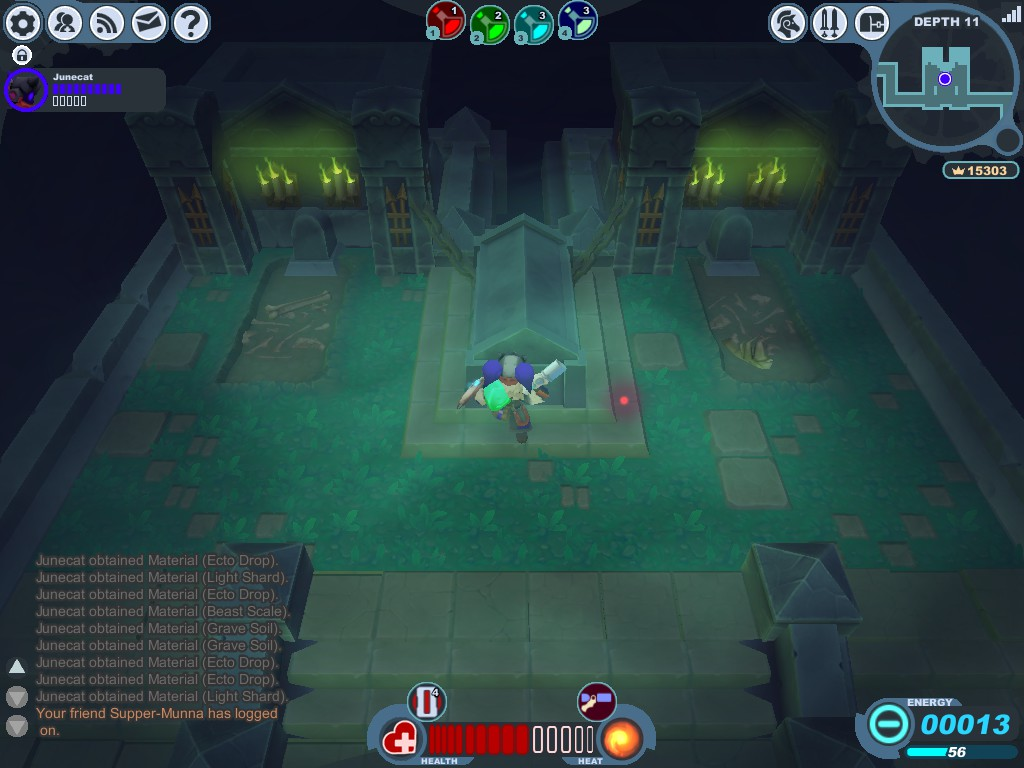
|
Graveyard | Where Monsters Fear to Tread | Notes:
This room has been encountered in tier 2 and 3. A big coffin with chains on the sides. Dust Zombies may spawn upon interaction. | ||||||||||||||||
| N/A | 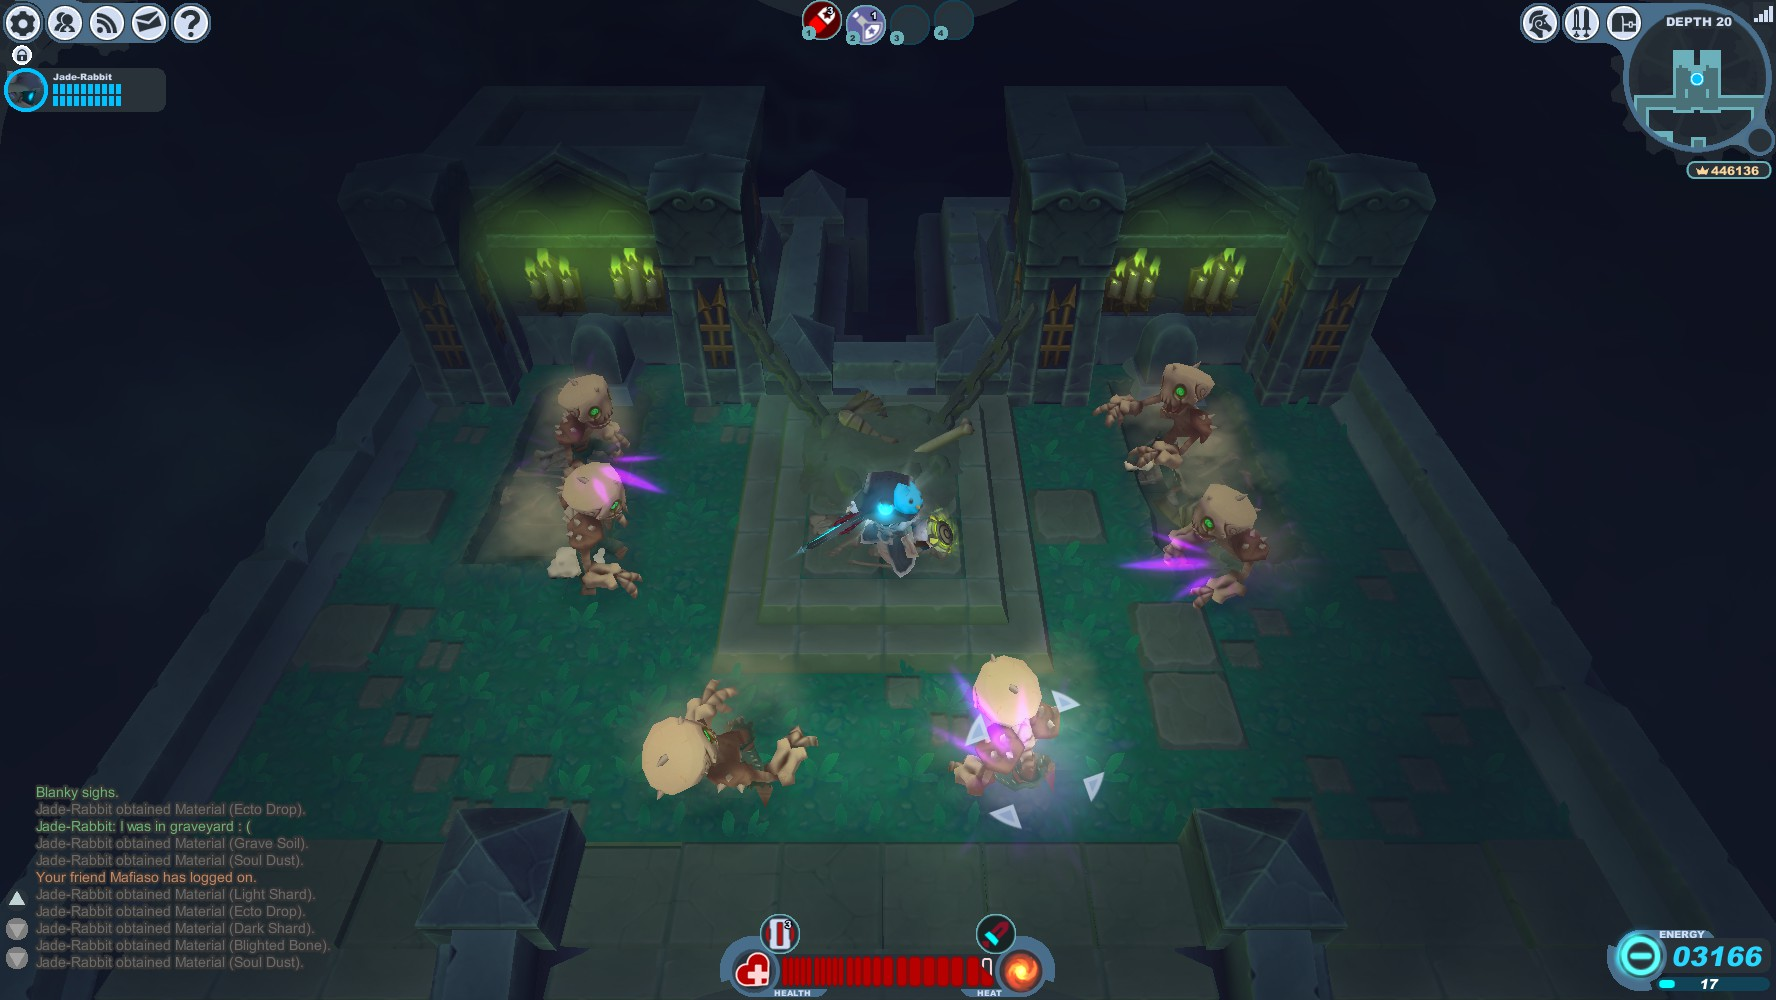
|
Graveyard | Where Monsters Fear to Tread | Notes:
This room has been encountered in tier 3. Similar to the previous room except that the coffin is gone. | ||||||||||||||||

|
|
Graveyard | Where Monsters Fear to Tread | Notes:
This room has been encountered in tier 2. A single big coffin with purple miasma above in the middle of the area. A Carnavon appears when you get near. | ||||||||||||||||

|
|
Lichenous Lair | Fiery Fusion and Shocking Synthesis |
Notes:
This room has been encountered in tier 2. A meteor of some sort that has crash landed into the Clockworks. Upon approaching the meteor, several waves of Lichens will spawn. It have Shadow Fire. | ||||||||||||||||

|
|
Lichenous Lair | Prognosis: Symbiosis | Notes:
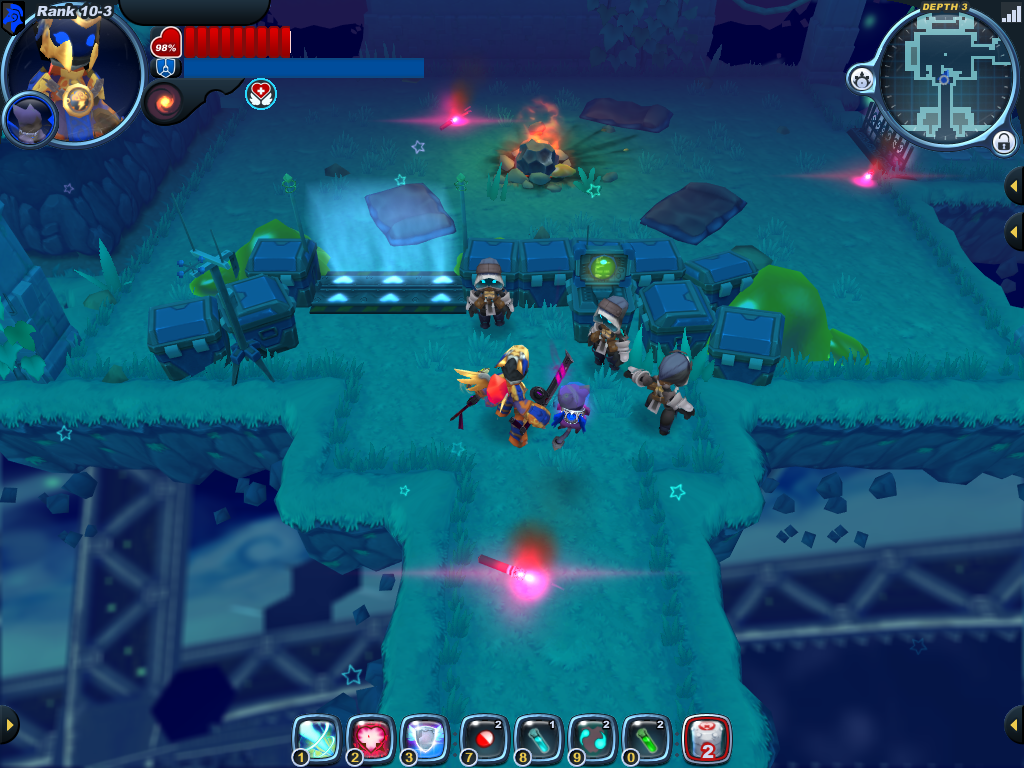
This variant is always encountered in the 3-1 The two Knights standing:
The one Knight shaking:
The two Knights near the Treasure Boxes:
| ||||||||||||||||

|
|
Lichenous Lair | Any level from Lichenous Lair |
Notes:
This room has been encountered in tier 2. A fountain with a totem on the middle. Shoot at the fountain with your gun or with a vial to get crowns. Lichens will sometimes spawn instead of crowns. Wolver Den have a variation of this scenario, the fountain its the same but instead of Lichen, Wolvers will spawn. | ||||||||||||||||

|
|
Scarlet Fortress | Grim Gallery | Notes:
This room can always be encountered in 5-2 Edger is really happy in this library. This NPC's dialogue is contained a speech bubble. It does not trigger a traditional dialogue screen. When spoken to, he will say one of the following:
| ||||||||||||||||
| N/A | 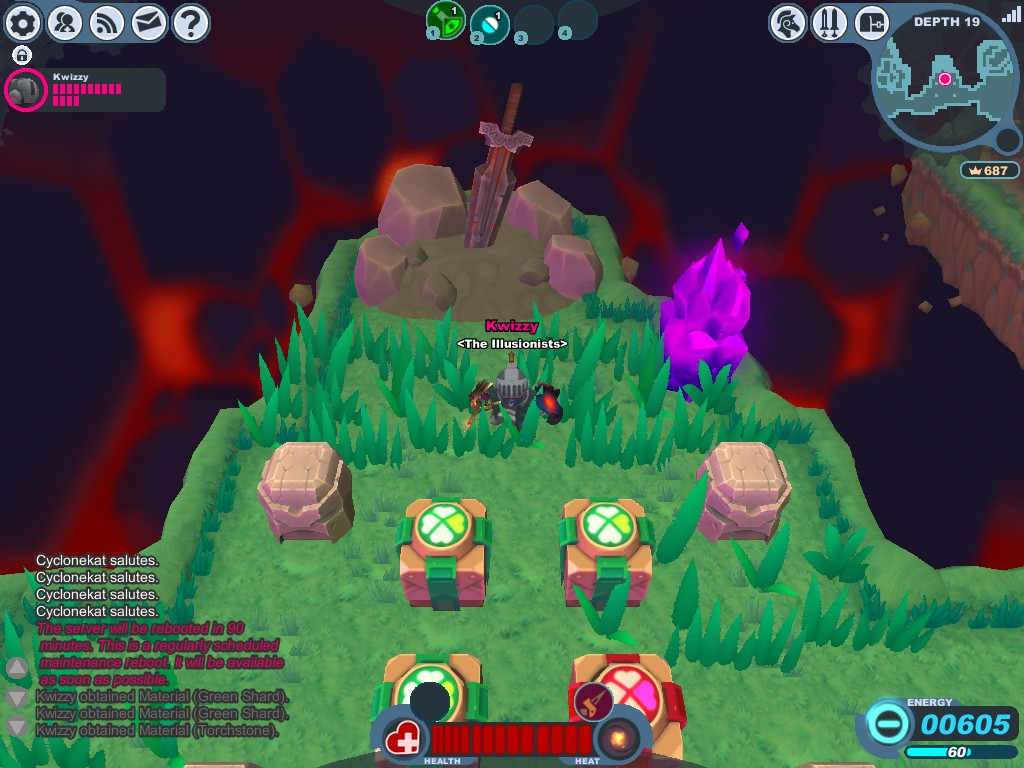
|
Wolver Den | Pack Brutality and Ashes to Ash Tails |
Notes:
This room has been encountered in tier 3. A giant sword on the ground surrounded by statues and boxes. | ||||||||||||||||
| N/A | 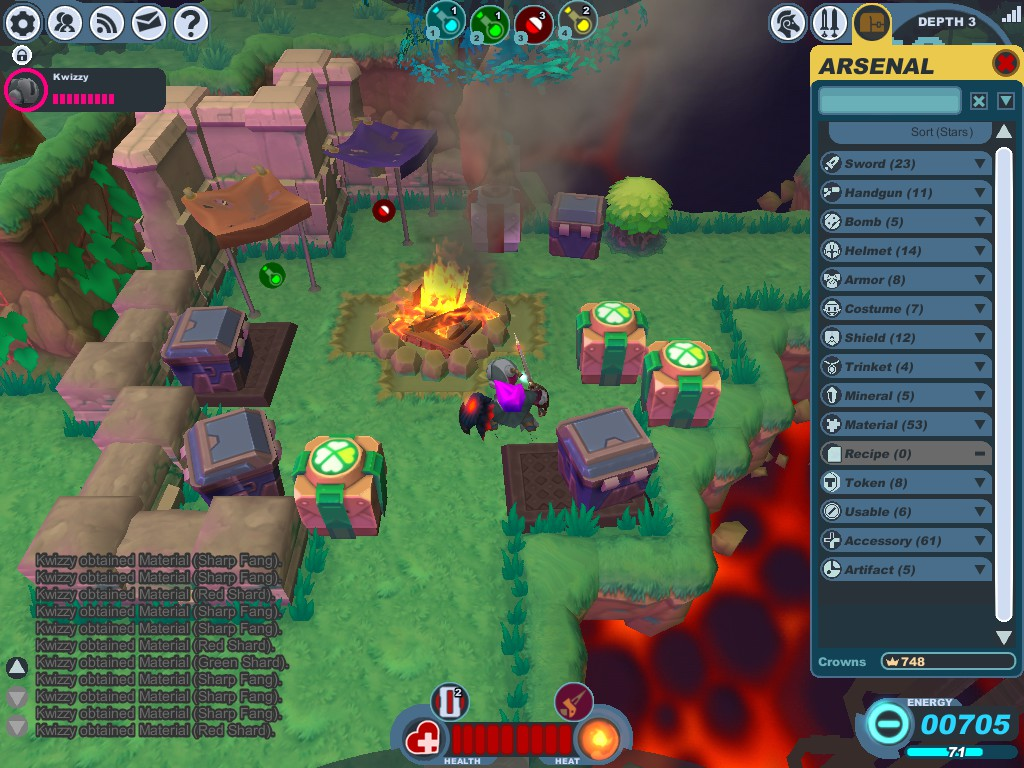
|
Wolver Den | Ashes to Ash Tails and High Voltail |
Notes:
This room has been encountered in tier 1 and 2. A campsite near the exit elevator. The campfire is still burning. Lots of unusable containers, 3 treasure boxes, a heart box, and two pickup items. | ||||||||||||||||
| N/A | 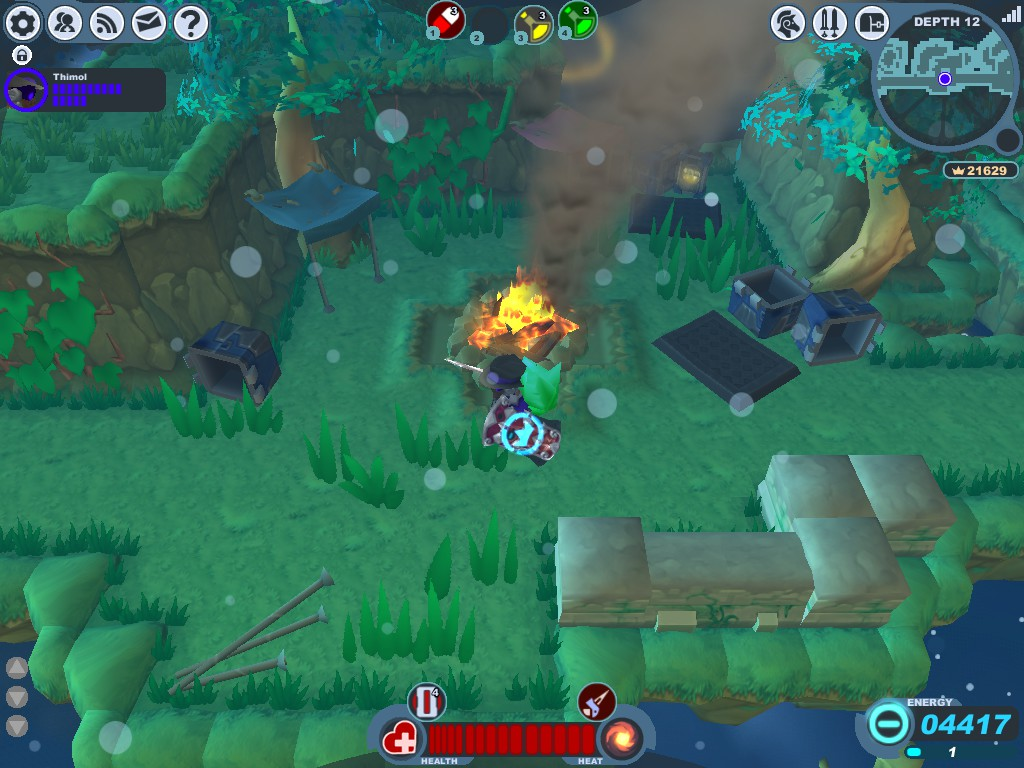
|
Wolver Den | Frosty Fury | Notes:
This room has been encountered in tier 2. A lonely campsite. Could they have possibly abandoned the camp, or did something worse happen? | ||||||||||||||||
| N/A | 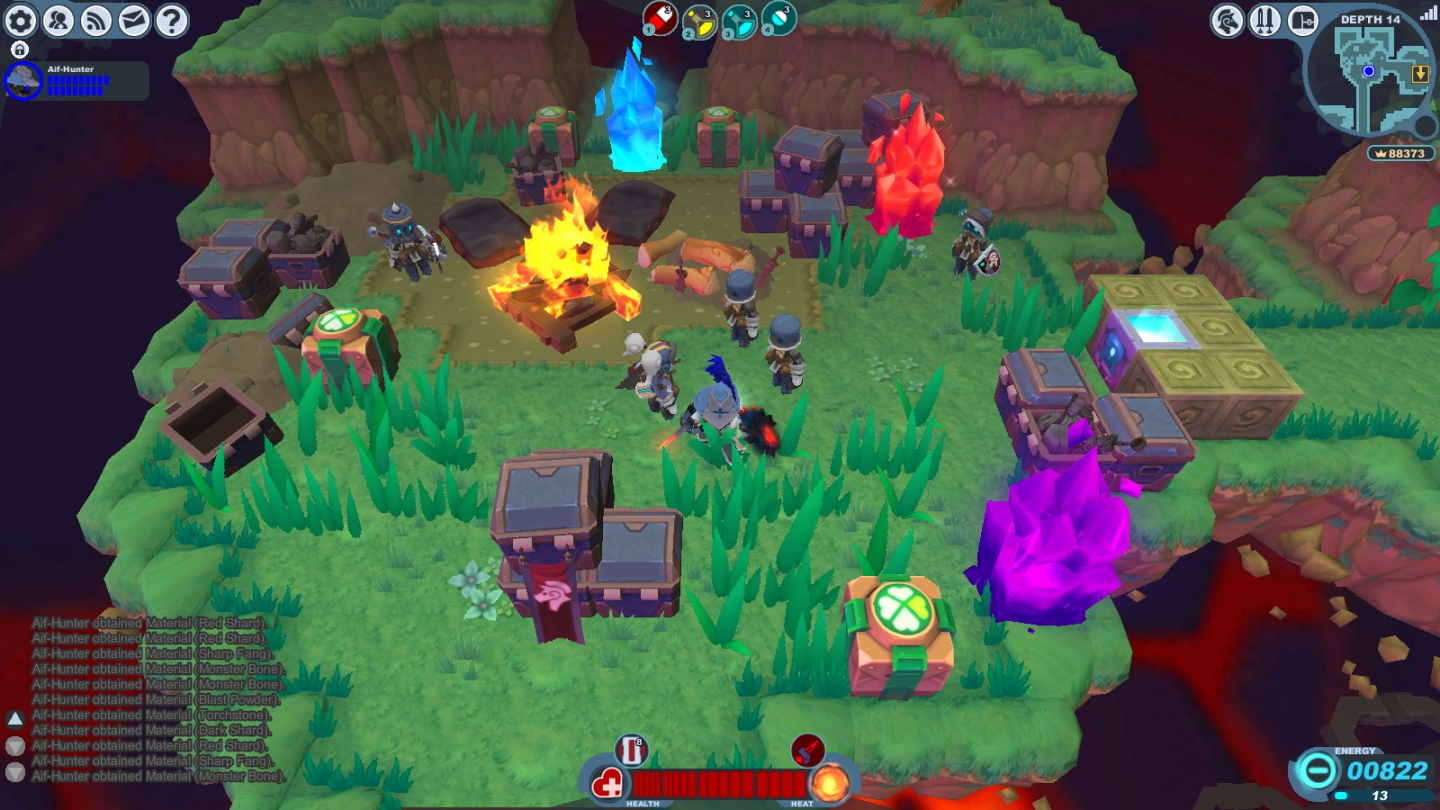
|
Wolver Den | Ashes to Ash Tails, Pack Brutality, and Raving Rabids |
Notes:
This room has been encountered in tier 1 and 2. A camp with some recruits. Each recruit says a variety of things when interacting with. | ||||||||||||||||
| N/A | 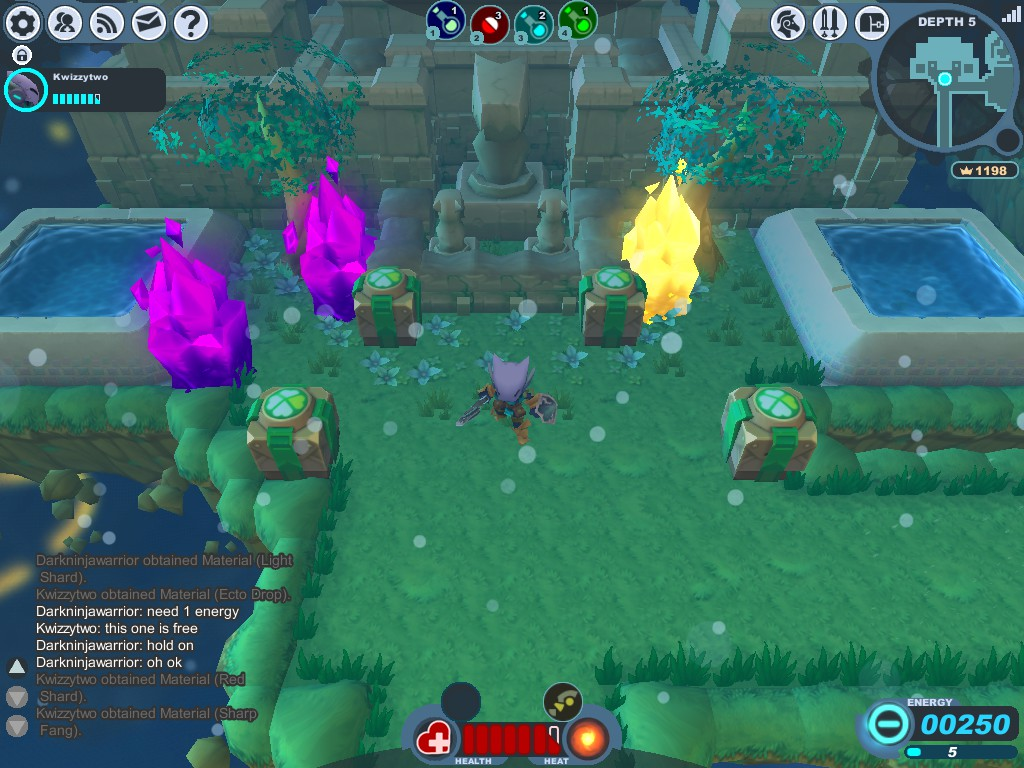
|
Wolver Den | Ashes to Ash Tails and Frosty Fury |
Notes:
This room has been encountered in tier 1. 1 large Gun Puppy statue accompanied by 2 smaller Gun Puppy statues, with one pool on the left and right side. | ||||||||||||||||
| N/A | 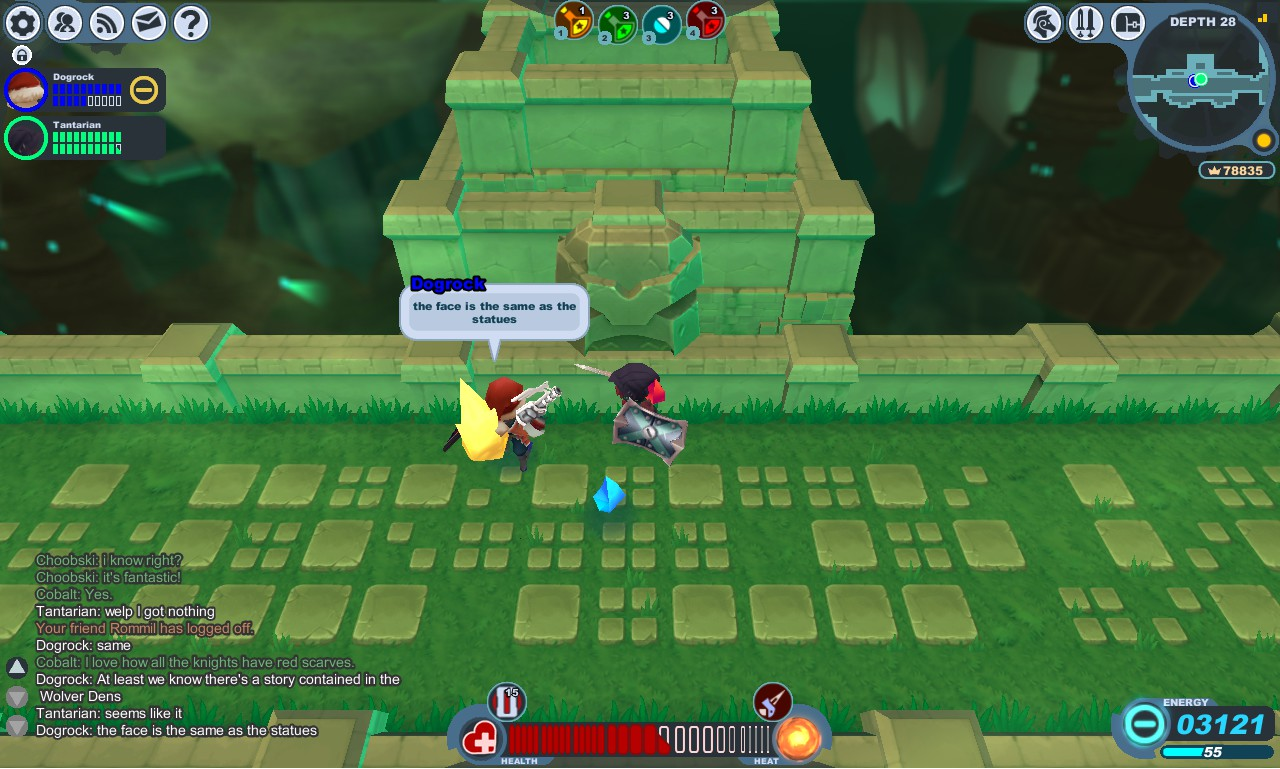
|
Wolver Den | Raving Rabids, Frosty Fury, and Ashes to Ash Tails |
Notes:
This room has been encountered in tier 2 and 3. An ancient structure of some sort. | ||||||||||||||||
| N/A | 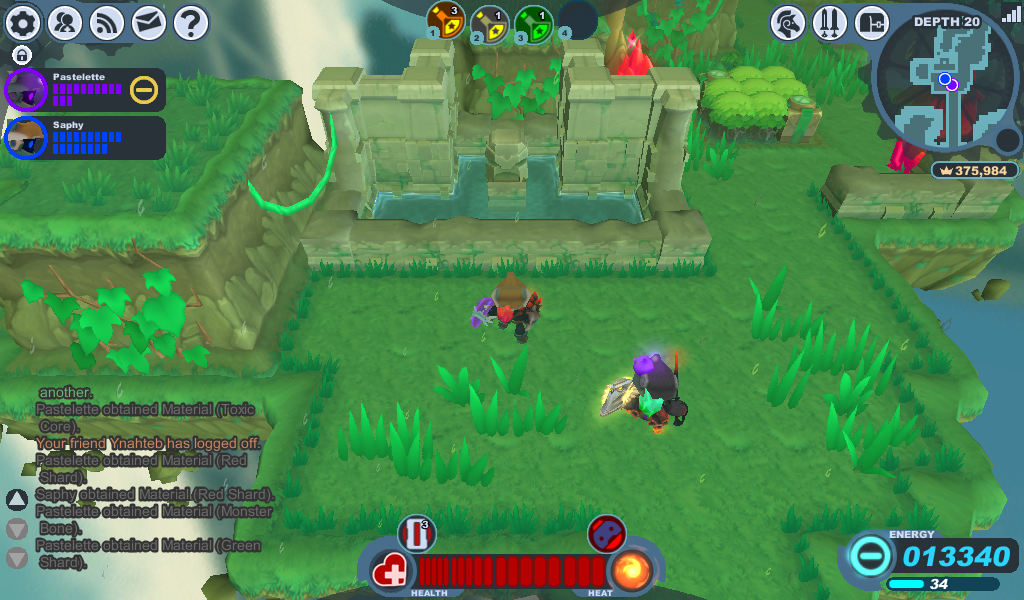
|
Wolver Den | Any level from Wolver Den |
Notes:
This room has been encountered in tier 2 and 3. A fountain with a totem on the middle. Shoot at the fountain with your gun or with a vial to get crowns. Wolvers will sometimes spawn instead of crowns. Lichenous Lair have a variation of this scenario, the fountain its the same but instead of Wolvers, Lichens will spawn. | ||||||||||||||||
| N/A | 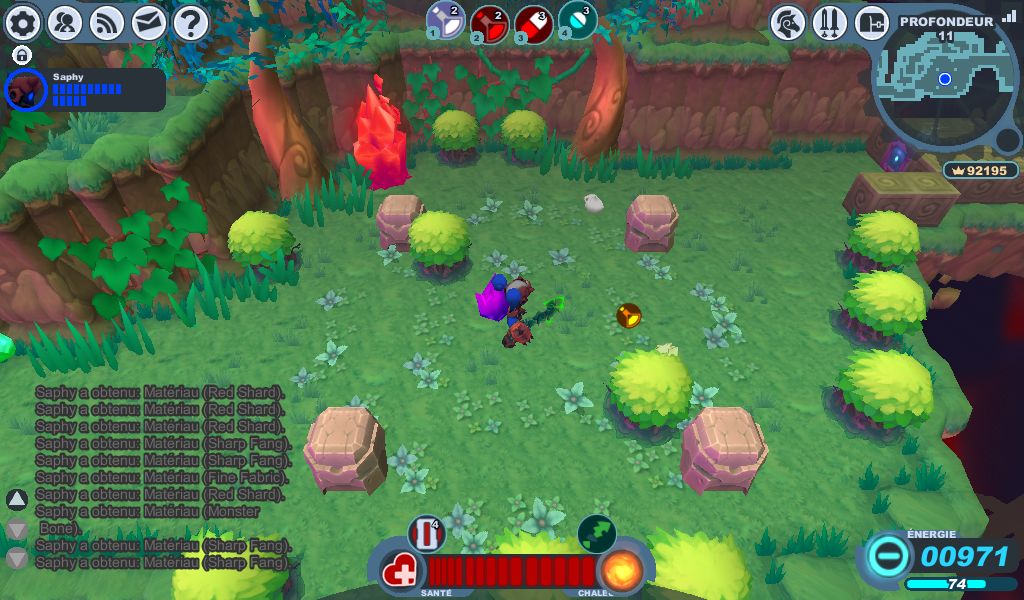
|
Wolver Den | Ashes to Ash Tails and Frosty Fury |
Notes:
This room has been encountered in tier 2. A Snipe meadow with treasure boxes and invisible heart pads. | ||||||||||||||||
| N/A | 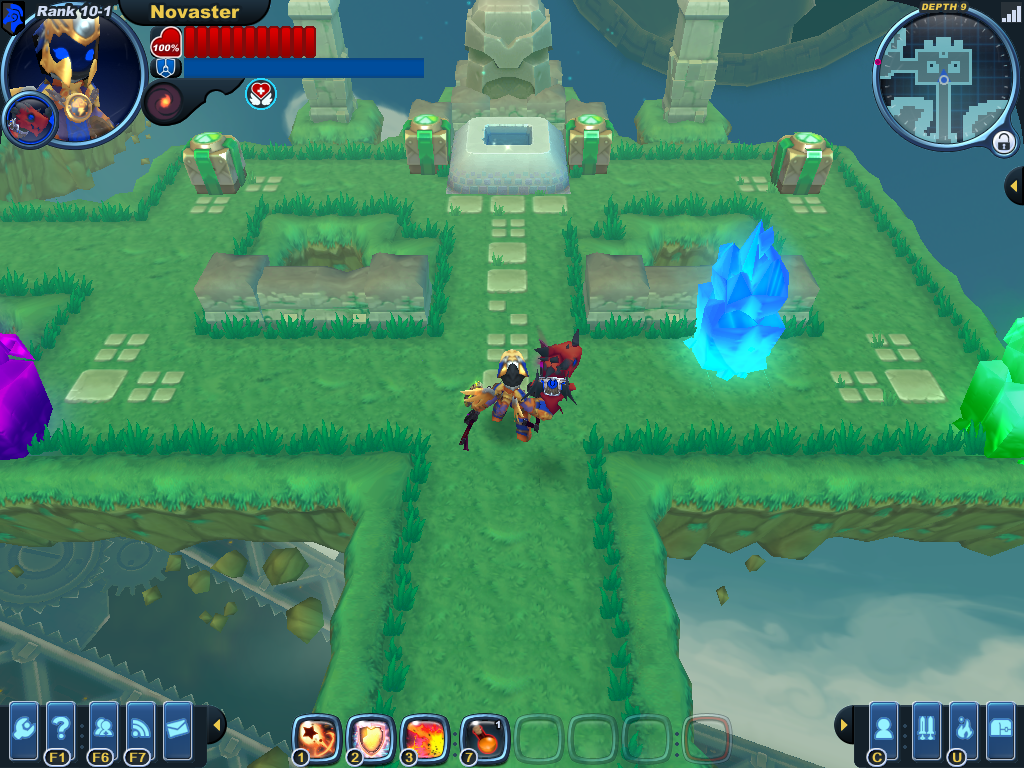
|
Wolver Den | Pack Brutality and High Voltail |
Notes:
This room has been encountered in tier 1 and 2. A sort of wishing well between two pillars. Interacting with the well will cause crowns and heat to appear. This can be done a few times. | ||||||||||||||||
| N/A | 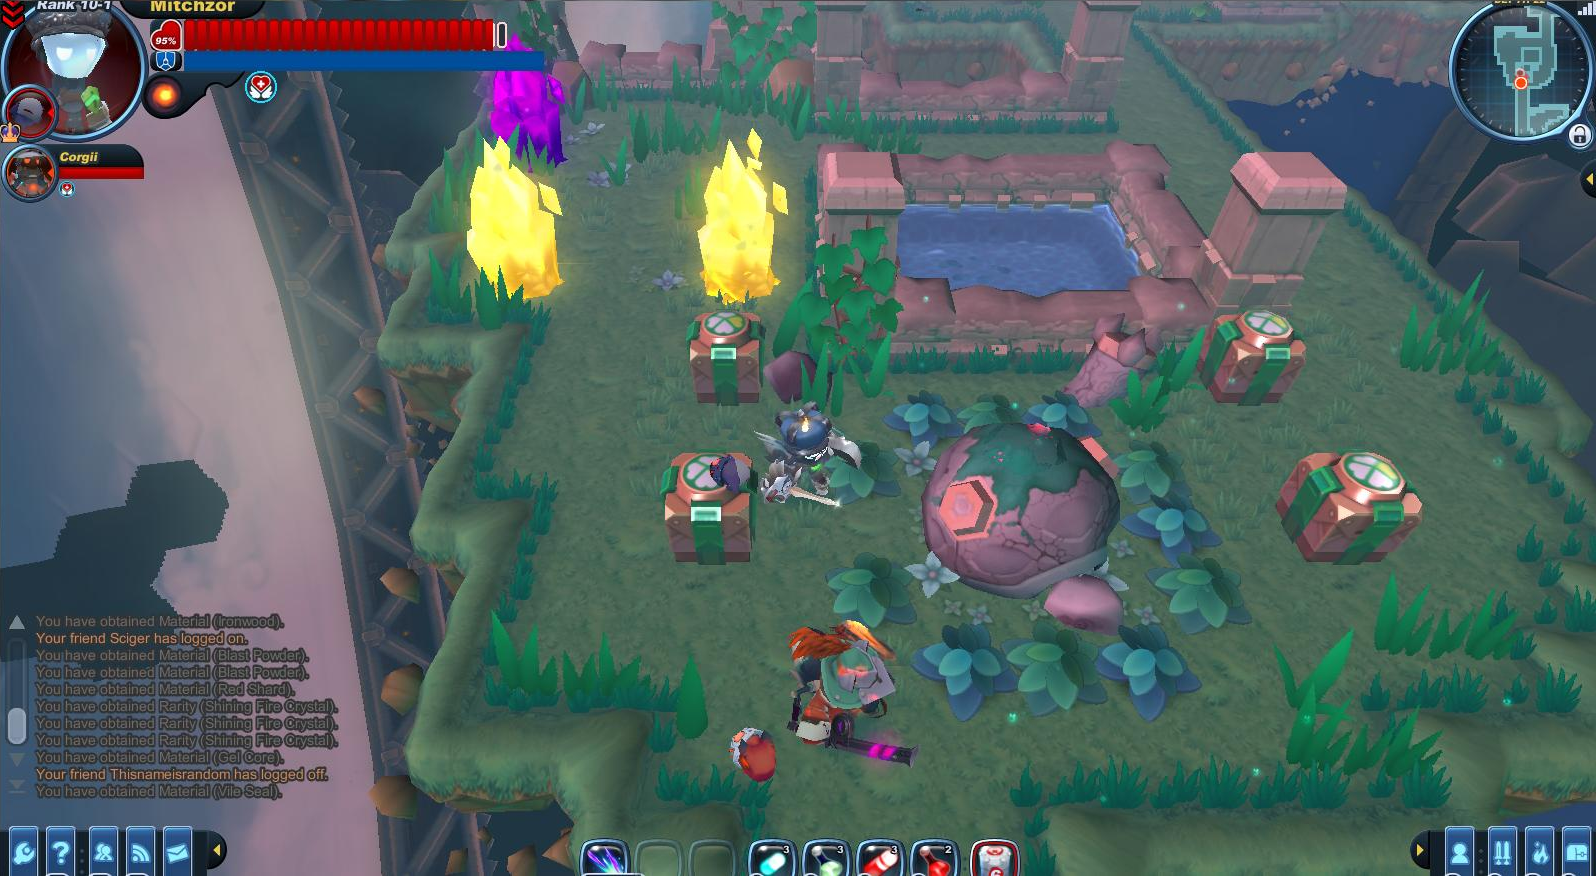
|
Wolver Den | High Voltail | Notes:
This room has been encountered in tier 2. A place with a fossilized Tortodrone, a water feature, and 4 treasure boxes. Maybe the Tortodrone was abandoned by someone, or simply died. | ||||||||||||||||
| N/A | 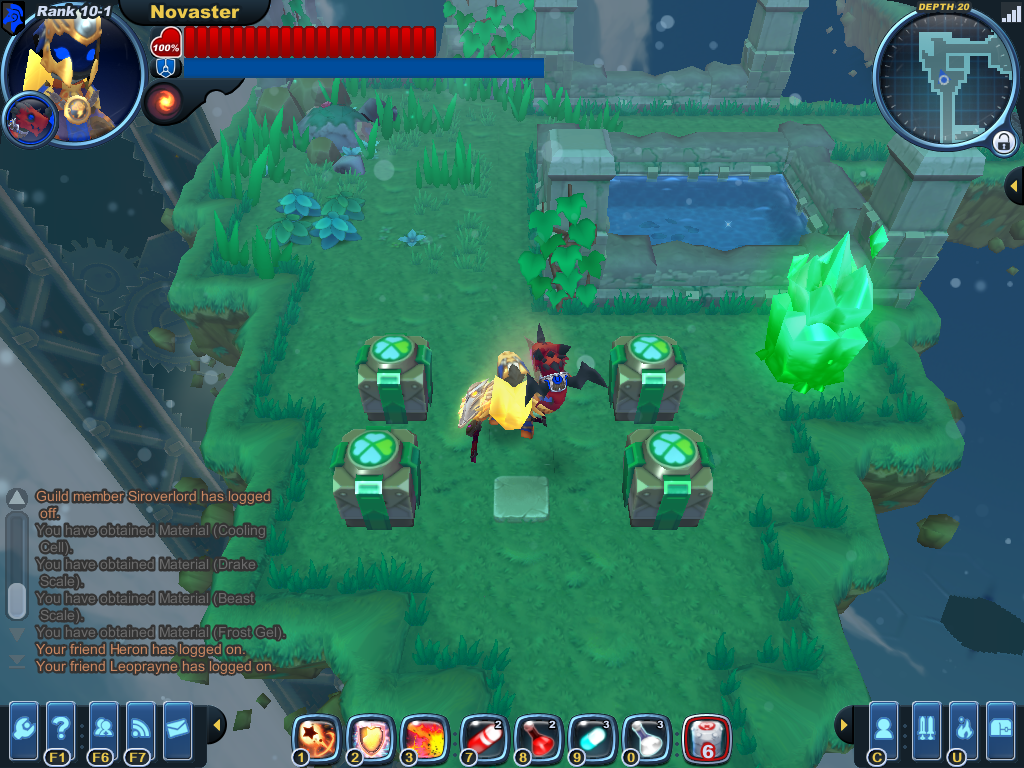
|
Wolver Den | Frosty Fury | Notes:
This room has been encountered in tier 3. A place with a fossilized Tortodrone, a water feature, and 4 treasure boxes. | ||||||||||||||||
| N/A | 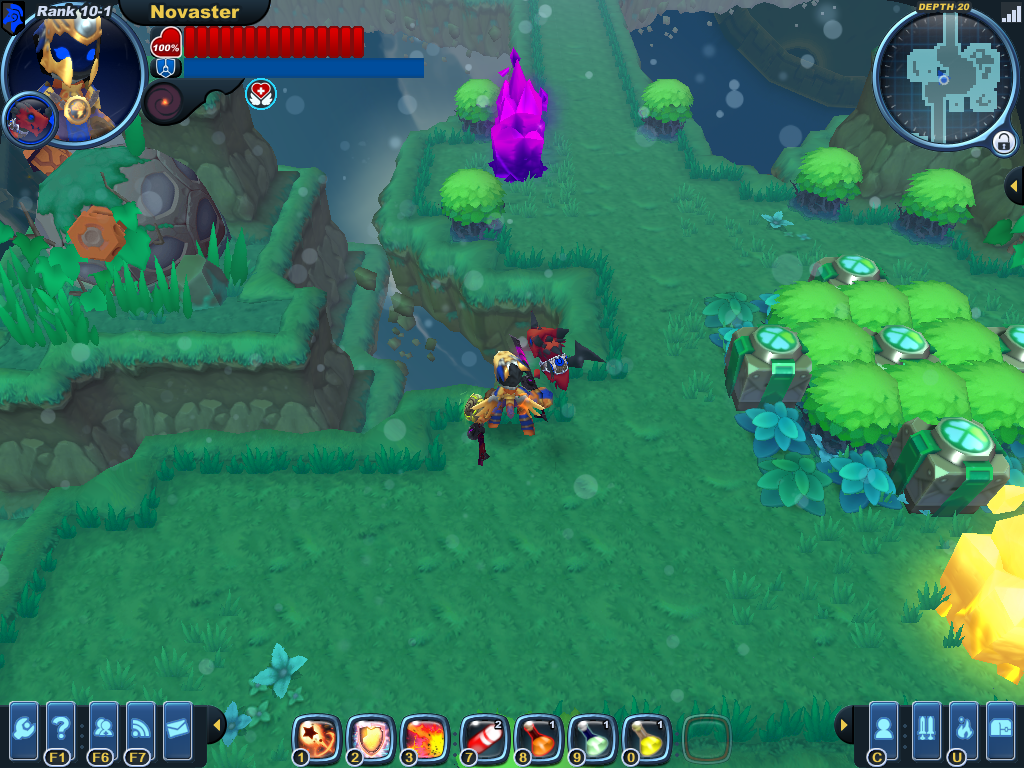
|
Wolver Den | Frosty Fury | Notes:
This room has been encountered in tier 3. A valley-like area with an unmoving Tortodrone on a pillar to the left. This one have 5 Treasure Boxes on the right. |