Difference between revisions of "Supply Depot"
From SpiralKnights
(link to activities panel) |
(updating links to images) |
||
| (34 intermediate revisions by 9 users not shown) | |||
| Line 1: | Line 1: | ||
| − | The '''Supply Depot''' | + | [[Image:Supply_depot.png|thumb|right|The Supply Depot]] |
| + | The '''Supply Depot''' is a place where players can purchase items with [[energy]]. This includes [[:Category:Gear|gear]], some [[material]]s, [[usable|upgrades]], and [[weapons]]. Players can also access the [[Energy Depot]]. The Supply Depot is available to all players as soon as they reach the [[Rescue Camp]] (Rank 1-1). It is accessible from the mission interface, the [[User_interface#Top_right|activities]] panel to the right of the game client, by talking to [[Kozma]], the Spiral Quartermaster, or clicking the '''K key'''. | ||
| − | + | '''NOTE''': Weapons and gear purchased from the Supply Depot are ''[[bound]]'' on purchase. Some special items may be purchased unbound, so be sure to check the tool-tip before purchasing. | |
| − | [[ | + | == Specials == |
| + | [[File:SpiralKnights News 125.png|thumb|right|A [[News]] image for "Flash Sales."]] | ||
| + | The "[[File:Icon-specials.png|13px]] specials" section of the Supply Depot displays featured items, some of which might be available for a discounted price. The normal price will be slashed out, with the lower price displayed directly below the normal price. In certain cases these items are not normally be available from the Supply Depot - this is especially true for "Flash Sales." Some items for these sales might not show "discount" behavior - they will not have slashed prices. | ||
| − | + | "Flash Sales" (or "Sale" for short) are periods of time during which different items are available for purchase - sometimes one at a time, a few, or several at once. These items will show up in the "specials" section of the Supply Depot. Flash Sales usually feature accessories, gear, and various other items which were previously only available via relevant [[Prize Box]]es or other transient events, including previous Flash Sales. Sometimes items are introduced to the game with a Flash Sale, as with the [[Gatecrasher Helm]] and many others. Flash Sales can also feature discounts on regularly available items, such as [[Fire Crystal]]s. In relation to the Flash Sale, each item or group of items is available for purchase for a short period of time, usually a few hours, after which they are removed and other items are put up for sale. The entire Flash Sale occurrence can last a few days. Such timing details, as well as the entire Flash Sale occurrence, are typically announced on the forums [http://forums.spiralknights.com/en/node/92682 like this]. These sales are non-[[:Category:Promotions|promotional]] and are not directly associated with [[:Category:Events|events]]. | |
| − | + | ||
| − | + | Due to the very brief nature of these sales, players might lack knowledge of what went on sale when. The [[Supply Depot Sale]] page contains a list of known sale occurrences and more details about sales. | |
| − | + | ||
| − | + | ||
| − | + | ||
| − | + | ||
| − | + | ||
| − | + | ||
| − | {| | + | ==Wares== |
| + | [[Image:Supply depot rarity.png|thumb|right|Rarities]] | ||
| + | [[Image:Supply depot usables.png|thumb|right|Usables]] | ||
| + | [[Image:Supply depot keys.png|thumb|right|Keys]] | ||
| + | Items always available to knights of all ranks: | ||
| + | {| cellpadding="5" cellspacing="2" style="background-color: transparent;" | ||
|- | |- | ||
| − | ||[[ | + | ! bgcolor="#93add4" align="left" | Rarity - (General) |
| − | ||[[ | + | ! bgcolor="#93add4" | Energy |
| − | ||[[ | + | ! bgcolor="#93add4" | Availability |
| + | |- | ||
| + | | bgcolor="#f5f5ff" | [[file:Rarity-Spark of Life.png|36px]] [[Rarity#Spark of Life|Spark of Life]] x10 | ||
| + | | bgcolor="#f5f5ff" align="right" | 200 | ||
| + | | bgcolor="#f5f5ff" align="center" | [[Haven]] | ||
| + | |- | ||
| + | | bgcolor="#f5f5ff" | [[file:Rarity-Spark of Life.png|36px]] [[Rarity#Spark of Life|Spark of Life]] | ||
| + | | bgcolor="#f5f5ff" align="right" | 50 | ||
| + | | bgcolor="#f5f5ff" align="center" | [[Clockworks|Expedition]] | ||
| + | |- | ||
| + | ! bgcolor="#93add4" align="left" | Rarity - (Evo Catalysts) | ||
| + | ! bgcolor="#93add4" | Energy | ||
| + | ! bgcolor="#93add4" | Availability | ||
| + | |- | ||
| + | | bgcolor="#f5f5ff" | [[file:Rarity-Evo_Catalyst_icon.png|36px]] [[Rarity#Evo_Catalyst|Evo Catalyst]] | ||
| + | | bgcolor="#f5f5ff" align="right" | 125 | ||
| + | | bgcolor="#f5f5ff" align="center" | Always | ||
| + | |- | ||
| + | | bgcolor="#f5f5ff" | [[file:Rarity-Advanced Evo_Catalyst_icon.png|36px]] [[Rarity#Advanced_Evo_Catalyst|Advanced Evo Catalyst]] | ||
| + | | bgcolor="#f5f5ff" align="right" | 250 | ||
| + | | bgcolor="#f5f5ff" align="center" | Always | ||
| + | |- | ||
| + | | bgcolor="#f5f5ff" | [[file:Rarity-Ultimate Evo_Catalyst_icon.png|36px]] [[Rarity#Ultimate_Evo_Catalyst|Ultimate Evo Catalyst]] | ||
| + | | bgcolor="#f5f5ff" align="right" | 525 | ||
| + | | bgcolor="#f5f5ff" align="center" | Always | ||
| + | |- | ||
| + | ! bgcolor="#93add4" align="left" | Rarity - (Fire Crystals) | ||
| + | ! bgcolor="#93add4" | Energy | ||
| + | ! bgcolor="#93add4" | Availability | ||
| + | |- | ||
| + | | bgcolor="#f5f5ff" | [[file:Rarity-Warm Fire_Crystal_icon.png|36px]] [[Rarity#Fire_Crystal|Warm Fire Crystal]] x50 | ||
| + | | bgcolor="#f5f5ff" align="right" | 85 | ||
| + | | bgcolor="#f5f5ff" align="center" | Always | ||
| + | |- | ||
| + | | bgcolor="#f5f5ff" | [[file:Rarity-Glowing Fire_Crystal_icon.png|36px]] [[Rarity#Fire_Crystal|Glowing Fire Crystal]] x50 | ||
| + | | bgcolor="#f5f5ff" align="right" | 175 | ||
| + | | bgcolor="#f5f5ff" align="center" | Always | ||
| + | |- | ||
| + | | bgcolor="#f5f5ff" | [[file:Rarity-Shining Fire_Crystal_icon.png|36px]] [[Rarity#Fire_Crystal|Shining Fire Crystal]] x50 | ||
| + | | bgcolor="#f5f5ff" align="right" | 350 | ||
| + | | bgcolor="#f5f5ff" align="center" | Always | ||
| + | |- | ||
| + | | bgcolor="#f5f5ff" | [[file:Rarity-Radiant Fire_Crystal_icon.png|36px]] [[Rarity#Fire_Crystal|Radiant Fire Crystal]] x50 | ||
| + | | bgcolor="#f5f5ff" align="right" | 700 | ||
| + | | bgcolor="#f5f5ff" align="center" | Always | ||
| + | |- | ||
| + | ! bgcolor="#93add4" align="left" | Rarity - (Orbs of Alchemy) | ||
| + | ! bgcolor="#93add4" | Energy | ||
| + | ! bgcolor="#93add4" | Availability | ||
| + | |- | ||
| + | | bgcolor="#f5f5ff" | [[file:Rarity-Flawed Orb_of_Alchemy_icon.png|36px]] [[Rarity#Flawed_Orb_of_Alchemy|Flawed Orb of Alchemy]] x3 | ||
| + | | bgcolor="#f5f5ff" align="right" | 10 | ||
| + | | bgcolor="#f5f5ff" align="center" | Always | ||
| + | |- | ||
| + | | bgcolor="#f5f5ff" | [[file:Rarity-Simple Orb_of_Alchemy_icon.png|36px]] [[Rarity#Simple_Orb_of_Alchemy|Simple Orb of Alchemy]] x3 | ||
| + | | bgcolor="#f5f5ff" align="right" | 50 | ||
| + | | bgcolor="#f5f5ff" align="center" | Always | ||
| + | |- | ||
| + | | bgcolor="#f5f5ff" | [[file:Rarity-Advanced Orb_of_Alchemy_icon.png|36px]] [[Rarity#Advanced_Orb_of_Alchemy|Advanced Orb of Alchemy]] x3 | ||
| + | | bgcolor="#f5f5ff" align="right" | 200 | ||
| + | | bgcolor="#f5f5ff" align="center" | Always | ||
| + | |- | ||
| + | | bgcolor="#f5f5ff" | [[file:Rarity-Elite Orb_of_Alchemy_icon.png|36px]] [[Rarity#Elite_Orb_of_Alchemy|Elite Orb of Alchemy]] x3 | ||
| + | | bgcolor="#f5f5ff" align="right" | 400 | ||
| + | | bgcolor="#f5f5ff" align="center" | Always | ||
| + | |- | ||
| + | | bgcolor="#f5f5ff" | [[file:Rarity-Eternal Orb_of_Alchemy_icon.png|36px]] [[Rarity#Eternal_Orb_of_Alchemy|Eternal Orb of Alchemy]] x3 | ||
| + | | bgcolor="#f5f5ff" align="right" | 800 | ||
| + | | bgcolor="#f5f5ff" align="center" | Always | ||
| + | |- | ||
| + | ! bgcolor="#93add4" align="left" | Material | ||
| + | ! bgcolor="#93add4" | Energy | ||
| + | ! bgcolor="#93add4" | Availability | ||
| + | |- | ||
| + | | bgcolor="#f5f5ff" | [[file:Crafting-Reset_Star.png|36px]] [[Material#Reset_Star|Reset Star]] | ||
| + | | bgcolor="#f5f5ff" align="right" | 2000 | ||
| + | | bgcolor="#f5f5ff" align="center" | Always | ||
| + | |- | ||
| + | ! bgcolor="#93add4" align="left" | Usables | ||
| + | ! bgcolor="#93add4" | Energy | ||
| + | ! bgcolor="#93add4" | Availability | ||
| + | |- | ||
| + | | bgcolor="#f5f5ff" | [[file:Usable-Heat_Amplifier.png|36px]] [[Usable#Heat Amplifier|Heat Amplifier (2 Days)]] | ||
| + | | bgcolor="#f5f5ff" align="right" | 800 | ||
| + | | bgcolor="#f5f5ff" align="center" | Always | ||
| + | |- | ||
| + | | bgcolor="#f5f5ff" | [[file:Usable-Krogmo_Coin_Booster.png|36px]] [[Usable#Krogmo Coin Booster|Krogmo Coin Booster (24 Hours)]] | ||
| + | | bgcolor="#f5f5ff" align="right" | 300 | ||
| + | | bgcolor="#f5f5ff" align="center" | Always | ||
| + | |- | ||
| + | | bgcolor="#f5f5ff" | [[file:Usable-Trinket_Slot_Upgrade.png|36px]] [[Usable#Trinket Slot Upgrade|Trinket Slot Upgrade (30 Days)]] | ||
| + | | bgcolor="#f5f5ff" align="right" | 150 | ||
| + | | bgcolor="#f5f5ff" align="center" | Always | ||
| + | |- | ||
| + | | bgcolor="#f5f5ff" | [[file:Usable-Weapon_Slot_Upgrade.png|36px]] [[Usable#Weapon Slot Upgrade|Weapon Slot Upgrade (30 Days)]] | ||
| + | | bgcolor="#f5f5ff" align="right" | 250 | ||
| + | | bgcolor="#f5f5ff" align="center" | Always | ||
| + | |- | ||
| + | | bgcolor="#f5f5ff" | [[file:Usable-Guild_Name_Change_Pass.png|36px]] [[Name Change Pass|Guild Name Change Pass]] | ||
| + | | bgcolor="#f5f5ff" align="right" | 7000 | ||
| + | | bgcolor="#f5f5ff" align="center" | Always | ||
| + | |- | ||
| + | | bgcolor="#f5f5ff" | [[file:Usable-Knight_Name_Change_Pass.png|36px]] [[Name Change Pass|Knight Name Change Pass]] | ||
| + | | bgcolor="#f5f5ff" align="right" | 3500 | ||
| + | | bgcolor="#f5f5ff" align="center" | Always | ||
| + | |- | ||
| + | ! bgcolor="#93add4" align="left" | Sprite Gear | ||
| + | ! bgcolor="#93add4" | Energy | ||
| + | ! bgcolor="#93add4" | Availability | ||
| + | |- | ||
| + | | bgcolor="#f5f5ff" | [[file:Icon-Drakon Pod.png|36px]] [[Usable#Sprite Gear|Drakon Pod]] | ||
| + | | bgcolor="#f5f5ff" align="right" | 2100 | ||
| + | | bgcolor="#f5f5ff" align="center" | Always | ||
| + | |- | ||
| + | | bgcolor="#f5f5ff" | [[file:Icon-Maskeraith Pod.png|36px]] [[Usable#Sprite Gear|Maskeraith Pod]] | ||
| + | | bgcolor="#f5f5ff" align="right" | 2100 | ||
| + | | bgcolor="#f5f5ff" align="center" | Always | ||
| + | |- | ||
| + | | bgcolor="#f5f5ff" | [[file:Icon-Seraphynx Pod.png|36px]] [[Usable#Sprite Gear|Seraphynx Pod]] | ||
| + | | bgcolor="#f5f5ff" align="right" | 2100 | ||
| + | | bgcolor="#f5f5ff" align="center" | Always | ||
| + | |- | ||
| + | ! bgcolor="#93add4" align="left" | Keys | ||
| + | ! bgcolor="#93add4" | Energy | ||
| + | ! bgcolor="#93add4" | Availability | ||
| + | |- | ||
| + | | bgcolor="#f5f5ff" | [[file:Key-Silver Key icon.png|36px]] [[Key|Silver Key]] | ||
| + | | bgcolor="#f5f5ff" align="right" | 750 | ||
| + | | bgcolor="#f5f5ff" align="center" | Always | ||
| + | |- | ||
| + | | bgcolor="#f5f5ff" | [[file:Key-Shadow Key icon.png|36px]] [[Key|Shadow Key]] | ||
| + | | bgcolor="#f5f5ff" align="right" | 1800 | ||
| + | | bgcolor="#f5f5ff" align="center" | Always | ||
|} | |} | ||
| + | ===Ranking Up=== | ||
| + | {{showhide|Items available at Rank 3-1, all of which are 1-star quality and cost 65 Energy|content= | ||
| + | *'''Swords''': {{Equip|Big Beast Basher|16}}, {{Equip|Bolted Blade|16}}, {{Equip|Heavy Hatchet|16}}, {{Equip|Super Slime Slasher|16}} | ||
| + | *'''Handguns''': {{Equip|Frost Gun|16}}, {{Equip|Pummel Gun|16}}, {{Equip|Super Stun Gun|16}} | ||
| + | *'''Bombs''': {{Equip|Cold Snap|16}}, {{Equip|Firecracker|16}} | ||
| + | *'''Helmets''': {{Equip|Spiral Scale Helm|16}} | ||
| + | *'''Armors''': {{Equip|Spiral Scale Mail|16}} | ||
| + | *'''Shields''': {{Equip|Force Buckler|16}} | ||
| + | }} | ||
| + | {{showhide|Items available at Rank 4-1, all of which are 2-star quality and cost 150 Energy|content= | ||
| + | *'''Swords''': {{Equip|Flourish|16}}, {{Equip|Troika|16}}, {{Equip|Wrench Wand|16}} | ||
| + | *'''Handguns''': {{Equip|Firotech Alchemer|16}}, {{Equip|Shadowtech Alchemer|16}}, {{Equip|Voltech Alchemer|16}} | ||
| + | *'''Bombs''': {{Equip|Crystal Bomb|16}}, {{Equip|Fiery Vaporizer|16}}, {{Equip|Freezing Vaporizer|16}}, {{Equip|Haze Bomb|16}} | ||
| + | *'''Helmets''': {{Equip|Jelly Helm|16}}, {{Equip|Magic Hood|16}}, {{Equip|Skelly Mask|16}}, {{Equip|Wolver Cap|16}} | ||
| + | *'''Armors''': {{Equip|Jelly Mail|16}}, {{Equip|Magic Cloak|16}}, {{Equip|Skelly Suit|16}}, {{Equip|Wolver Coat|16}} | ||
| + | *'''Shields''': {{Equip|Jelly Shield|16}}, {{Equip|Owlite Shield|16}}, {{Equip|Skelly Shield|16}} | ||
| + | }} | ||
| − | + | {{showhide|Items available at Rank 5-2, all of which are 3-star quality and cost 500 Energy|content= | |
| − | + | *'''Swords''': {{Equip|Fireburst Brandish|16}}, {{Equip|Iceburst Brandish|16}}, {{Equip|Nightblade|16}}, {{Equip|Rigadoon|16}}, {{Equip|Swift Flourish|16}} | |
| − | + | *'''Handguns''': {{Equip|Magnus|16}}, {{Equip|Shadowtech Alchemer Mk II|16}}, {{Equip|Voltech Alchemer Mk II|16}} | |
| − | ''' | + | *'''Bombs''': {{Equip|Deconstructor|16}}, {{Equip|Fiery Vaporizer Mk II|16}}, {{Equip|Graviton Charge|16}}, {{Equip|Sun Shards|16}}, {{Equip|Toxic Vaporizer Mk II|16}} |
| + | *'''Helmets''': {{Equip|Blazebreak Helm|16}}, {{Equip|Chroma Mask|16}}, {{Equip|Drake Scale Helm|16}}, {{Equip|Dusker Cap|16}}, {{Equip|Elemental Hood|16}}, {{Equip|Scary Skelly Mask|16}} | ||
| + | *'''Armors''': {{Equip|Blazebreak Armor|16}}, {{Equip|Chroma Suit|16}}, {{Equip|Drake Scale Mail|16}}, {{Equip|Dusker Coat|16}}, {{Equip|Elemental Cloak|16}}, {{Equip|Scary Skelly Suit|16}} | ||
| + | *'''Shields''': {{Equip|Blazebreak Shield|16}}, {{Equip|Brute Jelly Shield|16}}, {{Equip|Drake Scale Shield|16}}, {{Equip|Horned Owlite Shield|16}}, {{Equip|Scary Skelly Shield|16}} | ||
| + | }} | ||
| + | {{showhide|Items available at Rank 6-2, all of which are 4-star quality and cost 1,600 Energy|content= | ||
| + | *'''Swords''': {{Equip|Ascended Calibur|16}}, {{Equip|Blazebrand|16}}, {{Equip|Blizzbrand|16}}, {{Equip|Cold Iron Carver|16}}, {{Equip|Daring Rigadoon|16}}, {{Equip|Fierce Flamberge|16}}, {{Equip|Grand Flourish|16}}, {{Equip|Hunting Blade|16}}, {{Equip|Khorovod|16}}, {{Equip|Silent Nightblade|16}}, {{Equip|Vile Striker|16}}, {{Equip|Winmillion|16}} | ||
| + | *'''Handguns''': {{Equip|Cryo Driver|16}}, {{Equip|Fiery Pepperbox|16}}, {{Equip|Firo Driver|16}}, {{Equip|Master Blaster|16}}, {{Equip|Mega Magnus|16}}, {{Equip|Prisma Driver|16}}, {{Equip|Shadow Driver|16}}, {{Equip|Strike Needle|16}}, {{Equip|Volt Driver|16}} | ||
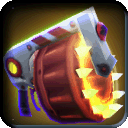
| + | *'''Bombs''': {{Equip|Fiery Atomizer|16}}, {{Equip|Freezing Atomizer|16}}, {{Equip|Heavy Crystal Bomb|16}}, {{Equip|Heavy Dark Matter Bomb|16}}, {{Equip|Heavy Deconstructor|16}}, {{Equip|Heavy Shard Bomb|16}}, {{Equip|Heavy Splinter Bomb|16}}, {{Equip|Ionized Salt Bomb|16}}, {{Equip|Irontech Bomb|16}}, {{Equip|Master Blast Bomb|16}}, {{Equip|Radiant Sun Shards|16}}, {{Equip|Toxic Atomizer|16}} | ||
| + | *'''Helmets''': {{Equip|Ash Tail Cap|16}}, {{Equip|Heavy Demo Helm|16}}, {{Equip|Heavy Plate Helm|16}}, {{Equip|Mighty Cobalt Helm|16}}, {{Equip|Miracle Hood|16}}, {{Equip|Rock Jelly Helm|16}}, {{Equip|Salamander Mask|16}}, {{Equip|Seraphic Helm|16}}, {{Equip|Sinister Skelly Mask|16}}, {{Equip|Sunset Stetson|16}}, {{Equip|Virulisk Mask|16}}, {{Equip|Wyvern Scale Helm|16}} | ||
| + | *'''Armors''': {{Equip|Ash Tail Coat|16}}, {{Equip|Heavy Demo Suit|16}}, {{Equip|Heavy Plate Mail|16}}, {{Equip|Mighty Cobalt Armor|16}}, {{Equip|Miracle Cloak|16}}, {{Equip|Rock Jelly Mail|16}}, {{Equip|Salamander Suit|16}}, {{Equip|Seraphic Mail|16}}, {{Equip|Silvermail|16}}, {{Equip|Sinister Skelly Suit|16}}, {{Equip|Sunset Duster|16}}, {{Equip|Virulisk Suit|16}}, {{Equip|Vitasuit Deluxe|16}}, {{Equip|Wyvern Scale Mail|16}} | ||
| + | *'''Shields''': {{Equip|Heavy Plate Shield|16}}, {{Equip|Mighty Defender|16}}, {{Equip|Rock Jelly Shield|16}}, {{Equip|Sinister Skelly Shield|16}}, {{Equip|Stone Tortoise|16}}, {{Equip|Wise Owlite Shield|16}}, {{Equip|Wyvern Scale Shield|16}} | ||
| + | }} | ||
| − | + | {{showhide|Items available at Rank 8-2, all of which are 5-star quality and cost 3,500 Energy|content= | |
| − | * | + | *'''Swords''': {{Equip|Acheron|16}}, {{Equip|Cold Iron Vanquisher|16}}, {{Equip|Combuster|16}}, {{Equip|Dread Venom Striker|16}}, {{Equip|Fearless Rigadoon|16}}, {{Equip|Final Flourish|16}}, {{Equip|Furious Flamberge|16}}, {{Equip|Glacius|16}}, {{Equip|Leviathan Blade|16}}, {{Equip|Sudaruska|16}}, {{Equip|Wild Hunting Blade|16}} |
| − | * | + | *'''Handguns''': {{Equip|Blitz Needle|16}}, {{Equip|Callahan|16}}, {{Equip|Hail Driver|16}}, {{Equip|Iron Slug|16}}, {{Equip|Magma Driver|16}}, {{Equip|Nova Driver|16}}, {{Equip|Storm Driver|16}}, {{Equip|Umbra Driver|16}}, {{Equip|Valiance|16}}, {{Equip|Volcanic Pepperbox|16}} |
| + | *'''Bombs''': {{Equip|Ash of Agni|16}}, {{Equip|Big Angry Bomb|16}}, {{Equip|Deadly Crystal Bomb|16}}, {{Equip|Deadly Dark Matter Bomb|16}}, {{Equip|Deadly Shard Bomb|16}}, {{Equip|Deadly Splinter Bomb|16}}, {{Equip|Irontech Destroyer|16}}, {{Equip|Nitronome|16}}, {{Equip|Scintillating Sun Shards|16}}, {{Equip|Shivermist Buster|16}}, {{Equip|Shocking Salt Bomb|16}}, {{Equip|Venom Veiler|16}} | ||
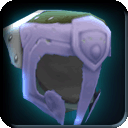
| + | *'''Helmets''': {{Equip|Azure Guardian Helm|16}}, {{Equip|Bombastic Demo Helm|16}}, {{Equip|Chaos Cowl|16}}, {{Equip|Crown of the Fallen|16}}, {{Equip|Deadly Virulisk Mask|16}}, {{Equip|Deadshot Chapeau|16}}, {{Equip|Divine Veil|16}}, {{Equip|Dragon Scale Helm|16}}, {{Equip|Dread Skelly Mask|16}}, {{Equip|Grey Feather Cowl|16}}, {{Equip|Ironmight Plate Helm|16}}, {{Equip|Justifier Hat|16}}, {{Equip|Mad Bomber Mask|16}}, {{Equip|Nameless Hat|16}}, {{Equip|Royal Jelly Crown|16}}, {{Equip|Shadowsun Stetson|16}}, {{Equip|Skolver Cap|16}}, {{Equip|Valkyrie Helm|16}}, {{Equip|Vog Cub Cap|16}}, {{Equip|Volcanic Demo Helm|16}}, {{Equip|Volcanic Plate Helm|16}}, {{Equip|Volcanic Salamander Mask|16}} | ||
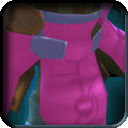
| + | *'''Armors''': {{Equip|Armor of the Fallen|16}}, {{Equip|Azure Guardian Armor|16}}, {{Equip|Bombastic Demo Suit|16}}, {{Equip|Chaos Cloak|16}}, {{Equip|Deadly Virulisk Suit|16}}, {{Equip|Deadshot Mantle|16}}, {{Equip|Divine Mantle|16}}, {{Equip|Dragon Scale Mail|16}}, {{Equip|Dread Skelly Suit|16}}, {{Equip|Grey Feather Mantle|16}}, {{Equip|Ironmight Plate Mail|16}}, {{Equip|Justifier Jacket|16}}, {{Equip|Mad Bomber Suit|16}}, {{Equip|Nameless Poncho|16}}, {{Equip|Radiant Silvermail|16}}, {{Equip|Royal Jelly Mail|16}}, {{Equip|Shadowsun Slicker|16}}, {{Equip|Skolver Coat|16}}, {{Equip|Valkyrie Mail|16}}, {{Equip|Vog Cub Coat|16}}, {{Equip|Volcanic Demo Suit|16}}, {{Equip|Volcanic Plate Mail|16}}, {{Equip|Volcanic Salamander Suit|16}} | ||
| + | *'''Shields''': {{Equip|Aegis|16}}, {{Equip|Dragon Scale Shield|16}}, {{Equip|Dread Skelly Shield|16}}, {{Equip|Grey Owlite Shield|16}}, {{Equip|Heater Shield|16}}, {{Equip|Ironmight Plate Shield|16}}, {{Equip|Omega Shell|16}}, {{Equip|Royal Jelly Shield|16}}, {{Equip|Volcanic Plate Shield|16}} | ||
| + | }} | ||
| + | ==Historical notes== | ||
| + | * The Supply Depot was implemented in game on {{release|2012-02-22}} | ||
| + | * Kozma opens the Supply Depot on {{release|2012-02-29}} | ||
| + | * The Rarity section in the Supply Depot was implemented in game on {{release|2013-07-30}} | ||
[[Category: Terminology]] | [[Category: Terminology]] | ||
Latest revision as of 08:42, 28 February 2015

The Supply Depot is a place where players can purchase items with energy. This includes gear, some materials, upgrades, and weapons. Players can also access the Energy Depot. The Supply Depot is available to all players as soon as they reach the Rescue Camp (Rank 1-1). It is accessible from the mission interface, the activities panel to the right of the game client, by talking to Kozma, the Spiral Quartermaster, or clicking the K key.
NOTE: Weapons and gear purchased from the Supply Depot are bound on purchase. Some special items may be purchased unbound, so be sure to check the tool-tip before purchasing.
Specials

The "![]() specials" section of the Supply Depot displays featured items, some of which might be available for a discounted price. The normal price will be slashed out, with the lower price displayed directly below the normal price. In certain cases these items are not normally be available from the Supply Depot - this is especially true for "Flash Sales." Some items for these sales might not show "discount" behavior - they will not have slashed prices.
specials" section of the Supply Depot displays featured items, some of which might be available for a discounted price. The normal price will be slashed out, with the lower price displayed directly below the normal price. In certain cases these items are not normally be available from the Supply Depot - this is especially true for "Flash Sales." Some items for these sales might not show "discount" behavior - they will not have slashed prices.
"Flash Sales" (or "Sale" for short) are periods of time during which different items are available for purchase - sometimes one at a time, a few, or several at once. These items will show up in the "specials" section of the Supply Depot. Flash Sales usually feature accessories, gear, and various other items which were previously only available via relevant Prize Boxes or other transient events, including previous Flash Sales. Sometimes items are introduced to the game with a Flash Sale, as with the Gatecrasher Helm and many others. Flash Sales can also feature discounts on regularly available items, such as Fire Crystals. In relation to the Flash Sale, each item or group of items is available for purchase for a short period of time, usually a few hours, after which they are removed and other items are put up for sale. The entire Flash Sale occurrence can last a few days. Such timing details, as well as the entire Flash Sale occurrence, are typically announced on the forums like this. These sales are non-promotional and are not directly associated with events.
Due to the very brief nature of these sales, players might lack knowledge of what went on sale when. The Supply Depot Sale page contains a list of known sale occurrences and more details about sales.
Wares


Items always available to knights of all ranks:
| Rarity - (General) | Energy | Availability |
|---|---|---|
| |
200 | Haven |
| |
50 | Expedition |
| Rarity - (Evo Catalysts) | Energy | Availability |
| |
125 | Always |
| |
250 | Always |
| |
525 | Always |
| Rarity - (Fire Crystals) | Energy | Availability |
| |
85 | Always |
| |
175 | Always |
| |
350 | Always |
| |
700 | Always |
| Rarity - (Orbs of Alchemy) | Energy | Availability |
| |
10 | Always |
| |
50 | Always |
| |
200 | Always |
| |
400 | Always |
| |
800 | Always |
| Material | Energy | Availability |
| |
2000 | Always |
| Usables | Energy | Availability |
| |
800 | Always |
| |
300 | Always |
| |
150 | Always |
| |
250 | Always |
| |
7000 | Always |
| |
3500 | Always |
| Sprite Gear | Energy | Availability |
| |
2100 | Always |
| |
2100 | Always |
| |
2100 | Always |
| Keys | Energy | Availability |
| |
750 | Always |
| |
1800 | Always |
Ranking Up
- Swords:
 Big Beast Basher,
  Bolted Blade,
  Heavy Hatchet,
  Super Slime Slasher
- Handguns:
 Frost Gun,
 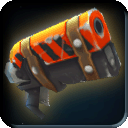 Pummel Gun,
 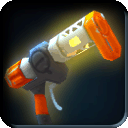 Super Stun Gun
- Bombs:
 Cold Snap,
  Firecracker
- Helmets:
 Spiral Scale Helm
- Armors:
 Spiral Scale Mail
- Shields:
 Force Buckler
- Swords:
 Flourish,
  Troika,
  Wrench Wand
- Handguns:
 Firotech Alchemer,
  Shadowtech Alchemer,
  Voltech Alchemer
- Bombs:
 Crystal Bomb,
  Fiery Vaporizer,
  Freezing Vaporizer,
  Haze Bomb
- Helmets:
 Jelly Helm,
  Magic Hood,
  Skelly Mask,
 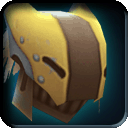 Wolver Cap
- Armors:
 Jelly Mail,
  Magic Cloak,
 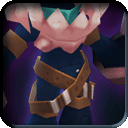 Skelly Suit,
 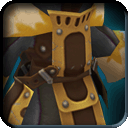 Wolver Coat
- Shields:
 Jelly Shield,
  Owlite Shield,
  Skelly Shield
- Swords:
 Fireburst Brandish,
  Iceburst Brandish,
  Nightblade,
  Rigadoon,
  Swift Flourish
- Handguns:
 Magnus,
  Shadowtech Alchemer Mk II,
  Voltech Alchemer Mk II
- Bombs:
 Deconstructor,
  Fiery Vaporizer Mk II,
  Graviton Charge,
  Sun Shards,
  Toxic Vaporizer Mk II
- Helmets:
 Blazebreak Helm,
  Chroma Mask,
  Drake Scale Helm,
 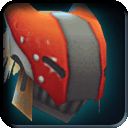 Dusker Cap,
  Elemental Hood,
  Scary Skelly Mask
- Armors:
 Blazebreak Armor,
 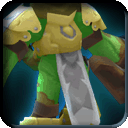 Chroma Suit,
 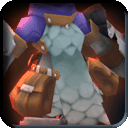 Drake Scale Mail,
 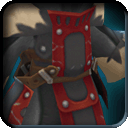 Dusker Coat,
  Elemental Cloak,
  Scary Skelly Suit
- Shields:
 Blazebreak Shield,
  Brute Jelly Shield,
  Drake Scale Shield,
  Horned Owlite Shield,
  Scary Skelly Shield
- Swords:
 Ascended Calibur,
  Blazebrand,
  Blizzbrand,
  Cold Iron Carver,
  Daring Rigadoon,
  Fierce Flamberge,
  Grand Flourish,
  Hunting Blade,
  Khorovod,
  Silent Nightblade,
  Vile Striker,
  Winmillion
- Handguns:
 Cryo Driver,
  Fiery Pepperbox,
  Firo Driver,
  Master Blaster,
  Mega Magnus,
  Prisma Driver,
  Shadow Driver,
  Strike Needle,
  Volt Driver
- Bombs:
 Fiery Atomizer,
  Freezing Atomizer,
 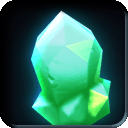 Heavy Crystal Bomb,
 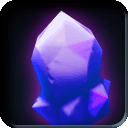 Heavy Dark Matter Bomb,
  Heavy Deconstructor,
 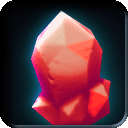 Heavy Shard Bomb,
  Heavy Splinter Bomb,
  Ionized Salt Bomb,
  Irontech Bomb,
  Master Blast Bomb,
  Radiant Sun Shards,
  Toxic Atomizer
- Helmets:
 Ash Tail Cap,
 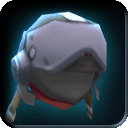 Heavy Demo Helm,
  Heavy Plate Helm,
 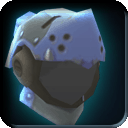 Mighty Cobalt Helm,
 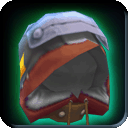 Miracle Hood,
  Rock Jelly Helm,
  Salamander Mask,
  Seraphic Helm,
  Sinister Skelly Mask,
  Sunset Stetson,
  Virulisk Mask,
  Wyvern Scale Helm
- Armors:
 Ash Tail Coat,
  Heavy Demo Suit,
  Heavy Plate Mail,
  Mighty Cobalt Armor,
  Miracle Cloak,
  Rock Jelly Mail,
  Salamander Suit,
  Seraphic Mail,
  Silvermail,
  Sinister Skelly Suit,
  Sunset Duster,
  Virulisk Suit,
  Vitasuit Deluxe,
  Wyvern Scale Mail
- Shields:
 Heavy Plate Shield,
  Mighty Defender,
  Rock Jelly Shield,
  Sinister Skelly Shield,
  Stone Tortoise,
  Wise Owlite Shield,
  Wyvern Scale Shield
- Swords:
 Acheron,
  Cold Iron Vanquisher,
  Combuster,
  Dread Venom Striker,
  Fearless Rigadoon,
  Final Flourish,
 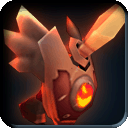 Furious Flamberge,
  Glacius,
 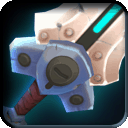 Leviathan Blade,
  Sudaruska,
  Wild Hunting Blade
- Handguns:
 Blitz Needle,
 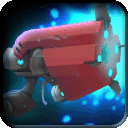 Callahan,
  Hail Driver,
  Iron Slug,
  Magma Driver,
  Nova Driver,
  Storm Driver,
  Umbra Driver,
  Valiance,
  Volcanic Pepperbox
- Bombs:
 Ash of Agni,
  Big Angry Bomb,
  Deadly Crystal Bomb,
  Deadly Dark Matter Bomb,
  Deadly Shard Bomb,
  Deadly Splinter Bomb,
  Irontech Destroyer,
  Nitronome,
  Scintillating Sun Shards,
  Shivermist Buster,
  Shocking Salt Bomb,
  Venom Veiler
- Helmets:
 Azure Guardian Helm,
  Bombastic Demo Helm,
  Chaos Cowl,
  Crown of the Fallen,
  Deadly Virulisk Mask,
  Deadshot Chapeau,
  Divine Veil,
  Dragon Scale Helm,
  Dread Skelly Mask,
  Grey Feather Cowl,
  Ironmight Plate Helm,
  Justifier Hat,
  Mad Bomber Mask,
  Nameless Hat,
  Royal Jelly Crown,
  Shadowsun Stetson,
  Skolver Cap,
  Valkyrie Helm,
  Vog Cub Cap,
  Volcanic Demo Helm,
  Volcanic Plate Helm,
  Volcanic Salamander Mask
- Armors:
 Armor of the Fallen,
  Azure Guardian Armor,
 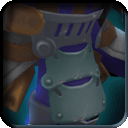 Bombastic Demo Suit,
  Chaos Cloak,
 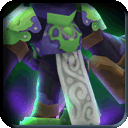 Deadly Virulisk Suit,
  Deadshot Mantle,
  Divine Mantle,
 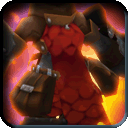 Dragon Scale Mail,
 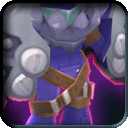 Dread Skelly Suit,
  Grey Feather Mantle,
  Ironmight Plate Mail,
  Justifier Jacket,
  Mad Bomber Suit,
  Nameless Poncho,
  Radiant Silvermail,
  Royal Jelly Mail,
  Shadowsun Slicker,
  Skolver Coat,
  Valkyrie Mail,
  Vog Cub Coat,
  Volcanic Demo Suit,
  Volcanic Plate Mail,
  Volcanic Salamander Suit
- Shields:
 Aegis,
  Dragon Scale Shield,
  Dread Skelly Shield,
  Grey Owlite Shield,
  Heater Shield,
  Ironmight Plate Shield,
  Omega Shell,
  Royal Jelly Shield,
  Volcanic Plate Shield
Historical notes
- The Supply Depot was implemented in game on release 2012-02-22
- Kozma opens the Supply Depot on release 2012-02-29
- The Rarity section in the Supply Depot was implemented in game on release 2013-07-30