Difference between revisions of "The Gauntlet"
From SpiralKnights
m (→Notes) |
m (→Notes) |
||
| (11 intermediate revisions by 3 users not shown) | |||
| Line 1: | Line 1: | ||
| − | |||
{{MissionInfo | {{MissionInfo | ||
|name = The Gauntlet | |name = The Gauntlet | ||
| Line 5: | Line 4: | ||
|type = rank | |type = rank | ||
|mission rank = 9-2 | |mission rank = 9-2 | ||
| − | |host rank = | + | |host rank = 9-1 |
|depth range = 24-26 | |depth range = 24-26 | ||
|combat floors = 3 | |combat floors = 3 | ||
| Line 21: | Line 20: | ||
|objective = Battle your way to the Firestorm Citadel through a bulwark of monstrous might. | |objective = Battle your way to the Firestorm Citadel through a bulwark of monstrous might. | ||
}} | }} | ||
| + | |||
| + | ==Gate Map== | ||
| + | {{:{{PAGENAME}}/Gate Map}} | ||
==Notes== | ==Notes== | ||
| − | + | Its mission card features the old model of the {{monster|Almirian Royal Guard}}, but these monsters don't appear during the mission. | |
| − | + | "Gauntlet" likely refers to the phrase [https://en.wikipedia.org/wiki/Running_the_gauntlet Running the Gauntlet]. In this sense "gauntlet" indicates a particularly arduous endeavor. Many players consider this mission to be very difficult due to its variety of dangerous obstacles. | |
| − | {{ | + | ===History=== |
| + | *{{release|2012-03-07}}: Mission introduced. | ||
===Strategy=== | ===Strategy=== | ||
| − | {{ | + | {{Note-Strategy}} |
| − | Here are some strategies and tips to navigate through and complete " | + | |
| + | Here are some strategies and tips to navigate through and complete "Last Stand" of this mission: | ||
*The Gauntlet is best done in parties rather than solo runs. | *The Gauntlet is best done in parties rather than solo runs. | ||
*Make sure to have gear to combat every monster family and each of the three status effects here. For example, with the second arena of Last Stand having monsters that inflict [[Damage#Shadow_Damage|shadow damage]] with possible [[Freeze]] status, equipping gear such as the [[Dread Skelly Mask|Dread Skelly]] and [[Snarbolax Cap|Snarbolax]] is highly advised. | *Make sure to have gear to combat every monster family and each of the three status effects here. For example, with the second arena of Last Stand having monsters that inflict [[Damage#Shadow_Damage|shadow damage]] with possible [[Freeze]] status, equipping gear such as the [[Dread Skelly Mask|Dread Skelly]] and [[Snarbolax Cap|Snarbolax]] is highly advised. | ||
| Line 37: | Line 41: | ||
*The second arena's freeze grates can be guaranteed death traps. Be careful not to be pushed onto a grate by a [[Trojan]]'s attacks or a [[Howlitzer]]'s skull missile attack. In case you get frozen on a grate, immediately use a [[Pickups#Capsules|Remedy Capsule]] or hope your shield lasts to break out of being frozen by a grate or a monster. The [[dash]] technique may help. Otherwise, hope you can escape from a slow, painful death. Getting frozen is almost inevitable, but better not to be over a grate if so. | *The second arena's freeze grates can be guaranteed death traps. Be careful not to be pushed onto a grate by a [[Trojan]]'s attacks or a [[Howlitzer]]'s skull missile attack. In case you get frozen on a grate, immediately use a [[Pickups#Capsules|Remedy Capsule]] or hope your shield lasts to break out of being frozen by a grate or a monster. The [[dash]] technique may help. Otherwise, hope you can escape from a slow, painful death. Getting frozen is almost inevitable, but better not to be over a grate if so. | ||
| − | + | ==See Also== | |
| − | + | {{mission see also|loadout=yes}} | |
| − | + | ||
| − | + | ||
| − | + | ||
| − | + | ||
| − | + | ||
| − | + | ||
| − | + | ||
| − | + | ||
| − | + | ||
| − | + | ||
| − | + | ||
| − | + | ||
| − | + | ||
| − | + | ||
| − | + | ||
| − | + | ||
| − | + | ||
| − | + | ||
| − | + | ||
| − | + | ||
| − | + | ||
| − | + | ||
| − | + | ||
| − | + | ||
| − | + | ||
| − | + | ||
| − | + | ||
| − | + | ||
| − | + | ||
| − | + | ||
| − | + | ||
| − | + | ||
| − | + | ||
| − | + | ||
| − | + | ||
| − | + | ||
| − | + | ||
| − | + | ||
| − | + | ||
| − | + | ||
| − | + | ||
| − | + | ||
| − | + | ||
| − | + | ||
| − | + | ||
| − | + | ||
| − | + | ||
| − | + | ||
| − | + | ||
| − | + | ||
| − | + | ||
| − | + | ||
| − | + | ||
| − | + | ||
| − | + | ||
| − | + | ||
| − | + | ||
| − | + | ||
| − | + | ||
| − | + | ||
| − | + | ||
| − | + | ||
| − | + | ||
| − | + | ||
| − | + | ||
| − | + | ||
| − | + | ||
| − | + | ||
| − | + | ||
| − | + | ||
| − | + | ||
| − | + | ||
| − | + | ||
| − | + | ||
| − | + | ||
| − | + | ||
| − | + | ||
| − | + | ||
| − | + | ||
| − | + | ||
| − | + | ||
| − | + | ||
| − | + | ||
| − | + | ||
| − | + | ||
| − | + | ||
| − | + | ||
| − | + | ||
| − | + | ||
| − | + | ||
| − | + | ||
| − | + | ||
| − | + | ||
| − | + | ||
| − | + | ||
| − | + | ||
| − | + | ||
| − | + | ||
| − | + | ||
| − | + | ||
| − | + | ||
| − | + | ||
| − | + | ||
| − | + | ||
| − | + | ||
| − | + | ||
| − | + | ||
| − | + | ||
| − | + | ||
| − | + | ||
| − | + | ||
| − | + | ||
| − | + | ||
| − | + | ||
| − | + | ||
| − | + | ||
| − | + | ||
| − | + | ||
| − | + | ||
| − | + | ||
| − | + | ||
| − | + | ||
| − | + | ||
| − | + | ||
| − | + | ||
| − | + | ||
| − | + | ||
| − | + | ||
| − | + | ||
| − | + | ||
| − | + | ||
| − | + | ||
| − | + | ||
| − | + | ||
| − | + | ||
| − | + | ||
| − | + | ||
| − | + | ||
| − | + | ||
| − | + | ||
| − | + | ||
| − | + | ||
| − | + | ||
| − | + | ||
| − | + | ||
| − | + | ||
| − | + | ||
| − | + | ||
| − | + | ||
| − | + | ||
| − | + | ||
| − | + | ||
| − | + | ||
| − | + | ||
| − | + | ||
| − | + | ||
| − | + | ||
| − | + | ||
| − | + | ||
| − | + | ||
| − | + | ||
| − | + | ||
| − | + | ||
| − | + | ||
| − | + | ||
| − | + | ||
| − | + | ||
| − | + | ||
| − | + | ||
| − | + | ||
| − | + | ||
| − | + | ||
| − | == See | + | |
| − | {{mission see also}} | + | |
Latest revision as of 05:30, 26 April 2020
| ||||||||||||||||||||||||||||||||||||||||||||||||||||||||||||||||||||||||||||||||||||||||||||||||||||||||||||||||||||||||||||||||||||||||||||||||||||||||||||||||||||||||||||||||||||||||||||||||||||||||||||||||||||||||||||||||||||||||||||||||||||||||||||||||||||||||||||||||||||||||||||||||||||||||||||||||||||||||||||||||||||||||||||||||||||||||||||||||||||||||||||||||||||||||||||||||||||||||||||||
| ||||||||||||||||||||||||||||||||||||||||||||||||||||||||||||||||||||||||||||||||||||||||||||||||||||||||||||||||||||||||||||||||||||||||||||||||||||||||||||||||||||||||||||||||||||||||||||||||||||||||||||||||||||||||||||||||||||||||||||||||||||||||||||||||||||||||||||||||||||||||||||||||||||||||||||||||||||||||||||||||||||||||||||||||||||||||||||||||||||||||||||||||||||||||||||||||||||||||||||||
The Gauntlet is a 9-2 rank mission.
Overview
Description:
One final battle stands in your way before reaching the Firestorm Citadel. Thought to be devised by Lord Vanaduke himself, this unrelenting gauntlet is teeming with all manners of dark creatures and culminates in a nightmarish battle arena that must be conquered in order to gain access to the gates of the Firestorm Citadel.
This mission will take everything you've got and requires a full arsenal of powerful weapons and gear. If Lord Vanaduke is testing you, give him the fight that he's asking for and show him what a true Champion can do!
Objective:
Battle your way to the Firestorm Citadel through a bulwark of monstrous might.
Gate Map
Depth: 0
Level Link: This mission's lobby is standard.
Depth: 24
Level Link: This floor is composed of random Devilish Drudgery: Wired for Synergy segments.
Depth: 25
Level Link: This floor is composed of random Deconstruction Zone: Molten Mayhem segments.
Depth: 26
Level Link: Last Stand is unique to this mission.
Notes
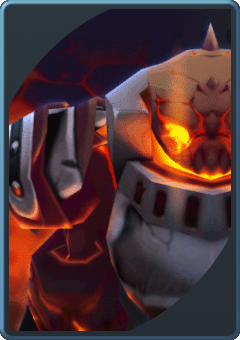
Its mission card features the old model of the ![]() Almirian Royal Guard, but these monsters don't appear during the mission.
Almirian Royal Guard, but these monsters don't appear during the mission.
"Gauntlet" likely refers to the phrase Running the Gauntlet. In this sense "gauntlet" indicates a particularly arduous endeavor. Many players consider this mission to be very difficult due to its variety of dangerous obstacles.
History
- release 2012-03-07: Mission introduced.
Strategy
Here are some strategies and tips to navigate through and complete "Last Stand" of this mission:
- The Gauntlet is best done in parties rather than solo runs.
- Make sure to have gear to combat every monster family and each of the three status effects here. For example, with the second arena of Last Stand having monsters that inflict shadow damage with possible Freeze status, equipping gear such as the Dread Skelly and Snarbolax is highly advised.
- In Last Stand, as with Battle Arenas, a new wave of monsters is spawned once the monsters of the previous wave of that branch are defeated. Keeping the last monster alive of a wave of one branch can help you focus on preparing for the waves of the next branch.
- The second arena's freeze grates can be guaranteed death traps. Be careful not to be pushed onto a grate by a Trojan's attacks or a Howlitzer's skull missile attack. In case you get frozen on a grate, immediately use a Remedy Capsule or hope your shield lasts to break out of being frozen by a grate or a monster. The dash technique may help. Otherwise, hope you can escape from a slow, painful death. Getting frozen is almost inevitable, but better not to be over a grate if so.


