Difference between revisions of "User:Eek5"
From SpiralKnights
m |
m |
||
| Line 23: | Line 23: | ||
=Favorite Bombs= | =Favorite Bombs= | ||
| − | |||
| − | + | These are my favorite bombs. | |
| − | [[file: | + | ===={{EeksEquip|Nitronome}} [[file:Snipe-eeks.png|18px]][[file:Snipe-eeks.png|18px]][[file:Snipe-eeks.png|18px]][[file:Snipe-eeks.png|18px]][[file:Snipe-eeks.png|18px]] ==== |
| + | The Nitronome is nearly always a part of my load out. Not only is it near the top of its class as a damage bomb, but it is also one of the best crowd control bombs. The Nitronome deals the same amount of normal damage as the [[Leviathan Blade]]'s first swing. As such, it is useful against all enemies. It has a fast charge time, fast fuse, and large radius. It also has a medium amount of knock back which, when combined with the fast handling, makes it an excellent choice for crowd control. You can essentially push groups of enemies into corners with well placed bombs, protecting yourself and your teammates. | ||
| − | [[file: | + | ===={{EeksEquip|Dark Briar Barrage}} [[file:Snipe-eeks.png|18px]][[file:Snipe-eeks.png|18px]][[file:Snipe-eeks.png|18px]][[file:Snipe-eeks.png|18px]][[file:Greysnipe-eeks.png|18px]]==== |
| + | :( | ||
| + | |||
| + | ===={{EeksEquip|Radiant Sun Shards}} [[file:Snipe-eeks.png|18px]][[file:Snipe-eeks.png|18px]][[file:Snipe-eeks.png|18px]][[file:Greysnipe-eeks.png|18px]][[file:Greysnipe-eeks.png|18px]] ==== | ||
| + | |||
| + | ===={{EeksEquip|Shivermist Buster}} [[file:Snipe-eeks.png|18px]][[file:Snipe-eeks.png|18px]][[file:Snipe-eeks.png|18px]][[file:Snipe-eeks.png|18px]][[file:Snipe-eeks.png|18px]] ==== | ||
| + | |||
| + | ===={{EeksEquip|Ash of Agni}} [[file:Snipe-eeks.png|18px]][[file:Snipe-eeks.png|18px]][[file:Snipe-eeks.png|18px]][[file:Snipe-eeks.png|18px]][[file:Snipe-eeks.png|18px]] ==== | ||
= Arsenal = | = Arsenal = | ||
| + | Below is a listing of some of the armor and weapons I have amassed during my travels. Many items are still in the planning stages and have been left at the fork in their alchemy paths. My general strategy for armor has been to to get [[status]] [[unique variants]] (UVs) for helmets and defense UVs for armor to run different mixed sets (Volcanic Demo Helm + Mad Bomber Suit) depending on what gate I'm headed into. For bombs, I targeted medium damage UVs for enemies that I'd normally wear full Mad Bomber and very high damager UVs for enemies that I'd normally run mixed sets with. | ||
{{SKWindow | {{SKWindow | ||
| Line 86: | Line 94: | ||
{{SKCell|{{EeksEquip|Radiant Sun Shards|uv=Damage Bonus vs Undead: Medium}}|}} | {{SKCell|{{EeksEquip|Radiant Sun Shards|uv=Damage Bonus vs Undead: Medium}}|}} | ||
{{SKCell|{{EeksEquip|Heavy Deconstructor|uv=Damage Bonus vs Construct: Medium}}|}} | {{SKCell|{{EeksEquip|Heavy Deconstructor|uv=Damage Bonus vs Construct: Medium}}|}} | ||
| + | {{SKCell|{{EeksEquip|Graviton Bomb}}|}} | ||
| + | {{SKNewRow}} | ||
| + | {{SKCell|{{EeksEquip|Ionized Salt Bomb}}|}} | ||
| + | {{SKCell|{{EeksEquip|Master Blast Bomb|uv=Damage Bonus vs Slime: Medium}}|}} | ||
| + | {{SKCell|{{EeksEquip|Twisted Spine Cone|uv=Damage Bonus vs Gremlin: Low}}|}} | ||
| + | {{SKCell|{{EeksEquip|Blast Bomb|uv=Damage Bonus vs Gremlin: Very High}}|}} | ||
}} | }} | ||
Revision as of 06:25, 6 July 2011
| ||||||||
| ||||||||

Contents
Best Friends
Favorite Bombs
These are my favorite bombs.
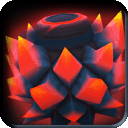
 Nitronome
The Nitronome is nearly always a part of my load out. Not only is it near the top of its class as a damage bomb, but it is also one of the best crowd control bombs. The Nitronome deals the same amount of normal damage as the Leviathan Blade's first swing. As such, it is useful against all enemies. It has a fast charge time, fast fuse, and large radius. It also has a medium amount of knock back which, when combined with the fast handling, makes it an excellent choice for crowd control. You can essentially push groups of enemies into corners with well placed bombs, protecting yourself and your teammates.
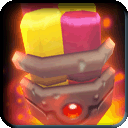
 Dark Briar Barrage
- (
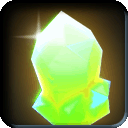 Radiant Sun Shards
 Shivermist Buster
 Ash of Agni
Arsenal
Below is a listing of some of the armor and weapons I have amassed during my travels. Many items are still in the planning stages and have been left at the fork in their alchemy paths. My general strategy for armor has been to to get status unique variants (UVs) for helmets and defense UVs for armor to run different mixed sets (Volcanic Demo Helm + Mad Bomber Suit) depending on what gate I'm headed into. For bombs, I targeted medium damage UVs for enemies that I'd normally wear full Mad Bomber and very high damager UVs for enemies that I'd normally run mixed sets with.
| |||||||
|
| ||||||
|
Videos
Below is a collection of my adventures into the clockworks. Most of these are short videos showing some of the bombing patterns that I use. On the right side of the external links are icons of the main bombs used in the video.
Dark Briar Barrage vs Devilites/Kat Ghosts ![]()