User:Eek5
From SpiralKnights
| ||||||||
| ||||||||

Contents
Favorite Bombs

I've used nearly every bomb in my main loadout. Whenever I get a new bomb I usually try to use it until it hits heat level 10 and then for days or more after that to get a really good feel for it. The bombs listed below are not necessarily the best bombs in the game but they've found a place in my heart and more often then note, in my loadout when I head into the clockworks.
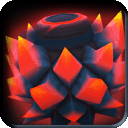
 Nitronome
The Nitronome is nearly always a part of my load out. Not only is it near the top of its class as a damage bomb, but it is also one of the best crowd control bombs. The Nitronome deals the same amount of normal damage as the Leviathan Blade's first swing. As such, it is useful against all enemies. It has a fast charge time, fast fuse, and large radius. It also has a medium amount of knock back which, when combined with the fast handling, makes it an excellent choice for crowd control. You can essentially push groups of enemies into corners with well placed bombs, protecting yourself and your teammates.
 Dark Briar Barrage
Dark Briar Barrage (DBB) is a piercing damage bomb which shares many similarities with its couson, the Nitronome. Both share the same blast style, damaging everything within the blast radius (which is also the same size). Piercing damage isn't the only difference between the two bombs, however, the DBB has no knockback and has a longer fuse (video) outdated; see update!. The longer fuse and lack of knockback mean that the DBB is a low impact and non-disruptive bomb perfect for players that aren't good at pushing enemies where they want to with the nitronome. The fuse and lack of knockback do, however, leave knights more vulnerable to attack. Because of this, knights should master being able to freely avoid attacks without shielding before using the DBB as they'll need to be able to move around while charging without any protection whatsoever.
The DBB is a great compliment to the Nitronome and often finds its way into my loadout. It is also a good replacement for the Nitronome when I head into specific gates (Wolver, Gremlin, Fiend).
Update: Nick listened! The fuse time on DBB was reduced and this bomb is now rated 5 out of 5 snipes, up from 4 out of 5!
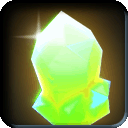 Radiant Sun Shards
The Radiant Sun Shards (RSS) only receives 3 out of 5 snipes from me but only because the line stunts at 4 stars. For what it is, the RSS is a great bomb. It can outclass other damage bombs in terms of pure damage if you manage to land 2 or more shards on an enemy but because of the mechanics of the bomb (the 8 shards come out at set 45 degree angles) it is sometimes difficult to get the environment and enemies to work with you. This means that more often then now, the RSS will be hitting with none or 1 shard rather than 2 or more. Even then, the RSS is a great weapon that I often find myself keeping in my bag. It has extremely long range on the shards which allows you to hit many switches which were, as a pure bomber, only accessible by throwing potions or pots.
For damage, the RSS finds its best uses hitting large targets where multiple shards land quickly. It has a fast charge time and a faster fuse which makes it extremely viable especially in large crowds where shards finding contact by chance occurs frequently. The RSS is also very good at downing groups of greavers. The way the greavers glide in to surround you works out perfectly for the fast charging RSS since they'll land on top of it and get hit multiple times by the split piercing damage the RSS deals. REST IN PEACE!!!
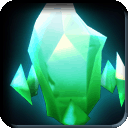
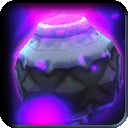
 Shivermist Buster
 Ash of Agni
![]()
Least Favorite Bombs
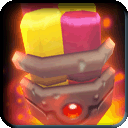
 Shard Bombs
These bombs have so many small issues with their mechanics that I just wouldn't recommend them. The double-fuse is too long, the knockback is chaotic, the damage is way too low. Click the link above to see a more in-depth look at why these bombs are so bad.
Arsenal
Below is a listing of some of the armor and weapons I have amassed during my travels. Many items are still in the planning stages and have been left at the fork in their alchemy paths. My general strategy for armor has been to to get status unique variants (UVs) for helmets and defense UVs for armor to run different mixed sets (Volcanic Demo Helm + Mad Bomber Suit) depending on what gate I'm headed into. For bombs, I targeted medium damage UVs for enemies that I'd normally wear full Mad Bomber and very high damager UVs for enemies that I'd normally run mixed sets with.
| ||||||||||
|
| |||||||
|
Videos
Below is a collection of my adventures into the clockworks. Most of these are short videos showing some of the bombing patterns that I use. On the right side of the external links are icons of the main bombs used in the video.
- BOSS Jelly King (prepatch) SOLO BOMB ONLY
- BOSS Jelly King SOLO BOMB ONLY
- BOSS Jelly King - 61 Second Clear SOLO OLD/Pre-Patch BOMB ONLY
- BOSS Jelly King - 46 Second Clear SOLO OLD/Pre-Patch BOMB ONLY
- BOSS Jelly King - 25 Second Clear
 DUO BOMB ONLY
- BOSS Lord Vanaduke
OTHER: