User:Eek5/Shard Bombs
From SpiralKnights
Shard bombs
This page contains observations and opinions of 5-star shard-style bombs. There are 6 separate bombs which exhibit the same basic mechanics (bomb radius, number of shards, fuse times, charge times). There is a bomb that covers each pure damage type (normal, elemental, piercing, and shadow) as well as two semi-redundant bombs which have family-specific damage bonuses as well as a chance to proc status on hit. The four pure-damage bombs all share the same base damage for all explosions; all 6 bombs share the same base damage for the initial explosion.
- Deadly Shard Bomb

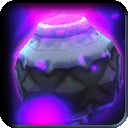
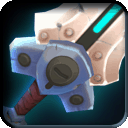
- Deadly Crystal Bomb

- Deadly Splinter Bomb

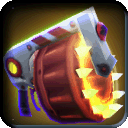
- Scintillating Sun Shards

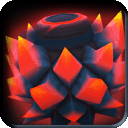
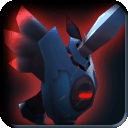
- Deadly Dark Matter Bomb

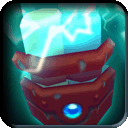
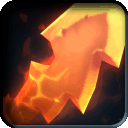
- Shocking Salt Bomb

| Shard Bomb Alchemy Paths | ||||||||||||||||||||||||||||||||||||||||||
|
Shard Bomb Mechanics
Charge
The shard bombs share charge times with the Blast Bomb series.
| None | Low | Medium | High | V. High | Ultra | Max | |
| Shard Bombs | 2200 | 2050 | 1870 | 1700 | 1550 | 1400 | 1225 |
* Time in milliseconds
Damage
Status Bombs
| Eek5/Shard Bombs's Damage Table (Click to Show!) | ||||||
|---|---|---|---|---|---|---|
| Stratum 1 | Stratum 2 | Stratum 3 | Stratum 4 | Stratum 5 | Stratum 6 | |
| Bonus Damage | ||||||
| Bomb Blast | 19-21 | 23-26 | 50-52 | 55-56 | 87-116 | 128-143 |
| Shards | 22-25 | 28-33 | 57-62 | 63-67 | 103-133 | 147-165 |
| UV Bonus (Slimes/Fiends) | ||||||
| Bomb Blast | 22-25 | 28-34 | 62-64 | 69-71 | 108-144 | 159-179 |
| Shards | 26-30 | 34-41 | 69-76 | 78-84 | 127-164 | 181-204 |
| Neutral Damage | ||||||
| Bomb Blast | 14 | 16-18 | 32-33 | 35 | 51-65 | 70-75 |
| Shards | 17 | 19-22 | 37-39 | 39-41 | 60-75 | 81-86 |
| Penalty Damage | ||||||
| Bomb Blast | 3-4 | 5-6 | 9-10 | 11-12 | 17-22 | 24-27 |
| Shards | 4-5 | 5-6 | 10-11 | 12-13 | 19-24 | 26-30 |
Pure Damage Bombs
| Eek5/Shard Bombs's Damage Table (Click to Show!) | ||||||
|---|---|---|---|---|---|---|
| Stratum 1 | Stratum 2 | Stratum 3 | Stratum 4 | Stratum 5 | Stratum 6 | |
| Bonus Damage | ||||||
| Bomb Blast | 19-21 | 23-26 | 50-52 | 55-56 | 87-116 | 128-143 |
| Shards | 23-27 | 33-38 | 66-71 | 74-79 | 117-151 | 166-186 |
| Neutral Damage (Also damage for normal damage shard bomb) | ||||||
| Bomb Blast | 14 | 16-18 | 32-33 | 35 | 51-65 | 70-75 |
| Shards | 18 | 22-25 | 46-45? | 45-47 | 71-89 | 95-99 |
| Penalty Damage | ||||||
| Bomb Blast | 3-4 | 5-6 | 9-10 | 11-12 | 17-22 | 24-27 |
| Shards | 4-5 | 6-7 | 11-13 | 13-15 | 20-26 | 29-33 |
Fuse & Explosion

The shard bombs have a two-stage explosion, both of which have knock back. The displayed radius on the fuse is that of the first explosion. The initial fuse is 1.8 seconds long and when it goes off it sends out 8 additional shards at 45 degree angles. These shards have a fuse of 2.5 seconds.
The first explosion behaves similarly to blast bomb, dealing damage to any unit inside of its radius and knocking the unit back. Most enemies will be knocked back as far as the outer-ring of shards, setting them up for a combo attack assuming they don't move.
![]() Note: The 2.5 second stage-two fuse allows enough time for enemies to move inside the outer shard ring and get pushed inward.
Note: The 2.5 second stage-two fuse allows enough time for enemies to move inside the outer shard ring and get pushed inward.

Latency
It takes 5.7 seconds from charge to explosion for a player with maximum charge time reduction. Because the charge time is only 1.225 seconds, a player "spamming" the bomb as fast as possible will be charging their fourth bomb by the time the main payload of the first bomb goes off. When holding a fully charged bomb, the player must anticipate where an enemy will be 4.3 seconds from the bomb drop to hit it with the main payload of the shard bombs. The inner fuse is 0.1 seconds shorter than the Nitronome but the double fuse is 115% longer.
![]() Snipe Fun Fact: In the time it takes to drop a shard bomb and have the outer-ring explode, a player with maximum charge time reduction can charge and drop 3 nitronomes, 2 of which will deal damage before the shard bomb's outer explosion goes off.
Snipe Fun Fact: In the time it takes to drop a shard bomb and have the outer-ring explode, a player with maximum charge time reduction can charge and drop 3 nitronomes, 2 of which will deal damage before the shard bomb's outer explosion goes off.
Status Bombs
Shocking Salt Bomb and Scintillating Sun Shards paths both have a fair chance of causing moderate shock and stun, respectively, at the cost of dealing 10.5% less damage per shard. The initial explosion deals damage equivalent to each bomb's non-status dealing counterpart.
Status application is similar to bombs such as the firecracker where enemies hit by the explosion have a chance to proc status. This applies to both the initial explosion and the secondary explosions. Note: Stun can make dodging attacks difficult.
Usage
Combo

Because of the long double-fuse, pre-bomb placement is very tricky. One strategy that works is to knock back enemies with the first explosion which takes the guesswork out of aiming the secondary ring, however, enemies will move in or out of the second ring and can either get knocked back in unintended directions or sneak into the dead-zone of the bomb. This strategy only works against small numbers of enemies because of the smaller initial radius.
Spamming
For larger groups of enemies, placing as many bombs as possible seems to work the best. The optimal placement for shard bombs is to have the rings overlap. A good rule of thumb is to place the second bomb one "square unit" away from the outer radius of the fuse indicator. This will overlap the 8 shards in a way that minimizes any dead zones. One of the biggest issues of spamming the shard bomb is that both the initial and secondary explosions knock enemies back and when dropping shard bombs as quickly as possible, explosions from 3 bombs back will be going off which can be difficult to anticipate.
General Placement
Shard units should be placed at least one "square unit" away from any obstacles (walls, low walls, boxes, etc) such that the entire initial radius is in "open" space. While this does not guarantee that shards on the blocked side of the bomb will appear it will at least give shards a chance to stack up against the short-side.
Placing the bomb down against a wall or obstacle will completely prevent 3 shards from appearing.
Videos
This section includes videos of clears using shard bombs. The section is categorized by bomb type and only covers 5* versions of each bomb. Unless otherwise noted in video descriptions, each clear is done with maximum CTR and maximum damage to show the bombs at their fullest potential. To see shard bomb effectiveness relative to other bombs see the comparisons section.
 Shocking Salt Bomb
- Jelly Farm

- D14 RJP Slimes vs Dark Retribution, Big Angry Bomb, Nitronome, Shocking Salt Bomb


- Jelly King
- D14&D15 RJP, Jelly King
- Compound 42 - SSB vs DR
- Gremlin Deconstruction Zones
 Deadly Crystal Bomb
- Zombies in Firestorm Citadel (duo)
- Zombies in Fire Storm Citadel Part 2 (solo)
- Lumbers, Retrodes, Scuttelbots
- Compound 42 - SSB vs DR vs
 Scintillating Sun Shards
Comparisons
This section contains comparison videos between shard bombs and other bombs.
Disclaimer: All these "tests" have been designed to be skewed in shard bomb's favor. For example, shard bombs are always shown being used against enemies weak to their respective damage while "opposing" bombs range from bonus to negative damage against enemies. Most of the non-shard bomb runs were done on a single pass whereas shard bomb clears are representative of the best clear out of a handful of runs.
- Zombies: DBB vs DCB
 vs
vs
- Zombies: Deadly Crystal Bomb vs Voltaic Tempest & Electron Vortex vs
 /
/
- D14 RJP Slimes" Dark Retribution, Big Angry Bomb, Nitronome, Shocking Salt Bomb
- Gremlin Deconstruction Zones vs Gremlins vs Dark Briar Barrage
- D14-16 Royal Jelly Palace with 3 Bombs vs vs
- Compound 42 - SSB vs DR vs
- Trojans: DR vs SSS vs
- Trojans in FSC vs Eeks vs Trojans


- Devilites & Kats: DBB vs SSS vs
- Wolvers: Nitronome vs DBB vs SSS
Bugs, Quirks and Criticism
Zero Damage Bombs
Shard bombs have been observed to occasionally deal no damage from either the initial blast or the outer ring. This appears to happen in regular use with the outer ring knocking enemies back but dealing no damage and may happen on a shard-to-shard basis and be one of the reasons why sometimes only deal single damage on double hits. Ocassionally enemies will not take damage to several shard bombs in a row regardless of whether it is initial blast or outer blast. This has been observed with both DCB and SSB (only on video for SSB). Videos of invulnerable enemies against shard bombs can be found below.
It is possible that this issue is much deeper than with just shard bombs, however, this behavior has not been observed on other damage bombs.
Bombing Over Gaps/Short Walls
This bomb does not work over gaps, short walls, or over open corners. This seems to be a compromise for allowing "short-side" (partially obscured/blocked) shards to group up before they reach their maximum distance. Unfortunately this mechanic does not always work and shards on the short-side don't consistently appear.
Disappearing Shards


When the full outer radius is obscured by walls (short or regular) or obstacles, shards are able to group up at the edge of the hard boundary, however, the shard behavior isn't always consistent. Sometimes all 3 short-side shards can appear grouped together and sometimes they will completely disappear.
It is also possible for some enemies such as trojans to prevent shards from appearing. This behavior seems to be very consistent as the shard actually collides with the enemy and never appears. (Note: The August 22nd patch that fixed shards colliding with players had no effect on shards colliding with some enemies)
Related Video(s)
Scintillating Sun Shards Stun Sorrows
This bomb isn't recommended mainly because stun is broken and it makes bombing Trojans very risky. Trojans can get stunned and immediately do their charge up attack without any animation whatsoever. Since stun can proc on both initial explosion and shard explosions this forces the player to maintain a "safe" distance away from trojans, making bombing trojans with SSS take even longer. SSS is one of the most inefficient ways to deal with Trojans as a result of this.
Related Video(s)
Bombing enemies in corners
This issue is related to disappearing shards; bombing targets that are wedged in corners can prove to be ineffective. Because diagonal shards are needed to hit a target in the corner (video example 1 example 2), sometimes placing the bomb at an angle off of 45 degrees will cause shards to "hit" the wall and sometimes never appear. Occassionally shards will appear but be affected by the zero damage bug and deal no damage whatsoever. If an enemy finds itself in a corner the best option is to use another weapon.
An alternative strategy is to place the bomb against one of the walls, throwing away 3 of the shards but guaranteeing that the corner shard is aligned with the corner. Unfortunately this bombing position can "force" the enemy to move out since the player is no longer blocking AI pathing.
Double hits only dealing single shard damage

Despite outer-ring shards having an overlap, enemies will often find themselves right between two charges before the shard explosion but only take damage as if only hit by a single shard. This seems to be due to the fact that shard explosions aren't synchronized; it is possible for two adjacent shards to explode asynchronously from each other with the preceding blast knocking the enemy out of range of the second blast or providing immunity? to the second blast. In either case, not being able to deal double-shard damage hurts shard bombs' competitiveness with other pure-damage bombs such as the nitronome, big angry bomb, or dark briar barrage.
In the video below, zombies are observed being affected by knockback from multiple shards but only taking single-hit damage. On some occasions, zombies change direction more than two times but only take one hit of damage.
Related Video(s)
Large Deadzone

One of the issues of the two-stage bomb is that by the time the outer-ring explosion goes off, there is a large hole in the center where enemies can move to and take zero damage. This dead zone is approximately 48% of the total area inside the full radius of the bomb. For stationary targets, there is a zone between the inner and outer explosions where enemies will take no damage at all. This applies to both the 4* and 5* versions of shard bombs.
Related Video(s)
No Mechanical Change from 4 to 5-star

Aside from small cosmetic changes with bomb models, the 4 and 5-star versions of shard bombs all behave identically and differ only in damage. Other bombs receive other benefits such as increased radii to differentiate from 4 and 5 star variants but this mechanical difference is absent in shard bombs. Increasing the inside radius as well as the radius of each shard explosion would decrease the dead zone on 5-star shard bombs while allowing for more frequent double shard hits as well as reducing the amount of misses per bomb.
Unpredictable Knockback
A disadvantage of bombs that a player dropped 3 charges in the past going off is that knockback can become unpredictable. Using the shard bombs in a similar manner to Nitronome (where the player places a bomb 1-2 "squares" away from an enemy) will often result in shards overshooting targets then knocking enemies towards the player. Even when using the bomb in a "combo" scenario, the initial explosion can push enemies into the outer ring only to have the enemy move before the outer ring explodes making secondary knockback inconsistent from scenario to scenario.
It is impossible to predict if the enemy will get pushed or "pulled" by the secondary explosions based on where the bomb is initially placed. Because of asynchronous explosions, sometimes it is even difficult to tell which direction an enemy will be pushed when they're standing on top of the outer ring. Here is an example (video) of completely unpredictable knockback.
Damage
One of the main factors preventing shard bombs from being competitive damage dealers is due to the low amount of damage they deal per bomb. While hitting enemies can be tricky, even when hits land they don't have as much impact as other damage bombs.
Bonus and Neutral Damage
Bonus Damage
Most specialized weapons deal 30-40% more than their base damage which gives them a big advantage when facing weak enemies. For example, a flourish deals 40.3% more damage on its first swing against beasts/fiends compared to undead; the DBB has a 40.3% bonus and the AoA has a 56.8% bonus. Unlike other weapons, the shard bombs have a huge discrepancy between bonus and neutral damage. On the initial explosion shard bombs "benefit" from a 90.6% damage boost against weak foes (75 damage vs 143). On the secondary explosions, shard bombs deal 87.8% higher damage against weak foes as opposed to neutral targets. While these boosts appear to be big it is important to keep in mind that the shard bombs are not competitive against even normal damage bombs when facing weak foes. What this huge bonus really means is that while the DCB may be barely competitive against the DBB against undead (instead of clearing ~40% faster as would be expected), it is receiving a massive penalty against neutral targets.
Neutral Damage
All the non-status shard bombs share the same base damage as the neutral, normal-dealing Deadly Shard Bomb (DSB). At depth 28, the Deadly Shard Bomb hits targets for 75 damage with the initial explosion and 99 damage for each shard. The maximum damage a single DSB can inflict would be to hit for the initial explosion knocking an enemy into the outer ring then double-hitting with shard damage for another 198 damage for a total of 273 damage. At the same depth, a Nitronome will hit a target for 230 damage in a single explosion. Another thing to consider is that in the time it takes for a shard bomb to deliver the main payload of the outer-ring, two nitronomes will already have dealt damage. In this scenario the Nitronome user would be dealing 230-480 damage whereas the shard bomb user would be dealing 75-273 damage. The damage potential isn't competitive.
When looking at clear speeds for levels, Nitronome and DBB (against neutral targetS) have been observed to clear levels 2.5 times faster than neutral dealing shard bombs.
Competitive Potential, Low Actual Average Damage
Even the specialized damage bombs fall short when compared to the normal damage Nitronome. The Deadly Crystal Bomb, for example, deals 143 damage in its initial blast and 186 per shard to enemies weak against elemental damage. In the time two Nitronomes go off, the DCB would be dealing 143-515 damage compared to a normal-damage Nitronome which would deal 230-460 damage. Even with a damage bonus, the shard bombs are barely competitive against a normal damage bomb! The Dark Briar Barrage would deal 285-570 against enemies weak to pierce at depth 28 and most likely always be dealing 570 damage per two bombs because of its ease of use and lack of knockback.
![]() Snipe Fun Fact: Despite having a penalty against fiends, the dark retribution can kill trojans just as fast as Scintillating Sun Shards which have a piercing damage bonus against fiends. Video
Snipe Fun Fact: Despite having a penalty against fiends, the dark retribution can kill trojans just as fast as Scintillating Sun Shards which have a piercing damage bonus against fiends. Video
This low base damage makes these bombs very unattractive as options in loadouts due to their one-dimensional nature. In mixed family group levels such as Firestorm Citadel where players can find trojans (fiends) and zombies intermingling, the low base damage forces players to double up on bombs. For example, a player clearing FSC with the Deadly Crystal bomb would be doing decent damage to zombies but very poor damage to trojans which are neutral to elemental damage and vice versa.
Other weapons such as the DBB or flourish series remain competitive even when dealing damage to neutral targets and their high damage to fiends and beasts is balanced via the in game damage mechanism where they are weak to 2 family groups (construct and slimes). All the shard bombs suffer from being barely competitive against enemies they're strong against and getting completely outclassed in the other 4 off-strength families.
While the damage potential of a single bomb can be high, the small radius of the individual shard explosions and the double hit bug often leads to bombs dealing only a single hit of outer shard damage per bomb. In this scenario even a normal bomb such as the nitronome outclasses pure damage bombs such as the DCB. These "dud" bombs drag down the DPS of shard bombs compared to other damage bombs even when not including the long set-up time of the shard bomb.
Set-up, Anticipation and Timing

Spin Up
One way to understand the latency on shard-style bombs is to think of it like a mini-gun that needs to spool up before it can start dealing damage. The 5.7 second delay from charge to main explosions is basically "spin up" or "set-up" time. This can be ignored in most party rooms where players can have time to set-up but any time a bomber gets hit or has to stop dropping bombs the start-up time resets. One of the disadvantages of having such a long set-up is that in party situations shard bombs may deal very little damage (video) as other players kill enemies faster than 5.7 seconds. An argument against this is that the fuse for stage-one of shard bombs is 0.1 seconds faster than a Nitronome but the initial explosion is 12-13% less damage than outer-ring explosions on status-shard bombs and 23% less damage than outer-ring explosions on pure-damage shard bombs, sacrificing even more damage on already non-competitive bombs.
The slow set-up time of the bombs (see: bottom upside-down staircase of time graph) means that getting the bomb into its "stride" where it is dealing maximum damage every ~1.2s takes 2 seconds longer than other damage bombs. Even in scenarios where you can pre-set bombs before enemy spawns (party buttons) the bomb still isn't competitive against enemies that move around because you have to adjust your position and suffer the slow start-up time again. This can be seen in the wolver clear video. Despite cutting out the entire start-up cycle, the clear for SSS takes longer because everytime the wolvers shift positions the cycle has to start over. (hitting wolvers for only single shard damage instead of getting frequent double-hits also hurts the clear speed for SSS)
The slow set-up time also affects the ability to hit targets with vulnerability time windows such as Royal Jelly's Spin phase. Because the window for vulnerability is only 7 seconds, a player can only hit RJ after it stops spinning once with an out-ring explosion along with whatever they managed to place on the ground before RJ enters vulnerability. This start-up "latency" hurts shard bomb damage potential any time there are short and quick encounters.
Entropy
Another criticism with the shard-style bombs is that timing their drop is tricky. Positioning the first bomb to set up a combo is simple but after that the delay of the secondary explosions begins to insert a lot of entropy into battles. Expecting players to be able to anticipate where enemies will be nearly 6 seconds into the future is unreasonable especially when there are time-delayed charges scattered throughout the battlefield. Instead, the better strategy to get the most "bang for your buck" is to just "spam" the bomb as often as possible despite what Remi says!
Double Fuse and Bomb Synergy
When just looking at a single bomb drop the positioning is straight forward. Placing a bomb at the feet of an enemy will often knock them back into the outer ring, however, the shard bomb has poor synergy with itself. The secondary fuse is long enough that enemies can leave the AOE of secondary shards and end up only taking damage from the initial blast.
Related Video(s)