|
|
| Line 43: |
Line 43: |
| | | | |
| | Alternate layout 2 | | Alternate layout 2 |
| − |
| |
| − | == Equipment ==
| |
| − | {{SKWindow2|width=450px|collapsible={{{collapsible|yes}}} |state={{{state|collapsed}}}
| |
| − | |header=[[file:icon-sword.png|20px]] '''Swords'''}}
| |
| − | {{SKNewRow}}
| |
| − | {{SKCell2|[[file:Equipment-Leviathan_Blade_icon.png|25px|Leviathan Blade|link={{{1|Leviathan Blade}}}]] [[file:Unique variant icon.png|15px|{{{uv|Charge Time Reduction: Low}}}]]{{star|5}}|center|background=#ebc94d}}
| |
| − | {{SKCell2|[[file:Equipment-Sealed_Sword_icon.png|25px|Sealed Sword|link={{{1|Sealed Sword}}}]] {{star|3}}|center|background=#ebc94d}}
| |
| − | {{SKNewRow}}
| |
| − | {{SKCell2|[[file:Equipment-Snarble_Barb_icon.png|25px|Snarbe Barb|link={{{1|Snarble Barb}}}]] {{star|2}}|center|background=#ebc94d}}
| |
| − | {{SKNewRow}}
| |
| − | {{SKWindow/NewRow}}
| |
| − | {{SKWindow2|width=450px|collapsible={{{collapsible|yes}}} |state={{{state|collapsed}}}
| |
| − | |header=[[file:icon-handgun.png|20px]] '''Handguns'''}}
| |
| − | {{SKNewRow}}
| |
| − | {{SKCell2|[[file:Equipment-Super_Blaster_icon.png|25px|Super Blaster|link={{{3|Super Blaster}}}]] {{star|3}}|center|background=#ebc94d}}
| |
| − | {{SKCell2|[[file:Equipment-Toxic_Needle_icon.png|25px|Toxic Needle|link={{{1|Toxic Needle}}}]]{{star|3}}|center|background=#ebc94d}}
| |
| − | {{SKWindow/NewRow}}
| |
| − | {{SKWindow2|width=450px|collapsible={{{collapsible|yes}}} |state={{{state|collapsed}}}
| |
| − | |header=[[file:icon-bomb.png|20px]] '''Bombs'''}}
| |
| − | {{SKNewRow}}
| |
| − | {{SKCell2|[[file:Equipment-Twisted_Spine_Cone_icon.png|25px|Twisted Spine Cone|link={{{1|Twisted Spine Cone}}}]] {{star|3}}|center|background=#ebc94d}}
| |
| − | {{SKWindow/NewRow}}
| |
| − | {{SKWindow2|width=450px|collapsible={{{collapsible|yes}}} |state={{{state|collapsed}}}
| |
| − | |header=[[file:icon-helmet.png|20px]] '''Helmets'''}}
| |
| − | {{SKNewRow}}
| |
| − | {{SKCell2|[[file:Equipment-Ash_Tail_Cap_icon.png|25px|Ash Tail Cap|link={{{1|Ash Tail Cap}}}]]{{star|4}}|center|background=#ebc94d}}
| |
| − | {{SKCell2|[[file:Equipment-Magic_Hood_icon.png|25px|Magic Hood|link={{{1|Magic Hood}}}]]{{star|2}}|center|background=#ebc94d}}
| |
| − | {{SKWindow/NewRow}}
| |
| − | {{SKWindow2|width=450px|collapsible={{{collapsible|yes}}} |state={{{state|collapsed}}}
| |
| − | |header=[[file:icon-armor.png|20px]] '''Armors'''}}
| |
| − | {{SKNewRow}}
| |
| − | {{SKCell2|[[file:Equipment-Skolver_Coat_icon.png|25px|Skolver Coat|link={{{1|Skolver Coat}}}]] {{star|5}}|center|background=#ebc94d}}
| |
| − | {{SKCell2|[[file:Equipment-Fencing Jacket icon.png|25px|Fencing Jacket|link={{{1|Fencing Jacket}}}]] {{star|0}}|center|background=#ebc94d}}
| |
| − | {{SKWindow/NewRow}}
| |
| − | {{SKWindow2|width=450px|collapsible={{{collapsible|yes}}} |state={{{state|collapsed}}}
| |
| − | |header=[[file:icon-shield.png|20px]] '''Shields'''}}
| |
| − | {{SKNewRow}}
| |
| − | {{SKCell2|[[file:Equipment-Dark_Thorn_Shield_icon.png|25px|Dark Thorn Shield|link={{{1|Dark Thorn Shield}}}]] {{star|4}}|center|background=#ebc94d}}
| |
| − | {{SKWindow/NewRow}}
| |
| − | {{SKWindow2|width=450px|collapsible={{{collapsible|yes}}} |state={{{state|collapsed}}}
| |
| − | |header=[[file:icon-shield.png|20px]] '''Costumes'''}}
| |
| − | {{SKNewRow}}
| |
| − | {{SKCell2|[[file:Equipment-Ruby_Bombhead_Mask_icon.png|25px|Ruby Bombhead Mask|link={{{1|Ruby Bombhead Mask}}}]]}} [[Ruby Bombhead Mask]]
| |
| − | {{SKCell2|[[file:Equipment-Spiral_Bombhead_Mask_icon.png|25px|Spiral Bombhead Mask|link={{{1|Spiral Bombhead Mask}}}]]}} [[Spiral Bombhead Mask]]
| |
| − | {{SKWindow/NewRow}}
| |
| − | {{SKWindow2|width=450px|collapsible={{{collapsible|yes}}} |state={{{state|collapsed}}}
| |
| − | |header=[[file:icon-trinket.png|20px]] '''Trinkets'''}}
| |
| − | {{SKNewRow}}
| |
| − | {{SKCell2|[[file:Equipment-Royal Jelly Band icon.png|25px|Royal Jelly Band|link={{{1|Royal Jelly Band}}}]] {{star|5}}|center|background=#ebc94d}}
| |
| − | {{SKCell2|[[file:Equipment-Dread Skelly Charm icon.png|25px|Dread Skelly Charm|link={{{1|Dread Skelly Charm}}}]] {{star|5}}|center|background=#ebc94d}}
| |
| − | {{Table/End}}
| |
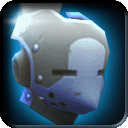 Azure Guardian Helm ★★★★★
 Azure Guardian Armor ★★★★★
 Mercurial Helm ★★★★★
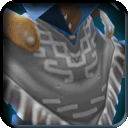
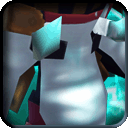 Mercurial Mail ★★★★★
 Nameless Hat ★★★★★
 Nameless Poncho ★★★★★