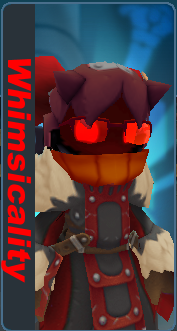
Difference between revisions of "User:Whimsicality"
From SpiralKnights
m (corrected redlink) |
Whimsicality (Talk | contribs) |
||
| Line 18: | Line 18: | ||
== Hiya! == | == Hiya! == | ||
| − | The username's Whimsicality, but for simplicity's sake, call me | + | The username's Whimsicality, but for simplicity's sake, call me Whimsy. Two of my closest friends, Mintsdale and [[User:DoctahWahwee|Dr. Wily]] have brought my attention to this game a while ago. I was skeptical at first, and when I found out my computer could hardly run the dang thing, I almost wanted to delete the game and quit. I do not regret continuing in the slightest. It's been enough to hold my attention for so long, so I think OOO deserves some credit for making a neat game. |
Now, I may be lenient on who I accept friend requests from, but don't think I'm just gonna abandon ship and tend to your whim. I'm here for my friends, and random nobodies who spam requests ain't friends of mine. Plus, I'm a F2P (free-to-play) player at heart. I don't particularly care for spending money to progress through the game, but that doesn't mean I hate those who do contribute to OOO's wallet. | Now, I may be lenient on who I accept friend requests from, but don't think I'm just gonna abandon ship and tend to your whim. I'm here for my friends, and random nobodies who spam requests ain't friends of mine. Plus, I'm a F2P (free-to-play) player at heart. I don't particularly care for spending money to progress through the game, but that doesn't mean I hate those who do contribute to OOO's wallet. | ||
The name Whimsicality originated from some silly name I had on Skype, relating to the Pokémon Whimsicott, or something. I feel that this name is fairly fitting for how I generally act in this game; I joke around playfully, and I like to do certain tasks in the game spontaneously. (Variety is the spice of life!) I guess you could say I'm very whimsical! <s>Oh God, kill me for that lame joke.</s> | The name Whimsicality originated from some silly name I had on Skype, relating to the Pokémon Whimsicott, or something. I feel that this name is fairly fitting for how I generally act in this game; I joke around playfully, and I like to do certain tasks in the game spontaneously. (Variety is the spice of life!) I guess you could say I'm very whimsical! <s>Oh God, kill me for that lame joke.</s> | ||
| Line 26: | Line 26: | ||
This thing won't stop growing! | This thing won't stop growing! | ||
| − | |||
| − | |||
| − | |||
| − | |||
| − | |||
| − | |||
| − | |||
| − | |||
| − | |||
| − | |||
| − | |||
| − | |||
| − | |||
| − | |||
| − | |||
| − | |||
| − | |||
| − | |||
| − | |||
| − | |||
| − | |||
| − | |||
| − | |||
| − | |||
| − | |||
| − | |||
| − | |||
| − | |||
| − | |||
| − | |||
| − | |||
| − | |||
| − | |||
| − | |||
| − | |||
| − | |||
| − | |||
{{showhide|[[file:icon-sword.png|20px]] Swords|content= | {{showhide|[[file:icon-sword.png|20px]] Swords|content= | ||
* [[File:Equipment-Barbarous_Thorn_Blade_icon.png|20px]] [[Barbarous Thorn Blade]] | * [[File:Equipment-Barbarous_Thorn_Blade_icon.png|20px]] [[Barbarous Thorn Blade]] | ||
| − | * [[File:Equipment-Voltedge_icon.png|20px]] [[Voltedge]] [[file:Unique variant icon.png|20px|Attack Speed Increase | + | * [[File:Equipment-Lionheart_Honor_Blade_icon.png|20px]] [[Lionheart Honor Blade|Levi Recolor]] |
| + | * [[File:Equipment-Dread_Venom_Striker_icon.png|20px]] [[Dread Venom Striker]] [[file:Unique variant icon.png|20px|Charge Time Reduction Low]] | ||
| + | * [[File:Equipment-Voltedge_icon.png|20px]] [[Voltedge]] [[file:Unique variant icon.png|20px|Attack Speed Increase Medium]] | ||
* [[File:Equipment-Warmaster_Rocket_Hammer_icon.png|20px]] [[Warmaster Rocket Hammer]] | * [[File:Equipment-Warmaster_Rocket_Hammer_icon.png|20px]] [[Warmaster Rocket Hammer]] | ||
* [[File:Equipment-Gran_Faust_icon.png|20px]] [[Faust]] | * [[File:Equipment-Gran_Faust_icon.png|20px]] [[Faust]] | ||
| − | * [[File:Equipment-Stable_Rocket_Hammer_icon.png|20px]] [[Stable Rocket Hammer]] | + | * [[File:Equipment-Stable_Rocket_Hammer_icon.png|20px]] [[Stable Rocket Hammer]] [[file:Unique variant icon.png|20px|Charge Time Reduction Low]] |
| − | * [[File:Equipment- | + | * [[File:Equipment-Final_Flourish_icon.png|20px]] [[Swift Flourish]] [[file:Unique variant icon.png|20px|Attack Speed Increase Medium]] |
* [[File:Equipment-Rigadoon_icon.png|20px]] [[Rigadoon]] | * [[File:Equipment-Rigadoon_icon.png|20px]] [[Rigadoon]] | ||
| − | * [[File:Equipment- | + | * [[File:Equipment-Acheron_icon.png|20px]] [[Nightblade]] [[file:Unique variant icon.png|20px|Damage Bonus: Slimes Medium]] |
| − | * [[File:Equipment-Combuster_icon.png|20px]] [[Fireburst Brandish]] | + | * [[File:Equipment-Combuster_icon.png|20px]] [[Fireburst Brandish]] [[file:Unique variant icon.png|20px|Damage Bonus: Constructs Low]] |
| − | * [[File:Equipment-Glacius_icon.png|20px]] [[Iceburst Brandish]] | + | * [[File:Equipment-Glacius_icon.png|20px]] [[Iceburst Brandish]] [[file:Unique variant icon.png|20px|Damage Bonus: Undead Medium]] |
| − | * [[File:Equipment-Cautery_Sword_icon.png|20px]] [[Cautery Sword]] | + | * [[File:Equipment-Cautery_Sword_icon.png|20px]] [[Cautery Sword]] [[file:Unique variant icon.png|20px|Damage Bonus: Gremlin Low]] |
* [[File:Equipment-Leviathan_Blade_icon.png|20px]] [[Tempered Calibur]] | * [[File:Equipment-Leviathan_Blade_icon.png|20px]] [[Tempered Calibur]] | ||
* [[File:Equipment-Wrench_Wand_icon.png|20px]] [[Wrench Wand]] | * [[File:Equipment-Wrench_Wand_icon.png|20px]] [[Wrench Wand]] | ||
* [[File:Equipment-Triglav_icon.png|20px]] [[Troika|WHAM BAM]] | * [[File:Equipment-Triglav_icon.png|20px]] [[Troika|WHAM BAM]] | ||
| − | * [[File:Equipment-Winmillion_icon.png|20px]] [[ | + | * [[File:Equipment-Winmillion_icon.png|20px]] [[Arc Razor]] [[file:Unique variant icon.png|20px|Attack Speed Increase Medium]] |
* [[File:Equipment-Prototype_Rocket_Hammer_icon.png|20px]] [[Prototype Rocket Hammer]] | * [[File:Equipment-Prototype_Rocket_Hammer_icon.png|20px]] [[Prototype Rocket Hammer]] | ||
* [[File:Equipment-Heavy_Hatchet_icon.png|20px]] [[Heavy Hatchet|Something Ylol worked for]] [[file:Unique variant icon.png|20px|Attack Speed Increase High]] | * [[File:Equipment-Heavy_Hatchet_icon.png|20px]] [[Heavy Hatchet|Something Ylol worked for]] [[file:Unique variant icon.png|20px|Attack Speed Increase High]] | ||
| Line 93: | Line 58: | ||
{{showhide|[[file:icon-handgun.png|20px]] Guns|content= | {{showhide|[[file:icon-handgun.png|20px]] Guns|content= | ||
| − | * [[File:Equipment-Argent_Peacemaker_icon.png|20px]] [[ | + | * [[File:Equipment-Argent_Peacemaker_icon.png|20px]] [[Argent Peacemaker]] |
* [[File:Equipment-Biohazard_icon.png|20px]] [[Biohazard]] | * [[File:Equipment-Biohazard_icon.png|20px]] [[Biohazard]] | ||
| − | * [[File:Equipment-Callahan_icon.png|20px]] [[Magnus]] | + | * [[File:Equipment-Callahan_icon.png|20px]] [[Magnus]] [[file:Unique variant icon.png|20px|Charge Time Reduction Low]] |
| − | * [[File:Equipment-Plague_Needle_icon.png|20px]][[Plague Needle]] | + | * [[File:Equipment-Plague_Needle_icon.png|20px]][[Plague Needle]] [[file:Unique variant icon.png|20px|Damage Bonus: Fiends Medium]] |
| − | * [[File:Equipment-Polaris_icon.png|20px]] [[Kilowatt Pulsar]] | + | * [[File:Equipment-Polaris_icon.png|20px]] [[Kilowatt Pulsar]] [[file:Unique variant icon.png|20px|Attack Speed Increase Low]] |
| + | * [[File:Equipment-Storm_Driver_icon.png|20px]] [[Voltech Alchemer Mk II]] [[file:Unique variant icon.png|20px|Charge Time Reduction Low]] | ||
* [[File:Equipment-Umbra_Driver_icon.png|20px]] [[Shadowtech Alchemer Mk II|Vana was feeling generous that day]] | * [[File:Equipment-Umbra_Driver_icon.png|20px]] [[Shadowtech Alchemer Mk II|Vana was feeling generous that day]] | ||
| − | * [[File:Equipment-Valiance_icon.png|20px]] [[ | + | * [[File:Equipment-Valiance_icon.png|20px]] [[Valiance]] |
* [[File:Equipment-Zapper_icon.png|20px]] [[Zapper|Taser]] [[file:Unique variant icon.png|20px|Attack Speed Increase High]] | * [[File:Equipment-Zapper_icon.png|20px]] [[Zapper|Taser]] [[file:Unique variant icon.png|20px|Attack Speed Increase High]] | ||
* [[File:Equipment-Frost_Gun_icon.png|20px]] [[Frost Gun|Snow Peas]] [[file:Unique variant icon.png|20px|Charge Time Reduction High]] | * [[File:Equipment-Frost_Gun_icon.png|20px]] [[Frost Gun|Snow Peas]] [[file:Unique variant icon.png|20px|Charge Time Reduction High]] | ||
| Line 109: | Line 75: | ||
{{showhide|[[file:icon-bomb.png|20px]] Bombs|content= | {{showhide|[[file:icon-bomb.png|20px]] Bombs|content= | ||
| − | * [[File:Equipment-Voltaic_Tempest_icon.png|20px]] [[Voltaic Tempest]] [[file:Unique variant icon.png|20px| | + | * [[File:Equipment-Voltaic_Tempest_icon.png|20px]] [[Voltaic Tempest]] [[file:Unique variant icon.png|20px|Damage Bonus: Undead Very High]] |
| − | * [[File:Equipment- | + | * [[File:Equipment-Stagger_Storm_icon.png|20px]][[Haze Burst]] [[file:Unique variant icon.png|20px|Charge Time Reduction Low]] |
* [[File:Equipment-Dark_Retribution_icon.png|20px]] [[Dark Retribution]] | * [[File:Equipment-Dark_Retribution_icon.png|20px]] [[Dark Retribution]] | ||
* [[File:Equipment-Dark_Briar_Barrage_icon.png|20px]] [[Spike Shower]] [[file:Unique variant icon.png|20px|Gremlin Bonus Low]] | * [[File:Equipment-Dark_Briar_Barrage_icon.png|20px]] [[Spike Shower]] [[file:Unique variant icon.png|20px|Gremlin Bonus Low]] | ||
| Line 116: | Line 82: | ||
* [[File:Equipment-Dark Reprisal_icon.png|20px]] [[Dark Reprisal]] | * [[File:Equipment-Dark Reprisal_icon.png|20px]] [[Dark Reprisal]] | ||
* [[File:Equipment-Ash_of_Agni_icon.png|20px]] [[Fiery Vaporizer Mk II]] | * [[File:Equipment-Ash_of_Agni_icon.png|20px]] [[Fiery Vaporizer Mk II]] | ||
| − | * [[File:Equipment-Shivermist_Buster_icon.png|20px]] [[Freezing Vaporizer]] | + | * [[File:Equipment-Shivermist_Buster_icon.png|20px]] [[Freezing Vaporizer Mk II]] |
* [[File:Equipment-Nitronome_icon.png|20px]] [[Blast Bomb]] | * [[File:Equipment-Nitronome_icon.png|20px]] [[Blast Bomb]] | ||
* [[File:Equipment-Cold_Snap_icon.png|20px]] [[Cold Snap]] [[file:Unique variant icon.png|20px|Charge Time Reduction Medium]] | * [[File:Equipment-Cold_Snap_icon.png|20px]] [[Cold Snap]] [[file:Unique variant icon.png|20px|Charge Time Reduction Medium]] | ||
* [[File:Equipment-Firecracker_icon.png|20px]] [[Cold Snap]] [[file:Unique variant icon.png|20px|Charge Time Reduction Medium]] | * [[File:Equipment-Firecracker_icon.png|20px]] [[Cold Snap]] [[file:Unique variant icon.png|20px|Charge Time Reduction Medium]] | ||
| − | * [[File:Equipment-Proto_Bomb_icon.png|20px]] [[Proto Bomb]] [[file:Unique variant icon.png|20px|Charge Time Reduction High]] }} | + | * [[File:Equipment-Proto_Bomb_icon.png|20px]] [[Proto Bomb]] [[file:Unique variant icon.png|20px|Charge Time Reduction High]] |
| + | }} | ||
| + | |||
| + | {{showhide|[[file:icon-helmet.png|20px]] Helms|content= | ||
| + | * [[File:Equipment-Vog_Cub_Cap_icon.png|20px]] [[Vog Cub Cap]] [[file:Unique variant icon.png|20px|Stun Resist Low]] | ||
| + | * [[File:Equipment-Perfect_Mask_of_Seerus_icon.png|20px]] [[Perfect Mask of Seerus]] [[file:Unique variant icon.png|20px|Stun Resist Low]] | ||
| + | * [[File:Equipment-Snarbolax_Cap_icon.png|20px]] [[Snarbolax Cap]] [[file:Unique variant icon.png|20px|Piercing Defense Increase Low]] | ||
| + | * [[File:Equipment-Divine_Veil_icon.png|20px]] [[Divine Veil]] | ||
| + | * [[File:Equipment-Mercurial_Demo_Helm_icon.png|20px]] [[Mercurial Demo Helm]] [[file:Unique variant icon.png|20px|Fire Resist Medium]] | ||
| + | * [[File:Equipment-Ice_Queen_Crown_icon.png|20px]] [[Ice Queen Crown]] [[file:Unique variant icon.png|20px|Shock Resist Low]] | ||
| + | * [[File:Equipment-Blazebreak_Helm_icon.png|20px]] [[Blazebreak Helm]] [[file:Unique variant icon.png|20px|Curse Resist Low]] | ||
| + | * [[File:Equipment-Blazebreak_Helm_icon.png|20px]] [[Blazebreak Helm]] [[file:Unique variant icon.png|20px|Piercing Defense Increase Med]] [[file:Unique variant icon.png|20px|Normal Defense Increase Low]] + Hallow Scarf + Hallow Glasses + Toasty Flower | ||
| + | * [[File:Equipment-Angelic_Helm_icon.png|20px]] [[Seraphic Helm]] + Cool Glasses | ||
| + | * [[File:Equipment-Chroma_Mask_icon.png|20px]] [[Chroma Mask]] [[file:Unique variant icon.png|20px|Poison Resist Low]] | ||
| + | * [[File:Equipment-Dusker_Cap_icon.png|20px]] [[Dusker Cap]] [[file:Unique variant icon.png|20px|Shock Resist Medium]] | ||
| + | * [[File:Equipment-Flawed_Mask_of_Seerus_icon.png|20px]] [[Flawed Mask of Seerus]] [[file:Unique variant icon.png|20px|Freeze Resist High]] | ||
| + | * [[File:Equipment-Quicksilver_Helm_icon.png|20px]] [[Quicksilver Helm]] [[file:Unique variant icon.png|20px|Curse Resist Low]] + Heavy Game Face | ||
| + | * [[File:Equipment-Magic_Hood_icon.png|20px]] [[Magic Hood]] | ||
| + | * [[File:Equipment-Cobalt_Helm_icon.png|20px]] [[Cobalt Helm]] | ||
| + | * [[File:Equipment-Spiral_Demo_Helm_icon.png|20px]] [[Spiral Demo Helm]] + Regal Plume | ||
| + | * [[File:Equipment-Spiral_Plate_Helm_icon.png|20px]] [[Spiral Plate Helm]] | ||
| + | * [[File:Equipment-Skelly_Mask_icon.png|20px]] [[Skelly Mask]] | ||
| + | * [[File:Equipment-Emberbreak_Helm_icon.png|20px]] [[Emberbreak Helm]] + Cool Maid Headband + Cool Ribbon + Fancy Goggles | ||
| + | * [[File:Equipment-Fractured_Mask_of_Seerus_icon.png|20px]] [[Fractured Mask of Seerus]] | ||
| + | * [[File:Equipment-Toasty_Spiral_Sallet_icon.png|20px]] [[Spiral Sallet| Toasty Spiral Sallet]] | ||
| + | }} | ||
| + | |||
| + | {{showhide|[[file:icon-armor.png|20px]] Armor|content= | ||
| + | * [[File:Equipment-Vog_Cub_Coat_icon.png|20px]] [[Vog Cub Coat]] [[file:Unique variant icon.png|20px|Poison Resist Low]] + Toasty Canteen | ||
| + | * [[File:Equipment-Skolver_Coat_icon.png|20px]] [[Skolver Coat]] | ||
| + | * [[File:Equipment-Snarbolax_Coat_icon.png|20px]] [[Snarbolax Coat]] [[file:Unique variant icon.png|20px|Elemental Defense Increase Low]] | ||
| + | * [[File:Equipment-Mercurial_Demo_Suit_icon.png|20px]] [[Mercurial Demo Suit]] | ||
| + | * [[File:Equipment-Blazebreak_Armor_icon.png|20px]] [[Blazebreak Armor]] [[file:Unique variant icon.png|20px|Piercing Defense Increase Medium]] | ||
| + | * [[File:Equipment-Dragon_Scale_Mail_icon.png|20px]] [[Dragon Scale Mail]] [[file:Unique variant icon.png|20px|Elemental Defense Increase Medium]] | ||
| + | * [[File:Equipment-Dusker_Coat_icon.png|20px]] [[Dusker Coat]] [[file:Unique variant icon.png|20px|Shock Resist Medium]] [[file:Unique variant icon.png|20px|Elemental Defense Low]] | ||
| + | * [[File:Equipment-Chroma_Suit_icon.png|20px]] [[Chroma Suit]] | ||
| + | * [[File:Equipment-Cobalt_Armor_icon.png|20px]] [[Cobalt Armor]] | ||
| + | * [[File:Equipment-Jelly_Mail_icon.png|20px]] [[Jelly Mail]] | ||
| + | * [[File:Equipment-Magic_Cloak_icon.png|20px]] [[Magic Cloak]] | ||
| + | * [[File:Equipment-Spiral_Scale_Mail_icon.png|20px]] [[Spiral Scale Mail]] + Fancy Vitakit + Fancy Canteen | ||
| + | * [[File:Equipment-Skelly_Suit_icon.png|20px]] [[Skelly Suit]] + Military Canteen | ||
| + | * [[File:Equipment-Emberbreak_Armor_icon.png|20px]] [[Emberbreak Armor]] | ||
| + | * [[File:Equipment-Fencing_Jacket_icon.png|20px]] [[Fencing Jacket]] | ||
| + | * [[File:Equipment-Vitasuit_icon.png|20px]] [[Vitasuit]] + Proto Crest | ||
| + | * [[File:Equipment-Toasty_Spiral_Culet_icon.png|20px]] [[Spiral Culet|Toasty Spiral Culet]] | ||
| + | }} | ||
{{showhide|[[file:icon-shield.png|20px]] Shields|content= | {{showhide|[[file:icon-shield.png|20px]] Shields|content= | ||
* [[File:Equipment-Barbarous_Thorn_Shield_icon.png|20px]] [[Dark Thorn Shield]] | * [[File:Equipment-Barbarous_Thorn_Shield_icon.png|20px]] [[Dark Thorn Shield]] | ||
| + | * [[File:Equipment-Exalted_Honor_Guard_icon.png|20px]] [[Exalted Honor Guard|Aegis Recolor]] | ||
* [[File:Equipment-Volcanic_Plate_Shield_icon.png|20px]] [[Volcanic Plate Shield]] | * [[File:Equipment-Volcanic_Plate_Shield_icon.png|20px]] [[Volcanic Plate Shield]] | ||
* [[File:Equipment-Crest_of_Almire_icon.png|20px]] [[Blackened Crest]] | * [[File:Equipment-Crest_of_Almire_icon.png|20px]] [[Blackened Crest]] | ||
* [[File:Equipment-Frostbreaker_Shield_icon.png|20px]] [[Frostbreaker Shield]] | * [[File:Equipment-Frostbreaker_Shield_icon.png|20px]] [[Frostbreaker Shield]] | ||
| − | * [[File:Equipment-Swiftstrike_Buckler_icon.png|20px]] [[Swiftstrike Buckler]] | + | * [[File:Equipment-Swiftstrike_Buckler_icon.png|20px]] [[Swiftstrike Buckler]] [[file:Unique variant icon.png|20px|Piercing Defense Increase Low]][[file:Unique variant icon.png|20px|Elemental Defense Increase Low]] |
* [[File:Equipment-Proto_Shield_icon.png|20px]] [[Proto Shield]] | * [[File:Equipment-Proto_Shield_icon.png|20px]] [[Proto Shield]] | ||
| − | * [[File:Equipment-Iron_Buckler_icon.png|20px]] [[Iron Buckler]] [[file:Unique variant icon.png|20px|Stun Resist | + | * [[File:Equipment-Iron_Buckler_icon.png|20px]] [[Iron Buckler]] [[file:Unique variant icon.png|20px|Stun Resist Med]] |
| + | }} | ||
{{showhide|[[file:icon-costume.png|20px]] Costumes *|content= | {{showhide|[[file:icon-costume.png|20px]] Costumes *|content= | ||
| Line 137: | Line 150: | ||
* [[File:Equipment-Azure_Bombhead_Mask_icon.png|20px]] [[Azure Bombhead Mask]] (x4) | * [[File:Equipment-Azure_Bombhead_Mask_icon.png|20px]] [[Azure Bombhead Mask]] (x4) | ||
* [[File:Equipment-Checkered_Bombhead_Mask_icon.png|20px]] [[Checkered Bombhead Mask]] (x2) | * [[File:Equipment-Checkered_Bombhead_Mask_icon.png|20px]] [[Checkered Bombhead Mask]] (x2) | ||
| − | * [[File:Equipment-Emerald_Bombhead_Mask_icon.png|20px]] [[Emerald Bombhead Mask]] ( | + | * [[File:Equipment-Emerald_Bombhead_Mask_icon.png|20px]] [[Emerald Bombhead Mask]] (x6) |
* [[File:Equipment-Golden_Bombhead_Mask_icon.png|20px]] [[Golden Bombhead Mask]] | * [[File:Equipment-Golden_Bombhead_Mask_icon.png|20px]] [[Golden Bombhead Mask]] | ||
| + | * A whole bunch of Hallow stuff. | ||
| + | * [[File:Equipment-Infernal_Guardian_Helm_icon.png|20px]] [[Infernal Guardian Helm]] | ||
| + | * [[File:Equipment-Infernal_Guardian_Armor_icon.png|20px]] [[Infernal Guardian Armor]] | ||
| + | * [[File:Equipment-Heavenly_Guardian_Helm_icon.png|20px]] [[Heavenly Guardian Helm]] | ||
| + | * [[File:Equipment-Heavenly_Guardian_Armor_icon.png|20px]] [[Heavenly Guardian Armor]] | ||
* [[File:Equipment-Iron_Bombhead_Mask_icon.png|20px]] [[Iron Bombhead Mask]] (x3) | * [[File:Equipment-Iron_Bombhead_Mask_icon.png|20px]] [[Iron Bombhead Mask]] (x3) | ||
* [[File:Equipment-Love_Puppy_Disguise_icon.png|20px]] [[Love Puppy Disguise]] | * [[File:Equipment-Love_Puppy_Disguise_icon.png|20px]] [[Love Puppy Disguise]] | ||
| − | * [[File:Equipment-Lovely_Bombhead_Mask_icon.png|20px]] [[Lovely Bombhead Mask]] ( | + | * [[File:Equipment-Lovely_Bombhead_Mask_icon.png|20px]] [[Lovely Bombhead Mask]] (x3) |
| + | * [[File:Equipment-Magic_Bombhead_Mask_icon.png|20px]] [[Magic Bombhead Mask]] | ||
* [[File:Equipment-Military_Stranger_Hat_icon.png|20px]] [[Military Stranger Hat]] | * [[File:Equipment-Military_Stranger_Hat_icon.png|20px]] [[Military Stranger Hat]] | ||
| − | * [[File:Equipment-Ruby_Bombhead_Mask_icon.png|20px]] [[Ruby Bombhead Mask]] ( | + | * [[File:Equipment-Ruby_Bombhead_Mask_icon.png|20px]] [[Ruby Bombhead Mask]] (x4) |
* [[File:Equipment-Scary_Bombhead_Mask_icon.png|20px]] [[Scary Bombhead Mask]] (x2) | * [[File:Equipment-Scary_Bombhead_Mask_icon.png|20px]] [[Scary Bombhead Mask]] (x2) | ||
| − | * [[File:Equipment-Silver_Bombhead_Mask_icon.png|20px]] [[Silver Bombhead Mask]] | + | * [[File:Equipment-Silver_Bombhead_Mask_icon.png|20px]] [[Silver Bombhead Mask]] (x2) |
| + | * [[File:Equipment-Surge_Tailed_Helm_icon.png|20px]] [[Surge Tailed Helm]] | ||
| + | * [[File:Equipment-Surge_Culet_icon.png|20px]] [[Surge Culet]] | ||
* [[File:Equipment-Starry_Bombhead_Mask_icon.png|20px]] [[Starry Bombhead Mask]] | * [[File:Equipment-Starry_Bombhead_Mask_icon.png|20px]] [[Starry Bombhead Mask]] | ||
* [[File:Equipment-Volcanic_Stranger_Hat_icon.png|20px]] [[Volcanic Stranger Hat]] | * [[File:Equipment-Volcanic_Stranger_Hat_icon.png|20px]] [[Volcanic Stranger Hat]] | ||
| Line 158: | Line 179: | ||
{{showhide|[[file:icon-accessory.png|20px]] Accessories|content= | {{showhide|[[file:icon-accessory.png|20px]] Accessories|content= | ||
| − | * [[File:Equipment- | + | * [[File:Equipment-Military_Goggles_icon.png|20px]] [[Goggles|Military Goggles]] |
* [[File:Equipment-Fancy_Goggles_icon.png|20px]] [[Goggles|Fancy Goggles]] | * [[File:Equipment-Fancy_Goggles_icon.png|20px]] [[Goggles|Fancy Goggles]] | ||
* [[File:Equipment-Cool_Ribbon_icon.png|20px]] [[Ribbon|Cool Ribbon]] | * [[File:Equipment-Cool_Ribbon_icon.png|20px]] [[Ribbon|Cool Ribbon]] | ||
| Line 165: | Line 186: | ||
* [[File:Equipment-Proto_Crest_icon.png|20px]] [[Crest|Proto Crest]] | * [[File:Equipment-Proto_Crest_icon.png|20px]] [[Crest|Proto Crest]] | ||
* [[File:Equipment-Cool_Maid_Headband_icon.png|20px]] [[Maid Headband|Cool Maid Headband]] | * [[File:Equipment-Cool_Maid_Headband_icon.png|20px]] [[Maid Headband|Cool Maid Headband]] | ||
| − | * [[File:Equipment-Pumpkin_Bomb_Bandolier_icon.png|20px]] [[Bomb Bandolier|Pumpkin Bandolier]] }} | + | * [[File:Equipment-Pumpkin_Bomb_Bandolier_icon.png|20px]] [[Bomb Bandolier|Pumpkin Bandolier]] |
| + | * [[File:Equipment-Divine_Vitakit_icon.png|20px]] [[Vitakit|Divine Vitakit]] | ||
| + | * [[File:Equipment-Fancy_Canteen_icon.png|20px]] [[Canteen|Fancy Canteen]] | ||
| + | * A whole bunch of Halloween stuff, including 6 Haunted Auras | ||
| + | }} | ||
{{showhide|[[file:icon-material.png|20px]] Materials|content= | {{showhide|[[file:icon-material.png|20px]] Materials|content= | ||
| Line 175: | Line 200: | ||
== PvE == | == PvE == | ||
| − | + | Arenas, RJP, Vana, oh my! | |
| Line 187: | Line 212: | ||
{{showhide|Tier 1|content= | {{showhide|Tier 1|content= | ||
| − | * [[Lockdown#classes| | + | * [[Lockdown#classes|Guardian Shield]] |
* [[Emberbreak Helm]] | * [[Emberbreak Helm]] | ||
* [[Emberbreak Armor]] | * [[Emberbreak Armor]] | ||
* [[Frost Gun]] | * [[Frost Gun]] | ||
* [[Cold Snap]] | * [[Cold Snap]] | ||
| − | * [[ | + | * [[Heavy Hatchet]] |
| + | * [[Prototype Rocket Hammer]] | ||
''Wait, why do you have this?'' | ''Wait, why do you have this?'' | ||
| − | Well... I haven't played T1 lockdown that much, so I can't really say. But, I have a very quick charge time on the Cold Snap, making it effective in defending bases and overall being annoying. The | + | Well... I haven't played T1 lockdown that much, so I can't really say. But, I have a very quick charge time on the Cold Snap, making it effective in defending bases and overall being annoying. The hammer is effective for maneuvering, and chunking away health. Though, from what little I have played, you just mash the attack button and hope the other player dies first. As such, virtually not much skill is required. I do have quite a bit of fun running around and spamming my Cold Snap, though. Cold Snap works wonders in roadblocking other players, and if they get frozen, there is ample opportunity to beat on them. I find Tier 1 is the only tier in which a guardian can easily overpower an entire team. The health regeneration is absolutely broken. |
}} | }} | ||
{{showhide|Tier 2|content= | {{showhide|Tier 2|content= | ||
| − | ''' | + | '''Generic Set:''' |
| − | * [[Lockdown#classes| | + | * [[Lockdown#classes|Striker Booster]] |
* [[Dusker Cap]] | * [[Dusker Cap]] | ||
* [[Dusker Coat]] | * [[Dusker Coat]] | ||
| − | * [[ | + | * [[Swift Flourish]] |
* [[Kilowatt Pulsar]] | * [[Kilowatt Pulsar]] | ||
| − | * | + | * [[Shockburst Brandish]] |
| − | * [[ | + | * [[Arc Razor]] |
* [[Tri-Heart Pendant]] (x2) | * [[Tri-Heart Pendant]] (x2) | ||
''Wait, why do you have this?'' | ''Wait, why do you have this?'' | ||
| − | + | As much as I dislike abiding by any sort of meta, I have found that sometimes it's necessary for me to swallow my pride and carry my team. So here's your basic generic set, but not really. Instead of opting in for a Sealed sword like everybody and their mother, I prefer the speeed of an Arc Razor. The Arc Razor hard counters any slow sword with it's sheer speed and it's erratic swing pattern. I love my Arc Razor. Otherwise, I use my ASI VH Shockburst to whittle someone down, or I juggle someone around with the Flourish. | |
| − | ''' | + | |
| − | * [[Lockdown#classes| | + | |
| + | '''Recon Set''' | ||
| + | * [[Lockdown#classes|Recon Cloak]] | ||
* [[Blazebreak Helm]] | * [[Blazebreak Helm]] | ||
| − | * [[ | + | * [[Dusker Coat]] |
| − | * [[ | + | * [[Shockburst Brandish]] |
| − | * [[ | + | * [[Voltech Alchemer Mk II]] |
| − | * [[ | + | * [[Swift Flourish]] |
| − | * [[ | + | * [[Lightning Capacitor.]] |
* [[Tri-Heart Pendant]] (x2) | * [[Tri-Heart Pendant]] (x2) | ||
''What about this junk?'' | ''What about this junk?'' | ||
| − | + | Being a fast piercing weapon, a toothpick is a pretty basic choice to bring in, and it counters out the recon's slowed down sword attacks. Not to mention, it makes the kills so much quicker and satisfying once the foe's defense is nerfed. Even without a defense nerf, a few strikes from the TSB can bring down foes easily. I typically try to cripple strikers with a shot from my Voltech Alchemer, but Kilowatt Pulsar is a good alternative for creating a distraction to lure enemies away from a base, or stop a bomber from charging his bomb. Shock is also a good status to inflict upon others, as it gives you ample opportunity to strike while they're spasming, and it dishes out extra damage. I have found that Shock removes invincibility frames, making a Striker with ASI an effective health-bar-melting tool. The Dusker Cap and Coat are pretty standard, being some of the best armor you can possibly wear. I wear a Blazebreak helm because it's functional and stylish. <s>Sun Shards are an example of an amazing, yet underused bomb in Lockdown. Not only do they deal Elemental and Piercing, two important damage types, it has multiple purposes. Picking off foes from afar, breaking a recon's cloak, supporting teammates attacking someone, etc. </s> THIS IS OBSOLETE AS THE SUN SHARDS SUCK NOW. | |
| − | + | ||
'''Hammer time!''' | '''Hammer time!''' | ||
* [[Stable Rocket Hammer]] | * [[Stable Rocket Hammer]] | ||
| − | |||
''What the--?!'' | ''What the--?!'' | ||
| − | At times, I will switch in the Stable Rocket Hammer | + | At times, I will switch in the Stable Rocket Hammer, when I feel the need to whip out my new toys. I tend to go either guardian or striker while wielding the Hammer. Why do I use the Hammer? Well, it's a "slow" sword that hits three times, has a unique dash that can deal damage, and it encourages everyone to be as varied in their gear as possible. One by one, the Duskers all fall! Dark Reprisal is also a good area-of-denial bomb, despite the damage being unnecessarily nerfed to the Core and back. I find that if combined with a Shock bomber, the Dark Reprisal will be pretty dang effective. It also has a short charge time, making it easy to spam and fill up a base with little purple orbs. |
| − | + | ||
| − | + | ||
| − | + | ||
| − | + | ||
| − | + | ||
| − | + | ||
| − | + | ||
| − | + | ||
| − | + | ||
| − | + | ||
| − | |||
}} | }} | ||
{{showhide|Heart Pendant Controversy(?)|content= | {{showhide|Heart Pendant Controversy(?)|content= | ||
| − | ''Hey, Heart Trinkets are easier to get! What are your views on this?'' Well, I have a couple of Dual-Hearts myself, and I don't mind switching my Brute Jelly Bands to them if/when someone else happens to have them. It really doesn't make too much of a difference if it takes six hits or three, this game is still a matter of skill. And really, Lockdown, in my eyes, is a giant Arms Race. It helps to be skillful, yes, but you need to keep your gear up to date in order to keep up with everyone else! And, really, other trinkets don't really make much of a difference unless you're in T3.}} | + | ''Hey, Heart Trinkets are easier to get! What are your views on this?'' |
| + | Well, I have a couple of Dual-Hearts myself, and I don't mind switching my Brute Jelly Bands to them if/when someone else happens to have them. It really doesn't make too much of a difference if it takes six hits or three, this game is still a matter of skill. And really, Lockdown, in my eyes, is a giant Arms Race. It helps to be skillful, yes, but you need to keep your gear up to date in order to keep up with everyone else! And, really, other trinkets don't really make much of a difference unless you're in T3.}} | ||
== What about Blast Network? == | == What about Blast Network? == | ||
Once in a blue moon, when the planets align absolutely perfectly, when the derivative of f(x) is the inverse of h(x), when the world is in perfect harmony, I ''might'' just play this. I, admittedly, never was good at Bomberman. Just throw in some lag and input delay, and you got the perfect recipe for disaster. | Once in a blue moon, when the planets align absolutely perfectly, when the derivative of f(x) is the inverse of h(x), when the world is in perfect harmony, I ''might'' just play this. I, admittedly, never was good at Bomberman. Just throw in some lag and input delay, and you got the perfect recipe for disaster. | ||
Revision as of 17:59, 28 November 2012
| |||||||
| |||||||
Hiya!
The username's Whimsicality, but for simplicity's sake, call me Whimsy. Two of my closest friends, Mintsdale and Dr. Wily have brought my attention to this game a while ago. I was skeptical at first, and when I found out my computer could hardly run the dang thing, I almost wanted to delete the game and quit. I do not regret continuing in the slightest. It's been enough to hold my attention for so long, so I think OOO deserves some credit for making a neat game.
Now, I may be lenient on who I accept friend requests from, but don't think I'm just gonna abandon ship and tend to your whim. I'm here for my friends, and random nobodies who spam requests ain't friends of mine. Plus, I'm a F2P (free-to-play) player at heart. I don't particularly care for spending money to progress through the game, but that doesn't mean I hate those who do contribute to OOO's wallet.
The name Whimsicality originated from some silly name I had on Skype, relating to the Pokémon Whimsicott, or something. I feel that this name is fairly fitting for how I generally act in this game; I joke around playfully, and I like to do certain tasks in the game spontaneously. (Variety is the spice of life!) I guess you could say I'm very whimsical! Oh God, kill me for that lame joke.
My Whole Arsenal
This thing won't stop growing!
-
 Barbarous Thorn Blade
-
 Levi Recolor
-
 Dread Venom Striker
-
 Voltedge
-
 Warmaster Rocket Hammer
-
 Faust
Faust
-
 Stable Rocket Hammer
-
 Swift Flourish
-
 Rigadoon
-
 Nightblade
-
 Fireburst Brandish
-
 Iceburst Brandish
-
 Cautery Sword
-
 Tempered Calibur
-
 Wrench Wand
-
 WHAM BAM
-
 Arc Razor
-
 Prototype Rocket Hammer
-
 Something Ylol worked for
-
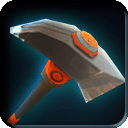 Pickaxe
-
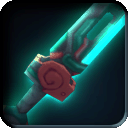 Shockburst Brandish V0.1
-
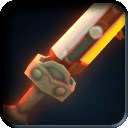 Fireburst Brandish V0.1
-
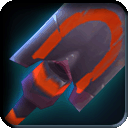 Shovel
-
 Wet Noodle
-
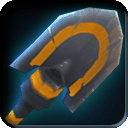 Notch's Pickaxe
-
 Troika Prototype
-
 This isn't a shovel I swear
-
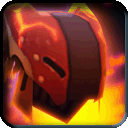 Vog Cub Cap
-
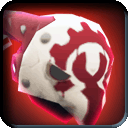 Perfect Mask of Seerus
-
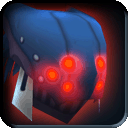 Snarbolax Cap
-
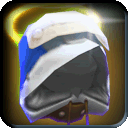 Divine Veil
-
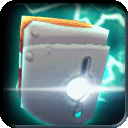 Mercurial Demo Helm
-
 Ice Queen Crown
-
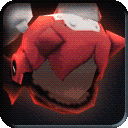 Blazebreak Helm
-
 Blazebreak Helm
 + Hallow Scarf + Hallow Glasses + Toasty Flower
-
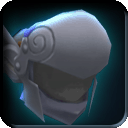 Seraphic Helm + Cool Glasses
-
 Chroma Mask
-
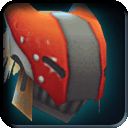 Dusker Cap
-
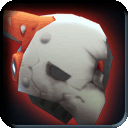 Flawed Mask of Seerus
-
 Quicksilver Helm
  + Heavy Game Face
-
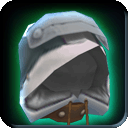 Magic Hood
-
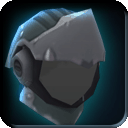 Cobalt Helm
-
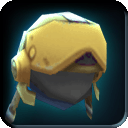 Spiral Demo Helm + Regal Plume
-
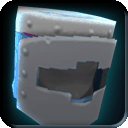 Spiral Plate Helm
-
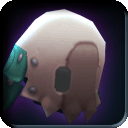 Skelly Mask
-
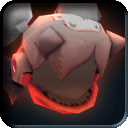 Emberbreak Helm + Cool Maid Headband + Cool Ribbon + Fancy Goggles
-
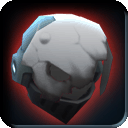 Fractured Mask of Seerus
-
 Toasty Spiral Sallet
-
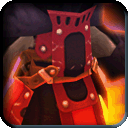 Vog Cub Coat
  + Toasty Canteen
-
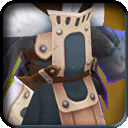 Skolver Coat
-
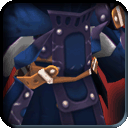 Snarbolax Coat
-
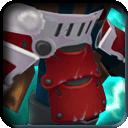 Mercurial Demo Suit
-
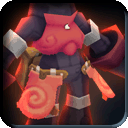 Blazebreak Armor
-
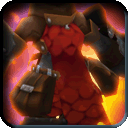 Dragon Scale Mail
-
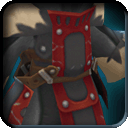 Dusker Coat

-
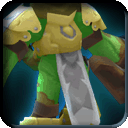 Chroma Suit
-
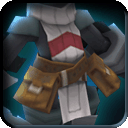 Cobalt Armor
-
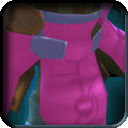 Jelly Mail
-
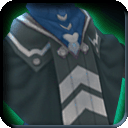 Magic Cloak
-
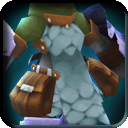 Spiral Scale Mail + Fancy Vitakit + Fancy Canteen
-
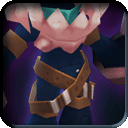 Skelly Suit + Military Canteen
-
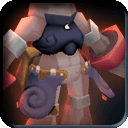 Emberbreak Armor
-
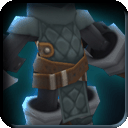 Fencing Jacket
-
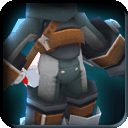 Vitasuit + Proto Crest
-
 Toasty Spiral Culet
-
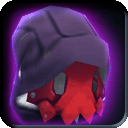 Authentic Phantom Mask
-
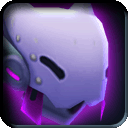 Authentic Spookat Mask
-
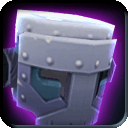 Authentic Frankenzom Mask
-
 Azure Bombhead Mask (x4)
-
 Checkered Bombhead Mask (x2)
-
 Emerald Bombhead Mask (x6)
-
 Golden Bombhead Mask
- A whole bunch of Hallow stuff.
-
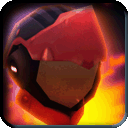 Infernal Guardian Helm
-
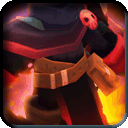 Infernal Guardian Armor
-
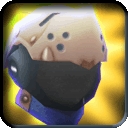 Heavenly Guardian Helm
-
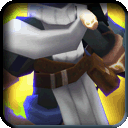 Heavenly Guardian Armor
-
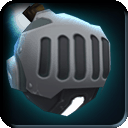 Iron Bombhead Mask (x3)
-
 Love Puppy Disguise
-
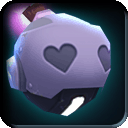 Lovely Bombhead Mask (x3)
-
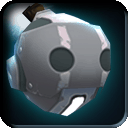 Magic Bombhead Mask
-
 Military Stranger Hat
-
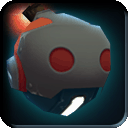 Ruby Bombhead Mask (x4)
-
 Scary Bombhead Mask (x2)
-
 Silver Bombhead Mask (x2)
-
 Surge Tailed Helm
-
 Surge Culet
-
 Starry Bombhead Mask
-
 Volcanic Stranger Hat
-
 Tri-Heart Pendant (2x)
-
 Heart Pendant (x2)
-
 Royal Jelly Band (x2)
-
 Brute Jelly Band (x2)
-
 Military Goggles
-
 Fancy Goggles
-
 Cool Ribbon
-
 Toasty Canteen
-
 Military Canteen
-
 Proto Crest
-
 Cool Maid Headband
-
 Pumpkin Bandolier
-
 Divine Vitakit
-
 Fancy Canteen
- A whole bunch of Halloween stuff, including 6 Haunted Auras
PvE
Arenas, RJP, Vana, oh my!
PvP
Yes, I am a big fan of playing Lockdown. I honestly prefer playing on Tier 2, mainly since I find it most balanced fun.
So what do you use?
- Guardian Shield
- Emberbreak Helm
- Emberbreak Armor
- Frost Gun
- Cold Snap
- Heavy Hatchet
- Prototype Rocket Hammer
Wait, why do you have this?
Generic Set:
- Striker Booster
- Dusker Cap
- Dusker Coat
- Swift Flourish
- Kilowatt Pulsar
- Shockburst Brandish
- Arc Razor
- Tri-Heart Pendant (x2)
Wait, why do you have this? As much as I dislike abiding by any sort of meta, I have found that sometimes it's necessary for me to swallow my pride and carry my team. So here's your basic generic set, but not really. Instead of opting in for a Sealed sword like everybody and their mother, I prefer the speeed of an Arc Razor. The Arc Razor hard counters any slow sword with it's sheer speed and it's erratic swing pattern. I love my Arc Razor. Otherwise, I use my ASI VH Shockburst to whittle someone down, or I juggle someone around with the Flourish.
Recon Set
- Recon Cloak
- Blazebreak Helm
- Dusker Coat
- Shockburst Brandish
- Voltech Alchemer Mk II
- Swift Flourish
- Lightning Capacitor.
- Tri-Heart Pendant (x2)
What about this junk?
Being a fast piercing weapon, a toothpick is a pretty basic choice to bring in, and it counters out the recon's slowed down sword attacks. Not to mention, it makes the kills so much quicker and satisfying once the foe's defense is nerfed. Even without a defense nerf, a few strikes from the TSB can bring down foes easily. I typically try to cripple strikers with a shot from my Voltech Alchemer, but Kilowatt Pulsar is a good alternative for creating a distraction to lure enemies away from a base, or stop a bomber from charging his bomb. Shock is also a good status to inflict upon others, as it gives you ample opportunity to strike while they're spasming, and it dishes out extra damage. I have found that Shock removes invincibility frames, making a Striker with ASI an effective health-bar-melting tool. The Dusker Cap and Coat are pretty standard, being some of the best armor you can possibly wear. I wear a Blazebreak helm because it's functional and stylish. Sun Shards are an example of an amazing, yet underused bomb in Lockdown. Not only do they deal Elemental and Piercing, two important damage types, it has multiple purposes. Picking off foes from afar, breaking a recon's cloak, supporting teammates attacking someone, etc. THIS IS OBSOLETE AS THE SUN SHARDS SUCK NOW.
Hammer time!
What the--?!
At times, I will switch in the Stable Rocket Hammer, when I feel the need to whip out my new toys. I tend to go either guardian or striker while wielding the Hammer. Why do I use the Hammer? Well, it's a "slow" sword that hits three times, has a unique dash that can deal damage, and it encourages everyone to be as varied in their gear as possible. One by one, the Duskers all fall! Dark Reprisal is also a good area-of-denial bomb, despite the damage being unnecessarily nerfed to the Core and back. I find that if combined with a Shock bomber, the Dark Reprisal will be pretty dang effective. It also has a short charge time, making it easy to spam and fill up a base with little purple orbs.Hey, Heart Trinkets are easier to get! What are your views on this?
Well, I have a couple of Dual-Hearts myself, and I don't mind switching my Brute Jelly Bands to them if/when someone else happens to have them. It really doesn't make too much of a difference if it takes six hits or three, this game is still a matter of skill. And really, Lockdown, in my eyes, is a giant Arms Race. It helps to be skillful, yes, but you need to keep your gear up to date in order to keep up with everyone else! And, really, other trinkets don't really make much of a difference unless you're in T3.What about Blast Network?
Once in a blue moon, when the planets align absolutely perfectly, when the derivative of f(x) is the inverse of h(x), when the world is in perfect harmony, I might just play this. I, admittedly, never was good at Bomberman. Just throw in some lag and input delay, and you got the perfect recipe for disaster.
