
|
The topic of this article or section is subject to personal opinion, and does not represent any one absolute truth.
|
| If you disagree, discuss your concerns on the the talk page before editing.
|
Introduction
Battle Sprites are pets which assist their Knight owner out in the field by providing both passive bonuses and a variety of on-command skills. Raising a sprite is a high-commitment effort: they cost many minerals and materials, Supply Depot items (therefore energy), and impose permanent choices the player cannot revert without a Reset Star. Because of all this, it would be very helpful to know what you're doing in advance. This guide will go over each sprite, their various skills/equipment, and perhaps most importantly, your options for ultimate skills.
Important Information for New Players
Only your first sprite is provided for free from 2-3  Mission: An Eternal Bond. While other sprites may be obtained from the Supply Depot or Auction House later on, it is recommended to focus on fully leveling your first sprite before investing in others; sprites tend to get exponentially better at higher levels so it would serve you well to not divide resources. Later missions also provide one-time free Evo Catalysts to make your first sprite a bit less expensive to cap.
General Sprite Overview
This section will cover basic mechanics and items shared between all sprite types.
Raising your Sprite
For basic information, see Battle Sprite#Heating and Battle Sprite#Leveling. Since sprites compete for materials you'll also need for crafting equipment, it's best to inspect the alchemy recipes of your planned arsenal and use materials you won't need for crafting as sprite food. For a balance of fast and efficient leveling, feed 4 star materials while your pet is below 4 stars, and 5 star materials at 4 stars and above. If you end up very close to a level up after feeding, you may want to feed a lower quality material to finish the job to avoid wasting resources. 5 star materials are acquired at a much slower pace, but you can get more mileage out of them by using more minerals to craft extra copies of your sprite's favored 5 star Sprite Food. Note that you can significantly speed up crafting these by pressing ESC to cancel the alchemy animation.
Harnesses
Every sprite starts out with an Iron Harness, and has the ability to equip three out of four harness types depending on its species. Your sprite's equipped harness determines the damage type it inflicts. The four types are: Iron  , Crystal
  , Golden
  , and Dark
  . Advanced and Elite Harnesses provide a 5% and 10% cooldown reduction compared to their normal version, but they are very expensive, so you should only worry about acquiring these once your sprite is already high level. To save money, consider upgrading your Iron harness instead of using a special damage type; having the cooldown reduction for your is much more significant upgrade for every sprite than a bit of extra damage (which becomes almost no damage if resisted!). Iron also increases DPS against Lord Vanaduke's mask phases, helping you burst it down before it can reignite and dish out the pain.
Perks
There are currently 26 total perks that you can unlock. For a complete list, see Perk. The definitive perk that's useful everywhere is Swift Steps, but many of the others will also be helpful depending on your equipment and the enemies you expect to encounter. For example, a user with the Chaos set receives Very High bonuses to damage and charge time reduction, but no attack speed, so choosing Quick Strike or Quick Draw would help round out your build. The global damage bonuses are usually better options than the family-specific damage bonuses outside of levels which feature only a single monster family (such as Devilish Drudgery). Healthy Boost is mediocre but works well with Seraphynx. Status resistances are best used to supplement your armor's existing resistance to acheive a status immunity. The damage type defense bonuses are typically not worth taking.
Specific Sprite Details
There are currently 3 types of Battle Sprites available: Drakon, Seraphynx and Maskeraith. Several reskins of each exist, but are purely cosmetic options.
Drakon
The smoldering Drakon resembles a dragon and delivers powerful, fiery blasts to foes. The most damage-oriented battle sprite, but in practice is more useful for its buff effects. Unfortunately, most of said buffs are locked behind specific Ultimate skills, meaning this sprite is the worst performing of the three at low to mid level. Once the correct ultimates are obtained, however, it becomes the best sprite for speed clearing. All of Drakon's skills can inflict the Fire status, so its damage output is reduced in fire-themed areas. Be mindful of Oilers as well.
Launches a fireball with a range of 9 blocks. Not a particularly good ability. Can hit switches and blocks without a gun, but might not be worth triggering the shared cooldown to do so.
Ultimates:
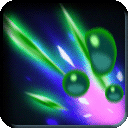
 Meteoric Firebolt
- Increases the size of the explosion, making it the longest range renewable projectile available to the player. Good for sniping Treasure Boxes behind energy gates that are a bit out of reach of your gun without using one of your vials.
Verdict: Recommended! If unsure, choose this one.
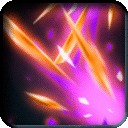
 Concussive Firebolt
- Adds a Stun status chance to firebolt. Potentially more helpful in combat than Meteoric, but using this skill for combat in the first place is typically suboptimal. Still, stun is a good status.
Verdict: Slightly inferior, but this particular choice of Ultimate doesn't really matter much.
Generates a flame barrier similar to the Pickup version, but larger. Buffs your defense and lasts for 7 seconds. Does a decent amount of damage and is good for sword or bomb users that are frequently in the fray.
Ultimates:
 Backfire Barrier
- Activates a Speed Booster buff when using the skill. Moving faster is amazing utility for both combat and boosting your profit for time spent by speeding up how quickly you can clear levels.
Verdict: Definitely pick this one.
 Scorching Barrier
- Adds an extra fireball, and increases the size of all three. A good upgrade to the skill itself, but Backfire's speed boost is too important to miss out on.
Verdict: Avoid unless you don't want a speed boost for some reason.
With Firestorm, you can burn everything in your path with dragon breath! The best sprite skill for direct damage.
Ultimates:
 Frenzied Firestorm
- Adds a chance to give the whole party both an Attack Booster and Speed Booster of 5 seconds each, refreshing per enemy struck. A great option that gets even better with friends, increasing your group's ability to clear rooms quickly. The only potential hiccup is that its bonuses could become redundant if Attack and Speed boosters both drop, but the chance of this scenario becomes increasingly less likely as your party size increases.
Verdict: Recommended! If unsure, choose this one.
 Explosive Firestorm
- Enhances the firestorm with a series of explosions that do extra damage and apply frequent knockdown, trapping monsters in the flames. Does decent damage, but putting Backfire on cooldown can hurt since you won't be getting any compensatory speed boosters.
Verdict: Inferior, but still decent. Pick it if you really want wings on your Drakon.
Seraphynx
The divine Seraphynx resembles an angelic cat-like creature and uses its luminous powers to defend the party from attacks. It primarily focuses on support, but can contribute a bit of damage as well. Seraphynx is a great pick for party play — with the right Ultimates, all three skills can benefit the whole party.
Fires a mid-range AoE beam in front of the Seraphynx. Doesn't do enough damage to help much, but becomes much better with its Disintegration Ray ultimate.
Ultimates:
 Dazzling Light Ray
- Increases the beam's damage against the Undead and Fiend families. Its counterpart's debuff will result in more damage from the beam, you, and your party to all monster families, so this option is completely pointless.
Verdict: Strictly worse, do not choose unless you want the sprite cosmetic
 Disintegration Ray
- Applies a debuff that reduces defense to enemies hit by the beam for as long as they remain within it, plus 4 seconds. Results in ~15-20% more damage per hit. Effects nearly all sources of damage except Fire, including the beam itself.
Verdict: Definitely pick this one
With Heart Attack, you can enchant a group of monsters. Enchanted targets have an increased chance of dropping hearts when defeated.
Ultimates:
 Iron Heart Attack
- Also boosts enchanted enemies chances of dropping a Defense Booster. Unlike attack and speed boosters, these don't help as much. Currently available data is unclear as to whether the increased rate of defense orb drops negatively effects the chance of heart drops.
Verdict: More research is needed, but this is either barely an upgrade or secretly a downgrade. It's a toss-up in the case of the former.
 Violent Heart Attack
- Causes a small heart explosion when an enchanted target is defeated. The explosion causes minor damage and, more importantly, flinches anything hit by it which can interrupt nearby monsters. It's not especially useful, but will probably help you more than its competition.
Verdict: Recommended! If unsure, choose this one.
This ability creates a protective aura which shields Knights within it from damage. Great for surviving tough encounters, rushing down monsters, and even bypassing environmental hazards.
Ultimates:
 Seraphic Aura
- Knights within the shield gain a 20% boost to shield regeneration speed, which also reduces the recovery delay after a shield break. Won't do a bunch of Swiftstrike Bucklers much good but can make a difference when using a damage+status-appropriate shield that can take several hits.
Verdict: Recommended! If unsure, choose this one.
 Valkyrian Aura
- Knights within the shield gain up to a Maximum! Charge Time Reduction bonus. This has absolutely no effect on anyone that already has a Maximum! bonus from their equipment. Given the prevalence of the Chaos set, this is likely. Can theoretically be more useful than its counterpart, but the very limited uptime of the buff doesn't help its case.
Verdict: Avoid in most cases.
Maskeraith
The shadowy Maskeraith resembles a masked phantom and uses its toxic powers to debilitate enemies. This sprite has a mix of damage and support skills. Lacks party buffs, but is great for solo play and is arguably the best choice of the three for difficult content such as Danger Missions and Shadow Lairs. Maskeraith gains utility the fastest out of the three sprites; its best skills are in the first two slots rather than the latter two, and neither require ultimates to perform well.
Fires a series of quills that stick to targets and inflict poison. For each hit a quilled target receives, they lose one quill and take additional damage. Poison provides great utility, increasing the damage monsters take and reducing their attack power while also converting incoming healing to damage. This skill is not nearly as good against poison-immune foes, though.
Ultimates:
 Virulent Quills
- Upgrades inflicted poison from Moderate to Strong. Additionally, each time a quilled target is hit there is a chance to trigger a poisonous explosion which spreads poison to other monsters in close proximity. The increased poison potency results in a small DPS increase to all inflicted enemies compared to other quill variants. Also great for disrupting Silkwings. Using a vortex bomb can help you get the most out of this skill.
Verdict: Recommended! If unsure, choose this one.
 Vengeful Quills
- Each time a quilled target is hit, another quill is fired from the target to the next available target. Upsides compared to Virulent include: deals more raw damage, is less dependent on monster positioning, and won't be rendered pointless by status immunity. On the other hand, your poison remains at moderate level making it less effective at debuffing both lone targets and close groups.
Verdict: Very slightly inferior? Both options are good.
Renders the player invisible for about 15 seconds and boosts their defense. Any monsters targeting an invisible Knight will stop doing so, but it won't prevent attacks already in progress. Shadow Cloak is cancelled if you take damage, attack, or interact with/throw an object. Despite these limitations, this skill makes for an extremely useful panic button that can instantly drop aggro from the entire room. Also, it's important to note using pickups doesn't deactivate the cloak; you can deal a decent anount of damage while remaining invisible using barriers. Vials don't offer this benefit, so a Maskeraith user should prioritize other pickup types over them.
Ultimates:
 Deadly Shadow Cloak
- Grants the user an Attack Booster and an attack speed buff when activating the skill. This makes the cloak useful for more than just hiding, serving alternatively as an on-demand DPS boost. The buffs last for only 2 seconds after the cloak ends, so you'll need to act quickly.
Verdict: Recommended! If unsure, choose this one.
 Vengeful Shadow Cloak
- Causes an explosion when Shadow Cloak is interrupted that does no damage but can stun nearby monsters. A more defensive option compared to Deadly's offense boost.
Verdict: Inferior, but can still be useful
Creates a miasma around you that hexes any foe within. Hexed targets take moderate damage after roughly 2.5 seconds. For every target acquired by hexing haze, the duration of the miasma increases up to a cap of around 10 seconds. While a source of damage, it's not worth putting Deadly Shadow Cloak on cooldown unless you already have an attack booster.
Ultimates:
 Chaotic Haze
- Targets damaged by hexing haze have a ~22% chance of receiving a random status condition. All statuses except Sleep are possible results. While unpredictable, this ultimate adds much-needed utility to the skill. Be careful using it around Oilers, Quicksilvers, or Ice Cubes though, since you may end up accidentally buffing them.
Verdict: It's okay, but the other option is terrible
 Haunted Haze
- Any enemy that dies as a result of hex damage will spawn a vengeful ghost that seeks out other targets and explodes on impact... dealing almost no damage. It's unclear if this skill is bugged or severely undertuned. Regardless, the lack of damage isn't the only problem: since this specifically requires the monster to die from the hex damage, it is very unreliable to even trigger in the first place.
Verdict: Please don't pick this
Other Links