Diferencia entre revisiones de «Enciclopedia Visual/criatura»
De SpiralKnights-es
| Línea 1: | Línea 1: | ||
| + | {{TOCright}} | ||
:''Para una lista actualizada, ve al {{en|Visual_Encyclopedia/creature}}'' | :''Para una lista actualizada, ve al {{en|Visual_Encyclopedia/creature}}'' | ||
| − | + | Esta es una enciclopedia visual de las criaturas que se encuentran en los [[mecanismos]]. Por favor toma nota que puede haber imágenes que no estén actualizadas y otros problemas que se están tratando de resolver. | |
| − | + | =Bestia= | |
| − | + | ||
| − | = | + | |
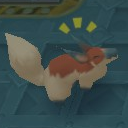
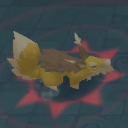
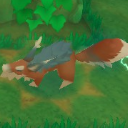
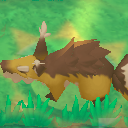
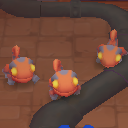
==Wolver== | ==Wolver== | ||
<gallery widths=100px perrow=6> | <gallery widths=100px perrow=6> | ||
| − | Image:Monster-Wolver.png|[[Wolver#Wolver|Wolver]] ( | + | Image:Monster-Wolver.png|[[Wolver#Wolver|Wolver]] (Nivel 1) |
| − | Image:Monster-Ash Tail.png|[[Wolver#Ash Tail|Ash Tail]] ( | + | Image:Monster-Ash Tail.png|[[Wolver#Ash Tail|Ash Tail]] (Nivel 1) |
| − | Image:Monster-Frostifur.png|[[Wolver#Frostifur|Frostifur]] ( | + | Image:Monster-Frostifur.png|[[Wolver#Frostifur|Frostifur]] (Nivel 1) |
| − | Image:Monster-Voltail.png|[[Wolver#Voltail|Voltail]] ( | + | Image:Monster-Voltail.png|[[Wolver#Voltail|Voltail]] (Nivel 1) |
| − | Image:Monster-Rabid Wolver.png|[[Wolver#Rabid Wolver|Rabid Wolver]] ( | + | Image:Monster-Rabid Wolver.png|[[Wolver#Rabid Wolver|Rabid Wolver]] (Nivel 1) |
| − | + | ||
| − | Image:Monster-Wolver 2.png|[[Wolver#Wolver|Wolver]] ( | + | Image:Monster-Wolver 2.png|[[Wolver#Wolver|Wolver]] (Nivel 2) |
| − | Image:Monster-Ash Tail 2.png|[[Wolver#Ash Tail|Ash Tail]] ( | + | Image:Monster-Ash Tail 2.png|[[Wolver#Ash Tail|Ash Tail]] (Nivel 2) |
| − | Image:Monster-Frostifur 2.png|[[Wolver#Frostifur|Frostifur]] ( | + | Image:Monster-Frostifur 2.png|[[Wolver#Frostifur|Frostifur]] (Nivel 2) |
| − | Image:Monster-Voltail 2.png|[[Wolver#Voltail|Voltail]] ( | + | Image:Monster-Voltail 2.png|[[Wolver#Voltail|Voltail]] (Nivel 2) |
| − | Image:Monster-Rabid Wolver 2.png|[[Wolver#Rabid Wolver|Rabid Wolver]] ( | + | Image:Monster-Rabid Wolver 2.png|[[Wolver#Rabid Wolver|Rabid Wolver]] (Nivel 2) |
Image:-| | Image:-| | ||
| − | Image:Monster-Wolver 3.png|[[Wolver#Wolver|Wolver]] ( | + | Image:Monster-Wolver 3.png|[[Wolver#Wolver|Wolver]] (Nivel 3) |
| − | Image:Monster-Ash Tail 3.png|[[Wolver#Ash Tail|Ash Tail]] ( | + | Image:Monster-Ash Tail 3.png|[[Wolver#Ash Tail|Ash Tail]] (Nivel 3) |
| − | Image:Monster-Frostifur 3.png|[[Wolver#Frostifur|Frostifur]] ( | + | Image:Monster-Frostifur 3.png|[[Wolver#Frostifur|Frostifur]] (Nivel 3) |
| − | Image:Monster-Voltail 3.png|[[Wolver#Voltail|Voltail]] ( | + | Image:Monster-Voltail 3.png|[[Wolver#Voltail|Voltail]] (Nivel 3) |
| − | Image:Monster-Rabid Wolver 3.png|[[Wolver#Rabid Wolver|Rabid Wolver]] ( | + | Image:Monster-Rabid Wolver 3.png|[[Wolver#Rabid Wolver|Rabid Wolver]] (Nivel 3) |
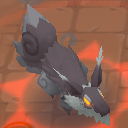
| − | Image:Monster-Void_Wolver.png|[[Wolver#Void Wolver|Void Wolver]] ([[ | + | Image:Monster-Void_Wolver.png|[[Wolver#Void Wolver|Void Wolver]] ([[Guarida de la Sombra]]) |
</gallery> | </gallery> | ||
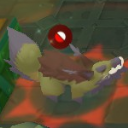
==Alpha Wolver== | ==Alpha Wolver== | ||
<gallery widths=100px perrow=6> | <gallery widths=100px perrow=6> | ||
| − | Image:Monster-Alpha Wolver.png|[[Wolver#Alpha Wolver|Alpha Wolver]] ( | + | Image:Monster-Alpha Wolver.png|[[Wolver#Alpha Wolver|Alpha Wolver]] (Nivel 1) |
| − | Image:Monster-Alpha Ash Tail.png|[[Wolver#Alpha Ash Tail|Alpha Ash Tail]] ( | + | Image:Monster-Alpha Ash Tail.png|[[Wolver#Alpha Ash Tail|Alpha Ash Tail]] (Nivel 1) |
| − | Image:Monster-Alpha Frostifur.png|[[Wolver#Alpha Frostifur|Alpha Frostifur]] ( | + | Image:Monster-Alpha Frostifur.png|[[Wolver#Alpha Frostifur|Alpha Frostifur]] (Nivel 1) |
| − | Image:Monster-Alpha Voltail.png|[[Wolver#Alpha Voltail|Alpha Voltail]] ( | + | Image:Monster-Alpha Voltail.png|[[Wolver#Alpha Voltail|Alpha Voltail]] (Nivel 1) |
| − | Image:Monster-Rabid Alpha Wolver.png|[[Wolver#Rabid Alpha Wolver|Rabid Alpha Wolver]] ( | + | Image:Monster-Rabid Alpha Wolver.png|[[Wolver#Rabid Alpha Wolver|Rabid Alpha Wolver]] (Nivel 1) |
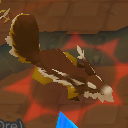
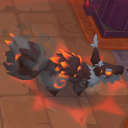
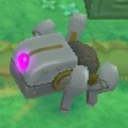
| − | Image:Monster-Snarbolax.png|[[Snarbolax]] ( | + | Image:Monster-Snarbolax.png|[[Snarbolax]] (Nivel 1) |
| − | Image:Monster-Alpha Wolver 2.png|[[Wolver#Alpha Wolver|Alpha Wolver]] ( | + | Image:Monster-Alpha Wolver 2.png|[[Wolver#Alpha Wolver|Alpha Wolver]] (Nivel 2) |
| − | Image:Monster-Alpha Ash Tail 2.png|[[Wolver#Alpha Ash Tail|Alpha Ash Tail]] ( | + | Image:Monster-Alpha Ash Tail 2.png|[[Wolver#Alpha Ash Tail|Alpha Ash Tail]] (Nivel 2) |
| − | Image:Monster-Alpha Frostifur 2.png|[[Wolver#Alpha Frostifur|Alpha Frostifur]] ( | + | Image:Monster-Alpha Frostifur 2.png|[[Wolver#Alpha Frostifur|Alpha Frostifur]] (Nivel 2) |
| − | Image:Monster-Alpha Voltail 2.png|[[Wolver#Alpha Voltail|Alpha Voltail]] ( | + | Image:Monster-Alpha Voltail 2.png|[[Wolver#Alpha Voltail|Alpha Voltail]] (Nivel 2) |
| − | Image:Monster-Rabid Alpha Wolver 2.png|[[Wolver#Rabid Alpha Wolver|Rabid Alpha Wolver]] ( | + | Image:Monster-Rabid Alpha Wolver 2.png|[[Wolver#Rabid Alpha Wolver|Rabid Alpha Wolver]] (Nivel 2) |
Image:Monster-Perma-Frostifur.png|[[Wolver#Perma-Frostifur|Perma-Frostifur]] | Image:Monster-Perma-Frostifur.png|[[Wolver#Perma-Frostifur|Perma-Frostifur]] | ||
| − | Image:Monster-Alpha Wolver 3.png|[[Wolver#Alpha Wolver|Alpha Wolver]] ( | + | Image:Monster-Alpha Wolver 3.png|[[Wolver#Alpha Wolver|Alpha Wolver]] (Nivel 3) |
| − | Image:Monster-Alpha Ash Tail 3.png|[[Wolver#Alpha Ash Tail|Alpha Ash Tail]] ( | + | Image:Monster-Alpha Ash Tail 3.png|[[Wolver#Alpha Ash Tail|Alpha Ash Tail]] (Nivel 3) |
| − | Image:Monster-Alpha Frostifur 3.png|[[Wolver#Alpha Frostifur|Alpha Frostifur]] ( | + | Image:Monster-Alpha Frostifur 3.png|[[Wolver#Alpha Frostifur|Alpha Frostifur]] (Nivel 3) |
| − | Image:Monster-Alpha Voltail 3.png|[[Wolver#Alpha Voltail|Alpha Voltail]] ( | + | Image:Monster-Alpha Voltail 3.png|[[Wolver#Alpha Voltail|Alpha Voltail]] (Nivel 3) |
| − | Image:Monster-Rabid Alpha Wolver 3.png|[[Wolver#Rabid Alpha Wolver|Rabid Alpha Wolver]] ( | + | Image:Monster-Rabid Alpha Wolver 3.png|[[Wolver#Rabid Alpha Wolver|Rabid Alpha Wolver]] (Nivel 3) |
| − | Image:Monster-Rabid Snarbolax.png|[[Rabid Snarbolax]] ([[ | + | Image:Monster-Rabid Snarbolax.png|[[Rabid Snarbolax]] ([[Guarida de la Sombra]]) |
</gallery> | </gallery> | ||
| Línea 55: | Línea 53: | ||
<gallery widths=100px perrow=6> | <gallery widths=100px perrow=6> | ||
Image:Monster-Chroma Whelp.png| [[Chromalisk#Chroma Whelp|Chroma Whelp]] no page, but exists in crash landing | Image:Monster-Chroma Whelp.png| [[Chromalisk#Chroma Whelp|Chroma Whelp]] no page, but exists in crash landing | ||
| − | Image:Monster-Salamander.png|[[Chromalisk#Salamander|Salamander]] ( | + | Image:Monster-Salamander.png|[[Chromalisk#Salamander|Salamander]] (Nivel 1) |
| − | Image:Monster-Tundralisk.png|[[Chromalisk#Tundralisk|Tundralisk]] ( | + | Image:Monster-Tundralisk.png|[[Chromalisk#Tundralisk|Tundralisk]] (Nivel 1) |
| − | Image:Monster-Electrolisk.PNG|[[Chromalisk#Electrolisk|Electrolisk]] ( | + | Image:Monster-Electrolisk.PNG|[[Chromalisk#Electrolisk|Electrolisk]] (Nivel 1) |
| − | Image:Monster-Virulisk.png|[[Chromalisk#Virulisk|Virulisk]] ( | + | Image:Monster-Virulisk.png|[[Chromalisk#Virulisk|Virulisk]] (Nivel 1) |
Image:Monster-Kleptolisk.png|[[Chromalisk#Kleptolisk|Kleptolisk]] | Image:Monster-Kleptolisk.png|[[Chromalisk#Kleptolisk|Kleptolisk]] | ||
| − | Image:Monster-Chromalisk.png|[[Chromalisk#Chromalisk|Chromalisk]] ( | + | Image:Monster-Chromalisk.png|[[Chromalisk#Chromalisk|Chromalisk]] (Nivel 2) |
| − | Image:Monster-Salamander 2.png|[[Chromalisk#Salamander|Salamander]] ( | + | Image:Monster-Salamander 2.png|[[Chromalisk#Salamander|Salamander]] (Nivel 2) |
| − | Image:Monster-Tundralisk 2.png|[[Chromalisk#Tundralisk|Tundralisk]] ( | + | Image:Monster-Tundralisk 2.png|[[Chromalisk#Tundralisk|Tundralisk]] (Nivel 2) |
| − | Image:Monster-Electrolisk 2.png|[[Chromalisk#Electrolisk|Electrolisk]] ( | + | Image:Monster-Electrolisk 2.png|[[Chromalisk#Electrolisk|Electrolisk]] (Nivel 2) |
| − | Image:Monster-Virulisk 2.png|[[Chromalisk#Virulisk|Virulisk]] ( | + | Image:Monster-Virulisk 2.png|[[Chromalisk#Virulisk|Virulisk]] (Nivel 2) |
Image:-| | Image:-| | ||
| − | Image:Monster-Chromalisk 3.png|[[Chromalisk#Chromalisk|Chromalisk]] ( | + | Image:Monster-Chromalisk 3.png|[[Chromalisk#Chromalisk|Chromalisk]] (Nivel 3) |
| − | Image:Monster-Salamander 3.png|[[Chromalisk#Salamander|Salamander]] ( | + | Image:Monster-Salamander 3.png|[[Chromalisk#Salamander|Salamander]] (Nivel 3) |
| − | Image:Monster-Tundralisk 3.png|[[Chromalisk#Tundralisk|Tundralisk]] ( | + | Image:Monster-Tundralisk 3.png|[[Chromalisk#Tundralisk|Tundralisk]] (Nivel 3) |
| − | Image:Monster-Electrolisk 3.png|[[Chromalisk#Electrolisk|Electrolisk]] ( | + | Image:Monster-Electrolisk 3.png|[[Chromalisk#Electrolisk|Electrolisk]] (Nivel 3) |
| − | Image:Monster-Virulisk 3.png|[[Chromalisk#Virulisk|Virulisk]] ( | + | Image:Monster-Virulisk 3.png|[[Chromalisk#Virulisk|Virulisk]] (Nivel 3) |
| + | </gallery> | ||
| + | |||
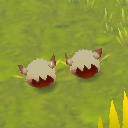
| + | ==Dust Bunny== | ||
| + | <gallery widths=100px perrow=5> | ||
| + | Image:Monster-Dust Bunny.png|[[Dust Bunny#Dust Bunny|Dust Bunny]] (Nivel 1) | ||
| + | Image:Monster-Toast Bunny.png|[[Dust Bunny#Toast Bunny|Toast Bunny]] (Nivel 1) | ||
| + | Image:Monster-Snow Bunny.png|[[Dust Bunny#Snow Bunny|Snow Bunny]] (Nivel 1) | ||
| + | Image:Monster-Jolt Bunny.png|[[Dust Bunny#Jolt Bunny|Jolt Bunny]] (Nivel 1) | ||
| + | Image:Monster-Blech Bunny.png|[[Dust Bunny#Blech Bunny|Blech Bunny]] (Nivel 1) | ||
| + | |||
| + | Image:Monster-Dust Bunny 2.png|[[Dust Bunny#Dust Bunny|Dust Bunny]] (Nivel 2) | ||
| + | Image:Monster-Toast Bunny 2.png|[[Dust Bunny#Toast Bunny|Toast Bunny]] (Nivel 2) | ||
| + | Image:Monster-Snow Bunny 2.png|[[Dust Bunny#Snow Bunny|Snow Bunny]] (Nivel 2) | ||
| + | Image:Monster-Jolt Bunny 2.png|[[Dust Bunny#Jolt Bunny|Jolt Bunny]] (Nivel 2) | ||
| + | Image:Monster-Blech Bunny 2.png|[[Dust Bunny#Blech Bunny|Blech Bunny]] (Nivel 2) | ||
| + | |||
| + | Image:Monster-Dust Bunny 3.png|[[Dust Bunny#Dust Bunny|Dust Bunny]] (Nivel 3) | ||
| + | Image:Monster-Toast Bunny 3.png|[[Dust Bunny#Toast Bunny|Toast Bunny]] (Nivel 3) | ||
| + | Image:Monster-Snow Bunny 3.png|[[Dust Bunny#Snow Bunny|Snow Bunny]] (Nivel 3) | ||
| + | Image:Monster-Jolt Bunny 3.png|[[Dust Bunny#Jolt Bunny|Jolt Bunny]] (Nivel 3) | ||
| + | Image:Monster-Blech Bunny 3.png|[[Dust Bunny#Blech Bunny|Blech Bunny]] (Nivel 3) | ||
</gallery> | </gallery> | ||
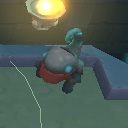
| − | = | + | =Constructor= |
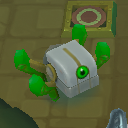
==Gun Puppy== | ==Gun Puppy== | ||
<gallery widths=100px perrow=6> | <gallery widths=100px perrow=6> | ||
| − | Image:Monster-Gun Puppy.png|[[Gun Puppy#Gun Puppy|Gun Puppy]] ( | + | Image:Monster-Gun Puppy.png|[[Gun Puppy#Gun Puppy|Gun Puppy]] (Nivel 1) |
| − | Image:Monster-Rocket Puppy.png|[[Gun Puppy#Rocket Puppy|Rocket Puppy]] ( | + | Image:Monster-Rocket Puppy.png|[[Gun Puppy#Rocket Puppy|Rocket Puppy]] (Nivel 1) |
| − | Image:Monster-Red Rover.png|[[Gun_Puppy#Red_Rover|Red Rover]] ( | + | Image:Monster-Red Rover.png|[[Gun_Puppy#Red_Rover|Red Rover]] (Nivel 1) |
| − | Image:Monster-Slush Puppy.png|[[Gun Puppy#Slush Puppy|Slush Puppy]] ( | + | Image:Monster-Slush Puppy.png|[[Gun Puppy#Slush Puppy|Slush Puppy]] (Nivel 1) |
| − | Image:Monster-Sparky.png|[[Gun Puppy#Sparky|Sparky]] ( | + | Image:Monster-Sparky.png|[[Gun Puppy#Sparky|Sparky]] (Nivel 1) |
| − | Image:Monster-Sick Puppy.png|[[Gun Puppy#Sick Puppy|Sick Puppy]] ( | + | Image:Monster-Sick Puppy.png|[[Gun Puppy#Sick Puppy|Sick Puppy]] (Nivel 1) |
| − | Image:Monster-Gun Puppy 2.png|[[Gun Puppy#Gun Puppy|Gun Puppy]] ( | + | Image:Monster-Gun Puppy 2.png|[[Gun Puppy#Gun Puppy|Gun Puppy]] (Nivel 2) |
| − | Image:Monster-Rocket Puppy 2.png|[[Gun Puppy#Rocket Puppy|Rocket Puppy]] ( | + | Image:Monster-Rocket Puppy 2.png|[[Gun Puppy#Rocket Puppy|Rocket Puppy]] (Nivel 2) |
| − | Image:Monster-Red Rover 2.png|[[Gun_Puppy#Red_Rover|Red Rover]] ( | + | Image:Monster-Red Rover 2.png|[[Gun_Puppy#Red_Rover|Red Rover]] (Nivel 2) |
| − | Image:Monster-Slush Puppy 2.png|[[Gun Puppy#Slush Puppy|Slush Puppy]] ( | + | Image:Monster-Slush Puppy 2.png|[[Gun Puppy#Slush Puppy|Slush Puppy]] (Nivel 2) |
| − | Image:Monster-Sparky 2.png|[[Gun Puppy#Sparky|Sparky]] ( | + | Image:Monster-Sparky 2.png|[[Gun Puppy#Sparky|Sparky]] (Nivel 2) |
| − | Image:Monster-Sick Puppy 2.png|[[Gun Puppy#Sick Puppy|Sick Puppy]] ( | + | Image:Monster-Sick Puppy 2.png|[[Gun Puppy#Sick Puppy|Sick Puppy]] (Nivel 2) |
| − | Image:Monster-Gun Puppy 3.png|[[Gun Puppy#Gun Puppy|Gun Puppy]] ( | + | Image:Monster-Gun Puppy 3.png|[[Gun Puppy#Gun Puppy|Gun Puppy]] (Nivel 3) |
| − | Image:Monster-Rocket Puppy 3.png|[[Gun Puppy#Rocket Puppy|Rocket Puppy]] ( | + | Image:Monster-Rocket Puppy 3.png|[[Gun Puppy#Rocket Puppy|Rocket Puppy]] (Nivel 3) |
| − | Image:Monster-Red Rover 3.png|[[Gun_Puppy#Red_Rover|Red Rover]] ( | + | Image:Monster-Red Rover 3.png|[[Gun_Puppy#Red_Rover|Red Rover]] (Nivel 3) |
| − | Image:Monster-Slush Puppy 3.png|[[Gun Puppy#Slush Puppy|Slush Puppy]] ( | + | Image:Monster-Slush Puppy 3.png|[[Gun Puppy#Slush Puppy|Slush Puppy]] (Nivel 3) |
| − | Image:Monster-Sparky 3.png|[[Gun Puppy#Sparky|Sparky]] ( | + | Image:Monster-Sparky 3.png|[[Gun Puppy#Sparky|Sparky]] (Nivel 3) |
| − | Image:Monster-Sick Puppy 3.png|[[Gun Puppy#Sick Puppy|Sick Puppy]] ( | + | Image:Monster-Sick Puppy 3.png|[[Gun Puppy#Sick Puppy|Sick Puppy]] (Nivel 3) |
Image:-| | Image:-| | ||
| Línea 104: | Línea 123: | ||
Image:-| | Image:-| | ||
Image:Monster-Love Puppy.png|[[Gun Puppy#Love Puppy|Love Puppy]] | Image:Monster-Love Puppy.png|[[Gun Puppy#Love Puppy|Love Puppy]] | ||
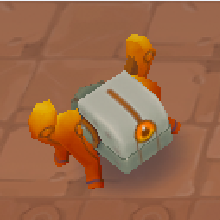
| − | Image:Monster-Roarmulus Twins.png|[[Roarmulus Twins]] ( | + | Image:Monster-Roarmulus Twins.png|[[Roarmulus Twins]] (Nivel 2) |
| − | Image:Monster-Red Roarmulus Twins.png|[[Red Roarmulus Twins]] ([[ | + | Image:Monster-Red Roarmulus Twins.png|[[Red Roarmulus Twins]] ([[Guarida de la Sombra]]) |
</gallery> | </gallery> | ||
==Lumber== | ==Lumber== | ||
<gallery widths=100px perrow=6> | <gallery widths=100px perrow=6> | ||
| − | Image:Monster-Lumber.png|[[Lumber#Lumber|Lumber]] ( | + | Image:Monster-Lumber.png|[[Lumber#Lumber|Lumber]] (Nivel 1) |
| − | Image:Monster-Redward.png|[[Lumber#Redward|Redward]] ( | + | Image:Monster-Redward.png|[[Lumber#Redward|Redward]] (Nivel 1) |
| − | Image:Monster-Silversap.png|[[Lumber#Silversap|Silversap]] ( | + | Image:Monster-Silversap.png|[[Lumber#Silversap|Silversap]] (Nivel 1) |
| − | Image:Monster-Electreant.png|[[Lumber#Electreant|Electreant]] ( | + | Image:Monster-Electreant.png|[[Lumber#Electreant|Electreant]] (Nivel 1) |
| − | Image:Monster-Vilewood.png|[[Lumber#Vilewood|Vilewood]] ( | + | Image:Monster-Vilewood.png|[[Lumber#Vilewood|Vilewood]] (Nivel 1) |
Image:Monster-Ironwood Sentinel.png|[[Lumber#Ironwood Sentinel|Ironwood Sentinel]] | Image:Monster-Ironwood Sentinel.png|[[Lumber#Ironwood Sentinel|Ironwood Sentinel]] | ||
| − | Image:Monster-Lumber 2.png|[[Lumber#Lumber|Lumber]] ( | + | Image:Monster-Lumber 2.png|[[Lumber#Lumber|Lumber]] (Nivel 2) |
| − | Image:Monster-Redward 2.png|[[Lumber#Redward|Redward]] ( | + | Image:Monster-Redward 2.png|[[Lumber#Redward|Redward]] (Nivel 2) |
| − | Image:Monster-Silversap 2.png|[[Lumber#Silversap|Silversap]] ( | + | Image:Monster-Silversap 2.png|[[Lumber#Silversap|Silversap]] (Nivel 2) |
| − | Image:Monster-Electreant 2.png|[[Lumber#Electreant|Electreant]] ( | + | Image:Monster-Electreant 2.png|[[Lumber#Electreant|Electreant]] (Nivel 2) |
| − | Image:Monster-Vilewood 2.png|[[Lumber#Vilewood|Vilewood]] ( | + | Image:Monster-Vilewood 2.png|[[Lumber#Vilewood|Vilewood]] (Nivel 2) |
Image:-| | Image:-| | ||
| − | Image:Monster-Lumber 3.png|[[Lumber#Lumber|Lumber]] ( | + | Image:Monster-Lumber 3.png|[[Lumber#Lumber|Lumber]] (Nivel 3) |
| − | Image:Monster-Redward 3.png|[[Lumber#Redward|Redward]] ( | + | Image:Monster-Redward 3.png|[[Lumber#Redward|Redward]] (Nivel 3) |
| − | Image:Monster-Silversap 3.png|[[Lumber#Silversap|Silversap]] ( | + | Image:Monster-Silversap 3.png|[[Lumber#Silversap|Silversap]] (Nivel 3) |
| − | Image:Monster-Electreant 3.png|[[Lumber#Electreant|Electreant]] ( | + | Image:Monster-Electreant 3.png|[[Lumber#Electreant|Electreant]] (Nivel 3) |
| − | Image:Monster-Vilewood 3.png|[[Lumber#Vilewood|Vilewood]] ( | + | Image:Monster-Vilewood 3.png|[[Lumber#Vilewood|Vilewood]] (Nivel 3) |
| − | Image:Monster-Void Lumber.png|[[Lumber#Void Lumber|Void Lumber]] ( | + | Image:Monster-Void Lumber.png|[[Lumber#Void Lumber|Void Lumber]] (Guarida de la Sombra) |
</gallery> | </gallery> | ||
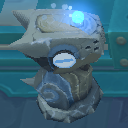
==Mecha Knight== | ==Mecha Knight== | ||
<gallery widths=100px perrow=5> | <gallery widths=100px perrow=5> | ||
| − | Image:Monster-Mecha Knight.png|[[Mecha Knight#Mecha Knight|Mecha Knight]] ( | + | Image:Monster-Mecha Knight.png|[[Mecha Knight#Mecha Knight|Mecha Knight]] (Nivel 1) |
| − | Image:Monster-Firo Knight.png|[[Mecha Knight#Firo Knight|Firo Knight]] ( | + | Image:Monster-Firo Knight.png|[[Mecha Knight#Firo Knight|Firo Knight]] (Nivel 1) |
| − | Image:Monster-Cryo Knight.png|[[Mecha Knight#Cryo Knight|Cryo Knight]] ( | + | Image:Monster-Cryo Knight.png|[[Mecha Knight#Cryo Knight|Cryo Knight]] (Nivel 1) |
| − | Image:Monster-Volt Knight.png|[[Mecha Knight#Volt Knight|Volt Knight]] ( | + | Image:Monster-Volt Knight.png|[[Mecha Knight#Volt Knight|Volt Knight]] (Nivel 1) |
| − | Image:Monster-Blight Knight.png|[[Mecha Knight#Blight Knight|Blight Knight]] ( | + | Image:Monster-Blight Knight.png|[[Mecha Knight#Blight Knight|Blight Knight]] (Nivel 1) |
| − | Image:Monster-Mecha Knight 2.png|[[Mecha Knight#Mecha Knight|Mecha Knight]] ( | + | Image:Monster-Mecha Knight 2.png|[[Mecha Knight#Mecha Knight|Mecha Knight]] (Nivel 2) |
| − | Image:Monster-Firo Knight 2.png|[[Mecha Knight#Firo Knight|Firo Knight]] ( | + | Image:Monster-Firo Knight 2.png|[[Mecha Knight#Firo Knight|Firo Knight]] (Nivel 2) |
| − | Image:Monster-Cryo Knight 2.png|[[Mecha Knight#Cryo Knight|Cryo Knight]] ( | + | Image:Monster-Cryo Knight 2.png|[[Mecha Knight#Cryo Knight|Cryo Knight]] (Nivel 2) |
| − | Image:Monster-Volt Knight 2.png|[[Mecha Knight#Volt Knight|Volt Knight]] ( | + | Image:Monster-Volt Knight 2.png|[[Mecha Knight#Volt Knight|Volt Knight]] (Nivel 2) |
| − | Image:Monster-Blight Knight 2.png|[[Mecha Knight#Blight Knight|Blight Knight]] ( | + | Image:Monster-Blight Knight 2.png|[[Mecha Knight#Blight Knight|Blight Knight]] (Nivel 2) |
| − | Image:Monster-Mecha Knight 3.png|[[Mecha Knight#Mecha Knight|Mecha Knight]] ( | + | Image:Monster-Mecha Knight 3.png|[[Mecha Knight#Mecha Knight|Mecha Knight]] (Nivel 3) |
| − | Image:Monster-Firo Knight 3.png|[[Mecha Knight#Firo Knight|Firo Knight]] ( | + | Image:Monster-Firo Knight 3.png|[[Mecha Knight#Firo Knight|Firo Knight]] (Nivel 3) |
| − | Image:Monster-Cryo Knight 3.png|[[Mecha Knight#Cryo Knight|Cryo Knight]] ( | + | Image:Monster-Cryo Knight 3.png|[[Mecha Knight#Cryo Knight|Cryo Knight]] (Nivel 3) |
| − | Image:Monster-Volt Knight 3.png|[[Mecha Knight#Volt Knight|Volt Knight]] ( | + | Image:Monster-Volt Knight 3.png|[[Mecha Knight#Volt Knight|Volt Knight]] (Nivel 3) |
| − | Image:Monster-Blight Knight 3.png|[[Mecha Knight#Blight Knight|Blight Knight]] ( | + | Image:Monster-Blight Knight 3.png|[[Mecha Knight#Blight Knight|Blight Knight]] (Nivel 3) |
</gallery> | </gallery> | ||
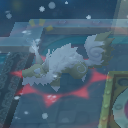
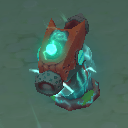
==Retrode== | ==Retrode== | ||
<gallery widths=100px perrow=5> | <gallery widths=100px perrow=5> | ||
| − | Image:Monster-Retrode.png|[[Retrode#Retrode|Retrode]] ( | + | Image:Monster-Retrode.png|[[Retrode#Retrode|Retrode]] (Nivel 1) |
| − | Image:Monster-Hotrode.png|[[Retrode#Hotrode|Hotrode]] ( | + | Image:Monster-Hotrode.png|[[Retrode#Hotrode|Hotrode]] (Nivel 1) |
| − | Image:Monster-Sleetrode.png|[[Retrode#Sleetrode|Sleetrode]] ( | + | Image:Monster-Sleetrode.png|[[Retrode#Sleetrode|Sleetrode]] (Nivel 1) |
| − | Image:Monster-Voltrode.png|[[Retrode#Voltrode|Voltrode]] ( | + | Image:Monster-Voltrode.png|[[Retrode#Voltrode|Voltrode]] (Nivel 1) |
| − | Image:Monster-Isotrode.png|[[Retrode#Isotrode|Isotrode]] ( | + | Image:Monster-Isotrode.png|[[Retrode#Isotrode|Isotrode]] (Nivel 1) |
| − | Image:Monster-Retrode 2.png|[[Retrode#Retrode|Retrode]] ( | + | Image:Monster-Retrode 2.png|[[Retrode#Retrode|Retrode]] (Nivel 2) |
| − | Image:Monster-Hotrode 2.png|[[Retrode#Hotrode|Hotrode]] ( | + | Image:Monster-Hotrode 2.png|[[Retrode#Hotrode|Hotrode]] (Nivel 2) |
| − | Image:Monster-Sleetrode 2.png|[[Retrode#Sleetrode|Sleetrode]] ( | + | Image:Monster-Sleetrode 2.png|[[Retrode#Sleetrode|Sleetrode]] (Nivel 2) |
| − | Image:Monster-Voltrode 2.png|[[Retrode#Voltrode|Voltrode]] ( | + | Image:Monster-Voltrode 2.png|[[Retrode#Voltrode|Voltrode]] (Nivel 2) |
| − | Image:Monster-Isotrode 2.png|[[Retrode#Isotrode|Isotrode]] ( | + | Image:Monster-Isotrode 2.png|[[Retrode#Isotrode|Isotrode]] (Nivel 2) |
| − | Image:Monster-Retrode 3.png|[[Retrode#Retrode|Retrode]] ( | + | Image:Monster-Retrode 3.png|[[Retrode#Retrode|Retrode]] (Nivel 3) |
| − | Image:Monster-Hotrode 3.png|[[Retrode#Hotrode|Hotrode]] ( | + | Image:Monster-Hotrode 3.png|[[Retrode#Hotrode|Hotrode]] (Nivel 3) |
| − | Image:Monster-Sleetrode 3.png|[[Retrode#Sleetrode|Sleetrode]] ( | + | Image:Monster-Sleetrode 3.png|[[Retrode#Sleetrode|Sleetrode]] (Nivel 3) |
| − | Image:Monster-Voltrode 3.png|[[Retrode#Voltrode|Voltrode]] ( | + | Image:Monster-Voltrode 3.png|[[Retrode#Voltrode|Voltrode]] (Nivel 3) |
| − | Image:Monster-Isotrode 3.png|[[Retrode#Isotrode|Isotrode]] ( | + | Image:Monster-Isotrode 3.png|[[Retrode#Isotrode|Isotrode]] (Nivel 3) |
</gallery> | </gallery> | ||
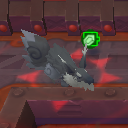
==Scuttlebot== | ==Scuttlebot== | ||
<gallery widths=100px perrow=6> | <gallery widths=100px perrow=6> | ||
| − | Image:Monster-Scuttlebot.png|[[Scuttlebot#Scuttlebot|Scuttlebot]] ( | + | Image:Monster-Scuttlebot.png|[[Scuttlebot#Scuttlebot|Scuttlebot]] (Nivel 1) |
| − | Image:Monster-Cinderbot.png|[[Scuttlebot#Cinderbot|Cinderbot]] ( | + | Image:Monster-Cinderbot.png|[[Scuttlebot#Cinderbot|Cinderbot]] (Nivel 1) |
| − | Image:Monster-Brumabot.png|[[Scuttlebot#Brumabot|Brumabot]] ( | + | Image:Monster-Brumabot.png|[[Scuttlebot#Brumabot|Brumabot]] (Nivel 1) |
| − | Image:Monster-Surgebot.png|[[Scuttlebot#Surgebot|Surgebot]] ( | + | Image:Monster-Surgebot.png|[[Scuttlebot#Surgebot|Surgebot]] (Nivel 1) |
| − | Image:Monster-Hazbot.png|[[Scuttlebot#Hazbot|Hazbot]] ( | + | Image:Monster-Hazbot.png|[[Scuttlebot#Hazbot|Hazbot]] (Nivel 1) |
| − | Image:Monster-Shufflebot.png|[[Shufflebot#Shufflebot|Shufflebot]] ( | + | Image:Monster-Shufflebot.png|[[Shufflebot#Shufflebot|Shufflebot]] (Salón de Entrenamiento Avanzado) |
| − | Image:Monster-Scuttlebot 2.png|[[Scuttlebot#Scuttlebot|Scuttlebot]] ( | + | Image:Monster-Scuttlebot 2.png|[[Scuttlebot#Scuttlebot|Scuttlebot]] (Nivel 2) |
| − | Image:Monster-Cinderbot 2.png|[[Scuttlebot#Cinderbot|Cinderbot]] ( | + | Image:Monster-Cinderbot 2.png|[[Scuttlebot#Cinderbot|Cinderbot]] (Nivel 2) |
| − | Image:Monster-Brumabot 2.png|[[Scuttlebot#Brumabot|Brumabot]] ( | + | Image:Monster-Brumabot 2.png|[[Scuttlebot#Brumabot|Brumabot]] (Nivel 2) |
| − | Image:Monster-Surgebot 2.png|[[Scuttlebot#Surgebot|Surgebot]] ( | + | Image:Monster-Surgebot 2.png|[[Scuttlebot#Surgebot|Surgebot]] (Nivel 2) |
| − | Image:Monster-Hazbot 2.png|[[Scuttlebot#Hazbot|Hazbot]] ( | + | Image:Monster-Hazbot 2.png|[[Scuttlebot#Hazbot|Hazbot]] (Nivel 2) |
Image:-| | Image:-| | ||
| − | Image:Monster-Scuttlebot 3.png|[[Scuttlebot#Scuttlebot|Scuttlebot]] ( | + | Image:Monster-Scuttlebot 3.png|[[Scuttlebot#Scuttlebot|Scuttlebot]] (Nivel 3) |
| − | Image:Monster-Cinderbot 3.png|[[Scuttlebot#Cinderbot|Cinderbot]] ( | + | Image:Monster-Cinderbot 3.png|[[Scuttlebot#Cinderbot|Cinderbot]] (Nivel 3) |
| − | Image:Monster-Brumabot 3.png|[[Scuttlebot#Brumabot|Brumabot]] ( | + | Image:Monster-Brumabot 3.png|[[Scuttlebot#Brumabot|Brumabot]] (Nivel 3) |
| − | Image:Monster-Surgebot 3.png|[[Scuttlebot#Surgebot|Surgebot]] ( | + | Image:Monster-Surgebot 3.png|[[Scuttlebot#Surgebot|Surgebot]] (Nivel 3) |
| − | Image:Monster-Hazbot 3.png|[[Scuttlebot#Hazbot|Hazbot]] ( | + | Image:Monster-Hazbot 3.png|[[Scuttlebot#Hazbot|Hazbot]] (Nivel 3) |
</gallery> | </gallery> | ||
| Línea 203: | Línea 222: | ||
</gallery> | </gallery> | ||
| − | == | + | ==Otros== |
<gallery widths=100px perrow=6> | <gallery widths=100px perrow=6> | ||
Image:Monster-Tortodrone.png|[[Tortodrone|Tortodrone]] | Image:Monster-Tortodrone.png|[[Tortodrone|Tortodrone]] | ||
| + | Image:Monster-Collector.png|[[El Coleccionista]] | ||
</gallery> | </gallery> | ||
| Línea 240: | Línea 260: | ||
</gallery> | </gallery> | ||
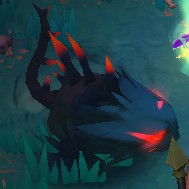
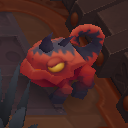
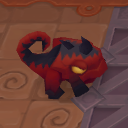
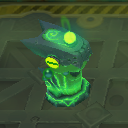
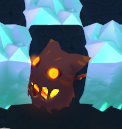
| − | = | + | =Demonio= |
==Devilite== | ==Devilite== | ||
<gallery widths=100px perrow=6> | <gallery widths=100px perrow=6> | ||
| Línea 256: | Línea 276: | ||
Image:Monster-Devil-IT Overtimer.png|[[Devilite#Devil-IT|Devil-IT Overtimer]] | Image:Monster-Devil-IT Overtimer.png|[[Devilite#Devil-IT|Devil-IT Overtimer]] | ||
Image:Monster-Blarful Overtimer.png|[[Devilite#Blarful|Blarful Overtimer]] | Image:Monster-Blarful Overtimer.png|[[Devilite#Blarful|Blarful Overtimer]] | ||
| + | </gallery> | ||
| + | |||
| + | ==Gorgo== | ||
| + | <gallery widths=100px perrow=5> | ||
| + | Image:Monster-Gorgo.png|[[Gorgo#Gorgo|Gorgo]] (Nivel 1) | ||
| + | Image:Monster-Firegut.png|[[Gorgo#Firegut|Firegut]] (Nivel 1) | ||
| + | Image:Monster-Guster.png|[[Gorgo#Guster|Guster]] (Nivel 1) | ||
| + | Image:Monster-Storm Belly.png|[[Gorgo#Storm Belly|Storm Belly]] (Nivel 1) | ||
| + | Image:Monster-Waster.png|[[Gorgo#Waster|Waster]] (Nivel 1) | ||
| + | |||
| + | Image:Monster-Gorgo 2.png|[[Gorgo#Gorgo|Gorgo]] (Nivel 2) | ||
| + | Image:Monster-Firegut 2.png|[[Gorgo#Firegut|Firegut]] (Nivel 2) | ||
| + | Image:Monster-Guster 2.png|[[Gorgo#Guster|Guster]] (Nivel 2) | ||
| + | Image:Monster-Storm Belly 2.png|[[Gorgo#Storm Belly|Storm Belly]] (Nivel 2) | ||
| + | Image:Monster-Waster 2.png|[[Gorgo#Waster|Waster]] (Nivel 2) | ||
| + | |||
| + | Image:Monster-Gorgo 3.png|[[Gorgo#Gorgo|Gorgo]] (Nivel 3) | ||
| + | Image:Monster-Firegut 3.png|[[Gorgo#Firegut|Firegut]] (Nivel 3) | ||
| + | Image:Monster-Guster 3.png|[[Gorgo#Guster|Guster]] (Nivel 3) | ||
| + | Image:Monster-Storm Belly 3.png|[[Gorgo#Storm Belly|Storm Belly]] (Nivel 3) | ||
| + | Image:Monster-Waster 3.png|[[Gorgo#Waster|Waster]] (Nivel 3) | ||
</gallery> | </gallery> | ||
| Línea 271: | Línea 312: | ||
==Trojan== | ==Trojan== | ||
<gallery widths=100px perrow=6> | <gallery widths=100px perrow=6> | ||
| − | Image:Monster-Trojan.png|[[Trojan|Trojan]] ( | + | Image:Monster-Trojan.png|[[Trojan|Trojan]] (Nivel 1) |
| − | Image:Monster-Trojan 2.png|[[Trojan|Trojan]] ( | + | Image:Monster-Trojan 2.png|[[Trojan|Trojan]] (Nivel 2) |
| − | Image:Monster-Trojan 3.png|[[Trojan|Trojan]] ( | + | Image:Monster-Trojan 3.png|[[Trojan|Trojan]] (Nivel 3) |
Image:Monster-Gold_Trojan.png|[[Trojan#Gold Trojan|Gold Trojan]] | Image:Monster-Gold_Trojan.png|[[Trojan#Gold Trojan|Gold Trojan]] | ||
Image:Monster-Arkus.png|[[Trojan#Arkus|Arkus]] | Image:Monster-Arkus.png|[[Trojan#Arkus|Arkus]] | ||
| Línea 283: | Línea 324: | ||
==Thwacker== | ==Thwacker== | ||
<gallery widths=100px perrow=6> | <gallery widths=100px perrow=6> | ||
| − | Image:Monster-Gremlin Thwacker.png|[[Thwacker#Tenderfoot Thwacker|Tenderfoot Thwacker]] ( | + | Image:Monster-Gremlin Thwacker.png|[[Thwacker#Tenderfoot Thwacker|Tenderfoot Thwacker]] (Nivel 1) |
| − | Image:Monster-Gremlin Thwacker 2.png|[[Thwacker#Ironclaw Thwacker|Ironclaw Thwacker]] ( | + | Image:Monster-Gremlin Thwacker 2.png|[[Thwacker#Ironclaw Thwacker|Ironclaw Thwacker]] (Nivel 2) |
| − | Image:Monster-Gremlin Thwacker 3.png|[[Thwacker#Darkfang Thwacker|Darkfang Thwacker]] ( | + | Image:Monster-Gremlin Thwacker 3.png|[[Thwacker#Darkfang Thwacker|Darkfang Thwacker]] (Nivel 3) |
| − | Image:Monster-Void_Thwacker.png|[[Thwacker#Void Thwacker|Void Thwacker]] ( | + | Image:Monster-Void_Thwacker.png|[[Thwacker#Void Thwacker|Void Thwacker]] (Guarida de la Sombra) |
| + | Image:Monster-Grinchlin Thwacker.png|[[Thwacker#Grinchlin Thwacker|Grinchlin Thwacker]] | ||
</gallery> | </gallery> | ||
==Mender== | ==Mender== | ||
<gallery widths=100px perrow=6> | <gallery widths=100px perrow=6> | ||
| − | Image:Monster-Gremlin Mender.png|[[Mender#Tenderfoot Mender|Tenderfoot Mender]] ( | + | Image:Monster-Gremlin Mender.png|[[Mender#Tenderfoot Mender|Tenderfoot Mender]] (Nivel 1) |
| − | Image:Monster-Gremlin Mender 2.png|[[Mender#Ironclaw Mender|Ironclaw Mender]] ( | + | Image:Monster-Gremlin Mender 2.png|[[Mender#Ironclaw Mender|Ironclaw Mender]] (Nivel 2) |
| − | Image:Monster-Gremlin Mender 3.png|[[Mender#Darkfang Mender|Darkfang Mender]] ( | + | Image:Monster-Gremlin Mender 3.png|[[Mender#Darkfang Mender|Darkfang Mender]] (Nivel 3) |
</gallery> | </gallery> | ||
==Scorcher== | ==Scorcher== | ||
<gallery widths=100px perrow=6> | <gallery widths=100px perrow=6> | ||
| − | Image:Monster-Gremlin Scorcher.png|[[Scorcher#Tenderfoot Scorcher|Tenderfoot Scorcher]] ( | + | Image:Monster-Gremlin Scorcher.png|[[Scorcher#Tenderfoot Scorcher|Tenderfoot Scorcher]] (Nivel 1) |
| − | Image:Monster-Gremlin Scorcher 2.png|[[Scorcher#Ironclaw Scorcher|Ironclaw Scorcher]] ( | + | Image:Monster-Gremlin Scorcher 2.png|[[Scorcher#Ironclaw Scorcher|Ironclaw Scorcher]] (Nivel 2) |
| − | Image:Monster-Gremlin Scorcher 3.png|[[Scorcher#Darkfang Scorcher|Darkfang Scorcher]] ( | + | Image:Monster-Gremlin Scorcher 3.png|[[Scorcher#Darkfang Scorcher|Darkfang Scorcher]] (Nivel 3) |
Image:Monster-Razwog.png|[[Schemer Razwog]] | Image:Monster-Razwog.png|[[Schemer Razwog]] | ||
Image:Monster-Gremlin Incinerator.png|[[Scorcher#Gremlin Incinerator|Gremlin Incinerator]] | Image:Monster-Gremlin Incinerator.png|[[Scorcher#Gremlin Incinerator|Gremlin Incinerator]] | ||
| Línea 307: | Línea 349: | ||
==Demo== | ==Demo== | ||
<gallery widths=100px perrow=6> | <gallery widths=100px perrow=6> | ||
| − | Image:Monster-Gremlin Demo.png|[[Demo#Tenderfoot Demo|Tenderfoot Demo]] ( | + | Image:Monster-Gremlin Demo.png|[[Demo#Tenderfoot Demo|Tenderfoot Demo]] (Nivel 1) |
| − | Image:Monster-Gremlin Demo 2.png|[[Demo#Ironclaw Demo|Ironclaw Demo]] ( | + | Image:Monster-Gremlin Demo 2.png|[[Demo#Ironclaw Demo|Ironclaw Demo]] (Nivel 2) |
| − | Image:Monster-Gremlin Demo 3.png|[[Demo#Darkfang Demo|Darkfang Demo]] ( | + | Image:Monster-Gremlin Demo 3.png|[[Demo#Darkfang Demo|Darkfang Demo]] (Nivel 3) |
</gallery> | </gallery> | ||
| Línea 324: | Línea 366: | ||
<gallery widths=100px perrow=6> | <gallery widths=100px perrow=6> | ||
Image:Monster-Gremlin Mortafire.png|[[Mortafire#Gremlin Mortafire|Gremlin Mortafire]] | Image:Monster-Gremlin Mortafire.png|[[Mortafire#Gremlin Mortafire|Gremlin Mortafire]] | ||
| + | Image:Monster-Blazing Mortafire.png|[[Mortafire#Blazing Mortafire|Blazing Mortafire]] | ||
| + | Image:Monster-Toxic Mortafire.png|[[Mortafire#Toxic Mortafire|Toxic Mortafire]] | ||
</gallery> | </gallery> | ||
| − | ==Crimson | + | ==Orden Crimson== |
<gallery widths=100px perrow=6> | <gallery widths=100px perrow=6> | ||
Image:Monster-Warmaster_Seerus.png|[[Warmaster Seerus|Warmaster Seerus]] | Image:Monster-Warmaster_Seerus.png|[[Warmaster Seerus|Warmaster Seerus]] | ||
</gallery> | </gallery> | ||
| − | == | + | ==Otros== |
<gallery widths=100px perrow=6> | <gallery widths=100px perrow=6> | ||
Image:Monster-Ghostmane Stalker.png|[[Ghostmane Stalker|Ghostmane Stalker]] | Image:Monster-Ghostmane Stalker.png|[[Ghostmane Stalker|Ghostmane Stalker]] | ||
| Línea 337: | Línea 381: | ||
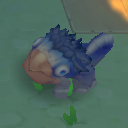
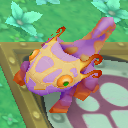
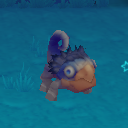
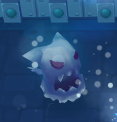
| − | = | + | =Viscoso= |
==Jelly== | ==Jelly== | ||
<gallery widths=100px perrow=6> | <gallery widths=100px perrow=6> | ||
| − | Image:Monster-Jelly Cube.png|[[Jelly#Jelly Cube|Jelly Cube]] ( | + | Image:Monster-Jelly Cube.png|[[Jelly#Jelly Cube|Jelly Cube]] (Nivel 1) |
| − | Image:Monster-Blast Cube.png|[[Jelly#Blast Cube|Blast Cube]] | + | Image:Monster-Blast Cube.png|[[Jelly#Blast Cube|Blast Cube]] (Nivel 1) |
| − | Image:Monster-Ice Cube.png|[[Jelly#Ice Cube|Ice Cube]] ( | + | Image:Monster-Ice Cube.png|[[Jelly#Ice Cube|Ice Cube]] (Nivel 1) |
Image:Monster-Impostocube.png|[[Jelly#Impostocube|Impostocube]] | Image:Monster-Impostocube.png|[[Jelly#Impostocube|Impostocube]] | ||
Image:Monster-Jelly Green Mini.png|[[Jelly#Jelly_Green_Mini|Jelly Green Mini]] | Image:Monster-Jelly Green Mini.png|[[Jelly#Jelly_Green_Mini|Jelly Green Mini]] | ||
Image:Monster-Jelly Green Giant.png|[[Jelly#Jelly_Green_Giant|Jelly Green Giant]] | Image:Monster-Jelly Green Giant.png|[[Jelly#Jelly_Green_Giant|Jelly Green Giant]] | ||
| − | Image:Monster-Jelly Cube 2.png|[[Jelly#Jelly Cube|Jelly Cube]] ( | + | Image:Monster-Jelly Cube 2.png|[[Jelly#Jelly Cube|Jelly Cube]] (Nivel 2) |
| − | Image:Monster-Super Blast Cube.png|[[Jelly# | + | Image:Monster-Super Blast Cube.png|[[Jelly#Blast Cube|Blast Cube]] (Nivel 2) |
| − | Image:Monster-Ice Cube 2.png|[[Jelly#Ice Cube|Ice Cube]] ( | + | Image:Monster-Ice Cube 2.png|[[Jelly#Ice Cube|Ice Cube]] (Nivel 2) |
Image:Monster-Rock Jelly Cube.png|[[Jelly#Rock Jelly Cube|Rock Jelly Cube]] | Image:Monster-Rock Jelly Cube.png|[[Jelly#Rock Jelly Cube|Rock Jelly Cube]] | ||
Image:Monster-Royal Mini.png|[[Jelly#Royal Mini|Royal Mini]] | Image:Monster-Royal Mini.png|[[Jelly#Royal Mini|Royal Mini]] | ||
| − | Image:Monster-Royal Jelly1.png|[[Royal Jelly|Royal Jelly]] ( | + | Image:Monster-Royal Jelly1.png|[[Royal Jelly|Royal Jelly]] (Nivel 2) |
| − | Image:Monster-Jelly Cube 3.png|[[Jelly#Jelly Cube|Jelly Cube]] ( | + | Image:Monster-Jelly Cube 3.png|[[Jelly#Jelly Cube|Jelly Cube]] (Nivel 3) |
| − | Image:Monster-Ultra Blast Cube.png|[[Jelly# | + | Image:Monster-Ultra Blast Cube.png|[[Jelly#Blast Cube|Blast Cube]] (Nivel 3) |
| − | Image:Monster-Ice Cube 3.png|[[Jelly#Ice Cube|Ice Cube]] ( | + | Image:Monster-Ice Cube 3.png|[[Jelly#Ice Cube|Ice Cube]] (Nivel 3) |
Image:-| | Image:-| | ||
Image:Monster-Ice Mini.png|[[Jelly#Ice Mini|Ice Mini]] | Image:Monster-Ice Mini.png|[[Jelly#Ice Mini|Ice Mini]] | ||
| − | Image:Monster-Ice Queen.png|[[Ice Queen]] ([[ | + | Image:Monster-Ice Queen.png|[[Ice Queen]] ([[Guarida de la Sombra]]) |
</gallery> | </gallery> | ||
| Línea 365: | Línea 409: | ||
<gallery widths=100px perrow=6> | <gallery widths=100px perrow=6> | ||
Image:Monster-Lichen.png|[[Lichen#Lichen|Lichen]] | Image:Monster-Lichen.png|[[Lichen#Lichen|Lichen]] | ||
| − | Image:Monster-Oiler.png|[[Lichen#Oiler|Oiler]] ( | + | Image:Monster-Oiler.png|[[Lichen#Oiler|Oiler]] (Nivel 1) |
| − | Image:Monster-Quicksilver.png|[[Lichen#Quicksilver|Quicksilver]] ( | + | Image:Monster-Quicksilver.png|[[Lichen#Quicksilver|Quicksilver]] (Nivel 1) |
| − | Image:Monster-Toxigel.png|[[Lichen#Toxigel|Toxigel]] ( | + | Image:Monster-Toxigel.png|[[Lichen#Toxigel|Toxigel]] (Nivel 1) |
Image:Monster-Toxoil.png|[[Lichen#Toxoil|Toxoil]] | Image:Monster-Toxoil.png|[[Lichen#Toxoil|Toxoil]] | ||
Image:Monster-Sloom.png|[[Lichen#Sloom|Sloom]] | Image:Monster-Sloom.png|[[Lichen#Sloom|Sloom]] | ||
Image:Monster-Lichen Colony.png|[[Lichen#Lichen Colony|Lichen Colony]] | Image:Monster-Lichen Colony.png|[[Lichen#Lichen Colony|Lichen Colony]] | ||
| − | Image:Monster-Oiler 2.png|[[Lichen#Oiler|Oiler]] ( | + | Image:Monster-Oiler 2.png|[[Lichen#Oiler|Oiler]] (Nivel 2) |
| − | Image:Monster-Quicksilver 2.png|[[Lichen#Quicksilver|Quicksilver]] ( | + | Image:Monster-Quicksilver 2.png|[[Lichen#Quicksilver|Quicksilver]] (Nivel 2) |
| − | Image:Monster-Toxigel 2.png|[[Lichen#Toxigel|Toxigel]] ( | + | Image:Monster-Toxigel 2.png|[[Lichen#Toxigel|Toxigel]] (Nivel 2) |
Image:Monster-Giant Toxoil.png|[[Lichen#Giant Toxoil|Giant Toxoil]] | Image:Monster-Giant Toxoil.png|[[Lichen#Giant Toxoil|Giant Toxoil]] | ||
Image:Monster-Sloombargo.png|[[Lichen#Sloombargo|Sloombargo]] | Image:Monster-Sloombargo.png|[[Lichen#Sloombargo|Sloombargo]] | ||
Image:Monster-Giant Lichen Colony.png|[[Lichen#Giant Lichen Colony|Giant Lichen Colony]] | Image:Monster-Giant Lichen Colony.png|[[Lichen#Giant Lichen Colony|Giant Lichen Colony]] | ||
| − | Image:Monster-Oiler 3.png|[[Lichen#Oiler|Oiler]] ( | + | Image:Monster-Oiler 3.png|[[Lichen#Oiler|Oiler]] (Nivel 3) |
| − | Image:Monster-Quicksilver 3.png|[[Lichen#Quicksilver|Quicksilver]] ( | + | Image:Monster-Quicksilver 3.png|[[Lichen#Quicksilver|Quicksilver]] (Nivel 3) |
| − | Image:Monster-Toxigel 3.png|[[Lichen#Toxigel|Toxigel]] ( | + | Image:Monster-Toxigel 3.png|[[Lichen#Toxigel|Toxigel]] (Nivel 3) |
Image:Monster-Toxilargo.png|[[Lichen#Toxilargo|Toxilargo]] | Image:Monster-Toxilargo.png|[[Lichen#Toxilargo|Toxilargo]] | ||
| + | Image:Monster-Void Gel.png|[[Lichen#Void Gel|Void Gel]] (Guarida de la Sombra) | ||
| + | |||
Image:Monster-Soul Jelly.png|[[Lichen#Soul Jelly|Soul Jelly]] | Image:Monster-Soul Jelly.png|[[Lichen#Soul Jelly|Soul Jelly]] | ||
| Línea 390: | Línea 436: | ||
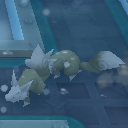
==Polyp== | ==Polyp== | ||
<gallery widths=100px perrow=6> | <gallery widths=100px perrow=6> | ||
| − | Image:Monster-Polyp.png|[[Polyp#Polyp|Polyp]] ( | + | Image:Monster-Polyp.png|[[Polyp#Polyp|Polyp]] (Nivel 1) |
| − | Image:Monster-Slick Polyp.png|[[Polyp#Slick Polyp|Slick Polyp]] ( | + | Image:Monster-Slick Polyp.png|[[Polyp#Slick Polyp|Slick Polyp]] (Nivel 1) |
| − | Image:Monster-Polar Polyp.png|[[Polyp#Polar Polyp|Polar Polyp]] ( | + | Image:Monster-Polar Polyp.png|[[Polyp#Polar Polyp|Polar Polyp]] (Nivel 1) |
| − | Image:Monster-Silver Polyp.png|[[Polyp#Silver Polyp|Silver Polyp]] ( | + | Image:Monster-Silver Polyp.png|[[Polyp#Silver Polyp|Silver Polyp]] (Nivel 1) |
| − | Image:Monster-Caustic Polyp.png|[[Polyp#Caustic Polyp|Caustic Polyp]] ( | + | Image:Monster-Caustic Polyp.png|[[Polyp#Caustic Polyp|Caustic Polyp]] (Nivel 1) |
| − | Image: | + | Image:-| |
| − | Image:Monster-Polyp 2.png|[[Polyp#Polyp|Polyp]] ( | + | Image:Monster-Polyp 2.png|[[Polyp#Polyp|Polyp]] (Nivel 2) |
| − | Image:Monster-Slick Polyp 2.png|[[Polyp#Slick Polyp|Slick Polyp]] ( | + | Image:Monster-Slick Polyp 2.png|[[Polyp#Slick Polyp|Slick Polyp]] (Nivel 2) |
| − | Image:Monster-Polar Polyp 2.png|[[Polyp#Polar Polyp|Polar Polyp]] ( | + | Image:Monster-Polar Polyp 2.png|[[Polyp#Polar Polyp|Polar Polyp]] (Nivel 2) |
| − | Image:Monster-Silver Polyp 2.png|[[Polyp#Silver Polyp|Silver Polyp]] ( | + | Image:Monster-Silver Polyp 2.png|[[Polyp#Silver Polyp|Silver Polyp]] (Nivel 2) |
| − | Image:Monster-Caustic Polyp 2.png|[[Polyp#Caustic Polyp|Caustic Polyp]] ( | + | Image:Monster-Caustic Polyp 2.png|[[Polyp#Caustic Polyp|Caustic Polyp]] (Nivel 2) |
| + | Image:Monster-Compound Polyp.png|[[Polyp#Compound Polyp|Compound Polyp]] (Nivel 2) | ||
| + | |||
| + | Image:Monster-Polyp 3.png|[[Polyp#Polyp|Polyp]] (Nivel 3) | ||
| + | Image:Monster-Slick Polyp 3.png|[[Polyp#Slick Polyp|Slick Polyp]] (Nivel 3) | ||
| + | Image:Monster-Polar Polyp 3.png|[[Polyp#Polar Polyp|Polar Polyp]] (Nivel 3) | ||
| + | Image:Monster-Silver Polyp 3.png|[[Polyp#Silver Polyp|Silver Polyp]] (Nivel 3) | ||
| + | Image:Monster-Caustic Polyp 3.png|[[Polyp#Caustic Polyp|Caustic Polyp]] (Nivel 3) | ||
| + | Image:Monster-Compound Polyp 2.png|[[Polyp#Compound Polyp|Compound Polyp]] (Nivel 3) | ||
| + | |||
| + | Image:Monster-Royal Polyp.png|[[Polyp#Royal Polyp|Royal Polyp]] | ||
Image:Monster-Royal Polar Polyp.png|[[Polyp#Royal Polar Polyp|Royal Polar Polyp]] | Image:Monster-Royal Polar Polyp.png|[[Polyp#Royal Polar Polyp|Royal Polar Polyp]] | ||
| + | </gallery> | ||
| + | |||
| + | ==Glop Drop== | ||
| + | <gallery widths=100px perrow=5> | ||
| + | Image:Monster-Glop Drop.png|[[Glop Drop#Glop Drop|Glop Drop]] (Nivel 1) | ||
| + | Image:Monster-Spice Drop.png|[[Glop Drop#Spice Drop|Spice Drop]] (Nivel 1) | ||
| + | Image:Monster-Snow Drop.png|[[Glop Drop#Snow Drop|Snow Drop]] (Nivel 1) | ||
| + | Image:Monster-Power Drop.png|[[Glop Drop#Power Drop|Power Drop]] (Nivel 1) | ||
| + | Image:Monster-Germ Drop.png|[[Glop Drop#Germ Drop|Germ Drop]] (Nivel 1) | ||
| + | |||
| + | Image:Monster-Glop Drop 2.png|[[Glop Drop#Glop Drop|Glop Drop]] (Nivel 2) | ||
| + | Image:Monster-Spice Drop 2.png|[[Glop Drop#Spice Drop|Spice Drop]] (Nivel 2) | ||
| + | Image:Monster-Snow Drop 2.png|[[Glop Drop#Snow Drop|Snow Drop]] (Nivel 2) | ||
| + | Image:Monster-Power Drop 2.png|[[Glop Drop#Power Drop|Power Drop]] (Nivel 2) | ||
| + | Image:Monster-Germ Drop 2.png|[[Glop Drop#Germ Drop|Germ Drop]] (Nivel 2) | ||
| − | Image:Monster- | + | Image:Monster-Glop Drop 3.png|[[Glop Drop#Glop Drop|Glop Drop]] (Nivel 3) |
| − | Image:Monster- | + | Image:Monster-Spice Drop 3.png|[[Glop Drop#Spice Drop|Spice Drop]] (Nivel 3) |
| − | Image:Monster- | + | Image:Monster-Snow Drop 3.png|[[Glop Drop#Snow Drop|Snow Drop]] (Nivel 3) |
| − | Image:Monster- | + | Image:Monster-Power Drop 3.png|[[Glop Drop#Power Drop|Power Drop]] (Nivel 3) |
| − | Image:Monster- | + | Image:Monster-Germ Drop 3.png|[[Glop Drop#Germ Drop|Germ Drop]] (Nivel 3) |
| − | + | ||
</gallery> | </gallery> | ||
| − | = | + | =Muerto Viviente= |
==Howlitzer== | ==Howlitzer== | ||
<gallery widths=100px perrow=5> | <gallery widths=100px perrow=5> | ||
| − | Image:Monster-Howlitzer.png|[[Howlitzer#Howlitzer|Howlitzer]] ( | + | Image:Monster-Howlitzer.png|[[Howlitzer#Howlitzer|Howlitzer]] (Nivel 1) |
| − | Image:Monster-Smoking Howlitzer.png|[[Howlitzer#Smoking Howlitzer|Smoking Howlitzer]] ( | + | Image:Monster-Smoking Howlitzer.png|[[Howlitzer#Smoking Howlitzer|Smoking Howlitzer]] (Nivel 1) |
| − | Image:Monster-Chilling Howlitzer.png|[[Howlitzer#Chilling Howlitzer|Chilling Howlitzer]] ( | + | Image:Monster-Chilling Howlitzer.png|[[Howlitzer#Chilling Howlitzer|Chilling Howlitzer]] (Nivel 1) |
| − | Image:Monster-Shocking Howlitzer.png|[[Howlitzer#Shocking Howlitzer|Shocking Howlitzer]] ( | + | Image:Monster-Shocking Howlitzer.png|[[Howlitzer#Shocking Howlitzer|Shocking Howlitzer]] (Nivel 1) |
| − | Image:Monster-Vile Howlitzer.png|[[Howlitzer#Vile Howlitzer|Vile Howlitzer]] ( | + | Image:Monster-Vile Howlitzer.png|[[Howlitzer#Vile Howlitzer|Vile Howlitzer]] (Nivel 1) |
| − | Image:Monster-Howlitzer 2.png|[[Howlitzer#Howlitzer|Howlitzer]] ( | + | Image:Monster-Howlitzer 2.png|[[Howlitzer#Howlitzer|Howlitzer]] (Nivel 2) |
| − | Image:Monster-Smoking Howlitzer 2.png|[[Howlitzer#Smoking Howlitzer|Smoking Howlitzer]] ( | + | Image:Monster-Smoking Howlitzer 2.png|[[Howlitzer#Smoking Howlitzer|Smoking Howlitzer]] (Nivel 2) |
| − | Image:Monster-Chilling Howlitzer 2.png|[[Howlitzer#Chilling Howlitzer|Chilling Howlitzer]] ( | + | Image:Monster-Chilling Howlitzer 2.png|[[Howlitzer#Chilling Howlitzer|Chilling Howlitzer]] (Nivel 2) |
| − | Image:Monster-Shocking Howlitzer 2.png|[[Howlitzer#Shocking Howlitzer|Shocking Howlitzer]] ( | + | Image:Monster-Shocking Howlitzer 2.png|[[Howlitzer#Shocking Howlitzer|Shocking Howlitzer]] (Nivel 2) |
| − | Image:Monster-Vile Howlitzer 2.png|[[Howlitzer#Vile Howlitzer|Vile Howlitzer]] ( | + | Image:Monster-Vile Howlitzer 2.png|[[Howlitzer#Vile Howlitzer|Vile Howlitzer]] (Nivel 2) |
| − | Image:Monster-Howlitzer 3.png|[[Howlitzer#Howlitzer|Howlitzer]] ( | + | Image:Monster-Howlitzer 3.png|[[Howlitzer#Howlitzer|Howlitzer]] (Nivel 3) |
| − | Image:Monster-Smoking Howlitzer 3.png|[[Howlitzer#Smoking Howlitzer|Smoking Howlitzer]] ( | + | Image:Monster-Smoking Howlitzer 3.png|[[Howlitzer#Smoking Howlitzer|Smoking Howlitzer]] (Nivel 3) |
| − | Image:Monster-Chilling Howlitzer 3.png|[[Howlitzer#Chilling Howlitzer|Chilling Howlitzer]] ( | + | Image:Monster-Chilling Howlitzer 3.png|[[Howlitzer#Chilling Howlitzer|Chilling Howlitzer]] (Nivel 3) |
| − | Image:Monster-Shocking Howlitzer 3.png|[[Howlitzer#Shocking Howlitzer|Shocking Howlitzer]] ( | + | Image:Monster-Shocking Howlitzer 3.png|[[Howlitzer#Shocking Howlitzer|Shocking Howlitzer]] (Nivel 3) |
| − | Image:Monster-Vile Howlitzer 3.png|[[Howlitzer#Vile Howlitzer|Vile Howlitzer]] ( | + | Image:Monster-Vile Howlitzer 3.png|[[Howlitzer#Vile Howlitzer|Vile Howlitzer]] (Nivel 3) |
</gallery> | </gallery> | ||
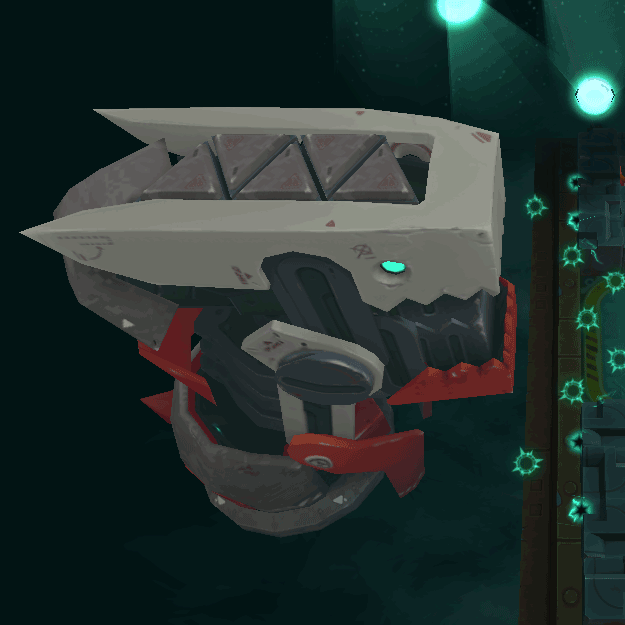
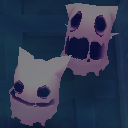
==Kat== | ==Kat== | ||
<gallery widths=100px perrow=6> | <gallery widths=100px perrow=6> | ||
| − | Image:Monster-Spookat.png|[[Kat#Spookat|Spookat]] ( | + | Image:Monster-Spookat.png|[[Kat#Spookat|Spookat]] (Nivel 1) |
| − | Image:Monster-Pepperkat.png|[[Kat#Pepperkat|Pepperkat]] ( | + | Image:Monster-Pepperkat.png|[[Kat#Pepperkat|Pepperkat]] (Nivel 1) |
| − | Image:Monster-Bloogato.png|[[Kat#Bloogato|Bloogato]] ( | + | Image:Monster-Bloogato.png|[[Kat#Bloogato|Bloogato]] (Nivel 1) |
| − | Image:Monster-Statikat.png|[[Kat#Statikat|Statikat]] ( | + | Image:Monster-Statikat.png|[[Kat#Statikat|Statikat]] (Nivel 1) |
| − | Image:Monster-Hurkat.png|[[Kat#Hurkat|Hurkat]] ( | + | Image:Monster-Hurkat.png|[[Kat#Hurkat|Hurkat]] (Nivel 1) |
Image:Monster-Mewkat.png|[[Kat#Mewkat|Mewkat]] | Image:Monster-Mewkat.png|[[Kat#Mewkat|Mewkat]] | ||
| − | Image:Monster-Spookat 2.png|[[Kat#Spookat|Spookat]] ( | + | Image:Monster-Spookat 2.png|[[Kat#Spookat|Spookat]] (Nivel 2) |
| − | Image:Monster-Pepperkat 2.png|[[Kat#Pepperkat|Pepperkat]] ( | + | Image:Monster-Pepperkat 2.png|[[Kat#Pepperkat|Pepperkat]] (Nivel 2) |
| − | Image:Monster-Bloogato 2.png|[[Kat#Bloogato|Bloogato]] ( | + | Image:Monster-Bloogato 2.png|[[Kat#Bloogato|Bloogato]] (Nivel 2) |
| − | Image:Monster-Statikat 2.png|[[Kat#Statikat|Statikat]] ( | + | Image:Monster-Statikat 2.png|[[Kat#Statikat|Statikat]] (Nivel 2) |
| − | Image:Monster-Hurkat 2.png|[[Kat#Hurkat|Hurkat]] ( | + | Image:Monster-Hurkat 2.png|[[Kat#Hurkat|Hurkat]] (Nivel 2) |
| − | + | ||
| − | + | ||
| − | + | ||
| − | + | ||
| − | + | ||
| − | + | ||
| − | + | ||
Image:Monster-Grimalkin.png|[[Kat#Grimalkin|Grimalkin]] | Image:Monster-Grimalkin.png|[[Kat#Grimalkin|Grimalkin]] | ||
| + | |||
| + | Image:Monster-Spookat 3.png|[[Kat#Spookat|Spookat]] (Nivel 3) | ||
| + | Image:Monster-Pepperkat 3.png|[[Kat#Pepperkat|Pepperkat]] (Nivel 3) | ||
| + | Image:Monster-Bloogato 3.png|[[Kat#Bloogato|Bloogato]] (Nivel 3) | ||
| + | Image:Monster-Statikat 3.png|[[Kat#Statikat|Statikat]] (Nivel 3) | ||
| + | Image:Monster-Hurkat 3.png|[[Kat#Hurkat|Hurkat]] (Nivel 3) | ||
| + | Image:Monster-Margrel.png|[[Kat#Margrel|Margrel]] | ||
| + | |||
| + | Image:Monster-Black Kat.png|[[Kat#Black Kat|Black Kat]] | ||
</gallery> | </gallery> | ||
| Línea 473: | Línea 545: | ||
<gallery widths=100px perrow=6> | <gallery widths=100px perrow=6> | ||
Image:Monster-Deadnaught.png|[[Deadnaught#Deadnaught|Deadnaught]] | Image:Monster-Deadnaught.png|[[Deadnaught#Deadnaught|Deadnaught]] | ||
| − | Image:Monster-Static Deadnaught.png|[[Deadnaught#Static Deadnaught|Deadnaught]] | + | Image:Monster-Static Deadnaught.png|[[Deadnaught#Static Deadnaught|Static Deadnaught]] |
| − | Image:Monster- | + | Image:Monster-Vile Deadnaught.png|[[Deadnaught#Vile Deadnaught|Vile Deadnaught]] |
| − | Image:Monster- | + | Image:Monster-Almirian Royal Guard.png|[[Deadnaught#Almirian Royal Guard|Almirian Royal Guard]] |
| + | Image:Monster-Almirian Shadow Guard.png|[[Deadnaught#Almirian Shadow Guard|Almirian Shadow Guard]] | ||
</gallery> | </gallery> | ||
==Bombie== | ==Bombie== | ||
| − | <gallery widths=100px perrow | + | <gallery widths=100px perrow=6> |
Image:Monster-Bombie.png|[[Bombie#Bombie|Bombie]] | Image:Monster-Bombie.png|[[Bombie#Bombie|Bombie]] | ||
Image:Monster-Surging Bombie.png|[[Bombie#Surging Bombie|Surging Bombie]] | Image:Monster-Surging Bombie.png|[[Bombie#Surging Bombie|Surging Bombie]] | ||
| + | Image:Monster-Choking Bombie.png|[[Bombie#Choking Bombie|Choking Bombie]] | ||
</gallery> | </gallery> | ||
| − | == | + | ==Scarab== |
| + | <gallery widths=100px perrow=5> | ||
| + | Image:Monster-Grave Scarab.png|[[Scarab#Grave Scarab|Grave Scarab]] (Nivel 1) | ||
| + | Image:Monster-Sun Scarab.png|[[Scarab#Sun Scarab|Sun Scarab]] (Nivel 1) | ||
| + | Image:Monster-Pale Scarab.png|[[Scarab#Pale Scarab|Pale Scarab]] (Nivel 1) | ||
| + | Image:Monster-Silver Scarab.png|[[Scarab#Silver Scarab|Silver Scarab]] (Nivel 1) | ||
| + | Image:Monster-Plague Scarab.png|[[Scarab#Plague Scarab|Plague Scarab]] (Nivel 1) | ||
| + | |||
| + | Image:Monster-Grave Scarab 2.png|[[Scarab#Grave Scarab|Grave Scarab]] (Nivel 2) | ||
| + | Image:Monster-Sun Scarab 2.png|[[Scarab#Sun Scarab|Sun Scarab]] (Nivel 2) | ||
| + | Image:Monster-Pale Scarab 2.png|[[Scarab#Pale Scarab|Pale Scarab]] (Nivel 2) | ||
| + | Image:Monster-Silver Scarab 2.png|[[Scarab#Silver Scarab|Silver Scarab]] (Nivel 2) | ||
| + | Image:Monster-Plague Scarab 2.png|[[Scarab#Plague Scarab|Plague Scarab]] (Nivel 2) | ||
| + | |||
| + | Image:Monster-Grave Scarab 3.png|[[Scarab#Grave Scarab|Grave Scarab]] (Nivel 3) | ||
| + | Image:Monster-Sun Scarab 3.png|[[Scarab#Sun Scarab|Sun Scarab]] (Nivel 3) | ||
| + | Image:Monster-Pale Scarab 3.png|[[Scarab#Pale Scarab|Pale Scarab]] (Nivel 3) | ||
| + | Image:Monster-Silver Scarab 3.png|[[Scarab#Silver Scarab|Silver Scarab]] (Nivel 3) | ||
| + | Image:Monster-Plague Scarab 3.png|[[Scarab#Plague Scarab|Plague Scarab]] (Nivel 3) | ||
| + | </gallery> | ||
| + | |||
| + | ==Otros== | ||
<gallery widths=100px perrow=6> | <gallery widths=100px perrow=6> | ||
Image:Monster-Phantom.png|[[Phantom|Phantom]] | Image:Monster-Phantom.png|[[Phantom|Phantom]] | ||
Image:Monster-Punkin_King.png|[[Punkin_King|Punkin King]] | Image:Monster-Punkin_King.png|[[Punkin_King|Punkin King]] | ||
Image:Monster-Gourdling.png|[[Gourdling|Gourdling]] | Image:Monster-Gourdling.png|[[Gourdling|Gourdling]] | ||
| − | |||
Image:Monster-Almirian Crusader.png|[[Almirian Crusader#Almirian Crusader|Almirian Crusader]] | Image:Monster-Almirian Crusader.png|[[Almirian Crusader#Almirian Crusader|Almirian Crusader]] | ||
| + | Image:-| | ||
| + | Image:-| | ||
</gallery> | </gallery> | ||
| − | = | + | =Jefes= |
<gallery widths=100px perrow=5> | <gallery widths=100px perrow=5> | ||
| − | Image:Monster-Snarbolax.png|[[Snarbolax]] ( | + | Image:Monster-Snarbolax.png|[[Snarbolax]] (Nivel 1) |
| − | Image:Monster-Roarmulus Twins.png|[[Roarmulus Twins]] ( | + | Image:Monster-Roarmulus Twins.png|[[Roarmulus Twins]] (Nivel 2) |
| − | Image:Monster-Royal Jelly1.png|[[Royal Jelly|Royal Jelly]] ( | + | Image:Monster-Royal Jelly1.png|[[Royal Jelly|Royal Jelly]] (Nivel 2) |
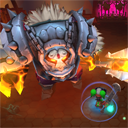
| − | Image:Monster-Lord Vanaduke.png|[[Lord Vanaduke]] ( | + | Image:Monster-Lord Vanaduke.png|[[Lord Vanaduke]] (Nivel 3) |
Image:Monster-Warmaster Seerus.png|[[Warmaster Seerus]] | Image:Monster-Warmaster Seerus.png|[[Warmaster Seerus]] | ||
| − | Image:Monster-Rabid Snarbolax.png|[[ | + | Image:Monster-Rabid Snarbolax.png|[[Snarbolax Rabioso]] ([[Guarida de la Sombra]]) |
| − | Image:Monster-Red Roarmulus Twins.png|[[ | + | Image:Monster-Red Roarmulus Twins.png|[[Gemelos Roarmulus Rojos]] ([[Guarida de la Sombra]]) |
| − | Image:Monster-Ice Queen.png|[[ | + | Image:Monster-Ice Queen.png|[[Reina de Hielo]] ([[Guarida de la Sombra]]) |
| − | Image:Monster-Darkfire Vanaduke.png|[[Darkfire Vanaduke]] ([[ | + | Image:Monster-Darkfire Vanaduke.png|[[Darkfire Vanaduke]] ([[Guarida de la Sombra]]) |
Image:-| | Image:-| | ||
| + | </gallery> | ||
| + | =Sin Tipo= | ||
| + | <gallery widths=100px perrow=5> | ||
| + | Image:Monster-Creep Cake.png|[[Creep Cake]] | ||
| + | Image:Monster-Mini Creep Cake.png|[[Creep Cake#Mini Creep Cake|Mini Creep Cake]] | ||
| + | Image:Monster-Wheel Launcher.png|[[Wheel Launcher]] | ||
| + | Image:Monster-Swarm Seed.png|[[El Enjambre#Swarm Seed|Swarm Seed]] | ||
| + | Image:Monster-Swarm Turret.png|[[El Enjambre#Swarm Turret|Swarm Turret]] | ||
</gallery> | </gallery> | ||
[[Categoría:Listas]] | [[Categoría:Listas]] | ||
[[Categoría:Enciclopedia Visual]] | [[Categoría:Enciclopedia Visual]] | ||
Revisión de 18:56 3 sep 2013
- Para una lista actualizada, ve al Artículo en inglés: Visual_Encyclopedia/creature
Esta es una enciclopedia visual de las criaturas que se encuentran en los mecanismos. Por favor toma nota que puede haber imágenes que no estén actualizadas y otros problemas que se están tratando de resolver.
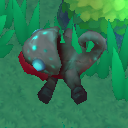
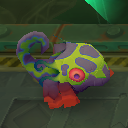
Bestia
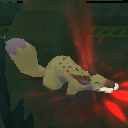
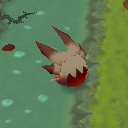
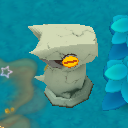
Wolver
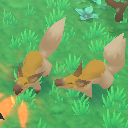
Wolver (Nivel 1)
Ash Tail (Nivel 1)
Frostifur (Nivel 1)
Voltail (Nivel 1)
Rabid Wolver (Nivel 1)

Wolver (Nivel 2)
Ash Tail (Nivel 2)
Frostifur (Nivel 2)
Voltail (Nivel 2)
Rabid Wolver (Nivel 2)
- -
Wolver (Nivel 3)
Ash Tail (Nivel 3)
Frostifur (Nivel 3)

Voltail (Nivel 3)
Rabid Wolver (Nivel 3)


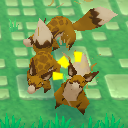
Alpha Wolver
Alpha Wolver (Nivel 1)
Alpha Ash Tail (Nivel 1)
Alpha Frostifur (Nivel 1)
Alpha Voltail (Nivel 1)
Rabid Alpha Wolver (Nivel 1)
Snarbolax (Nivel 1)
Alpha Wolver (Nivel 2)
Alpha Ash Tail (Nivel 2)
Alpha Frostifur (Nivel 2)

Alpha Voltail (Nivel 2)

Rabid Alpha Wolver (Nivel 2)
Alpha Wolver (Nivel 3)
Alpha Ash Tail (Nivel 3)
Alpha Frostifur (Nivel 3)
Alpha Voltail (Nivel 3)
Rabid Alpha Wolver (Nivel 3)


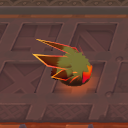
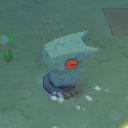
Chromalisk
Chroma Whelp no page, but exists in crash landing
Salamander (Nivel 1)
Tundralisk (Nivel 1)
- Monster-Electrolisk.PNG
Electrolisk (Nivel 1)
Virulisk (Nivel 1)
Chromalisk (Nivel 2)
Salamander (Nivel 2)
Tundralisk (Nivel 2)
Electrolisk (Nivel 2)
Virulisk (Nivel 2)
- -

Chromalisk (Nivel 3)
Salamander (Nivel 3)
Tundralisk (Nivel 3)
Electrolisk (Nivel 3)
Virulisk (Nivel 3)


Dust Bunny
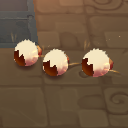
Dust Bunny (Nivel 1)
Toast Bunny (Nivel 1)
Snow Bunny (Nivel 1)
Jolt Bunny (Nivel 1)
Blech Bunny (Nivel 1)
Dust Bunny (Nivel 2)

Toast Bunny (Nivel 2)
Snow Bunny (Nivel 2)

Jolt Bunny (Nivel 2)
Blech Bunny (Nivel 2)
Dust Bunny (Nivel 3)
Toast Bunny (Nivel 3)
Snow Bunny (Nivel 3)
Jolt Bunny (Nivel 3)

Blech Bunny (Nivel 3)


Constructor
Gun Puppy
Gun Puppy (Nivel 1)
Rocket Puppy (Nivel 1)
Red Rover (Nivel 1)
Slush Puppy (Nivel 1)

Sparky (Nivel 1)
Sick Puppy (Nivel 1)
Gun Puppy (Nivel 2)

Rocket Puppy (Nivel 2)
Red Rover (Nivel 2)
Slush Puppy (Nivel 2)
Sparky (Nivel 2)
Sick Puppy (Nivel 2)
Gun Puppy (Nivel 3)

Rocket Puppy (Nivel 3)
Red Rover (Nivel 3)
Slush Puppy (Nivel 3)
Sparky (Nivel 3)
Sick Puppy (Nivel 3)
- -
- -
- -
Roarmulus Twins (Nivel 2)


Lumber
- Monster-Lumber.png
Lumber (Nivel 1)
- Monster-Redward.png
Redward (Nivel 1)
- Monster-Silversap.png
Silversap (Nivel 1)
- Monster-Electreant.png
Electreant (Nivel 1)
- Monster-Vilewood.png
Vilewood (Nivel 1)
- Monster-Ironwood Sentinel.png
- Monster-Lumber 2.png
Lumber (Nivel 2)
- Monster-Redward 2.png
Redward (Nivel 2)
- Monster-Silversap 2.png
Silversap (Nivel 2)
- Monster-Electreant 2.png
Electreant (Nivel 2)
- Monster-Vilewood 2.png
Vilewood (Nivel 2)
- -
- Monster-Lumber 3.png
Lumber (Nivel 3)
- Monster-Redward 3.png
Redward (Nivel 3)
- Monster-Silversap 3.png
Silversap (Nivel 3)
- Monster-Electreant 3.png
Electreant (Nivel 3)
- Monster-Vilewood 3.png
Vilewood (Nivel 3)
- Monster-Void Lumber.png
Void Lumber (Guarida de la Sombra)
Mecha Knight
- Monster-Mecha Knight.png
Mecha Knight (Nivel 1)
- Monster-Firo Knight.png
Firo Knight (Nivel 1)
- Monster-Cryo Knight.png
Cryo Knight (Nivel 1)
- Monster-Volt Knight.png
Volt Knight (Nivel 1)
- Monster-Blight Knight.png
Blight Knight (Nivel 1)
- Monster-Mecha Knight 2.png
Mecha Knight (Nivel 2)
- Monster-Firo Knight 2.png
Firo Knight (Nivel 2)
- Monster-Cryo Knight 2.png
Cryo Knight (Nivel 2)
- Monster-Volt Knight 2.png
Volt Knight (Nivel 2)
- Monster-Blight Knight 2.png
Blight Knight (Nivel 2)
- Monster-Mecha Knight 3.png
Mecha Knight (Nivel 3)
- Monster-Firo Knight 3.png
Firo Knight (Nivel 3)
- Monster-Cryo Knight 3.png
Cryo Knight (Nivel 3)
- Monster-Volt Knight 3.png
Volt Knight (Nivel 3)
- Monster-Blight Knight 3.png
Blight Knight (Nivel 3)
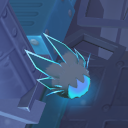
Retrode
- Monster-Retrode.png
Retrode (Nivel 1)
- Monster-Hotrode.png
Hotrode (Nivel 1)
- Monster-Sleetrode.png
Sleetrode (Nivel 1)
- Monster-Voltrode.png
Voltrode (Nivel 1)
- Monster-Isotrode.png
Isotrode (Nivel 1)
- Monster-Retrode 2.png
Retrode (Nivel 2)
- Monster-Hotrode 2.png
Hotrode (Nivel 2)
- Monster-Sleetrode 2.png
Sleetrode (Nivel 2)
- Monster-Voltrode 2.png
Voltrode (Nivel 2)
- Monster-Isotrode 2.png
Isotrode (Nivel 2)
- Monster-Retrode 3.png
Retrode (Nivel 3)
- Monster-Hotrode 3.png
Hotrode (Nivel 3)
- Monster-Sleetrode 3.png
Sleetrode (Nivel 3)
- Monster-Voltrode 3.png
Voltrode (Nivel 3)
- Monster-Isotrode 3.png
Isotrode (Nivel 3)
Scuttlebot
Scuttlebot (Nivel 1)
Cinderbot (Nivel 1)
Brumabot (Nivel 1)
Surgebot (Nivel 1)
Hazbot (Nivel 1)
- Monster-Shufflebot.png
Shufflebot (Salón de Entrenamiento Avanzado)
- Monster-Scuttlebot 2.png
Scuttlebot (Nivel 2)
- Monster-Cinderbot 2.png
Cinderbot (Nivel 2)
- Monster-Brumabot 2.png
Brumabot (Nivel 2)
- Monster-Surgebot 2.png
Surgebot (Nivel 2)
- Monster-Hazbot 2.png
Hazbot (Nivel 2)
- -
- Monster-Scuttlebot 3.png
Scuttlebot (Nivel 3)
- Monster-Cinderbot 3.png
Cinderbot (Nivel 3)
- Monster-Brumabot 3.png
Brumabot (Nivel 3)
- Monster-Surgebot 3.png
Surgebot (Nivel 3)
- Monster-Hazbot 3.png
Hazbot (Nivel 3)


Battlepod
- Monster-Battlepod.png
- Monster-The Big Iron.png
Otros
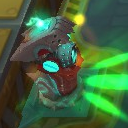
- Monster-Tortodrone.png
- Monster-Collector.png
Drone
Shankle
- Monster-Shankle.png
- Monster-Sharp Shankle.png
- Monster-Sage Shankle.png
- Monster-Dark Shankle.png
- Monster-Golden Shankle.png
- Monster-Golden Sharp Shankle.png
- Monster-Golden Sage Shankle.png
- Monster-Golden Dark Shankle.png
Wisp
- Monster-Volcanic Wisp.png
- Monster-Winter Wisp.png
- Monster-Storm Wisp.png
- Monster-Bog Wisp.png
- Monster-Golden Volcanic Wisp.png
- Monster-Golden Winter Wisp.png
- Monster-Golden Storm Wisp.png
- Monster-Golden Bog Wisp.png
Soul


Demonio
Devilite


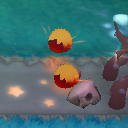
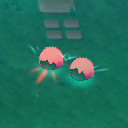
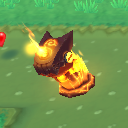
Gorgo
- Monster-Gorgo.png
Gorgo (Nivel 1)
- Monster-Firegut.png
Firegut (Nivel 1)
- Monster-Guster.png
Guster (Nivel 1)
- Monster-Storm Belly.png
Storm Belly (Nivel 1)
- Monster-Waster.png
Waster (Nivel 1)
- Monster-Gorgo 2.png
Gorgo (Nivel 2)
- Monster-Firegut 2.png
Firegut (Nivel 2)
- Monster-Guster 2.png
Guster (Nivel 2)
- Monster-Storm Belly 2.png
Storm Belly (Nivel 2)
- Monster-Waster 2.png
Waster (Nivel 2)
- Monster-Gorgo 3.png
Gorgo (Nivel 3)
- Monster-Firegut 3.png
Firegut (Nivel 3)
- Monster-Guster 3.png
Guster (Nivel 3)
- Monster-Storm Belly 3.png
Storm Belly (Nivel 3)
- Monster-Waster 3.png
Waster (Nivel 3)
Greaver & Silkwing
- Monster-Greaver.png
- Monster-Ruby Greaver.png
- Monster-Pearl Greaver.png
- Monster-Beryl Greaver.png
- Monster-Jade Greaver.png
- Monster-Winterfest Greaver.png

Trojan


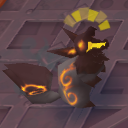
Gremlin
Thwacker
- Monster-Gremlin Thwacker.png
Tenderfoot Thwacker (Nivel 1)
- Monster-Gremlin Thwacker 2.png
Ironclaw Thwacker (Nivel 2)
- Monster-Gremlin Thwacker 3.png
Darkfang Thwacker (Nivel 3)
- Monster-Void Thwacker.png
Void Thwacker (Guarida de la Sombra)
- Monster-Grinchlin Thwacker.png
Mender
- Monster-Gremlin Mender.png
Tenderfoot Mender (Nivel 1)
- Monster-Gremlin Mender 2.png
Ironclaw Mender (Nivel 2)
- Monster-Gremlin Mender 3.png
Darkfang Mender (Nivel 3)
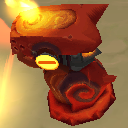
Scorcher
- Monster-Gremlin Scorcher.png
Tenderfoot Scorcher (Nivel 1)
- Monster-Gremlin Scorcher 2.png
Ironclaw Scorcher (Nivel 2)
- Monster-Gremlin Scorcher 3.png
Darkfang Scorcher (Nivel 3)
- Monster-Gremlin Incinerator.png

Demo
- Monster-Gremlin Demo.png
Tenderfoot Demo (Nivel 1)
- Monster-Gremlin Demo 2.png
Ironclaw Demo (Nivel 2)
- Monster-Gremlin Demo 3.png
Darkfang Demo (Nivel 3)
Knocker
- Monster-Gremlin Knocker.png
- Monster-Gremlin Lighter.png
- Monster-Gremlin Cooler.png
- Monster-Gremlin Jumper.png
- Monster-Gremlin Choker.png
Mortafire
- Monster-Gremlin Mortafire.png
- Monster-Blazing Mortafire.png
- Monster-Toxic Mortafire.png
Orden Crimson

Otros
- Monster-Ghostmane Stalker.png
Viscoso
Jelly
- Monster-Jelly Cube.png
Jelly Cube (Nivel 1)
- Monster-Blast Cube.png
Blast Cube (Nivel 1)
- Monster-Ice Cube.png
Ice Cube (Nivel 1)
- Monster-Impostocube.png
- Monster-Jelly Green Mini.png
- Monster-Jelly Green Giant.png
- Monster-Jelly Cube 2.png
Jelly Cube (Nivel 2)
- Monster-Super Blast Cube.png
Blast Cube (Nivel 2)
- Monster-Ice Cube 2.png
Ice Cube (Nivel 2)
- Monster-Rock Jelly Cube.png
- Monster-Royal Mini.png
- Monster-Royal Jelly1.png
Royal Jelly (Nivel 2)
- Monster-Jelly Cube 3.png
Jelly Cube (Nivel 3)
- Monster-Ultra Blast Cube.png
Blast Cube (Nivel 3)
- Monster-Ice Cube 3.png
Ice Cube (Nivel 3)
- -
- Monster-Ice Mini.png

Lichen
- Monster-Lichen.png
- Monster-Oiler.png
Oiler (Nivel 1)
- Monster-Quicksilver.png
Quicksilver (Nivel 1)
- Monster-Toxigel.png
Toxigel (Nivel 1)
- Monster-Toxoil.png
- Monster-Sloom.png
- Monster-Lichen Colony.png
- Monster-Oiler 2.png
Oiler (Nivel 2)
- Monster-Quicksilver 2.png
Quicksilver (Nivel 2)
- Monster-Toxigel 2.png
Toxigel (Nivel 2)
- Monster-Giant Toxoil.png
- Monster-Sloombargo.png
- Monster-Giant Lichen Colony.png
- Monster-Oiler 3.png
Oiler (Nivel 3)
- Monster-Quicksilver 3.png
Quicksilver (Nivel 3)
- Monster-Toxigel 3.png
Toxigel (Nivel 3)
- Monster-Toxilargo.png
- Monster-Void Gel.png
Void Gel (Guarida de la Sombra)
- Monster-Soul Jelly.png
Polyp
- Monster-Polyp.png
Polyp (Nivel 1)
- Monster-Slick Polyp.png
Slick Polyp (Nivel 1)
- Monster-Polar Polyp.png
Polar Polyp (Nivel 1)
- Monster-Silver Polyp.png
Silver Polyp (Nivel 1)
- Monster-Caustic Polyp.png
Caustic Polyp (Nivel 1)
- -
- Monster-Polyp 2.png
Polyp (Nivel 2)
- Monster-Slick Polyp 2.png
Slick Polyp (Nivel 2)
- Monster-Polar Polyp 2.png
Polar Polyp (Nivel 2)
- Monster-Silver Polyp 2.png
Silver Polyp (Nivel 2)
- Monster-Caustic Polyp 2.png
Caustic Polyp (Nivel 2)
- Monster-Compound Polyp.png
Compound Polyp (Nivel 2)
- Monster-Polyp 3.png
Polyp (Nivel 3)
- Monster-Slick Polyp 3.png
Slick Polyp (Nivel 3)
- Monster-Polar Polyp 3.png
Polar Polyp (Nivel 3)
- Monster-Silver Polyp 3.png
Silver Polyp (Nivel 3)
- Monster-Caustic Polyp 3.png
Caustic Polyp (Nivel 3)
- Monster-Compound Polyp 2.png
Compound Polyp (Nivel 3)
- Monster-Royal Polyp.png
- Monster-Royal Polar Polyp.png
Glop Drop
- Monster-Glop Drop.png
Glop Drop (Nivel 1)
- Monster-Spice Drop.png
Spice Drop (Nivel 1)
- Monster-Snow Drop.png
Snow Drop (Nivel 1)
- Monster-Power Drop.png
Power Drop (Nivel 1)
- Monster-Germ Drop.png
Germ Drop (Nivel 1)
- Monster-Glop Drop 2.png
Glop Drop (Nivel 2)
- Monster-Spice Drop 2.png
Spice Drop (Nivel 2)
- Monster-Snow Drop 2.png
Snow Drop (Nivel 2)
- Monster-Power Drop 2.png
Power Drop (Nivel 2)
- Monster-Germ Drop 2.png
Germ Drop (Nivel 2)
- Monster-Glop Drop 3.png
Glop Drop (Nivel 3)
- Monster-Spice Drop 3.png
Spice Drop (Nivel 3)
- Monster-Snow Drop 3.png
Snow Drop (Nivel 3)
- Monster-Power Drop 3.png
Power Drop (Nivel 3)
- Monster-Germ Drop 3.png
Germ Drop (Nivel 3)
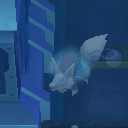
Muerto Viviente
Howlitzer
- Monster-Howlitzer.png
Howlitzer (Nivel 1)
- Monster-Smoking Howlitzer.png
Smoking Howlitzer (Nivel 1)
- Monster-Chilling Howlitzer.png
Chilling Howlitzer (Nivel 1)
- Monster-Shocking Howlitzer.png
Shocking Howlitzer (Nivel 1)
- Monster-Vile Howlitzer.png
Vile Howlitzer (Nivel 1)
- Monster-Howlitzer 2.png
Howlitzer (Nivel 2)
- Monster-Smoking Howlitzer 2.png
Smoking Howlitzer (Nivel 2)
- Monster-Chilling Howlitzer 2.png
Chilling Howlitzer (Nivel 2)
- Monster-Shocking Howlitzer 2.png
Shocking Howlitzer (Nivel 2)
- Monster-Vile Howlitzer 2.png
Vile Howlitzer (Nivel 2)
- Monster-Howlitzer 3.png
Howlitzer (Nivel 3)
- Monster-Smoking Howlitzer 3.png
Smoking Howlitzer (Nivel 3)
- Monster-Chilling Howlitzer 3.png
Chilling Howlitzer (Nivel 3)
- Monster-Shocking Howlitzer 3.png
Shocking Howlitzer (Nivel 3)
- Monster-Vile Howlitzer 3.png
Vile Howlitzer (Nivel 3)
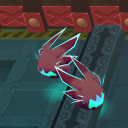
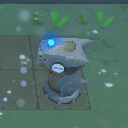
Kat
Spookat (Nivel 1)
Pepperkat (Nivel 1)
Bloogato (Nivel 1)

Statikat (Nivel 1)

Hurkat (Nivel 1)
- Monster-Spookat 2.png
Spookat (Nivel 2)
- Monster-Pepperkat 2.png
Pepperkat (Nivel 2)
- Monster-Bloogato 2.png
Bloogato (Nivel 2)
- Monster-Statikat 2.png
Statikat (Nivel 2)
- Monster-Hurkat 2.png
Hurkat (Nivel 2)
- Monster-Spookat 3.png
Spookat (Nivel 3)
- Monster-Pepperkat 3.png
Pepperkat (Nivel 3)
- Monster-Bloogato 3.png
Bloogato (Nivel 3)
- Monster-Statikat 3.png
Statikat (Nivel 3)
- Monster-Hurkat 3.png
Hurkat (Nivel 3)


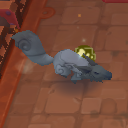
Zombie
- Monster-Dust Zombie.png
- Monster-Slag Walker.png
- Monster-Frozen Shambler.png
- Monster-Frankenzom.png
- Monster-Droul.png
- Monster-Carnavon.png
- Monster-Void Zombie.png
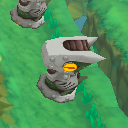
Deadnaught
- Monster-Deadnaught.png
- Monster-Static Deadnaught.png
- Monster-Vile Deadnaught.png
- Monster-Almirian Royal Guard.png
- Monster-Almirian Shadow Guard.png
Bombie
- Monster-Bombie.png
- Monster-Surging Bombie.png
- Monster-Choking Bombie.png
Scarab
- Monster-Grave Scarab.png
Grave Scarab (Nivel 1)
- Monster-Sun Scarab.png
Sun Scarab (Nivel 1)
- Monster-Pale Scarab.png
Pale Scarab (Nivel 1)
- Monster-Silver Scarab.png
Silver Scarab (Nivel 1)
- Monster-Plague Scarab.png
Plague Scarab (Nivel 1)
- Monster-Grave Scarab 2.png
Grave Scarab (Nivel 2)
- Monster-Sun Scarab 2.png
Sun Scarab (Nivel 2)
- Monster-Pale Scarab 2.png
Pale Scarab (Nivel 2)
- Monster-Silver Scarab 2.png
Silver Scarab (Nivel 2)
- Monster-Plague Scarab 2.png
Plague Scarab (Nivel 2)
- Monster-Grave Scarab 3.png
Grave Scarab (Nivel 3)
- Monster-Sun Scarab 3.png
Sun Scarab (Nivel 3)
- Monster-Pale Scarab 3.png
Pale Scarab (Nivel 3)
- Monster-Silver Scarab 3.png
Silver Scarab (Nivel 3)
- Monster-Plague Scarab 3.png
Plague Scarab (Nivel 3)
Otros
- Monster-Phantom.png
- Monster-Almirian Crusader.png
- -
- -


Jefes
Snarbolax (Nivel 1)
Roarmulus Twins (Nivel 2)
- Monster-Royal Jelly1.png
Royal Jelly (Nivel 2)
Lord Vanaduke (Nivel 3)
- -


Sin Tipo
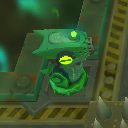
- Monster-Creep Cake.png
- Monster-Mini Creep Cake.png
- Monster-Wheel Launcher.png
- Monster-Swarm Seed.png
- Monster-Swarm Turret.png