Difference between revisions of "Shield"
From SpiralKnights
(Add Volcanic Plate Shield) |
(Template, add series) |
||
| Line 1: | Line 1: | ||
'''Shields''' have defense and health, just like a player. When a shield blocks, any damage that gets past its defense degrades its health, which regenerates over time. Once a shield reaches 0 health it breaks. So even if the shield has no defense against a certain damage type, it still has a wall of health that can absorb the damage. Obviously if the shield does have the right defense less damage gets through, taking more hits before breaking. | '''Shields''' have defense and health, just like a player. When a shield blocks, any damage that gets past its defense degrades its health, which regenerates over time. Once a shield reaches 0 health it breaks. So even if the shield has no defense against a certain damage type, it still has a wall of health that can absorb the damage. Obviously if the shield does have the right defense less damage gets through, taking more hits before breaking. | ||
| − | + | All stat images are taken from level 1 items. Due to item rebalancing during the Preview, stat images may not be current. Click on the stat image to see when it was uploaded. | |
| + | {{Gearlist/start}} | ||
| − | { | + | {{Gearlist |
| − | | | + | | name = Proto Shield |
| − | + | | abilities = | |
| − | + | | star = 0 | |
| − | + | | series = | |
| − | + | }} | |
| − | + | ||
| − | + | ||
| − | + | ||
| − | + | ||
| − | | | + | |
| − | | | + | |
| − | + | ||
| − | + | ||
| − | + | ||
| − | + | ||
| − | + | ||
| − | + | ||
| − | + | ||
| − | | | + | |
| − | + | ||
| − | + | ||
| − | + | ||
| − | + | ||
| − | + | ||
| − | + | ||
| − | + | ||
| − | + | ||
| − | + | ||
| − | + | ||
| − | + | ||
| − | + | ||
| − | + | ||
| − | + | ||
| − | + | ||
| − | + | ||
| − | + | ||
| − | + | ||
| − | + | ||
| − | + | ||
| − | + | ||
| − | + | ||
| − | + | ||
| − | + | ||
| − | + | ||
| − | + | ||
| − | + | ||
| − | + | ||
| − | + | ||
| − | + | ||
| − | + | ||
| − | + | ||
| − | + | ||
| − | + | ||
| − | + | ||
| − | + | ||
| − | + | ||
| − | + | ||
| − | + | ||
| − | + | ||
| − | + | ||
| − | + | ||
| − | + | ||
| − | + | ||
| − | + | ||
| − | + | ||
| − | + | ||
| − | + | ||
| − | + | ||
| − | + | ||
| − | + | ||
| − | + | ||
| − | + | ||
| − | + | ||
| − | + | ||
| − | + | ||
| − | + | ||
| − | + | ||
| − | + | ||
| − | + | ||
| − | + | ||
| − | + | ||
| − | + | ||
| − | + | ||
| − | + | ||
| − | + | ||
| − | + | ||
| − | + | ||
| − | + | ||
| − | + | ||
| − | + | ||
| − | + | ||
| − | + | ||
| − | + | ||
| − | + | ||
| − | + | ||
| − | + | ||
| − | + | ||
| − | + | ||
| − | + | ||
| − | + | ||
| − | + | ||
| − | + | ||
| − | + | ||
| − | + | ||
| − | + | ||
| − | + | ||
| − | + | ||
| − | + | ||
| − | + | ||
| − | + | ||
| − | + | ||
| − | + | ||
| − | + | ||
| − | + | ||
| − | + | ||
| − | + | ||
| − | + | ||
| − | + | ||
| − | + | ||
| − | + | ||
| − | + | ||
| − | + | ||
| − | + | ||
| − | + | ||
| − | + | ||
| − | + | ||
| − | + | ||
| − | + | ||
| − | + | ||
| − | + | ||
| − | + | ||
| − | + | ||
| − | + | ||
| − | + | ||
| − | + | ||
| − | + | ||
| − | + | ||
| − | + | ||
| − | + | ||
| − | + | ||
| − | + | ||
| − | + | ||
| − | + | ||
| − | + | ||
| − | + | ||
| − | + | ||
| − | + | ||
| − | + | ||
| − | + | ||
| − | + | ||
| − | + | ||
| − | + | ||
| − | + | ||
| − | + | ||
| − | + | ||
| − | + | ||
| − | + | ||
| − | + | ||
| − | + | ||
| − | + | ||
| − | + | ||
| − | + | ||
| − | + | ||
| − | + | ||
| − | + | ||
| − | + | ||
| − | + | ||
| − | + | ||
| − | + | ||
| − | + | ||
| − | + | ||
| − | + | ||
| − | + | ||
| − | + | ||
| − | + | ||
| − | + | ||
| − | + | ||
| − | + | ||
| − | + | ||
| − | + | ||
| − | + | ||
| − | + | ||
| − | + | ||
| − | + | ||
| − | + | ||
| − | + | ||
| − | + | ||
| − | + | ||
| − | + | ||
| − | + | ||
| − | + | ||
| − | + | ||
| − | + | ||
| − | + | ||
| − | + | ||
| − | + | ||
| − | + | ||
| − | + | ||
| − | + | ||
| − | + | ||
| − | + | ||
| − | + | ||
| − | + | ||
| − | + | ||
| − | + | ||
| − | + | ||
| − | + | ||
| − | + | ||
| − | + | ||
| − | + | ||
| − | + | ||
| − | + | ||
| − | + | ||
| − | + | ||
| − | + | ||
| − | + | ||
| − | + | ||
| − | + | ||
| − | + | ||
| − | + | ||
| − | + | ||
| − | + | ||
| − | + | ||
| − | + | ||
| − | + | ||
| − | + | ||
| − | + | ||
| − | + | ||
| − | + | ||
| − | + | ||
| − | + | ||
| − | + | ||
| − | + | ||
| − | + | ||
| − | + | ||
| − | + | ||
| − | + | ||
| − | + | ||
| − | + | ||
| − | + | ||
| − | + | ||
| − | + | ||
| − | + | ||
| − | + | ||
| − | + | ||
| − | + | ||
| − | + | ||
| − | + | ||
| − | + | ||
| − | + | ||
| − | + | ||
| − | + | ||
| − | + | ||
| − | + | ||
| − | + | ||
| − | + | ||
| − | + | ||
| − | + | ||
| − | + | ||
| − | + | ||
| − | + | ||
| − | + | ||
| − | + | ||
| − | + | ||
| − | + | ||
| − | + | ||
| − | + | ||
| − | + | ||
| − | + | ||
| − | + | ||
| − | + | ||
| + | {{Gearlist | ||
| + | | name = Iron Buckler | ||
| + | | abilities = | ||
| + | | star = 0 | ||
| + | | series = | ||
| + | }} | ||
| + | |||
| + | {{Gearlist | ||
| + | | name = Circuit Breaker Shield | ||
| + | | abilities = | ||
| + | | star = 1 | ||
| + | | series = Circuit Breaker | ||
| + | }} | ||
| + | |||
| + | {{Gearlist | ||
| + | | name = Emberbreak Shield | ||
| + | | abilities = | ||
| + | | star = 1 | ||
| + | | series = Emberbreak | ||
| + | }} | ||
| + | |||
| + | {{Gearlist | ||
| + | | name = Force Buckler | ||
| + | | abilities = | ||
| + | | star = 1 | ||
| + | | series = | ||
| + | }} | ||
| + | |||
| + | {{Gearlist | ||
| + | | name = Frostbreaker Shield | ||
| + | | abilities = | ||
| + | | star = 1 | ||
| + | | series = Frostbreaker | ||
| + | }} | ||
| + | |||
| + | {{Gearlist | ||
| + | | name = Scale Shield | ||
| + | | abilities = | ||
| + | | star = 1 | ||
| + | | series = | ||
| + | }} | ||
| + | |||
| + | {{Gearlist | ||
| + | | name = Defender | ||
| + | | abilities = | ||
| + | | star = 2 | ||
| + | | series = Defender | ||
| + | }} | ||
| + | |||
| + | {{Gearlist | ||
| + | | name = Firebreak Shield | ||
| + | | abilities = | ||
| + | | star = 2 | ||
| + | | series = Emberbreak | ||
| + | }} | ||
| + | |||
| + | {{Gearlist | ||
| + | | name = Jelly Shield | ||
| + | | abilities = | ||
| + | | star = 2 | ||
| + | | series = Jelly | ||
| + | }} | ||
| + | |||
| + | {{Gearlist | ||
| + | | name = Icebreaker Shield | ||
| + | | abilities = | ||
| + | | star = 2 | ||
| + | | series = Frostbreaker | ||
| + | }} | ||
| + | |||
| + | {{Gearlist | ||
| + | | name = Owlite Shield | ||
| + | | abilities = | ||
| + | | star = 2 | ||
| + | | series = Owlite | ||
| + | }} | ||
| + | |||
| + | {{Gearlist | ||
| + | | name = Plate Shield | ||
| + | | abilities = | ||
| + | | star = 2 | ||
| + | | series = Plate | ||
| + | }} | ||
| + | |||
| + | {{Gearlist | ||
| + | | name = Skelly Shield | ||
| + | | abilities = | ||
| + | | star = 2 | ||
| + | | series = Skelly | ||
| + | }} | ||
| + | |||
| + | {{Gearlist | ||
| + | | name = Volt Breaker Shield | ||
| + | | abilities = | ||
| + | | star = 2 | ||
| + | | series = Circuit Breaker | ||
| + | }} | ||
| + | |||
| + | {{Gearlist | ||
| + | | name = Blazebreak Shield | ||
| + | | abilities = | ||
| + | | star = 3 | ||
| + | | series = Emberbreak | ||
| + | }} | ||
| + | |||
| + | {{Gearlist | ||
| + | | name = Blizzbreaker Shield | ||
| + | | abilities = | ||
| + | | star = 3 | ||
| + | | series = Frostbreaker | ||
| + | }} | ||
| + | |||
| + | {{Gearlist | ||
| + | | name = Boosted Plate Shield | ||
| + | | abilities = | ||
| + | | star = 3 | ||
| + | | series = Plate | ||
| + | }} | ||
| + | |||
| + | {{Gearlist | ||
| + | | name = Brute Jelly Shield | ||
| + | | abilities = | ||
| + | | star = 3 | ||
| + | | series = Jelly | ||
| + | }} | ||
| + | |||
| + | {{Gearlist | ||
| + | | name = Drake Scale Shield | ||
| + | | abilities = | ||
| + | | star = 3 | ||
| + | | series = Drake Scale | ||
| + | }} | ||
| + | |||
| + | {{Gearlist | ||
| + | | name = Great Defender | ||
| + | | abilities = | ||
| + | | star = 3 | ||
| + | | series = Defender | ||
| + | }} | ||
| + | |||
| + | {{Gearlist | ||
| + | | name = Heater Shield | ||
| + | | abilities = | ||
| + | | star = 3 | ||
| + | | series = | ||
| + | }} | ||
| + | |||
| + | {{Gearlist | ||
| + | | name = Horned Owlite Shield | ||
| + | | abilities = | ||
| + | | star = 3 | ||
| + | | series = Owlite | ||
| + | }} | ||
| + | |||
| + | {{Gearlist | ||
| + | | name = Scarlet Shield | ||
| + | | abilities = Health Bonus: +1 | ||
| + | | star = 3 | ||
| + | | series = | ||
| + | }} | ||
| + | |||
| + | {{Gearlist | ||
| + | | name = Scary Skelly Shield | ||
| + | | abilities = | ||
| + | | star = 3 | ||
| + | | series = Skelly | ||
| + | }} | ||
| + | |||
| + | {{Gearlist | ||
| + | | name = Surge Breaker Shield | ||
| + | | abilities = | ||
| + | | star = 3 | ||
| + | | series = Circuit Breaker | ||
| + | }} | ||
| + | |||
| + | {{Gearlist | ||
| + | | name = Swiftstrike Buckler | ||
| + | | abilities = Attack Speed Increased: Ultra | ||
| + | | star = 3 | ||
| + | | series = | ||
| + | }} | ||
| + | |||
| + | {{Gearlist | ||
| + | | name = Blackened Crest | ||
| + | | abilities = | ||
| + | | star = 4 | ||
| + | | series = Blackened Crest | ||
| + | }} | ||
| + | |||
| + | {{Gearlist | ||
| + | | name = Heavy Plate Shield | ||
| + | | abilities = | ||
| + | | star = 4 | ||
| + | | series = Plate | ||
| + | }} | ||
| + | |||
| + | {{Gearlist | ||
| + | | name = Mighty Defender | ||
| + | | abilities = | ||
| + | | star = 4 | ||
| + | | series = Defender | ||
| + | }} | ||
| + | |||
| + | {{Gearlist | ||
| + | | name = Rock Jelly Shield | ||
| + | | abilities = | ||
| + | | star = 4 | ||
| + | | series = Jelly | ||
| + | }} | ||
| + | |||
| + | {{Gearlist | ||
| + | | name = Sinister Skelly Shield | ||
| + | | abilities = | ||
| + | | star = 4 | ||
| + | | series = Skelly | ||
| + | }} | ||
| + | |||
| + | {{Gearlist | ||
| + | | name = Stone Tortoise | ||
| + | | abilities = | ||
| + | | star = 4 | ||
| + | | series = Stone Tortoise | ||
| + | }} | ||
| + | |||
| + | {{Gearlist | ||
| + | | name = Wise Owlite Shield | ||
| + | | abilities = | ||
| + | | star = 4 | ||
| + | | series = Owlite | ||
| + | }} | ||
| + | |||
| + | {{Gearlist | ||
| + | | name = Wyvern Scale Shield | ||
| + | | abilities = | ||
| + | | star = 4 | ||
| + | | series = Dragon Scale | ||
| + | }} | ||
| + | |||
| + | {{Gearlist | ||
| + | | name = Aegis | ||
| + | | abilities = | ||
| + | | star = 5 | ||
| + | | series = Defender | ||
| + | }} | ||
| + | |||
| + | {{Gearlist | ||
| + | | name = Ancient Plate Shield | ||
| + | | abilities = | ||
| + | | star = 5 | ||
| + | | series = Plate | ||
| + | }} | ||
| + | |||
| + | {{Gearlist | ||
| + | | name = Crest of Almire | ||
| + | | abilities = | ||
| + | | star = 5 | ||
| + | | series = Blackened Crest | ||
| + | }} | ||
| + | |||
| + | {{Gearlist | ||
| + | | name = Dragon Scale Shield | ||
| + | | abilities = | ||
| + | | star = 5 | ||
| + | | series = Drake Scale | ||
| + | }} | ||
| + | |||
| + | {{Gearlist | ||
| + | | name = Dread Skelly Shield | ||
| + | | abilities = | ||
| + | | star = 5 | ||
| + | | series = Skelly | ||
| + | }} | ||
| + | |||
| + | {{Gearlist | ||
| + | | name = Grey Owlite Shield | ||
| + | | abilities = | ||
| + | | star = 5 | ||
| + | | series = Owlite | ||
| + | }} | ||
| + | |||
| + | {{Gearlist | ||
| + | | name = Ironmight Plate Shield | ||
| + | | abilities = | ||
| + | | star = 5 | ||
| + | | series = Plate | ||
| + | }} | ||
| + | |||
| + | {{Gearlist | ||
| + | | name = Omega Shell | ||
| + | | abilities = | ||
| + | | star = 5 | ||
| + | | series = Stone Tortoise | ||
| + | }} | ||
| + | |||
| + | {{Gearlist | ||
| + | | name = Royal Jelly Shield | ||
| + | | abilities = | ||
| + | | star = 5 | ||
| + | | series = Jelly | ||
| + | }} | ||
| + | |||
| + | {{Gearlist | ||
| + | | name = Volcanic Plate Shield | ||
| + | | abilities = | ||
| + | | star = 5 | ||
| + | | series = Plate | ||
| + | }} | ||
| + | |||
| + | {{Table/End}} | ||
== Other Links == | == Other Links == | ||
Revision as of 02:22, 26 February 2011
Shields have defense and health, just like a player. When a shield blocks, any damage that gets past its defense degrades its health, which regenerates over time. Once a shield reaches 0 health it breaks. So even if the shield has no defense against a certain damage type, it still has a wall of health that can absorb the damage. Obviously if the shield does have the right defense less damage gets through, taking more hits before breaking.
All stat images are taken from level 1 items. Due to item rebalancing during the Preview, stat images may not be current. Click on the stat image to see when it was uploaded.
| Name | Stats | Abilities | Rating | Series |
| Proto Shield | 
|
☆☆☆☆☆ | ||
| Iron Buckler | 
|
☆☆☆☆☆ | ||
| Circuit Breaker Shield | 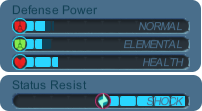
|
★☆☆☆☆ | Circuit Breaker | |
| Emberbreak Shield | 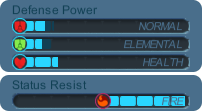
|
★☆☆☆☆ | Emberbreak | |
| Force Buckler | 
|
★☆☆☆☆ | ||
| Frostbreaker Shield | 
|
★☆☆☆☆ | Frostbreaker | |
| Scale Shield | 
|
★☆☆☆☆ | ||
| Defender | 
|
★★☆☆☆ | Defender | |
| Firebreak Shield | 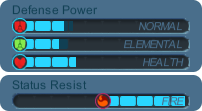
|
★★☆☆☆ | Emberbreak | |
| Jelly Shield | 
|
★★☆☆☆ | Jelly | |
| Icebreaker Shield | 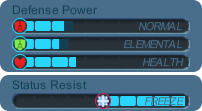
|
★★☆☆☆ | Frostbreaker | |
| Owlite Shield | 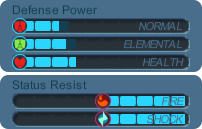
|
★★☆☆☆ | Owlite | |
| Plate Shield | 
|
★★☆☆☆ | Plate | |
| Skelly Shield | 
|
★★☆☆☆ | Skelly | |
| Volt Breaker Shield | 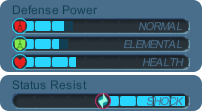
|
★★☆☆☆ | Circuit Breaker | |
| Blazebreak Shield | 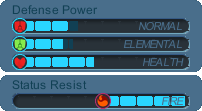
|
★★★☆☆ | Emberbreak | |
| Blizzbreaker Shield | 
|
★★★☆☆ | Frostbreaker | |
| Boosted Plate Shield | 
|
★★★☆☆ | Plate | |
| Brute Jelly Shield | 
|
★★★☆☆ | Jelly | |
| Drake Scale Shield | 
|
★★★☆☆ | Drake Scale | |
| Great Defender | 
|
★★★☆☆ | Defender | |
| Heater Shield | 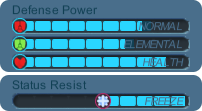
|
★★★☆☆ | ||
| Horned Owlite Shield | 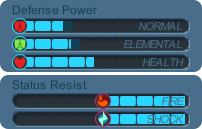
|
★★★☆☆ | Owlite | |
| Scarlet Shield | 
|
Health Bonus: +1 | ★★★☆☆ | |
| Scary Skelly Shield | 
|
★★★☆☆ | Skelly | |
| Surge Breaker Shield | 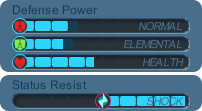
|
★★★☆☆ | Circuit Breaker | |
| Swiftstrike Buckler | 
|
Attack Speed Increased: Ultra | ★★★☆☆ | |
| Blackened Crest | 
|
★★★★☆ | Blackened Crest | |
| Heavy Plate Shield | 
|
★★★★☆ | Plate | |
| Mighty Defender | 
|
★★★★☆ | Defender | |
| Rock Jelly Shield | 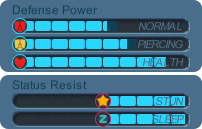
|
★★★★☆ | Jelly | |
| Sinister Skelly Shield | 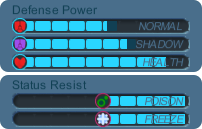
|
★★★★☆ | Skelly | |
| Stone Tortoise | 
|
★★★★☆ | Stone Tortoise | |
| Wise Owlite Shield | 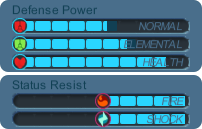
|
★★★★☆ | Owlite | |
| Wyvern Scale Shield | 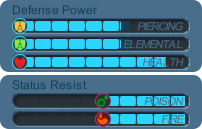
|
★★★★☆ | Dragon Scale | |
| Aegis | 
|
★★★★★ | Defender | |
| Ancient Plate Shield | 
|
★★★★★ | Plate | |
| Crest of Almire | 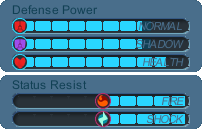
|
★★★★★ | Blackened Crest | |
| Dragon Scale Shield | 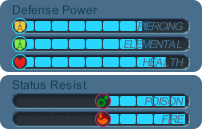
|
★★★★★ | Drake Scale | |
| Dread Skelly Shield | 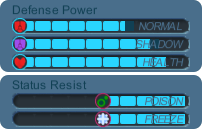
|
★★★★★ | Skelly | |
| Grey Owlite Shield | 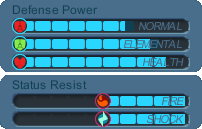
|
★★★★★ | Owlite | |
| Ironmight Plate Shield | 
|
★★★★★ | Plate | |
| Omega Shell | 
|
★★★★★ | Stone Tortoise | |
| Royal Jelly Shield | 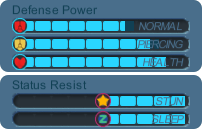
|
★★★★★ | Jelly | |
| Volcanic Plate Shield | 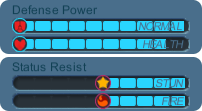
|
★★★★★ | Plate |