Difference between revisions of "User:CobaltMoon"
From SpiralKnights
CobaltMoon (Talk | contribs) m |
CobaltMoon (Talk | contribs) |
||
| Line 12: | Line 12: | ||
{{SKWindow/Cell|'''Guild:''' [[Knights of Blacktide (Guild) |Knights of Blacktide]]|||2}} | {{SKWindow/Cell|'''Guild:''' [[Knights of Blacktide (Guild) |Knights of Blacktide]]|||2}} | ||
{{SKWindow/NewRow}} | {{SKWindow/NewRow}} | ||
| − | {{SKWindow/Cell|'''Rank:''' Knight|||2}} | + | {{SKWindow/Cell|'''Rank:''' Knight Elite|||2}} |
}} | }} | ||
| Line 19: | Line 19: | ||
== Construction Zone == | == Construction Zone == | ||
| − | *Finish the Dream Arsenal | + | *Finish the Dream Arsenal. |
| − | *Add star values to the dream arsenal | + | *Add star values to the dream arsenal. |
| − | *Add Heat Level pics to the dream arsenal | + | *Add Heat Level pics to the dream arsenal. |
*Add the in-game Achievements I've obtained. | *Add the in-game Achievements I've obtained. | ||
| Line 73: | Line 73: | ||
{{showhide|[[file:Equipment-Aegis_icon.png|20px]] Defensive Arsenal (16) |content = | {{showhide|[[file:Equipment-Aegis_icon.png|20px]] Defensive Arsenal (16) |content = | ||
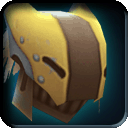
| − | {{showhide|[[file:icon-helmet.png|20px]] Helms ( | + | {{showhide|[[file:icon-helmet.png|20px]] Helms (6) |content = |
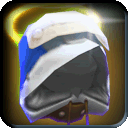
| + | :[[file:Equipment-Cobalt_Helm_icon.png|25px]] [[Cobalt Helm]] [[file:Heat_Level_01.png|20px]] {{star|2|color=6cb0b9}} | ||
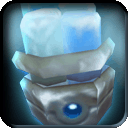
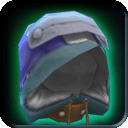
:[[file:Equipment-Magic_Hood_icon.png|25px]] [[Magic Hood]] [[file:Heat_Level_10.png|20px]] {{star|2|color=6cb0b9}} | :[[file:Equipment-Magic_Hood_icon.png|25px]] [[Magic Hood]] [[file:Heat_Level_10.png|20px]] {{star|2|color=6cb0b9}} | ||
| − | :[[file:Equipment-Mighty_Cobalt_Helm_icon.png|25px]] [[Mighty Cobalt Helm]] [[file: | + | :[[file:Equipment-Mighty_Cobalt_Helm_icon.png|25px]] [[Mighty Cobalt Helm]] [[file:Heat_Level_10.png|20px]] {{star|4|color=6cb0b9}} |
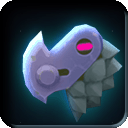
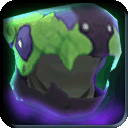
:[[file:Equipment-Skelly_Mask_icon.png|25px]] [[Skelly Mask]] [[file:Heat_Level_10.png|20px]] [[file: Unique variant icon.png|20px]] Increased Freeze Resistance: High {{star|2|color=6cb0b9}} | :[[file:Equipment-Skelly_Mask_icon.png|25px]] [[Skelly Mask]] [[file:Heat_Level_10.png|20px]] [[file: Unique variant icon.png|20px]] Increased Freeze Resistance: High {{star|2|color=6cb0b9}} | ||
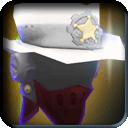
:[[file:Equipment-Spiral_Scale_Helm_icon.png|25px]] [[Spiral Scale Helm]] [[file:Heat_Level_10.png|20px]] {{star|1|color=6cb0b9}} | :[[file:Equipment-Spiral_Scale_Helm_icon.png|25px]] [[Spiral Scale Helm]] [[file:Heat_Level_10.png|20px]] {{star|1|color=6cb0b9}} | ||
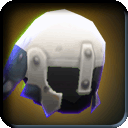
:[[file:Equipment-Wolver_Cap_icon.png|25px]] [[Wolver Cap]] [[file:Heat_Level_03.png|20px]]{{star|2|color=6cb0b9}}}} | :[[file:Equipment-Wolver_Cap_icon.png|25px]] [[Wolver Cap]] [[file:Heat_Level_03.png|20px]]{{star|2|color=6cb0b9}}}} | ||
| − | {{showhide|[[file:icon-armor.png|20px]] Armors ( | + | {{showhide|[[file:icon-armor.png|20px]] Armors (7) |content = |
| + | :[[file:Equipment-Cobalt_Armor_icon.png|25px]] [[Cobalt Armor]] [[file:Heat_Level_01.png|20px]] {{star|2|color=6cb0b9}} | ||
:[[file:Equipment-Jelly_Mail_icon.png|25px]] [[Jelly Mail]] [[file:Heat_Level_01.png|20px]] {{star|2|color=6cb0b9}} | :[[file:Equipment-Jelly_Mail_icon.png|25px]] [[Jelly Mail]] [[file:Heat_Level_01.png|20px]] {{star|2|color=6cb0b9}} | ||
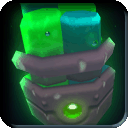
:[[file:Equipment-Magic_Cloak_icon.png|25px]] [[Magic Cloak]] [[file:Heat_Level_10.png|20px]] {{star|2|color=6cb0b9}} | :[[file:Equipment-Magic_Cloak_icon.png|25px]] [[Magic Cloak]] [[file:Heat_Level_10.png|20px]] {{star|2|color=6cb0b9}} | ||
| + | :[[file:Equipment-Mighty_Cobalt_Armor_icon.png|25px]] [[Mighty Cobalt Armor]] [[file:Heat_Level_05.png|20px]] {{star|4|color=6cb0b9}} | ||
:[[file:Equipment-Skelly_Suit_icon.png|25px]] [[Skelly Suit]] [[file:Heat_Level_10.png|20px]] {{star|2|color=6cb0b9}} | :[[file:Equipment-Skelly_Suit_icon.png|25px]] [[Skelly Suit]] [[file:Heat_Level_10.png|20px]] {{star|2|color=6cb0b9}} | ||
| − | |||
:[[file:Equipment-Spiral_Scale_Mail_icon.png|25px]] [[Spiral Scale Mail]] [[file:Heat_Level_10.png|20px]] {{star|1|color=6cb0b9}} | :[[file:Equipment-Spiral_Scale_Mail_icon.png|25px]] [[Spiral Scale Mail]] [[file:Heat_Level_10.png|20px]] {{star|1|color=6cb0b9}} | ||
:[[file:Equipment-Wolver_Coat_icon.png|25px]] [[Wolver Coat]] [[file:Heat_Level_03.png|20px]] {{star|2|color=6cb0b9}}}} | :[[file:Equipment-Wolver_Coat_icon.png|25px]] [[Wolver Coat]] [[file:Heat_Level_03.png|20px]] {{star|2|color=6cb0b9}}}} | ||
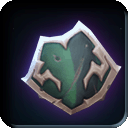
| − | {{showhide|[[file:icon-shield.png|20px]] Shields ( | + | {{showhide|[[file:icon-shield.png|20px]] Shields (6) |content = |
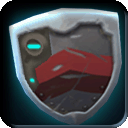
| − | :[[file:Equipment- | + | :[[file:Equipment-Defender_icon.png|25px]] [[Defender]] [[file:Heat_Level_01.png|20px]] {{star|2|color=6cb0b9}} |
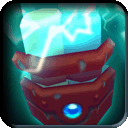
| + | :[[file:Equipment-sMighty_Defender_icon.png|25px]] [[Mighty Defender]] [[file:Heat_Level_10.png|20px]] [[file: Unique variant icon.png|20px]] Increased Elemental Defense: High {{star|4|color=6cb0b9}} | ||
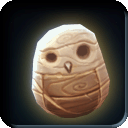
:[[file:Equipment-Owlite_Shield_icon.png|25px]] [[Owlite Shield]] [[file:Heat_Level_10.png|20px]] {{star|2|color=6cb0b9}} | :[[file:Equipment-Owlite_Shield_icon.png|25px]] [[Owlite Shield]] [[file:Heat_Level_10.png|20px]] {{star|2|color=6cb0b9}} | ||
:[[file:Equipment-Scale_Shield_icon.png|25px]] [[Scale Shield]] [[file:Heat_Level_10.png|20px]] {{star|1|color=6cb0b9}} | :[[file:Equipment-Scale_Shield_icon.png|25px]] [[Scale Shield]] [[file:Heat_Level_10.png|20px]] {{star|1|color=6cb0b9}} | ||
| Line 95: | Line 98: | ||
:[[file:Equipment-Twisted_Targe_icon.png|25px]] [[Twisted Targe]] [[file:Heat_Level_01.png|20px]]{{star|3|color=6cb0b9}}}}}} | :[[file:Equipment-Twisted_Targe_icon.png|25px]] [[Twisted Targe]] [[file:Heat_Level_01.png|20px]]{{star|3|color=6cb0b9}}}}}} | ||
| − | {{showhide|[[file:Equipment-Proto_Crest_icon.png|20px]] Misc. Arsenal ( | + | {{showhide|[[file:Equipment-Proto_Crest_icon.png|20px]] Misc. Arsenal (5) |content = |
{{showhide|[[file:icon-costume.png|20px]] Costumes (0) |content = | {{showhide|[[file:icon-costume.png|20px]] Costumes (0) |content = | ||
:Nothing to see here, folks!}} | :Nothing to see here, folks!}} | ||
| − | {{showhide|[[file:icon-accessory.png|20px]] Accessories ( | + | {{showhide|[[file:icon-accessory.png|20px]] Accessories (5) |content = |
| + | :[[file:Equipment-Cobalt_Crest_icon.png|25px]] [[Cobalt Crest]] {{star|0|color=6cb0b9}} | ||
| + | :[[file:Equipment-Mighty_Cobalt_Crest_icon.png|25px]] [[Mighty Cobalt Crest]] {{star|0|color=6cb0b9}} | ||
| + | :[[file:Equipment-Solid_Cobalt_Crest_icon.png|25px]] [[Solid Cobalt Crest]] {{star|0|color=6cb0b9}} | ||
| + | :[[file:Equipment-Stunning_Crest_icon.png|25px]] [[Stunning Crest]] {{star|0|color=6cb0b9}} | ||
:[[file:Equipment-Proto_Crest_icon.png|25px]] [[Proto Crest]] {{star|0|color=6cb0b9}} | :[[file:Equipment-Proto_Crest_icon.png|25px]] [[Proto Crest]] {{star|0|color=6cb0b9}} | ||
}}}}}} | }}}}}} | ||
| Line 193: | Line 200: | ||
:[[file:Equipment-Arcane_Salamander_Suit_icon.png|25px]] [[Arcane Salamander Suit]] [[file:Heat_Level_10.png|20px]] {{star|5|color=6cb0b9}} | :[[file:Equipment-Arcane_Salamander_Suit_icon.png|25px]] [[Arcane Salamander Suit]] [[file:Heat_Level_10.png|20px]] {{star|5|color=6cb0b9}} | ||
:[[file:Equipment-Azure_Guardian_Armor_icon.png|25px]] [[Azure Guardian Armor]] [[file:Heat_Level_10.png|20px]] {{star|5|color=6cb0b9}} | :[[file:Equipment-Azure_Guardian_Armor_icon.png|25px]] [[Azure Guardian Armor]] [[file:Heat_Level_10.png|20px]] {{star|5|color=6cb0b9}} | ||
| − | :[[file:Equipment-Bombastic_Demo_Suit_icon.png|25px]] [[Bombastic Demo Suit]] [[file:Heat_Level_10.png|20px]] {{star|5|color=6cb0b9}}}} | + | :[[file:Equipment-Bombastic_Demo_Suit_icon.png|25px]] [[Bombastic Demo Suit]] [[file:Heat_Level_10.png|20px]] {{star|5|color=6cb0b9}} |
| − | :[[file:Equipment- | + | :[[file:Equipment-Chaos_Cloak_icon.png|25px]] [[Chaos Cloak]] [[file:Heat_Level_10.png|20px]] {{star|5|color=6cb0b9}} |
| + | :[[file:Equipment-Deadly_Virulisk_Suit_icon.png|25px]] [[Deadly Virulisk Suit]] [[file:Heat_Level_10.png|20px]] {{star|5|color=6cb0b9}} | ||
| + | :[[file:Equipment-Deadshot_Mantle_icon.png|25px]] [[Deadshot Mantle]] [[file:Heat_Level_10.png|20px]] {{star|5|color=6cb0b9}} | ||
| + | :[[file:Equipment-Divine_Mantle_icon.png|25px]] [[Divine Mantle]] [[file:Heat_Level_10.png|20px]] {{star|5|color=6cb0b9}} | ||
| + | :[[file:Equipment-Dragon_Scale_Mail_icon.png|25px]] [[Dragon Scale Mail]] [[file:Heat_Level_10.png|20px]] {{star|5|color=6cb0b9}} | ||
| + | :[[file:Equipment-Dread_Skelly_Suit_icon.png|25px]] [[Dread Skelly Suit]] [[file:Heat_Level_10.png|20px]] {{star|5|color=6cb0b9}} | ||
| + | :[[file:Equipment-Grey_Feather_Mantle_icon.png|25px]] [[Grey Feather Mantle]] [[file:Heat_Level_10.png|20px]] {{star|5|color=6cb0b9}} | ||
| + | :[[file:Equipment-Heavenly_Iron_Armor_icon.png|25px]] [[Heavenly Iron Armor]] [[file:Heat_Level_10.png|20px]] {{star|5|color=6cb0b9}} | ||
| + | :[[file:Equipment-Ice_Queen_Mail_icon.png|25px]] [[Ice Queen Mail]] [[file:Heat_Level_10.png|20px]] {{star|5|color=6cb0b9}} | ||
| + | :[[file:Equipment-Ironmight_Plate_Mail_icon.png|25px]] [[Ironmight Plate Mail]] [[file:Heat_Level_10.png|20px]] {{star|5|color=6cb0b9}} | ||
| + | :[[file:Equipment-Justifier_Jacket_icon.png|25px]] [[Justifier Jacket]] [[file:Heat_Level_10.png|20px]] {{star|5|color=6cb0b9}} | ||
| + | :[[file:Equipment-Mad_Bomber_Suit_icon.png|25px]] [[Mad Bomber Suit]] [[file:Heat_Level_10.png|20px]] {{star|5|color=6cb0b9}} | ||
| + | :[[file:Equipment-Mercurial_Demo_Suit_icon.png|25px]] [[Mercurial Demo Suit]] [[file:Heat_Level_10.png|20px]] {{star|5|color=6cb0b9}} | ||
| + | :[[file:Equipment-Mercurial_Mail_icon.png|25px]] [[Mercurial Mail]] [[file:Heat_Level_10.png|20px]] {{star|5|color=6cb0b9}} | ||
| + | :[[file:Equipment-Nameless_Poncho_icon.png|25px]] [[Nameless Poncho]] [[file:Heat_Level_10.png|20px]] {{star|5|color=6cb0b9}} | ||
| + | :[[file:Equipment-Radiant_Silvermail_icon.png|25px]] [[Radiant Silvermail]] [[file:Heat_Level_10.png|20px]] {{star|5|color=6cb0b9}}}}}} | ||
:You may be asking: Jandalf, why do you want every 5-Star item in the game? My answer: I plan to get every 5-Star item in the game because that way, I'll have a wide variety of choices for both offense and defense. Also, once you have everything you want in Spiral Knights, it gets kind of boring. Yes, there's always the [[Shadow Lair|Shadow Lairs]], but they're hard as all heck anyway. | :You may be asking: Jandalf, why do you want every 5-Star item in the game? My answer: I plan to get every 5-Star item in the game because that way, I'll have a wide variety of choices for both offense and defense. Also, once you have everything you want in Spiral Knights, it gets kind of boring. Yes, there's always the [[Shadow Lair|Shadow Lairs]], but they're hard as all heck anyway. | ||
| Line 380: | Line 402: | ||
:Added 5 of the 31 Armors to my Dream Arsenal. | :Added 5 of the 31 Armors to my Dream Arsenal. | ||
*Version 6.9 | *Version 6.9 | ||
| − | :}} | + | :Updated my blog, added the new crests I've gotten to the Acessories, added in more armor to the Dream Arsenal. It now consists of 22 of the 31 5-Star sets of armor in the game. 9 to go, then 12 shields to add, and then I start adding a table of the achievements that I've obtained.}} |
| + | {{showhide | User Page Updates 7.0 - 7.9 |content = | ||
| + | }} | ||
[[file:Mineral-Moonstone.png|50px]] [[file:Personal Color-Blue.png|right|50px]] | [[file:Mineral-Moonstone.png|50px]] [[file:Personal Color-Blue.png|right|50px]] | ||
Revision as of 07:08, 28 June 2012
| |||||||
| |||||||

Sup? I'm CobaltMoon (better known as Jandalf). I will continue to mercilessly edit this page until I've got everything I want on it!!! Deal with it!
- Next up: Work some more on the Dream Arsenal, try and once again fail at "Whipping & Mishandling".
Contents
Construction Zone
- Finish the Dream Arsenal.
- Add star values to the dream arsenal.
- Add Heat Level pics to the dream arsenal.
- Add the in-game Achievements I've obtained.
Jandalf's Blog
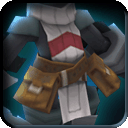
I know, I know, I've been gone for a while. Had a lot of crap going on in my life the past few months, kinda fell out of swing with Spiral Knights. However, now I'm back and here to stay. Finally got to Tier 3... just under a year after I started the game. Also, thanks for the continued views, I know I'm far from the most well-known knight, but I appreciate the 1,100+ views I've gotten thus far. I'm gonna update this page just as soon as I finish this blog.
Major Achievements
- 1. Second in command to Siralac in the Guild Knights of Blacktide.
- 2. Defeated Snarbolax at least 30 times.
- 3. Bought CE before it became 7,000 crowns.
- 4. Signed up for Newsletter.
- 5. Defeated the Royal Jelly Boss 6 times.
- 6. Caused entire crowds of people to roll around on the floor laughing out loud. =)
- 7. Defeated the Roarmulus Twins Boss twice.
- 8. Heralded as the nicest knight since December 9th(according to Havens 1, 3, 4, 6, and 9).
- Sorry about the suckish Achievements.
 Ascended Calibur
  ★★★★☆
★★★★☆
 Bolted Blade
  Damage Bonus vs. Beast: Low ★☆☆☆☆
 Brandish
  ★★☆☆☆
★★☆☆☆
- Brandish ★★☆☆☆
- Brandish ★★☆☆☆
- Brandish ★★☆☆☆
 Flourish ★★☆☆☆
- Flourish Charge Time Reduction: Medium ★★☆☆☆
- Flourish ★★☆☆☆
 Sealed Sword
  ★★★☆☆
★★★☆☆
 Snarble Barb ★★☆☆☆
 Autogun ★★☆☆☆
 Cryotech Alchemer ★★☆☆☆
 Firotech Alchemer ★★☆☆☆
 Master Blaster ★★★★☆
 Prismatech Alchemer ★★☆☆☆
 Pummel Gun ★☆☆☆☆
 Shadowtech Alchemer ★★☆☆☆
 Voltech Alchemer ★★☆☆☆
 Fiery Vaporizer ★★☆☆☆
 Firecracker ★☆☆☆☆
 Freezing Vaporizer ★★☆☆☆
 Haze Bomb ★★☆☆☆
 Master Blast Bomb ★★★★☆
 Spine Cone ★★☆☆☆
 Toxic Vaporizer ★★☆☆☆
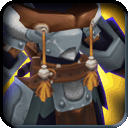
 Cobalt Helm ★★☆☆☆
 Magic Hood ★★☆☆☆
 Mighty Cobalt Helm ★★★★☆
 Skelly Mask Increased Freeze Resistance: High ★★☆☆☆
 Spiral Scale Helm ★☆☆☆☆
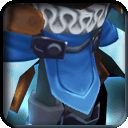
 Wolver Cap
  ★★☆☆☆
★★☆☆☆
 Cobalt Armor ★★☆☆☆
 Jelly Mail ★★☆☆☆
 Magic Cloak ★★☆☆☆
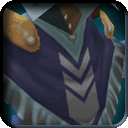
 Mighty Cobalt Armor
  ★★★★☆
★★★★☆
 Skelly Suit ★★☆☆☆
 Spiral Scale Mail ★☆☆☆☆
 Wolver Coat ★★☆☆☆
 Defender ★★☆☆☆
- 25px Mighty Defender Increased Elemental Defense: High ★★★★☆
 Owlite Shield ★★☆☆☆
 Scale Shield ★☆☆☆☆
 Skelly Shield ★★☆☆☆
 Twisted Targe ★★★☆☆
- Nothing to see here, folks!
 Cobalt Crest ☆☆☆☆☆
 Mighty Cobalt Crest ☆☆☆☆☆
 Solid Cobalt Crest ☆☆☆☆☆
 Stunning Crest ☆☆☆☆☆
 Proto Crest ☆☆☆☆☆
 Acheron ★★★★★
 Barbarous Thorn Blade ★★★★★
 Cold Iron Vanquisher ★★★★★
 Combuster ★★★★★
 Divine Avenger ★★★★★
 Dread Venom Striker ★★★★★
 Fang of Vog ★★★★★
 Fearless Rigadoon ★★★★★
 Final Flourish ★★★★★
 Furious Flamberge ★★★★★
 Glacius ★★★★★
 Gran Faust ★★★★★
 Leviathan Blade ★★★★★
 Sudaruska ★★★★★
 Triglav ★★★★★
 Voltedge ★★★★★
 Wild Hunting Blade ★★★★★
 Argent Peacemaker ★★★★★
 Biohazard ★★★★★
 Blitz Needle ★★★★★
 Callahan ★★★★★
 Hail Driver ★★★★★
 Iron Slug ★★★★★
 Magma Driver ★★★★★
 Neutralizer ★★★★★
 Nova Driver ★★★★★
 Plague Needle ★★★★★
 Polaris ★★★★★
 Sentenza ★★★★★
 Storm Driver ★★★★★
 Supernova ★★★★★
 Umbra Driver ★★★★★
 Valiance ★★★★★
 Volcanic Pepperbox ★★★★★
 Ash of Agni ★★★★★
 Big Angry Bomb ★★★★★
 Dark Briar Barrage ★★★★★
 Electron Vortex ★★★★★
 Graviton Vortex ★★★★★
 Irontech Destroyer ★★★★★
 Nitronome ★★★★★
 Shivermist Buster ★★★★★
 Stagger Storm ★★★★★
 Venom Veiler ★★★★★
 Voltaic Tempest ★★★★★
 Almirian Crusader Helm ★★★★★
 Ancient Plate Helm ★★★★★
 Arcane Salamander Mask ★★★★★
 Azure Guardian Helm ★★★★★
 Bombastic Demo Helm ★★★★★
 Chaos Cowl ★★★★★
 Crown of the Fallen ★★★★★
 Deadly Virulisk Mask ★★★★★
 Deadshot Chapeau ★★★★★
 Divine Veil ★★★★★
 Dragon Scale Helm ★★★★★
 Dread Skelly Mask ★★★★★
 Grey Feather Cowl ★★★★★
 Heavenly Iron Helm ★★★★★
 Ice Queen Crown ★★★★★
 Ironmight Plate Helm ★★★★★
 Justifier Hat ★★★★★
 Mad Bomber Mask ★★★★★
 Mercurial Demo Helm ★★★★★
 Mercurial Helm ★★★★★
 Nameless Hat ★★★★★
 Royal Jelly Crown ★★★★★
 Shadowsun Stetson ★★★★★
 Skolver Cap ★★★★★
 Snarbolax Cap ★★★★★
 Valkyrie Helm ★★★★★
 Vog Cub Cap ★★★★★
 Volcanic Demo Helm ★★★★★
 Volcanic Plate Helm ★★★★★
 Volcanic Salamander Mask ★★★★★
 Armors (31)
 ★★★★★
 Ancient Plate Mail ★★★★★
 Arcane Salamander Suit ★★★★★
 Azure Guardian Armor ★★★★★
 Bombastic Demo Suit ★★★★★
 Chaos Cloak ★★★★★
 Deadly Virulisk Suit ★★★★★
 Deadshot Mantle ★★★★★
 Divine Mantle ★★★★★
 Dragon Scale Mail ★★★★★
 Dread Skelly Suit ★★★★★
 Grey Feather Mantle ★★★★★
 Heavenly Iron Armor ★★★★★
 Ice Queen Mail ★★★★★
 Ironmight Plate Mail ★★★★★
 Justifier Jacket ★★★★★
 Mad Bomber Suit ★★★★★
 Mercurial Demo Suit ★★★★★
 Mercurial Mail ★★★★★
 Nameless Poncho ★★★★★
 Radiant Silvermail ★★★★★
- You may be asking: Jandalf, why do you want every 5-Star item in the game? My answer: I plan to get every 5-Star item in the game because that way, I'll have a wide variety of choices for both offense and defense. Also, once you have everything you want in Spiral Knights, it gets kind of boring. Yes, there's always the Shadow Lairs, but they're hard as all heck anyway.
Hidden Knight: My very own game!
- If you have several knights, please, don't enter all of them. It's not fair if one player gets all the rewards.
- If you didn't win, don't ask me if I can add another prize. This will be counted as bribing, and I will ignore you.
- Don't bribe me. I'll take your stuff, but won't do anything. So, don't bribe me, because then you have a reason to report me to the Game Masters for scamming, and frankly, I like this game.
- If you didn't win, and I tell you no, don't report me. I didn't do anything wrong.
- If I'm in your guild or friends list, please, don't just join me. Look at what Haven I'm in, then go to that haven if you want to play.
- I'll post on the forums what day the game is on, where it is (not where I'm hiding, which Haven I'll be in), and what the prizes are.
- If you read my forum post, don't start searching for me before I say GO over the zone channel.
- If you ignore the rule above, and find me before the game even starts, I will go to my guildhall, and the game will be delayed for several minutes while I wait you out.
- Please, do not tell me to do a game, as that will simply ensure that I won't do it for several months.
- The first player to find me gets first picks.
- The second player to find me picks from whatever's left.
- It goes on like this, until all my prizes are gone.
- The first player to find me gets the best materials, the second player to find me gets slightly less valuable materials, it goes on and on like this.
- The first player to find me wins 300 CE.
- The second player to find me wins 200 CE.
- The third player to find me wins 100 CE.
- The fourth player to find me wins 50 CE.
- The first player to find me wins 2,000 Crowns.
- The second player to find me wins 1,500 Crowns.
- The third player to find me wins 1,000 Crowns.
- The fourth player to find me wins 500 Crowns.
- The fifth player to find me wins 250 Crowns.
- The sixth player to find me wins 100 Crowns.
On occasion, I'll do a special friends edition, where only friends can enter, or a special guild edition, where only guildmates can enter.
Forums
Updates
- User Page Version 1.0
- Added a blurb about me, Jandalf's gear, and info about my not at all famous game show, Hidden Knight.
- Version 1.1
- Fixed the Sprial Scale Mail's name.
- Version 1.2
- Put the prizes into seperate sections of Hidden Knight edition headlines.
- Version 1.3
- Put each of the Knight's stuff into seperate categories.
- Version 1.4
- Added links to some of the fourm sections, will add the rest later tonight.
- Version 1.5
- Added links to the user pages that probably have the best looking stuff on them (also probably the two most powerful knights in the game).
- Version 1.6
- Fixed Biznasty's user link. Sorry about not knowing your username!
- Version 1.7
- Fixed some grammar problems on the page, checked out the formatting for Biznasty's page, learned how to make seperate lines.
- Version 1.8
- Added the rest of the links to the forum threads.
- Version 1.9
- Put in links to 2 great ideas for Spiral Knights.
- Version 2.0
- Reformatted so that now the links to the 2 best players in Spiral Knights say only their names.
- Version 2.1
- Added the Heat Levels of my gear. Now you know exactly how strong or weak my gear is!
- Version 2.2
- Changed "Gear" to "Arsenal", added a Costumes section, and edited the placement of some of the sections to match the arsenal menu in Spiral Knights.
- Version 2.3
- Organized my arsenal by name, alphabetical order.
- Version 2.4
- Added a picture of Jandalf and Karonastar (checked out Pueo's page to see how it worked. Don't worry, I didn't change anything!!!), and added Karonastar's gear.
- Version 2.5
- Removed Karonastar's arsenal.
- Version 2.6
- Removed pic of Jandalf & Karonastar, added pic of Jandalf. Next order of business: Add the weapon icons to each weapon!!!
- Version 2.7
- Added the weapon/UV icons for my swords, will add the rest later tonight, after I make myself a brand new Prismatech Alchemer.
- Version 2.8
- Added the weapon/UV icons for the rest of my arsenal, and saved some space on my user page by adding a table of my arsenal.
- Version 2.9
- Merged the Level 2 Headlines on my Hidden Knight Section into one small table.
- Version 3.0
- Merged the Level 2 Headlines on my Forums Section into another small table. Yet again, not enough crowns to make a Prismatech Alchemer...
- Version 3.1
- As you can see, I added a table for my User Page updates.
- Version 3.2
- Added a link to my guild, Knights of Blacktide.
- Version 3.3
- Added links to the three bosses I've defeated.
- Version 3.4
- Added an unneccessary pic of the mineral that happens to be my favorite color.
- Version 3.5
- Added an unneccessary pic of my favorite of the personal colors.
- Version 3.6
- Categorized my arsenal.
- Version 3.7
- Added what accessory is on which piece of armor. Of course, there's only one, for now...
- Version 3.8
- Added Jandalf's blog, will add the pic that goes with it later on.
- Version 3.9
- Removed links to Magnus' and Biznasty's pages. They get enough pageviews already, without me helping them!
- Version 4.0
- Swapped my old pic setup for a template.
- Version 4.1
- Added a dream arsenal, haven't added anything to it yet.
- Version 4.2
- Added the swords to the dream arsenal.
- Version 4.3
- Added the handguns to the dream arsenal.
- Version 4.4
- Added a Construction Zone section.
- Version 4.5
- Added the "How I Play" section.
- Version 4.6
- Removed the "How I Play" section, it screwed up the rest of the page.
- Version 4.7
- Redid the picture of Jandalf.
- Version 4.8
- Added the bombs to the dream arsenal, and added an explanation for the dream arsenal.
- Version 4.9
- Finally figured out how to make the star values show. So, I added in the star values of the swords in my dream arsenal. Will add values to the rest of my dream arsenal as it expands, and my current arsenal in a few minutes.
- Version 5.0
- Added star values to the handguns in my dream arsenal.
- Version 5.1
- Added the star values to the swords in my arsenal.
- Version 5.2
- Added the star values to the bombs in my dream arsenal.
- Version 5.3
- Uploaded the Level 01 pic, added it to my arsenal where applicable.
- Version 5.4
- Added the star values to the handguns in my arsenal.
- Version 5.5
- Added the star values to the bombs in my arsenal.
- Version 5.6
- Added the star values to the helms & armors in my arsenal.
- Version 5.7
- Added the star values to the shields and accessory in my arsenal.
- Version 5.8
- Uploaded the rest of the Heat Level pics, added the pics to my Offensive Arsenal. Will update with current levels after I'm done typing this update.
- Version 5.9
- Added a UV on my 2nd Flourish I'd initially missed, and added the Level pics to the swords in my dream arsenal.
- Version 6.0
- Fixed one of the screw-ups in my User Page update versions.
- Version 6.1
- Added the star values to the handguns and bombs in my dream arsenal. Now to just figure out how many 5-Star Helms there are in the game!
- Version 6.2
- Added a new row to my profile template, showing my current rank. And for future reference, I'm only a solider because I blew all my CE on a new helm, so I only have like 40 ME left!
- Version 6.3
- Added a helms table to my dream arsenal, nothing in it... yet. i've checked the helms page, and know that there's 30 5-Star helms (yet only 17 swords? What is wrong with these people?), which means there's 31 5-Star armors (Radiant Silvermail doesn't have a match).
- Version 6.4
- Added one third of the helms to my dream arsenal. Will add the rest once my fingers stop killing me, and I actually help on the wiki instead of screwing up on the images.
- Version 6.5
- Added the remaining two thirds of the helms to my dream arsenal. No matter what, I will not get the stuff from Operation: Crimson Hammer!
- Version 6.6
- Moved my entire arsenal into one table simply titled Arsenal.
- Version 6.7
- Moved my dream arsenal into one table simply titled Dream Arsenal.
- Version 6.8
- Added 5 of the 31 Armors to my Dream Arsenal.
- Version 6.9
- Updated my blog, added the new crests I've gotten to the Acessories, added in more armor to the Dream Arsenal. It now consists of 22 of the 31 5-Star sets of armor in the game. 9 to go, then 12 shields to add, and then I start adding a table of the achievements that I've obtained.

