Heat
Every weapon, shield, helmet, suit, and battle sprite possesses an attribute called heat. When any of those items is used in battle in the Clockworks, it gradually acquires more and more heat, and progresses from heat level 1 to heat level 10. Heat is required to fill an item's heat meter, but for it to level, a fire crystal is needed. These crystals correspond to tiers, for each new level about to be applied to the item, a higher level Fire Crystal would be needed.
With each new heat level, the item's performance improves slightly. When the item reaches heat level 10, it is deemed complete, and does not heat further. In addition to bringing slight improvements to an item, heat plays a role in the crafting process for high-star items. A Heat Amplifier increases the rate at which a knight earns heat.
Acquiring Heat

Heat is acquired in the Clockworks when the knight picks up a special kind of consumable called an ember. Embers drop from defeated monsters and from treasure boxes. Embers come in three sizes (small, medium, and large) indicating their heat content. Embers despawn after a certain period of time if not picked up.
On any given Clockworks level, the heat that the knight has earned thus far is shown in the heat meter, which is located next to the health meter in the heads-up display (HUD). The heat meter appears as a tiny flame that intensifies as heat is acquired. There is no limit to the heat that a knight can earn on a level. Even when the heat meter appears to be maxed out, more heat can be acquired.
Applying Heat

When a knight steps on the elevator at the end of the level, that knight's accumulated heat is distributed across all of the knight's items that are equipped and heatable. An animation shows the knight's heat draining into these items. Items that are already fully heated, items in costume slots, and trinkets are not heatable.
Higher-star items require more heat to gain a heat level than low-star items do. High-heat items require more heat to gain a heat level than low-heat items do.
If a knight leaves the party before the elevator, then the knight's heat is lost without being applied to the knight's equipment. This includes going solo, returning to Haven, or logging off. Also, if a knight is left dead while the party boards the elevator, then his heat is lost. (However, the knight automatically descends to the next level with the party, and is revived with the emergency revive.)
When an item is unbound by Vise, it loses all of its heat and returns to heat level 1. Otherwise, an item cannot lose heat.
The Forge
Item level advancement happens when using the fire crystals in the forge interface. When an item is ready to be levelled, a notice will appear in the forge icon at the bottom right of the screen. Players can quickly access the forge by pressing the U key.
The Forge can be accessed in town or at any arsenal station. When an item is ready to level up, open the Forge and select the item. The item will require a certain number of a specific fire crystal to level up. However, in some cases there is a chance the forge will not succeed and the fire crystals will be lost. No heat is ever lost due a failed forging.
Items that acquire heat do not automatically level up when enough heat is acquired at the end of a level. When an item is ready to go to the next level, an item called Fire Crystals must be used within an interface called 'The Forge' in order to level up those items.
Additionally, players have the option to add more than the requisite fire crystals in order to improve the odds of a successful forge as well as the chance to gain a special bonus. These bonuses include:
- Heat Bonus: +25% (one level of heat)
- Double Level Up!
- One
 Forge Prize Box containing a random assortment of various rarities and other items.
Fire crystals include:
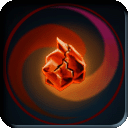 Cracked Fire Crystal (☆☆☆☆☆)
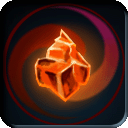 Dim Fire Crystal (★☆☆☆☆)
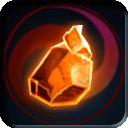 Warm Fire Crystal (★★☆☆☆)
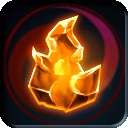 Glowing Fire Crystal (★★★☆☆)
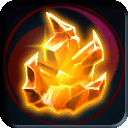 Shining Fire Crystal (★★★★☆)
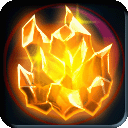 Radiant Fire Crystal (★★★★★)
Using The Forge
After opening the forge, the interface will show three sections:
- The first one, labelled 'FORGE', located on the left side of the interface, contains the items in your arsenal that have acquired enough heat to be levelled up.
- The middle section shows item selected and the required Fire Crystals needed to level. Below that there are three buttons allowing a player to choose different amounts of crystals that will return different probabilities for the forge success (Minimal, Medium, Maximum).
- The section on the far right, labelled 'RESULTS', show different probabilities for that forge. This section is divided into three distinct areas:
- The top one shows the 'Chance for Forge Success'. This percentage will show the chances for a failed or successful forge and it changes depending on the number of Fire Crystals used (Min, Med, Max). When it reaches 100%, it guarantees that the forge will be successful and that the item will reach the next level. It does not guarantee the acquisition of the additional possible bonuses below.
- The middle are shows the 'Enhancements'. These are special bonuses the item will acquire with that particular forge.
- The bottom area displays the 'Possible Bonuses'. Those are additional bonuses that have a probability of being acquired with that particular forge. Those bonuses could be Health or Heat bonuses, skipping levels or a forge prize box. These are possibilities for additional benefits, however, not guaranteed prizes.
Clicking the 'Forge' button will complete the process and the player will get a confirmation pop up displaying the success or failure of that forge, dependant on the probabilities outlined in the 'Chance for Forge Success' section.


Fire Crystals Requirements
The tables below show how many of which kind of Fire Crystals are required and which bonuses are possible for each level of forging. Note that the percentage (%) applies to forge success only, not to the additional bonuses.
Effects

A player can inspect an item's heat by hovering the mouse over the item in the knight's Arsenal. The displayed graphic shows the item's heat level and progress toward the next heat level.

The statistics bars displayed on an item show the current stats in light blue, and the potential stats, to be fulfilled at heat level 10, in darker blue. These stats improve incrementally, when each new heat level is attained. They do not improve gradually within a single heat level. Weapon speed, status resistances, and shield health are never improved by heating.
It is worth noting that heat has a dramatic effect on the damage inflicted by weapons. According to player research on Tier 3, a 4-star item at heat level 10 often significantly out-damages its 5-star version at heat level 1. In fact, the 5-star version catches up to the 4-star damage around heat level 7 or 8. Of course, the 5-star version may offer other advantages, such as new damage type, more projectiles, etc.
At certain heat levels, weapons and armor receive special bonuses. At heat level 5, a weapon automatically receives Charge Time Reduction: Low. At heat level 10, a weapon automatically receives CTR: Medium. At heat level 5, most helmets and armor suits receive a +1 health bonus. (The health bonuses on Scarlet Shield and the 0-star Vitasuit do not level.)
Heat affects the crafting of high-star items as follows. A 3-star item must attain heat level 5 before it can be upgraded to 4 stars. A 4-star item must attain heat level 10 before it can be upgraded to 5 stars. Other than these minimum requirements, heat has no effect on the quality of the upgrade. Upgraded items always begin at heat level 1.
History
- release 2013-07-30: Fire Crystals and The Forge are introduced.