Diferencia entre revisiones de «Misión de Peligro»
De SpiralKnights-es
(Página creada con '{{traducir|Danger_Mission}}') |
(necesita traducción) |
||
| Línea 1: | Línea 1: | ||
{{traducir|Danger_Mission}} | {{traducir|Danger_Mission}} | ||
| + | Danger Missions become available to knights after they reach Rank 4-1. These especially hazardous missions contain three levels, the third level being a [[Nivel de Tesoro]]. Note that you cannot invite players or join parties on the second depth of these missions since it is considered a boss level. This final level, like a Clockworks Terminal, costs no energy to enter, and equipment can be changed freely. | ||
| + | |||
| + | There are currently four Danger Missions, which rotate daily, but there might be more Danger Missions added to the rotation. Like all [[Misiones de Prestigio]], they can only be cleared once per day. | ||
| + | |||
| + | =Misiones de Peligro= | ||
| + | ==Legión de Almire== | ||
| + | {{main|Legión de Almire}} | ||
| + | This danger mission is styled like [[Cementerio]]s levels and thus contain mostly [[muerto viviente|muertos vivientes]]. The only statuses present in these levels are [[aturdir]] from dust zombies and lumbers, and [[maldición]] from cursed deadnaughts. It is recommended that you bring armor that protect against shadow damage and have weapons that do elemental damage. It is also recommended that you bring a weapon that can kill deadnaughts in one strike since the resurrection ring on them continually revive the surrounding zombies. | ||
| + | |||
| + | [[file:Almire Mission.jpg|frame|100px|Propaganda promocional.]] | ||
| + | |||
| + | ====Los monstruos incluyen:==== | ||
| + | * {{Monster_Icons|Undead}} [[Howlitzer]]s | ||
| + | * {{Monster_Icons|Undead}} [[Kat#Spookat|Spookat]]s | ||
| + | * {{Monster_Icons|Undead}} {{status|stun}} [[Zombie#Dust_Zombie|Dust Zombie]]s | ||
| + | * {{Monster_Icons|Undead}} [[Almirian Crusader]]s | ||
| + | * {{Monster_Icons|Undead}} {{status|stun}} [[Bombie]]s | ||
| + | * {{Monster_Icons|Construct}} {{status|stun}} [[Lumber]]s | ||
| + | * {{Monster_Icons|Fiend}} [[Wing#Silkwing|Silkwing]]s | ||
| + | * {{Monster_Icons|Undead}} [[Deadnaught#Deadnaught|Deadnaught]]s | ||
| + | * {{Monster_Icons|Undead}} {{status|curse}} [[Deadnaught#Almirian Shadow Guard|Almirian Shadow Guard]]s | ||
| + | |||
| + | {{clear}} | ||
| + | |||
| + | ==Compuesto 42== | ||
| + | {{main|Compuesto 42}} | ||
| + | This danger mission is composed of slimes and gremlins. The levels are filled with monsters and traps that will inflict poison and fire. It is ideal for knights to wear the {{SetLink|Dragon Scale}} due to its protection against elemental and pierce damage along with its poison and fire resist. The ideal weapons for these levels are ones that do shadow damage. It isn't very common, but Construct monsters like Red Rovers or Isotrodes can sometimes appear in the first depth. | ||
| + | |||
| + | [[file:Compound Mission.jpg|frame|200px|Propaganda promocional.]] | ||
| + | |||
| + | ====Los monstruos incluyen:==== | ||
| + | *{{Monster_Icons|Slime}} {{Status|poison}} [[Lichen#Toxoil|Toxoil]]s | ||
| + | *{{Monster_Icons|Slime}} {{Status|poison}} [[Lichen#Toxigel|Toxigel]]s | ||
| + | *{{Monster_Icons|Slime}} {{Status|poison}} [[Lichen#Giant Toxoil|Giant Toxoil]]s | ||
| + | *{{Monster_Icons|Slime}} {{Status|poison}} [[Polyp#Compound Polyp|Compound Polyp]]s | ||
| + | *{{Monster_Icons|Slime}} {{Status|poison}} [[Polyp#Caustic Polyp|Caustic Polyp]]s | ||
| + | *{{Monster_Icons|Slime}} [[Jelly#Jelly Cube|Jelly Cube]]s (Raramente vistos) | ||
| + | *{{Monster_Icons|Slime}} [[Lichen#Lichen|Lichen]]s (Raramente vistos) | ||
| + | *{{Monster_Icons|Gremlin}} {{Status|fire}} [[Scorcher#Darkfang Scorcher|Darkfang Scorcher]]s | ||
| + | *{{Monster_Icons|Gremlin}} {{Status|fire}} [[Scorcher#Gremlin Incinerator|Gremlin Incinerator]]s | ||
| + | *{{Monster_Icons|Gremlin}} [[Mender#Darkfang Mender|Darkfang Mender]]s | ||
| + | *{{Monster_Icons|Gremlin}} [[Thwacker#Darkfang Thwacker|Darkfang Thwacker]]s | ||
| + | *{{Monster_Icons|Gremlin}} [[Knocker#Gremlin Knocker|Gremlin Knocker]]s (Raramente vistos) | ||
| + | *{{Monster_Icons|Gremlin}} {{Status|poison}} [[Knocker#Gremlin Choker|Gremlin Choker]]s | ||
| + | *{{Monster_Icons|Gremlin}} {{Status|fire}} [[Knocker#Gremlin Lighter|Gremlin Lighter]]s | ||
| + | *{{Monster_Icons|Gremlin}} {{Status|fire}} [[Mortafire#Blazing Mortafire|Blazing Mortafire]]s | ||
| + | *{{Monster_Icons|Gremlin}} {{Status|poison}} [[Mortafire#Toxic Mortafire|Toxic Mortafire]]s (Raramente vistos) | ||
| + | *{{Monster_Icons|Construct}} {{Status|fire}} [[Gun Puppy#Red Rover|Red Rover]]s | ||
| + | *{{Monster_Icons|Construct}} {{Status|poison}} [[Retrode#Isotrode|Isotrode]]s (Raramente vistos) | ||
| + | *{{Monster_Icons|Fiend}} [[Wing#Silkwing|Silkwing]]s (Raramente vistos) | ||
| + | *{{Monster_Icons|Beast}} {{Status|poison}} [[Chromalisk#Virulisk|Virulisk]]s (Raramente vistos) | ||
| + | |||
| + | |||
| + | |||
| + | ==Corazón de Hielo== | ||
| + | {{main|Corazón de Hielo}} | ||
| + | This ice themed danger mission contains mostly fiends and beasts. Knights should wear armor that grants them freeze resist along with shadow and pierce protection. Unfortunately there is no armor or shield that will grant you maximum protection against all 3 threats therefore most knights choose to skip pierce protection. Knights should bring a pierce weapon and an elemental gun due to the threat of Howlitzers in the center of freeze grates. If there are one or two players in the party, [[lost Soul#Frozen Soul|Frozen Soul]]s will appear to attack the players. | ||
| + | |||
| + | [[file:Ice Heart.jpg|frame|200px|Propaganda promocional.]] | ||
| + | |||
| + | ====Los monstruos incluyen:==== | ||
| + | *{{Monster_Icons|Undead}} [[Howlitzer#Howlitzer|Howlitzer]]s (Raramente vistos) | ||
| + | *{{Monster_Icons|Undead}} {{Status|freeze}} [[Howlitzer#Chilling Howlitzer|Chilling Howlitzer]]s | ||
| + | *{{Monster_Icons|Fiend}} [[Devilite]]s | ||
| + | *{{Monster_Icons|Fiend}} {{Status|freeze}} [[Devilite#Layoafer|Layoafer]]s | ||
| + | *{{Monster_Icons|Fiend}} [[Devilite#Pit Boss|Pit Boss]]es | ||
| + | *{{Monster_Icons|Fiend}} [[Devilite#Yesman|Yesmen]] | ||
| + | *{{Monster_Icons|Fiend}} {{Status|freeze}} [[Greaver#Pearl Greaver|Pearl Greaver]]s | ||
| + | *{{Monster_Icons|Fiend}} [[Wing#SilkWing|Silkwing]]s | ||
| + | *{{Monster_Icons|Beast}} {{Status|freeze}} [[Chromalisk#Tundralisk|Tundralisk]]s | ||
| + | *{{Monster_Icons|Beast}} {{Status|freeze}} [[Wolver#Frostifur|Frostifur]]s | ||
| + | *{{Monster_Icons|Beast}} {{Status|freeze}} [[Wolver#Alpha Frostifur|Alpha Frostifur]]s | ||
| + | *{{Monster_Icons|Beast}} {{Status|freeze}} [[Wolver#Perma-Frostifur|Perma-Frostifur]]s | ||
| + | *{{Monster_Icons|Fiend}} [[Trojan]]s | ||
| + | *{{Monster_Icons|Fiend}} {{Status|freeze}} [[Trojan#Maulos|Maulos]] (Jefe) | ||
| + | |||
| + | ==Fantasmas en la Máquina== | ||
| + | {{main|Fantasmas en la Máquina}} | ||
| + | This shock themed Danger Mission contains both [[Constructor]] and [[Muerto Viviente]] monsters as well as [[Lost Soul#Static Soul|Static Souls]]. Shock protection is must so the [[Magic Cloak|Magic Line]] of armor, particularly [[Divine Mantle]] set is recommended, although protecting against either shadow or elemental damage should keep you healthy. Elemental [[Daño#Daño_Elemental|weapons]] should be your first choice, and like Legion of Almire, [[Deadnaught#Static Deadnaught|Deadnaught]]s should be disposed of quickly. | ||
| + | Deactivated Mecha Knights can sometimes be found in the first depth, they can offer a little help if it is necessary for 5 energy. | ||
| + | Note that there are a notable amount of [[Wisp#Golden Storm Wisp|Golden Storm Wisp]]s around the place and [[lost Soul#Static Soul|Static Soul]]s will come if there are one or two players in the party. | ||
| + | |||
| + | [[file:Ghosts Machine.jpg|frame|200px|Propaganda promocional.]] | ||
| + | |||
| + | ====Los monstruos incluyen:==== | ||
| + | *{{Monster_Icons|Undead}} {{Status|shock}} [[Bombie#Surging Bombie|Surging Bombie]]s | ||
| + | *{{Monster_Icons|Undead}} {{Status|shock}} [[Zombie#Frankenzom|Frankenzom]]s | ||
| + | *{{Monster_Icons|Undead}} {{Status|shock}} [[Deadnaught#Static_Deadnaught|Static Deadnaught]]s | ||
| + | *{{Monster_Icons|Undead}} {{Status|shock}} [[Howlitzer#Shocking Howlitzer|Shocking Howlitzer]]s | ||
| + | *{{Monster_Icons|Construct}} {{Status|shock}} [[Gun Puppy#Sparky|Sparky]]s | ||
| + | *{{Monster_Icons|Construct}} {{Status|shock}} [[Mecha Knight#Volt Knight|Volt Knight]]s | ||
| + | *{{Monster_Icons|Construct}} {{Status|shock}} [[Retrode#Voltrode|Voltrode]]s | ||
| + | *{{Monster_Icons|Construct}} {{Status|shock}} [[Lumber#Electreant|Electreant]]s (Raramente vistos) | ||
| + | *{{Monster_Icons|Construct}} {{Status|shock}} [[Scuttlebot#Surgebot|Surgebot]]s | ||
| + | *{{Monster_Icons|Construct}} {{Status|shock}} [[Battlepod#The Big Iron|The Big Iron]] (Jefe) | ||
| + | |||
| + | == Otros enlaces == | ||
| + | * {{en|Danger_Mission}} | ||
| + | |||
| + | |||
| + | [[Categoría: Terminología]] | ||
Revisión de 04:22 30 ago 2013
| Esta página o sección necesita ser traducida. En este momento puede tener errores sintácticos o texto sin traducir. Por favor ayuda al wiki continuando con la traducción desde el artículo original: Danger_Mission. Borra esta plantilla al terminar de traducir el artículo. |
Danger Missions become available to knights after they reach Rank 4-1. These especially hazardous missions contain three levels, the third level being a Nivel de Tesoro. Note that you cannot invite players or join parties on the second depth of these missions since it is considered a boss level. This final level, like a Clockworks Terminal, costs no energy to enter, and equipment can be changed freely.
There are currently four Danger Missions, which rotate daily, but there might be more Danger Missions added to the rotation. Like all Misiones de Prestigio, they can only be cleared once per day.
Contenido
Misiones de Peligro
Legión de Almire
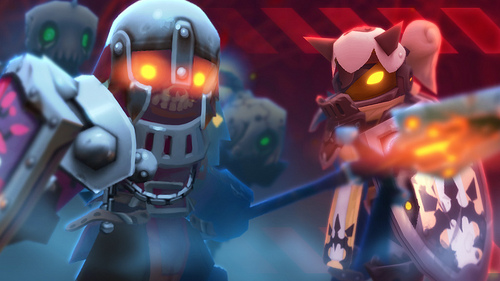
This danger mission is styled like Cementerios levels and thus contain mostly muertos vivientes. The only statuses present in these levels are aturdir from dust zombies and lumbers, and maldición from cursed deadnaughts. It is recommended that you bring armor that protect against shadow damage and have weapons that do elemental damage. It is also recommended that you bring a weapon that can kill deadnaughts in one strike since the resurrection ring on them continually revive the surrounding zombies.
Los monstruos incluyen:
-
 Howlitzers
-
 Spookats
-

 Dust Zombies
-
 Almirian Crusaders
-

 Bombies
-

 Lumbers
-
 Silkwings
-
 Deadnaughts
-

 Almirian Shadow Guards
Compuesto 42
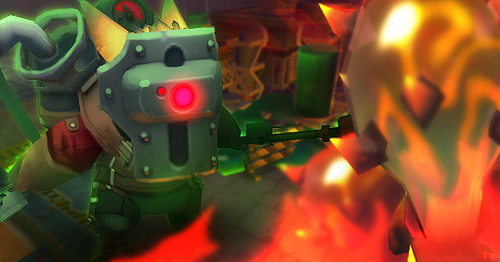
This danger mission is composed of slimes and gremlins. The levels are filled with monsters and traps that will inflict poison and fire. It is ideal for knights to wear the Dragon Scale Set due to its protection against elemental and pierce damage along with its poison and fire resist. The ideal weapons for these levels are ones that do shadow damage. It isn't very common, but Construct monsters like Red Rovers or Isotrodes can sometimes appear in the first depth.
Los monstruos incluyen:

 Toxoils

 Toxigels

 Giant Toxoils

 Compound Polyps

 Caustic Polyps
 Jelly Cubes (Raramente vistos)
 Lichens (Raramente vistos)

 Darkfang Scorchers

 Gremlin Incinerators
 Darkfang Menders
 Darkfang Thwackers
 Gremlin Knockers (Raramente vistos)

 Gremlin Chokers

 Gremlin Lighters

 Blazing Mortafires

 Toxic Mortafires (Raramente vistos)

 Red Rovers

 Isotrodes (Raramente vistos)
 Silkwings (Raramente vistos)

 Virulisks (Raramente vistos)
Corazón de Hielo
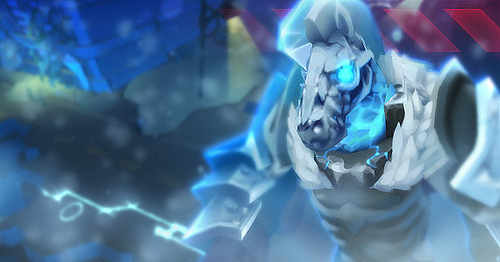
This ice themed danger mission contains mostly fiends and beasts. Knights should wear armor that grants them freeze resist along with shadow and pierce protection. Unfortunately there is no armor or shield that will grant you maximum protection against all 3 threats therefore most knights choose to skip pierce protection. Knights should bring a pierce weapon and an elemental gun due to the threat of Howlitzers in the center of freeze grates. If there are one or two players in the party, Frozen Souls will appear to attack the players.
Los monstruos incluyen:
 Howlitzers (Raramente vistos)

 Chilling Howlitzers
 Devilites

 Layoafers
 Pit Bosses
 Yesmen

 Pearl Greavers
 Silkwings

 Tundralisks

 Frostifurs

 Alpha Frostifurs

 Perma-Frostifurs
 Trojans

 Maulos (Jefe)
Fantasmas en la Máquina
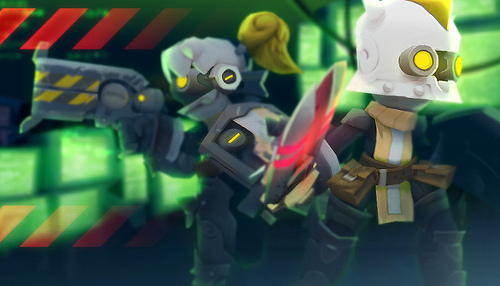
This shock themed Danger Mission contains both Constructor and Muerto Viviente monsters as well as Static Souls. Shock protection is must so the Magic Line of armor, particularly Divine Mantle set is recommended, although protecting against either shadow or elemental damage should keep you healthy. Elemental weapons should be your first choice, and like Legion of Almire, Deadnaughts should be disposed of quickly. Deactivated Mecha Knights can sometimes be found in the first depth, they can offer a little help if it is necessary for 5 energy. Note that there are a notable amount of Golden Storm Wisps around the place and Static Souls will come if there are one or two players in the party.
Los monstruos incluyen:

 Surging Bombies

 Frankenzoms

 Static Deadnaughts

 Shocking Howlitzers

 Sparkys

 Volt Knights

 Voltrodes

 Electreants (Raramente vistos)

 Surgebots

 The Big Iron (Jefe)
Otros enlaces
- Artículo en inglés: Danger_Mission
