Difference between revisions of "User:Whimsicality"
From SpiralKnights
Whimsicality (Talk | contribs) |
Whimsicality (Talk | contribs) |
||
| Line 23: | Line 23: | ||
== Dungeon Runs == | == Dungeon Runs == | ||
| − | I typically go and do many [[Royal Jelly|Jelly King]] runs, either from the terminal, or the whole gate, if there's any [[Arena|arenas]]. If there's a gate that produces a good outcome that gives at least 7K crowns or more, I'll run through it with [[Hat Simulator (Guild)|<s>a bunch of morons</s> my guild]] or some friends. At the moment, I'm still stuck with 4* gear, so I can't be doing [[Lord Vanaduke|Vanaduke]] runs just yet. I can't wait until I'm ready for those, though! | + | I typically go and do many [[Royal Jelly|Jelly King]] runs, either from the terminal, or the whole gate, if there's any [[Arena|arenas]]. If there's a gate that produces a good outcome that gives at least 7K crowns or more, I'll run through it with [[Hat Simulator (Guild)|<s>a bunch of morons</s> my guild]] or some friends. Considering CE prices, it doesn't seem all too worth it to do runs off CE anymore... At the moment, I'm still stuck with 4* gear, so I can't be doing [[Lord Vanaduke|Vanaduke]] runs just yet. I can't wait until I'm ready for those, though! That'll be fun! |
| Line 31: | Line 31: | ||
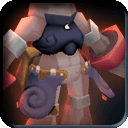
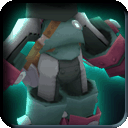
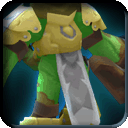
{{showhide|[[file:icon-armor.png|20px]] Armor [[file:icon-helmet.png|20px]]|content= | {{showhide|[[file:icon-armor.png|20px]] Armor [[file:icon-helmet.png|20px]]|content= | ||
| − | * [[Ash Tail Cap]] | + | * [[File:Equipment-Ash_Tail_Cap_icon.png|20px]] [[Ash Tail Cap]] |
| − | * [[Ash Tail Coat]] | + | * [[File:Equipment-Ash_Tail_Coat_icon.png|20px]] [[Ash Tail Coat]] |
| − | * [[Dusker Cap]] | + | * [[File:Equipment-Dusker_Cap_icon.png|20px]] [[Dusker Cap]] |
| − | * [[Dusker Coat]] | + | * [[File:Equipment-Dusker_Coat_icon.png|20px]] [[Dusker Coat]] |
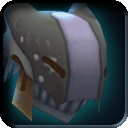
| − | * [[Emberbreak Helm]] | + | * [[File:Equipment-Emberbreak_Helm_icon.png|20px]] [[Emberbreak Helm]] |
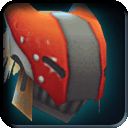
| − | * [[Emberbreak Armor]] | + | * [[File:Equipment-Emberbreak_Armor_icon.png|20px]] [[Emberbreak Armor]] |
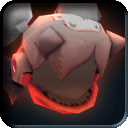
| − | * [[Circuit Breaker Armor]] | + | * [[File:Equipment-Circuit_Breaker_Armor_icon.png|20px]] [[Circuit Breaker Armor]] |
| − | * [[Chroma Suit]] | + | * [[File:Equipment-Chroma_Suit_icon.png|20px]] [[Chroma Suit]] |
| − | * [[Skelly Mask]] | + | * [[File:Equipment-Skelly_Mask_icon.png|20px]] [[Skelly Mask]] |
| − | * [[Jelly Mail]] | + | * [[File:Equipment-Jelly_Mail_icon.png|20px]] [[Jelly Mail]] |
| − | * [[Spiral Sallet]] (Used as costume) | + | * [[File:Equipment-Spiral_Sallet_icon.png|20px]] [[Spiral Sallet]] (Used as costume) |
| − | * [[Spiral Culet]] (Used as costume)}} | + | * [[File:Equipment-Spiral_Culet_icon.png|20px]] [[Spiral Culet]] (Used as costume)}} |
{{showhide|[[file:icon-sword.png|20px]] Swords|content= | {{showhide|[[file:icon-sword.png|20px]] Swords|content= | ||
| − | * [[Boltbrand]] | + | * [[File:Equipment-Boltbrand_icon.png|20px]] [[Boltbrand]] |
| − | * [[Dark Thorn Blade]] | + | * [[File:Equipment-Dark_Thorn_Blade_icon.png|20px]] [[Dark Thorn Blade]] |
| − | * [[Twisted Snarble Barb]] | + | * [[File:Equipment-Twisted_Snarble_Barb_icon.png|20px]] [[Twisted Snarble Barb]] |
| − | * [[Calibur]] | + | * [[File:Equipment-Calibur_icon.png|20px]][[Calibur]] |
| − | * [[Nightblade]] | + | * [[File:Equipment-Nightblade_icon.png|20px]] [[Nightblade]] |
| − | * [[Brandish]] | + | * [[File:Equipment-Brandish_icon.png|20px]] [[Brandish]] |
| − | * [[Faust]] | + | * [[File:Equipment-Faust_icon.png|20px]] [[Faust]] |
| − | * [[Static Edge]] | + | * [[File:Equipment-Static_Edge_icon.png|20px]] [[Static Edge]] |
| − | * [[Proto Sword]]}} | + | * [[File:Equipment-Proto_Sword_icon.png|20px]] [[Proto Sword]]}} |
{{showhide|[[file:icon-handgun.png|20px]] Guns|content= | {{showhide|[[file:icon-handgun.png|20px]] Guns|content= | ||
| − | * [[Kilowatt Pulsar]] | + | * [[File:Equipment-Kilowatt_Pulsar_icon.png|20px]][[Kilowatt Pulsar]] |
| − | * [[Toxic Needle]] | + | * [[File:Equipment-Toxic_Needle_icon.png|20px]][[Toxic Needle]] |
| − | * [[Antigua]] | + | * [[File:Equipment-Antigua_icon.png|20px]] [[Antigua]] |
| − | * [[Proto Gun]]}} | + | * [[File:Equipment-Proto_Gun_icon.png|20px]] [[Proto Gun]]}} |
{{showhide|[[file:icon-bomb.png|20px]] Bombs|content= | {{showhide|[[file:icon-bomb.png|20px]] Bombs|content= | ||
| − | * [[Sun Shards]] | + | * [[File:Equipment-Sun_Shards_icon.png|20px]][[Sun Shards]] |
| − | * [[Cold Snap]] | + | * [[File:Equipment-Cold_Snap_icon.png|20px]] [[Cold Snap]] |
| − | * [[Freezing Vaporizer]]}} | + | * [[File:Equipment-Freezing_Vaporizer_icon.png|20px]] [[Freezing Vaporizer]]}} |
{{showhide|[[file:icon-shield.png|20px]] Shields|content= | {{showhide|[[file:icon-shield.png|20px]] Shields|content= | ||
| − | * [[Heavy Plate Shield]] | + | * [[File:Equipment-Heavy_Plate_Shield_icon.png|20px]] [[Heavy Plate Shield]] |
| − | * [[Bristling Buckler]] | + | * [[File:Equipment-Bristling_Buckler_icon.png|20px]] [[Bristling Buckler]] |
| − | * [[Proto Shield]] }} | + | * [[File:Equipment-Proto_Shield_icon.png|20px]] [[Proto Shield]] }} |
{{showhide|[[file:icon-costume.png|20px]] Costumes|content= | {{showhide|[[file:icon-costume.png|20px]] Costumes|content= | ||
| − | * Authentic Phantom Mask | + | * [[File:Equipment-Authentic_Phantom_Mask_icon.png|20px]] Authentic Phantom Mask |
| − | * Authentic Spookat Mask | + | * [[File:Equipment-Authentic_Spookat_Mask_icon.png|20px]] Authentic Spookat Mask |
| − | * Authentic Frankenzom Mask | + | * [[File:Equipment-Authentic_Frankenzom_Mask_icon.png|20px]] Authentic Frankenzom Mask |
| − | * Azure Bombhead Mask | + | * [[File:Equipment-Azure_Bombhead_Mask_icon.png|20px]] [[Azure Bombhead Mask]] |
| − | * Iron Bombhead Mask | + | * [[File:Equipment-Iron_Bombhead_Mask_icon.png|20px]] Iron Bombhead Mask |
| − | * Checkered Bombhead Mask | + | * [[File:Equipment-Checkered_Bombhead_Mask_icon.png|20px]] Checkered Bombhead Mask |
| − | * Ruby Bombhead Mask}} | + | * [[File:Equipment-Ruby_Bombhead_Mask_icon.png|20px]] Ruby Bombhead Mask}} |
{{showhide|[[file:icon-trinket.png|20px]] Trinkets|content= | {{showhide|[[file:icon-trinket.png|20px]] Trinkets|content= | ||
| − | * [[Brute Jelly Band]] (x2) | + | * [[File:Equipment-Brute_Jelly_Band_icon.png|20px]] [[Brute Jelly Band]] (x2) |
| − | * [[Rock Jelly Band]]}} | + | * [[File:Equipment-Rock_Jelly_Band_icon.png|20px]] [[Rock Jelly Band]]}} |
{{showhide|[[file:icon-accessory.png|20px]] Accessories|content= | {{showhide|[[file:icon-accessory.png|20px]] Accessories|content= | ||
| − | * Drab Goggles }} | + | * [[File:Equipment-Drab_Goggles_icon.png|20px]] [[Goggles|Drab Goggles]] |
| + | * [[File:Equipment-Proto_Crest_icon.png|20px]] [[Crest|Proto Crest]] | ||
| + | * [[File:Equipment-Pumpkin_Bomb_Bandolier_icon.png|20px]] [[Bomb Bandolier|Pumpkin Bandolier]] }} | ||
Revision as of 16:07, 22 November 2011
| |||||
| |||||

Contents
Sup
The username's Whimsicality, but for simplicity's sake, call me Whim or Whimsy. I've been playing for a couple of months, and with the help of two close friends ( Mintsdale and Doctahwahwee ) I have become not only decent at this game, but fond of it as well! I'd consider myself a fairly skilled player, but that doesn't mean anything since my computer lags every other second! Isn't that just GRAND?
Dungeon Runs
I typically go and do many Jelly King runs, either from the terminal, or the whole gate, if there's any arenas. If there's a gate that produces a good outcome that gives at least 7K crowns or more, I'll run through it with a bunch of morons my guild or some friends. Considering CE prices, it doesn't seem all too worth it to do runs off CE anymore... At the moment, I'm still stuck with 4* gear, so I can't be doing Vanaduke runs just yet. I can't wait until I'm ready for those, though! That'll be fun!
My Whole Arsenal
I'm working hard on a whole buncha things at the moment, and I doubt I'll stop any time soon.
-
 Ash Tail Cap
-
 Ash Tail Coat
-
 Dusker Cap
-
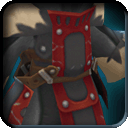 Dusker Coat
-
 Emberbreak Helm
-
 Emberbreak Armor
-
 Circuit Breaker Armor
-
 Chroma Suit
-
 Skelly Mask
-
 Jelly Mail
-
 Spiral Sallet (Used as costume)
-
 Spiral Culet (Used as costume)
-
 Authentic Phantom Mask
-
 Authentic Spookat Mask
-
 Authentic Frankenzom Mask
-
 Azure Bombhead Mask
-
 Iron Bombhead Mask
-
 Checkered Bombhead Mask
-
 Ruby Bombhead Mask
Lockdown Set
Yes, I am a big fan of playing Lockdown. I honestly prefer playing on Tier 2, mainly since I find it most balanced.
So what do you use?
Wait, why do you have this?
Well... I haven't played T1 lockdown that much, so I can't really say. But, I have a very quick charge time on the Cold Snap, making it effective in defending bases and overall being annoying. The Static edge is just to have a chance of inflicting shock, which of course is a pretty good status to inflict.
Wait, why do you have this? Being a fast piercing weapon, Twisted Snarble Barb is a pretty basic choice to bring in, and it counters out the recon's slowed down sword attacks. Not to mention, it makes the kills so much quicker and satisfying once the foe's defense is nerfed. Even without a defense nerf, a few strikes from the TSB can bring down foes easily. Kilowatt Pulsar is good for creating a distraction to lure enemies away from a base, or stop a bomber from charging and spamming his bomb. Shock is also a good status to inflict upon others, as it gives you ample opportunity to strike while they're spasming, and it dishes out extra damage. As an alternative, I guess a Voltech Alchemer would work. Sealed Sword and Toxic Needle are merely last resort weapons for me, despite their drawbacks for recons. Sealed Swords' sheer power helps a bit when there's a mob. Poison's really useless for a recon to dish out, though, as you can already nerf someone's defenses. Of course, I recently upgraded my Sealed Sword to a Faust, so I can't use that if/when I get another. The Dusker Cap and Coat are pretty standard, being some of the best armor you can possibly wear. People rarely use weapons that deal Shadow Damage, granted they don't have a Nightblade or Shadowtech Alchemer, and even then, Normal and Piercing defense are most important in T2 lockdown.
Blast Network?
Haha, no. If I wanted to play Bomberman, I wouldn't be playing Spiral Knights.
You want to stalk me?
Fine, go on ahead. I won't stop you. I can't.