Difference between revisions of "Danger room"
From SpiralKnights
(expansion) |
m |
||
| Line 4: | Line 4: | ||
''However, should you manage to come out victorious you will be rewarded for your bravery. Enter at your own risk!'' | ''However, should you manage to come out victorious you will be rewarded for your bravery. Enter at your own risk!'' | ||
| − | '''Danger rooms''' are optional areas sometimes found within [[Clockwork Tunnels]]. They are pay areas that cost 3 [[energy]]. Inside the gate, the danger room is a single room with a party button where the gates will not open until all the [[monsters]] are defeated, similar to [[Battle Arena]]s. Past the danger room is a treasure room with red [[treasure box]]es if you successfully defeat the enemies. | + | '''Danger rooms''' are optional areas sometimes found within [[Clockwork Tunnels]]. They are pay areas that cost 3 [[energy]]. Inside the gate, the danger room is a single room with a party button where the gates will not open until all the [[monsters]] are defeated, similar to [[Battle Arena]]s. Past the danger room is a treasure room with eight red [[treasure box]]es and four heart boxes if you successfully defeat the enemies. |
Two types of monsters will spawn within danger rooms. Higher-tier monsters have a chance of spawning inside danger rooms; [[Gremlin#Thwackers|Darkfang Thwackers]] normally only appear in Tier 3, but can be found inside Tier 2 danger rooms. At a danger room's entrance, there are two columns on each side of the gate. These columns indicate the possible theme of the danger room: | Two types of monsters will spawn within danger rooms. Higher-tier monsters have a chance of spawning inside danger rooms; [[Gremlin#Thwackers|Darkfang Thwackers]] normally only appear in Tier 3, but can be found inside Tier 2 danger rooms. At a danger room's entrance, there are two columns on each side of the gate. These columns indicate the possible theme of the danger room: | ||
*Fire grates: [[Fire]] monsters | *Fire grates: [[Fire]] monsters | ||
| + | *Ice mist: [[Freeze]] monsters | ||
*Lightning rods: [[Shock]] monsters | *Lightning rods: [[Shock]] monsters | ||
*Poison bubbles: [[Poison]] monsters | *Poison bubbles: [[Poison]] monsters | ||
Revision as of 03:28, 21 April 2011
Warning! The path beyond this point is far more dangerous than what you would expect on this level. By entering you will not be able to turn back until you complete the challenges within.
However, should you manage to come out victorious you will be rewarded for your bravery. Enter at your own risk!
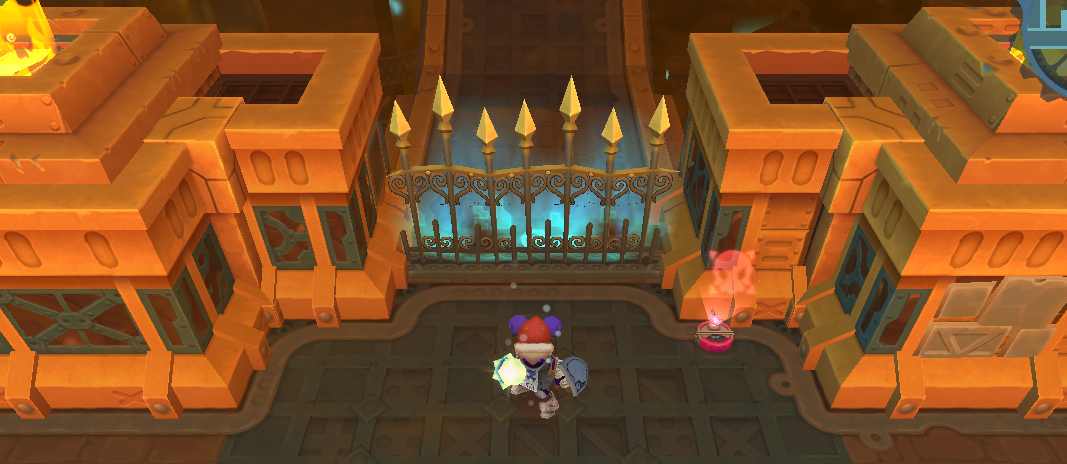
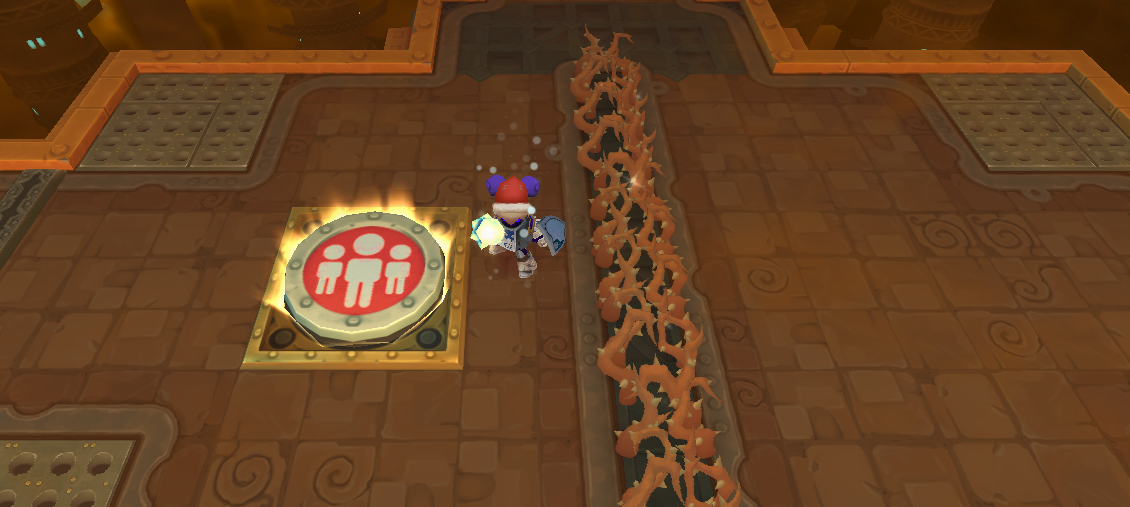
Danger rooms are optional areas sometimes found within Clockwork Tunnels. They are pay areas that cost 3 energy. Inside the gate, the danger room is a single room with a party button where the gates will not open until all the monsters are defeated, similar to Battle Arenas. Past the danger room is a treasure room with eight red treasure boxes and four heart boxes if you successfully defeat the enemies.
Two types of monsters will spawn within danger rooms. Higher-tier monsters have a chance of spawning inside danger rooms; Darkfang Thwackers normally only appear in Tier 3, but can be found inside Tier 2 danger rooms. At a danger room's entrance, there are two columns on each side of the gate. These columns indicate the possible theme of the danger room:
- Fire grates: Fire monsters
- Ice mist: Freeze monsters
- Lightning rods: Shock monsters
- Poison bubbles: Poison monsters
However, themed monsters may not appear despite the entrance columns displaying otherwise. It may be based on the actual level's theme.
There are three known danger room layouts:
Center Brambles
Square with some spikes and a line of brambles down the center. Gremlins have a bad habit of hiding in the spikes when low on health.
Monster Combinations:
Spike Trap
Square with mostly spikes and a cross-shaped area in the middle and a single block width passage around the outside. The perimeter is filled in with breakable blocks at the start; it is advisable to take the time to break these first, as safe ground is valuable here.
Monster Combinations:
Big Room
Circular with no hazards, unlike the other two. Generally the easiest danger room, as there is no need to worry about your footing.
Monster Combinations:

