Difference between revisions of "Deadly Shard Bomb"
From SpiralKnights
m (→Vendors) |
m (Table of Contents) |
||
| Line 7: | Line 7: | ||
== Description == | == Description == | ||
| − | + | {{Quote|A large chunk of Crimsonite primed with a potent explosive. No more depleted Crimsonite here: this bomb's made with the good stuff! Or the bad stuff, if you happen to be the target.|Tooltip}} | |
| − | == Acquisition == | + | === Acquisition === |
{{Bomb/Acquisition}} | {{Bomb/Acquisition}} | ||
| − | == | + | === Recipe === |
| − | + | ||
| − | + | ||
| − | + | ||
| − | + | ||
| − | + | ||
| − | + | ||
| − | + | ||
{{recipe/start|star=5}} | {{recipe/start|star=5}} | ||
{{recipe/row|Red Shard|20}} | {{recipe/row|Red Shard|20}} | ||
| Line 33: | Line 26: | ||
== Alchemy Path == | == Alchemy Path == | ||
{{:Shard Bomb/alchemy path}} | {{:Shard Bomb/alchemy path}} | ||
| + | |||
| + | == Combat == | ||
| + | === Basic Attack === | ||
| + | {{Bomb/BA}} | ||
| + | |||
| + | === Charge Attack === | ||
| + | *Detonation Time: ~5 seconds | ||
| + | *Radius: ~3.5 tiles | ||
| + | |||
| + | [[Abilities#Movement Speed|Movement speed]] is decreased by medium while using the charged attack. Detonation produces a damaging core explosion with a small ~1.5 tiles radius that immediately explodes outward into a larger ring of 8 shards with radius ~3.5 tiles. The central explosion causes minor knockback, usually just enough to push enemies into the second ring. Each shard in the ring explodes ~3 seconds after the central explosion and deal slightly more damage than the central explosion. Enemies dealt enough damage will be knocked down by both primary and secondary explosions. | ||
| + | |||
| + | === Damage === | ||
| + | {{Damage_Disclaimer}} | ||
| + | {{Damage/Pure_Shards/5|Normal}} | ||
| + | |||
| + | Enemies take more damage at the beginning of strata 3 than at the end. | ||
| + | |||
| + | {{Note-Damage/ShardBomb}} | ||
== See Also == | == See Also == | ||
{{equipment see also}} | {{equipment see also}} | ||
| + | *[[Bombs]] | ||
| + | |||
| + | === External links === | ||
| + | {{Note-External Links/Video}} | ||
| + | |||
| + | *[https://www.youtube.com/watch?v=jCx7tw5X9yo Demonstration] | ||
Revision as of 11:10, 25 April 2016
| |||||
|
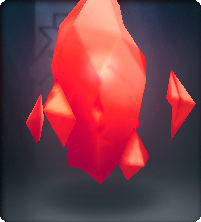
The Deadly Shard Bomb is a 5-star bomb.
Contents
Description
A large chunk of Crimsonite primed with a potent explosive. No more depleted Crimsonite here: this bomb's made with the good stuff! Or the bad stuff, if you happen to be the target. — Tooltip
Acquisition
![]() : Remi - Always in stock for 25,000 crowns in the Hall of Heroes if the player is rank 8-2 or higher (bound).
: Remi - Always in stock for 25,000 crowns in the Hall of Heroes if the player is rank 8-2 or higher (bound).
![]() : Basil - Randomly in stock for 25,000 crowns in depth 23 Clockwork Terminals (unbound).
: Basil - Randomly in stock for 25,000 crowns in depth 23 Clockwork Terminals (unbound).
Recipe
The 5-star recipe for this item costs 25,000 crowns; the alchemy cost is 5,000 crowns. Below are the materials needed to make the Deadly Shard Bomb.
| Name | Amount |
| |
20 |
| |
5 |
| |
4 |
| |
3 |
| |
2 |
| |
1 |
| 3 | |
Note: When crafting using bound equipment as a precursor, the upgraded item will also be bound.
Alchemy Path
| Deadly Shard Bomb's alchemy path | |||||||||||||||||||||||||||||||||||||||||
CombatBasic AttackBombs do not have basic attacks, only charge attacks. Charge Attack
Movement speed is decreased by medium while using the charged attack. Detonation produces a damaging core explosion with a small ~1.5 tiles radius that immediately explodes outward into a larger ring of 8 shards with radius ~3.5 tiles. The central explosion causes minor knockback, usually just enough to push enemies into the second ring. Each shard in the ring explodes ~3 seconds after the central explosion and deal slightly more damage than the central explosion. Enemies dealt enough damage will be knocked down by both primary and secondary explosions. DamageThe following damage values represent the weapon at its completed level, without any UV or bonus from other equipment, and are listed as a range found from the first to last floor of each stratum.
Enemies take more damage at the beginning of strata 3 than at the end. While the base damage for shard bombs are low, they increase substantially more with damage bonuses than other weapons do. See this DPS chart for details. See Also
External linksThe content of external links relies on individual parties. As such, parts might be inaccurate, especially if the game updates and the external source does not. |
|||||||||||||||||||||||||||||||||||||||||

