Difference between revisions of "Ghosts in the Machine"
From SpiralKnights
(→First Arena) |
m (→Notes) |
||
| (61 intermediate revisions by 9 users not shown) | |||
| Line 1: | Line 1: | ||
| − | == | + | {{MissionInfo |
| − | + | |name = Ghosts in the Machine | |
| − | + | |event = no | |
| + | |type = danger | ||
| + | |host rank = 4-1 | ||
| + | |combat floors = 2 | ||
| + | |stratum = | ||
| + | *Monsters: {{Monster_Icons|Construct}} {{Monster_Icons|Undead}} | ||
| + | *Status: {{status|shock}} | ||
| + | |NPCs = | ||
| + | *[[The Big Iron]] (enemy) | ||
| + | |soundtrack = | ||
| + | *Rotten to the Core | ||
| + | *A Dangerous Game | ||
| + | *Bad News | ||
| + | }} | ||
| − | Spiral HQ has received a distress call from a derelict facility deep within the Clockworks. The distress call came in the form of a digital message saying only 'save us.' Believing it to be a potential trap, Spiral HQ has deployed Desna's Recon Rangers to investigate the facility and assist anyone who may have sent the message. | + | ==Overview== |
| + | {{MissionOverview | ||
| + | |description = Warning: This is a Dangerous Mission!<br><br>Desna and her Recon Rangers are an elite team tasked with recovering intel from some of the most dangerous levels of the Clockworks. Joining them could lead to great rewards, but it is guaranteed to be a perilous journey!<br><br>Spiral HQ has received a distress call from a derelict facility deep within the Clockworks. The distress call came in the form of a digital message saying only 'save us.' Believing it to be a potential trap, Spiral HQ has deployed Desna's Recon Rangers to investigate the facility and assist anyone who may have sent the message. | ||
| − | + | |objective = Join Desna's Recon Rangers in discovering the source of the distress call within the derelict facility. | |
| + | }} | ||
| − | == | + | ==Gate Map== |
| − | + | {{:{{PAGENAME}}/Gate Map}} | |
| − | == | + | ==Notes== |
| − | + | [[File:SpiralKnights News 62-big.png|thumb|200x200px|right|[[News]] art for this mission.]] | |
| − | + | It is the fourth Danger Mission incorporated into the daily [[Prestige Mission Rotation]]. | |
| − | + | The player must be at least [[Player Rank|ranked Soldier (4-1)]] to host this mission. | |
| − | + | ||
| − | + | ||
| − | + | ||
| − | + | ||
| − | + | ||
| − | + | ||
| − | + | ||
| − | + | ||
| − | + | ||
| − | + | As with all danger missions, the party locks for the second combat floor and onward. Participants will only receive the prestige reward if they were present in the mission lobby. | |
| − | + | [[Static Soul]]s spawn continuously for most of the first floor of this mission. | |
| − | + | ||
| − | + | There are a few computers throughout the second combat floor that contain cryptic messages. Along the path to the miniboss fight numerous lights similar to the [[Hacked Aura]] flicker over the ground and scatter away as the player approaches. This aura was released with the {{PrizeBox|Surge}} on the same day as the mission. | |
| − | === | + | |
| − | + | ===History=== | |
| − | + | *{{release|2012-09-12}}: Mission introduced. | |
| − | + | ||
| + | ==See Also== | ||
| + | {{mission see also|loadout=yes}} | ||
Latest revision as of 22:33, 26 April 2020
| |||||||||||||||||||||||||||||||||||||||||||||||||||||||||||||||||||||||||||||||||||||||||||||||||||||||||||||||||||||||||||||||||||||||||||||||||||||||||||||||||||||||||||||||||||||||||||||||||||||||||||||||||||||||||||||||||||||||||||||||||||||||||||||||||||||||||||||||||||||||||||||||||||||||||||||||||||||||||||||||||||||||||||||||||||||||||||||||||||||||||||||||||||||||||||||||||||||||||||||||||||||||||||||||||||||||||||||||||||||||||||||||||||||||||||||||||||||||||||||||||||||||||||||||||||||||||||||||||||||
| |||||||||||||||||||||||||||||||||||||||||||||||||||||||||||||||||||||||||||||||||||||||||||||||||||||||||||||||||||||||||||||||||||||||||||||||||||||||||||||||||||||||||||||||||||||||||||||||||||||||||||||||||||||||||||||||||||||||||||||||||||||||||||||||||||||||||||||||||||||||||||||||||||||||||||||||||||||||||||||||||||||||||||||||||||||||||||||||||||||||||||||||||||||||||||||||||||||||||||||||||||||||||||||||||||||||||||||||||||||||||||||||||||||||||||||||||||||||||||||||||||||||||||||||||||||||||||||||||||||
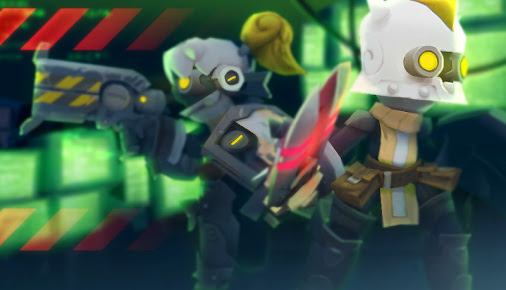
Ghosts in the Machine is a dangerous prestige mission.
Contents
Overview
Description:
Warning: This is a Dangerous Mission!
Desna and her Recon Rangers are an elite team tasked with recovering intel from some of the most dangerous levels of the Clockworks. Joining them could lead to great rewards, but it is guaranteed to be a perilous journey!
Spiral HQ has received a distress call from a derelict facility deep within the Clockworks. The distress call came in the form of a digital message saying only 'save us.' Believing it to be a potential trap, Spiral HQ has deployed Desna's Recon Rangers to investigate the facility and assist anyone who may have sent the message.
Objective:
Join Desna's Recon Rangers in discovering the source of the distress call within the derelict facility.
Gate Map
Depth: 0
Level Link: This mission's lobby is a danger mission lobby.
Depth: Depends on rank
Level Link: This floor is composed of random Dry Dock segments. Several are unique to this mission and are always encountered.
Depth: Depends on rank
Level Link: Iron Hulk is unique to this mission.
Depth: Depends on rank
Level Link: Cargo Bay is unique to this mission.
Notes

It is the fourth Danger Mission incorporated into the daily Prestige Mission Rotation.
The player must be at least ranked Soldier (4-1) to host this mission.
As with all danger missions, the party locks for the second combat floor and onward. Participants will only receive the prestige reward if they were present in the mission lobby.
Static Souls spawn continuously for most of the first floor of this mission.
There are a few computers throughout the second combat floor that contain cryptic messages. Along the path to the miniboss fight numerous lights similar to the Hacked Aura flicker over the ground and scatter away as the player approaches. This aura was released with the ![]() Surge Prize Box on the same day as the mission.
Surge Prize Box on the same day as the mission.
History
- release 2012-09-12: Mission introduced.


