Difference between revisions of "Gunslinger Guide"
From SpiralKnights
m (Found a typo.) |
(→Techniques: added some technique descriptions) |
||
| Line 194: | Line 194: | ||
===Techniques=== | ===Techniques=== | ||
<font size=2><b>Weapon Switching (Two guns)</b></font> | <font size=2><b>Weapon Switching (Two guns)</b></font> | ||
| − | :When using a pair of mobile guns, most commonly Alchemers, it is possible to skip the reload and cooldown timers altogether. Fire the first gun and immediately | + | :When using a pair of mobile guns (able to move while firing), most commonly Alchemers, it is possible to skip the reload and cooldown timers altogether. Fire the first gun and immediately hit switch weapon or weapon 2, wait a beat for the second weapon to come into ready position, and fire. Once you have a grasp of the rhythm needed, add shield canceling so that your actions are now as follows: fire-switch-shield-fire-switch-shield. While the extra action increases the difficulty of maintaining a good rhythm, it will also increase your rate of fire. Note that your timing will be slightly different depending on how much ASI you have, so adjust accordingly. Though it takes a little practice to get the rhythm down, this is an essential technique for a damage gunner. Immobilizing guns such as Callahan can also benefit, but because the immobility is part of a long attack animation that is unaffected, the effect is less dramatic. When used with guns with larger magazines, multiple rounds can be fired before switching, as long as you do not use the last shot in your magazine. |
<font size=2><b>Alchemer Trick Shots</b></font> | <font size=2><b>Alchemer Trick Shots</b></font> | ||
| Line 203: | Line 203: | ||
<font size=2><b>Weapon Switching (One gun)</b></font> | <font size=2><b>Weapon Switching (One gun)</b></font> | ||
| − | : | + | :Weapon switching for faster fire rate can also be accomplished with only one gun. Conceptually, it work identical to dual weapon switching, absent the firing of the second weapon. Depending on the method you use for weapon switching, this may be a fairly simple transition. |
| − | + | ||
| − | + | ||
| − | + | ||
===Equipment Advice=== | ===Equipment Advice=== | ||
Revision as of 19:30, 20 July 2012
| |
The topic of this article or section is subject to personal opinion, and does not represent any one absolute truth. |
| If you disagree, discuss your concerns on the the talk page before editing. |
| |
|
|
Introduction
Specializing as a gunslinger is very useful. As a gunslinger you are able to keep your enemy at range while still dealing damage to them.
Since you are at a distance, you don't take as much damage as up close combat like swordfighting, which means you do not die most of the time. A gunslinger also has the advantage that many guns deal full specialized damage, which means more critical damage dealt from a gun.
Some of this material will be applicable to anyone who uses a gun, but the page as a whole is written for players who use mostly guns or only guns.
Getting started
Guns generally do less damage than swords, but make up for it in range. This immediately means two things:
- Having specialized damage weapons is more important for gunslingers.
- Gunslingers have the potential to take very little damage, being able to easily stay at range from enemies.
Starting out, you might as well skip normal damage guns and go straight into specialized damage. This is because once you have two specialized damage types, you are guaranteed to be able to deal at least neutral damage to all six monster types and critical damage against four types. If you were to make a normal damage gun and one specialized damage gun, you would be able to do normal damage against all six types, but critical damage against only two types.
Guns have a magazine size, after which you must stop and reload before firing again. During this time you also can not shield and move at 55% speed. What this means is that reloading is the most vulnerable time for a gunslinger. Also note that one line of guns which have larger magazines are autofire, and require you to stand still and shoot the entire magazine which also leaves you vulnerable.
As a gunslinger you can also take shots at enemies that might otherwise not be as exposed. For example, if a silkwing were healing a lumber, and several other enemies blocked it on either side, you could pull out your Magnus and snipe a few shots at it.
Controls
Controls are important because unlike a swordsman, a gunslinger will more often move and attack in different directions. And unlike a bomber, our attacks have direction. With that in mind here is an example of how you could set up your controls to help you be an effective gunslinger:
| ||||||||||
|
| ||||||||||
|
The Basics
Coming soon...
- Basic strategies for staying alive, maximizing damage
- Techniques for maintaining mobility: shoot-pause (avoiding reload); shield-charge; any other easily mastered technique
- How to play nice with (non-gunner) party members
To be sorted into appropriate sections...
There are situations when you just can't afford to take damage. At times like that, it is important for a gunslinger to avoid reloading so they stay out of danger, still able to move at normal speed and shield. In this case, it is best to follow a shot pattern as follows to avoid reloading:
- shoot all but one bullet->pause->shoot all but one bullet->pause
You can avoid having to shoot before charging your weapon by using this pattern:
- shield->hold attack key->release shield
Quick weapon switching can be accomplished by using this trick to cancel the switching animations:
- switch->shield
If your shot hits between two monsters who are directly next to each other, you can do damage to both. To do this it helps to turn off your autotarget, which by default you can do by pressing and holding your left shift button.
The Armament
Alchemers
Alchemers remain the heavy-hitters of the handgun arsenal. A properly used alchemer is a fearsome sight, and can produce a constant stream of damage or explosive, concentrated power as needed. Alchemer bullets will ricochet upon striking a wall or target, with ricochets becoming more likely at the higher star levels, and bullets becoming capable of multiple ricochets. There are five alchemers, four which deal elemental damage, and one that deal shadow damage. Of the elemental alchemers, three deal slightly less damage in exchange for a status effect. All bullets from these three versions, including ricochets, have a chance to cause status. Alchemers have a 2-shot magazine, and the reload will leave you briefly unable to shield and moving at reduced speed. Also note that the ricochet may have negative side effects, such as tripping switches or setting off explosive blocks.
- Prismatech Alchemers deal elemental damage with no status effect. In exchange, they deal slightly more damage than the Volt, Cryo and Firo lines, and have no monster-specific strengths or drawbacks.
- Voltech Alchemers deal elemental damage with a chance to inflict shock. This can be very powerful in crowds, as shock spasms may damage nearby enemies. Additionally, it inhibits their movement, making the Voltech line moderately effective at crowd control. Be aware that it can also supercharge Quicksilvers.
- Cryotech Alchemers deal elemental damage and also have a chance to freeze its targets. Ricochets, however, may break the freeze, making the Cryotech line less effective at crowd control in practice. The freeze inflicted by the Cryotech line can extinguish Oilers, but may also refreeze melted Ice Cubes.
- Firotech Alchemers deal elemental damage and have a chance to set targets on fire. The fire damage can cause the Firotech line to output more damage per second than the Prismatech line in some cases. This gun can melt Ice Cubes, but will also set Oilers ablaze.
- Shadowtech Alchemers behave exactly like the Prismatech line, except they deal shadow damage. They are highly effective on Slime type monsters, which are both weak to shadow, and move very predictably.
Blaster
The Blaster line has surged back into the limelight as possibly the best all-around gun. A 3-shot magazine makes it very easy to use, and the small but noticeable knockback on hits can easily keep enemies at bay when paired with good footwork, in both PvE and PvP. Although the normal damage means you won't be seeing any stars, it works reliably on all enemies. The versatility and user-friendliness of this handgun makes it a good choice for both beginners and masters alike.
- The update buffing gun damage also granted consistent, low-level knockback to the entire Blaster line. This improvement makes the Blaster a true jack-of-all-trades, providing decent damage and crowd control capabilities effective on nearly all enemies.
Antigua
After the conversion to pure typed damage, the Antigua lines have become more specialized in their roles. Due to their relatively low damage output, they are not the best choice of weapon for gunslingers, but they are fun and easy to use. The rapid fire, 6-shot magazine allows for a very active run-and-gun style, and lack of knockback or status means minimal interference with other party members. They are also quite useful strategic weapons in PvP. Note that the 3* Antigua deals piercing damage, while its upgrade paths deal elemental or shadow. Recipes for these upgrade paths must be found in the Clockworks from Basil.
- The relatively lower damage output is compensated by increased mobility.
-
 Sentenza
  ,
, 

- The fast bullets and ease of use makes this gun ideal against Gremlins, which it has a bonus against.
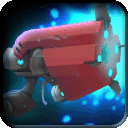
Pulsar
The Pulsar line shoots very slow bullets that expand at about half of their maximum range. The expanded bullets deal more damage and high knockback; the latter property has been much maligned by the community, as it is all too easy to knock enemies out of range, or to fling an attacking monster into an ally without warning. However, the Pulsar line is ideal for stationary targets, and can be a good area-denial line when used properly in PvP. The knockback also provides a great deal of safety when exploring unknown levels solo, so you may want one in your arsenal. Like other weapon lines derived from boss tokens, recipes for upgrades must be found in the Clockworks from Basil. The Pulsar line has a 3-shot magazine.
-
 Polaris
  ,
, 
- Elemental pulsars are a good turret-killers in PvE and effective area-denial weapons in PvP. They inflict shock, which can additionally interrupt enemies. Like the Voltech line, the shock can supercharge Quicksilvers.
- Normal damage Pulsars are unfortunately rather lackluster, being less effective at turret-killing while still retaining the same problematic knockback in parties. Additionally, the lack of shock makes them less effective in PvP.
Catalyzer
The Catalyzer line is unfortunately seldom used, as their bullets are slow and less damaging than that of Alchemers, but the 3-shot clip does make it easier to stay mobile. The charged attack fires a bullet that 'sticks' to and orbits an enemy, which can be detonated by its normal attack, causing a sizeable explosion for each orbiting charge. Although the mechanic is novel and fun to use, it is inefficient due to the slow process of stacking charges, and the likelihood of charged monsters dying by an ally's hand before the charges are detonated. The Biohazard has some utility in PvP, being pure shadow damage with a chance to inflict poison, but is again tricky to wield due to its slow bullet speed. Catalyzer line weapons are obtained from tokens, and upgrade recipes must be found in the Clockworks from Basil.
- Poison is an underrated status effect, as poisoned enemies deal much less damage, and take moderately increased damage. However, the extremely slow bullet speed and lack of AoE, unlike the Pulsar line, makes this a difficult gun to aim.
- Like the normal damage Pulsars, this upgrade path is rather lackluster. However, the Neutralizer seems to be noticeably stronger than the Biohazard when compared against neutral enemies.
Autogun
The Autogun lines are known for their devastating charged attacks, and rightly so. However, they carry very significant drawbacks- they root you in place while firing, and their normal attacks are very weak in comparison. They require a good deal of skill to use, and are fairly situational. The higher damage Blitz Needle is generally preferred over the Plague Needle. The Volcanic Pepperbox, while fun, is not very effective due to its knockback. Due to the lack of mobility, it is difficult to use in PvP. The normal attack fires a spread of 6 bullets, with a 2-burst magazine, and the charged attack unleashes a zig-zag spread of 15 bullets in the firing cone.
- Currently, the Blitz Needle is the preferred weapon against Trojans and Lord Vanaduke. It is harder to use on Wolvers in tier 3, as they teleport whenever a gun is fired nearby, but it can be used to provide cover fire against Devilites. Be warned, if you are stunned while using a charge attack, you will be completely frozen in place for about a second.
- Identical to the Blitz Needle, but it trades a significant amount of damage for the poison effect. While the poison effects may reduce damage taken, numerous comparisons indicate that the damage bonus due to poison does not make up for the reduced base damage, even in large parties. The recipes for this upgrade path must also be purchased with Krogmo Coins.
- The Pepperbox line causes a controlled, moderate knockback and can inflict fire. The knockback tends to push enemies out of range, reducing its damage output, but can be useful in certains situations. Like the Magma Driver, it can light Oilers on fire and melt Ice Cubes.
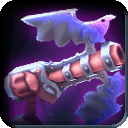
Magnus
The Magnus line is a 2-shot gun that emphasizes high single-bullet damage. Their damage output is a little lackluster due to slow rate of fire, and they also prevent you from moving while shooting, but the high damage allows them to knock down or flinch enemies with high frequency. With enough damage bonuses or a small party, you can effectively lock down a single target. The fast bullet also prevents dodging enemies from avoiding your attack. The charged attack consists of a single large bullet and launches the user backwards.
-
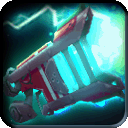
 Callahan
  ,
, 
- An excellent gun against Wolvers and Devilites, although it still tends to be outperformed by piercing swords. The stun is also useful, and can be deadly in PvP.
- Generally considered inferior, the Iron Slug has a high rate of flinching enemies, which can be quite handy. The bullets also deal splash damage in a small radius.
The Armor
Gunslinger gear is very limited until the 5-star level, but the changes in the past few months have rounded out the gunner's wardrobe. Initially, the 3- and 4-star equipment only provide low handgun attack speed bonuses, and normal/piercing defense with no status resists. However, the 5-star upgrade paths cover each special damage type, along with providing status resists, and medium handgun bonuses. At 4- and 5-star, handgun bonus Trinkets can be crafted at the Krogmo Alchemy machine, which can be used to shore up any deficiencies. Additional gear beneficial to gunners is also listed below.
Gunner Sets
Gunslinger
- The Gunslinger Set is the initial 3-star version of the gunner line. It protects against normal and piercing damage. It has a low handgun attack speed bonus per piece.
Sunset
- The Sunset Set is the 4-star upgrade, and offers increased protection against normal and piercing damage. It also has a low handgun attack speed bonus per piece.
Deadshot
- The Deadshot Set protects against normal and shadow damage, and the curse status. Each piece offers a medium damage vs undead bonus and a low handgun attack speed increase.
Justifier
- The Justifier Set protects against normal damage and piercing, and the stun status. It has a medium handgun attack speed bonus per piece.
Nameless
- Nameless protects against normal damage and elemental, and the freeze status. It has a medium handgun attack speed bonus per piece.
Shadowsun
- The Shadowsun Set protects against normal and shadow damage, and the poison status. It has a medium handgun damage bonus per piece.
Other Helms and Armors
Perfect Mask of Seerus
- The Perfect Mask of Seerus protects against normal and elemental, and the fire and shock statuses. However, it has strong negative resistances to the poison and freeze statuses. It provides a low handgun attack speed bonus and a medium handgun charge time reduction bonus. It is a popular helm for FSC, often used in conjunction with Shadowsun Slicker. Note that it must be obtained by either purchasing and running the Operation Crimson Hammer DLC, or purchasing the item itself from another player.
Chaos Set
- The Chaos Set is also a viable choice for a gunner, particularly if one utilizes charged attacks (for example, Alchemers and Autoguns). It protects against normal and elemental, but has moderate negative resistances to all statuses. It confers a low damage increase and low charge time reduction for ALL weapons per piece.
Swiftstrike Buckler
- The only shield that directly benefits gunners is the Swiftstrike Buckler, which provides a global high attack speed increase to ALL weapons. However, it is a 3-star shield with fairly low normal defense and health, and will at most sustain a single glancing blow in Tier 3.
Trinkets
Obtained by crafting at the Krogmo Alchemy Machine in the Arcade, trinkets are an very useful part of the gunner's arsenal. They come in 3 flavors and 2 strengths, providing handgun attack speed increase, charge time reduction, and global damage bonus at low and medium bonus levels. They are important for reaching Very High or Maximum! bonuses when your other equipment fall short. Elite Trueshot modules are particularly helpful, as only one gunner set (Shadowsun) provides any damage bonuses.
-
 Trueshot Module
-
 Quick Draw Module
-
 Handgun Focus Module
-
 Elite Trueshot Module
-
 Elite Quick Draw Module
-
 Elite Handgun Focus Module
Advanced Tips and Tricks
Here you will find more detailed advice on how to build your arsenal and utilize more efficiently. This information is primarily for players who have a reasonable mastery of the basic controls and wish to take their gunning to the next level.
Techniques
Weapon Switching (Two guns)
- When using a pair of mobile guns (able to move while firing), most commonly Alchemers, it is possible to skip the reload and cooldown timers altogether. Fire the first gun and immediately hit switch weapon or weapon 2, wait a beat for the second weapon to come into ready position, and fire. Once you have a grasp of the rhythm needed, add shield canceling so that your actions are now as follows: fire-switch-shield-fire-switch-shield. While the extra action increases the difficulty of maintaining a good rhythm, it will also increase your rate of fire. Note that your timing will be slightly different depending on how much ASI you have, so adjust accordingly. Though it takes a little practice to get the rhythm down, this is an essential technique for a damage gunner. Immobilizing guns such as Callahan can also benefit, but because the immobility is part of a long attack animation that is unaffected, the effect is less dramatic. When used with guns with larger magazines, multiple rounds can be fired before switching, as long as you do not use the last shot in your magazine.
Alchemer Trick Shots
- The Alchemer charged shot has good range, and its bullets split very predictably upon reaching maximum range. The split bullets come off at an angle between 70-80 degrees, so with careful positioning and memorization of the charged shot pattern, one can perform trick shots that hit switches, blocks or enemies around a corner.
Alchemer Charge Shots Revisited
- The charged shot of an alchemer will split into multiple bullets, and with the right positioning, you can cause the charged shot to explode almost inside a target's hitbox, causing the ricochet bullets to also hit the target for massive damage. This is typically best used on stationary targets such as turrets, but can also be used to great effect on any enemy that doesn't shield or dodge. To perform this trick, take aim at a point adjacent to your target, about a quarter tile away. Depending on the size of the target's hitbox, you may need to adjust; practice makes perfect. Done right, this can easily KO turrets in one hit; even if your target does not die, bonus effects such as freeze or shock are also likely to occur if you use the appropriate alchemer.
Weapon Switching (One gun)
- Weapon switching for faster fire rate can also be accomplished with only one gun. Conceptually, it work identical to dual weapon switching, absent the firing of the second weapon. Depending on the method you use for weapon switching, this may be a fairly simple transition.
Equipment Advice
Handgun Bonuses
- Gunner gear offers a variety of handgun bonuses that can make your life much easier. Due to the lower damage dealt by guns, typically most gunslingers shoot for (pun intended) Very High or Maximum! increased handgun damage. The second bonus commonly sought is attack speed increase (ASI). This stat determines how fast you can unload your magazine, as well as how long it takes to reload after expending your magazine from regular fire or a charged shot. If you employ switch-gunning as your main technique, you will want Very High or Maximum! in this category as well. Finally, charge time reduction (CTR) can be very desirable if one uses Autoguns, or charged Alchemer attacks. The key is to tailor your outfit to the situation, so the more gear you have at your disposal, the better off you will be.
- A good minimal arsenal is a Shadowsun armor (or helm), a Nameless and Justifier helm (or armor), and an Elite Trueshot module. This allows you to assemble a loadout with good normal defense and at least partial defense against whatever special type damage you may be facing, while maintaining Medium and Very High bonuses in handgun attack speed and/or damage. If you are willing to use the Swiftstrike buckler, you can maintain Ultra handgun attack speed and Very High handgun damage.
Helpful Unique Variants
- As with most other weapons, Unique Variants (UVs) conferring attack speed increase and charge time reduction are highly desirable. All guns benefit from ASI by firing faster, and reloading faster. Guns that have a powerful charged attack also benefit from CTR; these include Alchemers, Catalyzers, and Autoguns. Monster-specific damage bonuses are less useful, but can be helpful if the bonus conferred synergizes with the gun's damage type. For example, an Umbra Driver with damage versus Slime is a very serviceable weapon, as is an Argent Peacemaker with damage versus Construct.
- While any UV is better than none, performance improvements from low damage bonuses are not very noticeable, especially if they are against monster families that naturally resist the type of damage dealt by the gun. Good UVs are difficult to acquire due to their rarity, but they are in no way required to be a successful gunner. However, as you progress you will likely wish to (and have the means) to acquire some decent variants; after playing as a gunslinger for a while, you will be able to notice the subtle difference between different levels of ASI and CTR. Unique variants are in no way a substitute for skill and proficiency, but they can give you an extra edge.
Strategy
Coming soon...
- Anything else that isn't covered in Getting Started
PvP
-The Polaris is a very popular gun for PvP, as it causes knockback and the truly annoying Shock status. Strikers and even Guardians can carry it as a sidearm.
-For a dedicated gunslinger, an Antigua in tier 2, or one of its higher forms in tier 3, can cause decent damage. It also interrupts charges, efficiently rendering bombers defenseless.
-Firotech, Cryotech, and Voltech Alchemers are sometimes used for their status effect, and at higher levels, their ricochet can be a menace to groups of enemies. One trick as a Recon is to sneak in, uncloak, fire one shot, recloak, move, repeat. This keeps gunners from having to reload. A similar strategy can be employed with the Magnus (or Callahan); however, keep in mind that Stun doesn't last as long as Shock, Fire, or Freeze.
-The Recon Cloak gives a Handgun Attack Speed: Medium and a universal Charge Time Reduction: Medium, so it's a popular choice for a gunslinger. However, gunners may opt for the Striker Dash instead. The Guardian Shield is not recommended for a pure gunner.
-For gunners playing in the striker class, your main objective is to dodge all enemies, usually Skolvers. Sweep in and out of the battle, but keep an eye out for recons and try to reveal them. Also, look out for strikers that will rush abruptly and ruin you.
-A tip for recon is to move in one direction, cloak, and head in the other direction. About 90% of the time, an enemy will aim in the direction you were heading last. While they are trying to uncloak you, just come in behind and strike.
-Voltech and Cryotech Alchemers can shock or freeze enemies, so it would be useful to have a heavy sword as a sidearm to strike while the enemy is weak.
- If you own two alchemers, a effective but difficult technique is to attack once, switch, and use the other alchemer. This avoids reloading and causes massive damage.
-Try to provoke enemies, not damage. Provoke first, damage second. Once you have an enemy on your tail, play dumb and pretend as if you don't even notice them but always at the last second, dodge their attack and suprise them.
| |
|---|
| Starting Out | New Player Briefing | User interface | Useful Links |
| |
| |
| |