Gunslinger Guide
| The topic of this article or section is subject to personal opinion, and does not represent any one absolute truth. | |
| If you disagree, discuss your concerns on the the talk page before editing. |
| |
|
|
Introduction
Gunslingers are Knights wielding Handguns. They specialize in long range combat using projectiles.
Handguns excel at evasive gameplay. A knight with a handgun doesn't need to get close to monsters to deal damage, granting them the freedom to outmaneuver foes without needing to disengage from combat.
If you wish to rain death upon your foes, live the dream of being a gunslinger, or simply want a trusty sidearm: this guide is for you!
Getting started
Your first step is to decide which gun line(s) you wish to craft first. If you plan on carrying multiple guns in your loadout you should avoid most normal damage guns in favor of specialized damage. This is because once you have two specialized damage types, you are guaranteed to be able to deal at least neutral damage to all six monster types and critical damage against four types. If you were to bring a normal damage gun and one specialized damage gun, you would be able to do normal damage against all six types, but critical damage against only two types. Note that certain normal damage guns have use cases despite this; see their individual entries later on for more information.
Most guns deal pure damage, which means it's very important to use an appropriate type: more critical damage is dealt compared to a split damage weapon, but attacks resisted by monsters will be almost entirely ineffective.
Beyond damage type, guns vary in four major categories: mobility while firing, projectile speed, knockback, and clip size. Typically, an alchemy family of guns will share these properties: see the Blaster lines, which feature high mobility, fast projectiles, a small knockback, and a clip size of 3.
Of course, it's not all fun and guns. If you shoot your gun's full clip, you'll be locked in to a short reload animation during which you cannot shield. Thankfully, this can be avoided by pausing before you shoot your final shot, allowing the ammo to regenerate without having to reload. Attack Speed Increase bonuses to handguns also shorten the reload recovery time.
Controls
A comfortable control setup that allows you to move and fire in different directions is very important. While using a gamepad or arrow keys may be acceptable for swords and bombs, to get the most out of your guns you'll need a keyboard+mouse setup to allow for precise aiming. Here is one example of how you could set up your controls to be an effective gunslinger:
| ||||||||||
|
The Basics
When in a party...
Gunslingers play an important role in holding down strategic locations, whether that involves outright killing monsters or suppressing them. Creating areas to maneuver is vital to keeping the party alive. While high knockback guns such as the Pulsar line can be very useful for this purpose, be sure to plan its usage with your party ahead of time. Blindly firing a knockback-inducing gun may pose a danger to teammates.
Shooting switches and ghost blocks with your gun can help keep the party moving along, preventing sword and bomb users from needing to throw pots.
When in specific situations...
There are situations when you just can't afford to take damage. During those times, it is important for a gunslinger to avoid reloading so they stay out of danger, still able to move at normal speed and shield. In this case, it is best to follow a shot pattern as follows to avoid reloading:
- shoot all but one bullet->pause->shoot all but one bullet->pause
You can avoid having to shoot before charging your weapon by using this pattern:
- shield->hold attack key->release shield
Quick weapon switching can be accomplished by using this trick to cancel the switching animations:
- switch->shield
To avoid damage in situations where you just cannot back away from the crowd, use the Shield Canceling technique. While more popular among swordmasters, this basic technique also works well for gunslingers, and doubles as an opportunity to combine getting an extra shot off before Shield Bumping:
- shoot only one bullet->shield->repeat
If your shot hits between two monsters who are directly next to each other, you can do damage to both. To do this it helps to turn off your autotarget, which by default you can do by pressing and holding your left shift button.
The Armament
Alchemers
Alchemers are a potent force in a gunner's arsenal. A properly used Alchemer is a fearsome sight as it can produce a steady stream or a burst of damage on demand. Alchemer bullets will ricochet to the left when it strikes a wall or a target; the chance of ricochets will rise as the star level increases. The charge shot of the Alchemer is its main selling point. Once an Alchemer reaches its 5* form, the initial charged shot will split into four ricochets, two the left and right. Each splitting bullet will ricochet again up to two times causing large amounts of damage. If a charged Alchemer shot is aimed correctly (which is to the left or right of a monster, and not directly), the resulting damage will be several times the amount of a regular bullet and the status (should the player be using a status Alchemer) is practically guaranteed. It is important to note that an Alchemer's regular shots have slightly less range than most other guns. The charge shots however have a longer range.
Damage-focused Alchemers
- The Prismatech to Nova Driver line deals elemental damage. Although this line does not induce status, it is compensated with a higher raw damage output than the other elemental alchemers. The charge shot of a Prismatech is considerably more powerful than the status alchemers should the player land a fair amount of ricochets on the target(s).
- The Shadowtech line deals shadow damage and has no additional status. Its raw damage output is equal to that of the Prismatech line, both of which are higher than that of the status Alchemers. Its power and fast bullet speed is ideal for dealing with the Gremlin and Slime families, the latter of which tend to approach in clusters.
- The Firotech to Magma Driver line deals elemental damage and is able to set fire to all enemies that are not immune. The Firotech line has two outlets of damage: the bullets, and the fire status which causes damage per tick. When spreading fire over a large group of enemies, this alchemer has the potential to output more total damage than the Nova Driver. When against a small number of targets, the randomness of the status and delay in fire ticks almost always results in Nova having more DPS. This line can melt Ice Cubes, but will also set Oilers ablaze.
Utility-focused Alchemers
- The Cryotech to Hail Driver line deals elemental damage and is able to induce freeze onto targets not immune to the status. All shots as well as their ricochets have a chance to freeze their target into place, but each bullet can also break the freeze. Though the Hail Driver may have less potential damage output than the other Alchemers, the freezes, especially from charge shots, can be used to set up enemies for additional charges which can provide a stream of high damage. The freeze inflicted by the Cryotech line can extinguish Oilers, but may also refreeze melted Ice Cubes.
- The Voltech to Storm Driver line deals elemental damage and is able to shock all foes that are not immune. The Voltech line provides a weaker crowd control that won't be broken by consecutive shots and a small amount of extra damage over time. While less adept at locking down small groups than Hail, the Storm excels against large crowds where the shock will hinder the movement of the mob while providing extra damage at the same time. Be aware that it can also supercharge Quicksilvers.
Remember!
- Alchemer line guns have a two-shot magazine.
- The ricochets may trip switches, set off explosive blocks, or aggro unwanted monsters if the player is not careful.
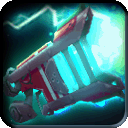
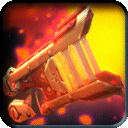
Blaster
The Blaster line is a general-purpose gun that can viably fill roles in both PvE and PvP. The bullets fired from a Blaster are considerably fast and provide a fair amount of knockback with each impact. Blasters are good at playing both offensively and defensively and are a good choice for novice gunslingers. Their charge attacks have high knockback but considerably lower DPS than just shooting normally, making it more of a crowd control utility option.
- The Valiance deals normal damage, making it equally effective against all enemies in the Clockworks. While the Valiance is almost never the outright best gun for any situation, it is universally useful, making it an excellent choice for a knight who is using only one gun. Knights who plan on owning multiple guns should craft one of the Blaster's specialized damage lines instead.
- Note that the recipes for the Valiance line are given for free as rank mission rewards, which makes the Valiance line cheaper to craft than the specialized Blasters.
- The Arcana is the elemental variant of the Blaster. The Arcana, when supported by a piercing or shadow weapon, can make a better anti-turret gun than the Valiance as the Arcana hits for critical damage against two of the three turrets, and hits the third for neutral damage. The Construct and Undead families contain many slow moving monsters, making them easy targets for the Arcana.
- The Riftlocker is the piercing variant of the Blaster. While most piercing guns can restrict the user's mobility, the Riftlocker is instead a highly mobile gun, which is especially helpful for avoiding damage from quick Fiends and Beasts. Do note that Wolvers and Devilites are among the hardest enemies to hit with projectiles, so getting the most out of this gun requires a better aim than the other Blasters.
- The Phantamos is the shadow variant of the Blaster. Its knockback is helpful for keeping smaller Slimes away, and its high mobility allows the user to snipe annoying Menders out of a crowd. Be warned that Gremlins will attempt to dodge projectiles.
Remember!
- Blaster line guns have a three-shot magazine.
- Each shot of a Blaster causes knockback; the charged shot causes even more knockback.
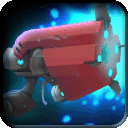
Antigua
The Antigua line fires a clip of six fast bullets. Though individual bullets have a lower damage output than other guns, it compensates for this by having a very high DPS rate. Antigua line bullets themselves cause minimal (almost nonexistent) knockback which means it will hardly interfere with other party members. While normally a very mobile gun, the charge attacks cause a long animation lock, making charges very dangerous to use when any monsters are nearby. The finale of the charge attack shoots a phantasmal bird which has a significantly larger hitbox than most projectiles and can pierce through enemies. This line of gun is also quite useful in PvP; its rapid fire properties can amass considerable damage. It also interrupts bombers during their charge period, crippling their effectiveness in battle.
- The Argent Peacemaker is an elemental revolver with a high damage bonus against the undead. The damage bonus is much appreciated as the undead family consists of several slow moving monsters (such as zombies), which means the player can deliver large amounts of damage, even killing the monster, before it ever gets close enough to attack. The Argent Peacemaker's bullets can also chase faster moving targets (such as the Kat family). This gun is just as competent against the construct family since it consists of slow moving monsters.
 Sentenza
  ,
,

- The Sentenza is a shadow revolver with a high damage bonus against Gremlins. Since Gremlins are able to move quickly and behave haphazardly, fights with a Sentenza are more active and alert (and arguably more fun) than with its counterpart. The Sentenza is also viable against the Slime family which are slow moving and track in clusters. The Sentenza is specialized against monsters of different speeds, and therefore requires a more versatile player.
- The Gilded Griffin is a piercing revolver with a damage bonus of high against Fiends. The high projectile speed and large clip size of this gun makes it great for dealing with dodgy piercing-weak monsters such as Wolvers and Devilites.
- The Obsidian Carbine deals Shadow damage like the Sentenza, but trades off its Gremlin damage bonus for a chance to inflict poison with each shot. While more difficult to obtain, the Obsidian Carbine is a strictly better gun than the Sentenza. The Gremlin bonus of the Sentenza can be made irrelevant by obtaining Max handgun damage, and the poison provided by the Carbine prevents the gun's damage from being out-healed by Menders and Silkwings.
Remember!
- Antigua line guns have a six-shot magazine, the most of any gun line. The reload rate is also slightly faster than other guns.
- The Antigua costs 20 Jelly Gems which are obtained by completing the Royal Jelly Palace.
- Recipes for the Antigua's upgrades can only be obtained from Basil.
- The Obsidian Carbine is an event weapon and has no recipe. It may be crafted at the Mysterious Alchemy Machine and requires materials from the event Shroud of the Apocrea to craft. The Obelisk of Creation may also be used to craft this weapon, but only while the event is active.
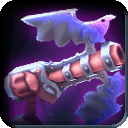
Pulsar
The Pulsar line shoots slow bullets that expand into large orbs halfway to maximum range. Each large orb is more damaging than its initial form and causes both flinch and moderate knockback with each impact. Expanded shots detonate upon contact with a monster, or reaching the 9 tile range of the gun. The Pulsar line makes an effective utility gun, being able to interrupt turrets with ease and keep groups of monsters from approaching the party. Pulsars are suited for defensive gunslingers, or as support weapons, taking up the "area denial" weapon role commonly associated with bombs and other AoE weapons.
Due to the large size of the expaned projectiles, a Pulsar can make a good sidearm for a gamepad user, as they requires less precise aiming than most other guns.
Be warned that simply spamming the Pulsar without paying attention to where your shots are knocking enemies will often do more harm than good. Keep track of where your party members are and only knock the enemies away if you're sure it won't interfere with what they're doing.
- The Supernova is a normal damage Pulsar that does not inflict a status effect. It deals more neutral damage than the other Pulsar lines, making it a great general area denial weapon, especially against monster mobs of mixed types.
 Polaris
  ,
, 
- The Polaris is one of the two elemental damage Pulsars. The Polaris is somewhat unreliable at dealing knockback as shocked enemies are briefly locked in place. However, this can also be used to your advantage as enemies which do not suffer knockback are much easier to hit with consecutive shots. This is especially useful in PvP, as it allows you to deal additional damage to an opponent who would normally attempt to get out of range of your gun.
 Wildfire ,
- The Wildfire is one of the two elemental damage Pulsars. The Wildfire's fire status does not interfere with its knockback, making it the better of the two elemental Pulsars for area denial. The fire status combined with specialized damage makes this the Pulsar line with the highest potential damage.
- The Permafroster is the sole shadow damage option for the Pulsar. While frozen enemies cannot be knocked back, they also cannot approach, leaving them wide open for another blast to the face. Uniquely among Pulsars, even its smaller bullets can provide crowd control in a pinch thanks to freeze.
Tip/Trick
- Bullet Streaming - Single clicking the "Fire" button and charging the pulsar a fraction and then releasing and repeating the process produces a stream of bullets without reloading.
Remember!
- Pulsar line guns have a three-shot magazine
- The smaller bullets of a Pulsar do not cause knockback but can still inflict a status.
- Expanded bullets can flinch enemies, interrupting their attacks. This is especially useful against turrets.
- The Pulsar costs 15 Bark Modules, which are obtained by completing the Ironclaw Munitions Factory.
- Recipes for the Pulsar's upgrades are only sold by Basil.
Catalyzer
The Catalyzer line has one of the most unique mechanics of any gun. The Catalyzer shoots very slow bullets in rapid succession that "stick" to the enemy. The orbs revolve around the enemy until it is set of by ANY Catalyzer line charge attack (which is the quickest in the game by default). The result is a massive explosion that results in massive knockback. The orbs will dissipate overtime (roughly 20 seconds), so the player can stack multiple orbs onto enemies and detonate them causing waves of damage. The Catalyzer can have an explosive payout; however, it requires time to set up orbs. Party members wishing to deal damage fast can (and most likely will) kill your target, so the Catalyzer is generally more suited for soloing, or for Catalyzer parties where each member has a gun from the Catalyzer line.
- The Neutralizer line is the normal damage variant and is considerably stronger than the Biohazard line against neutral enemies. It is notably viable in the Firestorm Citadel, where zombies are commonplace. It can be used on Lord Vanaduke in the early stages as well as the mask phases, but the later phases hinder its effectiveness without water support. Overall, the Neutralizer’s damage output, even with set up time, is comparable to players with a Leviathan Blade, except with more explosions.
- The Biohazard line is the poisonous shadow variant of the two possible Catalyzer routes. It is very effective against slow moving slime mobs, and its explosions can spread poison over a large area, preventing any survivors from being healed by a nearby Mender. While potentially devastating to a horde of Gremlins, beware of Darkfang Thwackers which can block your shots with their back shields, significantly hindering the effectiveness of the gun. Slime floors and the Royal Jelly Palace are prime places to use the Biohazard, especially the latter area. The poison it causes nullifies the Royal Jelly's healing and causes it to take slightly more damage on top of the super effective shadow damage, making Jelly Gem farming a breeze. An explosive breeze.
Remember!
- The Catalyzer line has a three-shot magazine.
- Each charge shot causes its own explosion so the affected monster(s) may shuffle from the multiple knockbacks.
- The Catalyzer charge is the quickest in the game, roughly 1.3 seconds.
- The uncharged projectile deals exactly one unit of damage to all monsters.
- The Catalyzer costs 15 Bark Modules, which can be obtained from the Ironclaw Munitions Factory.
- Recipes for the Catalyzer’s upgrades are only sold by Basil.
Autogun
The Autogun family is known for their high damage and devastating charge attacks. They possess some of the highest DPS of any weapon, not just guns. However, there's one significant drawback: they root you in place while firing. Autoguns require a good deal of skill to use well due to the lack of mobility. The normal attack fires a spread of 6 bullets, with a 2-burst magazine, and the charged attack unleashes a zig-zag spread of 15 bullets in the firing cone. Be warned, if you are stunned while using a charge attack, you will be completely frozen in place for about a second.
- Currently, the Blitz Needle is the best weapon against Lord Vanaduke and is very useful throughout the Firestorm Citadel, making it a high priority craft. Its charge can quickly dispatch nearly every enemy that doesn't resist piercing and is especially great at dealing with tanky piercing-weak enemies such as Trojans, Gorgos, Pit Bosses, and Alpha Wolvers. A notable danger to users of this gun are Greavers, as despite being very weak to the Blitz they are very fast and will swiftly rush down a knight rooted in place by their gun if not immediately taken out.
- Identical to the Blitz Needle, but trades a significant amount of damage for a chance to inflict poison. This gun is strictly inferior damage-wise to the Blitz Needle, as numerous comparisons indicate that the damage bonus due to poison does not make up for the reduced base damage, even in large parties. The recipes for this upgrade path must also be purchased with Krogmo Coins.
- The Grim Repeater is a shadow damage Autogun. It can easily dispatch hordes of slimes and the charge attack can make short work of Lichen Colonies and the Royal Jelly. The Repeater has a harder time hitting dodgy Gremlins, but a well-aimed charge attack will do them in.
- The Pepperbox line causes a controlled, moderate knockback and can inflict fire. The knockback caused can be used to very easily provide area denial, and is more reliable than the Magnus family's charge or the Pulsar family's expanded shots, although a bit less safe to pull off. Do note that the knockback will cause less shots to land, reducing the damage of the charge unless the targets are held in place by Shock, Freeze, a vortex bomb, or are up against a wall.
Remember!
- The Autogun line roots you to the ground while firing.
- You cannot change direction while firing the Autogun line.
- The guns fire in a 30-40º wide arc in the direction you face.
- Point blank charged fire is the best way to ensure an instant-kill.
Magnus
The Magnus line is a 2-shot gun that emphasizes high single-bullet damage. Their damage output is a little lackluster due to slow rate of fire, and they also prevent you from moving while shooting, but the high damage allows them to knock down or flinch enemies with high frequency. With enough damage bonuses or a small party, you can effectively lock down a single target. The fast bullet also prevents dodging enemies from avoiding your attack. The charged attack consists of a single large bullet that can pierce through multipe enemies and hit multiple times, usually instant-killing less resistant monsters while soloing.
- The Iron Slug is a normal damage Magnus that a deals larger amount of neutral damage than the other Magnus lines. Its charge attack can devastate a large number of enemies if aimed correctly. Anything that happens to survive will likely be stunned and easy to finish off.
 Callahan
  ,
, 
- An excellent gun against Wolvers and Devilites, although it still tends to be outperformed by piercing swords. The stun is also useful, and can be deadly in PvP.
- The Winter Grave is a shadow damage, freeze inflicting version of the Callahan. Due to the slow rate of fire, it is easy to avoid breaking your own freeze. Said freeze also synergies well with the charge attack, locking enemies in place to take even more damage.
Remember!
- The charge attack can hit multiple times on one enemy.
- The Winter Grave line does not start at the Magnus, but at the Tundrus. They exhibit the same firing mechanics.
- Due to their piercing charge attacks, the Winter Grave and Iron Slug are the best guns to use against the Treasure Mimic.
Tortofist
The Tortofist line of guns offer a very unique style of gameplay. They have a two-shot magazine, and each shot propels the knight forwards, much like a Flourish. The charge attack consists of six crystals shot into the air which then impact and lodge themselves into the ground, creating a wall enemies can't cross. A jack of all trades in terms of their unique attack styles.
- The Grand Tortofist deals normal damage so it is a viable weapon for all monsters in the clockworks. Its alchemy line starts at the 2* Blaster.
- The Omegafist deals elemental damage, great for dealing with the rampant Construct and Undead family. Its alchemy line starts at the 2* Prismatech Alchemer.
- The Gorgofist deals Shadow damage, ideal for slowing down the Gremlin family. In the Royal Jelly Palace, with enough charges, you can make an impenetrable wall that can kill Slimes at the same time. Its alchemy line begins with the 2* Shadowtech Alchemer.
- The Savage Tortofist deals piercing damage, ideal for the Fiend and Beast families. With enough shots landed, the Savage Tortofist can keep the user safe and amass considerable damage. Its alchemy line starts at the 2* Autogun.
Remember!
- The materials needed to make the Torto guns are found in the event March of the Tortodrones.
- The Torto guns can only be crafted at the Mysterious Alchemy Machine.
- The charge attack can leave the user vulnerable for a while.
- The charge attack second use as a dodge against attacks
Defensive Gear with Handgun Bonuses
These sets provide marginally better defense for gunners than a glass cannon set, in exchange for their bonuses being handgun exclusive rather than global. Unless you are only carrying guns or really want to avoid a negative status resist, it's usually better to use a glass cannon set for the universal bonus.
Padded Set Alchemy Family
- This is a 1 star set always available from Greave in the Haven Bazaar for 3,000 crowns each. It is currently the most diverse alchemy family in the game, upgrading into a grand total of 36 different pieces of 5 star equipment. The 2, 3, and 5 star upgrades each add a new prefix which respectively determine the secondary defense type, status resist/weakness, and whether the piece has a global low damage bonus or a medium damage bonus against a specific monster family. Due to the sheer amount of options available, it is unrealistic for a player without vast resources to craft every line, so one should focus on the defense and status resists most important to them. If you're unsure about status resists, go for Firefly first and Falcon second to cover the most dangerous statuses. As for defense type, Fiends are generally the most dangerous family to a gunner, so starting with Shade would be a good idea. Lastly, avoid the monster family specific pieces unless you know what you're doing; the global damage bonus is more useful for general gameplay.
Firefly
- Fire is very deadly and lacks any way to mitigate the damage beyond status resistance, so Firefly is a great choice for your set. You'll unfortunately receive a Shock penalty, so crafting a companion Falcon set would be helpful if you have the resources to do so.
- Targeted content:
- Shade is ideal for most of the Firestorm Citadel, although Sentinel is more helpful against Vanaduke specifically
- Pathfinder, especially with a Poison UV, is good for Compound 42
Falcon
- Shock is annoying, frequently leaving you vulnerable, so the shorter the timer the better. Unlike fire, it does have counterplay in the forms of disengaging from combat and blocking shock ticks with your shield, so it's not *as* important as fire resist. This is still a good option for you first set though, especially because its Freeze weakness is the least impactful of the gunner amor weaknesses. Also makes a great companion set for Firefly, covering its shock weakness.
- Targeted content:
- Sentinel is good for both Ironclaw Munitions Factory and the Ghosts in the Machine danger mission. If you can obtain a fire UV, you'll be set for the Shadow Ironclaw Muntions Factory as well.
- Pathfinder technically helps against Quicksilvers, but Sentinel is generally better against them as the silvery slimes in question actually inflict Elemental damage during their dash attack.
Grizzly
- Freeze resist is generally unimportant as both enemy and ally attacks end the status early, but can still be helpful sometimes. Poison weakeness, though not as bad as a Fire or Shock weakness, doesn't help Grizzly's case.
- Targeted content:
- Pathfinder does well in the Shadow Royal Jelly Palace
- Shade would be good for the Heart of Ice danger mission
Snakebite
- Poison resist is certainly nice to have when it's relevant, but this set's Fire weakness significantly hinders its general performance. Shade in particular has to compete with the Gunslinger family's Shadowsun set which offers poison resistance with no penalty. A better but more expensive option would be to obtain a Poison UV on a Firefly or Falcon set.
- Targeted content:
- Pathfinder is great for the Shadow Gloaming Wildwoods
Gunslinger Set Alchemy Family
- The Gunslinger Set is the initial 3 star version of the gunner line. It protects against normal and piercing damage, and has a low handgun attack speed bonus per piece. Gunslinger uppgrades to the Sunset Set at 4 stars, and then to four different sets at 5 stars.
Shadowsun
- The Shadowsun Set provides normal/shadow defense and resists the poison status. It has a medium handgun damage bonus per piece. This is arguably the only 5 star Gunslinger family armor worth crafting, and the damage bonus is far more useful than the attack speed bonus provided by the rest of the family. This set also outclasses Snakebite Shade as a poison resisting shadow defense option.
- Targeted content:
- Shroud of the Apocrea event frequently features poison-themed Undead and Fiend arenas
Deadshot
- The Deadshot Set provides normal/shadow defense and resists the curse status. Each piece offers a medium undead-specific bonus and a low handgun attack speed increase. While it can outperform Shadowsun against Undead, it's worse than any other Gunslinger set otherwise. Curse resistance is also only useful in very specific content.
- Targeted content:
- Good for Black Kat farming?
- Can do well in the Shadow Firestorm Citadel if you have a Fire UV
Justifier
- The Justifier Set provides normal/piercing defense and resists the stun status. It has a medium handgun attack speed bonus per piece. Handgun attack speed is the least important gun bonus, so it is recommended to avoid this set.
Nameless
- The Nameless Set provides normal/elemental defense and resists the freeze status. It has a medium handgun attack speed bonus per piece. Handgun attack speed is the least important gun bonus, so it is recommended to avoid this set.
Mask of Seerus
- The Perfect Mask of Seerus provides normal/elemental defense and resists both the fire and shock statuses. However, it has strong weaknesses to the poison and freeze statuses. The lack of a matching armor piece somewhat hurts it as you won't be able to double up on the shock/fire dual resist without a UV. This helmet has both a low handgun attack speed bonus and a medium handgun charge time reduction bonus. Compared to the Padded Family's bonuses, it provides marginally more charge time at the cost of no damage bonus. Best used with a gun that requires frequent charging, such as the Autogun and Alchemer families. Note that all Masks of Seerus must be obtained by purchasing and clearing the Operation Crimson Hammer DLC.
Kat Eye
- The Kat Eye Set provides normal/shadow defense, resists freeze, and has minor weaknesses to both shock and curse. It includes both attack speed and damage bonuses of low for handguns only. While it grants marginally more Shadow defense than a Shade set, this doesn't typically matter, making the Shade set superior due its additional charge time reduction. This set can only be crafted at the Mysterious Alchemy Machine with materials from the Katacylsmic Confrontation.
Glass Cannon Gear
Trading defense for more power, these items will significantly boost your damage output with all weapons. Carrying only guns is often suboptimal, so having gear with universal bonuses will be far more useful than gear which only benefits guns. These items are extremely good overall and are currently the "meta" picks.
Chaos
- The Chaos Set protects against normal/elemental, but has moderate negative resistances to all statuses except stun. It confers a medium damage increase and medium charge time reduction for ALL weapons per piece. While the status penalities can be harsh, especially Fire and Shock, the massive damage increase can help wipe out monsters before they even get a chance to inflict you with anything. Compared to the Padded family, Chaos offers better damage and faster charges at the cost of no attack speed increase, which isn't a huge loss as it's both the least important bonus for guns and can be supplemented with a Swiftstrike Buckler or trinkets.
Black Kat
- The Black Kat set protects against normal/shadow and offers a universal high damage bonus plus a low movement speed increase, but comes with negative resistances to all statuses except freeze. Compared to Chaos, it offers more damage but no charge time reduction, making it a good option for guns (and swords!) that don't require frequent charging. Moving slightly faster also synergises very well with a gunner's playstyle, increasing their ability to kite and dodge enemy attacks. The only real problem with this set is acquiring it: the Cowl requires a Book of Dark Rituals drop from Black Kats, and the Raiment can only be crafted at the Mysterious Alchemy Machine with materials from the Katacylsmic Confrontation.
Swiftstrike Buckler
- The only shield that benefits gunner offensively is the Swiftstrike Buckler, which provides a global high attack speed increase to sll weapons. However, it is a 3 star shield with fairly low normal defense and health, and will at most sustain a single glancing blow in Tier 3.
Trinkets
Gun-boosting trinkets come in 3 flavors and 2 strengths, providing handgun attack speed increase, charge time reduction, and damage bonus. Initial 4 star versions offer a low bonus, while the 5 star Elite upgrades offer a medium bonus. Trinkets are important for reaching Very High or Maximum! bonuses when your other equipment fall short. Obtaining these may prove somewhat problematic as they are a PvP reward exclusive to the Krogmo Alchemy Machine.
Advanced Tips and Tricks
Here you will find more detailed advice on how to build your arsenal and utilize it more efficiently. This information is primarily for players who have a reasonable mastery of the basic controls and wish to take their gunning to the next level.
Techniques
Double Hits
- When a bullet strikes an enemy, it doesn't immediately deal damage; rather, it creates a small burst that does the damage for it. If another enemy is close enough to the point of impact to be hit by the burst, it will also take damage. You can try to force this effect by turning off auto-targeting and firing between two or more closely-packed monsters.
Weapon Switching (Two guns)
- When using a pair of mobile guns (able to move while firing), it is possible to skip the reload altogether. Fire the first gun and immediately hit switch weapon or weapon 2, wait a beat for the second weapon to come into ready position, and fire. Once you have a grasp of the rhythm needed, add shield canceling so that your actions are now as follows: fire-switch-shield-fire-switch-shield. While the extra action increases the difficulty of maintaining a good rhythm, it will also increase your rate of fire. Note that your timing will be slightly different depending on how much ASI you have, so adjust accordingly. Though it takes a little practice to get the rhythm down, this is an essential technique for a damage gunner. Immobilizing guns such as Callahan can also benefit, but because the immobility is part of a long attack animation that is unaffected, the effect is less dramatic. When used with guns with larger magazines, multiple rounds can be fired before switching, as long as you do not use the last shot in your magazine. NOTE: Holding sheild during the animation of shooting will help you bring it up quicker, it is also possible to swap in advance while shooting.
Weapon Switching (One gun)
- Weapon switching for faster fire rate can also be accomplished with only one gun. Conceptually, it work identical to dual weapon switching, absent the firing of the second weapon. Depending on the method you use for weapon switching, this may be a fairly simple transition.
Alchemer Tricks
- Alchemers' ricochet behavior gives them a variety of interesting applications:
- Alchemer bullets always bounce to the left after their initial impact, at an angle of ~70-80 degrees. Skilled gunslingers can bend their attacks around corners with this technique.
- When a ricochet spawns from an impact, it has a chance of spawning inside its original target if the attack was at the proper angle. For normal shots, bullets always bounce to the left, so aiming to the far right of the enemy with auto-target off has the best chance of triggering this effect, doubling or even tripling the shot's effective damage. Performing a double hit can also trigger one of these internal bounces and devastate the affected enemies.
- Alchemer charges can deal extremely high damage to single enemies, potentially killing them in one shot. If a charged shot hits an enemy at the proper angle (either at the far left or right side relative to the player), its ricochets can spawn inside the target, dealing several times their normal damage plus the already significant initial impact damage. Status alchemers will almost certainly inflict their status on the target if this occurs. See this video for example.In Lockdown, this technique is often used with Cryotech Alchemers to permanently freeze and slowly kill a hapless foe.
Equipment Advice
Handgun Bonuses
- Gunner gear offers a variety of handgun bonuses that can make your life much easier. Due to the lower damage dealt by guns, typically most gunslingers shoot for (pun intended) Very High or Maximum! increased handgun damage. The second bonus commonly sought is attack speed increase (ASI). This stat determines how fast you can unload your magazine, as well as how long it takes to reload after expending your magazine from regular fire or a charged shot. If you employ switch-gunning as your main technique, you will want Very High or Maximum! in this category as well. Finally, charge time reduction (CTR) can be very desirable if one uses Autoguns, Catalyzers, or Alchemer charges. The key is to tailor your outfit to the situation, so the more gear you have at your disposal, the better off you will be.
- A good minimal arsenal is a Shadowsun armor (or helm), a Nameless and Justifier helm (or armor), and an Elite Trueshot module. This allows you to assemble a loadout with good normal defense and at least partial defense against whatever special type damage you may be facing, while maintaining Medium and Very High bonuses in handgun attack speed and/or damage. If you are willing to use the Swiftstrike buckler, you can maintain Ultra handgun attack speed and Very High handgun damage.
Helpful Unique Variants
- As with most other weapons, Unique Variants (UVs) conferring attack speed increase and charge time reduction are highly desirable. All guns benefit from ASI by firing faster, and reloading faster. Guns that have a powerful charged attack also benefit from CTR; these include Alchemers, Catalyzers, and Autoguns. Monster-specific damage bonuses are less useful, but can be helpful if the bonus conferred synergizes with the gun's damage type. For example, an Umbra Driver with damage versus Slime is a very serviceable weapon, as is an Argent Peacemaker with damage versus Construct.
- While any UV is better than none, performance improvements from low damage bonuses are not very noticeable, especially if they are against monster families that naturally resist the type of damage dealt by the gun. Good UVs are difficult to acquire due to their rarity, but they are in no way required to be a successful gunner. However, as you progress you will likely wish (and have the means) to acquire some decent variants; after playing as a gunslinger for a while, you will be able to notice the subtle difference between different levels of ASI and CTR. Unique variants are in no way a substitute for skill and proficiency, but they can give you an extra edge.
Strategy
Kiting
Due to their quick moving nature, kiting is a great skill a gunslinger would want to master. The key is being able to move and dodge enemies while still targeting the desired enemy. There are different variations of kiting. One way is the basic dodge and shoot method. The fast moving Antigua line is popular for slow and fast moving monsters. Another is kiting around clumped groups of monsters or countinually frozen monster, much like how the Shivermist Buster pairs with the Blitz Needle against Lord Vanaduke.
Supression and Chaining
Using a Supernova or Polaris the right way can keep gunslingers safe while soloing countless dungeons. But not only can the Pulsar line protect gunners, the high DPS Autogun line can take out most non-resistant enemies in one charge in their respective tiers. Stringing together long chains of damage by connecting different weapons together. Switching between alchemers or shield canceling between long magazines can create what seems like and endless stream of damage. This is a gunslinger's most dangerous power.
Selective Targeting
When facing a huge wave with different types of monsters, the responsibility of taking on different monsters is often divided into classes. Usually, the smaller or high damaging monsters are designated to gunners. Maybe a Callahan can take down the Silkwing that hides behind the Lumber. The gunner can then proceed to eliminate the lumber with ease.
PvP
-Specialized damage is preferred over normal damage in PvP, as the majority of armor has at least partial normal defense.
-Shock, Freeze, and Stun are the best status effects for a gunner to bring to PvP. All of these status effects restrict your opponent's ability to both approach you and evade your shots, allowing for much easier kills.
-Pulsars are very useful in PvP as their large bullet size and high knockback can completely block off chokepoints and make capture points difficult to approach.
-For a dedicated gunslinger, an Antigua in tier 2, or one of its higher forms in tier 3, can cause decent damage. It also interrupts charges, efficiently rendering bombers defenseless.
-Firotech, Cryotech, and Voltech Alchemers are sometimes used for their status effect, and at higher levels, their ricochet can be a menace to groups of enemies. One trick as a Recon is to sneak in, uncloak, fire one shot, recloak, move, repeat. This keeps gunners from having to reload. A similar strategy can be employed with the Magnus (or Callahan); however, keep in mind that Stun doesn't last as long as Shock, Fire, or Freeze.
-The Recon Cloak gives a Handgun Attack Speed: Medium and a universal Charge Time Reduction: Medium, so it's a popular choice for a gunslinger. However, gunners may opt for the Striker Dash instead. The Guardian Shield is not recommended for a pure gunner.
-For gunners playing in the striker class, your main objective is to dodge all enemy attacks. Sweep in and out of the battle, but keep an eye out for recons and try to reveal them. Also, look out for strikers that will rush abruptly and ruin you.
-A tip for recon is to move in one direction, cloak, and head in the other direction. About 90% of the time, an enemy will aim in the direction you were heading last. While they are trying to uncloak you, just come in behind and strike.
-Voltech and Cryotech Alchemers can shock or freeze enemies, so it would be useful to have a heavy sword as a sidearm to strike while the enemy is weak.
- If you own two alchemers, a effective but difficult technique is to attack once, switch, and use the other alchemer. This avoids reloading and causes massive damage.
-Try to provoke enemies, not damage. Provoke first, damage second. Once you have an enemy on your tail, it is quite easy to land shots on your enemy.
Parting Thoughts
The three most important things for a gunner to remember is move quickly, shoot sharply and to always stay on the offensive (while not hindering teammates of course). The world of gunslinging can be exciting, but one needs to be prepared to enter every battle with a plan, instead of launching in recklessly.
With this in mind, take care and stay sharp!
| Starting Out | New Player Briefing | User interface | Useful Links |