Difference between revisions of "Talk:Heart of Ice"
From SpiralKnights
m (→Notes) |
m (→Runthrough) |
||
| Line 66: | Line 66: | ||
*[[Desna]] seems to have a plan. | *[[Desna]] seems to have a plan. | ||
| − | |floor notes = A place to gear up. | + | |floor notes = A place to gear up. The party is not actually accompanied by the [[Recon Rangers]]. |
| − | + | |gallery= | |
| − | + | ||
<gallery widths=200px heights=150px> | <gallery widths=200px heights=150px> | ||
File:Map-Legion of Almire-Mission Lobby-1A.png |Map of the lobby. | File:Map-Legion of Almire-Mission Lobby-1A.png |Map of the lobby. | ||
| Line 83: | Line 82: | ||
|depth = Depends on [[Player Rank|rank]]. | |depth = Depends on [[Player Rank|rank]]. | ||
|monsters = | |monsters = | ||
| − | *{{Monster_Icons| | + | *{{Monster_Icons|Beast}} {{Status|freeze}} [[Wolver#Alpha Frostifur|Alpha Frostifur]] |
| − | *{{Monster_Icons| | + | *{{Monster_Icons|Beast}} {{Status|freeze}} [[Wolver#Frostifur|Frostifur]] |
| + | *{{Monster_Icons|Beast}} {{Status|freeze}} [[Chromalisk#Tundralisk|Tundralisk]] | ||
*{{Monster_Icons|Fiend}} [[Devilite]] | *{{Monster_Icons|Fiend}} [[Devilite]] | ||
| − | |||
*{{Monster_Icons|Fiend}} [[Devilite#Pit Boss|Pit Boss]] | *{{Monster_Icons|Fiend}} [[Devilite#Pit Boss|Pit Boss]] | ||
*{{Monster_Icons|Fiend}} [[Devilite#Yesman|Yesman]] | *{{Monster_Icons|Fiend}} [[Devilite#Yesman|Yesman]] | ||
| − | |||
*{{Monster_Icons|Fiend}} [[Wing#SilkWing|Silkwing]] | *{{Monster_Icons|Fiend}} [[Wing#SilkWing|Silkwing]] | ||
| − | |||
| − | |||
| − | |||
*{{Monster_Icons|Fiend}} [[Trojan]] | *{{Monster_Icons|Fiend}} [[Trojan]] | ||
| + | *{{Monster_Icons|Fiend}} {{Status|freeze}} [[Devilite#Layoafer|Layoafer]] | ||
| + | *{{Monster_Icons|Fiend}} {{Status|freeze}} [[Greaver#Pearl Greaver|Pearl Greaver]] | ||
| + | *{{Monster_Icons|Undead}} [[Howlitzer#Howlitzer|Howlitzer]] (Rarely) | ||
| + | *{{Monster_Icons|Undead}} {{Status|freeze}} [[Howlitzer#Chilling Howlitzer|Chilling Howlitzer]] | ||
| + | |||
|exploration = | |exploration = | ||
| + | *Much of this floor is similar to ''[[Devilish Drudgery|Devilish Drudgery: Hiring Freeze]]'' with a number of special areas. See Gallery. | ||
*Freeze Trap | *Freeze Trap | ||
*Respawning Hazard (Howlitzer, Greaver, Silkwing) | *Respawning Hazard (Howlitzer, Greaver, Silkwing) | ||
| − | |||
| − | |||
| − | + | |floor notes = There are a few mandatory fights along the way. Get to the elevator. | |
| + | |gallery= | ||
{{showhide|List of Areas|width=100%|content= | {{showhide|List of Areas|width=100%|content= | ||
{{MapList/Start}} | {{MapList/Start}} | ||
| Line 165: | Line 165: | ||
|depth = Depends on [[Player Rank|rank]]. | |depth = Depends on [[Player Rank|rank]]. | ||
|monsters = | |monsters = | ||
| − | *{{Monster_Icons| | + | *{{Monster_Icons|Beast}} {{Status|freeze}} [[Wolver#Alpha Frostifur|Alpha Frostifur]] |
| − | *{{Monster_Icons| | + | *{{Monster_Icons|Beast}} {{Status|freeze}} [[Wolver#Frostifur|Frostifur]] |
| + | *{{Monster_Icons|Beast}} {{Status|freeze}} [[Chromalisk#Tundralisk|Tundralisk]] | ||
*{{Monster_Icons|Fiend}} [[Devilite]] | *{{Monster_Icons|Fiend}} [[Devilite]] | ||
| − | |||
*{{Monster_Icons|Fiend}} [[Devilite#Pit Boss|Pit Boss]] | *{{Monster_Icons|Fiend}} [[Devilite#Pit Boss|Pit Boss]] | ||
*{{Monster_Icons|Fiend}} [[Devilite#Yesman|Yesman]] | *{{Monster_Icons|Fiend}} [[Devilite#Yesman|Yesman]] | ||
| − | |||
*{{Monster_Icons|Fiend}} [[Wing#SilkWing|Silkwing]] | *{{Monster_Icons|Fiend}} [[Wing#SilkWing|Silkwing]] | ||
| − | |||
| − | |||
| − | |||
| − | |||
*{{Monster_Icons|Fiend}} [[Trojan]] | *{{Monster_Icons|Fiend}} [[Trojan]] | ||
| + | *{{Monster_Icons|Fiend}} {{Status|freeze}} [[Devilite#Layoafer|Layoafer]] | ||
| + | *{{Monster_Icons|Fiend}} {{Status|freeze}} [[Greaver#Pearl Greaver|Pearl Greaver]] | ||
| + | *{{Monster_Icons|Undead}} [[Howlitzer#Howlitzer|Howlitzer]] (Rarely) | ||
| + | *{{Monster_Icons|Undead}} {{Status|freeze}} [[Howlitzer#Chilling Howlitzer|Chilling Howlitzer]] | ||
| + | |||
| + | Exclusive to Maulos fight: | ||
| + | *{{Monster_Icons|Beast}} {{Status|freeze}} [[Wolver#Perma-Frostifur|Perma-Frostifur]] | ||
*{{Monster_Icons|Fiend}} {{Status|freeze}} [[Trojan#Maulos|Maulos]] (Boss) | *{{Monster_Icons|Fiend}} {{Status|freeze}} [[Trojan#Maulos|Maulos]] (Boss) | ||
| + | |||
|exploration = | |exploration = | ||
*Freeze Trap | *Freeze Trap | ||
| Line 186: | Line 189: | ||
*Maulos is located in the last fight area. | *Maulos is located in the last fight area. | ||
*A set level composed of special areas. See Floor Notes. | *A set level composed of special areas. See Floor Notes. | ||
| + | |||
|floor notes = | |floor notes = | ||
| − | Fight through | + | Fight through several hazardous areas, defeat [[Maulos]], and get to the elevator. |
| − | + | |gallery= | |
| − | + | ||
<gallery widths=200px heights=150px> | <gallery widths=200px heights=150px> | ||
| − | File:Map-Heart of Ice-Amu-Sol-1A.png|Map of Amu-Sol. | + | File:Map-Heart of Ice-Amu-Sol-1A.png|Map of "Amu-Sol." |
</gallery> | </gallery> | ||
}} | }} | ||
| Line 209: | Line 212: | ||
|floor notes = Collect loot and talk with NPCs in the area. Players can change gear here. This is useful for [[heat|heating]]. | |floor notes = Collect loot and talk with NPCs in the area. Players can change gear here. This is useful for [[heat|heating]]. | ||
| − | + | |gallery = | |
| − | + | ||
<gallery widths=200px heights=150px> | <gallery widths=200px heights=150px> | ||
| − | File:Map-Heart of Ice-Everfrost Tower-1A.png|Map of Amu-Sol. | + | File:Map-Heart of Ice-Everfrost Tower-1A.png|Map of "Amu-Sol." |
</gallery> | </gallery> | ||
}} | }} | ||
Revision as of 14:02, 11 September 2015
| ||||||||||||||||||||||||||||||||||||||||||||||||||||||||||||||||||||||||||||||||||||||||||||||||||||||||||||||||||||||||||||||||||||||||||||||||||||||||||||||||||||||||||||||||||||||||||||||||||||||||||||||||||||||||||||||||||||||||||||||||||||||||||||||||||||||||||||||||||||||||||||||||||||||||||||||||||||||||||||||||||||||||||||||||||||||||||||||||||||||||||||||||||||||||||||||||||||||||||||
| ||||||||||||||||||||||||||||||||||||||||||||||||||||||||||||||||||||||||||||||||||||||||||||||||||||||||||||||||||||||||||||||||||||||||||||||||||||||||||||||||||||||||||||||||||||||||||||||||||||||||||||||||||||||||||||||||||||||||||||||||||||||||||||||||||||||||||||||||||||||||||||||||||||||||||||||||||||||||||||||||||||||||||||||||||||||||||||||||||||||||||||||||||||||||||||||||||||||||||||

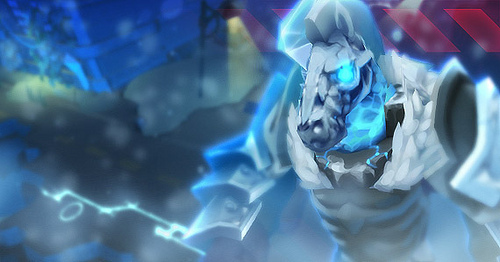
Heart of Ice is a dangerous prestige mission.
Overview
Description:
Warning: This is a Dangerous Mission!
Desna and her Recon Rangers are an elite team tasked with recovering intel from some of the most dangerous levels of the Clockworks. Joining them could lead to great rewards, but it is guaranteed to be a perilous journey!
Spiral HQ has detected a sudden climate shift emanating from deep within the Clockworks. Freak snowstorms and blizzards have begun surging through the depths seeming to originate from an inhospitable, fiendish city known as 'Amu-Sol.' The Recon Rangers have been dispatched to infiltrate Amu-Sol and discover the source of these freezing storms.
Objective:
Discover the source of the terrible blizzards emanating from Amu-Sol.
Notes
This mission was introduced with release 2012-08-01. It is the third Danger Mission released.
It is part of the daily Prestige Mission Rotation.
As with all danger missions, the party locks for the second combat floor and onward. Players will only have access to the arsenal station in the lobby and at the start of the first combat floor. Participants will only receive the prestige reward if they were present in the mission lobby.
Frozen Souls spawn continuously in many areas of the mission if there are two members or fewer in the party.
Chilling Howlitzers are rarely replaced by normal Howlitzers in combat depths.
There are a few computers in this mission where you can read about how Devilites had planned to freeze the Clockworks with the support of Maulos. This involves contact with Morgral'm.
Strategy
- moved to better name, doubt this is linked to externally.Recommended Equipment:
The recommended armor set for this mission is a Piercing/Shadow hybrid. One popular choice is the Skolver/Snarbolax, considering they both give the corresponding defenses and freeze resistance. Any additional resistance from UVs, trinkets, or perks can potentially make you immune to the wisps and souls throughout the mission. Nearly all the monsters in this mission are weak to piercing. A defensive shield such as the Dread Skelly is highly recommended.
Suggested Weapons (make this list shiny with icons):
- Dark Briar Barrage
- Blitz Needle
- Callahan
- Final Flourish
Gallery
Related news art.

Include HUDless images from sega blog?
Runthrough
First Floor
- just really want to avoid using the term "floor" due to March 2011 decisionsSecond Floor
- just really want to avoid using the term "floor" due to March 2011 decisionsThird Floor
- just really want to avoid using the term "floor" due to March 2011 decisionsFourth Floor
- just really want to avoid using the term "floor" due to March 2011 decisionsSee Also
External Links
- Pending Videos