Bombing Guide
From SpiralKnights
| |
The topic of this article or section is subject to personal opinion, and does not represent any one absolute truth. |
| If you disagree, discuss your concerns on the the talk page before editing. |
| |||
|
Introduction
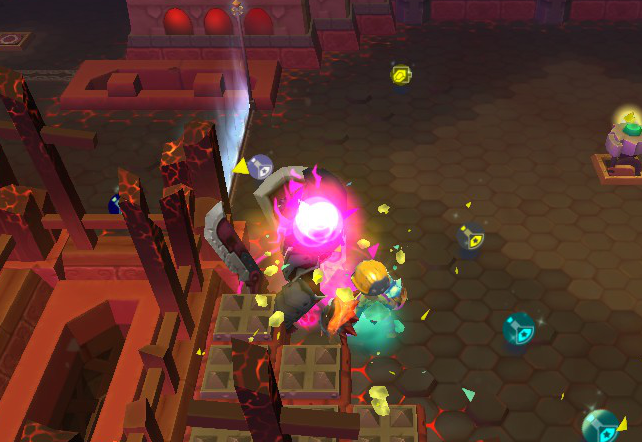
A bomber is a core player key to any party. A pure bomber's main responsibilities can involve crowd control, spreading status effects, or dealing damage over an area to either kill or soften up enemies for teammates. Though this may seem to be a tedious line of work at first, it is an integral position for any organized party, and to some there is no greater satisfaction than to see a bombing run go perfectly. There are four points to being a bomber;
- avoid the common mistake of simply running about randomly while dropping bombs erratically,
- be aware of their party as well as their enemies,
- memorize the spawn patterns that appear after a party button has been pressed. and,
- know how to deal with monsters that attack at range.
Bombs
The main equipment needed for a bomber is, of course, a bomb.
Nitronome
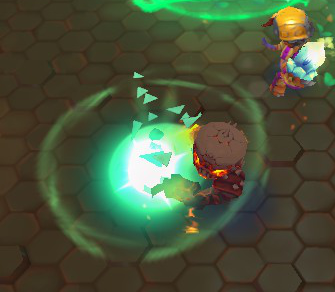
The Nitronome is arguably the best damage bomb available to bombers. It is a large-radius bomb that deals damage to everything inside of its blast radius as well as pushing everything outward from the center of the bomb. Of the Blast Bomb alchemy line bombs, it has the shortest fuse, fastest walk speed, and a short charge time. For a bomber looking to deal damage to a large area, the Nitronome is the obvious choice. The Nitronome has less knockback and less damage than the alternate blast bomb alchemy lines but it makes up for it with the fastest bomb-charging walk speed and a radius that covers over 200% more area than the other two. These attributes combine to create a weapon that leaves the bomber feeling nimble and agile, allowing them to avoid attacks while charging bombs and using the Nitronome's moderate amount of knockback as a "shield".
The Nitronome deals normal damage making it useful against all monsters.
 Potential Hazards
- Blast explosion is bright and is accompanied by screen shake which can obscure vision for you and teammates
- Poorly placed bombs can push enemies into teammates
- Over-kiting enemies past bombs can cause knock back to push enemies into you
Big Angry Bomb
The next best option (but still considered a terrible option and isn't recommended) is the Big Angry Bomb. This bomb offers a large knockback, said to be in between that of a calibur, and a Divine Avenger's charge. It sounds useful, and looks tempting due as it has the largest damage possible by a bomb, however it is quite unusable, as it has a large fuse, short radius, slow movement when charging (leaving a player open for mobs attacks) but with a CTR of a blast bomb. There aren't really any situations this bomb could be used over Nitronome, unless it was used to nuke a swarm of mobs away from the player when in dire trouble. In party's, this bomb... annoys any player that you are with, as no one wants to be strolling along only to find a jelly fly across and hit them mid attack. It's almost worse than a Calibur user who only uses the charge attack. Overall... it isn't an option unless you are a collector, or just want to try it for yourself. Just don't make a forum post complaining about it, because, well, we know.
 Potential Hazards
- Huge knock back and a long fuse can make pushing enemies unpredictable
Irontech Destroyer
Basically not an option... at all. long fuse, small radius, average damage (in between nitro + BAB) and average knock back. Any one upgrading from the 4* version will be disappointed to find the 5 star version is just a 'redder' color than its predecessor. Overall; Don't get it, as really, BAB was bad, and this is worse.
Graviton Vortex
This is another 'Situation' bomb. The Graviton Vortex is a bomb every bomber will own, just because the idea of a black hole is so cool. Many players disagree with those exclaiming how great the bomb is, but the ones disagreeing usually haven't used the bomb to it's full potential or only have the 4star version. The Vortex is great with localizing mobs to one area, and if there is a large amount of monsters in the hole, the knock back usually performed when there is 1 or 2 enemies is next to null, and the bomb can successfully be chained with little effort. This bomb also does wonder with sword combinations (like the brandish line) and can be combined with the Shivermist Buster to disallow any knock back from the bomb; which overall traps enemies to a specific area. Graviton is still something of an acquired taste. The bombing patterns used are quite different from that of blast bombs epicenter routine and Vaporizer's kiting pattern.. and it can only be experimented with. The main pattern is just to walk around in a large figure 8 if one is pure bombing, but there are other ways to feel comfortable about. There is an indepth discussion of Graviton (particularly the Vortex) located at http://forums.spiralknights.com/en/node/13755 in the arsenal sub-forums.
- The Graviton Vortex is best used against melee enemies that cannot get in range quickly. Ranged enemies are likely to snipe you off as you go in to plant the bomb thus causing you to drop the charge and fast, melee enemies will hit you before you finish charging.
- The most effective way to use the Vortex is to run around enemies in a circle until you've collected themselves roughly into a packed formation. At this point, you should place the bomb such that it will catch the most enemies as they try to attack you.
For demonstrations of using the Vortex in various situations against various enemies here is a Youtube video: http://www.youtube.com/watch?v=MKjKrWnpbKY
 Potential Hazards
- Standing on top of the bomb when the fuse goes off can often trap you in the center of vortexed enemies
- Enemies can still attack while inside the vortex
- Enemies that are alive when the vortex expires are flung randomly away from the bomb
- Kats are unaffected by the Graviton's suction
Dark Briar Barrage
The Dark Briar Barrage (DBB) is a piercing damage bomb with characteristics similar to the Nitronome. It has the same movement speed while charging and radius of the Nitronome but has a slightly longer fuse[1] and has no knockback. The Dark Briar Barrage is capable of knocking down soft-bodied enemies such as gremlins and wolvers.
The absence of knockback makes the DBB a great choice for bombers less adept at nitronome placement. The non-disruptive nature of the bomb means that teammates will not have to make adjustments to their gameplay and also means that several DBBs can be comboed together effectively without interfering with each other. The DBB is an excellent choice against fiends, beasts, undead, and gremlins. Because it deals pierce damage, it is ineffective against slimes and construct.
Because the DBB has no knockback and a longer fuse, it offers less protection and must be used differently than a bomb like the Nitronome. Bombers can take advantage of the DBB's longer fuse and non-disruptive behavior by running away from enemies while placing down DBBs and essentially kiting them into the blast zone. Another strategy is to take advantage of the lack of knockback by overlap the bomb radius over an enemy's position like a venn diagram while dodging attacks normally. This will allow bombers to easily hit a target multiple times without having to predict where enemies will be pushed to.
 Potential Hazards
- Lack of enemy knock back will require you to avoid many attacks as if there were no bomb
Shivermist Buster
Looking for crowd control? You have found everything you need! The freeze line with its highest upgrade, the Shivermist Buster, will freeze mobs in place. The damage is quite low, though. If a mob that is frozen takes no damage until the status effect wears off, it will take some damage from the thawing. This bomb can be a very good support weapon. Freeze most of the mobs, finish the leftovers. Alternatively, you can pick single mobs and leave the rest. Note that mobs will become unfrozen if they take damage of any kind. They are also still able to attack, hitting them from the side or from behind is safe. Combining a freeze bomb with a damaging weapon can be quite devastating. First freeze the mobs in place, then charge up a blast bomb or a calibur sword. Since the mobs are all herded nicely, the AOE damage will apply to many targets at once. There is a downside that should be considered, however. If a teammate or you is trapped in a corner and mobs are around him, freezing the mobs will stick them in place. As a result, the knight will not be able to evade the situation by pushing the mobs away with his shield.
 Potential Hazards
- Enemies can still attack from the front; approach frozen enemies from behind to melee
- Can refreeze melted Ice Cubes
Ash of Agni
The fire bomb line and its highest upgrade, the Ash of Agni, provide damage over time. As the other haze bomb upgrades, its explosion damage is hardly worth mentioning. The fiery mist inflicts a fire status on mobs that were foolish enough to not run away fast enough. They will take some nice ticks of fire damage by that. Still, the fire line bombs may be considered as support bombs. They surely help killing monsters faster. However, the raw damage of e. g. a Nitronome bomb may be more effective, as it also provides some crowd control by the knockback. Setting monsters on fire and then blasting them away helps very much though. Also, kiting is quite possible with the bomb. Setting monsters on fire and then running in large circles in an arena is a viable strategy. It takes some time, but the damage taken will be minimal if done right. All in all, this bomb is one of the better ones and can be recommended.
 Potential Hazards
Venom Veiler
Poison is a very weak status. Knights rarely die from being poisoned and the same can be said of the clockwork's residents. The effects of the bomb are quite poor - the defensive and offensive debuffs are minimal and the poison doesn't completely stop healing in monsters. The time spent charging the bomb and placing it could be better spent using any other bomb.
The one redeeming value of the bomb is that it does not disrupt other haze bombs. So given a small area, one could alternate between Ash of Agni and Venom Veiler to do passive damage and provide a debuff, but the effects of the Venom Veiler would hardly be noticeable. Venom Veiler will slightly increase the ticks from Voltaic Tempest since it does actual damage, but the improvement is only about 7% over the low damage shock provides.
The bomb should help in the last room of Arenas when the two healers spawn, but generally it is better to out DPS the healers with Ash of Agni or Nitronome rather than just remove most of their healing ability.
Voltaic Tempest
Given the option between Ash of Agni, Shivermist or Voltaic Tempest there are rare situations where the Voltaic Tempest would be preferred. The Voltaic Tempest is an AoE shocks bomb which delivers damage while interrupting movement and attacks. The problem is that the other two bombs do these duties better - the Ash of Agni is much more powerful for damage and the Shivermist completely locks down movement.
The Voltaic Tempest is effective against large groups of Kats. The shock interrupts their lunges and their tendency to clump together makes them shock each other for decent damage.
It can also be used against Wolver packs. Shock will usually keep Alpha Wolvers from lunging (though they will still bite) and the wolvers tend to not teleport continuously, which can be problematic after applying the fire or freeze status. The shock does very little damage to Beasts though.
Unlike the Ash of Agni, one can actually use Voltaic Tempest in the Firestorm Citadel. Unfortunately it is of little use, the shocks occasionally interrupt lunges but does not affect their breath attack. The damage isn't significant enough to make a difference. The shock does interrupt Vanaduke's charge but Shivermist would do the same.
 Potential Hazards
- Can supercharge quicksilvers
- Enemies can break ghost blocks, activate switches, and blow up explosive crates with shock spasms
- Enemies have reduced knock back while shocked
Ionized Salt Bomb
Any one telling you how great this bomb is, is sadly mistaken. The bomb itself has the slowest CTR of any bomb, in fact its in its' own league. Sure the damage is effective, and might work well in Tier 1 + 2 against beasts but beyond that its a waste of CE especially when Radiant offers you more. One point players might argue, is that the bomb's Shock chance makes up for the charge time, but there isn't really anything else. The bomb has normal + piercing damage, with a bonus Jelly damage (overall making the ineffective piercing give average damage) and is useful against all mobs apart from construct. The DPS on the bomb is really why the minority of bombers use it, and as Radiant Sun Shards covers a comparable range of effectiveness towards mob types and has a faster charge time, Sun Shards is usually favored over Ionized. In the end Dark Briar Barrage is better against beasts than ionized (which players claim is it's leading point) with higher DPS and a generally satisfying charge time, which doesn't throw a bomber off after using other bombs. In all, Radiant is the better option.
 Potential Hazards
- Long charge time can leave you vulnerable to attack
- Same shock hazards as Voltaic Tempest
- Long range of shards can aggro distant enemies
- Shards from a single bomb can activate multiple switches at once
Radiant Sun Shards.
There are some bombs that are fun to use, and aren't useful.... Radiant Sun Shards is both fun to use and useful, with a side of added difficulty. Sun Shards claim to fame was in the last preview; where it was the first 5 star item available through the bazaar for a hefty 103k, and was also favored over other bombs such as Nitronome... the rest were typically unused. Although the bomb has been nerfed to 4star now, its capabilities remain. The bomb is incredible; covering all mob fields, apart from jellies (damage types canceling Et Cetera, However Rads can still be used on JK quite effectively...Jellies are just frustrating to use this bomb on them.), and makes colorful rainbows spew from Trojans and those Thomas-the-Tank-Engine-like slag guards. It remains at its 4 star form as a completely viable bomb for tier 3, and will make short work of Firestorm Citadel. Its all well and good that the damages are there, but switching from a radius bomb to a shard bomb is quite a change to get used to. There are many new tactics in which are very different from kiting or spamming. The trick to Sun Shards is to try to make as many of the shards hit your target as possible. In FSC each shard does around 222 damage (give or take, depending on a players bonuses) and can do a very large sum of damage to slags and Trojans. To keep it in order, Shard bombing will be discussed below in the Tactics section. Sun Shards is definitely a choice for a pure bomber heading to end game, and taking on Vannaduke, and switching from an Argent peacemaker, or a sword is still an operable choice. Potential Hazards
- Long range of shards can aggro distant enemies
- Shards from a single bomb can activate multiple switches at once
Heavy Deconstructor
One of the least known bombs is the Heavy Deconstructor. This bomb gives the appearance of a gremlin-demo style 'ticker' bomb, as well as showing what appears to be the Darkfang symbol in the effect. The Heavy Decon is one of the least used just because, in all honesty, Master Blast Bomb is better. The two are the same in fuse, radius and CTR....so whats the problem? The +Construct damage isn't really that noticeable and the Master Blast bombs extra damage overall is a nicer option. In end game bomber mode, its probably just a better option to look for a UV Construct bonus than going to the effort of making a heavy decon. Previously(as in, in the preview), The Heavy Decon was even more disappointing with an incredibly small radius (that of today's regular blast- super blast) . However back then, it seemed to have an actual use, due to the reduced radius after getting a UV on bombs (Obviously this feature has been removed), it was an actual option inside the bombing community, eliminating gun puppies in a matter of 3 hits in a 4 way party. Despite what is behind us, there is no real use in favoring a Heavy Deconstructor over the Master Blast (especially with a +construct UV), and for now it is only a novelty; perhaps it will be balanced in the future.
Bomb Alchemy Paths
This is a list of the alchemy paths of all the bombs currently in game. Click the bomb you want to view the materials needed to craft it.
| The Haze Bomb | ||||||||||||||||||||||||
|
| The Blast Bomb | ||||||||||||||||||||||||||||||||||||
|
| The Crystal Bomb | ||||||||||||||||||
|
| The Spine Cone | ||||||||||||
|
| The Static Capacitor | ||||||||||||
|
| Other Bombs | ||||||||||||||||||||||||
|
Bomb Charge Time
Bomb charge time is the minimum time required to hold down the action key to successfully prepare a bomb. The minimum charge time occurs prior to the charge-complete animation (glowing). All bombs gain a natural CTR bonus while leveling up via heat. At level 5, bombs will gain a low charge time reduction and at level 10 they will have a medium charge time reduction bonus.
| None | Low | Medium | High | V. High | Ultra | Max | |
| Haze Bomb | 3180 | 2960 | 2700 | 2447 | 2230 | 1975 | 1755 |
| Blast Bomb | 2200 | 2040 | 1866 | 1701 | 1545 | 1400 | 1225 |
| Ionized Salt Bomb | 4200 | 3850 | 3570 | 3250 | 2950 | 2595 | 2300 |
| None | Low | Medium | High | V. High | Ultra | Max | |
| Haze Bomb | 0% | 6.92% | 15.09% | 23.05% | 29.87% | 37.89% | 44.81% |
| Blast Bomb | 0% | 7.27% | 15.18% | 22.68% | 29.77% | 36.36% | 44.32% |
| Ionized Salt Bomb | 0% | 8.33% | 15.00% | 22.62% | 29.76% | 38.21% | 45.24% |
Bombs that share Haze Bomb charge times: Graviton Bomb, Big Angry Bomb, Voltaic Tempest
Bombs that share Blast Bomb charge times: Dark Briar Barrage, Sun Shards, Radiant Sun Shards, Irontech Destroyer, Heavy Deconstructor, Rock Salt Bomb
Armor
The armor choice for bombers is quite simple. The demo series (Spiral Demo Helm, Spiral Demo Suit and their upgrades) definitely improves the effectiveness a player has as a bomber, unless the player is lucky and owns UV equipment with Charge Time Reduction (CTR). It is pretty simple until you get to the five star variant by upgrading the Heavy Demo set. There are three choices: Bombastic Demo, Volcanic Demo and finally Mad Bomber.
Bombastic Demo
Starting with the worst choice possible, the Bombastic Demo set (Bombastic Demo Suit, Bombastic Demo Helm) is basically a no-no for a well educated bomber. The set is frustrating to use, especially as it feels like such a downgrade from the Heavy demo set; this is because it has no CTR bonuses as the other sets. The only replacement for the lack of CTR is a low damage bonus on each piece. As of now, the Bombastic set is unbalanced and has the same defense statistics as Volcanic Demo, but lacks the fire resistance. In terms of Damage per Second, the rate of deployment is easily favored over the somewhat minuscule damage bonus. On top of all this, the suit may appear as cosmetically unappealing to some unlike both the Volcanic Demo Suit and Mad Bomber Suit. Choosing this set should be thoroughly thought about and is not recommended.
Volcanic Demo
The Volcanic Demo set (Volcanic Demo Suit, Volcanic Demo Helm) is a good choice, and is the best out of the three choices in terms of defense. The low CTR bonus on the suit, and the Medium CTR bonus on the helm are also an attractive feature of the set. The set is typically used in places such as Firestorm Citadel due to the elemental, normal and fire resistance stats. The helm is also one of the best for using the Shivermist Buster on Vanaduke, and many players who do not pursue a typical bomber equipment route will still own the helm. Volcanic Demo is really for those who want to play it safe, or those with latency issues, and those are really the only two reasons why the set could be chosen by a good bomber over the favorite: Mad Bomber...MWAHAHA.Mad Bomber
The Mad Bomber set (Mad Bomber Suit, Mad Bomber Mask) is comparable to Volcanic Demo in effectiveness, and is a great choice for all-out Bombers. The set offers Medium CTR AND damage bonus, in return for a somewhat lackluster defense considering resistance. Wearing the complete set using a level 10 bomb without a CTR UV, a bomber will acquire "Maximum!" charge time reduction, and with a medium damage bonus UV on a bomb will acquire the "Maximum!" damage to a certain mob, with very high damage to everything else. The set is typically known as the best of the three if only by giving the feeling of being a true bomber.
Conclusion
The Mad Bomber and the Volcanic Demo sets are the main choices. If you are undecided, head for a Volcanic Demo helm and Mad Bomber suit, which grants fire resistance for Firestorm Citadel runs, yet still provides "Maximum!" CTR on a level 10 bomb.
Tactics
General Tactics
There are several important things to consider while playing the role of the bomber. First, and perhaps most importantly, is to avoid the common mistake of simply running about randomly while dropping bombs erratically. This will cause the positioning of monsters to become very difficult to predict, and the explosions may randomly push monsters into places where they may be able to attack a vulnerable ally. Instead, focus on what would be the most efficient strategy to ensure that monsters are persistently lured into your bombs (and preferably blown away from your allies). An easy tactic is to place a bomb, begin charging a second bomb, run into the crowd of enemies in front of you to lure them into the blast radius of your bomb, and then after the explosion, place the second bomb in the same place as the first, repeating for as long as necessary.
Second, a bomber must be aware of their party as well as their enemies. Remember that the Blast Bombs are great for soloing, but in a party, your group will begin to tire of not being able to see enemies due to the large blue cloud produced after the detonation, which is very dangerous. Though you may well be safe standing at the epicenter of your bomb, your fellow knights will likely be blinded, unable to see the foes that are around them. The only real way to effectively blast bomb in a party is to follow members closely if they have a gun, or to simply herd enemies into a corner for your swordsmen. To a lesser extent, be aware of the interactions of your bombs with certain monsters. Using the Ash of Agni on Oilers is a poor idea due to their healing when set ablaze, as well as using the Ionized Salt Bomb on Quicksilvers as they become extremely fast when affected with shock.
Third, memorize the spawn patterns that appear after a party button has been pressed. Though the spawns are somewhat random, they are collected from a pool of possible locations, and a bomber can capitalize on this by placing a Haze Bomb-series bomb on one of those locations before the monsters spawn, which will apply the respective status effect on the monsters that appear there. Even if no monsters spawn in that location, other monsters may be lured into the resulting cloud of mist, ensuring that the bomb is not wasted.
Lastly, a bomber must know how to deal with monsters that attack at range. though a knight with a sword or handgun will be able to combat them as normal usually, sometimes "pure" bombers will not have either of those things (instead having an equipment set of four bombs), or the duties of a bomber may take precedence over defeating those monsters personally. A bomber is not entirely helpless, however; bombs such as the Crystal Bombs fire projectiles instead of a standard explosion, and can be used to "snipe" ranged attackers such as Gun Puppies and Devilites. A well-placed Shivermist Buster may also freeze several foes in place, making Devilites easy targets and making it impossible for gun puppies to rotate, effectively limiting them to attacking only knights that cross directly in front of them.
Shards
Shard bombs are quite the alternative to the spam and kite methods of Haze and Blast lines. Here's a few tactics to get started.- Spamming is useful in general, however in beast, fiend and gremlin environments, the field becomes hazardous for team members due to the large amount of dodging mobs(the shards act as projectiles similar to which guns use, so these bombs are really just guns that shoot a number of directions in one time).
- In FCS slags can be short work. Stand in one place until a slag starts the leap attack animation; place a Radiant Sun Shards where you're standing and walk backwards (don't shield or it will knock them away). This method hits the slag with every projectile, and with the right bonuses '1Hitting' is plausible but not definite.
- Trojans are now made easy. Shiver - circle: Trojan is frozen; Place Rad behind them = Big Damage and only a few hits to take them out.
- Shards disrupt gun puppies and the range will allow you to take them out from a distance.
Support Tactics
Kamikaze
Situations can unfold where you'll have to take one for the team. A prime example is against Spiny Toxilargos, where poison really demoralizes the team. Simply place freezies next to him risking running through the poison field as the status affect of the bomb is all that matters.
Corner Shielding
One of my favourites is to grab a big radius blast bomb, sit in a corner while the rest of your team guns. it keeps melee mobs distant and your teamates will thank you when a zombie starts noming on their face.
Carry Your Team Tactics
In order to carry a team, there are many factors that will help. four availiable weapon slots is always a good option, unless you feel comfortable with the crowd control bombs (nitro). Damage per second is really whats need to carry a party by yourself (by saying carry, Its implied that you aren't helping your team members in anyway as its assumed they're dead). One should be equipped with a crowd control bomb (vortex/Nitronome) a high damage bomb (radiant sun shards) a field stabilizing bomb(Shivermist). Ash of agni is always helpful against crowds of mobs (last room arena) ~ but isn't needed unless it's preferred over Vortex. There are many combinations which allow a player to carry a team - and they really depend on a players style. However the best possible set up will be Nitronome, Shivermist, Radiant Sun Shards and a bomb the player feels comfortable using (or just a sword/gun).
Other Stuff
With a recent update, there are now 4 guns that have explosive abilities; Supernova, Polaris, Biohazard and the Neutralizer. These 4 guns prove viable options in both crowd control + DPS. The two catalysers(Bio+Neut) allow the player to charge an enemy up with several amounts of charges before being able to detonate the high explosive contained in each particle. You may be thinking how these guns don't relate to bombs - but they do, and one can never have enough explosions. The Polaris and Supernova are another option; with Polaris now being compared to guns such as the Argent Peacemaker and Storm Driver. These guns get stronger as they go, and provide a blast with a knock-back when the bullet reaches its maximum range. This ability is especially useful in crown control and getting rid of gun puppies as the blast tends to cancel their attacks. Having a Pulsar gun at a narrow stretch with mecha zombies is quite useful as even the larger bombs to reach far enough past the Retrodes range attack. In all, don't out way a gun when choosing an alternate weapon to bombing - and if you like explosion, why not stick to guns that provide you with that satisfaction?
Diagrams/Videos
Eek's Vault
Lumbers
There was some dispute over taking down lumbers. Was just to whip out a sword? or were there effective bombs for taking the walking trees down? using 3 bombs, a player was able to remove a large amount of lumbers from cradle... effectively and without a sword.
Mecha Knights
Mechas can get out of hand in some arena stages, and players tend to over kite them - in turn getting hit by a flying charge attack. This example shows a player dealing with the type using only a nitronome.
Devilites
In tier 3, Devilites tend to be a bombers worst nightmare. Especially in the deeper depths, bombers end up lying on the ground, thinking a way out from the hordes of fiends. It is actually quite possible to solo through these stages (devilish drudgery) with limited damage taken. Here are two good examples. (the latter is at a higher depth)
Gun Puppies
Boss
For a while, it was thought to be useless taking a bomb into JK, but obviously this is no longer the case:
- BOSS Jelly King


Firestorm Citadel is the equivalent of a bomber paradise... We make those swashbucklers feel useless like a boss. Vannaduke runs home at the sight of them demo experts.
- BOSS Lord Vanaduke


Graveyards
Problem?
F.A.Q.
There are a few questions that have been answered repeatedly, yet Players still get confused. So here are some Answers to the Questions that haven't specifically been talked about in this guide.
It would work much better if there were none, and the only reason to charge a bomb would be to give it more power/radius.
Answer: In early previews, this is exactly how bombs worked; A player could repeatedly place (spam) bombs everywhere, and due to the charge time only applying to larger power the charge was rarely used due to a lower DPS than placing 3 bombs in a few seconds. Bombing in the previews was abused, with shard bombs granting the best deployment to damage rate. Three Rings did the right thing in severely nerfing bombs before the last preview, but this resulted in bombs being underused, and only being made effective by a select group. Bombing hasn't changed since the last preview, however the only reason for a wider use of bombs today is because players like discovering these less used weapons for themselves, or it has been highlighted to them by other players the usefulness of bombs.
Answer: Generally, upgrading a weapon will have a greater effect to your gameplay than upgrading your armor. This does of course not mean that your armor is not important. First of all, start with two star gear, maybe even leave out the Haze bomb and buy/craft a two star bomb first (If you need a Haze bomb for that, they are really cheap in the AH). Since this game is all about upgrading your gear, you can save quite some Crowns by upgrading your weapons by recipes you bought from Basil and not the AH. Still, it can be frustating if you look for a specific recipe. Try to find a good balance for that. Being a pure bomber can be a bit frustating at first. Many bombs have a small bomb radius until upgraded to higher star versions (this has been improved a bit by a recent patch). Also, you often won't be of much help to your party or you will take much time for some simple tasks such as detroying blocks, crystals or finishing leftover monsters. It might be more fun to have a sword for such tasks. A Calibur for instance is a good allrounder, other swords can be fine, too.
The upgrade lines from Haze bombs become better every upgrade. Since their bomb radius is low at first, e. g. a blast bomb may be more helpful for starters. You can then later add another bomb to your arsenal. Try to find out how much you need your shield. Since as a bomber you should be charging up bombs all the time, you can't shield much. If you have a bad latency or can't predict monster attacks as well yet, upgrading and using your shield can help quite much though. Based on that weigh up the priority of upgrading your shield.
Since you will be wearing the Spiral Suit set, getting both parts will be a high priority since it provides a medium reduction to your bomb charge time. However, the upgrades worth mentioning are five star only, the other ones just come natural. Because of that, their priority is rather low. As a bomber, you shouldn't get hit much anyway.


