Difference between revisions of "User:BahamutVoid"
From SpiralKnights
BahamutVoid (Talk | contribs) m (Weekly update and tidy up.) |
BahamutVoid (Talk | contribs) m (Haze bombs... -_- How do they work?) |
||
| Line 36: | Line 36: | ||
{{SKNewRow}} | {{SKNewRow}} | ||
{{SKCell|[[File:Icon_Crowns.png|45px]]|center}} | {{SKCell|[[File:Icon_Crowns.png|45px]]|center}} | ||
| − | {{SKCell|''' | + | {{SKCell|'''39012'''}} |
{{SKNewRow}} | {{SKNewRow}} | ||
{{SKCell|[[File:Icon_CE.png|45px]]|center}} | {{SKCell|[[File:Icon_CE.png|45px]]|center}} | ||
{{SKCell|'''123'''}} | {{SKCell|'''123'''}} | ||
| + | {{SKNewRow}} | ||
| + | {{SKCell|[[File:Token-Forge_Spark.png|45px]]|center}} | ||
| + | {{SKCell|'''37'''}} | ||
| + | {{SKNewRow}} | ||
| + | {{SKCell|[[File:Token-Grim_Spark.png|45px]]|center}} | ||
| + | {{SKCell|'''47'''}} | ||
| + | {{SKNewRow}} | ||
| + | {{SKCell|[[File:Token-Primal_Spark.png|45px]]|center}} | ||
| + | {{SKCell|'''53'''}} | ||
{{SKNewRow}} | {{SKNewRow}} | ||
{{SKCell|[[File:Token-Frumious_Fang.png|45px]]|center}} | {{SKCell|[[File:Token-Frumious_Fang.png|45px]]|center}} | ||
| Line 145: | Line 154: | ||
}} | }} | ||
| − | {{showhide|[[file:icon-bomb.png|20px]] Bomb ( | + | {{showhide|[[file:icon-bomb.png|20px]] Bomb (21)|content = |
:[[file:Equipment-Graviton_Bomb_icon.png|45px]] [[Graviton Bomb]] {{star|4|color=6cb0b9}} [[file:Unique variant icon.png|24px]] | :[[file:Equipment-Graviton_Bomb_icon.png|45px]] [[Graviton Bomb]] {{star|4|color=6cb0b9}} [[file:Unique variant icon.png|24px]] | ||
:[[file:Equipment-Radiant_Sun_Shards_icon.png|45px]] [[Radiant Sun Shards]] {{star|4|color=6cb0b9}} | :[[file:Equipment-Radiant_Sun_Shards_icon.png|45px]] [[Radiant Sun Shards]] {{star|4|color=6cb0b9}} | ||
| Line 156: | Line 165: | ||
:[[file:Equipment-Cold_Snap_icon.png|45px]] [[Cold Snap]] {{star|1|color=6cb0b9}} | :[[file:Equipment-Cold_Snap_icon.png|45px]] [[Cold Snap]] {{star|1|color=6cb0b9}} | ||
:[[file:Equipment-Firecracker_icon.png|45px]] [[Firecracker]] {{star|1|color=6cb0b9}} | :[[file:Equipment-Firecracker_icon.png|45px]] [[Firecracker]] {{star|1|color=6cb0b9}} | ||
| + | :[[file:Equipment-Haze_Bomb_icon.png|45px]] [[Haze Bomb]] {{star|1|color=6cb0b9}} [[file:Unique variant icon.png|24px]] | ||
| + | :[[file:Equipment-Haze_Bomb_icon.png|45px]] [[Haze Bomb]] {{star|1|color=6cb0b9}} [[file:Unique variant icon.png|24px]] | ||
| + | :[[file:Equipment-Haze_Bomb_icon.png|45px]] [[Haze Bomb]] {{star|1|color=6cb0b9}} [[file:Unique variant icon.png|24px]] | ||
:[[file:Equipment-Haze_Bomb_icon.png|45px]] [[Haze Bomb]] {{star|1|color=6cb0b9}} [[file:Unique variant icon.png|24px]] | :[[file:Equipment-Haze_Bomb_icon.png|45px]] [[Haze Bomb]] {{star|1|color=6cb0b9}} [[file:Unique variant icon.png|24px]] | ||
:[[file:Equipment-Haze_Bomb_icon.png|45px]] [[Haze Bomb]] {{star|1|color=6cb0b9}} [[file:Unique variant icon.png|24px]] | :[[file:Equipment-Haze_Bomb_icon.png|45px]] [[Haze Bomb]] {{star|1|color=6cb0b9}} [[file:Unique variant icon.png|24px]] | ||
| Line 252: | Line 264: | ||
{{SKCell|[[File:Equipment-Toxic_Vaporizer_Mk_II_icon.png|21px]] [[Toxic Vaporizer]]}} {{SKCell| Damage Bonus vs. Construct: ''Low''}} | {{SKCell|[[File:Equipment-Toxic_Vaporizer_Mk_II_icon.png|21px]] [[Toxic Vaporizer]]}} {{SKCell| Damage Bonus vs. Construct: ''Low''}} | ||
{{SKNewRow}} | {{SKNewRow}} | ||
| − | {{SKCell|[[File:Equipment-Haze_Bomb_icon.png|21px]] [[Haze Bomb]]}} {{SKCell| | + | {{SKCell|[[File:Equipment-Haze_Bomb_icon.png|21px]] [[Haze Bomb]]}} {{SKCell| Damage Bonus vs Construct: ''High''}} |
{{SKNewRow}} | {{SKNewRow}} | ||
| − | {{SKCell|[[File:Equipment-Haze_Bomb_icon.png|21px]] [[Haze Bomb]]}} {{SKCell| Damage Bonus vs | + | {{SKCell|[[File:Equipment-Haze_Bomb_icon.png|21px]] [[Haze Bomb]]}} {{SKCell| Damage Bonus vs Beast: ''Medium''}} |
{{SKNewRow}} | {{SKNewRow}} | ||
| − | {{SKCell|[[File:Equipment-Haze_Bomb_icon.png|21px]] [[Haze Bomb]]}} {{SKCell| Damage Bonus vs | + | {{SKCell|[[File:Equipment-Haze_Bomb_icon.png|21px]] [[Haze Bomb]]}} {{SKCell| Damage Bonus vs Slime: ''Low''}} |
{{SKNewRow}} | {{SKNewRow}} | ||
| − | {{SKCell|[[File:Equipment-Haze_Bomb_icon.png|21px]] [[Haze Bomb]]}} {{SKCell| Damage Bonus vs | + | {{SKCell|[[File:Equipment-Haze_Bomb_icon.png|21px]] [[Haze Bomb]]}} {{SKCell| Damage Bonus vs Gremlin: ''Medium''}} |
{{SKNewRow}} | {{SKNewRow}} | ||
| − | {{SKCell|[[File:Equipment-Haze_Bomb_icon.png|21px]] [[Haze Bomb]]}} {{SKCell| Damage Bonus vs | + | {{SKCell|[[File:Equipment-Haze_Bomb_icon.png|21px]] [[Haze Bomb]]}} {{SKCell| Damage Bonus vs Fiend: ''High''}} |
{{SKNewRow}} | {{SKNewRow}} | ||
| − | {{SKCell|[[File:Equipment-Haze_Bomb_icon.png|21px]] [[Haze Bomb]]}} {{SKCell| Damage Bonus vs | + | {{SKCell|[[File:Equipment-Haze_Bomb_icon.png|21px]] [[Haze Bomb]]}} {{SKCell| Damage Bonus vs Fiend: ''High''}} |
{{SKNewRow}} | {{SKNewRow}} | ||
| − | {{SKCell|[[File:Equipment-Haze_Bomb_icon.png|21px]] [[Haze Bomb]]}} {{SKCell| Damage Bonus vs | + | {{SKCell|[[File:Equipment-Haze_Bomb_icon.png|21px]] [[Haze Bomb]]}} {{SKCell| Damage Bonus vs Undead: ''Low''}} |
| + | {{SKNewRow}} | ||
| + | {{SKCell|[[File:Equipment-Haze_Bomb_icon.png|21px]] [[Haze Bomb]]}} {{SKCell| Charge Time Reduction: ''Low''}} | ||
| + | {{SKNewRow}} | ||
| + | {{SKCell|[[File:Equipment-Haze_Bomb_icon.png|21px]] [[Haze Bomb]]}} {{SKCell| Charge Time Reduction: ''Low''}} | ||
| + | {{SKNewRow}} | ||
| + | {{SKCell|[[File:Equipment-Haze_Bomb_icon.png|21px]] [[Haze Bomb]]}} {{SKCell| Charge Time Reduction: ''Low''}} | ||
{{SKNewRow}} | {{SKNewRow}} | ||
{{SKCell|'''Helmet'''|center||3}} | {{SKCell|'''Helmet'''|center||3}} | ||
Revision as of 22:39, 9 June 2011
| ||||||||||||||||||||||||||||||||||||||||
| ||||||||||||||||||||||||||||||||||||||||
Contents
Bahamutvoid (Last Update: 9th June 2011)
Hey, welcome to my Page. I've been playing Spiralknights at least one month before the closed Beta, and I've loved every second of it.
Currently, I just seem to be grinding to get to 5* equipment. Also, damn my perfectionism to hell, as you can probably tell from this page. :D
Youtube Channel & SpiralKnights Beta Playthrough
http://www.youtube.com/user/BahamutVoid
Guild (Legion Blades)
| br | This user is a native speaker of British. |
| am-3 | This user is able to contribute with an advanced level of American. |
| au-3 | This user is able to contribute with an advanced level of Australian. |
| ca-3 | This user is able to contribute with an advanced level of Canadian. |
I'm the Guild Master and we are recruiting! I originally started of this Guild just to keep in touch with friends via an easier method (back when my computer couldn't stand to be in the arcade :D). Now, we are on the lookout for social, team-players to create a great community where we can all feel at home.
Just send a /tell (or /w) to Bahamutvoid (GMT), Gemyma (GMT) or Schwarze (EDT).
- Recruits - New members who will prove that they belong here.
- Members - Members who have proven themselves willing to participate in Guild activites.
- Veterans - Members who actively participate in Guild activities, such as Clockwork runs, Guild lotteries and Guild chat.
- Officers - Members who have been dubbed worthy enough to manage the Guild while I am away.
- Guild Master - Me. Don't expect to be getting this position, no matter how hard you try. Nobody wants two leaders.
To-Do
- Better Character portrait for right-hand panel
- Material Listings
- Guild Recruitment
Equipment
 Cold Iron Vanquisher ★★★★★
 Ascended Calibur ★★★★☆
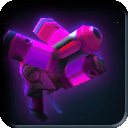
 Avenger ★★★★☆
 Daring Rigadoon ★★★★☆
 Hunting Blade ★★★★☆
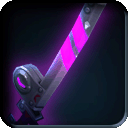 Silent Nightblade ★★★★☆
 Vile Striker ★★★★☆
 Winmillion ★★★★☆
 Fireburst Brandish ★★★☆☆
 Iceburst Brandish ★★★☆☆
 Brandish ★★☆☆☆
- Brandish ★★☆☆☆
 Searing Edge ★★☆☆☆
 Shocking Edge ★★☆☆☆
 Big Beast Basher ★☆☆☆☆
 Bolted Blade ★☆☆☆☆
 Heavy Hatchet ★☆☆☆☆
 Super Slime Slasher ★☆☆☆☆
 Thwack Hammer ★☆☆☆☆
 Hatchet ☆☆☆☆☆
 Proto Sword ☆☆☆☆☆
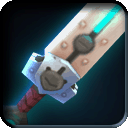
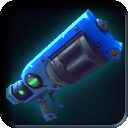
 Volt Driver ★★★★☆
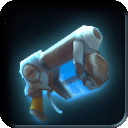
 Antigua ★★★☆☆
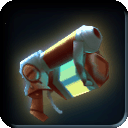
 Firotech Alchemer Mk II ★★★☆☆
 Needle Shot ★★★☆☆
 Pepperbox ★★★☆☆
 Shadowtech Alchemer Mk II ★★★☆☆
 Blaster ★★☆☆☆
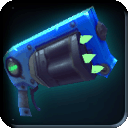
 Cryotech Alchemer ★★☆☆☆
 Prismatech Alchemer ★★☆☆☆
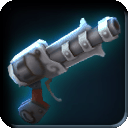
 Frost Gun ★☆☆☆☆
 Pummel Gun ★☆☆☆☆
 Super Stun Gun ★☆☆☆☆
 Zapper ★☆☆☆☆
 Proto Gun ☆☆☆☆☆
 Punch Gun ☆☆☆☆☆
 Stun Gun ☆☆☆☆☆
 Graviton Bomb ★★★★☆
 Radiant Sun Shards ★★★★☆
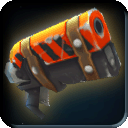
 Fiery Vaporizer Mk II ★★★☆☆
 Rock Salt Bomb ★★★☆☆
 Toxic Vaporizer Mk II ★★★☆☆
 Blast Bomb ★★☆☆☆
 Freezing Vaporizer ★★☆☆☆
 Spine Cone ★★☆☆☆
 Cold Snap ★☆☆☆☆
 Firecracker ★☆☆☆☆
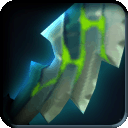
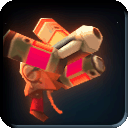
 Haze Bomb ★☆☆☆☆
- Haze Bomb ★☆☆☆☆
- Haze Bomb ★☆☆☆☆
- Haze Bomb ★☆☆☆☆
- Haze Bomb ★☆☆☆☆
- Haze Bomb ★☆☆☆☆
- Haze Bomb ★☆☆☆☆
- Haze Bomb ★☆☆☆☆
- Haze Bomb ★☆☆☆☆
- Haze Bomb ★☆☆☆☆
 Proto Bomb ☆☆☆☆☆
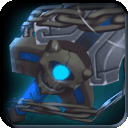
 Volcanic Salamander Mask ★★★★★
 Seraphic Helm ★★★★☆
 Brute Jelly Helm ★★★☆☆
 Dusker Cap ★★★☆☆
 Cobalt Helm ★★☆☆☆
 Skelly Mask ★★☆☆☆
 Cyclops Cap ☆☆☆☆☆
 Groundbreaker Helm ☆☆☆☆☆
 Mining Hat ☆☆☆☆☆
 Spiral Sallet ☆☆☆☆☆
 Salamander Suit ★★★★☆
 Seraphic Mail ★★★★☆
 Drake Scale Mail ★★★☆☆
 Dusker Coat ★★★☆☆
- Cobalt Helm ★★☆☆☆
 Jelly Mail ★★☆☆☆
 Skelly Suit ★★☆☆☆
 Fencing Jacket ☆☆☆☆☆
 Groundbreaker Armor ☆☆☆☆☆
 Spiral Culet ☆☆☆☆☆
 Vitasuit ☆☆☆☆☆
 Ironmight Plate Shield ★★★★★
 Sinister Skelly Shield ★★★★☆
 Swiftstrike Buckler ★★★☆☆
 Bristling Buckler ★★☆☆☆
 Defender ★★☆☆☆
 Owlite Shield ★★☆☆☆
- Owlite Shield ★★☆☆☆
 Iron Buckler ☆☆☆☆☆
 Proto Shield ☆☆☆☆☆
 Royal Jelly Band ★★★★★
 Dual Heart Pendant ★★☆☆☆
| ||||||||||||||||||||||||||||||||||||||||||||||||||||||||||||||||||||||||||
| ||||||||||||||||||||||||||||||||||||||||||||||||||||||||||||||||||||||||||