Difference between revisions of "Furniture"
From SpiralKnights
(fixed broken links for trophies) |
(using a new table - decided to reduce template use/make it more like other wikitables - means a longer list, but easier to manage. The snipes were getting out of hand.) |
||
| Line 7: | Line 7: | ||
{{showhide|Notes about this List|content= | {{showhide|Notes about this List|content= | ||
*Linking: ''images are links too - click on them to navigate.'' | *Linking: ''images are links too - click on them to navigate.'' | ||
| − | **If a furniture item has its own recipe or special interaction, then the ''image'' link will lead to a specific page for that item, while the ''text'' link will take you to a page with a list of items (a "group") that the item belongs to. Example: click the "energy well image" and the "energy well text" - you'll go to different but informative places. "Trophy (Boss)" and "Special" classified items will usually have this linking behavior. | + | **If a furniture item has its own recipe or special interaction, then the ''image'' link will lead to a specific page for that item, while the ''text'' link will take you to a page with a list of items (a "group") that the item belongs to. Example: click the "energy well image" and the "energy well text" - you'll go to different but informative places. "Trophy (Boss)" and "Special" classified items will usually have this linking behavior. |
**If a furniture item does not have any properties like the above, both the image and text links will direct you to the same place - a page containing a detailed list with that item as well as like-colored items or items in the same group. | **If a furniture item does not have any properties like the above, both the image and text links will direct you to the same place - a page containing a detailed list with that item as well as like-colored items or items in the same group. | ||
*Sorting: | *Sorting: | ||
| − | **Use the little box in the top | + | **This list is organized roughly by ''Group + Date of Release (DoR) - Alphabetical'' (alphabetically if items were released at the same time, DoR overrides). |
| − | ** | + | **Use the little box in the top part of the columns to sort the table alphabetically. |
| + | **If the table has been sorted, click the "page" button in the top left, or refresh the page to reset the table to the rough DoR order. | ||
*Other: | *Other: | ||
**Small tip: mousing over images without clicking them will reveal the full name (vs. the general name of the item in the "icon/form" column) of that item for certain browsers. | **Small tip: mousing over images without clicking them will reveal the full name (vs. the general name of the item in the "icon/form" column) of that item for certain browsers. | ||
}} | }} | ||
| − | |||
| − | |||
| + | There are different colors and/or shape variations available for many of these items! Go to individual pages for more information and visuals. | ||
| + | {{Hidden header|Birdsong Emporium}} | ||
| + | {{SKWindowSortable | ||
| + | | width = | ||
| + | | title = Furniture | ||
| + | | body = | ||
| + | {{SKWindow/Cell|'''Icon/General Name'''|font=small|left}} | ||
| + | {{SKWindow/Cell|'''Classification'''|font=small}} | ||
| + | {{SKWindow/Cell|'''Group'''|font=small|center}} | ||
| + | {{SKWindow/Cell|'''Sample Image'''|font=small|center}} | ||
| + | {{SKNewRow}} | ||
| + | {{SKCell|[[File:Furniture-Crash Pod icon.png|36px]] [[Crash Pod]]|font=small|left}} | ||
| + | {{SKWindow/Cell|Doodad}} | ||
| + | {{SKWindow/Cell|Basic}} | ||
| + | {{SKCell|[[File:Furniture-Crash Pod.png|80px|link=Crash Pod]]|font=small|center}} | ||
| + | {{SKNewRow}} | ||
| + | {{SKCell|[[File:Furniture-Field Sensor icon.png|36px]] [[Field Sensor]]|font=small|left}} | ||
| + | {{SKWindow/Cell|Doodad}} | ||
| + | {{SKWindow/Cell|Basic}} | ||
| + | {{SKCell|[[File:Furniture-Field Sensor.png|80px|link=Field Sensor]]|font=small|center}} | ||
| + | {{SKNewRow}} | ||
| + | {{SKCell|[[File:Furniture-Blue Light Beacon icon.png|36px]] [[Light Beacon]]|font=small|left}} | ||
| + | {{SKWindow/Cell|Light}} | ||
| + | {{SKWindow/Cell|Basic}} | ||
| + | {{SKCell|[[File:Furniture-Blue Light Beacon.png|80px|link=Blue Light Beacon]]|font=small|center}} | ||
| + | {{SKNewRow}} | ||
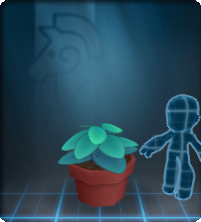
| + | {{SKCell|[[File:Furniture-Blue Potted Plant icon.png|36px]] [[Potted Plant]]|font=small|left}} | ||
| + | {{SKWindow/Cell|Plant}} | ||
| + | {{SKWindow/Cell|Basic}} | ||
| + | {{SKCell|[[File:Furniture-Blue Potted Plant.png|80px|link=Blue Potted Plant]]|font=small|center}} | ||
| + | {{SKNewRow}} | ||
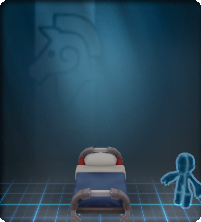
| + | {{SKCell|[[File:Furniture-Spiral Blue Bed icon.png|36px]] [[Spiral Blue Bed|Bed]]|font=small|left}} | ||
| + | {{SKWindow/Cell|Bed}} | ||
| + | {{SKWindow/Cell|Basic}} | ||
| + | {{SKCell|[[File:Furniture-Spiral Blue Bed.png|80px|link=Spiral Blue Bed]]|font=small|center}} | ||
| + | {{SKNewRow}} | ||
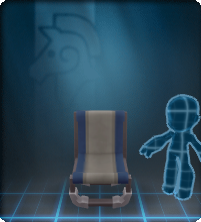
| + | {{SKCell|[[File:Furniture-Spiral Blue Compact Chair icon.png|36px]] [[Spiral Blue Compact Chair|Compact Chair]]|font=small|left}} | ||
| + | {{SKWindow/Cell|Seat}} | ||
| + | {{SKWindow/Cell|Basic}} | ||
| + | {{SKCell|[[File:Furniture-Spiral Blue Compact Chair.png|80px|link=Spiral Blue Compact Chair]]|font=small|center}} | ||
| + | {{SKNewRow}} | ||
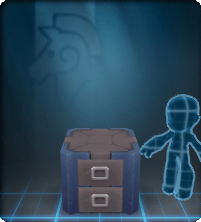
| + | {{SKCell|[[File:Furniture-Spiral Blue Chest of Drawers icon.png|36px]] [[Spiral Blue Chest of Drawers|Chest of Drawers]]|font=small|left}} | ||
| + | {{SKWindow/Cell|Doodad}} | ||
| + | {{SKWindow/Cell|Basic}} | ||
| + | {{SKCell|[[File:Furniture-Spiral Blue Chest of Drawers.png|80px|link=Spiral Blue Chest of Drawers]]|font=small|center}} | ||
| + | {{SKNewRow}} | ||
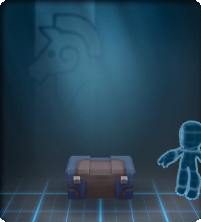
| + | {{SKCell|[[File:Furniture-Spiral Blue Footlocker icon.png|36px]] [[Spiral Blue Footlocker|Footlocker]]|font=small|left}} | ||
| + | {{SKWindow/Cell|Doodad}} | ||
| + | {{SKWindow/Cell|Basic}} | ||
| + | {{SKCell|[[File:Furniture-Spiral Blue Footlocker.png|80px|link=Spiral Blue Footlocker]]|font=small|center}} | ||
| + | {{SKNewRow}} | ||
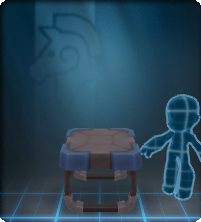
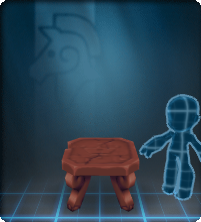
| + | {{SKCell|[[File:Furniture-Spiral Blue Modular Table icon.png|36px]] [[Spiral Blue Modular Table|Modular Table]]|font=small|left}} | ||
| + | {{SKWindow/Cell|Table}} | ||
| + | {{SKWindow/Cell|Basic}} | ||
| + | {{SKCell|[[File:Furniture-Spiral Blue Modular Table.png|80px|link=Spiral Blue Modular Table]]|font=small|center}} | ||
| + | {{SKNewRow}} | ||
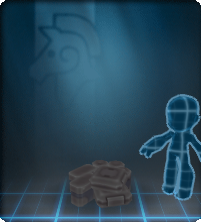
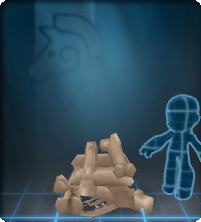
| + | {{SKCell|[[File:Furniture-Sundries icon.png|36px]] [[Sundries]]|font=small|left}} | ||
| + | {{SKWindow/Cell|Pile}} | ||
| + | {{SKWindow/Cell|Basic}} | ||
| + | {{SKCell|[[File:Furniture-Sundries.png|80px|link=Sundries]]|font=small|center}} | ||
| + | {{SKNewRow}} | ||
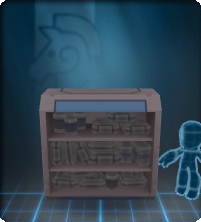
| + | {{SKCell|[[File:Furniture-Spiral Blue Supply Shelf icon.png|36px]] [[Spiral Blue Supply Shelf|Supply Shelf]]|font=small|left}} | ||
| + | {{SKWindow/Cell|Shelf}} | ||
| + | {{SKWindow/Cell|Basic}} | ||
| + | {{SKCell|[[File:Furniture-Spiral Blue Supply Shelf.png|80px|link=Spiral Blue Supply Shelf]]|font=small|center}} | ||
| + | {{SKNewRow}} | ||
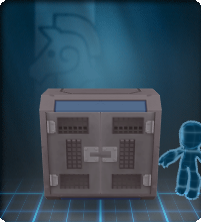
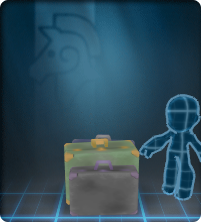
| + | {{SKCell|[[File:Furniture-Toughbox icon.png|36px]] [[Toughbox]]|font=small|left}} | ||
| + | {{SKWindow/Cell|Doodad}} | ||
| + | {{SKWindow/Cell|Basic}} | ||
| + | {{SKCell|[[File:Furniture-Toughbox.png|80px|link=Toughbox]]|font=small|center}} | ||
| + | {{SKNewRow}} | ||
| + | {{SKCell|[[File:Furniture-Spiral Blue Wardrobe icon.png|36px]] [[Spiral Blue Wardrobe|Wardrobe]]|font=small|left}} | ||
| + | {{SKWindow/Cell|Shelf}} | ||
| + | {{SKWindow/Cell|Basic}} | ||
| + | {{SKCell|[[File:Furniture-Spiral Blue Wardrobe.png|80px|link=Spiral Blue Wardrobe]]|font=small|center}} | ||
| + | {{SKNewRow}} | ||
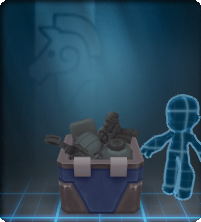
| + | {{SKCell|[[File:Furniture-Weapon Crate icon.png|36px]] [[Weapon Crate]]|font=small|left}} | ||
| + | {{SKWindow/Cell|Doodad}} | ||
| + | {{SKWindow/Cell|Basic}} | ||
| + | {{SKCell|[[File:Furniture-Weapon Crate.png|80px|link=Weapon Crate]]|font=small|center}} | ||
| + | {{SKNewRow}} | ||
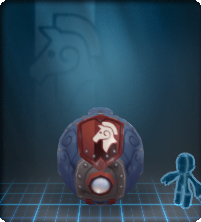
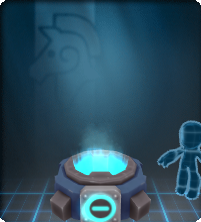
| + | {{SKCell|[[File:Furniture-Energy Well icon.png|36px]] [[Birdsong Emporium Furniture#Energy Well|Energy Well]]|font=small|left}} | ||
| + | {{SKWindow/Cell|Special}} | ||
| + | {{SKWindow/Cell|Basic}} | ||
| + | {{SKCell|[[File:Furniture-Energy Well.png|80px|link=Energy Well]]|font=small|center}} | ||
| + | {{SKNewRow}} | ||
| + | {{SKCell|[[File:Furniture-Vanguard's Battle Stand icon.png|36px]] [[Recruit's Battle Stand|Battle Stand]]|font=small|left}} | ||
| + | {{SKWindow/Cell|Stand}} | ||
| + | {{SKWindow/Cell|Homecoming}} | ||
| + | {{SKCell|[[File:Furniture-Vanguard's Battle Stand.png|80px|link=Vanguard's Battle Stand]]|font=small|center}} | ||
| + | {{SKNewRow}} | ||
| + | {{SKCell|[[File:Furniture-White Lazy Snipe icon.png|36px]] [[Snipe (Furniture)#Lazy Snipe|Snipe]] (Lazy)|font=small|left}} | ||
| + | {{SKWindow/Cell|Creature}} | ||
| + | {{SKWindow/Cell|Snipe}} | ||
| + | {{SKCell|[[File:Furniture-White Lazy Snipe-Placed.png|80px|link=Snipe (Furniture)#Lazy Snipe]]|font=small|center}} | ||
| + | {{SKNewRow}} | ||
| + | {{SKCell|[[File:Furniture-White Flying Snipe icon.png|36px]] [[Snipe (Furniture)#Flying Snipe|Snipe]] (Flying)|font=small|left}} | ||
| + | {{SKWindow/Cell|Creature}} | ||
| + | {{SKWindow/Cell|Snipe}} | ||
| + | {{SKCell|[[File:Furniture-White Flying Snipe-Placed.png|80px|link=Snipe (Furniture)#Flying Snipe]]|font=small|center}} | ||
| + | {{SKNewRow}} | ||
| + | {{SKCell|[[File:Furniture-White Wandering Snipe icon.png|36px]] [[Snipe (Furniture)#Wandering Snipe|Snipe]] (Wandering)|font=small|left}} | ||
| + | {{SKWindow/Cell|Creature}} | ||
| + | {{SKWindow/Cell|Snipe}} | ||
| + | {{SKCell|[[File:Furniture-White Wandering Snipe-Placed.png|80px|link=Snipe (Furniture)#Wandering Snipe]]|font=small|center}} | ||
| + | {{SKNewRow}} | ||
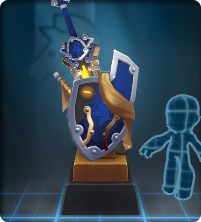
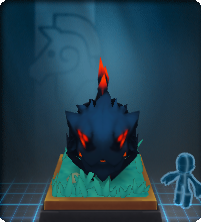
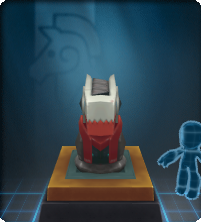
| + | {{SKCell|[[File:Furniture-Frumious Fang (Furniture) icon.png|36px]] [[Armero Alchemy Machine#Boss Trophies|Frumious Fang]]|font=small|left}} | ||
| + | {{SKWindow/Cell|Trophy (Boss)}} | ||
| + | {{SKWindow/Cell|Armero (Hunter's Lodge)}} | ||
| + | {{SKCell|[[File:Furniture-Frumious Fang (Furniture).png|80px|link=Frumious Fang (Furniture)]]|font=small|center}} | ||
| − | + | {{SKNewRow}} | |
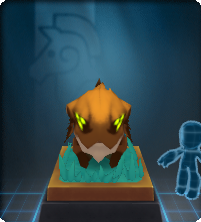
| + | {{SKCell|[[File:Furniture-Replica Natural Snarbolax icon.png|36px]] [[Armero Alchemy Machine#Boss Trophies|Replica Natural Snarbolax]]|font=small|left}} | ||
| + | {{SKWindow/Cell|Trophy (Boss)}} | ||
| + | {{SKWindow/Cell|Armero (Hunter's Lodge)}} | ||
| + | {{SKCell|[[File:Furniture-Replica Natural Snarbolax.png|80px|link=Replica Natural Snarbolax]]|font=small|center}} | ||
| − | + | {{SKNewRow}} | |
| + | {{SKCell|[[File:Furniture-Replica Shadowy Snarbolax icon.png|36px]] [[Armero Alchemy Machine#Boss Trophies|Replica Shadowy Snarbolax]]|font=small|left}} | ||
| + | {{SKWindow/Cell|Trophy (Boss)}} | ||
| + | {{SKWindow/Cell|Armero (Hunter's Lodge)}} | ||
| + | {{SKCell|[[File:Furniture-Replica Shadowy Snarbolax.png|80px|link=Replica Shadowy Snarbolax]]|font=small|center}} | ||
| − | + | {{SKNewRow}} | |
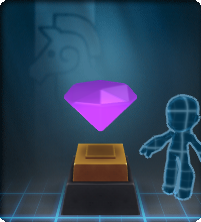
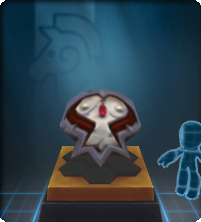
| + | {{SKCell|[[File:Furniture-Jelly Gem (Furniture) icon.png|36px]] [[Armero Alchemy Machine#Boss Trophies|Jelly Gem]]|font=small|left}} | ||
| + | {{SKWindow/Cell|Trophy (Boss)}} | ||
| + | {{SKWindow/Cell|Armero (Hunter's Lodge)}} | ||
| + | {{SKCell|[[File:Furniture-Jelly Gem (Furniture).png|80px|link=Jelly Gem (Furniture)]]|font=small|center}} | ||
| + | {{SKNewRow}} | ||
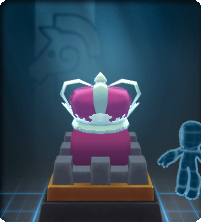
| + | {{SKCell|[[File:Furniture-Royal Jelly Crown (Furniture) icon.png|36px]] [[Armero Alchemy Machine#Boss Trophies|Royal Jelly Crown]]|font=small|left}} | ||
| + | {{SKWindow/Cell|Trophy (Boss)}} | ||
| + | {{SKWindow/Cell|Armero (Hunter's Lodge)}} | ||
| + | {{SKCell|[[File:Furniture-Royal Jelly Crown (Furniture).png|80px|link=Royal Jelly Crown (Furniture)]]|font=small|center}} | ||
| + | {{SKNewRow}} | ||
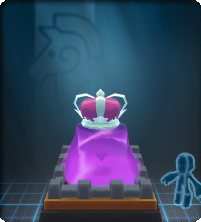
| + | {{SKCell|[[File:Furniture-Replica Royal Jelly icon.png|36px]] [[Armero Alchemy Machine#Boss Trophies|Replica Royal Jelly]]|font=small|left}} | ||
| + | {{SKWindow/Cell|Trophy (Boss)}} | ||
| + | {{SKWindow/Cell|Armero (Hunter's Lodge)}} | ||
| + | {{SKCell|[[File:Furniture-Replica Royal Jelly.png|80px|link=Replica Royal Jelly]]|font=small|center}} | ||
| + | {{SKNewRow}} | ||
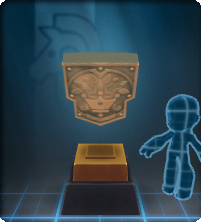
| + | {{SKCell|[[File:Furniture-Roarmulus Blueprints icon.png|36px]] [[Armero Alchemy Machine#Boss Trophies|Roarmulus Blueprints]]|font=small|left}} | ||
| + | {{SKWindow/Cell|Trophy (Boss)}} | ||
| + | {{SKWindow/Cell|Armero (Hunter's Lodge)}} | ||
| + | {{SKCell|[[File:Furniture-Roarmulus Blueprints.png|80px|link=Roarmulus Blueprints]]|font=small|center}} | ||
| + | {{SKNewRow}} | ||
| + | {{SKCell|[[File:Furniture-Small Replica Roarmulus Twin icon.png|36px]] [[Armero Alchemy Machine#Boss Trophies|Small Replica Roarmulus Twin]]|font=small|left}} | ||
| + | {{SKWindow/Cell|Trophy (Boss)}} | ||
| + | {{SKWindow/Cell|Armero (Hunter's Lodge)}} | ||
| + | {{SKCell|[[File:Furniture-Small Replica Roarmulus Twin.png|80px|link=Small Replica Roarmulus Twin]]|font=small|center}} | ||
| + | {{SKNewRow}} | ||
| + | {{SKCell|[[File:Furniture-Large Replica Roarmulus Twin icon.png|36px]] [[Armero Alchemy Machine#Boss Trophies|Large Replica Roarmulus Twin]]|font=small|left}} | ||
| + | {{SKWindow/Cell|Trophy (Boss)}} | ||
| + | {{SKWindow/Cell|Armero (Hunter's Lodge)}} | ||
| + | {{SKCell|[[File:Furniture-Large Replica Roarmulus Twin.png|80px|link=Large Replica Roarmulus Twin]]|font=small|center}} | ||
| + | {{SKNewRow}} | ||
| + | {{SKCell|[[File:Furniture-Almirian Seal (Furniture) icon.png|36px]] [[Armero Alchemy Machine#Boss Trophies|Almirian Seal]]|font=small|left}} | ||
| + | {{SKWindow/Cell|Trophy (Boss)}} | ||
| + | {{SKWindow/Cell|Armero (Hunter's Lodge)}} | ||
| + | {{SKCell|[[File:Furniture-Almirian Seal (Furniture).png|80px|link=Almirian Seal (Furniture)]]|font=small|center}} | ||
| + | {{SKNewRow}} | ||
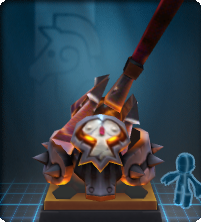
| + | {{SKCell|[[File:Furniture-Lord Vanaduke's Mask icon.png|36px]] [[Armero Alchemy Machine#Boss Trophies|Lord Vanaduke's Mask]]|font=small|left}} | ||
| + | {{SKWindow/Cell|Trophy (Boss)}} | ||
| + | {{SKWindow/Cell|Armero (Hunter's Lodge)}} | ||
| + | {{SKCell|[[File:Furniture-Lord Vanaduke's Mask.png|80px|link=Lord Vanaduke's Mask]]|font=small|center}} | ||
| + | {{SKNewRow}} | ||
| + | {{SKCell|[[File:Furniture-Lord Vanaduke's Finery icon.png|36px]] [[Armero Alchemy Machine#Boss Trophies|Lord Vanaduke's Finery]]|font=small|left}} | ||
| + | {{SKWindow/Cell|Trophy (Boss)}} | ||
| + | {{SKWindow/Cell|Armero (Hunter's Lodge)}} | ||
| + | {{SKCell|[[File:Furniture-Lord Vanaduke's Finery.png|80px|link=Lord Vanaduke's Finery]]|font=small|center}} | ||
| + | {{SKNewRow}} | ||
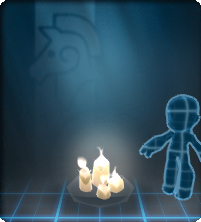
| + | {{SKCell|[[File:Furniture-White Candles icon.png|36px]] [[White Candles|Candles]]|font=small|left}} | ||
| + | {{SKWindow/Cell|Light}} | ||
| + | {{SKWindow/Cell|Winterfest}} | ||
| + | {{SKCell|[[File:Furniture-White Candles.png|80px|link=White Candles]]|font=small|center}} | ||
| + | {{SKNewRow}} | ||
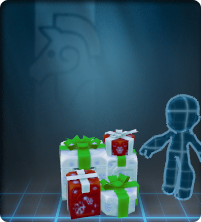
| + | {{SKCell|[[File:Furniture-White Holiday Presents icon.png|36px]] [[White Holiday Presents|Holiday Presents]]|font=small|left}} | ||
| + | {{SKWindow/Cell|Pile}} | ||
| + | {{SKWindow/Cell|Winterfest}} | ||
| + | {{SKCell|[[File:Furniture-White Holiday Presents.png|80px|link=White Holiday Presents]]|font=small|center}} | ||
| + | {{SKNewRow}} | ||
| + | {{SKCell|[[File:Furniture-Snow Block icon.png|36px]] [[Snow Block]]|font=small|left}} | ||
| + | {{SKWindow/Cell|Doodad}} | ||
| + | {{SKWindow/Cell|Winterfest}} | ||
| + | {{SKCell|[[File:Furniture-Snow Block.png|80px|link=Snow Block]]|font=small|center}} | ||
| + | {{SKNewRow}} | ||
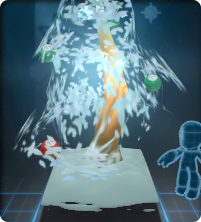
| + | {{SKCell|[[File:Furniture-White Winterfest Tree icon.png|36px]] [[White Winterfest Tree|Winterfest Tree]]|font=small|left}} | ||
| + | {{SKWindow/Cell|Plant}} | ||
| + | {{SKWindow/Cell|Winterfest}} | ||
| + | {{SKCell|[[File:Furniture-White Winterfest Tree.png|80px|link=White Winterfest Tree]]|font=small|center}} | ||
| + | {{SKNewRow}} | ||
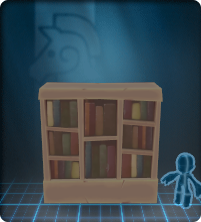
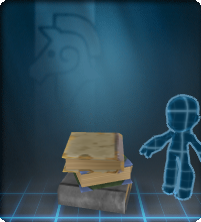
| + | {{SKCell|[[File:Furniture-Ancient Bookcase icon.png|36px]] [[Ancient Bookcase]]|font=small|left}} | ||
| + | {{SKWindow/Cell|Shelf}} | ||
| + | {{SKWindow/Cell|Moorcroft}} | ||
| + | {{SKCell|[[File:Furniture-Ancient Bookcase.png|80px|link=Ancient Bookcase]]|font=small|center}} | ||
| + | {{SKNewRow}} | ||
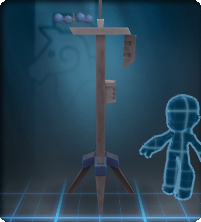
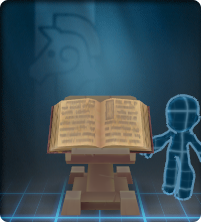
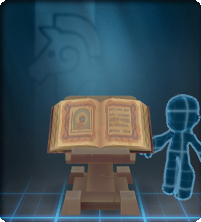
| + | {{SKCell|[[File:Furniture-Ancient Tome Stand icon.png|36px]] [[Ancient Tome Stand]]|font=small|left}} | ||
| + | {{SKWindow/Cell|Stand}} | ||
| + | {{SKWindow/Cell|Moorcroft}} | ||
| + | {{SKCell|[[File:Furniture-Ancient Tome Stand.png|80px|link=Ancient Tome Stand]]|font=small|center}} | ||
| + | {{SKNewRow}} | ||
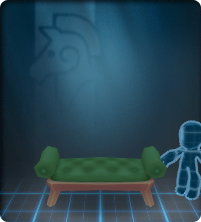
| + | {{SKCell|[[File:Furniture-Green Antique Bench icon.png|36px]] [[Green Antique Bench|Antique Bench]]|font=small|left}} | ||
| + | {{SKWindow/Cell|Seat}} | ||
| + | {{SKWindow/Cell|Moorcroft}} | ||
| + | {{SKCell|[[File:Furniture-Green Antique Bench.png|80px|link=Green Antique Bench]]|font=small|center}} | ||
| + | {{SKNewRow}} | ||
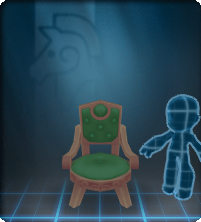
| + | {{SKCell|[[File:Furniture-Green Antique Chair icon.png|36px]] [[Green Antique Chair|Antique Chair]]|font=small|left}} | ||
| + | {{SKWindow/Cell|Seat}} | ||
| + | {{SKWindow/Cell|Moorcroft}} | ||
| + | {{SKCell|[[File:Furniture-Green Antique Chair.png|80px|link=Green Antique Chair]]|font=small|center}} | ||
| + | {{SKNewRow}} | ||
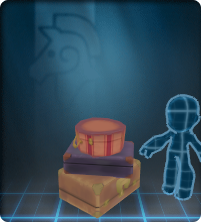
| + | {{SKCell|[[File:Furniture-Antique Luggage icon.png|36px]] [[Antique Luggage]]|font=small|left}} | ||
| + | {{SKWindow/Cell|Pile}} | ||
| + | {{SKWindow/Cell|Moorcroft}} | ||
| + | {{SKCell|[[File:Furniture-Antique Luggage.png|80px|link=Antique Luggage]]|font=small|center}} | ||
| + | {{SKNewRow}} | ||
| + | {{SKCell|[[File:Furniture-Antique Suitcases icon.png|36px]] [[Antique Suitcases]]|font=small|left}} | ||
| + | {{SKWindow/Cell|Pile}} | ||
| + | {{SKWindow/Cell|Moorcroft}} | ||
| + | {{SKCell|[[File:Furniture-Antique Suitcases.png|80px|link=Antique Suitcases]]|font=small|center}} | ||
| + | {{SKNewRow}} | ||
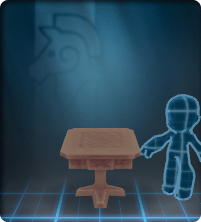
| + | {{SKCell|[[File:Furniture-Antique Table icon.png|36px]] [[Antique Table]]|font=small|left}} | ||
| + | {{SKWindow/Cell|Table}} | ||
| + | {{SKWindow/Cell|Moorcroft}} | ||
| + | {{SKCell|[[File:Furniture-Antique Table.png|80px|link=Antique Table]]|font=small|center}} | ||
| + | |||
| + | {{SKNewRow}} | ||
| + | {{SKCell|[[File:Furniture-Bone Stack icon.png|36px]] [[Bone Stack]]|font=small|left}} | ||
| + | {{SKWindow/Cell|Pile}} | ||
| + | {{SKWindow/Cell|Moorcroft}} | ||
| + | {{SKCell|[[File:Furniture-Bone Stack.png|80px|link=Bone Stack]]|font=small|center}} | ||
| + | |||
| + | {{SKNewRow}} | ||
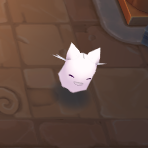
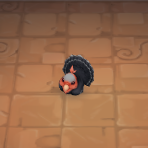
| + | {{SKCell|[[File:Furniture-Curious Mewkat icon.png|36px]] [[Curious Mewkat]]|font=small|left}} | ||
| + | {{SKWindow/Cell|Creature}} | ||
| + | {{SKWindow/Cell|Moorcroft}} | ||
| + | {{SKCell|[[File:Furniture-Curious Mewkat-Placed.png|80px|link=Curious Mewkat]]|font=small|center}} | ||
| + | |||
| + | {{SKNewRow}} | ||
| + | {{SKCell|[[File:Furniture-Cursed Tome Stand icon.png|36px]] [[Cursed Tome Stand]]|font=small|left}} | ||
| + | {{SKWindow/Cell|Stand}} | ||
| + | {{SKWindow/Cell|Moorcroft}} | ||
| + | {{SKCell|[[File:Furniture-Cursed Tome Stand.png|80px|link=Cursed Tome Stand]]|font=small|center}} | ||
| + | |||
| + | {{SKNewRow}} | ||
| + | {{SKCell|[[File:Furniture-Mystical Tome Stand icon.png|36px]] [[Mystical Tome Stand]]|font=small|left}} | ||
| + | {{SKWindow/Cell|Stand}} | ||
| + | {{SKWindow/Cell|Moorcroft}} | ||
| + | {{SKCell|[[File:Furniture-Mystical Tome Stand.png|80px|link=Mystical Tome Stand]]|font=small|center}} | ||
| + | |||
| + | {{SKNewRow}} | ||
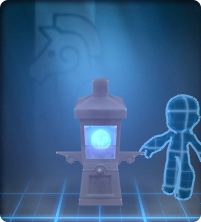
| + | {{SKCell|[[File:Furniture-Blue Short Gaslamp icon.png|36px]] [[Blue Short Gaslamp|Gaslamp]] (Short)|font=small|left}} | ||
| + | {{SKWindow/Cell|Light}} | ||
| + | {{SKWindow/Cell|Moorcroft}} | ||
| + | {{SKCell|[[File:Furniture-Blue Short Gaslamp.png|80px|link=Blue Short Gaslamp]]|font=small|center}} | ||
| + | |||
| + | {{SKNewRow}} | ||
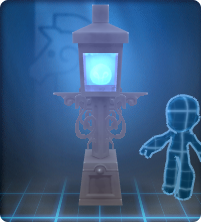
| + | {{SKCell|[[File:Furniture-Blue Tall Gaslamp icon.png|36px]] [[Blue Tall Gaslamp|Gaslamp]] (Tall)|font=small|left}} | ||
| + | {{SKWindow/Cell|Light}} | ||
| + | {{SKWindow/Cell|Moorcroft}} | ||
| + | {{SKCell|[[File:Furniture-Blue Tall Gaslamp.png|80px|link=Blue Tall Gaslamp]]|font=small|center}} | ||
| + | |||
| + | {{SKNewRow}} | ||
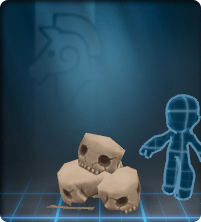
| + | {{SKCell|[[File:Furniture-Skull Pile icon.png|36px]] [[Skull Pile]]|font=small|left}} | ||
| + | {{SKWindow/Cell|Pile}} | ||
| + | {{SKWindow/Cell|Moorcroft}} | ||
| + | {{SKCell|[[File:Furniture-Skull Pile.png|80px|link=Skull Pile]]|font=small|center}} | ||
| + | |||
| + | {{SKNewRow}} | ||
| + | {{SKCell|[[File:Furniture-Moldy Tome Stack icon.png|36px]] [[Moldy Tome Stack|Tome Stack]]|font=small|left}} | ||
| + | {{SKWindow/Cell|Pile}} | ||
| + | {{SKWindow/Cell|Moorcroft}} | ||
| + | {{SKCell|[[File:Furniture-Moldy Tome Stack.png|80px|link=Moldy Tome Stack]]|font=small|center}} | ||
| + | |||
| + | {{SKNewRow}} | ||
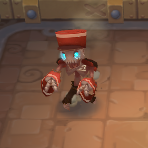
| + | {{SKCell|[[File:Furniture-Zombie Bellhop icon.png|36px]] [[Zombie Bellhop]]|font=small|left}} | ||
| + | {{SKWindow/Cell|Creature}} | ||
| + | {{SKWindow/Cell|Moorcroft}} | ||
| + | {{SKCell|[[File:Furniture-Zombie Bellhop-Placed.png|80px|link=Zombie Bellhop]]|font=small|center}} | ||
| + | |||
| + | {{SKNewRow}} | ||
| + | {{SKCell|[[File:Furniture-Black Lazy Gobblesnipe icon.png|36px]] [[Black Lazy Gobblesnipe|Gobblesnipe]] (Lazy)|font=small|left}} | ||
| + | {{SKWindow/Cell|Creature}} | ||
| + | {{SKWindow/Cell|Gobblesnipe}} | ||
| + | {{SKCell|[[File:Furniture-Black Lazy Gobblesnipe-Placed.png|80px|link=Black Lazy Gobblesnipe]]|font=small|center}} | ||
| + | |||
| + | {{SKNewRow}} | ||
| + | {{SKCell|[[File:Furniture-Black Plump Gobblesnipe icon.png|36px]] [[Black Plump Gobblesnipe|Gobblesnipe]] (Plump)|font=small|left}} | ||
| + | {{SKWindow/Cell|Creature}} | ||
| + | {{SKWindow/Cell|Gobblesnipe}} | ||
| + | {{SKCell|[[File:Furniture-Black Plump Gobblesnipe-Placed.png|80px|link=Black Plump Gobblesnipe]]|font=small|center}} | ||
| + | |||
| + | {{SKNewRow}} | ||
| + | {{SKCell|[[File:Furniture-Black Wandering Gobblesnipe icon.png|36px]] [[Black Wandering Gobblesnipe|Gobblesnipe]] (Wandering)|font=small|left}} | ||
| + | {{SKWindow/Cell|Creature}} | ||
| + | {{SKWindow/Cell|Gobblesnipe}} | ||
| + | {{SKCell|[[File:Furniture-Black Wandering Gobblesnipe-Placed.png|80px|link=Black Wandering Gobblesnipe]]|font=small|center}} | ||
| + | |||
| + | {{SKNewRow}} | ||
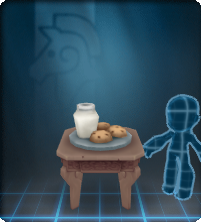
| + | {{SKCell|[[File:Furniture-Winterfest Table icon.png|36px]] [[Winterfest Table]]|font=small|left}} | ||
| + | {{SKWindow/Cell|Table}} | ||
| + | {{SKWindow/Cell|Winterfest}} | ||
| + | {{SKCell|[[File:Furniture-Winterfest Table.png|80px|link=Winterfest Table]]|font=small|center}} | ||
| + | |||
| + | {{SKNewRow}} | ||
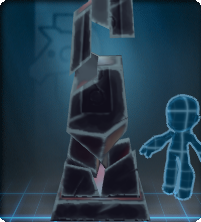
| + | {{SKCell|[[File:Furniture-Broken Obsidian Obelisk icon.png|36px]] [[Broken Obsidian Obelisk|Obsidian Obelisk]]|font=small|left}} | ||
| + | {{SKWindow/Cell|Doodad}} | ||
| + | {{SKWindow/Cell|Apocrean}} | ||
| + | {{SKCell|[[File:Furniture-Broken Obsidian Obelisk.png|80px|link=Broken Obsidian Obelisk]]|font=small|center}} | ||
| + | |||
| + | {{SKNewRow}} | ||
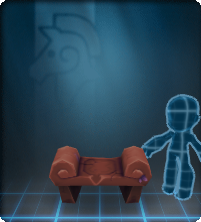
| + | {{SKCell|[[File:Furniture-Charred Bench icon.png|36px]] [[Charred Bench|Bench]] (Almire)|font=small|left}} | ||
| + | {{SKWindow/Cell|Seat}} | ||
| + | {{SKWindow/Cell|Almire}} | ||
| + | {{SKCell|[[File:Furniture-Charred Bench.png|80px|link=Charred Bench]]|font=small|center}} | ||
| + | |||
| + | {{SKNewRow}} | ||
| + | {{SKCell|[[File:Furniture-Charred Chair icon.png|36px]] [[Charred Chair|Chair]] (Almire)|font=small|left}} | ||
| + | {{SKWindow/Cell|Seat}} | ||
| + | {{SKWindow/Cell|Almire}} | ||
| + | {{SKCell|[[File:Furniture-Charred Chair.png|80px|link=Charred Chair]]|font=small|center}} | ||
| + | |||
| + | {{SKNewRow}} | ||
| + | {{SKCell|[[File:Furniture-Nature Sprite icon.png|36px]] [[Nature Sprite (Furniture)|Nature Sprite]]|font=small|left}} | ||
| + | {{SKWindow/Cell|Creature}} | ||
| + | {{SKWindow/Cell|Almire}} | ||
| + | {{SKCell|[[File:Furniture-Nature Sprite-Placed.png|80px|link=Nature Sprite (Furniture)]]|font=small|center}} | ||
| + | |||
| + | {{SKNewRow}} | ||
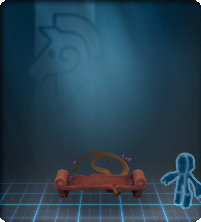
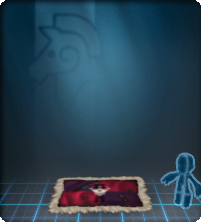
| + | {{SKCell|[[File:Furniture-Charred Rug icon.png|36px]] [[Charred Rug|Rug]] (Almire)|font=small|left}} | ||
| + | {{SKWindow/Cell|Rug}} | ||
| + | {{SKWindow/Cell|Almire}} | ||
| + | {{SKCell|[[File:Furniture-Charred Rug.png|80px|link=Charred Rug]]|font=small|center}} | ||
| + | |||
| + | {{SKNewRow}} | ||
| + | {{SKCell|[[File:Furniture-Charred Tapestry icon.png|36px]] [[Charred Tapestry|Tapestry]] (Almire)|font=small|left}} | ||
| + | {{SKWindow/Cell|Doodad}} | ||
| + | {{SKWindow/Cell|Almire}} | ||
| + | {{SKCell|[[File:Furniture-Charred Tapestry.png|80px|link=Charred Tapestry]]|font=small|center}} | ||
| + | |||
| + | {{SKNewRow}} | ||
| + | {{SKCell|[[File:Furniture-Charred Table icon.png|36px]] [[Charred Table|Table]] (Almire)|font=small|left}} | ||
| + | {{SKWindow/Cell|Table}} | ||
| + | {{SKWindow/Cell|Almire}} | ||
| + | {{SKCell|[[File:Furniture-Charred Table.png|80px|link=Charred Table]]|font=small|center}} | ||
| − | |||
| − | |||
| − | |||
| − | |||
| − | |||
| − | |||
| − | |||
| − | |||
| − | |||
| − | |||
| − | |||
| − | |||
| − | |||
| − | |||
| − | |||
| − | |||
| − | |||
| − | |||
| − | |||
| − | |||
| − | |||
| − | |||
| − | |||
| − | |||
| − | |||
| − | |||
| − | |||
| − | |||
| − | |||
| − | |||
| − | |||
| − | |||
| − | |||
| − | |||
| − | |||
| − | |||
| − | |||
| − | |||
| − | |||
| − | |||
| − | |||
| − | |||
| − | |||
| − | |||
| − | |||
| − | |||
| − | |||
| − | |||
| − | |||
| − | |||
| − | |||
| − | |||
| − | |||
| − | |||
| − | |||
| − | |||
| − | |||
| − | |||
| − | |||
| − | |||
| − | |||
| − | |||
| − | |||
| − | |||
| − | |||
| − | |||
| − | |||
| − | |||
| − | |||
| − | |||
| − | |||
| − | |||
| − | |||
| − | |||
| − | |||
| − | |||
| − | |||
| − | |||
| − | |||
| − | |||
| − | |||
| − | |||
| − | |||
| − | |||
| − | |||
| − | |||
| − | |||
| − | |||
| − | |||
| − | |||
| − | |||
| − | |||
| − | |||
| − | |||
| − | |||
| − | |||
| − | |||
| − | |||
| − | |||
| − | |||
| − | |||
| − | |||
| − | |||
| − | |||
| − | |||
| − | |||
| − | |||
| − | |||
| − | |||
| − | |||
| − | |||
| − | |||
| − | |||
| − | |||
| − | |||
| − | |||
| − | |||
| − | |||
| − | |||
| − | |||
| − | |||
| − | |||
| − | |||
| − | |||
| − | |||
| − | |||
| − | |||
| − | |||
| − | |||
| − | |||
| − | |||
| − | |||
| − | |||
| − | |||
| − | |||
| − | |||
| − | |||
| − | |||
| − | |||
| − | |||
| − | |||
| − | |||
| − | |||
| − | |||
| − | |||
| − | |||
| − | |||
| − | |||
| − | |||
| − | |||
| − | |||
| − | |||
| − | |||
| − | |||
| − | |||
| − | |||
| − | |||
| − | |||
| − | |||
| − | |||
| − | |||
| − | |||
| − | |||
| − | |||
| − | |||
| − | |||
| − | |||
| − | |||
| − | |||
| − | |||
| − | |||
| − | |||
| − | |||
| − | |||
| − | |||
| − | |||
| − | |||
| − | |||
| − | |||
| − | |||
| − | |||
| − | |||
| − | |||
| − | |||
| − | |||
| − | |||
| − | |||
| − | |||
| − | |||
| − | |||
| − | |||
| − | |||
| − | |||
| − | |||
| − | |||
| − | |||
| − | |||
| − | |||
| − | |||
| − | |||
| − | |||
| − | |||
| − | |||
| − | |||
| − | |||
| − | |||
| − | |||
| − | |||
| − | |||
| − | |||
| − | |||
| − | |||
| − | |||
| − | |||
| − | |||
| − | |||
| − | |||
| − | |||
| − | |||
| − | |||
| − | |||
| − | |||
| − | |||
| − | |||
| − | |||
| − | |||
| − | |||
| − | |||
| − | |||
| − | |||
| − | |||
| − | |||
| − | |||
| − | |||
| − | |||
| − | |||
| − | |||
| − | |||
| − | |||
| − | |||
| − | |||
| − | |||
| − | |||
| − | |||
| − | |||
| − | |||
| − | |||
| − | |||
| − | |||
| − | |||
| − | |||
| − | |||
| − | |||
| − | |||
| − | |||
| − | |||
| − | |||
| − | |||
| − | |||
| − | |||
| − | |||
| − | |||
| − | |||
| − | |||
| − | |||
| − | |||
| − | |||
| − | |||
| − | |||
| − | |||
| − | |||
| − | |||
| − | |||
| − | |||
| − | |||
| − | |||
| − | |||
| − | |||
| − | |||
| − | |||
| − | |||
| − | |||
| − | |||
| − | |||
| − | |||
| − | |||
| − | |||
| − | |||
| − | |||
| − | |||
| − | |||
| − | |||
| − | |||
| − | |||
| − | |||
| − | |||
| − | |||
| − | |||
| − | |||
| − | |||
| − | |||
| − | |||
| − | |||
| − | |||
| − | |||
| − | |||
| − | |||
| − | |||
| − | |||
| − | |||
| − | |||
| − | |||
| − | |||
| − | |||
| − | |||
| − | |||
| − | |||
| − | |||
| − | |||
| − | |||
| − | |||
| − | |||
| − | |||
| − | |||
| − | |||
| − | |||
| − | |||
| − | |||
| − | |||
| − | |||
| − | |||
| − | |||
| − | |||
| − | |||
| − | |||
| − | |||
| − | |||
| − | |||
| − | |||
| − | |||
| − | |||
| − | |||
| − | |||
| − | |||
| − | |||
| − | |||
| − | |||
| − | |||
| − | |||
| − | |||
| − | |||
| − | |||
| − | |||
| − | |||
| − | |||
| − | |||
| − | |||
| − | |||
| − | |||
| − | |||
| − | |||
| − | |||
| − | |||
| − | |||
| − | |||
| − | |||
| − | |||
| − | |||
| − | |||
| − | |||
| − | |||
| − | |||
| − | |||
| − | |||
| − | |||
| − | |||
| − | |||
| − | |||
| − | |||
| − | |||
| − | |||
| − | |||
| − | |||
| − | |||
| − | |||
| − | |||
| − | |||
| − | |||
| − | |||
| − | |||
| − | |||
| − | |||
| − | |||
| − | |||
| − | |||
| − | |||
| − | |||
| − | |||
| − | |||
| − | |||
| − | |||
| − | |||
| − | |||
| − | |||
| − | |||
| − | |||
| − | |||
| − | |||
| − | |||
| − | |||
| − | |||
| − | |||
| − | |||
| − | |||
| − | |||
| − | |||
| − | |||
| − | |||
| − | |||
| − | |||
| − | |||
| − | |||
| − | |||
| − | |||
| − | |||
| − | |||
| − | |||
| − | |||
| − | |||
| − | |||
| − | |||
| − | |||
| − | |||
| − | |||
| − | |||
| − | |||
| − | |||
| − | |||
| − | |||
| − | |||
| − | |||
| − | |||
| − | |||
| − | |||
| − | |||
| − | |||
| − | |||
| − | |||
| − | |||
| − | |||
| − | |||
| − | |||
| − | |||
}} | }} | ||
| − | |||
==Notes== | ==Notes== | ||
Revision as of 12:43, 12 August 2014


A Furniture is an item that can be placed in a Guild Hall. These are purely aesthetic items, with only a few exceptions (such as the Energy Well). Furniture items were introduced with this update, along with a major Guild Hall redesign. Furniture items show up in the "Furnishing" tab of your arsenal. This tab does not show up if you do not have any furniture. Furniture can be obtained and arranged in a variety of ways, see individual pages for availability and other details.
List of Available Furniture Items
Notes about this List
- Linking: images are links too - click on them to navigate.
- If a furniture item has its own recipe or special interaction, then the image link will lead to a specific page for that item, while the text link will take you to a page with a list of items (a "group") that the item belongs to. Example: click the "energy well image" and the "energy well text" - you'll go to different but informative places. "Trophy (Boss)" and "Special" classified items will usually have this linking behavior.
- If a furniture item does not have any properties like the above, both the image and text links will direct you to the same place - a page containing a detailed list with that item as well as like-colored items or items in the same group.
- Sorting:
- This list is organized roughly by Group + Date of Release (DoR) - Alphabetical (alphabetically if items were released at the same time, DoR overrides).
- Use the little box in the top part of the columns to sort the table alphabetically.
- If the table has been sorted, click the "page" button in the top left, or refresh the page to reset the table to the rough DoR order.
- Other:
- Small tip: mousing over images without clicking them will reveal the full name (vs. the general name of the item in the "icon/form" column) of that item for certain browsers.
There are different colors and/or shape variations available for many of these items! Go to individual pages for more information and visuals.
| ||||||||||||||||||||||||||||||||||||||||||||||||||||||||||||||||||||||||||||||||||||||||||||||||||||||||||||||||||||||||||||||||||||||||||||||||||||||||||||||||||||||||||||||||||||||||||||||||||||||||||||||||||||||||||||||||||||||||||||||||||||||||||||
|


Notes
- "Pile" classified furniture items are named "clutter" in the game files. This term is arbitrarily and unofficially used for understanding of item groups.
- "Doodad" is a general term used in many games to describe a miscellaneous, non-interactive, perhaps animated, scenic entity. This term is arbitrarily and unofficially used for understanding of item types.
- Most "Creature" type furniture can be walked through (intangible) - but a knight will cause a wandering entity to change its travel path.
- Rotation Information:
- Most "Light" classified furniture items cannot be rotated.
- Most "Pile" classified furniture items can be rotated in all directions (North, Northwest, West, Southwest, South, Southeast, East, Northeast).
- Most "Seat" classified furniture items can be rotated in all directions.
- Most "Shelf" classified furniture items can be rotated: South, West, and East.
- Most "Table" classified furniture items can be rotated: North, South, West, and East.
- The Winterfest Table and Antique Table furniture items can be rotated in any direction.
And so on.
Other classification types and individual items within types are highly variable.