Difference between revisions of "Bombing Guide"
From SpiralKnights
| Line 446: | Line 446: | ||
|stage1=Dark Reprisal | |stage1=Dark Reprisal | ||
|stage2= | |stage2= | ||
| − | |stage3=Dark Reprisal | + | |stage3=Dark Reprisal MK II |
|stage4= | |stage4= | ||
|stage5=Dark Retribution | |stage5=Dark Retribution | ||
| − | |||
}} | }} | ||
}} | }} | ||
Revision as of 17:58, 2 March 2012
| |
The topic of this article or section is subject to personal opinion, and does not represent any one absolute truth. |
| If you disagree, discuss your concerns on the the talk page before editing. |
| |||
|
Introduction
A bomber is a key player to any party. A pure bomber's main responsibilities can involve crowd control, spreading status effects, or dealing damage over an area to either kill or soften up enemies for teammates. Though this may seem to be a tedious line of work at first, it is an integral position for any organized party, and to some there is no greater satisfaction than to see a bombing run go perfectly. There are four points to being a bomber:
- Avoid running around randomly while dropping bombs erratically
- Be aware of the party and their enemies
- Memorize spawn locations triggered by party buttons
- Know how to deal with monsters that attack at range
Bombs
The main equipment needed for a bomber is, of course, a bomb.
Nitronome
Bomb Category: Damage, Crowd Control
The Nitronome is arguably the best damage bomb available to bombers. It is a large-radius bomb that deals damage to everything inside of its blast radius as well as pushing everything outward from the center of the bomb. Of the Blast Bomb alchemy line bombs, it has the shortest fuse, fastest walk speed, and a short charge time. Want to deal damage to a large area? The Nitronome is the obvious choice.
The Nitronome has less knockback and less damage than the alternate blast bomb alchemy lines but it makes up for it with the fastest bomb-charging walk speed and a radius that covers over 200% more area than the other two. These attributes combine to create a weapon that leaves the bomber feeling nimble and agile, allowing them to avoid attacks while charging bombs and using the Nitronome's moderate amount of knockback as a "shield."
The Nitronome deals normal damage making it useful against all monsters.
 Potential Hazards
- Blast explosion is bright and is accompanied by screen shake which can obscure vision for you and teammates
- Poorly placed bombs can push enemies into teammates
- Over-kiting enemies past bombs can cause knockback to push enemies into you
Big Angry Bomb
Bomb Category: Damage
The next best blast bomb after the Nitronome is the Big Angry Bomb, but it is considered a terrible option and isn't recommended. This bomb offers a large knockback, somewhere between that the Calibur and Divine Avenger's charge. Having the most damage of any bomb makes it rather tempting, however, it is quite unusable as it has a long fuse, small radius and slow movement when charging (leaving the bomber open to mob attacks). There aren't really any situations this bomb could be used over Nitronome, unless perhaps to nuke a swarm of mobs away from the player when in dire trouble.
In a party, this bomb annoys any player that you are with. No one wants to be strolling along only to find a jelly fly across and hit them mid attack. It's almost worse than a Calibur user who only uses the charge attack.
Overall it isn't an option unless you are a collector, or just want to try it for yourself. Just don't make a forum post complaining about it, because, well, we know.
 Potential Hazards
- Huge knockback and a long fuse can make pushing enemies unpredictable
Irontech Destroyer
Bomb Category: Damage
The worst of the blast bomb upgrades. Basically not an option at all. A long fuse, small radius, average damage (between Nitro and BAB) and average knockback. Anyone upgrading from the 4* version will be disappointed to find the 5* version is just a 'redder' color than its predecessor. Just don't get it, BAB was bad, this is much worse.
Heavy Deconstructor
Bomb Category: Damage, Crowd Control
One of the least known bombs is the Heavy Deconstructor. This bomb gives the appearance of a gremlin-demo style 'ticker' bomb, as well as showing what appears to be the Darkfang symbol in the blast effect. The Heavy Decon is one of the least used because, in all honesty, Master Blast Bomb is better. The two are the same in fuse, radius and charge time... so what's the problem? The construct damage bonus isn't really that noticeable and the Master Blast bomb's extra damage overall is a nicer option. The worst aspect is that the Heavy Deconstructor stops at 4* so the Nitronome greatly outclasses it. In end game bomber mode, its probably just a better option to look for a UV Construct bonus than going to the effort of making a Heavy Decon.
During the preview, the Heavy Decon was even more disappointing with an incredibly small radius (that of today's regular Blast/Super Blast Bomb). However, back then it seemed to have an actual use due to the reduced radius after getting a UV on bombs. (Obviously this feature has been removed.) This made the Heavy Decon an actual option inside the bombing community, eliminating gun puppies in a matter of 3 hits in a party of 4. Now though, there is no real use in favoring a Heavy Deconstructor over the Master Blast and for now it is only a novelty; perhaps it will be balanced in the future.
Dark Briar Barrage
Bomb Category: Damage
The Dark Briar Barrage (DBB) is a piercing damage bomb with characteristics similar to the Nitronome. It has the same movement speed while charging and radius of the Nitronome but has a slightly longer fuse[1] and has no knockback. The Dark Briar Barrage is capable of knocking down soft-bodied enemies such as gremlins and wolvers.
The absence of knockback makes the DBB a great choice for bombers less adept at nitronome placement. The non-disruptive nature of the bomb means that teammates will not have to make adjustments to their gameplay and also means that several DBBs can be comboed together effectively without interfering with each other. The DBB is an excellent choice against fiends, beasts, undead, and gremlins. Because it deals pierce damage, it is ineffective against slimes and construct.
When attacking enemies neutral to piercing (undead and gremlins) the DBB has the same damage output as a Nitronome.
Because the DBB has no knockback and a longer fuse, it offers less protection and must be used differently than a typical blast bomb. Bombers can take advantage of the DBB's longer fuse and non-disruptive behavior by running away from enemies while placing down DBBs and essentially kiting them into the blast zone. Another strategy is to take advantage of the lack of knockback by overlapping multiple bombs' blast areas on an enemy's position (like a Venn diagram[2]) while dodging attacks normally. This will allow bombers to easily hit a target multiple times without having to predict where enemies will be pushed.
 Potential Hazards
- Lack of knockback will require you to avoid many attacks as if there were no bomb
Ionized Salt Bomb
Bomb Category: Damage
Anyone telling you how great this bomb is, is sadly mistaken. Not only does this bomb have the slowest CTR of any bomb but it is also the only bomb that is so slow. Sure the damage is effective, and might work well in Tier 1/2 against beasts but beyond that it is a waste of CE especially when Radiant Sun Shards offers so much more. One point is that the bomb's shock chance makes up for the charge time, but that is the only redeeming characteristic. The bomb has normal + piercing damage with a bonus Jelly damage thus deals decent damage to all mobs apart from construct.
The low DPS due to the charge time is why the minority of bombers use it. Radiant Sun Shards is usually favored over Ionized since it covers a comparable range of effectiveness towards mob types and has a faster charge time.
The bomb should do well against beasts but the Dark Briar Barrage is much better due to a higher DPS and a solid AoE. Also the DBB has a generally satisfying charge time, which doesn't throw a bomber off after using other bombs.
 Potential Hazards
- Long charge time can leave you vulnerable to attack
- Same shock hazards as Voltaic Tempest
- Long range of shards can aggro distant enemies
- Shards from a single bomb can activate multiple switches at once
Radiant Sun Shards.
Bomb Category: Damage
There are some bombs that are fun to use, and aren't useful.... Radiant Sun Shards is both fun to use and very useful, with a side of added difficulty.The bomb covers all mob fields, apart from jellies (however Rads can still be used on JK quite effectively... it is just frustrating to use this bomb on jellies), and makes colorful rainbows spew from Trojans and those Thomas-the-Tank-Engine-like slag guards. Even in its 4* form it remains a completely viable bomb for Tier 3, and will make short work of Firestorm Citadel.
Switching from a radius bomb to a shard bomb is quite a change to get used to. There are many new tactics which are very different for kiting and spamming. The trick to Sun Shards is to try to make as many of the shards hit your target as possible. In FSC each shard does around 222 damage (depending on a player's bonuses) and can do a very large sum of damage to slags and Trojans. Shard bombing will be discussed thoroughly in the Tactics section later in this article.
Sun Shards is definitely a choice for a pure bomber heading to end game. When taking on Vanaduke one can use the Radiant Sun Shards instead of an Argent Peacemaker or a sword.
Sun Shards' claim to fame was in the last preview where it was the first 5* item available through the Bazaar for a hefty 103k fee. It was favored over other bombs such as Nitronome and the rest were typically unused. Now the bomb's line now stops at 4*, but its usefulness remains.
 Potential Hazards
- Long range of shards can aggro distant enemies
- Shards from a single bomb can activate multiple switches at once
- Shards are treated as projectiles and can cause rooms full of enemies that dodge projectiles to move into less advantageous positions
Graviton Vortex
Bomb Category: Crowd Control
This is a situational bomb, most useful for gathering up many mobs, then combining it with another weapons's attack. The Graviton Vortex is a bomb every bomber will own, just because the idea of a black hole is so cool. The Graviton Vortex doesn't reach its full potential until combined with a secondary weapon that deals a large amount of damage to a concentrated area. Because of this, the Vortex is suited for party play or bombers that have non-bomb secondary weapons.
The Vortex is great at drawing mobs into one area. If a large amount of monsters are pulled into the hole, then the knockback from the explosion will not occur. This bomb combos exceptionally well with sword charges, particularly the Brandish line. It can also be combined with the Shivermist Buster since Freeze will cancel the bomb's knockback; which traps enemies to a specific area.
Graviton is still something of an acquired taste. The bombing patterns used are quite different from that of blast bombs epicenter routine and Vaporizer's kiting pattern. The main pattern is just to walk around in a large figure 8 if one is pure bombing, but there are other ways to comfortably deploy the bomb. There is an indepth discussion of Graviton (particularly the Vortex) located at http://forums.spiralknights.com/en/node/13755 in the arsenal sub-forums.
- The Graviton Vortex is best used against melee enemies that are not too fast. Ranged enemies are likely to snipe you off as you go in to plant the bomb and fast melee enemies will reach you before you finish charging.
- The most effective way to use the Vortex is to run around enemies in a circle until they are in a packed formation. At this point, you should place the bomb such that it will catch the most enemies as they try to attack you.
For demonstrations of using the Graviton Vortex in various situations against various enemies, check out this Youtube video: http://www.youtube.com/watch?v=MKjKrWnpbKY
 Potential Hazards
- Standing on top of the bomb when the fuse goes off can often trap you in the center of vortexed enemies
- Enemies can still attack while inside the vortex
- Enemies that are alive when the vortex expires are flung randomly away from the bomb
- Kats are unaffected by the Graviton's suction
Electron Vortex
Bomb Category: Status, Crowd Control
The Electron Vortex is an elemental version of the Graviton Vortex that has a chance to status enemies that remain inside the vortex when it expires. Despite having a different damage type, the graviton-style bomb is still not a damage bomb as it only deals a trivial amount of damage at the beginning of the vortex and a moderate amount of damage to enemies still in the vortex at the end of it. Unlike the Graviton Vortex, the Electron Vortex is capable of trapping Kat ghosts which makes it a better option for targeting undead.
Because of the chance to spread shock status, the Electron Vortex will be less likely to fling enemies at the conclusion of the vortex. Being able to pull enemies into close proximity of each other and shocking them also maximizes the potential of shock. If the bomb manages to shock a group of enemies, they can be daisy-chained into another electron vortex.
The Electron Vortex is a new and improved Graviton Vortex but the mechanics are similar enough that frugal bombers that already own a Graviton Vortex should not feel the need to "upgrade".
 Potential Hazards
- Standing on top of the bomb when the fuse goes off can often trap you in the center of vortexed enemies; if the enemies get shocked at the end of the vortex, this can be potentially fatal since shield bumping may not be reliable
- Enemies can still attack while inside the vortex
- Enemies that are alive when the vortex expires are flung randomly away from the bomb unless they are prevented from being knocked back by shock status
- While charging you move at a significantly slower speed, leaving you open to fast moving enemies and projectiles.
Shivermist Buster
Bomb Category: Status, Crowd Control

Looking for crowd control? You have found everything you need! The freeze line with its highest upgrade, the Shivermist Buster, will freeze mobs in place. Frozen mobs cannot turn or move, but are still able to attack. This bomb is arguably the best support weapon. Freeze most of the mobs, finish the leftovers. Alternatively, you can freeze single mobs and leave the rest. Every mob in the game is easier to deal with when stuck in place so this bomb is useful almost everywhere.
The downside to a pure crowd control bomb is that the damage output is quite low. A mob that is frozen takes no damage from the status effect until it wears off, referred to as "thawing." Breaking the freeze early with another attack (from either a friend or foe) or refreezing results in no damage at all. Continuous freezing can be used to keep a mob alive while healing between waves, specifically in some rooms of the Firestorm Citadel.
Mobs can still attack while frozen so flank them from the side or from behind to stay safe when attacking.
Combining a freeze bomb with a damaging weapon can be quite devastating. First freeze the mobs in place, then charge up a blast bomb or a calibur sword and watch the carnage. Since the mobs are all herded together, the AoE damage will apply to many targets at once. The freeze also allows the calibur charge to connect on all three hits if released close to the target.
However, there is one downside that should be considered. If a knight is completely surrounded by mobs then freezing the mobs will hold them in place. As a result, the knight will not be able to evade the situation by pushing the mobs away with a shield.
 Potential Hazards
- Enemies can still attack from the front; approach enemies from behind to melee
- Can refreeze melted Ice Cubes
- Can create an impenetrable wall of enemies which Knights cannot shield bump through
Ash of Agni
Bomb Category: Status
The fire bomb line and its highest upgrade, the Ash of Agni, provide damage over time. The fiery mist inflicts a fire status on mobs that were foolish enough to not run away. Still, the fire line may be considered a support bomb. These bombs help by softening up monsters or by simply killing them slowly over time. However, the raw damage of a Nitronome bomb is usually more effective as it also provides some crowd control via knockback.
As with other haze-style bombs it has a small elemental damage blast in the middle when initially exploding. Damage UVs will increase the blast damage, but for these bombs it is negligible since the focus is on their status effects. As far as UVs go, CTR is desired as it allows bombs to be deployed quickly.
This bomb can be combined with a blast bomb by setting the monsters on fire and then blasting them away. Also, kiting is very easy with the bomb by simply running in a large circle setting monsters on fire. This strategy can out DPS menders, trivializing arenas or danger rooms. It takes some time, but the damage to yourself will be minimal if done right. Since the bomb only causes damage it should not disrupt other party members.
All in all, this bomb is one of the better ones and can be recommended.
 Potential Hazards
Venom Veiler
Bomb Category: Status
Poison is a very weak status. Knights rarely die from being poisoned and the same can be said of the clockwork's residents. The effects of the bomb are quite poor - the defensive and offensive debuffs are minimal. The time spent charging the bomb and placing it could be better spent using any other bomb.
The one redeeming value of the bomb is that it does not disrupt other haze bombs. So given a small area, one could alternate between Ash of Agni and Venom Veiler to do passive damage and provide a debuff, but the effects of the Venom Veiler would hardly be noticeable. Venom Veiler will slightly increase the ticks from Voltaic Tempest since it does actual damage, but the improvement is only about 7% over the low damage shock provides.
Despite the bomb having little effect in most areas, it can help a great deal while healers are in the room. The reason for this is that poisoned mobs will be damaged by menders' abilities. So in Tier 3 for example, if a room of poisoned mobs walk onto the circle of healing cast by gremlin menders, a great amount of damage will be inflicted upon the damaged mobs - so the room can be completed in less time then a lot of other bombs. The kiting ability of this bomb also means you are less likely to get hit so you are pretty safe in a room full of menders. So Venom Veiler can actually be a great bomb situationally, especially in shadow lairs, which have a lot of healers about.
Stagger Storm
Bomb Category: Status, Crowd Control
The Stagger Storm is a status bomb that stuns enemies that enter its mist. While stunning enemies, slowing down their attacks and movement, can be a useful crowd control tool, the stun duration does not last long after the mist dissipates. Bombers wishing to use Stagger Storm should attempt to keep the status rings deployed at all times to avoid having enemies go in and out of stun since adjusting to constant speed changes can be difficult for teammates.
The bomb is not very useful for solo play except in situations where bombers might want to deploy stun to a group of enemies in an attempt to run away from an area.
 Potential Hazards
- Enemies with lunging/tackling attacks are still able to perform attacks, however, animations for those attacks will not be shown
- Stun wearing off in the middle of an attack animation will sometimes cause the attack to abruptly occur without completion of the animation
- Spike attacks and thrown projectiles are unaffected by stun and will continue through the air at regular speeds.
Voltaic Tempest
Bomb Category: Status
Given the option between Ash of Agni, Shivermist or Voltaic Tempest there are rare situations where the Voltaic Tempest would be preferred. The Voltaic Tempest is an AoE shock bomb which delivers damage while interrupting movement and attacks. The problem is that the other two bombs do these duties better - the Ash of Agni is much more powerful for damage and the Shivermist completely locks down movement.
The one place it truly shines is against large groups of Kats. The shock interrupts their lunges and their tendency to clump together makes them shock each other for decent damage.
It can also be used against Wolver packs. Shock will usually keep Alpha Wolvers from lunging (though they will still rotate and bite) and, unlike other status effects, the wolvers tend to not teleport continuously. Shock does very little damage to Beasts though since the damage is elemental unlike fire and freeze.
Unlike the Ash of Agni, one can actually use Voltaic Tempest in the Firestorm Citadel. Unfortunately it is of little use; the shock occasionally interrupts zombies' lunges but does not affect their breath attack. The damage isn't significant enough to make noticeable difference. The shock does interrupt Vanaduke's charge, but Shivermist happens to do the same.
In LockDown, however, this bomb has a whole new purpose and usefulness as a defensive tool. In Tier 2, spamming Lightning Capacitors (the 3* version in this line of alchemy) is an effective way to defend capture points. This is because the majority of players tend to wear the Wolver or Cobalt line of armor (both of which provides no elemental or shock protection). It is a great way to force Gaurdians to keep their shields up, in which case it is then a great time to pound on their shield with another weapon or bomb. Breaking their shield in the mist will automatically shock them and keep them from pulling up their shield again as it restores. Also, a shocked Gaurdian cannot put up his shield long enough to heal himself or other players. The mist keeps Recons off of the capture point as well exposing those caught in the initial blast (and keeping them from re-shielding/disappearing). Strikers, on the other hand, might be able to fly over the capture point without getting shocked, though many times fly right into the mist and are unable to fly off as easily. Since most strikers carry the flourish or Snarble line of swords, they will often get caught in the mist on the third strike of their sword attack.
In Tier 3 LockDown, more players will have shock protection, or elemental resistance, mostly due to UVs, but the Voltaic Tempest is still a very viable defensive tool as most players will still not be protected against its effects.
 Potential Hazards
- Can supercharge quicksilvers
- Enemies can break ghost blocks, activate switches, and blow up explosive crates with shock spasms
- Enemies have reduced knock back while shocked
Bomb Alchemy Paths
This is a list of the alchemy paths of all the bombs currently in game. Click the bomb you want to view the materials needed to craft it.
| The Haze Bomb | ||||||||||||||||||||||||||||||
|
| The Blast Bomb | ||||||||||||||||||||||||||||||
|
| The Crystal Bomb | ||||||||||||||||||
|
| The Spine Cone | ||||||||||||
|
| The Static Capacitor | ||||||||||||
|
| The Graviton/Electron | ||||||||||||||||||
|
{{showhide|![]() Other Bombs
|content=
Other Bombs
|content=
| Other Bombs | ||||||||||||||||||||||||||||||
|
Bomb Charge Time
Bomb charge time is the minimum time required to hold down the action key to successfully prepare a bomb. The minimum charge time occurs prior to the charge-complete animation (glowing). All bombs gain a natural CTR bonus while leveling up via heat. At level 5, bombs will gain a low charge time reduction and at level 10 they will have a medium charge time reduction bonus.
-Bomb Charge Time in Milliseconds
-Bomb Charge Time - % reduced from base charge time from CTR bonus
| None | Low | Medium | High | V. High | Ultra | Max | |
| Haze Bomb | 3180 | 2960 | 2700 | 2447 | 2230 | 1975 | 1755 |
| Blast Bomb | 2200 | 2040 | 1866 | 1701 | 1545 | 1400 | 1225 |
| Ionized Salt Bomb | 4200 | 3850 | 3570 | 3250 | 2950 | 2595 | 2300 |
| None | Low | Medium | High | V. High | Ultra | Max | |
| Haze Bomb | 0% | 6.92% | 15.09% | 23.05% | 29.87% | 37.89% | 44.81% |
| Blast Bomb | 0% | 7.27% | 15.18% | 22.68% | 29.77% | 36.36% | 44.32% |
| Ionized Salt Bomb | 0% | 8.33% | 15.00% | 22.62% | 29.76% | 38.21% | 45.24% |
Bombs that share Haze Bomb charge times: Graviton Bomb, Electron Vortex, Big Angry Bomb, Voltaic Tempest
Bombs that share Blast Bomb charge times: Dark Briar Barrage, Sun Shards, Radiant Sun Shards, Irontech Destroyer, Heavy Deconstructor, Rock Salt Bomb
Armor
| ||||||||||||||||||||||||||||||||
|
Trinkets
Trinkets can be used to maximize the potential that bombs have. They provide a more accessible means to reaching maximum CTR or damage without having to target specific unique variants.
Bomb Focus Module
-
 Bomb Focus Module (Charge Time Reduction)
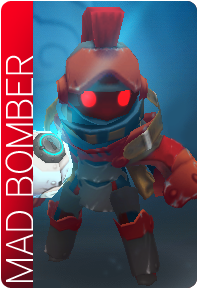
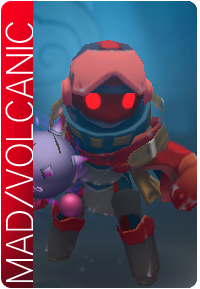
The Bomb Focus Module is a trinket more suited for status and hybrid bombers. The four-star variant will allow users of full Volcanic Demo Armor to reach maximum charge time reduction on all heat level 10 bombs. Hybrid bombers wearing either a Volcanic Demo Helm or one piece of Mad Bomber can reach maximum CTR with the five-star focus module.
Elite Boom Module
-
 Elite Boom Module (Bomb Damage Bonus)
The Elite Boom Module gives bombers a medium bonus to bomb damage. This trinket is best suited for bombers wearing full or partial (with medium bomb damage UVs) mad bomber armor wishing to maximize their damage potential. Coupling this trinket with both full mad bomber or a Volcanic Demo Helm + Mad Bomber Suit mix allows users to achieve maximum charge time reduction and maximum damage with bombs against all targets without the need of any unique variants.
Load-outs
Rookie Bomber
Starting off as a bomber is difficult; as most bombs are pretty stupid until they get to the higher levels. However, the beginner stages of being a bomber mostly revolve around what type of bomber you want to be; whether you want to be the all-out bomber with epic everything, or the support artist who make party runs all happy-like. This set is for finding and establishing your ground as a bomber.
The Bombs
- Blast Bomb
- Freezing/Fiery Vaporizer [are you the offensive status bomber or support?]
- Crystal Bomb
- Electron/Graviton Charge
Armor
- Spiral Demo Suit/Helm
- Owlite Shield
That Bomber with only two weapon slots
If you're just starting out or are fully fledged but free to play, there are some hard decisions to make for being a bomber. Only having two weapon slots means you will be changing a lot inline with each stratum. These are just some options; but play to your style if need be.
- Option 1: Blast/Shards
- Option 2: Blast/Vapor
- Option 3: Vapor/Vortex
- Option 4: Shards/Vapor
Where Blast includes And of the standard blast Bombs not including BAB or Irontech (including Snarbolax Bomb series), Vapor is whatever you like using (refer to bomb section above for comparisons), Vortex is Electron or Graviton lines and Shards is 3* Salt Bomb (not Ionized) and the Sun Shard lines.
Offensive
By this stage you understand where you stand as a bomber; you're the guy who want's to blow [obscenities] up - and clog them Wolvers throats with Spikes..... There are some great options out there, and never assume these are rules, only guidelines designed from tested sets. The Bombs
- Option 1:Nitro,RSS,AoA and Vortex
- Option 2:Nitro, DBB, RSS and AoA
- Option 3:DBB, VT/AoA, RSS and Vortex
The Other Stuff
- All Options: 1x Elite Boom Mod, Mad Bomber with Status resistances (mainly fire+Shock)
These Options work very well, with AoA delivering the initial and constant damage (use for kiting) RSS getting rid of Constructs and Gun-puppies, Vortex can be combo'd well with RSS and DBB when you need to be Party friendly for those not used to knock-back. They can be mixed and matched to your liking, but these 3 work the best for pure bombers.
Soloing
Playing solo is best using an offensive loadout; seeing as you will be the only one delivering damage. It is also necessary to have something to fall back on when on low health such as a polaris or heavy sword; because although pure bombing is quite easy after a few tries; it isn't a nice feeling getting stuck with low health in a gun puppy room. Bombs
- Nitronome for knockback
- RSS/DBB for DPS
- AoA (perhaps switch out for a polaris [AP for greavers if DBB isn't equipped] or your preferred sword)
- Shivermist (so when low on health you have time to recover and quickly strategize your next moves - combo it with closely placed RSS)
Other Stuff
- Vdemo helm (+Elite Boom mod)
- Mad suit
Defensive
Playing Defensive is pretty much the safest way to bomb. This requires a bit more dungeon knowledge; as it is basically a hold the fort style of play. E.G. in a clockworks tunnel area, you can hold off individual rooms when annoying mobs such as retrodes or devilites are chasing you. Basically lead the mobs to a choke point (corridor) and spam knock-back and freeze while hiding behind walls. this is not the funnest way to play but it is the safest: as it is more of a one enemy at a time pattern. The Bombs
- Shivermist Buster
- Dark Briar Barrage
- Nitronome
- Voltaic Tempest
Other Stuff
- Volcanic Demo Set
- 4star Bomb Focus Module
Status Bomber
Gunner/Bomber
PvP Bomber
Pathetic Bomber
If you feel like trolling, or just making a complete fool of yourself while disgracing the specialness that is bombing: this set is for you. (Caution: only use this if you are manly enough -> don't result to cowering in a corner. The Bombs
- Ionized Salt Bomb
- Big Angry Bomb
- Irontech Destroyer
- Heavy Deconstructor
Other Stuff
- Bombastic Set
- Dragon Scale Shield
Elite Bomber
So you're this....this Incredible Bomber; and you are probably working towards every bomb - even the gag bombs like Irontech. You might be a bit confused as to what to do next, and there is one thing that a few bombers miss (or have not understood): the most super-special set you can get. At this stage you know which bombs you're comfortable with ~ however, this isn't so much about the bombs, but everything else that makes bombing worth it.
That Epic Setup (stuff you need in your arsenal)
- UV Vhigh CTR Bombs (Whatever your favourties are)
- Stagger Storm, Ash of Agni, Shivermist Buster, Venom Veiler and Voltaic Tempest
- At least one Vortex
- Nitronome, Dark Briar Barrage
- Radiant Sun Shards
- Mercurial Demo Helm with Fire or Shadow resistance [Even both!]
- Mercurial Demo Suit with Freeze or Pierce resistance [Even both!]
- 2x Elite Boom Mod Trinkets
- 2x Elite Bomb Mod Trinkets
By now you may have an idea what this is about. With all these items you pretty much have everything you need to be the ultimate pure bomber. Why? Well for starters you have a medium movement speed bonus; allowing you to run while charging a bomb, or walk when charging Irontech. Yes! Irontech and BAB can actually be viable with one factor of their uselessness knocked out. You also have max damage and CTR in PvE, and can be the fastest bomber as a striker in Lock-Down and still have max CTR! You can basically enter any dungeon in Spiral Knights with a smile on your face instead of the "cheers to burning to death with Mad Bomber", and come out of party play with people wanting to know what bombs are the best. Congratulations in owning the best pure bombing arsenal in the game.... Now go out there and work on your tactics ;)
What you get from this setup
- Maximum damage for bombs (medium with striker in PvP)
- Maximum CTR for bombs
- Medium Movement Bonus to move faster while charging
- Highest PossibleSpamming increase
- Maximum dislike from Gunners and Swordsman
- Ultra Conversion rate of other players to bombers.
Tactics
General Tactics
There are several important things to consider while playing the role of the bomber. Firstly, and perhaps most importantly, is to avoid the common mistake of simply running about randomly while dropping bombs erratically. This will cause the positioning of monsters to become very difficult to predict, and the explosions may randomly push monsters into places where they may be able to attack a vulnerable ally. Instead, focus on what would be the most efficient strategy to ensure that monsters are persistently lured into your bombs (and preferably blown away from your allies). An easy tactic is to place a bomb, begin charging a second bomb, run into the crowd of enemies in front of you to lure them into the blast radius of your bomb, and then after the explosion, place the second bomb in the same place as the first, repeating for as long as necessary.
Second, a bomber must be aware of their party as well as their enemies. Remember that the Blast Bombs are great for soloing, but in a party, your group will begin to tire of not being able to see enemies due to the large blue cloud produced after the detonation, which is very dangerous. (This is known as the blue screen of death.) Though you may well be safe standing at the epicenter of your bomb, your fellow knights will likely be blinded, unable to see the foes that are around them. The only real way to effectively blast bomb in a party is to follow members closely if they have a gun, or to simply herd enemies into a corner for your swordsmen. To a lesser extent, be aware of the interactions of your bombs with certain monsters. Using the Ash of Agni on Oilers is a poor idea due to their healing when set ablaze, as well as using the Ionized Salt Bomb on Quicksilvers as they become extremely fast when affected with shock.
Third, memorize the spawn patterns that appear after a party button has been pressed. Though the spawns are somewhat random, they are collected from a pool of possible locations, and a bomber can capitalize on this by placing a Haze Bomb-series bomb on one of those locations before the monsters spawn, which will apply the respective status effect on the monsters that appear there. Even if no monsters spawn in that location, other monsters may be lured into the resulting cloud of mist, ensuring that the bomb is not wasted.
Lastly, a bomber must know how to deal with monsters that attack at range. though a knight with a sword or handgun will be able to combat them as normal usually, sometimes "pure" bombers will not have either of those things (instead having an equipment set of four bombs), or the duties of a bomber may take precedence over defeating those monsters personally. A bomber is not entirely helpless, however; bombs such as the Crystal Bombs fire projectiles instead of a standard explosion, and can be used to "snipe" ranged attackers such as Gun Puppies and Devilites. A well-placed Shivermist Buster may also freeze several foes in place, making Devilites easy targets and making it impossible for gun puppies to rotate, effectively limiting them to attacking only knights that cross directly in front of them.
Shards
Shard bombs are quite the alternative to the spam and kite methods of Haze and Blast lines. Here's a few tactics to get started.- Spamming is useful in general, however in beast, fiend and gremlin environments, the field becomes hazardous for team members due to the large amount of dodging mobs(the shards act as projectiles similar to which guns use, causing dodging; so these bombs are really just guns that shoot in a number of directions at once).
- In FSC, slags can be short work. Stand in one place until a slag starts the leap attack animation; place a Radiant Sun Shards where you're standing and walk backwards (don't shield or it will knock them away). This method hits the slag with every projectile, and with the right bonuses '1Hitting' is plausible but not definite.
- Trojans are now made easy. Shiver - circle: Trojan is frozen; Place RSS behind them = Big Damage and only a few hits to take them out.
- Shards disrupt Gun Puppies and the range will allow you to take them out from a distance.
- Shards are one of the only bombs that can be used to effectively handle Greavers, thanks to both their short charge and fuse.
- Shards can be quite devastating in Lockdown, especially when used in conjunction with a Shivermist.
Support Tactics
Kamikaze
Situations can unfold where you'll have to take one for the team. A prime example is against Spiny Toxilargos, where poison really demoralizes the team. Simply place freezies next to him risking running through the poison field as the status affect of the bomb is all that matters.
Corner Shielding
One of my favourites is to grab a big radius blast bomb, sit in a corner while the rest of your team guns. It keeps melee mobs distant and your teamates will thank you when a zombie starts noming on their face.
Carry Your Team Tactics
In order to carry a team, there are many factors that will help. four availiable weapon slots is always a good option, unless you feel comfortable with the crowd control bombs (nitro). Damage per second is really whats need to carry a party by yourself (by saying carry, Its implied that you aren't helping your team members in anyway as its assumed they're dead). One should be equipped with a crowd control bomb (vortex/Nitronome) a high damage bomb (radiant sun shards) a field stabilizing bomb(Shivermist). Ash of agni is always helpful against crowds of mobs (last room arena) ~ but isn't needed unless it's preferred over Vortex. There are many combinations which allow a player to carry a team - and they really depend on a players style. However the best possible set up will be Nitronome, Shivermist, Radiant Sun Shards and a bomb the player feels comfortable using (or just a sword/gun).
Other Stuff
With a recent update, there are now 4 guns that have explosive abilities; Supernova, Polaris, Biohazard and the Neutralizer. These 4 guns prove viable options in both crowd control + DPS. The two catalysers(Bio+Neut) allow the player to charge an enemy up with several amounts of charges before being able to detonate the high explosive contained in each particle. You may be thinking how these guns don't relate to bombs - but they do, and one can never have enough explosions. The Polaris and Supernova are another option; with Polaris now being compared to guns such as the Argent Peacemaker and Storm Driver. These guns's shots get stronger as they go, and provide a blast with a knock-back when the bullet reaches its maximum range. This ability is especially useful in crown control and getting rid of gun puppies, as the blast tends to cancel their attacks. Having a Pulsar gun at a narrow stretch with mecha zombies is quite useful, as much as even the larger bombs, since it can reach far enough past the Retrodes range attack. In all, don't out way a gun when choosing an alternate weapon to bombing - and if you like explosions, why not stick to guns that provide you with that satisfaction?
Player versus Player
Blast Network
The Blast Network is a PVP game mode quite similar to the classic Bomberman game series. It neglects the knight's equipment, the main and only weapon is an upgradable bomb.
The Basics
To win in a round of blast network, it is ideal to play defensively and let other players come to you; rushing at players, and spamming bombs doesn't always work as it does in the clockworks. Just remember a few key points and you're on your way to getting top position.
- stay away from corners and dead-ends; other players will be able to block you off with ease. It will be better to sit down the bottom at an intersection and carefully dodge bombs to stay alive.
- Collect power-ups; otherwise say goodbye to first place
- Play defensively, especially if you have bad latency; Other people will usually be ahead of you when you think they aren't...this makes it easy for you to place a bomb, and your opponent place a bomb straight after (trapping and killing you)
Team
Team play can be very frustrating if your team doesn't follow the basic concepts of #winning. The best way to help out your team is to stand and dodge in an optimal position (an intersection), and only occasionally place bombs if you are certain you'll cause your opposition some grief. However, there are people out there who are quite aggressive, and for you guys; the best help you provide will be the kill count. Try to power-up as much as possible, and place bombs in places that are easy for you to get out of while a surprise for your enemy. A long corridor that stretches to the top of the map should be ideal, and placing bombs down by the bottom will usually catch your enemy by surprise. Don't worry if you kill a teammate by doing this - it's their fault they weren't aware. If you have good latency, try your skills at trapping and spamming bombs while chasing players: it's a lot of fun and makes for an enjoyable game. One last tactic is to place 3 bombs down a column behind a breakable block. This way one bomb will break the block, and you have 1 bomb to catch unaware opponents, followed by the last bomb which will surprise the enemy, who expects less of a tactical placement.
Free-for-all
Spam your bombs.
Lock Down
Spamming bombs never helped... Unless you feel like scaring your opposition to death.
Lockdown is a great place to let your l337 bombing skillz shine, whether you feel the need to whip out a cold snap and make your enemy go 'oh snap', or if you want to see the Gran Faust striker's squirm while helplessly spinning in a vortex... either way much fun is to be had. As you probably realize, bombing isn't simple when competing against other conscious beings instead of mindless drones, and there are a lot of things that can't be predicted. To start, the best way to find your place as a bomber in PvP is to vary your styles, and never consistently follow each match after the other by spamming Voltaic or Shiver (although both are very effective methods). And although it is hard to say so... having entirely bombs equipped for PvP isn't a well thought out plan.
What you should know before starting
Here are a few things you need to know and consider before putting your hard hat on and going bowling with your Nitronome.
- Each class has different Bomb bonuses
- Recon has a Medium CTR bonus
- Guardian has a low CTR bonus
- Striker has a Very High CTR reduction
- This means a lot of different load-outs can be used. E.g.; Full Volcanic demo can be used with a Guardian class to reach max ctr, Only one 5* bomber piece [never bombastic[ever]] is needed with Recon (along with a lvl 10 bomb) to reach max etc.
- Another thing to consider is that Max CTR can still be achieved on striker (although expensive it is one of the best bombing methods) i.e. Full Mad Bomber + 2x Elite Bomb focus mods.
Striker
Striker to a bomber is pretty useless to a bomber... at least you would think so. The class is actually OP once a bomber gets around the boundaries, and if you can afford it, you'll quickly outwit the typical Vog Cub Strikers. Having max CTR will mean you can kite your way into a horde of enemies, dance around them with Shivermist or Voltaic, throw a couple of Dark Briar's in and you've wiped out an entire team. Then if you get close to death, just speed gently into the distance - and to stop other Strikers from following, just spam a few Shivers behind you and you're safe. This all sounds nice, but in reality you are sacrificing a lot. The typical way of reaching Max on striker is Full Mad Bomber, Level 10 Bomb and 2x Elite bomb modules. This option however leaves behind the max damage a Completely Mad bomber holds with an elite boom mod, along with other status trinkets such as shock, fire, pierce and shadow. The Mad bomber set also greatly reduces status effect defences... which can be fatal (such as shock.... stupid shock ruining everything). But as always there are ways around this. The most efficient way is having a Vhigh CTR bomb (negates the striker penalty), and then the rest is your choice (see armor section above).
Guardian
Recon
Combos, and teamwork
Guild matches are pretty intense, with some pretty unique strategies being used by different groups.
The most common method for a bomber is the Freeze and Voltaic lock. Voltaic is the better option as most players aren't equipped against shock whereas sword masters use Skolver, which has a high freeze resistance (they walk casually through shiver). The idea is to block the entrances to a control point with the vaporizer's wide radius... effectively holding the point. You will find strikers like to fly right into your bombs assuming they can zoom;GF;fly away. In the event that your enemy has a Polaris/Supernova... run (unless you are skilled at dodging flying bombs). Either that or pop up your guardian shield and wait for a team-mate to two-hit them with a Gran Faust. The combination of Freeze and Shock is a safe bet for locking a position into your team's hands. Having a friend to use the alternate bomb is optimal.
There are many ways to ruin the fun in this game; however as a bomber I believe GF'ers and DA'ers ruin the game ~ The following method is for you evil doers needing revenge (mwahahaha).
Videos
Eek's Vault
Devilites
In tier 3, Devilites tend to be a bombers worst nightmare. Especially in the deeper depths, bombers end up lying on the ground, thinking a way out from the hordes of fiends. It is actually quite possible to solo through these stages (devilish drudgery) with limited damage taken. Here are two good examples.
Gremlins
Two of the best options for dealing damage to gremlins are the nitronome and dark briar barrage. The nitronome can get risky since misplacement can push gremlins from their shield-side (not canceling their attack) into you or bombers but it does knockback and knockdown if placed correctly allowing you to have some breathing room. The dark briar barrage on the other hand only knocks back allowing you to trap gremlins that have been successfully hit in a knockback cycle similar to what the nitronome can do when pushing gremlins against a wall. The downside of the DBB is that the long fuse can leave you vulnerable and make it difficult to time a bomb that will knock all the gremlins down, leaving you open to attack from one or more if you miss with one of your bombs. Since these are AOE bombs, menders can't be specifically targeted. This can be mitigated by isolating menders by kiting other gremlins away or just trying to place bombs to hit them when possible.
Kats
Bombers can deal with kats by spreading shock status which is super effective against undead. The shock status partially immobilizes kats as well as interrupting many of their attacks allowing bombers to finish them off with either sword or damage bombs like the nitronome, dark briar barrage, or sun shards.
Lumbers
There is are a variety of options available for bombers to deal with lumbers. Using small damage radius bombs like haze-style bombs will mean approaching lumbers from their weak side and placing a bomb right next to them. When doing this, care should be taken NOT to shield after you drop the bomb so that Lumbers aren't pushed away. The RSS can be used at long-range but it is best used like a haze-style bomb so multiple hits can land.
Mecha Knights
Mechas can get out of hand in some arena stages, and players tend to over kite them - in turn getting hit by a flying charge attack. This example shows a player dealing with the type using only a nitronome.
Wolvers
Shard bombs cause wolvers to instinctively dodge the projectiles, fire can make them warp around feverishly, and freeze prevents them from moving but doesn't stop them from warping around. In Tier 3 the best options to deal with wolvers are the nitronome and dark briar barrage. The wolvers in tier 3 will warp around a lot and end up in the blast radius of both bombs quite often allowing a bomber to stay in place. Both bombs will knock down regular wolvers but the nitronome provides a little space to operate since it will also knock them back making regular wolver attacks miss. A bit more care should be taken with the dark briar barrage; bombers should pay attention to the direction of attack from both wolvers and alpha wolvers and prepare to move away from the attack to avoid getting hit. The piercing damage makes up for the small amount of extra legwork required with the DBB allowing it to two-shot regular wolvers before basil without any damage bonuses and two-shot up to D27 with full mad bomber.
Boss
Snarbolax isn't exactly the hardest boss to take down, but there is always something you don't know. Like, did you know you can relocate ol' snarby at anytime even in his defense stage with a graviton bomb?
- BOSS Vortex vs Snarbolax

With this newly found technique, Eeks and Fallout head in to see how fast they can kill Snarby in.... Sadly it doesn't help a lot. And Fallout dies.
For a while, it was thought to be useless taking a bomb into JK, but obviously this is no longer the case:
- BOSS Jelly King


Firestorm Citadel is the equivalent of a bomber paradise... We make those swashbucklers feel useless like a boss. Vanaduke runs home at the sight of them demo experts.
- BOSS Lord Vanaduke


Graveyards
Problem?
Culture Pwns everything
Gun Puppies
Fallout's Demonstration Collection
10s clips;
- Nitronome
- Dark Briar Barrage
- Graviton Vortex
- Irontech Destroyer
- Shivermist Buster
- Ash of Agni
- Stagger Storm
- Voltaic Tempest
- Radiant Sun Shards
- Electron Vortex
- Big Angry Bomb
- Venom Veiler
- Heavy Deconstructor
- Proto bomb
- Cold Snap
- Fire Cracker
- Static Flash
- Ionized Salt Bomb
Fallout's extended other shtuff
Echoez' Video Laboritoire
Aurora Isles
Concrete Jungle
F.A.Q.
There are a few questions that have been answered repeatedly, yet players still get confused. So here are some answers to the questions that haven't specifically been talked about in this guide.
It would work much better if there were none, and the only reason to charge a bomb would be to give it more power/radius!
Answer: In early previews, this is exactly how bombs worked: A player could repeatedly place (spam) bombs everywhere, and because charging up bombs only provided a small damage bonus (less than placing three uncharged bombs in a few seconds), the charge was rarely used. Bombing in the previews was abused, with shard bombs granting the best deployment to damage rate. Thus, Three Rings downgraded bombs before the last preview. However, this resulted in bombs being underused, and only being made effective by a select group. Bombing hasn't changed much since the last preview. The main reason for a wider use of bombs today is because players like discovering these less used weapons for themselves, or it has been highlighted to them by other players the usefulness of bombs.Answer: Generally, upgrading a weapon will have a greater effect to your gameplay than upgrading your armor. This does of course not mean that your armor is not important. First of all, start with two star gear. One-starred gear is not necessary at all. Since this game is all about upgrading your gear, you can save quite some Crowns by upgrading your weapons by recipes you bought from Basil and not the AH. Still, it can be frustrating if you look for a specific recipe. Try to find a good balance for that. Being a pure bomber can be a bit lacklustre at first. Many bombs have a too small bomb radius to be safe to use until upgraded to higher star versions. Also, you often won't be of much help to your party or you will take much time for some simple tasks such as destroying blocks, crystals or finishing leftover monsters. It might be more fun to have a sword for such tasks. A Calibur for instance is a good allrounder, other swords can be fine, too.
The upgrade lines from status bombs become better every upgrade. Since their bomb radius is low at first, e. g. a blast bomb may be more helpful for starters. You can then later add another bomb to your arsenal. Try to find out how much you need your shield. Since as a bomber you should be charging up bombs all the time, you can't shield much. If you have a bad latency or can't predict monster attacks as well yet, upgrading and using your shield can help quite much though. Based on that weigh up the priority of upgrading your shield.
Since you will be wearing the Spiral Suit set, getting both parts will be a high priority since it provides a medium reduction to your bomb charge time. However, the upgrades worth mentioning are five star only, the other ones just come natural. Because of that, their priority is rather low. As a bomber, you shouldn't get hit much anyway.Other Helpful links
| |
|---|
| Starting Out | New Player Briefing | User interface | Useful Links |
| |
| |
| |


