Difference between revisions of "Dreams and Nightmares"
From SpiralKnights
m (→Notes) |
m (→Monsters: pretty sure this is right) |
||
| Line 118: | Line 118: | ||
*[[Image:Gate_Icon-Unknown.png|16px|]] [[Image:Gate_Icon-Swarm.png|16px]] [[Lost_Soul#Void_Soul|Void Soul]] | *[[Image:Gate_Icon-Unknown.png|16px|]] [[Image:Gate_Icon-Swarm.png|16px]] [[Lost_Soul#Void_Soul|Void Soul]] | ||
*{{Monster Icons|Swarm}} [[Swarm#Swarm_Turret|Swarm Turret]] | *{{Monster Icons|Swarm}} [[Swarm#Swarm_Turret|Swarm Turret]] | ||
| + | |||
| + | {{showhide|Monster Waves for the Last Fight|content= | ||
| + | *Wave 1: A few Gels and Lumbers, a mini wave, there might be black swarm spheres that spawn random monsters | ||
| + | *Wave 2: Wolvers and Zombies | ||
| + | *Wave 3: Gremlins and Lumbers | ||
| + | *Wave 4: Wolvers and Zombies | ||
| + | *Wave 5: Gels and Lumbers | ||
| + | *Wave 6: Thwackers and Zombies | ||
| + | |||
| + | All waves: Void Souls | ||
| + | }} | ||
====Environment==== | ====Environment==== | ||
Revision as of 18:28, 13 June 2015
| ||||||||||||||||||||||||||||||||||||||||||||||||||||||||||||||||||||||||||||||||||||||||||||||||||||||||||||||||||||||||||||||||||||||||||||||||||||||||||||||||||||||||||||||||||||||||||||||||||||||||||||||||||||||||||||||||||||||||||||||||||||||||||||||||||||||||||||||||||||||||||||||||||||||||||||||||||||||||||||||||||||||||||||||||||||||||||||||||||||||||||||||||||||||||||||||||||||||||||||||
| ||||||||||||||||||||||||||||||||||||||||||||||||||||||||||||||||||||||||||||||||||||||||||||||||||||||||||||||||||||||||||||||||||||||||||||||||||||||||||||||||||||||||||||||||||||||||||||||||||||||||||||||||||||||||||||||||||||||||||||||||||||||||||||||||||||||||||||||||||||||||||||||||||||||||||||||||||||||||||||||||||||||||||||||||||||||||||||||||||||||||||||||||||||||||||||||||||||||||||||||
Dreams and Nightmares is a 10-2 rank mission.
Contents
Overview
Description:
Respond to the distress signal from the Core Terminal. We have no intel on what to expect. This is a dangerous mission. Prepare for anything.
Objective:
Prepare for the worst and journey to the Core.
Runthrough
First Floor
Environment
Second Floor
Environment
Third Floor
Monsters
Environment
- Explore random segments of new tileset, much like Clockwork Tunnels.
- Pending exploration entities
Fourth Floor
Monsters
Environment
- Explore random segments of new tileset, much like Clockwork Tunnels.
- Pending exploration entities
Fifth Floor
Monsters
- Wave 1: A few Gels and Lumbers, a mini wave, there might be black swarm spheres that spawn random monsters
- Wave 2: Wolvers and Zombies
- Wave 3: Gremlins and Lumbers
- Wave 4: Wolvers and Zombies
- Wave 5: Gels and Lumbers
- Wave 6: Thwackers and Zombies
Environment
A fixed floor with an arena at the end. The six monster gates blocking the exit each count for a wave of The Swarm that must be defeated in order to progress.
- Pending exploration entities
Sixth Floor
Environment
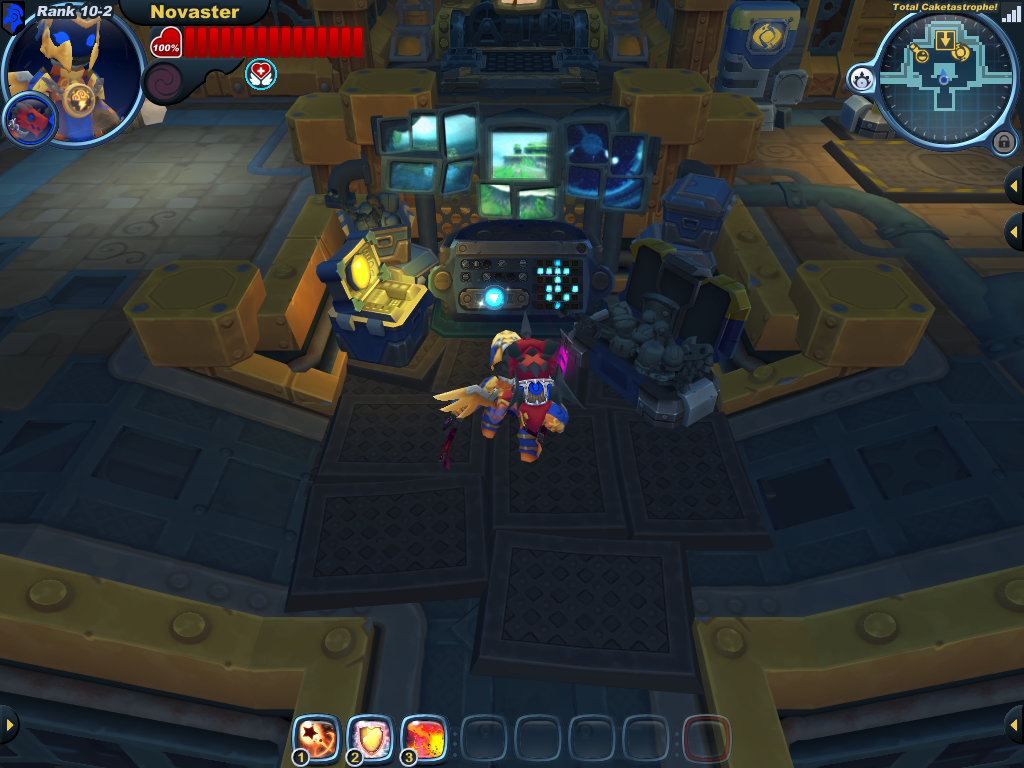
- several Treasure Boxes
Notes
This mission was introduced with release 2015-05-13.
It is the first rank mission to allow access to the Core.
Treasure Boxes in combat floors seem to only drop heat and crowns.
Strategy
| |
The topic of this article or section is subject to personal opinion, and does not represent any one absolute truth. |
| If you disagree, discuss your concerns on the the talk page before editing. |
Once the behavior of enemies and obstacles in this floor is understood, playing on elite difficulty is ideal to get the best loot in Refuge. This floor is a kind of Treasure Floor in Depth 28. The potential loot here, particularly Radiant Fire Crystals, is desired by many players. The mission is often repeated by players seeking crystals to forge their Tier 3 items. It is a very quick way to obtain radiants, but this mission does not have a high crown payout compared to other "end game" areas like Firestorm Citadel or deep arcade arenas, which have both crowns and radiants, but typically take more time to complete than Dreams and Nightmares.
Run through the preceding floors and areas as quickly as possible. Void monsters don't drop loot, so only defeat them when necessary. There are arsenal stations at the start of each combat floor, so change up as needed for speedrunning or fighting. You might run into some nasty mini-fights along the way, or you might not. The final fight in D27 takes place in a simple arena. Void Souls constantly spawn. The area is a large flat platform shaped like a square with simple exploration obstacles - 4 Swarm Turrets in the corners and orbital chains attached to these turrets are hazards the player must avoid in addition to defeating the six waves of monsters. Victory for the entire mission boils down to success in this fight.
Void monsters retain certain characteristics of the creature type they seem to be, with a few differences. Check the monster lists on this page and read up on their offenses and defenses. Most void monsters in this fight are limited to close-range attacks. The only projectiles in this fight are from Swarm Turrets, certain Void Thwacker swings, and the poisonous spikes of spinning Void Gels.
Establish an attack formation of sorts. If you are alone or in a squad, maintaining this pattern is important. Make sure Void Gels do not focus on Vaelyn (who is stuck to the north of the arena and unable to deal damage during the fight), because you do not want random spikes shooting around unexpectedly. There are two main strategies:
- Camping: Pick a corner and fight around one turrent avoiding its bullets and the orbital chain. Use lots of knockback (like with nitronome bomb or pulsar guns) and maintain damage output. This strategy eliminates issues with hazards elsewhere in the arena, and allows control of the battlefield - bump things far away, dash back to your corner, and deal with what's near you, then deal with what's left per wave. This strategy is ideal for players who suffer from lag and connection issues, but it is a little slower than kiting.
- Kiting: Avoid dashing, as this resets aggro. Dash only to save your life. Once you have the attention of the void monsters, walk counter-clockwise around the edge of the arena, firing bullets behind you and setting off bombs as you move. It is important to keep the monsters following you, but not too close. For this strategy, do not use weapons that inflict freeze or knockback, as this breaks the enemy patterns and increases the time it takes to get things done. This strategy is ideal for a quick victory but can be problematic for players who lag.
Recommended Equipment:
Disclaimer: As always, use whatever gear you are most comfortable with, as long as it does not interfere with the strategies and success of the squad. Some gear can be significantly more expensive than others, so you should always factor in economics when considering loadout options for missions. Will the gear help with only a few specific areas, or many? Will it pay for itself quickly, if at all? And so on. There is usually more than one way to solve problems - these are what work for many players.
A forum discussion about loadouts for this mission can be found here.
In general, a ranged loadout is recommended. Handguns and Bombs will keep you out of range of most things while dealing significant damage. Bombs will passively keep Void Souls at bay. High normal and some piercing defense is preferable. Poison resistance is a good idea.
Slow weapons or weapons that rely on charges that are not radial are comparatively poor choices, as these tend to leave you vulnerable and have lower overall dps in general.
The following gear has enabled a lot of success in many runs with different players. Work with your squad and gear and come up with combinations that best suit the situation and consider what each of you is best at. Someone could be the bomber, the gunner, the defender, etc.
- Using the Seraphynx's #2 ability, Heart Attack, is an excellent way to maintain squad integrity. Use it when enemies have depleted health, not right when they spawn. The Heart Attack effect will likely wear off by the time you chip away all that void monster HP. Be careful when casting, as you will be vulnerable for a moment. Pick up the hearts as you pass by, do not go after them and break formation.
 Healthy Boost perk:
- This lets your knight get hit a little more, forgiving an otherwise devastating lag spike or two. Players with little to no lag issues should augment their loadouts with weapon-boosting perks or Swift Steps instead of healthy boost.
- Equip trinkets that augment your offensive gear or HP in general, as needed or preferred.
Defenses: Shields:
- This shield will not save your skin as often as other shields, but it will significantly increase your attack speed. If you can dodge and avoid getting hit in general, this shield will certainly help you defeat monsters quickly.
- Increases sword power. This may help if you're using swords with the Chaos Set (to max out the sword damage bonus) and rely less on attack speed, plus it has more defense than Swiftstrike Buckler.
Armor and Helmets:
- Black Kat set:
![]() Black Kat Cowl
Black Kat Cowl
![]() Black Kat Raiment
Black Kat Raiment
- Chaos set:
- Using one of these sets, or combining one item from each of these "glass cannon" sets will let you deal a lot of damage. Chaos will help with Charge Time Reduction, so wearing it as a bomber is ideal. Black Kat will increase your movement speed, allowing you to get out of the way quickly, even without dashing. Both increase damage output significantly. Since the Black Kat items can be difficult to obtain, chaos is generally preferred for economic reasons.
Shields:
- This shield provides high normal, piercing, and stun defense. It will take most hits like a champ.
- Other shields that provide poison resistance, (or this shield with a poison resist UV) would also be useful, as long as that health and normal defense is high.
Armor and Helmets:
- Sacred Snakebite Pathfinder set:
![]() Sacred Snakebite Pathfinder Helm
Sacred Snakebite Pathfinder Helm
![]() Sacred Snakebite Pathfinder Armor
Sacred Snakebite Pathfinder Armor
- Are Void Gel spikes the only issue you've got with this mission? This set will take care of that problem while boosting your guns with ASI, CTR, and DMG. Your knight will also be able to take a few hits from other enemies.
- Pending (nitronome, big angry bomb, irontech destroyer, pulsars - especially polaris/wildfire)
- Many of the void monsters are weak to elemental, including Void Gels. The added fire dps is a nice touch, especially to cover lacking damage due to missed shots, but the magma driver specifically is not necessary. Bullets from the alchemer family are nice in this fight, because of their splitting behavior. Shoot into the monster groups - if you miss, the split bullet likely won't. The alchemer bullets are also an okay way to compensate for Void Souls absorbing your attacks.
- While this bomb doesn't do much against Void Lumbers and Void Gels, it deals very significant damage to other enemies, even those that are neutral to its piercing blasts. Importantly, the DBB will interrupt Void Thwackers and quickly deplete most enemy hp.
- This shadow bomb will take care of most things without significantly altering enemy attack patterns. It doesn't hurt Void Zombies much or significantly stutter enemies, but it will decimate the hp of most. Void Zombies are slow and generally not a problem - take care of them easily with other weapons.
Gallery
Related News art.
See Also
External Links
- Pending


