Swordmaster Guide
| The topic of this article or section is subject to personal opinion, and does not represent any one absolute truth. | |
| If you disagree, discuss your concerns on the the talk page before editing. |
| ||
|
|
While this guide is a thorough introduction to swords, links to more sources of useful information can be found at the bottom of the page.
Foreword
Swords are the bread-and-butter of Spiral Knights, but to utilize them to their full potential one must study the blade in great detail. Combat with swords is very fun due to the fact that you can easily deal vast amounts of damage. In most fights, swords are often the fastest way of getting rid of single enemies or small groups. Using your swords the right way will allow you to face nearly any danger in the game.
Introduction
The first thing a Swordmaster should learn is not how to use their sword, but their shield. Melee combat puts sword users in range of all monster attacks; this makes skillful use of the shield even more important for a Swordmaster. If one fights recklessly, they may find themself quickly dying in many situations. Spiral Knights should familiarize themselves with the information in the Shieldbearer Guide, and especially with the technique of shield bumping.
Most swords are capable of flinching monsters with both their charge attack and the final swing of their normal combo (notable exceptions exist). Landing a flinch while a monster is preparing to attack (signified by a damage-colored aura) will interrupt the attack, enabling a Knight to stay close and land as many hits as possible. Attack patterns are best memorized through first-hand experience.
It is also essential for all Knights to know monster damage resistances. There are four damage types: normal, piercing, elemental, and shadow. Having weapons with different damage types corresponding to monsters you expect to encounter is a great advantage. Carrying multiple swords is a good way to accomplish this, but you should also consider bringing a gun or bomb to increase your versatility.
Control Scheme
Control schemes are important for every swordsman. Having quick access to weapon-switching and shielding is important. Here is an example of a good control scheme for a Swordmaster:
| ||||||||||
|
| ||||||||||
|
Techniques
A good Swordmaster should make avoiding damage the top priority; remember, you can always land another hit later! Preserving your health is important, especially when going up against a great amount of monsters.
When facing a huge mob of enemies, a good attack pattern would be to:
Wait for enemy to come in range -> Attack once -> Shield and retreat -> Repeat
You can avoid having to attack before charging your weapon by using this pattern:
Shield -> Hold attack key -> Un-shield.
(See shield charge for more information.)
Slow two-hit swords have a wide swing; so, before attacking try to position and angle yourself to hit as many enemies as possible. This is sometimes easier with auto-targeting turned off (so you can aim between monsters rather than at one in particular), so make sure you bind the toggle to a convenient key.
Cutters, Spurs, Flourishes and Thorn Blades make you move a lot while attacking, which can be both a blessing or a curse. This allows you to dodge hits while attacking, but in some cases can put you in danger or make you run into spikes. Autotargeting is quite useful while using them (especially for Flourishes/Snarble Barbs), as it makes it easier to follow enemies with consecutive attacks, but can make it difficult to target small enemies (such as Silkwings) that are nearby larger ones.
Advanced Techniques
There are several subtleties in the mechanics and controls for swordplay in Spiral Knights that can be exploited to your advantage with a little practice.
Beat
The final attack of a sword combo generally does more damage than the attacks leading up to it, and may also have a larger hit area or greater knockback. While you can always begin a new combo, sometimes you really want to get that finisher, and the enemy just isn't in the right place.
Well, you don't need to attack as fast as possible to perform a combo; you can wait a fraction of a second between attacks and still build towards your finisher. Most enemies try to move towards nearby knights. If you notice an enemy is slightly out of range when you are ready to perform your next attack, waiting a beat will often allow the monster to blunder into your attack range just before you complete your combo.
This can be especially handy when you see the enemy charging an attack, if you have a finisher capable of flinching them or knocking them out of range before their attack goes off. Alternately, many enemies move forward while making an attack, and waiting a beat may be the difference between missing them as you step into their kill zone and letting them whiff before you strike.
Lunge
If you hold down your attack button after performing any sword attack, you will begin charging for a charge attack. If you release the button while you are charging but before charging is completed, you will perform a normal attack instead. If you release at just the right time, the release attack will continue your previous combo instead of starting a new one.
The trick is this: unlike while performing a combo, you can move freely while charging. If you continue a combo by holding the attack button and then releasing it with correct timing (rather than pressing it a second time, as normal), you can move up to one square in any direction between attacks without breaking your combo.
This can be done between any two attacks in a sword combo. However, because it relies on continuing to hold down the attack button from the previous attack, a lunge cannot be performed before and after the same attack — you can do it at most once every two attacks.
Shield Cancel
Shield canceling is a general technique usable with all weapons, but sword users gain the greatest benefits, because they can use it to change which attacks are included in a combo.
Weaponry
In contrast to guns and bombs, the vast majority of swords deal either pure or split Normal damage. This means monster resistances, while still important, won't make or break your damage output. The Flourish family, Thorn Blades and Rocket Hammers all deal pure damage, which means they'll be very strong against weak monsters and almost entirely ineffective against resistant ones.
Medium Swords
These follow a 3-hit combo pattern, with the third hit usually able to flinch monsters. Since the Proto Sword is a medium-weight, Knights should already be familiar with their gameplay style.
Calibur Alchemy Family
The Calibur family is well-rounded but unexceptional. They feature a spin attack charge which hits enemies in all directions. Useful pretty much everywhere, but completely outclassed by the Brandish family in both damage and utility.
The Leviathan Blade deals higher raw damage than the Cold Iron Vanquisher, and the charge attack provides high knockback. While the charge's knockback can help keep monsters away, it will also significantly hinder its damage potential. This can be worked around, though: enemies against a wall or those that can't move in the first place (turrets, battlepods, etc) will suffer the full power of the charge attack. Shield bumps, the Leviathan's own charge, or other high knockback weapons such as the Pulsar family are all methods to help push enemies into a wall. Additionally, Freeze, Sleep, or a vortex bomb can help keep enemies stationary so they'll take more damage from the charge without needing a wall. This is the cheapest 5 star sword to craft, as its recipes are all provided for free as rank mission rewards.
The Cold Iron Vanquisher, compared to the Leviathan Blade, provides a high damage bonus against Undead in trade for less raw damage numbers. The charge attack also provides far less knockback than the Leviathan Blade, however, this also makes it score multiple hits against large, knockback-resistant enemies such as Lumbers without needing to lock them in place first. It's also less likely to throw enemies into your party members. Despite these advantages, the higher damage of Leviathan is typically more useful and will even outperform Vanquisher against Undead with a capped damage bonus from other gear.
![]() Be Aware
Be Aware
- The charge attack will strike static enemies three times.
- Leviathan's charge has huge knockback and may throw enemies at your allies if used carelessly.
Brandish Alchemy Family
The Brandish is a versatile sword, able to be upgraded into various different 5 star swords. The charge attack consists of explosions whose number and chance of triggering increase with each upgrade. Note that the explosions generated from these sword's charge attack will cause projectile-fearing enemies to try and dodge the explosions; this is rarely a problem if the monster was hit by the initial swing and knocked down as a consequence.
The Combuster's status effect provides extra damage and does not disrupt knockback, meaning enemies may "ride" the full wave of the charge attack, taking damage from each blast. The ideal pick of the elemental trio for DPS or general party play.
Compared to Combuster, Glacius trades high damage and moderate utility for moderate damage and high utility. Monsters that are frozen by the charge attack will not be knocked back, usually resulting in less raw damage than the Combuster in addition to the damage loss from no fire status. This is perhaps the best of the Brandishes for solo play, as the large amounts of freeze it applies gives its wielder significant control over the battlefield.
The Voltedge is a damage/utility hybrid that does neither job best, but truly shines when used in combination with a vortex bomb. Tightly grouping enemies together maximises the benefits of shock.
The Acheron inflicts Normal/Shadow damage and lacks a status effect. This sword has very high damage values even compared to the other Brandishes; the damage it deals to shadow resistant monsters is comparable to the neutral damage of other swords. This gives the Acheron great versatility and makes it an excellent choice for any knight. Even the mighty Royal Jelly can be decimated by only a few charge attacks. Like the Combuster, enemies will ride the full wave of explosions, making sure you capitilize on its absurd damage and providing knockback utility as well.
Obsidian Edge is another Normal/Shadow damage Brandish, but unlike the Acheron it shares its damage values with the elemental brandishes and can inflict poison with the charge attack. While generally weaker than the Acheron, it is still a good option, and poison's ability to prevent enemy healing and increase party damage output should be considered. Note that this sword is a Shroud of the Apocrea event reward so obtaining it may be difficult.
The runt of the litter, the Amputator is a pure Normal damage Brandish that lacks a status effect. Its damage values are the lowest in the brandish family, with any other 5 star brandish outdamaging it against neutral targets. Its only apparent upside, the high damage bonus against Slimes, does not help the sword's case at all as both the the Acheron and Obsidian Edge will deal more damage against Slimes. The fact that maxing out your sword damage bonuses will nullify the Slime bonus completely only adds insult to injury. It does have a single helpful quirk: the charge explosions can flinch enemies and interrupt their attacks. Unless you have a specific use case in mind for that utility, it is recommended to avoid this sword.
![]() Be Aware
Be Aware
- Combuster can ignite Oilers with the charge attack.
- Glacius can refreeze Ice Cubes with the charge attack.
- Voltedge can electrify Quicksilvers with the charge attack.
- The Voltedge, like the Triglav, is a PvP reward.
Fang of Vog
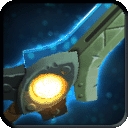
The Fang of Vog is a Normal/Elemental sword with a chance of causing Strong Fire with all three hits of its combo as well as its charge attack. Its attack speed is far lower than the other medium swords, reducing its DPS but increasing the range of its second and third swings. Where the Fang of Vog truly shines is its charge attack. Similar to the Leviathan Blade, it is a 360 swing with great knockback. While risky to use due to the chance of setting the user on fire, it provides both better range and far more damage than the Leviathan Blade's charge. The damage is so great that it can one-shot many enemies, especially solo, and can make boss fights much easier. The Royal Jelly in particular is made a breeze with the Fang of Vog. Just make sure to have a Remedy Capsule handy, especially if wearing armor with negative fire resist!
![]() Be Aware
Be Aware
- This sword's charge attack is incredibly powerful, but may set fire to the user.
- Avoid this sword if you do not plan on using the charge attack, as its normal swings are outclassed by other 5 star swords.
- Getting this sword requires at least 14 full Vanaduke runs.
Heavy Swords
The heavy swords have wide attacks with long range and good knockback, but they are rather slow. Attack speed increases, be it from UVs or gear, will help greatly when using these swords. The second strike of these swords have a moment afterwards when the player is vulnerable and cannot shield. Attack speed increases can shorten this time, however there are some situations where it will be better to use the first strike only and shield cancel.
Sealed Sword Alchemy Family
The Divine Avenger is a Normal/Elemental evolution of the Sealed Sword. Its charge is very useful for a Swordsmaster because it gives them a powerful ranged attack, great for crowds of enemies or distant Gun Puppies, but the swing itself deals even more damage (nearly doubled 2nd hit damage). While the Warmaster Rocket Hammer outclasses it in DPS, the Divine Avenger is much better at keeping the user safe.
Gran Faust is a Normal/Shadow evolution of the Sealed Sword. It can inflict Curse with its second swing and charge attack, giving it a unique role as the only weapon in Spiral Knights that can inflict curse. Its primary gameplay differenc from the Divine Avenger is the charge attack: the Gran Faust takes very long to charge up, shoots one large blade instead of three smaller oness, and has an approximately 1/3 chance of cursing the user. While the curse time (40 seconds with neutral resistance) and amount of weapons cursed can be reduced with curse-resistant gear, the charge attack is often not worth using unless you are confident that the curse will wear off before needing to attack again. This is made worse by the current meta gear, the Chaos and Black Kat sets, both having negative curse resistance which will render you completely unable to attack without taking heavy curse damage.
![]() Be Aware
Be Aware
- Is able to hit otherwise inaccessible enemies/blocks with the charge attack
- Projectile blades from charge attack make some enemies dodge or shield
- It is possible to activate several switches at once with the charge attack
- Undead and Fiends (excluding Greavers, Silkwings, and Howlitzers) are immune to Curse
- Some enemies, such as Lumbers, can be afflicted with Curse but will take no damage from it. This may be a bug.
Troika/Grintovec Alchemy Family
The Sudaruska deals pure Normal damage. It is slower than the Sealed Sword family (see data), with slightly longer range but the same knockback (see discussion). Its charge attack is an overhead swing with good AoE range, high damage output and huge knockback. The charge may also stun struck enemies... if they manage to survive it.
Triglav is the final form of the PvP-exclusive Grintovec line. It can cause freeze with both the second hit of the combo and the charge attack, which makes this sword very tricky to use as inflicting freeze will cancel out your attack's knockback. Since knockback is very helpful for counteracting this sword's long recovery times, it is not recommended to craft unless you know what you're doing.
![]() Be Aware
Be Aware
- The charge attack is very powerful, but can leave you vulnerable as there is a recovery period afterwards where you are unable to move or shield. Thankfully, the very large amount of knockback can make Sudaruska's charge safer to use against groups. Triglav's freeze will often get you smacked by anything that survives, however.
- The low speed means that the charge attack is almost useless in lockdown
Rocket Hammer
Possessing possibly the highest DPS of any weapon (Besides the Autogun line)in the game, the Warmaster Rocket Hammer is awarded for completion of the Operation Crimson Hammer Expansion Mission. It is somewhat different from other slow swords, as it not only deals pure elemental damage, but has a three hit combo attack instead of two, featuring a dash attack that can hit several times in between the two strike attacks. Its charge attack is a large overhead swing with a large knockback similair to the troika line charge, except that the smash is performed twice in succession. Remember that it is not always ideal to perform the dash attack in a combo. For this reason the shield cancel becomes vital: Shield cancelling after the first attack will turn the "dash" attack into a strike, allowing a knight to perform a 3-hit combo with this sword. Remember that the dash does not always have to be made in the direction of the enemy, so by striking once, then holding shift to disable Auto-Aim (or by disabling it in the options menu) you can dash away from enemies before they have a chance to retaliate. Like other slow swords, it is often wise to shield cancel after the second attack (strike or dash) rather than complete the combo with the final strike. This weapon can also interrupt elemental resistant enemies.
![]() Be Aware
Be Aware
- This weapon can only be obtained by purchasing and completing the Operation Crimson Hammer expansion mission.
- If used carelessly, this sword can propel you into traps and other unpleasant situations with both the dash and charge attacks.
- Pure Elemental Damage is dealt, so it is much less effective than other split-elemental swords for fighting gremlins or beasts.
- This weapon can dish out extremely high amounts of damage if all hits of the dash attack connect, provided the enemy does not resist Elemental.
Light Swords
Light swords have various attack patterns, all featuring exceptional speed. These swords tend to move the user a lot during their combo chains, so extra care must be taken to not be flung into floor hazards. They're also great for non-combat utiltiy such as quickly breaking minerals and blocks. Knowing when to toggle Auto Target is important!
Cutter Alchemy Family
Dealing only pure Normal damage, this family has low damage per swing but hits fast with a five-hit combo, each of which produces an afterimage that can hit a second time. Its overly aggressive playing style requires knowing when to shield and disengage to use safely, especially because only the final hit of the combo can flinch. The Cutter family has a particularly high reward for leveling it to level 10, as it gains the 30-odd bonus from leveling up on each hit, effectively giving it 300 extra damage on the combo.
Dread Venom offers a chance of inflicting strong Poison, which increases the damage per hit and also makes combat marginally safer as you'll take less damage in return. Unfortuately, its charge attack does not flinch enemies, making opportunities to use the charge safely rather rare thanks to its long animation lock.
While missing out on poison hurts, the Wild Hunting Blade is superior to the Dread Venom Striker in all other aspects. The charge attack of the Wild Hunting Blade flinches, which is an absolutely vital feature given how long you're rooted in place during it. Also, this sword's secondary hits have more range since the phantasmal Wolvers bite in front of the blade, while the rest of the family's afterimages have less range than the normal attack and will frequently miss unless you're hugging the target. There's also a damage bonus against Beast, but a piercing sword will still do a lot more damage to those.
![]() Be Aware
Be Aware
- Loses DPS the more frequently you need to interrupt the combo to disengage
- Can be very fun to use, but are outclassed by other sword types in most situations
Flourish/Snarble Barb Alchemy Family
The Flourish family features excellent swords for every Swordmaster that has trouble with Fiends or Beasts. Their attack pattern allows you to follow enemies as they dodge, and enabling auto target helps you dance around the battlefield decimating whole groups of monsters. Their second attack is able to flinch Greavers, third even Trojans. The initial swing has a very wide range, and can be spammed with shield canceling.
The Final Flourish focuses on damage above all else, lacking a status effect or projectiles. Its charge attack is particularly devasting and can travel a long distance, which makes it great for breaking through enemy walls but can be unsafe to use near floor hazards.
Compared to the Final Flourish, the Rigadoon loses some damage for a low chance to inflict stun. Stunning enemies can create an opening to rush them down with the charge attack, but the chance to inflict is so low that the enemy will often go down before they are stunned. It can be a fun gimmick in PvP, as stun is particularly helpful there. Most knights should craft the Final Flourish or Barbarous Thorn Blade instead.
A serious contender for the most pointless sword of all, the Flamberge is similar to the Rigadoon but trades its stun chance for a fire chance, therefore sacrificing guaranteed damage for a a very low chance to maybe inflict a bit of extra damage. Even if you get lucky with fire procs, it still outputs less damage than if you were using Final Flourish or Barbarous Thorn Blade. This blade's one niche is that it performs better against piercing-resistant monsters than its kin thanks to fire being typeless damage... but since the sword is pure piercing, the damage will be pitiful regardless.
Upgrading from Snarble Barb instead of the Flourish, the Barbarous Thorn Blade's normal combo is identical in every way to Final Flourish's combo. The selling point of this sword is its charge attack, which shoots a spread of spike projectiles without moving the wielder. Compared to the Flourish charge, this one is more effective against enemies grouped in front of the Knight, but less effective against single targets unless their hitbox is very large. Its lack of movement makes it safer and more predictable, but it won't be able to push through enemies pinning you down. Whether to craft this or Final Flourish is down to personal preference, but be warned it is also harder to obtain good UVs on the Snarble Barb because it is a boss reward.
![]() Be Aware
Be Aware
- Thrusts have long range and can make you enter floor hazards if not used carefully
- Due to the strict piercing damage output, these swords are nearly useless against slimes and constructs
Spur Alchemy Family
The Spur line has a basic combo which is similar to the Calibur or Brandish lines, except that each slash will propel the user forwards a fair distance. At 4 star and above, each slash also causes a small projectile to appear. The charge attack of the Spur line is a backstep followed by a strong slash which fires a projectile that deals low damage; the charge attack can have its aim adjusted at any point until the slash occurs, and can be shield cancelled.
![]() Be Aware
Be Aware
- Each attack causes a high level of movement and can easily throw the user into traps.
- Once the line reaches 4 stars, the projectiles that are added cause certain enemies to dodge.
- The hitbox on the charge attack is bugged. It is centered at the user meaning that it can hit behind the user and has less range at the front than the normal attack.
Promotion Exclusive Swords
Many uncraftable swords may only be obtained from prize box promotions — the vast majority of these are identical reskins to existing swords. A few notable exceptions exist, so this section will only go over swords that have non-cosmetic gameplay differences. Any given prize box is available for a limited time only, so players without a large stockpile of crowns should focus on rounding out their arsenal elsewhere before trying to obtain these.
 Celestial Saber

- Promotion: Equinox Prize Box
- Most similar to: Leviathan Blade
The Celestial Saber trades the ability to flinch most enemies on its third hit for a chance of moderate Stun on its charge attack. While it has a better charge attack than the Leviathan Blade, the inabiliy to flinch is a significant trade-off that makes the normal combo much less usable.
 Sweet Dreams
 - Promotion: Slumber Prize Box
- Most similar to: Cold Iron Vanquisher
The Sweet Dreams sword(?) offers a moderate Stun on its charge attack, with trade-offs compared to Vanquisher being a non-flinching charge and an Undead bonus of Medium instead of High. While the reduced Undead bonus barely matters, the loss of flinch makes the charge less safe to use despite the Stun chance. Overall a sidegrade.
Armor
While these are not all the options available, sword specialists or simply those who favor swords will often choose either a full or mixed Wolver set, which provides a low sword bonus on each piece. This is fairly simple up until 5*, where one must make the choice between Skolver, Snarbolax, and Vog Cub. While it is ideal for a sword specialist to possess both full sets, those who cannot yet afford this should conider the pros and cons of each.
Skolver
Skolver is the straight upgrade of the Wolver line, it protects against normal and piercing damage, gives resistance to Freeze and offers a medium sword damage bonus on each piece, offering a very high bonus when both pieces are equipped. When used with the Barbarous Thorn Shield, a maximum sword damage bonus will be obtained. While very good offensive armor, and excellent armor all around for the Royal Jelly Palace, its lack of elemental defense, attack speed increases, and fire resistance can make you much more vulnerable than Vog Cub users, especially with heavy swords and in Firestorm Citadel. However, remember that player skill can make this set shine anywhere by simply avoiding attacks, and Elite Quick Strike Modules can be used to make up for the lack of attack speed increases.
Snarbolax
Snarbolax provides the same sword damage bonus as Skolver, but has shadow defense in place of piercing, and loses some (not all) freeze resistance in exchange for poison. Since this armor can only be crafted after completing a Shadow Lair, it is not really a realistic choice for your first five-star armor, unless you are willing to pay someone else to craft and unbind it for you.
Vog Cub
Unlike Skolver, Vog Cub trades out medium sword damage bonuses for medium attack speed bonuses. It protects against normal and elemental damage, gives resistance to Fire, and will give a very high attack speed increase with both pieces. Of the two sets, Vog is more defensive than Skolver, speeding up swords for faster shielding and also providing increased DPS. Vog Cub is considered the best armor choice for Firestorm Citadel, providing both relevant defenses for the stratum, and being a great complement to heavy swords such as the Divine Avenger. Elemental defense is much more important than Piercing in tier 3, which usually makes this set a better choice than Skolver unless you are confident in your ability to dodge. To make up for the lack of sword damage bonuses, one could equip two Elite Slash Modules to obtain both Very High sword damage (max with Barbarous Thorn Shield) and attack speed, essentially providing the same bonuses as the Skolver set while also keeping Vog's Elemental defense and fire resistance.
Starlit Hunting
The Starlit Hunting set provides the same damage bonus as Skolver, but trades freeze resist for a far less generally useful sleep resist, and also adds on a stun weakness. This set also branches off at 3* rather than 5*, incurring extra recipe costs for those crafting more than one Wolver set. In short, this set is not worth crafting over Skolver unless you are specifically aiming for immunity to sleep bombs in Lockdown (or just really love doing Starlight Cradle levels).
Mixed Vog/Skolver/Snarbolax
A hybrid set will provide an average of the benefits of the sets you choose to mix. You can still reach the maximum bonus for either damage or attack speed using trinkets as long as you get a single "medium" bonus from a helmet, armor, or shield.
A given area of the clockworks will often have a strong bias towards a particular damage type, which means a pure defense against that type will generally serve you better than hybrid defenses. However, if you wish to play in many areas and can afford only a single set of armor, you might prefer to have a moderately hard time in two areas than an easy time in one and a very hard time in the other. Still, note that any combination of these lines will leave you defenseless against at least one damage type (probably shadow, given the difficulty of obtaining the snarbolax set), so you'll have to handle that somehow.
It is often said that elemental is the most common damage type, but several patches have reduced its prevalence, and its primacy is much more debatable now; there are certainly many particular levels with far more piercing or shadow damage than elemental.
Kat Claw Set
The Kat Claw Set is a unique piece of equipment, as each piece gives a bonus of both ASI Low and damage Low on swords. When paired with a Vog Cub armor piece and Barbarous Thorn Shield, this can create a balanced set for defense and offense alike (The bonuses will be High on both ASI and damage increase). This allows a player to deal moderate amounts of damage, and with the attack speed, one can avoid attacks more easily. (Other player opinions needed.)
Black Kat Set
For those who wish to deal damage without charging very often, the Black Kat Set can prove to be a useful piece of equipment, as the High Damage Bonus in each piece is universal. Swordbearers should look at quick weapons such as the Final Flourish, Barbarous Thorn Blade, Turbillion, Dread Venom Striker, or Wild Hunting Blade if they choose to wear this helmet.
Barbarous Thorn Shield
This shield and its predecessors are the best shields for a Swordsman, offering good piercing defense and a medium sword damage bonus, much like a piece of Skolver.
Swiftstrike Buckler
This shield greatly increases your attack speed, but can only be used for real blocking in T1 and T2, because on T3 it is far too weak to withstand most attacks. Unless you are very confident in your skill, it is better to use a different shield that will actually withstand attacks, and obtain attack speed from Vog or trinkets instead.
Trinkets
The trinkets received for PvP play are extremely powerful, and allow for a lot of customization, so obtaining them can allow to max sword statistics without using UV's. As defense UV's don't seem to work yet, it is recommended to obtain one of those. Try to cover the bonuses you don't have from your armor - eg. with full Vog, you won't benefit that much from Quick Strike, while Slash module will make a significant difference. By the time you can afford those, you will know which suits your playing style the most. Just remember that bonuses can be maxed, so taking two 5* Quick Strike Modules while wearing Vog Cub armor is pointless.
Sword damage bonus: Low
Useful for every swordsman, if you don't know which trinket to pick, choose this one.
Sword Charge Time Reduction: Low
Useful especially for swords with spammable charges, like the Divine Avenger, Calibur or Brandishes
Sword Attack Speed Increased: Low
Great for slow swords. Medium/fast swords' attack speed are also increased in the approximately the same rate.
Attack Speed Increase Vs. Damage Increase
The two armor boosts available for swordsmen have positive and negative aspects and present different ways to squeeze the life out of the monsters inhabiting the clockworks.
ASI
This is most useful when you can constantly attack. the more you wait the more possible damage you have wasted. It also works well with hit and run strategies.
Suggested Swords
- BTB/FF. This will let you attack almost unimaginably fast and save your self with your shield much quicker.
- Cutter. ASI on this sword makes it easier to avoid running into traps and allows you to execute its charge a bit faster.
- Winmillion. Its smooth attack let you glide across the field much faster, allowing you to single out your prey faster.
- Divine Avenger/Gran Faust. This is only recommended if you use the swings more then the charge attack; It doesn't increase the speed of the projectiles and minimally increases the swing speed of the slash.
Damage Increase
This is more for the strategic play style. It allows you to wait around and set up attacks (Or run) to deal lots of damage to a crowd or to not take damage from a boss by just waiting. Some attacks will leave you very vulnerable and some fast swords do get better with more damage.
Suggested Swords
- Brandish line. The normal attacks are almost useless at high speeds if you do not have Auto aim on, it can cause you to miss the last swing of your attack and make you vulnerable. It's suggested to use the charge attack with Damage Increase because you can set up a large group to be afflicted with a status, and the damage boost just makes more of those wonderful numbers fly into the sky.
- Sudaruska/Triglav. These swords are the slowest and also the ones able to hit the most number of monsters at once in one charge attack. The slow nature of the charge itself and the animation make the damage boost much better for crowds; allowing you to set them up and hit almost all of them at once.
- Divine Avenger/Gran Faust. The damage boost is helpful here because it lets you deal massive amounts of damage to a handful of monsters
- BTB/FF. It is suggested to use the damage boost in Lockdown because you can end most foes in 2-4 hits.
Further Resources
Bopp's sword guide Bopp's guide provides a deeper insight into how to pick the sword(s) that will best match your needs. It focuses its advice on which sword is optimal for a given role, whether you are a free-to-play or pay-to-play player, pure swordmaster or hybrid. It is easy to read and highly recommended for anyone who cares about optimizing their load out.
Lancer Knightz Guild - Sword data The Lancer Knightz guild has collected information on the combo time, charge speed, and movement speed effects while charging and presents the raw data in tabular format for those interested in a more in-depth analysis of swords.
Antistone's research on the mechanics of defense This page presents information on the mechanics of defense in Spiral Knights. It is relevant to all players, but it is only recommended reading for those who will appreciate a scientific approach to understanding the mechanics of armor defense.
| Starting Out | New Player Briefing | User interface | Useful Links |