Bombing Guide
From SpiralKnights
| ||
|
Introduction
A bomber is a person specializing in a play-style involving the primary use of a bomb. A bomber's responsibilities vary between crowd control, spreading status effects, or dealing damage over a large area. This may seem to be a tedious line of work to some, but bombs are very powerful tools and can significantly ease the difficultly of content for a party. There are two key points to being a successful bomber:
- Knowing which bombs are best for each situation, either to maximize damage or survivability.
- Placing bombs strategically, as to have to the greatest positive effect.
Bombs
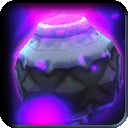
Blast Bombs
A go-to mainstay of almost any bomber's arsenal, the Blast Bombs are a line of explosive weaponry that deal pure Normal damage and have a large amount of knockback on them, making these bombs exceptionally useful for tactics like "shielding" and "boxing". The Blast Bombs are some of the most generally all-around useful bombs available, they're extremely effective in any stratum in the game and they're also easy to attain as players provided with a free Blast Bomb along with all the recipes to upgrade it through to the Nitronome just by progressing through the Ranked Missions. Despite their all purpose utility bombers do have to be careful when using this group of bombs, due to their knockback and very bright visual effect upon detonating, they can be extremely disruptive in uncoordinated parties. For this reason bombers planning to use Blast Bomb-line weapons should always be sure to inform their party beforehand and try to plan out strategies before major battles.
Nitronome
Bomb Category: Damage, Crowd Control

The Nitronome is arguably the best damage bomb available to bombers. It is a large-radius bomb that deals damage to everything inside of its blast radius as well as pushing everything outward from the center of the bomb. Of the Blast Bomb alchemy line bombs, it has the shortest fuse, fastest walk speed, and a short charge time. Want to deal damage to a large area? The Nitronome is the obvious choice.
The Nitronome has less knockback and less damage than the alternate blast bomb alchemy lines but it makes up for it with the fastest bomb-charging walk speed and a faster fuse than the other two. These attributes combine to create a weapon that leaves the bomber feeling nimble and agile, allowing them to avoid attacks while charging bombs and using the Nitronome's moderate amount of knockback as a "shield."
The Nitronome deals normal damage making it useful against virtually all monsters.
![]() Potential Hazards:
Potential Hazards:
- The explosion (and accompanying screen shake) obscures the view of surroundings for you and your teammates.
- Poorly placed bombs can push enemies into teammates.
- Over-kiting enemies past bombs will push enemies towards you.
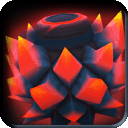
Big Angry Bomb
Bomb Category: Damage, Crowd Control, Status
The next best blast bomb after the Nitronome is the Big Angry Bomb, and is a unique option for those who want everything wiped from the screen. Offering an incredible amount of knockback and the highest damage per explosion of any bomb in the game, the BAB is a tool for players whom want to feel powerful, to control an area and sure as hell make sure nothing can get to you. A common misconception many people have is that the Nitronome is always the superior weapon, in actuality the mechanics of the two are different enough that they actually fill different niches; whilst chaining the BAB is significantly slower and less aggressive than Nitro-chaining, the greater knockback and stun effect it offers make it a much more effective "shielding weapon" when used defensively, making it a great choice in the Unknown Passage. Additionally the BAB is also a viable alternative in Lockdown despite what you might assume; many Strikers will find themselves taken off-guard by the slower-fuse and the potential stun on its explosion can leave anyone you hit easy pickings for your own Strikers.
![]() Potential Hazards:
Potential Hazards:
- Huge knockback alongside the long fuse means you need to be more pro-active in leading enemies into correct positioning than with the Nitronome
- Slow walking speed when charging leaves you vulnerable
Irontech Destroyer
Bomb Category: Damage, Crowd Control, Status
The Irontech Destroyer deals a bit more damage than Nitronome and does more knockback while having a fair chance of minor stun. The fuse time is as long as that of Big Angry Bomb and the walk speed reduction is also the same, making the bomb riskier to use than Nitronome. As the charge time is somewhere between that of Nitronome and BAB, DPS is not necessarily higher. Instead, Irontech sits somewhere right between its cousins: Hitting stronger than Nitro but being more spammable than BAB.
Some bombers find that the knockback and rapid exploding of Irontech negates the threat posed by the slowed walk speed and fuse time once you can get a chain going.
For the bomber on the cheap, the 4* Irontech Bomb is still stronger than Nitronome per blast (and, frankly, 5* Destroyer is barely any stronger) while still having the full radius of 5* bombs. As a bonus, the fuse time is faster than Destroyer's, too.
![]() Potential Hazards:
Potential Hazards:
- Slow walk speed will make dodging harder.
- Long fuse time makes it trickier to get the second bomb going than with Nitronome.
Heavy Deconstructor
Bomb Category: Damage, Crowd Control
One of the least known bombs is the Heavy Deconstructor. This bomb gives the appearance of a gremlin-demo style 'ticker' bomb, as well as showing what appears to be the Darkfang symbol in the blast effect. The Heavy Decon is one of the least used because, in all honesty, Master Blast Bomb is better. The two are the same in fuse, radius and charge time... so what's the problem? The construct damage bonus isn't really that noticeable and the Master Blast bomb's extra damage overall is a nicer option. The worst aspect is that the Heavy Deconstructor stops at 4* so the Nitronome greatly outclasses it. In end game bomber mode, its probably just a better option to look for a UV Construct bonus than going to the effort of making a Heavy Decon.
During the preview, the Heavy Decon was even more disappointing with an incredibly small radius (that of today's regular Blast/Super Blast Bomb). However, back then it seemed to have an actual use due to the reduced radius after getting a UV on bombs. (Obviously this feature has been removed.) This made the Heavy Decon an actual option inside the bombing community, eliminating gun puppies in a matter of 3 hits in a party of 4. Now though, there is no real use in favoring a Heavy Deconstructor over the Master Blast and for now it is only a novelty; perhaps it will be balanced in the future.
Dark Briar Barrage
Bomb Category: Damage

The Dark Briar Barrage (DBB) is a piercing damage bomb with characteristics similar to the Nitronome. Despite this the Dark Briar Barrage is not technically a "Blast Bomb" as it is neither part of the same alchemy tree, nor does it have the characteristic knockback of the other Blast Bombs, instead being capable of knocking down soft-bodied enemies such as gremlins and wolvers.
The absence of knockback makes the DBB a great choice for bombers less adept at nitronome placement. The non-disruptive nature of the bomb means that teammates will not have to make adjustments to their gameplay and also means that several DBBs can be comboed together effectively without interfering with each other. The DBB is an excellent choice against fiends, beasts, undead, and gremlins. Because it deals pierce damage, it is ineffective against slimes and construct.
When attacking enemies neutral to piercing (undead and gremlins) the DBB has the same damage output as a Nitronome.
Because the DBB has no knockback, it offers less protection and must be used differently than a typical blast bomb. Bombers can take advantage of the DBB's non-disruptive behavior by running away from enemies while placing down DBBs and essentially kiting them into the blast zone. Another strategy is to take advantage of the lack of knockback by overlapping multiple bombs' blast areas on an enemy's position (like a Venn diagram[1]) while dodging attacks normally. This will allow bombers to easily hit a target multiple times without having to predict where enemies will be pushed.
Shard Bombs

The Shard Bomb-line consists of six lines of cluster-like bombs which create an initial explosion on detonation that then fire a series of non-damaging shards in multiple directions. These shards will then stick into the ground and explode shortly thereafter causing a series a of explosions that form a kind of ‘ring’ around the initial placement point of the bomb. The initial shard does less damage than the ring of shards. These bombs are quite difficult to get used to similar to the old shard bombs, with the small knock-back making mobs end positions hard to predict. These bombs are hard to use, but they can deal extremely high damage with correct placement. The thing that makes this bomb special is that it can hit enemies multiple times whereas the nitronome only hits an enemy once.
If you want this bomb to hit more than a blast bomb then you need to get enemies to get hit by multiple shards. For example, if you get a slime between two shards then you hit the slime twice (three times if it gets hit by the primary explosion), but if you place a blast bomb you have a maximum chance of hitting the slime once. The bigger the enemy the more you can hit it. The jelly king can be hit with probably 4-5 shards at once dealing massive damage. Vanaduke could probably be hit with all 8 of the shards. This type of bomb is useful against bosses and normal enemies as long as your skilled enough. If you don't use the bomb right then you're better off with a different kind of dps bomb.
Unfortunately, there is a hit limit in place where no one shard bomb can inflict damage to the same enemy with more than 3 shards at once.
![]() Potential Hazards:
Potential Hazards:
- Shard Bombs knock back enemies multiple times, making it hard to predict the end positions.
- Placing near wall will result in some shards disappearing
- Sometimes hit limit will bug out, letting enemies take no damage or interruption from the shard bombs at all.
Shocking Salt Bomb
Bomb Category: Damage, Status
The Shocking Salt Bomb is a unique mix of shock and shadow damage not seen with any other weapons; and it can really pack a punch, especially to slimes with a Very High damage bonus to that family. The unique advantages presents by the way in which shock effects slimes makes the Shocking Salt Bomb a preferred choice in slime stratums over the Deadly Dark Matter Bomb.
![]() Potential Hazards:
Potential Hazards:
- Enemies who receive the shock status will not be affected by knockback, making the bomb more unpredictable than other shards.
Scintillating Sun Shards
Bomb Category: Damage, Status
The Scintillating Sun Shards combines stun and pierce to become a true fiend killer; with the helping hand of a Very High damage to fiend bonus.
Deadly Crystal Bomb

Bomb Category: Damage
The Deadly Crystal Bomb is the only elemental DPS Bomb, with the haze series focusing on the statuses. It is ideal for slow moving constructs, and can be good against undead with practice.
Deadly Dark Matter Bomb
Bomb Category: Damage
The Deadly Dark Matter Bomb also deals shadow damage like the Shocking Salt Bomb, however it deals more damage, has no bonus to any family, and does not deal a status. This bomb will outclass Shocking Salt against Slimes if the bomber obtains Very High or better damage bonus from armor or trinkets.
Deadly Shard Bomb
Bomb Category: Damage
The Deadly Shard Bomb is a red normal damage shard bomb, being the 'all-rounder' of the series. With other shard bombs being able to do larger damage to families, this bomb isn't something to get unless you are a collector. A player would be better off with a mix of the shadow shard bombs and the Deadly Crystal Bomb
Deadly Splinter Bomb
Bomb Category: Damage
Another Pierce damage shard bomb, the Deadly Splinter Bomb deals greater damage, has no bonus or status, however it will trump the Sun Shards against fiends if maximum damage is obtained through trinkets or armor.
Vortex Bombs
Starting their alchemy lines at three stars, the Vortex line are a few exceptionally powerful bombs that are in nearly every bomber's arsenal and for very good reason. Upon explosion the vortexes with pull all the nearby enemies toward them, enable a bomber to control the positioning of monsters in the immediate area and gather them into a particularly point to then be dealt with using another weapon for a lethal combo.
If a large amount of monsters are pulled into the hole, then the knockback from the explosion will not occur. These bombs combo exceptionally well with powerful charge attacks, particularly the Brandish and Autogun line weapons. The fact that these bombs enable you to gather up enemies for your teammates to then unleashed powerful attacks upon make them arguably the absolute best bombs for use in a team, with proper team work they are extremely lethal.
Graviton Vortex
Bomb Category: Crowd Control

The Graviton Vortex deals shadow damage and has no ability to inflict status conditions, meaning that dedicated bombers will find a lot of use comboing it with the Voltaic Tempest or Shivermist Buster to restrain enemies after the vortex explodes. Although as a general rule Graviton is considered inferior to its sister bomb, some players prefer it in stratums consisting of shadow-weak enemies.
For demonstrations of using the Graviton Vortex in various situations against various enemies, check out this Youtube video: http://www.youtube.com/watch?v=MKjKrWnpbKY
![]() Potential Hazards:
Potential Hazards:
- Standing on top of the bomb when the fuse goes off can often trap you in the center of vortexed enemies
- Enemies can still attack while inside the vortex
- Enemies that are alive when the vortex expires are flung randomly away from the bomb
- While charging you move at a significantly slower speed, leaving you open to fast moving enemies and projectiles.
- Kats are unaffected by the Graviton's suction
Electron Vortex
Bomb Category: Status, Crowd Control
The Electron Vortex is an elemental version of the Graviton Vortex that has a chance to status enemies that remain inside the vortex when it expires. Despite having a different damage type, the vortex-style bomb is still not a damage bomb as it only deals a trivial amount of damage at the beginning of the vortex and a moderate amount of damage to enemies still in the vortex at the end of it. Unlike the Graviton Vortex, the Electron Vortex is capable of trapping Kat ghosts which makes it a better option for targeting undead.
Because of the chance to spread shock status, the Electron Vortex will be less likely to fling enemies at the conclusion of the vortex. Being able to pull enemies into close proximity of each other and shocking them also maximizes the potential of shock. If the bomb manages to shock a group of enemies, they can be daisy-chained into another electron vortex.
![]() Potential Hazards:
Potential Hazards:
- Standing on top of the bomb when the fuse goes off can often trap you in the center of vortexed enemies; if the enemies get shocked at the end of the vortex, this can be potentially fatal since shield bumping may not be reliable
- Enemies can still attack while inside the vortex
- Enemies that are alive when the vortex expires are flung randomly away from the bomb unless they are prevented from being knocked back by shock status
- While charging you move at a significantly slower speed, leaving you open to fast moving enemies and projectiles.
- This bomb is a PvP reward
'Vaporizer' Bombs
Amongst all weapons in the game that are capable of inflicting status conditions upon the inhabitants of the Clockworks, one group reigns supreme and that is the "Vaporizer Bombs" line. Vaporizer Bombs are characterized by a small initial explosions that inflict an okay amount of elemental damage, but then spreads a large cloud of "haze" that deals a particularly status effect on everything within it that's vulnerable, making these weapons exceptionally effective at applying status effects to large groups of enemies.
While the name of these bombs may not make sense at first glance to newer players, once upon a time all of these bombs were a part of the Haze Bomb alchemy line, and the name has since stuck with many veteran bombers. That being said they also often called "mist bombs" or simply "status bombs".
Shivermist Buster
Bomb Category: Status, Crowd Control

Looking for crowd control? You have found everything you need! The freeze line with its highest upgrade, the Shivermist Buster, will freeze mobs in place. Frozen mobs cannot turn or move, but are still able to attack. Freeze most of the mobs, finish the leftovers. Alternatively, you can freeze single mobs and leave the rest. Every mob in the game is easier to deal with when stuck in place so this bomb is useful almost everywhere.
The downside to a pure crowd control bomb is that the damage output is quite low. A mob that is frozen takes no damage from the status effect until it wears off, referred to as "thawing." Breaking the freeze early with another attack (from either a friend or foe) or refreezing results in no damage at all. Continuous freezing can be used to keep a mob alive while healing between waves, specifically in some rooms of the Firestorm Citadel.
Mobs can still attack while frozen so flank them from the side or from behind to stay safe when attacking.
Combining a freeze bomb with a damaging weapon can be quite devastating. First freeze the mobs in place, then charge up a blast bomb or a calibur sword and watch the carnage. Since the mobs are all herded together, the AoE damage will apply to many targets at once. The freeze also allows the calibur charge to connect on all three hits if released close to the target.
However, there is one downside that should be considered. If a knight is completely surrounded by mobs then freezing the mobs will hold them in place. As a result, the knight will not be able to evade the situation by pushing the mobs away with a shield.
![]() Potential Hazards:
Potential Hazards:
- Enemies can still attack from the front; approach enemies from behind to melee
- Can refreeze melted Ice Cubes
- Can create an impenetrable wall of enemies which Knights cannot shield bump through
Ash of Agni
Bomb Category: Status, Damage,
The fire bomb line and its highest upgrade, the Ash of Agni, provide damage over time. The fiery mist inflicts a fire status on mobs that were foolish enough to not run away. Still, the fire line may be considered a support bomb. These bombs help by softening up monsters or by simply killing them slowly over time.
This bomb can be combined with a blast bomb by setting the monsters on fire and then blasting them away. Also, kiting is very easy with the bomb by simply running in a large circle setting monsters on fire. This strategy can out DPS menders, trivializing arenas or danger rooms, especially if used in conjunction with Venom Veiler. It takes some time, but the damage to yourself will be minimal if done right. Since the bomb only causes damage it should not disrupt other party members.
All in all, this bomb is one of the better ones and can be recommended.
![]() Potential Hazards:
Potential Hazards:
Venom Veiler
Bomb Category: Status
Poison is a very weak status. Knights rarely die from being poisoned and the same can be said of the clockwork's residents. The effects of the bomb are quite poor - the defensive and offensive debuffs are minimal. As a primary choice the veiler is one of the weakest bombs in the game, it only really shines when used to bolster the effectiveness of other weapons.
Despite the bomb having little effect in most areas, it can help a great deal while healers are in the room. The reason for this is that poisoned mobs will be damaged by menders' abilities. So in Tier 3 for example, if a room of poisoned mobs walk onto the circle of healing cast by gremlin menders, a great amount of damage will be inflicted upon the damaged mobs - so the room can be completed in less time then a lot of other bombs. The kiting ability of this bomb also means you are less likely to get hit so you are pretty safe in a room full of menders. So Venom Veiler can actually be a great bomb in the right situations, especially in shadow lairs, which have a lot of healers about.
Stagger Storm
Bomb Category: Status, Crowd Control
The Stagger Storm is a status bomb that stuns enemies that enter its mist. While stunning enemies, slowing down their attacks and movement, can be a useful crowd control tool, the stun duration does not last long after the mist dissipates. Bombers wishing to use Stagger Storm should attempt to keep the status rings deployed at all times to avoid having enemies go in and out of stun since adjusting to constant speed changes can be difficult for teammates.
Despite the risks presented by using Stagger Storm alone, it works extremely well in conjunction with certain other status bombs, namely Volatic Tempest where a dual stun/shock stack will completely prevent most enemies from being able to maneuver or attack.
![]() Potential Hazards:
Potential Hazards:
- Spike attacks and thrown projectiles are unaffected by stun and will continue through the air at regular speeds.
- This bomb is a PvP reward
- Quicksilvers, Oilers and Toxoils are immune to minor Stun.
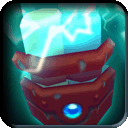
Voltaic Tempest
Bomb Category: Status

Given the option between Ash of Agni, Shivermist or Voltaic Tempest there are rare situations where the Voltaic Tempest would be preferred. The Voltaic Tempest is an AoE shock bomb which delivers damage while interrupting movement and attacks. The problem is that the other two bombs do these duties better - the Ash of Agni is much more powerful for damage and the Shivermist completely locks down movement.
However, that argument only holds against one enemy. An enemy that spasms from Shock will also damage nearby monsters. This makes Voltaic Tempest very effective against a large group, especially when used with another bomber's Graviton or Electron Vortex. Ash of Agni and Voltaic Tempest are a popular combination for damaging enemies that aren't immune or resistant to Fire or Shock. Keep in mind that Shock deals elemental damage, and thus is not nearly as effective against Gremlins or Beasts.
The one place it truly shines is against large groups of Kats. The shock interrupts their lunges and their tendency to clump together makes them shock each other for decent damage.
It can also be used against Wolver packs. Shock will usually keep Alpha Wolvers from lunging (though they will still rotate and bite) and, unlike other status effects, the wolvers tend to not teleport continuously. Shock does very little damage to Beasts though since the damage is elemental unlike fire and freeze.
Unlike the Ash of Agni, one can actually use Voltaic Tempest in the Firestorm Citadel. The shock occasionally interrupts zombies' lunges but does not affect their breath attack. The damage isn't significant enough to make noticeable difference unless the zombies are grouped together. The shock does interrupt Vanaduke's charge, but Shivermist happens to do the same.
In LockDown, however, this bomb has a whole new purpose and usefulness as a defensive tool. In Tier 2, spamming Lightning Capacitors (the 3* version in this line of alchemy) is an effective way to defend capture points. This is because the majority of players tend to wear the Wolver or Cobalt line of armor (both of which provides no elemental or shock protection). It is a great way to force Gaurdians to keep their shields up, in which case it is then a great time to pound on their shield with another weapon or bomb. Breaking their shield in the mist will automatically shock them and keep them from pulling up their shield again as it restores. Also, shocked Gaurdians cannot put up their shield long enough to heal themselves or other players. The mist keeps Recons off of the capture point as well exposing those caught in the initial blast (and keeping them from re-shielding/disappearing). Strikers, on the other hand, might be able to fly over the capture point without getting shocked, though many times fly right into the mist and are unable to fly off as easily. Since most strikers carry the flourish or Snarble line of swords, they will often get caught in the mist on the third strike of their sword attack.
In Tier 3 LockDown, more players will have shock protection, or elemental resistance, mostly due to UVs, but the Voltaic Tempest is still a very viable defensive tool as most players will still not be protected against its effects.
![]() Potential Hazards:
Potential Hazards:
- Can supercharge quicksilvers
- Enemies can break ghost blocks, activate switches, and blow up explosive crates with shock spasms
- Enemies have reduced knock back while shocked
Dark Retribution

Bomb Category: Damage
The Dark Retribution (DR) is a shadow damage bomb with a unique damage pattern. After a small initial explosion, four orbs will begin rotating inside the blast area (2 clockwise, 2 counterclockwise). These orbs are the primary source of damage that the DR deals.
DR has the highest damage-per-second of any bomb in the game, especially if used against immobile, or large enemies where multiple orbs will hit the target(s) repeatedly in quick succession. Against enemies such as the Royal Jelly or a Battlepod a few well placed bombs will lead to an extremely quick kill. The DR is undoubtedly one of the best bombs to use against slimes and constructs due to the abundance of monsters in their families that have movement patterns that make them very vulnerable to DR.
![]() Potential Hazards:
Potential Hazards:
- Jelly Minis are immune to the orbs
- This bomb can only be acquired through the expansion mission Operation Crimson Hammer
Armor
| ||||||||||||||||||||||||||||||||
|


![[1]](http://upload.wikimedia.org/wikipedia/commons/9/99/Venn0001.svg)
Trinkets
Trinkets can be used to increase the innate abilities of your bombs without, or in addition to, bomber specific armor. They provide a more accessible means to reaching maximum CTR or damage without having to target specific unique variants.
-
 Bomb Focus Module (Charge Time Reduction)
The Bomb Focus Module is a trinket more suited for status and hybrid bombers. The four-star variant will allow users of full Volcanic Demo Armor to reach maximum charge time reduction on all heat level 10 bombs. Hybrid bombers wearing either a Volcanic Demo Helm or one piece of Mad Bomber can reach maximum CTR with the five-star focus module.
-
 Elite Boom Module (Bomb Damage Bonus)
The Elite Boom Module gives bombers a medium bonus to bomb damage. This trinket is best suited for bombers wearing full or partial (with medium bomb damage UVs) mad bomber armor wishing to maximize their damage potential. Coupling this trinket with both full mad bomber or a Volcanic Demo Helm + Mad Bomber Suit mix allows users to achieve maximum charge time reduction and maximum damage with bombs against all targets without the need of any unique variants.
-
 Penta-Heart Pendant (+6 Health)
In the instance that you're primarily using your bombs to support a team, via status or crowd control, or you've simply managed to attain Max CTR and Max Damage without the need of your trinket slots, Penta-Hearts are a useful supplementary trinket that will increase you health, enabling you to better tank hits.
Tactics
General Tactics
There are several important things to consider while playing the role of the bomber. Firstly, and perhaps most importantly, is to avoid the common mistake of simply running about randomly while dropping bombs erratically. This will cause the positioning of monsters to become very difficult to predict, and the explosions may randomly push monsters into places where they may be able to attack a vulnerable ally. Instead, focus on what would be the most efficient strategy to ensure that monsters are persistently lured into your bombs (and preferably blown away from your allies). An easy tactic is to place a bomb, begin charging a second bomb, run into the crowd of enemies in front of you to lure them into the blast radius of your bomb, and then after the explosion, place the second bomb in the same place as the first, repeating for as long as necessary.
Second, a bomber must be aware of their party as well as their enemies. Remember that the Blast Bombs are great for soloing, but in a party, your group will begin to tire of not being able to see enemies due to the large blue cloud produced after the detonation, which is very dangerous. (This is known as the blue screen of death.) Though you may well be safe standing at the epicenter of your bomb, your fellow knights will likely be blinded, unable to see the foes that are around them. The only real way to effectively blast bomb in a party is to follow members closely if they have a gun, or to simply herd enemies into a corner for your swordsmen. To a lesser extent, be aware of the interactions of your bombs with certain monsters. Using the Ash of Agni on Oilers is a poor idea due to their healing when set ablaze, as well as using the Ionized Salt Bomb on Quicksilvers as they become extremely fast when affected with shock.
Third, memorize the spawn patterns that appear after a party button has been pressed. Though the spawns are somewhat random, they are collected from a pool of possible locations, and a bomber can capitalize on this by placing a Haze Bomb-series bomb on one of those locations before the monsters spawn, which will apply the respective status effect on the monsters that appear there. Even if no monsters spawn in that location, other monsters may be lured into the resulting cloud of mist, ensuring that the bomb is not wasted.
Lastly, a bomber must know how to deal with monsters that attack at range. though a knight with a sword or handgun will be able to combat them as normal usually, sometimes "pure" bombers will not have either of those things (instead having an equipment set of four bombs), or the duties of a bomber may take precedence over defeating those monsters personally.
Shielding
"Shielding" is a term used when a bomber relies on the knockback of their bomb to defend a segment of an area against large groups of enemies. Often this is done by chaining a Nitronome while a bomber and zir team remain in a corner, safe within the protective zone created by the knockback.
Boxing
"Boxing" is essentially the aggressive counterpart to shielding, in which a bomber uses the knockback of zir bomb to trap enemies into corners of rooms and repeatedly chain their bombs to maximize their damage whilst all keeping a group of enemies trapped, unable to fight back. The Blast Bomb once again more or less has a monopoly on this tactic, however it is also possible using Shards or a player can attempt a slightly different version with the Dark Retribution in which you use your shield to repeatedly knock enemies into the bomb's destructive attack.
Videos
This section is dedicated to video's demonstrating bombs and their uses versus a number of different enemies across a variety of different levels
Basic Bomb Demonstrations
- Nitronome
- Dark Briar Barrage
- Graviton Vortex
- Irontech Destroyer
- Shivermist Buster
- Ash of Agni
- Stagger Storm
- Voltaic Tempest
- Electron Vortex
- Big Angry Bomb
- Venom Veiler
- Heavy Deconstructor
- Proto bomb
- Cold Snap
- Fire Cracker
- Static Flash
Regular Enemies
Devilites
In tier 3, Devilites tend to be a bombers worst nightmare. Especially in the deeper depths, bombers end up lying on the ground, thinking a way out from the hordes of fiends. It is actually quite possible to solo through these stages (devilish drudgery) with limited damage taken. Here are two good examples.
Greavers
Bombers often find themselves at odds against greavers. Just a single greaver can sometimes spell doom and has massive wipe potential. The main issue is that greavers are fast, enter bomber personal space quickly withing giving bombers enough time to charge and drop a bomb. Unlike using swords, it's just not possible to cancel a greaver's attack without pre-dropping bombs. The best strategy for greavers is to always be prepared; drop bombs BEFORE greavers spawn so that you can cancel the first attack and get the upper hand. The best choices for greaver defense is probably the Nitronome.
Trojans
Trojans are one of the easiest fiends to deal with mostly because they can be predictably baited into doing certain attacks. The most efficient and safest trojan killers are definitely the DBB and nitronome using a back and forth bombing pattern where you drop a bomb in front of the trojan then spin them around and drop one on the other side while the first bomb explodes into their back.
Gremlins
Two of the best options for dealing damage to gremlins are the nitronome and dark briar barrage. The nitronome can get risky since misplacement can push gremlins from their shield-side (not canceling their attack) into you or bombers but it does knockback and knockdown if placed correctly allowing you to have some breathing room. The dark briar barrage on the other hand only knocks back allowing you to trap gremlins that have been successfully hit in a knockback cycle similar to what the nitronome can do when pushing gremlins against a wall. The downside of the DBB is that the long fuse can leave you vulnerable and make it difficult to time a bomb that will knock all the gremlins down, leaving you open to attack from one or more if you miss with one of your bombs. Since these are AOE bombs, menders can't be specifically targeted. This can be mitigated by isolating menders by kiting other gremlins away or just trying to place bombs to hit them when possible.
Constructs
There is are a variety of options available for bombers to deal with lumbers. Using small damage radius bombs like haze-style bombs will mean approaching lumbers from their weak side and placing a bomb right next to them. When doing this, care should be taken NOT to shield after you drop the bomb so that Lumbers aren't pushed away. The RSS can be used at long-range but it is best used like a haze-style bomb so multiple hits can land.
Mechaknights can get out of hand in some arena stages, and players tend to over kite them - in turn getting hit by a flying charge attack. This example shows a player dealing with the type using only a nitronome.
Slimes
- D14 RJP Slimes vs Dark Retribution, Big Angry Bomb, Nitronome, Shocking Salt Bomb


- D21 Jelly Farm vs Heavy Dark Matter Bomb (4*) & Shocking Salt Bomb (5*)

- D25 A Pinch of Salt - single bomb clear
Wolvers
Fire and shock can make wolvers warp around feverishly and freeze prevents them from moving but doesn't stop them from warping around. In Tier 3 the best options to deal with wolvers are the nitronome and dark briar barrage. The wolvers in tier 3 will warp around a lot and end up in the blast radius of both bombs quite often allowing a bomber to stay in place. Both bombs will knock down regular wolvers but the nitronome provides a little space to operate since it will also knock them back making regular wolver attacks miss. A bit more care should be taken with the dark briar barrage; bombers should pay attention to the direction of attack from both wolvers and alpha wolvers and move laterally or to the side of the wolver to avoid getting hit. The piercing damage makes up for the small amount of extra legwork required with the DBB allowing it to two-shot regular wolvers before basil without any damage bonuses and two-shot up to D27 with full mad bomber.
Undead
- Dark Briar Barrage vs Graveyard
- Graviton Vortex and Voltaic Tempest vs Graveyard

- D27 Firestorm Citadel: 4 Button Room
- Deadly Crystal Bomb vs Zombies in Firestorm Citadel (duo)

- Deadly Crystal Bomb vs Zombies in Firestorm Citadel Part 2 (solo)
- Dark Briar Barrage vs Zombies in Firestorm Citadel (solo)
Bombers can deal with kats by spreading shock status which is super effective against undead. The shock status partially immobilizes kats as well as interrupting many of their attacks allowing bombers to finish them off with either sword or damage bombs like the nitronome, dark briar barrage, or sun shards.
Boss Stratums
Snarbolax
Snarbolax isn't exactly the hardest boss to take down, but there is always something you don't know. Like, did you know you can relocate ol' snarby at anytime even when invulnerable by using a vortex-line bomb?
With this newly found technique, Eeks and Fallout head in to see how fast they can kill Snarby in.... Sadly it doesn't help a lot. And Fallout dies.
Royal Jelly
- Jelly King - Shocking Salt Bomb
- Jelly King - 25 Second Clear (Duo)

- D14-D16 Royal Jelly Palace & Boss Clear with 3 Bombs (side-by-side-by-side)
Firestorm Citadel
Firstorm citadel is a bomber's paradise and can make even mediocre bombs look good. The most important thing to learn is where and when enemies will spawn and take advantage of that with CC bombs (i.e. vortexing spawns, freezing groups, pushing into walls/corners, etc)
- D25/26 Firestorm Citadel (FSC)
- FSC - End of D26 (3 man)

- FSC - End of D27 Bomb Only solo

- Lord Vanaduke (support bombing)
- Vanaduke Solo with Shards
Shadow Lairs
Ice Queen Palace
Ice Queen Palace is by far the most bomb-friendly of the Shadow Lairs, due to the large clusters of slower moving enemies that really favor the crowd control of bombs over both swords and guns, and the fact the majority of the enemies in the palace are Ice Cubes, whom are easily made toothless thanks to Ash of Agni. A large variety, if not almost every non-Piercing bomb are viable here, making it an excellent place for higher level bombers to practice their skills before moving on to the harder lairs.
Danger Missions
Legion of Almire
LoA is very similar to FSC in terms of what loadouts you'll want to bring. One thing to note is that all enemies in this mission are affected by vortexes (including large alimirian knights) so it can be a very powerful CC tool if used correctly. Shivermist and Stagger are great CC bombs for this stage as shivermist can lock down shielded enemies for teammates. Stunned almirian knights (the smaller ones) are unable to attack while stunned so stagger storm is a decent choice for parties.
Compound 42
Dark Retribution really shines as a polyp sniper in C42. Unfortunately the SSB is not very good at clearing polyps and isn't as good as DR for kiting faster enemies like oilers.
- Shard Squad Angry Retribution
- Party Room Clears - SSB vs DR (solo)
- Compound 42 D25 Final Boss Room - solo
Heart of Ice
Ghosts in the Machine
Historical Videos
The following videos contain footage of a variety of bombs from older versions of the game, as a record of how things used to be
- Firestorm Citadel with Radiant Sun Shards

- Ionized Salt Bomb Demonstration

- Royal Jelly with Radiant Sun Shards
- Radiant Sun Shards to safely take out Gun Puppies
- Radiant Sun Shards vs Lumbers
Shard Squad Videos
F.A.Q.
There are a few questions that have been answered repeatedly, yet players still get confused. So here are some answers to the questions that haven't specifically been talked about in this guide.
It would work much better if there were none, and the only reason to charge a bomb would be to give it more power/radius!
Answer: In early previews, this is exactly how bombs worked: A player could repeatedly place (spam) bombs everywhere, and because charging up bombs only provided a small damage bonus (less than placing three uncharged bombs in a few seconds), the charge was rarely used. Bombing in the previews was abused, with shard bombs granting the best deployment to damage rate. Thus, Three Rings downgraded bombs before the last preview. However, this resulted in bombs being underused, and only being made effective by a select group. Bombing hasn't changed much since the last preview. The main reason for a wider use of bombs today is because players like discovering these less used weapons for themselves, or it has been highlighted to them by other players the usefulness of bombs.
Appendix
Bomb Alchemy Paths
This is a list of the alchemy paths of all the bombs currently in game. Click the bomb you want to view the materials needed to craft it.
| The Haze Bomb | ||||||||||||||||||||||||||||||||||||
|
| The Blast Bomb | ||||||||||||||||||||||||||||||
|
| The Shard Bomb | ||||||||||||||||||||||||||||||||||||||||||
|
| The Spine Cone | ||||||||||||
|
| The Vortex Bombs | ||||||||||||||||||
|
| Other Bombs | ||||||||||||||||||||||||||||||||||||
|
Bomb Charge Time
Bomb charge time is the minimum time required to hold down the action key to successfully prepare a bomb. The minimum charge time occurs prior to the charge-complete animation (glowing). All bombs gain a natural CTR bonus while leveling up via heat. At level 5, bombs will gain a low charge time reduction and at level 10 they will have a medium charge time reduction bonus.
-Bomb Charge Time in Milliseconds
-Bomb Charge Time - % reduced from base charge time from CTR bonus
| None | Low | Medium | High | V. High | Ultra | Max | |
| Haze Bomb | 3180 | 2960 | 2700 | 2447 | 2230 | 1975 | 1755 |
| Blast Bomb | 2200 | 2040 | 1866 | 1701 | 1545 | 1400 | 1225 |
| None | Low | Medium | High | V. High | Ultra | Max | |
| Haze Bomb | 0% | 6.92% | 15.09% | 23.05% | 29.87% | 37.89% | 44.81% |
| Blast Bomb | 0% | 7.27% | 15.18% | 22.68% | 29.77% | 36.36% | 44.32% |
Bombs that share Haze Bomb charge times: Graviton Bomb, Electron Vortex, Voltaic Tempest, Big Angry Bomb
Bombs that share Blast Bomb charge times: Dark Briar Barrage, Irontech Destroyer, Heavy Deconstructor, Shard Bombs
Helpful links
| |
|---|
| Starting Out | New Player Briefing | User interface | Useful Links |
| |
| |
| |
| |
The topic of this article or section is subject to personal opinion, and does not represent any one absolute truth. |
| If you disagree, discuss your concerns on the the talk page before editing. |