|
|
|
Taxonomy
 Undead Family, Giant Class Undead Family, Giant Class
|
|
Weak to  damage damage
Resistant to  damage damage
Neutral to  & &  damage damage
|
|
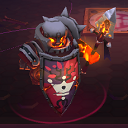
The Deadnaught is a monster.
Traits
Most of the time, higher tier monsters have all the abilities of preceding tiers, with increased intensity.
Deadnaught Traits by Tier
All Tiers
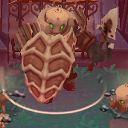
Deadnaughts are giant, shielded undead brutes that appear to be heavily armored Zombies.
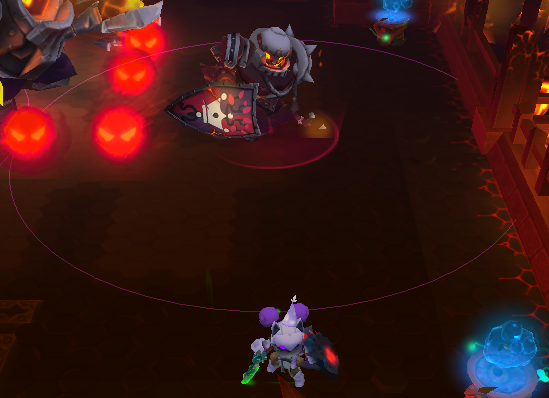
Deadnaughts attack by charging after knights with their spear, and they have the ability to revive Zombies and Bombies when they are near them, much like a Grim Totem. There are two basic variants of Deadnaughts: one, consisting only of the Almirian Royal Guard and the Almirian Shadow Guard, revives their undead brethren automatically when in range (indicated by a circle on the floor), while the more common second type, introduced in the  Dangerous Mission: Legion of Almire and containing all other Deadnaughts, needs to charge the revive move before using it.
Most Deadnaughts inflict shadow damage after Tier 2; however, both Almirian Guard variants deal strictly normal damage and therefore are the only members of the undead family to deal no shadow damage after Tier 1.
Strategy
 Guide: Deadnaught Combat
The typical strategy for these monsters is simply to always keep an eye on them. Unlike standard monsters who attack based on how close you are and your actions, these monsters will aggro any person and attack based on a timer instead of actions. The best method to taking down these tricky foes is to simply watch and wait for them to charge and then move out of their way and attack their back. After their charge misses, they will turn around to face their target quickly, which makes it tricky to land hits alone. You may need a teammate to help attack if you can't do it fast enough yourself. Note that their resurrection circle can be used as a warning sign that one is about to charge in from off-screen, so keep an eye on the floor. One can also kill nearby slag walkers or bombies to make them use their resurrection, which makes them stop and let you hit them if you're quick enough. It should also be noted that while their shield stops normal attacks from hitting them, attacks that can normally pierce through one or several enemies such as a Glacius will pass through and this can be used to freeze them from in front of them to then get behind to hit them for much damage.
Quick Glance Gear:
Pending
Resurrection Circle Radius
Notes
Deadnaughts are usually accompanied by Zombies and Bombies in battles, they must be the first priority to kill because of their powers of resurrection.
Almirian Royal Guards are probably undead Almirian citizens, considering the backstory of the Firestorm Citadel.
Despite appearing to be beefed-up Slag Walkers, neither variety of the Almirian Royal Guard can inflict fire, and they can receive the fire status from weapons or vials.
Since Vanaduke does not spawn Slag Walkers in his fifth phase, the Almirian Royal Guard's Resurrection ability is not used, the circle radius can be used as advantage to see them come when they use the Lance Charge.
The Almirian Royal Guard is currently the only Deadnaught variant not to appear in any prestige missions, only spawning during the battle against Lord Vanaduke.
A deadnaught may get inflicted with its own status.
Deadnaughts use shields similar to the Dread Skelly Shield.
History
List
Deadnaught
| Monstrous Profile
|
Tier 2,3
|
Description
A huge, skeletal knight carrying shadow-powered gear.
Notes
|
Combat
- Charge
- Resurrection
|
Loot
Depth and Material Drops:
Depth 1 and below:
Depth 4 and below:
Depth 8 and below:
Depth 13 and below:
Depth 18 and below:
As well as Crowns, Hearts, Heat, a Vitapod, and/or a Pickup.
|
Encounter
|
|
Burning Deadnaught
| Monstrous Profile
|
Tier 3

|
Description
A burning version of the Deadnaught.
Notes
Like other  Fire themed monsters, this enemy is immune to fire. Fire themed monsters, this enemy is immune to fire.
It behaves like the others. See above strategy for combat and equip effective gear.
|
Combat
- Charge
- Resurrection
|
Loot
Depth and Material Drops:
Depth 1 and below:
Depth 4 and below:
Depth 8 and below:
Depth 13 and below:
Depth 18 and below:
As well as Crowns, Hearts, Heat, a Vitapod, and/or a Pickup.
|
Encounter
|
|
Frozen Deadnaught
| Monstrous Profile
|
All Tiers

|
Description
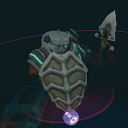
A freezing version of the Deadnaught.
Notes
Like other  Freeze themed monsters, this enemy is immune to frezee. Freeze themed monsters, this enemy is immune to frezee.
It behaves like the others. See above strategy for combat and equip effective gear.
|
Combat
- Charge
- Resurrection
|
Loot
Depth and Material Drops:
Depth 1 and below:
Depth 4 and below:
Depth 8 and below:
Depth 13 and below:
Depth 18 and below:
As well as Crowns, Hearts, Heat, a Vitapod, and/or a Pickup.
|
Encounter
This monster can always be found in these areas:
|
|
Vile Deadnaught
| Monstrous Profile
|
Tier 2,3
|
Description
A poisonous version of the Deadnaught.
Notes
Like other  Poison themed monsters, this enemy is immune to poison. Poison themed monsters, this enemy is immune to poison.
It behaves like the others. See above strategy for combat and equip effective gear.
|
Combat
- Charge
- Resurrection
|
Loot
Depth and Material Drops:
Depth 1 and below:
Depth 4 and below:
Depth 8 and below:
Depth 13 and below:
Depth 18 and below:
As well as Crowns, Hearts, Heat, a Vitapod, and/or a Pickup.
|
Encounter
This monster can always be found in these areas:
|
|
Static Deadnaught
| Monstrous Profile
|
Tier 2,3
|
Description
A shocking version of the Deadnaught.
Notes
Like other  Shock themed monsters, this enemy is immune to shock. Shock themed monsters, this enemy is immune to shock.
It behaves like the others. See above strategy for combat and equip effective gear.
|
Combat
- Charge
- Resurrection
|
Loot
Depth and Material Drops:
Depth 1 and below:
Depth 4 and below:
Depth 8 and below:
Depth 13 and below:
Depth 18 and below:
As well as Crowns, Hearts, Heat, a Vitapod, and/or a Pickup.
|
Encounter
|
|
Almirian Royal Guard
| Monstrous Profile
|
Tier 3

|
Description
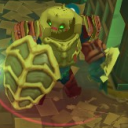
Almirian Royal Guards appear to be large Slag Walkers outfitted in an Almirian Crusader Helm and Almirian Crusader Armor, wielding a large spear and a Blackened Crest. They are significantly stronger than a typical Deadnaught.
Notes
Almirian Royal Guards are summoned by Lord Vanaduke in his final stage and do not spawn anywhere else outside Firestorm Citadel.
|
Combat
- Lance Charge
- Revive Buff
|
Loot
|
Encounter
This monster can always be found in these areas:
|
|
Almirian Shadow Guard
| Monstrous Profile
|
Tier 2,3
|
Description
Curse inflicting, spear wielding Deadnaughts. Since they do not differ visually from an Almirian Royal Guard, the only way to distinguish it is to get hit by one.
Notes
Almirian Shadow Guards are summoned by Darkfire Vanaduke.
|
Combat
- Lance Charge

- Revive Buff
|
Loot
Depth and Material Drops:
Depth 1 and below:
Depth 4 and below:
Depth 8 and below:
Depth 13 and below:
Depth 18 and below:
As well as Crowns, Hearts, Heat, a Vitapod, and/or a Pickup.
|
Encounter
This monster can always be found in these areas:
|
|
See Also


