|
|
| (10 intermediate revisions by 7 users not shown) |
| Line 1: |
Line 1: |
| − | {{SKWindow | + | {{RegionInfo |
| − | | width = 250px | + | |name = {{PAGENAME}} |
| − | | align = right | + | |monster = {{Monster_Icons|Swarm}} {{Monster_Icons|Beast}} {{Monster_Icons|Undead}} {{Monster_Icons|Slime}} {{Monster_Icons|Construct}} {{Monster_Icons|Gremlin}} |
| − | | margin = 0px 0px 20px 20px
| + | |status = {{Status|poison}} {{Status|freeze}} {{Status|fire}} {{Status|shock}} {{Status|curse}} |
| − | | title = Shadow Lair
| + | |soundtrack = |
| − | | body =
| + | *Shadow's Swarm |
| − | {{SKEmptyCell|[[File:Gate Icon-Swarm2.png]]|center|}} | + | |level = |
| − | {{SKNewRow}} | + | *{{location|Unknown Passage||2.6}} |
| − | {{SKCell|'''Theme(s)'''|center}} | + | *{{location|{{PAGENAME}}|Gloaming Wildwoods|2.3}} |
| − | {{SKNewRow}} | + | *{{location|{{PAGENAME}}|Royal Jelly Palace|2.3}} |
| − | {{SKCell|{{{Theme|{{status|poison}}{{status|freeze}}{{status|shock}}{{status|fire}}{{status|curse}}}}}|center}} | + | *{{location|{{PAGENAME}}|Ironclaw Munitions Factory|2.3}} |
| − | {{SKNewRow}} | + | *{{location|{{PAGENAME}}|Firestorm Citadel|2.3}} |
| − | {{SKCell|'''Levels'''|center}} | + | }} |
| − | {{SKNewRow}} | + | |
| − | {{SKCell|{{{Level|[[File:Gate Icon-Swarm2.png|32px]] [[Rabid Snarbolax]] | + | |
| | | | |
| − | [[File:Gate Icon-Swarm2.png|32px]] [[Ice Queen]]
| + | == Description == |
| | + | {{Quote|No gate icon description for this region.}} |
| | | | |
| − | [[File:Gate Icon-Swarm2.png|32px]] [[Red Roarmulus Twins]] | + | == Characteristics == |
| | + | The Shadow Lair is a special area of the [[Clockworks]], that contains an alternate version of an ordinary Clockworks boss stratum. There are four Shadow Lairs: |
| | + | * The '''Shadow Gloaming Wildwoods''' is the [[Gloaming Wildwoods]], but infected with a poisonous miasma, which has transformed the Snarbolax into two [[Rabid Snarbolax]]es. |
| | + | * The '''Shadow Royal Jelly Palace''' is the [[Royal Jelly Palace]], but frozen over and occupied by the true heir to the slimy throne, the frigid [[Ice Queen]]. |
| | + | * The '''Shadow Ironclaw Munitions Factory''' is the [[Ironclaw Munitions Factory]], but with additional fiery weapons, including its new ultimate weapon, the [[Red Roarmulus Twins]]. |
| | + | * The '''Shadow Firestorm Citadel''' is [[Firestorm Citadel]] under a terrible curse, that has transformed its master into the mighty [[Darkfire Vanaduke]]. |
| | | | |
| − | [[File:Gate Icon-Swarm2.png|32px]] [[Darkfire Vanaduke]]
| + | Each Shadow Lair is significantly more difficult than its ordinary Clockworks counterpart, and requires a high cost of entry. It is recommended that only Tier-3 knights with gear specifically chosen for a Shadow Lair attempt it. |
| | | | |
| − | [[File:Gate Icon-Swarm2.png|32px]] [[Unknown Passage]] | + | ===Entering=== |
| | + | To access a Shadow Lair, the party needs only one [[File:Key-Shadow Key icon.png|16px]] [[Shadow Key]]. Shadow Keys can be found in [[Iron Lockbox]]es, purchased from [[Kozma]], or purchased from other players, for example through the [[Auction House]]. It is common for one party member to purchase the Shadow Key, and the other party members to pay their share of the cost in energy or crowns just before entering the Shadow Lair. |
| | | | |
| − | [[File:Gate-The Sanctuary.png|32px]] [[The Sanctuary]]}}}
| + | A party with a Shadow Key can enter its desired Shadow Lair at depth 23 of any gate. That is, the party members assemble in a single depth-23 Clockworks Terminal, proceed to the north end of the terminal, and unlock the appropriate elevator with their Shadow Key. |
| − | }}}}
| + | |
| − | A '''Shadow Lair''' is a special area of the [[Clockworks]], that contains an alternate version of an ordinary Clockworks boss stratum. There are four Shadow Lairs: | + | |
| − | * The '''Shadow Gloaming Wildwoods''' (SGWW) is the [[Gloaming Wildwoods]], but infected with a poisonous miasma, which has transformed the Snarbolax into two [[Rabid Snarbolax]]es.
| + | |
| − | * The '''Shadow Royal Jelly Palace''' (SRJP) is the [[Royal Jelly Palace]], but frozen over and occupied by the true heir to the slimy throne, the frigid [[Ice Queen]].
| + | |
| − | * The '''Shadow Ironclaw Munitions Factory''' (SIMF) is the [[Ironclaw Munitions Factory]], but with additional fiery weapons, including its new ultimate weapon, the [[Red Roarmulus Twins]].
| + | |
| − | * The '''Shadow Firestorm Citadel''' (SFSC) is [[Firestorm Citadel]] under a terrible curse, that has transformed its master into the mighty [[Darkfire Vanaduke]].
| + | |
| − | Each Shadow Lair is significantly more difficult than its ordinary Clockworks counterpart, and requires a high cost of entry. It is recommended that only Tier-3 knights with gear specifically chosen for a Shadow Lair attempt that Shadow Lair. The Shadow Lairs were discovered (that is, added to the game) in the [http://forums.spiralknights.com/en/node/29852 2011 October 19 release].
| + | |
| | | | |
| − | ==Entering==
| + | As soon as a Shadow Key is used to unlock an elevator on depth 23, the key is destroyed. Any future visit to this or another Shadow Lair requires another Shadow Key. As soon as the party steps on the elevator, no new members may join the party. |
| | | | |
| − | [[image:Key-Shadow Key icon.png|36px|left]]
| + | ===Exiting=== |
| − | To access a Shadow Lair, the party needs one, and only one, [[Usable#Shadow Key|Shadow Key]]. Shadow Keys can be found in [[Iron Lockbox]]es, purchased from [[Kozma]], or purchased from other players, for example through the [[Auction House]]. Once a Shadow Key is used to access a Shadow Lair, the key is destroyed. Any future visit to this or another Shadow Lair requires another Shadow Key. (For example, suppose that a group of four knights does multiple Shadow Lair trips together. Each time, they buy a Shadow Key for 1,800 energy and split the cost evenly. Then each Shadow Lair trip costs each knight 450 energy.)
| + | A Shadow Lair expedition does not end with the defeat of the Shadow Lair boss. The party must fight its way through the [[Unknown Passage]]. The Unknown Passage is identical for all four Shadow Lairs, and has nothing to do with any of their particular themes. The party emerges into the [[The Sanctuary|Sanctuary]], where it finally receives its rewards, before returning to [[Haven]]. |
| | | | |
| − | To access a Shadow Lair, one person in the party needs clearance for that Shadow Lair:
| + | == Notes == |
| − | * For Shadow Gloaming Wildwoods, any player with Tier 3 clearance has clearance.
| + | Originally there were restrictions on the order in which Shadow Lairs were attempted. For example, a party could not enter the Shadow Royal Jelly Palace unless at least one party member had completed Shadow Gloaming Wildwoods. However, that restriction was removed. |
| − | * For Shadow Royal Jelly Palace, any player who has completed the SGWW has clearance.
| + | |
| − | * For Shadow Ironclaw Munitions Factory, any player who has completed the SGWW has clearance.
| + | |
| − | * For Shadow Firestorm Citadel, any player who has completed either SRJP or SIMF has clearance.
| + | |
| − | For example, a knight with SRJP clearance can bring three knights who do not have that clearance into SRJP. After the SRJP trip, all four knights will have SFSC clearance, but the three knights will still not have SRJP clearance.
| + | |
| | | | |
| − | If a party has a Shadow Key and clearance, it can enter its desired Shadow Lair at depth 23 of any gate. That is, the party members assemble in a single depth-23 Clockworks Terminal, proceed to the north end of the terminal, and unlock the appropriate gate with their Shadow Key. Once the party has entered the Shadow Lair, no new members may join the party.
| + | === History === |
| | + | *{{release|2011-10-19}}: Shadow Lairs were introduced to the game. |
| | + | *{{release|2013-10-16}}: Shadow Lairs can now be completed in any order. |
| | | | |
| − | ==Four Shadow Lairs== | + | == Gallery == |
| | + | <gallery> |
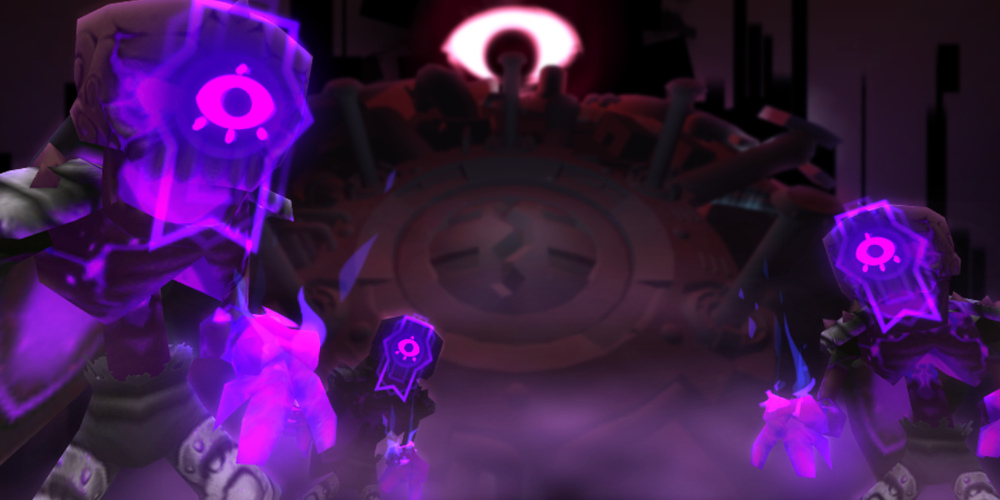
| | + | File:Swarm_Core_Carnavons.png|The Shadow Lair Propaganda with the Swarm Core and three [[Carnavon]]s. |
| | + | </gallery> |
| | | | |
| − | ===[[File:Gate-Firestorm_Citadel.png|70px|Left]] Gloaming Wildwoods=== | + | == See Also == |
| | + | {{exploration see also}} |
| | | | |
| − | Like the ordinary Gloaming Wildwoods, the Shadow Gloaming Wildwoods is filled with beasts. However, the Shadow version is also packed with undead (zombies, kats and howlitzers), and all of the monsters have a poison theme. Armor that protects against normal, piercing, shadow, and poison is recommended. Piercing, elemental, and crowd-control weapons are recommended.
| + | [[Category:Terminology]] |
| − | | + | |
| − | Monsters:
| + | |
| − | * {{Monster_Icons|Beast}} {{Status|poison}} [[Wolver#Rabid_Wolver|Rabid Wolver]]
| + | |
| − | * {{Monster_Icons|Beast}} {{Status|poison}} [[Wolver#Rabid_Alpha_Wolver|Rabid Alpha Wolver]]
| + | |
| − | * {{Monster_Icons|Undead}} {{Status|poison}} [[Zombie#Droul|Droul]]
| + | |
| − | * {{Monster_Icons|Undead}} {{Status|poison}} [[Kat#Hurkat|Hurkat]]
| + | |
| − | * {{Monster_Icons|Beast}} {{Status|poison}} [[Chromalisk#Virulisk|Virulisk]]
| + | |
| − | * {{Monster_Icons|Fiend}} [[Wing#Silkwing|Silkwing]]
| + | |
| − | * {{Monster_Icons|Construct}} {{Status|poison}} [[Lumber#Vilewood|Vilewood]]
| + | |
| − | * {{Monster_Icons|Undead}} {{Status|poison}} [[Howlitzer#Vile_Howlitzer|Vile Howlitzer]]
| + | |
| − | | + | |
| − | {{Caged Monsters}}
| + | |
| − | | + | |
| − | Boss:
| + | |
| − | * {{Monster_Icons|Beast}} {{Status|poison}} Two [[Rabid Snarbolax]]es: Unlike the [[Roarmulus Twins]], they have independent healths.
| + | |
| − | *{{Monster_Icons|Fiend}} One [[Wing#Silkwing|Silkwing]]: It heals 63 health per second to each Rabid Snarbolax near it.
| + | |
| − | *[[Image:Gate_Icon-Swarm.png|16px]] [[The Swarm#Swarm Source|Swarm Source]]
| + | |
| − | | + | |
| − | ==== Maps ====
| + | |
| − | {| style="background-color: transparent;"
| + | |
| − | |valign="top"|[[Image:Map_Shadow_Gloaming_Wildwoods_Terrilous_Trail.png|thumb|400px|Terrilous Trail]]
| + | |
| − | |valign="top"|[[Image:Map_Shadow_Gloaming_Wildwoods_Roarsterous_Ruins.png|thumb|250px|Roarsterous Ruins]]
| + | |
| − | |valign="top"|[[Image:Map_Shadow_Gloaming_Wildwoods_Lair_of_the_Snarbolax.png|thumb|130px|Lair of the Snarbolax]]
| + | |
| − | |}
| + | |
| − | | + | |
| − | ===[[File:Gate-Gloaming_Wildwoods.png|70px|Left]] Royal Jelly Palace===
| + | |
| − | | + | |
| − | The Shadow Royal Jelly Palace is similar to the ordinary Royal Jelly Palace in its monsters — many slimes, some constructs, and scattered silkwings — except that the turrets are primarily polyps rather than gun puppies. Many of the monsters have a freeze theme. Armor that protects against normal, piercing, and freeze is recommended. Shadow and elemental weapons are recommended.
| + | |
| − | | + | |
| − | Monsters:
| + | |
| − | * {{Monster_Icons|Slime}} {{status|freeze}} [[Jelly#Ice_Cube|Ice Cube]]
| + | |
| − | * {{Monster_Icons|Slime}} {{status|freeze}} [[Polyp#Polar Polyp|Polar Polyp]]
| + | |
| − | * {{Monster_Icons|Slime}} {{status|freeze}} [[Jelly#Ice_Mini|Ice Mini]]
| + | |
| − | * {{Monster_Icons|Construct}} {{status|freeze}} [[Silversap]]
| + | |
| − | * {{Monster_Icons|Slime}} [[Jelly#Blast Cube|Blast Cube]]
| + | |
| − | * {{Monster_Icons|Slime}} [[Lichen#Lichen|Lichen]]
| + | |
| − | * {{Monster_Icons|Slime}} [[Lichen Colony]]
| + | |
| − | * {{Monster_Icons|Slime}} [[Giant Lichen Colony]]
| + | |
| − | * {{Monster_Icons|Slime}} [[Jelly#Jelly_Green_Mini|Jelly Green Mini]]
| + | |
| − | * {{Monster_Icons|Fiend}} [[Silkwing]]
| + | |
| − | | + | |
| − | Boss:
| + | |
| − | * {{Monster_Icons|Slime}} [[Ice Queen]]
| + | |
| − | * {{Monster_Icons|Slime}} {{status|freeze}} [[Jelly#Ice_Mini|Ice Mini]]
| + | |
| − | * {{Monster_Icons|Slime}} {{status|freeze}} [[Polyp#Royal Polar Polyp|Royal Polar Polyp]]
| + | |
| − | * {{Monster_Icons|Slime}} {{status|freeze}} [[Jelly#Ice_Cube|Ice Cube]]
| + | |
| − | *[[Image:Gate_Icon-Swarm.png|16px]] [[The Swarm#Swarm Source|Swarm Source]]
| + | |
| − | | + | |
| − | ===[[File:Gate-Ironclaw_Munitions_Factory.png|70px|Left]] Ironclaw Munitions Factory===
| + | |
| − | | + | |
| − | Like the ordinary Ironclaw Munitions Factory, the Shadow Ironclaw Munitions Factory is filled with constructs, gremlins and slimes. However, the Shadow version contains both fire and shock themed monsters. Armor that protects against normal, elemental, fire, and shock is recommended. Shadow and elemental weapons are recommended.
| + | |
| − | | + | |
| − | Monsters:
| + | |
| − | * {{Monster_Icons|Construct}} {{status|fire}} [[Cinderbot]]
| + | |
| − | * {{Monster_Icons|Construct}} {{status|shock}} [[Surgebot]]
| + | |
| − | * {{Monster_Icons|Construct}} {{status|fire}} [[Firo Knight]]
| + | |
| − | * {{Monster_Icons|Construct}} {{status|shock}} [[Volt Knight]]
| + | |
| − | * {{Monster_Icons|Slime}} {{status|fire}} [[Oiler]]
| + | |
| − | * {{Monster_Icons|Slime}} {{status|shock}} [[Quicksilver]]
| + | |
| − | * {{Monster_Icons|Construct}} {{status|fire}} [[Hotrode]]
| + | |
| − | * {{Monster_Icons|Construct}} {{status|shock}} [[Voltrode]]
| + | |
| − | * {{Monster_Icons|Construct}} {{status|fire}} [[Red Rover]]
| + | |
| − | * {{Monster_Icons|Construct}} {{status|shock}}[[Sparky]]
| + | |
| − | * {{Monster_Icons|Construct}} [[Rocket Puppy]]
| + | |
| − | * {{Monster_Icons|Gremlin}} [[Mender#Darkfang Mender|Darkfang Mender]]
| + | |
| − | * {{Monster_Icons|Gremlin}} {{status|fire}} [[Scorcher#Darkfang Scorcher|Darkfang Scorcher]]
| + | |
| − | * {{Monster_Icons|Gremlin}} [[Thwacker#Darkfang Thwacker|Darkfang Thwacker]]
| + | |
| − | * {{Monster_Icons|Gremlin}} [[Demo#Darkfang Demo|Darkfang Demo]]
| + | |
| − | | + | |
| − | Boss:
| + | |
| − | * {{Monster_Icons|Construct}} [[Red Roarmulus Twins]]
| + | |
| − | * {{Monster_Icons|Construct}} {{status|shock}} [[Surgebot]]
| + | |
| − | * {{Monster_Icons|Gremlin}} [[Mender#Darkfang Mender|Darkfang Mender]] (Phase 2 & Phase 3)
| + | |
| − | *[[Image:Gate_Icon-Swarm.png|16px]] [[The Swarm#Swarm Source|Swarm Source]]
| + | |
| − | | + | |
| − | ===[[File:Gate-Firestorm_Citadel.png|70px|Left]] Firestorm Citadel===
| + | |
| − | | + | |
| − | The Shadow Firestorm Citadel is similar to the ordinary Firestorm Citadel in its monsters — undead, trojans, and turrets — except that the turrets are primarily howlitzers rather than gun puppies. Many of the monsters have a curse theme; others have a fire theme, as in the ordinary Firestorm Citadel. Armor that protects against normal, shadow, fire, and curse is recommended. Elemental and piercing weapons are recommended.
| + | |
| − | [[File:Swarm_Core_Carnavons.png|400 px|thumb|The Shadow Lair Propaganda with the Swarm Core and three [[Carnavon]]s.]]
| + | |
| − | Monsters:
| + | |
| − | * {{Monster_Icons|Undead}} {{status|curse}} [[Carnavon]]
| + | |
| − | * {{Monster_Icons|Undead}} {{status|fire}} [[Smoking Howlitzer]]
| + | |
| − | * {{Monster_Icons|Construct}} {{status|fire}} [[Red Rover]]
| + | |
| − | * {{Monster_Icons|Construct}} [[Rocket Puppy]]
| + | |
| − | * {{Monster_Icons|Slime}} [[Jelly#Blast Cube|Blast Cube]]
| + | |
| − | * {{Monster_Icons|Slime}} {{status|fire}} [[Oiler]]
| + | |
| − | * {{Monster_Icons|Fiend}} [[Silkwing]]
| + | |
| − | * {{Monster_Icons|Beast}} {{status|fire}} [[Ash Tail]]
| + | |
| − | * {{Monster_Icons|Beast}} {{status|fire}} [[Alpha Ash Tail]]
| + | |
| − | * {{Monster_Icons|Fiend}} [[Trojan]]
| + | |
| − | * {{Monster_Icons|Undead}} {{status|curse}} [[Deadnaught|Almirian Shadow Guard]]
| + | |
| − | * [[Image:Gate_Icon-Unknown.png|16px|]] [[Wheel_Launcher#Wheel Launcher|Wheel Launcher]]
| + | |
| − | | + | |
| − | Boss:
| + | |
| − | * {{Monster_Icons|Fiend}} [[Darkfire Vanaduke]]
| + | |
| − | * {{Monster_Icons|Undead}} {{status|curse}} [[Carnavon]] (Phase 1, Phase 3 & Phase 5)
| + | |
| − | * {{Monster_Icons|Undead}} {{status|curse}} [[Deadnaught|Almirian Shadow Guard]] (Phase 3 & Phase 5)
| + | |
| − | * {{Monster_Icons|Undead}} {{Status|fire}} [[Zombie#Slag Walker|Slag Walker]] (Phase 5, immediately replaced by Carnavons as soon as spawned, this is a bug)
| + | |
| − | *[[Image:Gate_Icon-Swarm.png|16px]] [[The Swarm#Swarm Source|Swarm Source]]
| + | |
| − | | + | |
| − | ==Exiting==
| + | |
| − | | + | |
| − | A Shadow Lair expedition does not end with the defeat of the Shadow Lair boss. The party must fight its way through the [[Unknown Passage]] — a single, Swarm-infested level, where the only goal is to survive. The Unknown Passage is identical for all four Shadow Lairs, and has nothing to do with any of their particular themes. The party emerges into a safe haven known as the [[The Sanctuary | Sanctuary]], where it finally receives its rewards, before returning to Haven.
| + | |
| − | | + | |
| − | [[Category:Terminology]][[Category:Geography]] | + | |
Each Shadow Lair is significantly more difficult than its ordinary Clockworks counterpart, and requires a high cost of entry. It is recommended that only Tier-3 knights with gear specifically chosen for a Shadow Lair attempt it.
A party with a Shadow Key can enter its desired Shadow Lair at depth 23 of any gate. That is, the party members assemble in a single depth-23 Clockworks Terminal, proceed to the north end of the terminal, and unlock the appropriate elevator with their Shadow Key.
As soon as a Shadow Key is used to unlock an elevator on depth 23, the key is destroyed. Any future visit to this or another Shadow Lair requires another Shadow Key. As soon as the party steps on the elevator, no new members may join the party.
A Shadow Lair expedition does not end with the defeat of the Shadow Lair boss. The party must fight its way through the Unknown Passage. The Unknown Passage is identical for all four Shadow Lairs, and has nothing to do with any of their particular themes. The party emerges into the Sanctuary, where it finally receives its rewards, before returning to Haven.
Originally there were restrictions on the order in which Shadow Lairs were attempted. For example, a party could not enter the Shadow Royal Jelly Palace unless at least one party member had completed Shadow Gloaming Wildwoods. However, that restriction was removed.