Difference between revisions of "Shadow Lair"
From SpiralKnights
(→Levels: cleaned up weird formatting; added some text to address FAQs) |
|||
| Line 40: | Line 40: | ||
==Levels== | ==Levels== | ||
| − | |||
===[[File:Gate-Gloaming_Wildwoods.png|70px|Left]] Gloaming Wildwoods=== | ===[[File:Gate-Gloaming_Wildwoods.png|70px|Left]] Gloaming Wildwoods=== | ||
| − | + | ||
| + | The Shadow Gloaming Wildwoods are filled with beasts and undead with a poison theme. Armor that protects against normal, piercing, shadow, and poison is recommended. Piercing, elemental, and crowd-control weapons are recommended. | ||
| + | |||
| + | Monsters: | ||
*[[Wolver#Rabid_Wolver|Rabid Wolver]] | *[[Wolver#Rabid_Wolver|Rabid Wolver]] | ||
*[[Zombie#Droul|Droul]] | *[[Zombie#Droul|Droul]] | ||
| Line 51: | Line 53: | ||
*[[Lumber#Vilewood|Vilewood]] | *[[Lumber#Vilewood|Vilewood]] | ||
*[[Howlitzer#Vile_Howlitzer|Vile Howlitzer]] | *[[Howlitzer#Vile_Howlitzer|Vile Howlitzer]] | ||
| − | |||
| − | + | {{Caged Monsters}} | |
| − | + | ||
| − | :*[[Wing#Silkwing| | + | Boss: |
| − | + | *Two [[Rabid Snarbolax]]es: Unlike the [[Roarmulus Twins]], they have independent healths. | |
| + | *One [[Wing#Silkwing|Silkwing]]: It heals 63 health per second to each Rabid Snarbolax near it. | ||
| + | *[[The Swarm#Swarm Seed|Swarm Seed]] | ||
===[[File:Gate-Royal_Jelly_Palace.png|70px|Left]] Royal Jelly Palace=== | ===[[File:Gate-Royal_Jelly_Palace.png|70px|Left]] Royal Jelly Palace=== | ||
| − | + | ||
| + | The Shadow Royal Jelly Palace is filled with slimes (and some constructs and silkwings) with a freeze theme. Armor that protects against normal, piercing, and freeze is recommended. Shadow and elemental weapons are recommended. | ||
| + | |||
| + | Monsters: | ||
*[[Jelly#Ice_Cube|Ice Cube]] | *[[Jelly#Ice_Cube|Ice Cube]] | ||
*[[Polyp#Polar Polyp|Polar Polyp]] | *[[Polyp#Polar Polyp|Polar Polyp]] | ||
| Line 71: | Line 76: | ||
*[[Silkwing]] | *[[Silkwing]] | ||
| − | + | Boss: | |
*[[Ice Queen]] | *[[Ice Queen]] | ||
| − | + | *[[Jelly#Ice_Mini|Ice Mini]] | |
| − | + | *[[Polyp#Royal Polar Polyp|Royal Polar Polyp]] | |
| − | + | *[[Jelly#Ice_Cube|Ice Cube]] | |
| − | + | *[[The Swarm#Swarm Seed|Swarm Seed]] | |
| − | + | ||
===[[File:Gate-Ironclaw_Munitions_Factory.png|70px|Left]] Ironclaw Munitions Factory=== | ===[[File:Gate-Ironclaw_Munitions_Factory.png|70px|Left]] Ironclaw Munitions Factory=== | ||
| − | + | ||
| + | Monsters: | ||
*[[Cinderbot]] | *[[Cinderbot]] | ||
*[[Surgebot]] | *[[Surgebot]] | ||
| Line 97: | Line 102: | ||
*[[Darkfang Demo]] | *[[Darkfang Demo]] | ||
| − | + | Boss: | |
*[[Red Roarmulus Twins]] | *[[Red Roarmulus Twins]] | ||
| − | + | *[[The Swarm#Swarm Seed|Swarm Seed]] | |
| − | + | ||
===[[File:Gate-Firestorm_Citadel.png|70px|Left]] Firestorm Citadel=== | ===[[File:Gate-Firestorm_Citadel.png|70px|Left]] Firestorm Citadel=== | ||
| − | + | ||
| + | Monsters: | ||
*[[Carnavon]] | *[[Carnavon]] | ||
*[[Smoking Howlitzer]] | *[[Smoking Howlitzer]] | ||
| Line 112: | Line 117: | ||
*[[Cursed Deadnaught]] | *[[Cursed Deadnaught]] | ||
| − | + | Boss: | |
*[[Darkfire Vanaduke]] | *[[Darkfire Vanaduke]] | ||
| + | *[[The Swarm#Swarm Seed|Swarm Seed]] | ||
==Unknown Passage== | ==Unknown Passage== | ||
Revision as of 14:08, 3 January 2012
| |||||
|
Shadow Lairs are intended for knights equipped with Tier 3 gear, specifically geared toward each Shadow Lair which includes:
- The Gloaming Wildwoods has been infected with a poisonous miasma transforming the Snarbolax into the Rabid Snarbolax...and now there're two of them!
- The Royal Jelly Palace has frozen over and it's king usurped by the true heir to the slimy throne, the frigid Ice Queen!
- The Ironclaw Munitions Factory has begun creating in fiery weapons and improved upon its ultimate weapon in the form of the Red Roarmulus Twins!
- A powerful curse has overtaken the Firestorm Citadel, transforming its hordes and lead by the mighty Darkfire Vanaduke!
Contents
Accessing
Shadow Lairs are grouped into three ranks. All knights with Tier 3 clearance automatically gain Shadow Lair Clearance 1. Completing a Shadow Lair Rank 1 earns you clearance into the next rank and so on. The highest Shadow Lair Clearance Level of anyone in the party is respected. Not everyone needs the same rank to join a party in a Shadow Lair.
Shadow Lairs require a Shadow Key to access. Only one key is needed for the entire party. A Shadow Key is destroyed once used. Shadow Keys can be found in ANY Iron Lockbox or from the Auction House if available.
Levels
 Gloaming Wildwoods

The Shadow Gloaming Wildwoods are filled with beasts and undead with a poison theme. Armor that protects against normal, piercing, shadow, and poison is recommended. Piercing, elemental, and crowd-control weapons are recommended.
Monsters:
![]() Information below is based on lack of information and might be incorrect. Most monsters have been witnessed. The following have not been reported in any tier:
Information below is based on lack of information and might be incorrect. Most monsters have been witnessed. The following have not been reported in any tier:
 Drone (Wisps, Shankles of any kind)
- Lost Souls of any kind
Boss:
- Two Rabid Snarbolaxes: Unlike the Roarmulus Twins, they have independent healths.
- One Silkwing: It heals 63 health per second to each Rabid Snarbolax near it.
- Swarm Seed
 Royal Jelly Palace

The Shadow Royal Jelly Palace is filled with slimes (and some constructs and silkwings) with a freeze theme. Armor that protects against normal, piercing, and freeze is recommended. Shadow and elemental weapons are recommended.
Monsters:
- Ice Cube
- Polar Polyp
- Ice Mini
- Silversap
- Ultra Blast Cube
- Lichen
- Lichen Colony
- Giant Lichen Colony
- Silkwing
Boss:
 Ironclaw Munitions Factory

Monsters:
- Cinderbot
- Surgebot
- Firo Knight
- Volt Knight
- Oiler
- Quicksilver
- Hotrode
- Voltrode
- Red Rover
- Sparky
- Rocket Puppy
- Darkfang Mender
- Darkfang Scorcher
- Darkfang Thwacker
- Darkfang Demo
Boss:
 Firestorm Citadel

Monsters:
Boss:
Unknown Passage

- Monsters:
The Sanctuary

Echo Stone
- Main article: Echo Stone
An Echo Stone is a beacon of light, usually containing a message (or echo) from the past. There is one in each Sanctuary relating to the boss you have just defeated.
Boss Armor
It is crafted by using the Sanctuary Alchemy Machine shown in the picture.
-
 Almirian Crusader Helm
-
 Arcane Salamander Mask
-
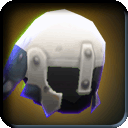
 Heavenly Iron Helm
-
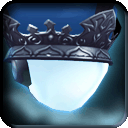 Ice Queen Crown
-
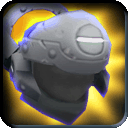
 Mercurial Demo Helm
-
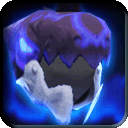
 Snarbolax Cap
-
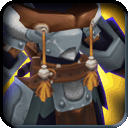
 Almirian Crusader Armor
-
 Arcane Salamander Suit
-
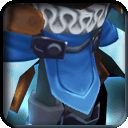
 Heavenly Iron Armor
-
 Ice Queen Mail
-
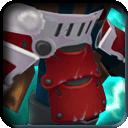 Mercurial Demo Suit
-
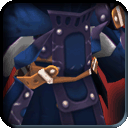 Snarbolax Coat
Shadow Materials
Shadow Materials are special crafting materials found in the Sanctuary. They are themed after the boss you have just defeated. They are used to create Boss Armor.
- Obtained after Rabid Snarbolax Shadow Lair
- Obtained after Ice Queen Shadow Lair
- Obtained after Red Roarmulus Twins Shadow Lair
- Obtained after Darkfire Vanaduke Shadow Lair