Difference between revisions of "Basil"
From SpiralKnights
m (the hat is still in game) |
|||
| (85 intermediate revisions by 30 users not shown) | |||
| Line 1: | Line 1: | ||
| − | [[ | + | {{NPCInfo |
| + | |name = {{PAGENAME}} | ||
| + | |type = stranger | ||
| + | |role = | ||
| + | *[[Vendor]]: Traveling Merchant | ||
| + | |location = | ||
| + | *[[Clockwork Terminal]]s | ||
| + | *[[Mission]] lobbies | ||
| + | }} | ||
| − | == | + | ==Appearance== |
| − | + | Basil is a [[stranger]] wearing a beige and brown [[Stranger Robe|robe]] with a headlamp-equipped [[Stranger Hat|hat]]. He totes a large rucksack on his back. Unlike many other strangers, there aren't any [[snipes]] perched on him. | |
| − | + | ==Notes== | |
| + | This character has been in the game since {{release|2011-04-04}} when the game officially launched. | ||
| − | + | At some point, the color of Basil's hat was changed from [[:File:No Items.png|grey]] to the current beige. This was likely changed with {{release|2012-01-30}}. He still have this hat in the clockwork's terminals in arcade. | |
| − | + | ||
| − | + | Basil is currently the only stranger in the game to wear the [[Stranger Hat]] instead of the [[Stranger Cap]]. [[Quince]] used to wear one too, before they were removed in {{???}}. | |
| − | + | ||
| + | ==Gallery== | ||
| + | <gallery heights=175px widths=175px perrow=4> | ||
| + | File:Area-Clockwork Terminal-The Crossroads of Adventure-D13.png|{{PAGENAME}} in a [[Clockwork Terminal]]. | ||
| + | File:Mission Lobby-Basil.png|{{PAGENAME}} in a [[mission]] lobby. | ||
| + | File:Danger Mission Lobby-Basil.png|{{PAGENAME}} in a [[Danger Mission]] lobby. | ||
| + | File:No Items.png|Basil's inventory with no items. Note the gray hat that is only present if you see them in the [[Clockwork Terminal]]. | ||
| + | </gallery> | ||
| + | |||
| + | ==Wares== | ||
| + | ===Clockwork Terminals=== | ||
| + | Basil appears in the Clockwork Terminals at depths 4, 13, and 23 of the Clockworks. Knights who join the party on Basil's level, or on the level just before Basil, are not allowed buy any recipes. All other knights in the party are offered the same list of 6-25 randomly chosen recipes. At depth 4, he offers 1- and 2-star recipes, including at least one of the latter. At depth 13, he offers 2*, 3*, and 4* recipes, including at least one of the latter. At depth 23, he offers 4* and 5* recipes, including at least one of the latter. | ||
| + | |||
| + | His prices are as follows: | ||
{| cellpadding="5" cellspacing="2" style="background-color: transparent; margin: 10px 0px 10px 0px; align: center" class="sortable" | {| cellpadding="5" cellspacing="2" style="background-color: transparent; margin: 10px 0px 10px 0px; align: center" class="sortable" | ||
|- bgcolor="#93add4" align="left" | |- bgcolor="#93add4" align="left" | ||
| − | ! | | + | ! | Star |
! | Crowns | ! | Crowns | ||
| + | ! | Depth 4 | ||
| + | ! | Depth 13 | ||
| + | ! | Depth 23 | ||
|- bgcolor="#f5f5ff" | |- bgcolor="#f5f5ff" | ||
| − | || {{star|1}} || ! align="right" | 250 | + | || {{star|1}} || ! align="right" | 250 || ! align="right" | Yes || ! align="right" | No || ! align="right" | No |
|- bgcolor="#f5f5ff" | |- bgcolor="#f5f5ff" | ||
| − | || {{star|2}} || ! align="right" | 1,000 | + | || {{star|2}} || ! align="right" | 1,000 || ! align="right" | Yes || ! align="right" | Yes || ! align="right" | No |
|- bgcolor="#f5f5ff" | |- bgcolor="#f5f5ff" | ||
| − | || {{star|3}} || ! align="right" | 4,000 | + | || {{star|3}} || ! align="right" | 4,000 || ! align="right" | No || ! align="right" | Yes || ! align="right" | No |
|- bgcolor="#f5f5ff" | |- bgcolor="#f5f5ff" | ||
| − | || {{star|4}} || ! align="right" | 10,000 | + | || {{star|4}} || ! align="right" | 10,000 || ! align="right" | No || ! align="right" | Yes || ! align="right" | Yes |
|- bgcolor="#f5f5ff" | |- bgcolor="#f5f5ff" | ||
| − | || {{star|5}} || ! align="right" | 25,000|} | + | || {{star|5}} || ! align="right" | 25,000 || ! align="right" | No || ! align="right" | No || ! align="right" | Yes |
| + | |} | ||
| + | |||
| + | While many recipes are available from [[Hall of Heroes]] or other vendors, there are a number of recipes available only from Basil in Clockwork Terminals. These include recipes for items on alchemy paths originating from [[Token#Boss_Tokens|boss-dropped tokens]] and all 3-star "breaker" series recipes, such as [[Blazebreak Armor]] and [[Surge Breaker Shield]]. | ||
| + | |||
| + | {{SKWindow2|width=*|collapsible={{{collapsible|yes}}}|state={{{state|collapsed}}} | ||
| + | | header = List of Basil-only recipes}} | ||
| + | {{SKWindow/NewRow}} | ||
| + | {{SKWindow/Cell|{{star|3}}|center}} | ||
| + | {{SKWindow/Cell|{{star|4}}|center}} | ||
| + | {{SKWindow/Cell|{{star|5}}|center}} | ||
| + | {{SKWindow/NewRow}} | ||
| + | {{SKWindow/Cell|{{Recipe_Icon|bomb|Lightning Capacitor|25}}}} | ||
| + | {{SKWindow/Cell|}} | ||
| + | {{SKWindow/Cell|{{Recipe_Icon|bomb|Voltaic Tempest|25}}}} | ||
| + | {{SKWindow/NewRow}} | ||
| + | {{SKWindow/Cell|{{Recipe_Icon|shield|Scarlet Shield|25}}}} | ||
| + | {{SKWindow/Cell|}} | ||
| + | {{SKWindow/Cell|}} | ||
| + | {{SKWindow/NewRow}} | ||
| + | {{SKWindow/Cell|{{Recipe_Icon|sword|Twisted Snarble Barb|25}}}} | ||
| + | {{SKWindow/Cell|{{Recipe_Icon|sword|Dark Thorn Blade|25}}}} | ||
| + | {{SKWindow/Cell|{{Recipe_Icon|sword|Barbarous Thorn Blade|25}}}} | ||
| + | {{SKWindow/NewRow}} | ||
| + | {{SKWindow/Cell|{{Recipe_Icon|bomb|Twisted Spine Cone|25}}}} | ||
| + | {{SKWindow/Cell|{{Recipe_Icon|bomb|Spike Shower|25}}}} | ||
| + | {{SKWindow/Cell|{{Recipe_Icon|bomb|Dark Briar Barrage|25}}}} | ||
| + | {{SKWindow/NewRow}} | ||
| + | {{SKWindow/Cell|{{Recipe_Icon|shield|Twisted Targe|25}}}} | ||
| + | {{SKWindow/Cell|{{Recipe_Icon|shield|Dark Thorn Shield|25}}}} | ||
| + | {{SKWindow/Cell|{{Recipe_Icon|shield|Barbarous Thorn Shield|25}}}} | ||
| + | {{SKWindow/NewRow}} | ||
| + | {{SKWindow/Cell|}} | ||
| + | {{SKWindow/Cell|{{Recipe_Icon|bomb|Graviton Bomb|25}}}} | ||
| + | {{SKWindow/Cell|}} | ||
| + | {{SKWindow/NewRow}} | ||
| + | {{SKWindow/Cell|{{Recipe_Icon|handgun|Elemental Blaster|25}}}} | ||
| + | {{SKWindow/Cell|{{Recipe_Icon|handgun|Fusion Blaster|25}}}} | ||
| + | {{SKWindow/Cell|{{Recipe_Icon|handgun|Arcana|25}}}} | ||
| + | {{SKWindow/NewRow}} | ||
| + | {{SKWindow/Cell|{{Recipe_Icon|handgun|Pierce Blaster|25}}}} | ||
| + | {{SKWindow/Cell|{{Recipe_Icon|handgun|Breach Blaster|25}}}} | ||
| + | {{SKWindow/Cell|{{Recipe_Icon|handgun|Riftlocker|25}}}} | ||
| + | {{SKWindow/NewRow}} | ||
| + | {{SKWindow/Cell|{{Recipe_Icon|handgun|Shadow Blaster|25}}}} | ||
| + | {{SKWindow/Cell|{{Recipe_Icon|handgun|Umbral Blaster|25}}}} | ||
| + | {{SKWindow/Cell|{{Recipe_Icon|handgun|Phantamos|25}}}} | ||
| + | {{SKWindow/NewRow}} | ||
| + | {{SKWindow/Cell|{{Recipe_Icon|handgun|Dark Chaingun|25}}}} | ||
| + | {{SKWindow/Cell|{{Recipe_Icon|handgun|Black Chaingun|25}}}} | ||
| + | {{SKWindow/Cell|{{Recipe_Icon|handgun|Grim Repeater|25}}}} | ||
| + | {{SKWindow/NewRow}} | ||
| + | {{SKWindow/Cell|{{Recipe_Icon|handgun|Tundrus|25}}}} | ||
| + | {{SKWindow/Cell|{{Recipe_Icon|handgun|Mega Tundrus|25}}}} | ||
| + | {{SKWindow/Cell|{{Recipe_Icon|handgun|Winter Grave|25}}}} | ||
| + | {{SKWindow/NewRow}} | ||
| + | {{SKWindow/Cell||5=3}} | ||
| + | {{SKWindow/Cell|{{Recipe_Icon|handgun|Silversix|25}}}} | ||
| + | {{SKWindow/Cell|{{Recipe_Icon|handgun|Argent Peacemaker|25}}}} | ||
| + | {{SKWindow/NewRow}} | ||
| + | {{SKWindow/Cell|{{Recipe_Icon|handgun|Raptor|25}}}} | ||
| + | {{SKWindow/Cell|{{Recipe_Icon|handgun|Gilded Griffin|25}}}} | ||
| + | {{SKWindow/NewRow}} | ||
| + | {{SKWindow/Cell|{{Recipe_Icon|handgun|Blackhawk|25}}}} | ||
| + | {{SKWindow/Cell|{{Recipe_Icon|handgun|Sentenza|25}}}} | ||
| + | {{SKWindow/NewRow}} | ||
| + | {{SKWindow/Cell||5=2}} | ||
| + | {{SKWindow/Cell|{{Recipe_Icon|sword|Avenger|25}}}} | ||
| + | {{SKWindow/Cell|{{Recipe_Icon|sword|Divine Avenger|25}}}} | ||
| + | {{SKWindow/NewRow}} | ||
| + | {{SKWindow/Cell|{{Recipe_Icon|sword|Faust|25}}}} | ||
| + | {{SKWindow/Cell|{{Recipe_Icon|sword|Gran Faust|25}}}} | ||
| + | {{SKWindow/NewRow}} | ||
| + | {{SKWindow/Cell|{{Recipe_Icon|handgun|Kilowatt Pulsar|25}}}} | ||
| + | {{SKWindow/Cell|{{Recipe_Icon|handgun|Gigawatt Pulsar|25}}}} | ||
| + | {{SKWindow/Cell|{{Recipe_Icon|handgun|Polaris|25}}}} | ||
| + | {{SKWindow/NewRow}} | ||
| + | {{SKWindow/Cell|{{Recipe_Icon|handgun|Heavy Pulsar|25}}}} | ||
| + | {{SKWindow/Cell|{{Recipe_Icon|handgun|Radiant Pulsar|25}}}} | ||
| + | {{SKWindow/Cell|{{Recipe_Icon|handgun|Supernova|25}}}} | ||
| + | {{SKWindow/NewRow}} | ||
| + | {{SKWindow/Cell|{{Recipe_Icon|handgun|Flaming Pulsar|25}}}} | ||
| + | {{SKWindow/Cell|{{Recipe_Icon|handgun|Blazing Pulsar|25}}}} | ||
| + | {{SKWindow/Cell|{{Recipe_Icon|handgun|Wildfire|25}}}} | ||
| + | {{SKWindow/NewRow}} | ||
| + | {{SKWindow/Cell|{{Recipe_Icon|handgun|Freezing Pulsar|25}}}} | ||
| + | {{SKWindow/Cell|{{Recipe_Icon|handgun|Frozen Pulsar|25}}}} | ||
| + | {{SKWindow/Cell|{{Recipe_Icon|handgun|Permafroster|25}}}} | ||
| + | {{SKWindow/NewRow}} | ||
| + | {{SKWindow/Cell|{{Recipe_Icon|handgun|Industrial Catalyzer|25}}}} | ||
| + | {{SKWindow/Cell|{{Recipe_Icon|handgun|Volatile Catalyzer|25}}}} | ||
| + | {{SKWindow/Cell|{{Recipe_Icon|handgun|Neutralizer|25}}}} | ||
| + | {{SKWindow/NewRow}} | ||
| + | {{SKWindow/Cell|{{Recipe_Icon|handgun|Toxic Catalyzer|25}}}} | ||
| + | {{SKWindow/Cell|{{Recipe_Icon|handgun|Virulent Catalyzer|25}}}} | ||
| + | {{SKWindow/Cell|{{Recipe_Icon|handgun|Biohazard|25}}}} | ||
| + | {{SKWindow/NewRow}} | ||
| + | {{SKWindow/Cell||5=2}} | ||
| + | {{SKWindow/Cell||5=2}} | ||
| + | {{SKWindow/Cell|{{Recipe_Icon|helmet|Mercurial Helm|25}}}} | ||
| + | {{SKWindow/NewRow}} | ||
| + | {{SKWindow/Cell|{{Recipe_Icon|armor|Mercurial Mail|25}}}} | ||
| + | {{SKWindow/NewRow}} | ||
| + | {{SKWindow/Cell|}} | ||
| + | {{SKWindow/Cell|}} | ||
| + | {{SKWindow/Cell|{{Recipe_Icon|shield|Crest of Almire|25}}}} | ||
| + | |||
| + | {{SKWindow/NewRow}} | ||
| + | {{SKWindow/Cell|{{Recipe_Icon|armor|Blazebreak Armor|25}} || {{star|3}}}} | ||
| + | {{SKWindow/Cell||5=3}} | ||
| + | {{SKWindow/Cell||5=3}} | ||
| + | {{SKWindow/NewRow}} | ||
| + | {{SKWindow/Cell|{{Recipe_Icon|helmet|Blazebreak Helm|25}} || {{star|3}}}} | ||
| + | {{SKWindow/NewRow}} | ||
| + | {{SKWindow/Cell|{{Recipe_Icon|shield|Blazebreak Shield|25}} || {{star|3}}}} | ||
| + | {{SKWindow/NewRow}} | ||
| + | {{SKWindow/Cell|{{Recipe_Icon|armor|Blizzbreaker Armor|25}} || {{star|3}}}} | ||
| + | {{SKWindow/Cell||5=3}} | ||
| + | {{SKWindow/Cell||5=3}} | ||
| + | {{SKWindow/NewRow}} | ||
| + | {{SKWindow/Cell|{{Recipe_Icon|helmet|Blizzbreaker Helm|25}} || {{star|3}}}} | ||
| + | {{SKWindow/NewRow}} | ||
| + | {{SKWindow/Cell|{{Recipe_Icon|shield|Blizzbreaker Shield|25}} || {{star|3}}}} | ||
| + | {{SKWindow/NewRow}} | ||
| + | {{SKWindow/Cell|{{Recipe_Icon|armor|Surge Breaker Armor|25}} || {{star|3}}}} | ||
| + | {{SKWindow/Cell||5=3}} | ||
| + | {{SKWindow/Cell||5=3}} | ||
| + | {{SKWindow/NewRow}} | ||
| + | {{SKWindow/Cell|{{Recipe_Icon|helmet|Surge Breaker Helm|25}} || {{star|3}}}} | ||
| + | {{SKWindow/NewRow}} | ||
| + | {{SKWindow/Cell|{{Recipe_Icon|shield|Surge Breaker Shield|25}} || {{star|3}}}} | ||
| + | {{SKWindow/NewRow}} | ||
| + | |||
| + | {{SKWindow/Cell|{{Recipe_Icon|armor|Woven Falcon Pathfinder Armor|25}}|5=3}} | ||
| + | {{SKWindow/Cell|{{Recipe_Icon|armor|Plated Falcon Pathfinder Armor|25}}|5=3}} | ||
| + | {{SKWindow/Cell|{{Recipe_Icon|armor|Sacred Falcon Pathfinder Armor|25}}}} | ||
| + | {{SKWindow/NewRow}} | ||
| + | {{SKWindow/Cell|{{Recipe_Icon|armor|Sacred Falcon Guerrilla Armor|25}}}} | ||
| + | {{SKWindow/NewRow}} | ||
| + | {{SKWindow/Cell|{{Recipe_Icon|armor|Sacred Falcon Hazard Armor|25}}}} | ||
| + | {{SKWindow/NewRow}} | ||
| + | {{SKWindow/Cell|{{Recipe_Icon|armor|Woven Firefly Pathfinder Armor|25}}|5=3}} | ||
| + | {{SKWindow/Cell|{{Recipe_Icon|armor|Plated Firefly Pathfinder Armor|25}}|5=3}} | ||
| + | {{SKWindow/Cell|{{Recipe_Icon|armor|Sacred Firefly Pathfinder Armor|25}}}} | ||
| + | {{SKWindow/NewRow}} | ||
| + | {{SKWindow/Cell|{{Recipe_Icon|armor|Sacred Firefly Guerrilla Armor|25}}}} | ||
| + | {{SKWindow/NewRow}} | ||
| + | {{SKWindow/Cell|{{Recipe_Icon|armor|Sacred Firefly Hazard Armor|25}}}} | ||
| + | {{SKWindow/NewRow}} | ||
| + | {{SKWindow/Cell|{{Recipe_Icon|armor|Woven Grizzly Pathfinder Armor|25}}|5=3}} | ||
| + | {{SKWindow/Cell|{{Recipe_Icon|armor|Plated Grizzly Pathfinder Armor|25}}|5=3}} | ||
| + | {{SKWindow/Cell|{{Recipe_Icon|armor|Sacred Grizzly Pathfinder Armor|25}}}} | ||
| + | {{SKWindow/NewRow}} | ||
| + | {{SKWindow/Cell|{{Recipe_Icon|armor|Sacred Grizzly Guerrilla Armor|25}}}} | ||
| + | {{SKWindow/NewRow}} | ||
| + | {{SKWindow/Cell|{{Recipe_Icon|armor|Sacred Grizzly Hazard Armor|25}}}} | ||
| + | {{SKWindow/NewRow}} | ||
| + | {{SKWindow/Cell|{{Recipe_Icon|armor|Woven Snakebite Pathfinder Armor|25}}|5=3}} | ||
| + | {{SKWindow/Cell|{{Recipe_Icon|armor|Plated Snakebite Pathfinder Armor|25}}|5=3}} | ||
| + | {{SKWindow/Cell|{{Recipe_Icon|armor|Sacred Snakebite Pathfinder Armor|25}}}} | ||
| + | {{SKWindow/NewRow}} | ||
| + | {{SKWindow/Cell|{{Recipe_Icon|armor|Sacred Snakebite Guerrilla Armor|25}}}} | ||
| + | {{SKWindow/NewRow}} | ||
| + | {{SKWindow/Cell|{{Recipe_Icon|armor|Sacred Snakebite Hazard Armor|25}}}} | ||
| + | |||
| + | {{SKWindow/NewRow}} | ||
| + | {{SKWindow/Cell|{{Recipe_Icon|armor|Woven Falcon Sentinel Armor|25}}|5=3}} | ||
| + | {{SKWindow/Cell|{{Recipe_Icon|armor|Plated Falcon Sentinel Armor|25}}|5=3}} | ||
| + | {{SKWindow/Cell|{{Recipe_Icon|armor|Sacred Falcon Sentinel Armor|25}}}} | ||
| + | {{SKWindow/NewRow}} | ||
| + | {{SKWindow/Cell|{{Recipe_Icon|armor|Sacred Falcon Keeper Armor|25}}}} | ||
| + | {{SKWindow/NewRow}} | ||
| + | {{SKWindow/Cell|{{Recipe_Icon|armor|Sacred Falcon Wraith Armor|25}}}} | ||
| + | {{SKWindow/NewRow}} | ||
| + | {{SKWindow/Cell|{{Recipe_Icon|armor|Woven Firefly Sentinel Armor|25}}|5=3}} | ||
| + | {{SKWindow/Cell|{{Recipe_Icon|armor|Plated Firefly Sentinel Armor|25}}|5=3}} | ||
| + | {{SKWindow/Cell|{{Recipe_Icon|armor|Sacred Firefly Sentinel Armor|25}}}} | ||
| + | {{SKWindow/NewRow}} | ||
| + | {{SKWindow/Cell|{{Recipe_Icon|armor|Sacred Firefly Keeper Armor|25}}}} | ||
| + | {{SKWindow/NewRow}} | ||
| + | {{SKWindow/Cell|{{Recipe_Icon|armor|Sacred Firefly Wraith Armor|25}}}} | ||
| + | {{SKWindow/NewRow}} | ||
| + | {{SKWindow/Cell|{{Recipe_Icon|armor|Woven Grizzly Sentinel Armor|25}}|5=3}} | ||
| + | {{SKWindow/Cell|{{Recipe_Icon|armor|Plated Grizzly Sentinel Armor|25}}|5=3}} | ||
| + | {{SKWindow/Cell|{{Recipe_Icon|armor|Sacred Grizzly Sentinel Armor|25}}}} | ||
| + | {{SKWindow/NewRow}} | ||
| + | {{SKWindow/Cell|{{Recipe_Icon|armor|Sacred Grizzly Keeper Armor|25}}}} | ||
| + | {{SKWindow/NewRow}} | ||
| + | {{SKWindow/Cell|{{Recipe_Icon|armor|Sacred Grizzly Wraith Armor|25}}}} | ||
| + | {{SKWindow/NewRow}} | ||
| + | {{SKWindow/Cell|{{Recipe_Icon|armor|Woven Snakebite Sentinel Armor|25}}|5=3}} | ||
| + | {{SKWindow/Cell|{{Recipe_Icon|armor|Plated Snakebite Sentinel Armor|25}}|5=3}} | ||
| + | {{SKWindow/Cell|{{Recipe_Icon|armor|Sacred Snakebite Sentinel Armor|25}}}} | ||
| + | {{SKWindow/NewRow}} | ||
| + | {{SKWindow/Cell|{{Recipe_Icon|armor|Sacred Snakebite Keeper Armor|25}}}} | ||
| + | {{SKWindow/NewRow}} | ||
| + | {{SKWindow/Cell|{{Recipe_Icon|armor|Sacred Snakebite Wraith Armor|25}}}} | ||
| + | |||
| + | {{SKWindow/NewRow}} | ||
| + | {{SKWindow/Cell|{{Recipe_Icon|armor|Woven Falcon Shade Armor|25}}|5=3}} | ||
| + | {{SKWindow/Cell|{{Recipe_Icon|armor|Plated Falcon Shade Armor|25}}|5=3}} | ||
| + | {{SKWindow/Cell|{{Recipe_Icon|armor|Sacred Falcon Shade Armor|25}}}} | ||
| + | {{SKWindow/NewRow}} | ||
| + | {{SKWindow/Cell|{{Recipe_Icon|armor|Sacred Falcon Ghost Armor|25}}}} | ||
| + | {{SKWindow/NewRow}} | ||
| + | {{SKWindow/Cell|{{Recipe_Icon|armor|Sacred Falcon Hex Armor|25}}}} | ||
| + | {{SKWindow/NewRow}} | ||
| + | {{SKWindow/Cell|{{Recipe_Icon|armor|Woven Firefly Shade Armor|25}}|5=3}} | ||
| + | {{SKWindow/Cell|{{Recipe_Icon|armor|Plated Firefly Shade Armor|25}}|5=3}} | ||
| + | {{SKWindow/Cell|{{Recipe_Icon|armor|Sacred Firefly Shade Armor|25}}}} | ||
| + | {{SKWindow/NewRow}} | ||
| + | {{SKWindow/Cell|{{Recipe_Icon|armor|Sacred Firefly Ghost Armor|25}}}} | ||
| + | {{SKWindow/NewRow}} | ||
| + | {{SKWindow/Cell|{{Recipe_Icon|armor|Sacred Firefly Hex Armor|25}}}} | ||
| + | {{SKWindow/NewRow}} | ||
| + | {{SKWindow/Cell|{{Recipe_Icon|armor|Woven Grizzly Shade Armor|25}}|5=3}} | ||
| + | {{SKWindow/Cell|{{Recipe_Icon|armor|Plated Grizzly Shade Armor|25}}|5=3}} | ||
| + | {{SKWindow/Cell|{{Recipe_Icon|armor|Sacred Grizzly Shade Armor|25}}}} | ||
| + | {{SKWindow/NewRow}} | ||
| + | {{SKWindow/Cell|{{Recipe_Icon|armor|Sacred Grizzly Ghost Armor|25}}}} | ||
| + | {{SKWindow/NewRow}} | ||
| + | {{SKWindow/Cell|{{Recipe_Icon|armor|Sacred Grizzly Hex Armor|25}}}} | ||
| + | {{SKWindow/NewRow}} | ||
| + | {{SKWindow/Cell|{{Recipe_Icon|armor|Woven Snakebite Shade Armor|25}}|5=3}} | ||
| + | {{SKWindow/Cell|{{Recipe_Icon|armor|Plated Snakebite Shade Armor|25}}|5=3}} | ||
| + | {{SKWindow/Cell|{{Recipe_Icon|armor|Sacred Snakebite Shade Armor|25}}}} | ||
| + | {{SKWindow/NewRow}} | ||
| + | {{SKWindow/Cell|{{Recipe_Icon|armor|Sacred Snakebite Ghost Armor|25}}}} | ||
| + | {{SKWindow/NewRow}} | ||
| + | {{SKWindow/Cell|{{Recipe_Icon|armor|Sacred Snakebite Hex Armor|25}}}} | ||
| + | |} | ||
| + | |||
| + | ===Mission Lobbies=== | ||
| + | Basil also appears in mission lobbies. Before each mission, he offers a totally predictable selection of recipes relevant to that mission. These recipes are listed below. | ||
| + | |||
| + | {{showhide|Missions 3-1 through 3-2|content = | ||
| + | |||
| + | {{showhide|3-1 [[Alien Ooze]]|content = | ||
| + | {{:Alien Ooze/Basil}} | ||
| + | }} | ||
| + | {{showhide|3-1 [[Toy Soldiers]]|content = | ||
| + | {{:Toy Soldiers/Basil}} | ||
| + | }} | ||
| + | {{showhide|3-2 [[Faith in Armor]]|content = | ||
| + | {{:Faith in Armor/Basil}} | ||
| + | }} | ||
| + | {{showhide|3-2 [[Strength in Unity]]|content = | ||
| + | {{:Strength in Unity/Basil}} | ||
| + | }} | ||
| + | {{showhide|3-2 [[Blades of the Fallen]]|content = | ||
| + | {{:Blades of the Fallen/Basil}} | ||
| + | }} | ||
| + | {{showhide|3-2 [[Shadow of the Beast]]|content = | ||
| + | {{:Shadow of the Beast/Basil}} | ||
| + | }} | ||
| + | |||
| + | }} | ||
| + | |||
| + | {{showhide|Missions 4-2 through 4-3|content = | ||
| + | |||
| + | {{showhide|4-2 [[Oilers in the Boilers]]|content = | ||
| + | {{:Oilers in the Boilers/Basil}} | ||
| + | }} | ||
| + | {{showhide|4-2 [[Frostifur Fandango]]|content = | ||
| + | {{:Frostifur Fandango/Basil}} | ||
| + | }} | ||
| + | {{showhide|4-3 [[Rescues and Recycling]]|content = | ||
| + | {{:Rescues and Recycling/Basil}} | ||
| + | }} | ||
| + | {{showhide|4-3 [[Shocking Sentient Sentries]]|content = | ||
| + | {{:Shocking Sentient Sentries/Basil}} | ||
| + | }} | ||
| + | |||
| + | }} | ||
| + | |||
| + | {{showhide|Missions 5-1 through 5-2|content = | ||
| + | |||
| + | {{showhide|5-1 [[Chilled to the Bone]]|content = | ||
| + | {{:Chilled to the Bone/Basil}} | ||
| + | }} | ||
| + | {{showhide|5-1 [[Work for Idle Hands]]|content = | ||
| + | {{:Work for Idle Hands/Basil}} | ||
| + | }} | ||
| + | {{showhide|5-2 [[Time Enough at Last]]|content = | ||
| + | {{:Time Enough at Last/Basil}} | ||
| + | }} | ||
| + | {{showhide|5-2 [[Rise or Fall]]|content = | ||
| + | {{:Rise or Fall/Basil}} | ||
| + | }} | ||
| + | {{showhide|5-2 [[The Sovereign Slime]]|content = | ||
| + | {{:The Sovereign Slime/Basil}} | ||
| + | }} | ||
| + | |||
| + | }} | ||
| + | |||
| + | {{showhide|Missions 6-1 through 6-2|content = | ||
| + | |||
| + | {{showhide|6-1 [[Axes of Evil]]|content = | ||
| + | {{:Axes of Evil/Basil}} | ||
| + | }} | ||
| + | {{showhide|6-1 [[Plan of Attack]]|content = | ||
| + | {{:Plan of Attack/Basil}} | ||
| + | }} | ||
| + | {{showhide|6-1 [[High Temperature Hostages]]|content = | ||
| + | {{:High Temperature Hostages/Basil}} | ||
| + | }} | ||
| + | {{showhide|6-2 [[Whipping and Mishandling]]|content = | ||
| + | {{:Whipping and Mishandling/Basil}} | ||
| + | }} | ||
| + | {{showhide|6-2 [[Sewer Stash]]|content = | ||
| + | {{:Sewer Stash/Basil}} | ||
| + | }} | ||
| + | {{showhide|6-2 [[Built to Destroy!]]|content = | ||
| + | {{:Built to Destroy!/Basil}} | ||
| + | }} | ||
| + | |||
| + | }} | ||
| + | |||
| + | {{showhide|Missions 7-2 through 7-3|content = | ||
| + | |||
| + | {{showhide|7-2 [[In Cold Blood]]|content = | ||
| + | {{:In Cold Blood/Basil}} | ||
| + | }} | ||
| + | {{showhide|7-2 [[Vicious and Viscous]]|content = | ||
| + | {{:Vicious and Viscous/Basil}} | ||
| + | }} | ||
| + | {{showhide|7-3 [[Beyond the Axes of Evil]]|content = | ||
| + | {{:Beyond the Axes of Evil/Basil}} | ||
| + | }} | ||
| + | {{showhide|7-3 [[Spark and Roar]]|content = | ||
| + | {{:Spark and Roar/Basil}} | ||
| + | }} | ||
| + | |||
| + | }} | ||
| + | |||
| + | {{showhide|Missions 8-1 through 8-2|content = | ||
| + | |||
| + | {{showhide|8-1 [[The Return of Ur]]|content = | ||
| + | {{:The Return of Ur/Basil}} | ||
| + | }} | ||
| + | {{showhide|8-1 [[Weight of Darkness]]|content = | ||
| + | {{:Weight of Darkness/Basil}} | ||
| + | }} | ||
| + | {{showhide|8-2 [[The Vile Engine]]|content = | ||
| + | {{:The Vile Engine/Basil}} | ||
| + | }} | ||
| + | {{showhide|8-2 [[The Rotting Metropolis]]|content = | ||
| + | {{:The Rotting Metropolis/Basil}} | ||
| + | }} | ||
| + | {{showhide|8-2 [[The Great Escape]]|content = | ||
| + | {{:The Great Escape/Basil}} | ||
| + | }} | ||
| + | |||
| + | }} | ||
| + | |||
| + | {{showhide|Missions 9-1 through 9-3|content = | ||
| + | |||
| + | {{showhide|9-1 [[An Occurrence at Owlite Keep]]|content = | ||
| + | {{:An Occurrence at Owlite Keep/Basil}} | ||
| + | }} | ||
| + | {{showhide|9-1 [[The Silent Legion]]|content = | ||
| + | {{:The Silent Legion/Basil}} | ||
| + | }} | ||
| + | {{showhide|9-2 [[Terminal Meltdown]]|content = | ||
| + | {{:Terminal Meltdown/Basil}} | ||
| + | }} | ||
| + | {{showhide|9-2 [[Alone in the Dark]]|content = | ||
| + | {{:Alone in the Dark/Basil}} | ||
| + | }} | ||
| + | {{showhide|9-2 [[The Gauntlet]]|content = | ||
| + | {{:The Gauntlet/Basil}} | ||
| + | }} | ||
| + | {{showhide|9-3 [[The King of Ashes]]|content = | ||
| + | {{:The King of Ashes/Basil}} | ||
| + | }} | ||
| + | |||
| + | }} | ||
| + | |||
| + | {{showhide|Missions 10-1 through 10-2|content = | ||
| + | |||
| + | {{showhide|10-1 [[Breaking in the Recruits]]|content = | ||
| + | {{:Breaking in the Recruits/Basil}} | ||
| + | }} | ||
| + | {{showhide|10-1 [[Crimson Chaos]]|content = | ||
| + | {{:Crimson Chaos/Basil}} | ||
| + | }} | ||
| + | {{showhide|10-1 [[It Came From Below]]|content = | ||
| + | {{:It Came From Below/Basil}} | ||
| + | }} | ||
| + | {{showhide|10-2 [[Shadowplay]]|content = | ||
| + | {{:Shadowplay/Basil}} | ||
| + | }} | ||
| + | {{showhide|10-2 [[Dreams and Nightmares]]|content = | ||
| + | {{:Dreams and Nightmares/Basil}} | ||
| + | }} | ||
| + | }} | ||
| + | |||
| + | |||
| + | {{showhide|[[Operation Crimson Hammer]]|content = | ||
| + | |||
| + | {{showhide|Tier 1|content = | ||
| + | {{:Operation Crimson Hammer (Tier 1)/Basil}} | ||
| + | }} | ||
| + | |||
| + | {{showhide|Tier 2|content = | ||
| + | {{:Operation Crimson Hammer (Tier 2)/Basil}} | ||
| + | }} | ||
| + | |||
| + | {{showhide|Tier 3|content = | ||
| + | {{:Operation Crimson Hammer (Tier 3)/Basil}} | ||
| + | }} | ||
| − | + | }} | |
| − | + | ||
| − | + | ||
| − | + | == See Also == | |
| + | {{NPC see also}} | ||
Latest revision as of 11:27, 20 April 2020
| ||||
|

Basil is an NPC.
Contents
Appearance
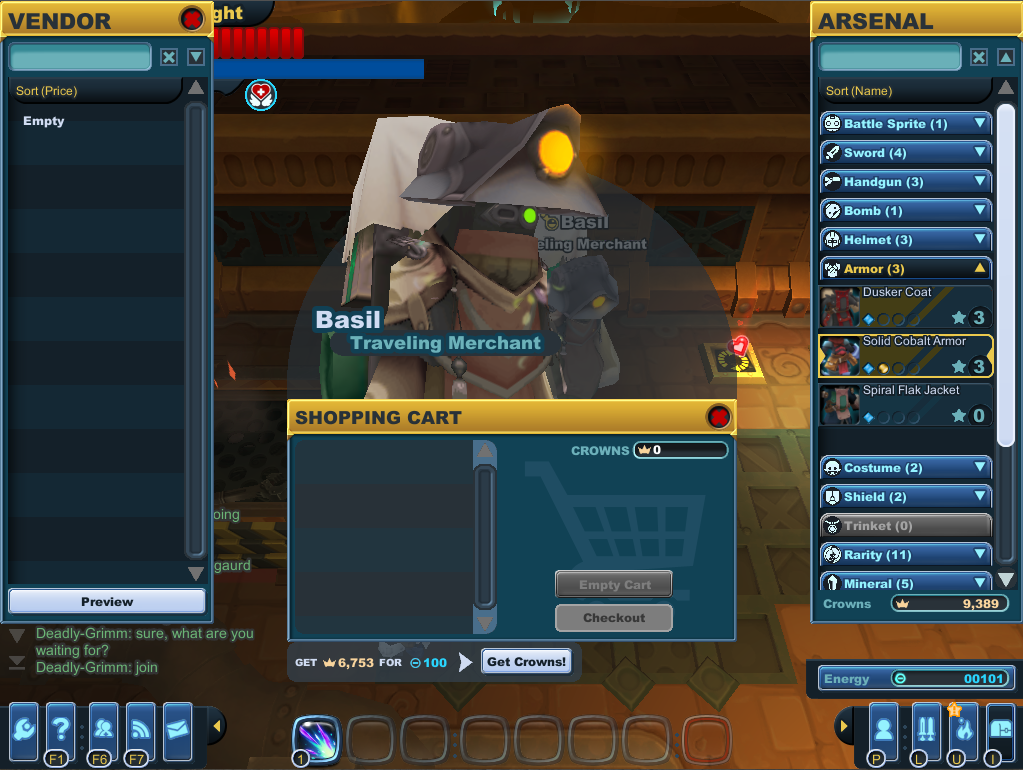
Basil is a stranger wearing a beige and brown robe with a headlamp-equipped hat. He totes a large rucksack on his back. Unlike many other strangers, there aren't any snipes perched on him.
Notes
This character has been in the game since release 2011-04-04 when the game officially launched.
At some point, the color of Basil's hat was changed from grey to the current beige. This was likely changed with release 2012-01-30. He still have this hat in the clockwork's terminals in arcade.
Basil is currently the only stranger in the game to wear the Stranger Hat instead of the Stranger Cap. Quince used to wear one too, before they were removed in ???.
Gallery

Basil in a Clockwork Terminal.

Basil in a mission lobby.

Basil in a Danger Mission lobby.
Basil's inventory with no items. Note the gray hat that is only present if you see them in the Clockwork Terminal.


Wares
Clockwork Terminals
Basil appears in the Clockwork Terminals at depths 4, 13, and 23 of the Clockworks. Knights who join the party on Basil's level, or on the level just before Basil, are not allowed buy any recipes. All other knights in the party are offered the same list of 6-25 randomly chosen recipes. At depth 4, he offers 1- and 2-star recipes, including at least one of the latter. At depth 13, he offers 2*, 3*, and 4* recipes, including at least one of the latter. At depth 23, he offers 4* and 5* recipes, including at least one of the latter.
His prices are as follows:
| Star | Crowns | Depth 4 | Depth 13 | Depth 23 |
|---|---|---|---|---|
| ★☆☆☆☆ | 250 | Yes | No | No |
| ★★☆☆☆ | 1,000 | Yes | Yes | No |
| ★★★☆☆ | 4,000 | No | Yes | No |
| ★★★★☆ | 10,000 | No | Yes | Yes |
| ★★★★★ | 25,000 | No | No | Yes |
While many recipes are available from Hall of Heroes or other vendors, there are a number of recipes available only from Basil in Clockwork Terminals. These include recipes for items on alchemy paths originating from boss-dropped tokens and all 3-star "breaker" series recipes, such as Blazebreak Armor and Surge Breaker Shield.
Mission Lobbies
Basil also appears in mission lobbies. Before each mission, he offers a totally predictable selection of recipes relevant to that mission. These recipes are listed below.
 Force Buckler Recipe (★☆☆☆☆: 250 crowns)
 Pummel Gun Recipe (★☆☆☆☆: 250 crowns)
 Super Slime Slasher Recipe (★☆☆☆☆: 250 crowns)
- Force Buckler Recipe (★☆☆☆☆: 250 crowns)
- Heavy Hatchet Recipe (★☆☆☆☆: 250 crowns)
- Pummel Gun Recipe (★☆☆☆☆: 250 crowns)
- Force Buckler Recipe (★☆☆☆☆: 250 crowns)
- Heavy Hatchet Recipe (★☆☆☆☆: 250 crowns)
- Pummel Gun Recipe (★☆☆☆☆: 250 crowns)
- Big Beast Basher Recipe (★☆☆☆☆: 250 crowns)
- Force Buckler Recipe (★☆☆☆☆: 250 crowns)
- Pummel Gun Recipe (★☆☆☆☆: 250 crowns)
- Bolted Blade Recipe (★☆☆☆☆: 250 crowns)
 Cold Snap Recipe (★☆☆☆☆: 250 crowns)
- Force Buckler Recipe (★☆☆☆☆: 250 crowns)
- Frost Gun Recipe (★☆☆☆☆: 250 crowns)
 Spiral Scale Helm Recipe (★☆☆☆☆: 250 crowns)
 Spiral Scale Mail Recipe (★☆☆☆☆: 250 crowns)
- Big Beast Basher Recipe (★☆☆☆☆: 250 crowns)
- Firecracker Recipe (★☆☆☆☆: 250 crowns)
- Force Buckler Recipe (★☆☆☆☆: 250 crowns)
- Spiral Scale Helm Recipe (★☆☆☆☆: 250 crowns)
- Spiral Scale Mail Recipe (★☆☆☆☆: 250 crowns)
- Super Stun Gun Recipe (★☆☆☆☆: 250 crowns)
- Dark Matter Bomb Recipe (★★☆☆☆: 1,000 crowns)
- Freezing Vaporizer Recipe (★★☆☆☆: 1,000 crowns)
- Jelly Helm Recipe (★★☆☆☆: 1,000 crowns)
- Jelly Mail Recipe (★★☆☆☆: 1,000 crowns)
- Jelly Shield Recipe (★★☆☆☆: 1,000 crowns)
- Shadowtech Alchemer Recipe (★★☆☆☆: 1,000 crowns)
- Troika Recipe (★★☆☆☆: 1,000 crowns)
- Flourish Recipe (★★☆☆☆: 1,000 crowns)
- Jelly Helm Recipe (★★☆☆☆: 1,000 crowns)
- Jelly Mail Recipe (★★☆☆☆: 1,000 crowns)
- Jelly Shield Recipe (★★☆☆☆: 1,000 crowns)
- Splinter Bomb Recipe (★★☆☆☆: 1,000 crowns)
- Magnus Recipe (★★★☆☆: 4,000 crowns)
- Dark Matter Bomb Recipe (★★☆☆☆: 1,000 crowns)
- Freezing Vaporizer Recipe (★★☆☆☆: 1,000 crowns)
- Magic Cloak Recipe (★★☆☆☆: 1,000 crowns)
- Magic Hood Recipe (★★☆☆☆: 1,000 crowns)
- Owlite Shield Recipe (★★☆☆☆: 1,000 crowns)
- Shadowtech Alchemer Recipe (★★☆☆☆: 1,000 crowns)
- Wrench Wand Recipe (★★☆☆☆: 1,000 crowns)
- Crystal Bomb Recipe (★★☆☆☆: 1,000 crowns)
- Freezing Vaporizer Recipe (★★☆☆☆: 1,000 crowns)
- Magic Cloak Recipe (★★☆☆☆: 1,000 crowns)
- Magic Hood Recipe (★★☆☆☆: 1,000 crowns)
- Owlite Shield Recipe (★★☆☆☆: 1,000 crowns)
- Voltech Alchemer Recipe (★★☆☆☆: 1,000 crowns)
- Wrench Wand Recipe (★★☆☆☆: 1,000 crowns)
- Crystal Bomb Recipe (★★☆☆☆: 1,000 crowns)
- Fiery Vaporizer Recipe (★★☆☆☆: 1,000 crowns)
- Firotech Alchemer Recipe (★★☆☆☆: 1,000 crowns)
- Skelly Mask Recipe (★★☆☆☆: 1,000 crowns)
- Skelly Shield Recipe (★★☆☆☆: 1,000 crowns)
- Skelly Suit Recipe (★★☆☆☆: 1,000 crowns)
- Fireburst Brandish Recipe (★★★☆☆: 4,000 crowns)
- Flourish Recipe (★★☆☆☆: 1,000 crowns)
- Skelly Mask Recipe (★★☆☆☆: 1,000 crowns)
- Skelly Shield Recipe (★★☆☆☆: 1,000 crowns)
- Skelly Suit Recipe (★★☆☆☆: 1,000 crowns)
- Splinter Bomb Recipe (★★☆☆☆: 1,000 crowns)
- Magnus Recipe (★★★☆☆: 4,000 crowns)
- Crystal Bomb Recipe (★★☆☆☆: 1,000 crowns)
- Haze Bomb Recipe (★★☆☆☆: 1,000 crowns)
- Skelly Mask Recipe (★★☆☆☆: 1,000 crowns)
- Skelly Shield Recipe (★★☆☆☆: 1,000 crowns)
- Skelly Suit Recipe (★★☆☆☆: 1,000 crowns)
- Voltech Alchemer Recipe (★★☆☆☆: 1,000 crowns)
- Fireburst Brandish Recipe (★★★☆☆: 4,000 crowns)
- Dark Matter Bomb Recipe (★★☆☆☆: 1,000 crowns)
- Fiery Vaporizer Recipe (★★☆☆☆: 1,000 crowns)
- Jelly Shield Recipe (★★☆☆☆: 1,000 crowns)
- Shadowtech Alchemer Recipe (★★☆☆☆: 1,000 crowns)
- Wolver Cap Recipe (★★☆☆☆: 1,000 crowns)
- Wolver Coat Recipe (★★☆☆☆: 1,000 crowns)
- Nightblade Recipe (★★★☆☆: 4,000 crowns)
- Brute Jelly Shield Recipe (★★★☆☆: 4,000 crowns)
- Chroma Mask Recipe (★★★☆☆: 4,000 crowns)
- Chroma Suit Recipe (★★★☆☆: 4,000 crowns)
- Graviton Charge Recipe (★★★☆☆: 4,000 crowns)
- Nightblade Recipe (★★★☆☆: 4,000 crowns)
- Rock Salt Bomb Recipe (★★★☆☆: 4,000 crowns)
- Shadowtech Alchemer Mk II Recipe (★★★☆☆: 4,000 crowns)
- Elemental Cloak Recipe (★★★☆☆: 4,000 crowns)
- Elemental Hood Recipe (★★★☆☆: 4,000 crowns)
- Fiery Vaporizer Mk II Recipe (★★★☆☆: 4,000 crowns)
- Fireburst Brandish Recipe (★★★☆☆: 4,000 crowns)
- Horned Owlite Shield Recipe (★★★☆☆: 4,000 crowns)
- Super Crystal Bomb Recipe (★★★☆☆: 4,000 crowns)
- Voltech Alchemer Mk II Recipe (★★★☆☆: 4,000 crowns)
- Brute Jelly Shield Recipe (★★★☆☆: 4,000 crowns)
- Dusker Cap Recipe (★★★☆☆: 4,000 crowns)
- Dusker Coat Recipe (★★★☆☆: 4,000 crowns)
- Magnus Recipe (★★★☆☆: 4,000 crowns)
- Rigadoon Recipe (★★★☆☆: 4,000 crowns)
- Super Splinter Bomb Recipe (★★★☆☆: 4,000 crowns)
- Toxic Vaporizer Mk II Recipe (★★★☆☆: 4,000 crowns)
- Blazebreak Armor Recipe (★★★☆☆: 4,000 crowns)
- Blazebreak Helm Recipe (★★★☆☆: 4,000 crowns)
- Blazebreak Shield Recipe (★★★☆☆: 4,000 crowns)
- Nightblade Recipe (★★★☆☆: 4,000 crowns)
- Shadowtech Alchemer Mk II Recipe (★★★☆☆: 4,000 crowns)
- Super Dark Matter Bomb Recipe (★★★☆☆: 4,000 crowns)
- Toxic Vaporizer Mk II Recipe (★★★☆☆: 4,000 crowns)
- Scary Skelly Mask Recipe (★★★☆☆: 4,000 crowns)
- Scary Skelly Shield Recipe (★★★☆☆: 4,000 crowns)
- Scary Skelly Suit Recipe (★★★☆☆: 4,000 crowns)
- Sun Shards Recipe (★★★☆☆: 4,000 crowns)
- Swift Flourish Recipe (★★★☆☆: 4,000 crowns)
- Voltech Alchemer Mk II Recipe (★★★☆☆: 4,000 crowns)
- Drake Scale Helm Recipe (★★★☆☆: 4,000 crowns)
- Drake Scale Mail Recipe (★★★☆☆: 4,000 crowns)
- Drake Scale Shield Recipe (★★★☆☆: 4,000 crowns)
- Graviton Charge Recipe (★★★☆☆: 4,000 crowns)
- Nightblade Recipe (★★★☆☆: 4,000 crowns)
- Shadowtech Alchemer Mk II Recipe (★★★☆☆: 4,000 crowns)
- Deconstructor Recipe (★★★☆☆: 4,000 crowns)
- Elemental Cloak Recipe (★★★☆☆: 4,000 crowns)
- Elemental Hood Recipe (★★★☆☆: 4,000 crowns)
- Horned Owlite Shield Recipe (★★★☆☆: 4,000 crowns)
- Iceburst Brandish Recipe (★★★☆☆: 4,000 crowns)
- Voltech Alchemer Mk II Recipe (★★★☆☆: 4,000 crowns)
- Heavy Splinter Bomb Recipe (★★★★☆: 10,000 crowns)
- Rock Jelly Helm Recipe (★★★★☆: 10,000 crowns)
- Rock Jelly Mail Recipe (★★★★☆: 10,000 crowns)
- Rock Jelly Shield Recipe (★★★★☆: 10,000 crowns)
- Shadow Driver Recipe (★★★★☆: 10,000 crowns)
- Silent Nightblade Recipe (★★★★☆: 10,000 crowns)
- Charged Quicksilver Helm Recipe (★★★★☆: 10,000 crowns)
- Charged Quicksilver Mail Recipe (★★★★☆: 10,000 crowns)
- Fiery Atomizer Recipe (★★★★☆: 10,000 crowns)
- Heavy Dark Matter Bomb Recipe (★★★★☆: 10,000 crowns)
- Shadow Driver Recipe (★★★★☆: 10,000 crowns)
- Silent Nightblade Recipe (★★★★☆: 10,000 crowns)
- Wise Owlite Shield Recipe (★★★★☆: 10,000 crowns)
- Blazebrand Recipe (★★★★☆: 10,000 crowns)
- Fiery Atomizer Recipe (★★★★☆: 10,000 crowns)
- Heavy Crystal Bomb Recipe (★★★★☆: 10,000 crowns)
- Miracle Cloak Recipe (★★★★☆: 10,000 crowns)
- Miracle Hood Recipe (★★★★☆: 10,000 crowns)
- Volt Driver Recipe (★★★★☆: 10,000 crowns)
- Wise Owlite Shield Recipe (★★★★☆: 10,000 crowns)
- Heavy Deconstructor Recipe (★★★★☆: 10,000 crowns)
- Miracle Cloak Recipe (★★★★☆: 10,000 crowns)
- Miracle Hood Recipe (★★★★☆: 10,000 crowns)
- Shadow Driver Recipe (★★★★☆: 10,000 crowns)
- Silent Nightblade Recipe (★★★★☆: 10,000 crowns)
- Wise Owlite Shield Recipe (★★★★☆: 10,000 crowns)
- Daring Rigadoon Recipe (★★★★☆: 10,000 crowns)
- Mega Magnus Recipe (★★★★☆: 10,000 crowns)
- Radiant Sun Shards Recipe (★★★★☆: 10,000 crowns)
- Seraphic Helm Recipe (★★★★☆: 10,000 crowns)
- Seraphic Mail Recipe (★★★★☆: 10,000 crowns)
- Sinister Skelly Shield Recipe (★★★★☆: 10,000 crowns)
- Daring Rigadoon Recipe (★★★★☆: 10,000 crowns)
- Radiant Sun Shards Recipe (★★★★☆: 10,000 crowns)
- Seraphic Helm Recipe (★★★★☆: 10,000 crowns)
- Seraphic Mail Recipe (★★★★☆: 10,000 crowns)
- Sinister Skelly Shield Recipe (★★★★☆: 10,000 crowns)
- Volt Driver Recipe (★★★★☆: 10,000 crowns)
- Ash Tail Cap Recipe (★★★★☆: 10,000 crowns)
- Ash Tail Coat Recipe (★★★★☆: 10,000 crowns)
- Fiery Atomizer Recipe (★★★★☆: 10,000 crowns)
- Ionized Salt Bomb Recipe (★★★★☆: 10,000 crowns)
- Rock Jelly Shield Recipe (★★★★☆: 10,000 crowns)
- Shadow Driver Recipe (★★★★☆: 10,000 crowns)
- Silent Nightblade Recipe (★★★★☆: 10,000 crowns)
- Blazebrand Recipe (★★★★☆: 10,000 crowns)
- Fiery Atomizer Recipe (★★★★☆: 10,000 crowns)
- Firo Driver Recipe (★★★★☆: 10,000 crowns)
- Rock Jelly Shield Recipe (★★★★☆: 10,000 crowns)
- Silvermail Recipe (★★★★☆: 10,000 crowns)
- Virulisk Mask Recipe (★★★★☆: 10,000 crowns)
- Freezing Atomizer Recipe (★★★★☆: 10,000 crowns)
- Khorovod Recipe (★★★★☆: 10,000 crowns)
- Sinister Skelly Mask Recipe (★★★★☆: 10,000 crowns)
- Sinister Skelly Shield Recipe (★★★★☆: 10,000 crowns)
- Sinister Skelly Suit Recipe (★★★★☆: 10,000 crowns)
- Volcanic Pepperbox Recipe (★★★★★: 25,000 crowns)
- Ash of Agni Recipe (★★★★★: 25,000 crowns)
- Combuster Recipe (★★★★★: 25,000 crowns)
- Dread Skelly Mask Recipe (★★★★★: 25,000 crowns)
- Dread Skelly Shield Recipe (★★★★★: 25,000 crowns)
- Dread Skelly Suit Recipe (★★★★★: 25,000 crowns)
- Storm Driver Recipe (★★★★★: 25,000 crowns)
- Callahan Recipe (★★★★★: 25,000 crowns)
- Deadly Splinter Bomb Recipe (★★★★★: 25,000 crowns)
- Dread Skelly Mask Recipe (★★★★★: 25,000 crowns)
- Dread Skelly Shield Recipe (★★★★★: 25,000 crowns)
- Dread Skelly Suit Recipe (★★★★★: 25,000 crowns)
- Fearless Rigadoon Recipe (★★★★★: 25,000 crowns)
- Acheron Recipe (★★★★★: 25,000 crowns)
- Deadly Dark Matter Bomb Recipe (★★★★★: 25,000 crowns)
- Deadly Virulisk Mask Recipe (★★★★★: 25,000 crowns)
- Deadly Virulisk Suit Recipe (★★★★★: 25,000 crowns)
- Dragon Scale Shield Recipe (★★★★★: 25,000 crowns)
- Shocking Salt Bomb Recipe (★★★★★: 25,000 crowns)
- Umbra Driver Recipe (★★★★★: 25,000 crowns)
- Venom Veiler Recipe (★★★★★: 25,000 crowns)
- Combuster Recipe (★★★★★: 25,000 crowns)
- Deadly Crystal Bomb Recipe (★★★★★: 25,000 crowns)
- Dread Skelly Mask Recipe (★★★★★: 25,000 crowns)
- Dread Skelly Shield Recipe (★★★★★: 25,000 crowns)
- Dread Skelly Suit Recipe (★★★★★: 25,000 crowns)
- Storm Driver Recipe (★★★★★: 25,000 crowns)
- Callahan Recipe (★★★★★: 25,000 crowns)
- Divine Mantle Recipe (★★★★★: 25,000 crowns)
- Divine Veil Recipe (★★★★★: 25,000 crowns)
- Final Flourish Recipe (★★★★★: 25,000 crowns)
- Grey Owlite Shield Recipe (★★★★★: 25,000 crowns)
- Scintillating Sun Shards Recipe (★★★★★: 25,000 crowns)
- Armor of the Fallen Recipe (★★★★★: 25,000 crowns)
- Blitz Needle Recipe (★★★★★: 25,000 crowns)
- Crown of the Fallen Recipe (★★★★★: 25,000 crowns)
- Glacius Recipe (★★★★★: 25,000 crowns)
- Grey Owlite Shield Recipe (★★★★★: 25,000 crowns)
- Scintillating Sun Shards Recipe (★★★★★: 25,000 crowns)
- Ash of Agni Recipe (★★★★★: 25,000 crowns)
- Combuster Recipe (★★★★★: 25,000 crowns)
- Grey Feather Cowl Recipe (★★★★★: 25,000 crowns)
- Grey Feather Mantle Recipe (★★★★★: 25,000 crowns)
- Grey Owlite Shield Recipe (★★★★★: 25,000 crowns)
- Magma Driver Recipe (★★★★★: 25,000 crowns)
- Bombastic Demo Helm Recipe (★★★★★: 25,000 crowns)
- Bombastic Demo Suit Recipe (★★★★★: 25,000 crowns)
- Glacius Recipe (★★★★★: 25,000 crowns)
- Hail Driver Recipe (★★★★★: 25,000 crowns)
- Heater Shield Recipe (★★★★★: 25,000 crowns)
- Shivermist Buster Recipe (★★★★★: 25,000 crowns)
- Ironmight Plate Shield Recipe (★★★★★: 25,000 crowns)
- Irontech Destroyer Recipe (★★★★★: 25,000 crowns)
- Sudaruska Recipe (★★★★★: 25,000 crowns)
- Valkyrie Helm Recipe (★★★★★: 25,000 crowns)
- Valkyrie Mail Recipe (★★★★★: 25,000 crowns)
- Volcanic Pepperbox Recipe (★★★★★: 25,000 crowns)
- Armor of the Fallen Recipe (★★★★★: 25,000 crowns)
- Blitz Needle Recipe (★★★★★: 25,000 crowns)
- Crown of the Fallen Recipe (★★★★★: 25,000 crowns)
- Glacius Recipe (★★★★★: 25,000 crowns)
- Grey Owlite Shield Recipe (★★★★★: 25,000 crowns)
- Scintillating Sun Shards Recipe (★★★★★: 25,000 crowns)
- Callahan Recipe (★★★★★: 25,000 crowns)
- Divine Mantle Recipe (★★★★★: 25,000 crowns)
- Divine Veil Recipe (★★★★★: 25,000 crowns)
- Final Flourish Recipe (★★★★★: 25,000 crowns)
- Grey Owlite Shield Recipe (★★★★★: 25,000 crowns)
- Scintillating Sun Shards Recipe (★★★★★: 25,000 crowns)
- Shadowtech Alchemer Recipe (★★☆☆☆: 1,000 crowns)
- Toxic Vaporizer Recipe (★★☆☆☆: 1,000 crowns)
- Elemental Cloak Recipe (★★★☆☆: 4,000 crowns)
- Elemental Hood Recipe (★★★☆☆: 4,000 crowns)
- Graviton Charge Recipe (★★★☆☆: 4,000 crowns)
- Horned Owlite Shield Recipe (★★★☆☆: 4,000 crowns)
- Iceburst Brandish Recipe (★★★☆☆: 4,000 crowns)
- Nightblade Recipe (★★★☆☆: 4,000 crowns)
- Shadowtech Alchemer Mk II Recipe (★★★☆☆: 4,000 crowns)
- Acheron Recipe (★★★★★: 25,000 crowns)
- Glacius Recipe (★★★★★: 25,000 crowns)
- Graviton Vortex Recipe (★★★★★: 25,000 crowns)
- Grey Feather Cowl Recipe (★★★★★: 25,000 crowns)
- Grey Feather Mantle Recipe (★★★★★: 25,000 crowns)
- Grey Owlite Shield Recipe (★★★★★: 25,000 crowns)
- Umbra Driver Recipe (★★★★★: 25,000 crowns)
- Venom Veiler Recipe (★★★★★: 25,000 crowns)