Difference between revisions of "User:MacaroonBomb"
From SpiralKnights
MacaroonBomb (Talk | contribs) |
MacaroonBomb (Talk | contribs) |
||
| Line 26: | Line 26: | ||
{{SKWindow/Cell|'''Preferred Lockdown class:''' Recon|||2}} | {{SKWindow/Cell|'''Preferred Lockdown class:''' Recon|||2}} | ||
{{SKWindow/NewRow}} | {{SKWindow/NewRow}} | ||
| − | {{SKWindow/Cell|''' | + | {{SKWindow/Cell|'''Mission rank:''' Vanguard|||2}} |
| + | {{SKWindow/NewRow}} | ||
| + | {{SKWindow/Cell|'''Prestige:''' 5695|||2}} | ||
{{SKWindow/NewRow}} | {{SKWindow/NewRow}} | ||
{{SKWindow/Cell|'''Personal color:''' [[File:Personal Color-Orange.png|Orange|35px]]|||2}} | {{SKWindow/Cell|'''Personal color:''' [[File:Personal Color-Orange.png|Orange|35px]]|||2}} | ||
| Line 60: | Line 62: | ||
*[[File:Monster-Golden Winter Wisp.png|40px]] [[Wisp|Golden Winter Wisp]] | *[[File:Monster-Golden Winter Wisp.png|40px]] [[Wisp|Golden Winter Wisp]] | ||
*[[File:Monster-Golden Shankle.png|40px]] [[Shankle|Golden Shankle]] | *[[File:Monster-Golden Shankle.png|40px]] [[Shankle|Golden Shankle]] | ||
| + | *[[File:Monster-Golden Dark Shankle.png|40px]] [[Shankle|Golden Dark Shankle]] | ||
| + | *[[File:Monster-Golden Sage Shankle.png|40px]] [[Shankle|Golden Sage Shankle]] | ||
| + | *[[File:Monster-Golden Sharp Shankle.png|40px]] [[Shankle|Golden Sharp Shankle]] | ||
*[[File:Monster-Impostocube.png|40px]] [[Impostocube]] | *[[File:Monster-Impostocube.png|40px]] [[Impostocube]] | ||
*[[File:Monster-Rock Jelly Cube.png|40px]] [[Rock Jelly Cube]] | *[[File:Monster-Rock Jelly Cube.png|40px]] [[Rock Jelly Cube]] | ||
| Line 69: | Line 74: | ||
{{showhide|[[File:Gate-Gloaming Wildwoods.png|15px]][[File:Gate-Ironclaw Munitions Factory.png|15px]][[File:Gate-Royal Jelly Palace.png|15px]][[File:Gate-Firestorm Citadel.png|15px]] [[Bosses]]|width= 500px|content= | {{showhide|[[File:Gate-Gloaming Wildwoods.png|15px]][[File:Gate-Ironclaw Munitions Factory.png|15px]][[File:Gate-Royal Jelly Palace.png|15px]][[File:Gate-Firestorm Citadel.png|15px]] [[Bosses]]|width= 500px|content= | ||
| − | *[[File:Monster-Snarbolax.png|50px]] [[Snarbolax]] (Successfully solo killed, no deaths, also killed using only | + | *[[File:Monster-Snarbolax.png|50px]] [[Snarbolax]] (Successfully solo killed, no deaths, also killed using only the mouse, meaning only movement and shield used) |
*[[File:Monster-Warmaster Seerus.png|50px]] [[Warmaster Seerus|Warmaster Seerus (T1)]] (Successfully solo killed, no deaths) | *[[File:Monster-Warmaster Seerus.png|50px]] [[Warmaster Seerus|Warmaster Seerus (T1)]] (Successfully solo killed, no deaths) | ||
*[[File:Monster-Roarmulus_Twins.png|50px]] [[Roarmulus Twins]] (Successfully solo killed, no deaths) | *[[File:Monster-Roarmulus_Twins.png|50px]] [[Roarmulus Twins]] (Successfully solo killed, no deaths) | ||
| Line 84: | Line 89: | ||
{{showhide|[[File:Icon-arsenal.png|15px]] Items recieved from boxes|width= 510px|content= | {{showhide|[[File:Icon-arsenal.png|15px]] Items recieved from boxes|width= 510px|content= | ||
| + | *[[File:Equipment-Firebreak Armor icon.png|35px]] [[Firebreak Armor]] {{star|2|color=6cb0b9}} | ||
*[[File:Equipment-Plate Shield icon.png|35px]] [[Plate Shield]] {{star|2|color=6cb0b9}} | *[[File:Equipment-Plate Shield icon.png|35px]] [[Plate Shield]] {{star|2|color=6cb0b9}} | ||
*[[File:Equipment-Skelly Shield icon.png|35px]] [[Skelly Shield]] {{star|2|color=6cb0b9}} | *[[File:Equipment-Skelly Shield icon.png|35px]] [[Skelly Shield]] {{star|2|color=6cb0b9}} | ||
| Line 121: | Line 127: | ||
*[[File:Equipment-Barbarous Thorn Blade icon.png|35px]] [[Barbarous Thorn Blade]] {{star|5|color=6cb0b9}} | *[[File:Equipment-Barbarous Thorn Blade icon.png|35px]] [[Barbarous Thorn Blade]] {{star|5|color=6cb0b9}} | ||
*[[File:Equipment-Divine Avenger icon.png|35px]] [[Divine Avenger]] {{star|5|color=6cb0b9}} [[file:Unique variant icon.png|25px|Damage Bonus vs. Construct: Low]] | *[[File:Equipment-Divine Avenger icon.png|35px]] [[Divine Avenger]] {{star|5|color=6cb0b9}} [[file:Unique variant icon.png|25px|Damage Bonus vs. Construct: Low]] | ||
| − | *[[File:Equipment-Gran Faust icon.png|35px]] [[Gran Faust]] {{star|5|color=6cb0b9}} | + | *[[File:Equipment-Gran Faust icon.png|35px]] [[Gran Faust]] {{star|5|color=6cb0b9}} (Given to me by Takendown as a [[Sealed sword]], but I paid for the unbinding!) |
*[[File:Equipment-Voltedge icon.png|35px]] [[Voltedge]] {{star|5|color=6cb0b9}} | *[[File:Equipment-Voltedge icon.png|35px]] [[Voltedge]] {{star|5|color=6cb0b9}} | ||
*[[File:Equipment-Warmaster Rocket Hammer icon.png|35px]] [[Warmaster Rocket Hammer]] {{star|5|color=6cb0b9}} | *[[File:Equipment-Warmaster Rocket Hammer icon.png|35px]] [[Warmaster Rocket Hammer]] {{star|5|color=6cb0b9}} | ||
| − | *[[File:Equipment-Ascended Calibur icon.png|35px]] [[Ascended Calibur]] {{star|4|color=6cb0b9}} | + | *[[File:Equipment-Ascended Calibur icon.png|35px]] [[Ascended Calibur]] {{star|4|color=6cb0b9}} (Given to me by Takendown as a [[Calibur]]) |
*[[File:Equipment-Arc Razor icon.png|35px]] [[Arc Razor]] {{star|3|color=6cb0b9}} | *[[File:Equipment-Arc Razor icon.png|35px]] [[Arc Razor]] {{star|3|color=6cb0b9}} | ||
*[[File:Equipment-Rigadoon icon.png|35px]] [[Rigadoon]] {{star|3|color=6cb0b9}} | *[[File:Equipment-Rigadoon icon.png|35px]] [[Rigadoon]] {{star|3|color=6cb0b9}} | ||
| Line 180: | Line 186: | ||
}} | }} | ||
| − | {{showhide|[[file:icon-helmet.png|20px]] [[Helmet]] ( | + | {{showhide|[[file:icon-helmet.png|20px]] [[Helmet]] (17)|width= 500px|content= |
*[[File:Equipment-Skolver Cap icon.png|35px]] [[Skolver Cap]] {{star|5|color=6cb0b9}} | *[[File:Equipment-Skolver Cap icon.png|35px]] [[Skolver Cap]] {{star|5|color=6cb0b9}} | ||
*[[File:Equipment-Snarbolax Cap icon.png|35px]] [[Snarbolax Cap]] {{star|5|color=6cb0b9}} | *[[File:Equipment-Snarbolax Cap icon.png|35px]] [[Snarbolax Cap]] {{star|5|color=6cb0b9}} | ||
| Line 200: | Line 206: | ||
}} | }} | ||
| − | {{showhide|[[file:icon-armor.png|20px]] [[Armor]] ( | + | {{showhide|[[file:icon-armor.png|20px]] [[Armor]] (17)|width= 500px|content= |
*[[File:Equipment-Skolver Coat icon.png|35px]] [[Skolver Coat]] {{star|5|color=6cb0b9}} +[[File:Equipment-Military Canteen icon.png|35px|Military Canteen]]+ | *[[File:Equipment-Skolver Coat icon.png|35px]] [[Skolver Coat]] {{star|5|color=6cb0b9}} +[[File:Equipment-Military Canteen icon.png|35px|Military Canteen]]+ | ||
| + | *[[File:Item-Silkwing Raiment.png|35px]] [[Gyro Avengers (Guild)|Silkwing Raiment]] {{star|5|color=6cb0b9}} [[file:Unique variant icon.png|25px|Movement Speed Increased: Very High]] [[file:Unique variant icon.png|25px|Increased Blind Resistance: Medium]] | ||
*[[File:Equipment-Snarbolax Coat icon.png|35px]] [[Snarbolax Coat]] {{star|5|color=6cb0b9}} [[file:Unique variant icon.png|25px|Increased Elemental Defence: Medium]] | *[[File:Equipment-Snarbolax Coat icon.png|35px]] [[Snarbolax Coat]] {{star|5|color=6cb0b9}} [[file:Unique variant icon.png|25px|Increased Elemental Defence: Medium]] | ||
*[[File:Equipment-Vog Cub Coat icon.png|35px]] [[Vog Cub Coat]] {{star|5|color=6cb0b9}} | *[[File:Equipment-Vog Cub Coat icon.png|35px]] [[Vog Cub Coat]] {{star|5|color=6cb0b9}} | ||
| − | |||
*[[File:Equipment-Charged Quicksilver Mail icon.png|35px]] [[Charged Quicksilver Mail]] {{star|4|color=6cb0b9}} | *[[File:Equipment-Charged Quicksilver Mail icon.png|35px]] [[Charged Quicksilver Mail]] {{star|4|color=6cb0b9}} | ||
*[[File:Equipment-Angelic Raiment icon.png|35px]] [[Angelic Raiment]] {{star|3|color=6cb0b9}} | *[[File:Equipment-Angelic Raiment icon.png|35px]] [[Angelic Raiment]] {{star|3|color=6cb0b9}} | ||
| Line 210: | Line 216: | ||
*[[File:Equipment-Fused Demo Suit icon.png|35px]] [[Fused Demo Suit]] {{star|3|color=6cb0b9}} +[[File:Equipment-Pumpkin Bomb Bandolier icon.png|35px|Pumpkin Bomb Bandolier]]+ | *[[File:Equipment-Fused Demo Suit icon.png|35px]] [[Fused Demo Suit]] {{star|3|color=6cb0b9}} +[[File:Equipment-Pumpkin Bomb Bandolier icon.png|35px|Pumpkin Bomb Bandolier]]+ | ||
*[[File:Equipment-Scary Skelly Suit icon.png|35px]] [[Scary Skelly Suit]] {{star|3|color=6cb0b9}} [[file:Unique variant icon.png|25px|Increased Stun Resistance: Low]] | *[[File:Equipment-Scary Skelly Suit icon.png|35px]] [[Scary Skelly Suit]] {{star|3|color=6cb0b9}} [[file:Unique variant icon.png|25px|Increased Stun Resistance: Low]] | ||
| − | *[[File:Equipment-Solid Cobalt Armor icon.png|35px]] [[Solid Cobalt Armor]] {{star|3|color=6cb0b9}} +[[File:Equipment-Cobalt Crest icon.png|35px|Cobalt Crest]]+ | + | *[[File:Equipment-Solid Cobalt Armor icon.png|35px]] [[Solid Cobalt Armor]] {{star|3|color=6cb0b9}} +[[File:Equipment-Mighty Cobalt Crest icon.png|35px|Mighty Cobalt Crest]]+ |
| + | *[[File:Equipment-Firebreak Armor icon.png|35px]] [[Firebreak Armor]] {{star|2|color=6cb0b9}} | ||
*[[File:Equipment-Jelly Mail icon.png|35px]] [[Jelly Mail]] {{star|2|color=6cb0b9}} | *[[File:Equipment-Jelly Mail icon.png|35px]] [[Jelly Mail]] {{star|2|color=6cb0b9}} | ||
*[[File:Equipment-Magic Cloak icon.png|35px]] [[Magic Cloak]] {{star|2|color=6cb0b9}} | *[[File:Equipment-Magic Cloak icon.png|35px]] [[Magic Cloak]] {{star|2|color=6cb0b9}} | ||
| Line 242: | Line 249: | ||
*[[File:Equipment-Authentic Phantom Mask icon.png|35px]] [[Authentic Phantom Mask]] | *[[File:Equipment-Authentic Phantom Mask icon.png|35px]] [[Authentic Phantom Mask]] | ||
*[[File:Equipment-Authentic Spookat Mask icon.png|35px]] [[Authentic Spookat Mask]] | *[[File:Equipment-Authentic Spookat Mask icon.png|35px]] [[Authentic Spookat Mask]] | ||
| − | *[[File:Equipment-Divine Stranger Hat icon.png|35px]] [[Divine Stranger Hat]] | + | *[[File:Equipment-Divine Stranger Hat icon.png|35px]] [[Divine Stranger Hat]] (Given to me by Sypherf) |
*[[File:Equipment-Metal Sonic Mask icon.png|35px]] [[Metal Sonic Mask]] | *[[File:Equipment-Metal Sonic Mask icon.png|35px]] [[Metal Sonic Mask]] | ||
*[[File:Equipment-Metal Sonic Suit icon.png|35px]] [[Metal Sonic Suit]] | *[[File:Equipment-Metal Sonic Suit icon.png|35px]] [[Metal Sonic Suit]] | ||
| Line 258: | Line 265: | ||
}} | }} | ||
| − | {{showhide|[[File:Icon-recipe.png|20px]] [[Recipe]] ( | + | {{showhide|[[File:Icon-recipe.png|20px]] [[Recipe]] (16)|width= 500px|content= |
| + | *[[File:Equipment-Leviathan Blade icon.png|35px]] [[Leviathan Blade]] {{star|5|color=6cb0b9}} (Bound) | ||
| + | *[[File:Equipment-Valiance icon.png|35px]] [[Valiance]] {{star|5|color=6cb0b9}} (Bound) | ||
| + | *[[File:Equipment-Nitronome icon.png|35px]] [[Nitronome]] {{star|5|color=6cb0b9}} (Bound) | ||
| + | *[[File:Equipment-Azure Guardian Helm icon.png|35px]] [[Azure Guardian Helm]] {{star|5|color=6cb0b9}} (Bound) | ||
| + | *[[File:Equipment-Azure Guardian Armor icon.png|35px]] [[Azure Guardian Armor]] {{star|5|color=6cb0b9}} (Bound) | ||
| + | *[[File:Equipment-Aegis icon.png|35px]] [[Aegis]] {{star|5|color=6cb0b9}} (Bound) | ||
*[[File:Equipment-Heavy Demo Helm icon.png|35px]] [[Heavy Demo Helm]] {{star|4|color=6cb0b9}} (Bound) | *[[File:Equipment-Heavy Demo Helm icon.png|35px]] [[Heavy Demo Helm]] {{star|4|color=6cb0b9}} (Bound) | ||
*[[File:Equipment-Heavy Demo Suit icon.png|35px]] [[Heavy Demo Suit]] {{star|4|color=6cb0b9}} (Bound) | *[[File:Equipment-Heavy Demo Suit icon.png|35px]] [[Heavy Demo Suit]] {{star|4|color=6cb0b9}} (Bound) | ||
*[[File:Equipment-Master Blaster icon.png|35px]] [[Master Blaster]] {{star|4|color=6cb0b9}} (Bound) | *[[File:Equipment-Master Blaster icon.png|35px]] [[Master Blaster]] {{star|4|color=6cb0b9}} (Bound) | ||
*[[File:Equipment-Master Blast Bomb icon.png|35px]] [[Master Blast Bomb]] {{star|4|color=6cb0b9}} (Bound) | *[[File:Equipment-Master Blast Bomb icon.png|35px]] [[Master Blast Bomb]] {{star|4|color=6cb0b9}} (Bound) | ||
| + | *[[File:Equipment-Plasma Capacitor icon.png|35px]] [[Plasma Capacitor]] {{star|4|color=6cb0b9}} (Bound) | ||
*[[File:Equipment-Mighty Cobalt Helm icon.png|35px]] [[Mighty Cobalt Helm]] {{star|4|color=6cb0b9}} (Bound) | *[[File:Equipment-Mighty Cobalt Helm icon.png|35px]] [[Mighty Cobalt Helm]] {{star|4|color=6cb0b9}} (Bound) | ||
*[[File:Equipment-Mighty Cobalt Armor icon.png|35px]] [[Mighty Cobalt Armor]] {{star|4|color=6cb0b9}} (Bound) | *[[File:Equipment-Mighty Cobalt Armor icon.png|35px]] [[Mighty Cobalt Armor]] {{star|4|color=6cb0b9}} (Bound) | ||
| Line 271: | Line 285: | ||
{{showhide|[[file:icon-token.png|20px]] [[Token]] (8)|width= 500px|content= | {{showhide|[[file:icon-token.png|20px]] [[Token]] (8)|width= 500px|content= | ||
| − | *[[File:Token-Primal Spark.png |35px]] Primal Spark | + | *[[File:Token-Primal Spark.png |35px]] Primal Spark x96 |
| − | *[[File:Token-Grim Spark.png |35px]] Grim Spark | + | *[[File:Token-Grim Spark.png |35px]] Grim Spark x22 |
| − | *[[File:Token-Forge Spark.png |35px]] Forge Spark | + | *[[File:Token-Forge Spark.png |35px]] Forge Spark x49 |
*[[File:Token-Frumious Fang.png |35px]] Frumious Fang x38 | *[[File:Token-Frumious Fang.png |35px]] Frumious Fang x38 | ||
| − | *[[File:Token-Bark Module.png |35px]] Bark Module | + | *[[File:Token-Bark Module.png |35px]] Bark Module x8 |
| − | *[[File:Token-Jelly Gem.png |35px]] Jelly Gem | + | *[[File:Token-Jelly Gem.png |35px]] Jelly Gem x90 |
| − | *[[File:Token-Almirian Seal.png |35px]] Almirian Seal | + | *[[File:Token-Almirian Seal.png |35px]] Almirian Seal x12 |
*[[File:Token-Krogmo Coin.png |35px]] Krogmo Coin x2 | *[[File:Token-Krogmo Coin.png |35px]] Krogmo Coin x2 | ||
}} | }} | ||
| − | {{showhide|[[file:icon-artifact.png|20px]] [[Artifact]] ( | + | {{showhide|[[file:icon-artifact.png|20px]] [[Artifact]] (9)|width= 500px|content= |
*[[File:Artifact-Echo Stone.png|35px]] Echo Stone: Gloaming Wildwoods | *[[File:Artifact-Echo Stone.png|35px]] Echo Stone: Gloaming Wildwoods | ||
*[[File:Artifact-Hatch Handle.png |35px]] Hatch Handle | *[[File:Artifact-Hatch Handle.png |35px]] Hatch Handle | ||
| Line 289: | Line 303: | ||
*[[File:Artifact-Recon Module.png |35px]] Recon Module: Royal Jelly Palace | *[[File:Artifact-Recon Module.png |35px]] Recon Module: Royal Jelly Palace | ||
*[[File:Artifact-Recon Module.png |35px]] Recon Module: Firestorm Citadel | *[[File:Artifact-Recon Module.png |35px]] Recon Module: Firestorm Citadel | ||
| + | *[[File:Artifact-Recon Module.png |35px]] Recon Module: The Gauntlet | ||
| + | *[[File:Artifact-Recon Module.png |35px]] Recon Module: Entrance to the Core | ||
}} | }} | ||
| − | {{showhide|[[File:Icon-accessory.png|20px]] [[Accessory]] ( | + | {{showhide|[[File:Icon-accessory.png|20px]] [[Accessory]] (13)|width= 500px|content= |
| + | *[[File:Equipment-Deconstructor Crest icon.png |35px]] Deconstructor Crest | ||
| + | *[[File:Equipment-Dismantler Crest icon.png |35px]] Dismantler Crest | ||
| + | *[[File:Equipment-Excorciser Crest icon.png |35px]] Excorciser Crest | ||
| + | *[[File:Equipment-Ghostbuster Crest icon.png |35px]] Ghostbuster Crest | ||
| + | *[[File:Equipment-Liquifier Crest icon.png |35px]] Liquifier Crest | ||
| + | *[[File:Equipment-Predator Crest icon.png |35px]] Predator Crest | ||
*[[File:Equipment-Fancy Canteen icon.png |35px]] Fancy Canteen | *[[File:Equipment-Fancy Canteen icon.png |35px]] Fancy Canteen | ||
*[[File:Equipment-Fancy Parrying Blade icon.png |35px]] Fancy Parrying Blade | *[[File:Equipment-Fancy Parrying Blade icon.png |35px]] Fancy Parrying Blade | ||
| − | |||
*[[File:Equipment-Proto Crest icon.png |35px]] Proto Crest | *[[File:Equipment-Proto Crest icon.png |35px]] Proto Crest | ||
*[[File:Equipment-Solid Cobalt Crest icon.png |35px]] Solid Cobalt Crest | *[[File:Equipment-Solid Cobalt Crest icon.png |35px]] Solid Cobalt Crest | ||
| + | *[[File:Equipment-Vanguard Crest icon.png |35px]] Vanguard Crest | ||
| + | *[[File:Equipment-Vanguard Crest icon.png |35px]] Vanguard Crest | ||
*[[File:Equipment-Stunning Crest icon.png |35px]] Stunning Crest | *[[File:Equipment-Stunning Crest icon.png |35px]] Stunning Crest | ||
}} | }} | ||
| Line 319: | Line 342: | ||
}} | }} | ||
| − | {{showhide|[[File:Icon-bomb.png|20px]] [[Bomb]] ( | + | {{showhide|[[File:Icon-bomb.png|20px]] [[Bomb]] (3)|width= 490px|content= |
*[[File:Equipment-Dark Briar Barrage icon.png|35px]] [[Dark Briar Barrage]] {{star|5|color=6cb0b9}} | *[[File:Equipment-Dark Briar Barrage icon.png|35px]] [[Dark Briar Barrage]] {{star|5|color=6cb0b9}} | ||
| − | |||
*[[File:Equipment-Shivermist Buster icon.png|35px]] [[Shivermist Buster]] {{star|5|color=6cb0b9}} | *[[File:Equipment-Shivermist Buster icon.png|35px]] [[Shivermist Buster]] {{star|5|color=6cb0b9}} | ||
*[[File:Equipment-Radiant Sun Shards icon.png|35px]] [[Radiant Sun Shards]] {{star|4|color=6cb0b9}} | *[[File:Equipment-Radiant Sun Shards icon.png|35px]] [[Radiant Sun Shards]] {{star|4|color=6cb0b9}} | ||
| Line 351: | Line 373: | ||
*[[File:Equipment-Cool Glasses icon.png |35px]] Cool Glasses | *[[File:Equipment-Cool Glasses icon.png |35px]] Cool Glasses | ||
*[[File:Equipment-Toasty Canteen icon.png |35px]] Toasty Canteen | *[[File:Equipment-Toasty Canteen icon.png |35px]] Toasty Canteen | ||
| + | *[[File:Equipment-Twilight Aura icon.png |35px]] Twilight Aura | ||
}} | }} | ||
Revision as of 02:36, 9 March 2012
[Insert interesting header here]
| |||||||||||||||||||||||
| |||||||||||||||||||||||

Kellnox
I'm a Tier 3 knight with abmitions that are probably too big. I'm a proud co-guild master of the Gyro Avengers, along with Andmatt and Takendown, some of my first and best friends in all of Cradle! I also love thinking up ideas to make the game more fun, such as designing bosses and weapons.
I'm also somewhat unlucky, the most notable unlucky experience being not obtaining a lockbox from the prize wheel until December 10th, 35 days after release.
Fun
I like to do many things on Spiral Knights after running out of energy, while waiting for my Mist energy to refill, many of which would get me arrested in real life. A few of the ones that wouldn't are hanging out with guild members, lounging around in Haven, doing basically nothing in the Advanced Training Hall (![]() +
+ ![]() +
+ ![]() +
+ ![]() = :D), and running in circles.
= :D), and running in circles.
The things I like to do before running out of energy include the things in the previous paragraph, and also include turning on my laptop, opening and logging into Steam, opening and logging into Spiral Knights, walking into the Arcade, and entering a gate. Yay!
66%.
Achievements
I've put the rare monsters I've seen at the top so it doesn't overlap with the Arsenal tab.
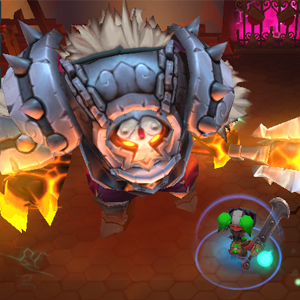
 Snarbolax (Successfully solo killed, no deaths, also killed using only the mouse, meaning only movement and shield used)
 Warmaster Seerus (T1) (Successfully solo killed, no deaths)
 Roarmulus Twins (Successfully solo killed, no deaths)
 Royal Jelly (Successfully solo killed, no deaths)
- Warmaster Seerus (T2) (Successfully solo killed, no deaths)
 Lord Vanaduke (Successfully killed, no deaths)
- Warmaster Seerus (T3) (Succesfully killed)
 Rabid Snarbolaxes (Successfully killed)


 Firebreak Armor ★★☆☆☆
 Plate Shield ★★☆☆☆
 Skelly Shield ★★☆☆☆
 Toxic Vaporizer ★★☆☆☆
 Crystal Bomb ★★☆☆☆
 Scale Shield ★☆☆☆☆
 Iron Buckler ☆☆☆☆☆
I don't really have any achievements (Example: I was not the first player to, say, get a Gran Faust), unless you include the possibility of being the first knight (along with Kirbz) to see a scenario room or the in-game ones (of which I'm only missing three), which are:
1: Master Miner- Deposit 10,000 minerals into a gate.
This one will be achieved eventually, OOO really needs to put in a counter to show how many minerals you've deposited already.
2: Cradle and All- Travel the entire Clockworks from depth 0 to depth 29 in a single expedition.
This'll take a while...
3: Dauntless Delver- Travel the entire Clockworks from depth 0 to depth 29 in a single expedition without having to revive.
Nope.
Arsenal
My entire arsenal is listed below. (Hit the "show" button!)
- I'm not just adding my good stuff. This is everything.
 Acheron ★★★★★
 Barbarous Thorn Blade ★★★★★
 Divine Avenger ★★★★★
 Gran Faust ★★★★★ (Given to me by Takendown as a Sealed sword, but I paid for the unbinding!)
 Voltedge ★★★★★
 Warmaster Rocket Hammer ★★★★★
 Ascended Calibur ★★★★☆ (Given to me by Takendown as a Calibur)
 Arc Razor ★★★☆☆
 Rigadoon ★★★☆☆
 Sealed Sword ★★★☆☆
 Stable Rocket Hammer ★★★☆☆
 Striker ★★★☆☆
 Brandish ★★☆☆☆
 Calibur ★★☆☆☆
 Searing Edge ★★☆☆☆
 Troika ★★☆☆☆
 Wrench Wand ★★☆☆☆
 Bolted Blade ★☆☆☆☆
 Hot Edge ★☆☆☆☆
 Prototype Rocket Hammer ★☆☆☆☆
 Static Edge ★☆☆☆☆
 Super Slime Slasher ★☆☆☆☆
 Thwack Hammer ★☆☆☆☆
 Proto Sword ☆☆☆☆☆
 Blitz Needle ★★★★★
 Polaris ★★★★★
 Sentenza ★★★★★
 Shadow Driver ★★★★☆
 Silversix ★★★★☆
 Voltech Alchemer Mk II ★★★☆☆
 Blaster ★★☆☆☆
 Catalyzer ★★☆☆☆
 Cryotech Alchemer ★★☆☆☆
 Firotech Alchemer ★★☆☆☆
 Prismatech Alchemer ★★☆☆☆
 Pulsar ★★☆☆☆
 Punch Gun ☆☆☆☆☆
 Proto Gun ☆☆☆☆☆
 Dark Retribution ★★★★★
 Freezing Atomizer ★★★★☆
 Spike Shower ★★★★☆
 Dark Reprisal Mk II ★★★☆☆
 Electron Charge ★★★☆☆
 Graviton Charge ★★★☆☆
 Sun Shards ★★★☆☆
 Super Blast Bomb ★★★☆☆
 Dark Reprisal ★★☆☆☆
 Static Capacitor ★★☆☆☆
- Toxic Vaporizer ★★☆☆☆
 Cold Snap ★☆☆☆☆
 Firecracker ★☆☆☆☆
 Static Flash ★☆☆☆☆
- Static Flash ★☆☆☆☆
 Proto Bomb ☆☆☆☆☆
 Skolver Cap ★★★★★
 Snarbolax Cap ★★★★★
 Vog Cub Cap ★★★★★
 Angelic Helm ★★★☆☆
 Brute Jelly Helm ★★★☆☆
 Fused Demo Helm ★★★☆☆
 Gunslinger Hat ★★★☆☆
 Quicksilver Helm ★★★☆☆
 Scary Skelly Mask ★★★☆☆
 Solid Cobalt Helm ★★★☆☆
 Jelly Helm ★★☆☆☆
 Magic Hood ★★☆☆☆ +
 +
+
- Magic Hood ★★☆☆☆
 Fractured Mask of Seerus ★☆☆☆☆
 Spiral Scale Helm ★☆☆☆☆
 Cyclops Cap ☆☆☆☆☆
 Spiral Sallet ☆☆☆☆☆
 Skolver Coat ★★★★★ +
 +
+
 Silkwing Raiment ★★★★★
 Snarbolax Coat ★★★★★
 Vog Cub Coat ★★★★★
 Charged Quicksilver Mail ★★★★☆
 Angelic Raiment ★★★☆☆
 Brute Jelly Mail ★★★☆☆
 Fused Demo Suit ★★★☆☆ +
 +
+
 Scary Skelly Suit ★★★☆☆
 Solid Cobalt Armor ★★★☆☆ +
 +
+
- Firebreak Armor ★★☆☆☆
 Jelly Mail ★★☆☆☆
 Magic Cloak ★★☆☆☆
 Spiral Scale Mail ★☆☆☆☆
 Fencing Jacket ☆☆☆☆☆
 Vitasuit ☆☆☆☆☆
 Spiral Brigandine ☆☆☆☆☆
 Barbarous Thorn Shield ★★★★★
 Crest of Almire ★★★★★
 Grey Owlite Shield ★★★★★
 Mighty Defender ★★★★☆
 Brute Jelly Shield ★★★☆☆
 Scary Skelly Shield ★★★☆☆
 Swiftstrike Buckler ★★★☆☆
 Bristling Buckler ★★☆☆☆
 Firebreak Shield ★★☆☆☆
 Jelly Shield ★★☆☆☆
- Plate Shield ★★☆☆☆
 Circuit Breaker Shield ★☆☆☆☆
 Green Ward ★☆☆☆☆
- Green Ward ★☆☆☆☆
- Iron Buckler ☆☆☆☆☆
 Proto Shield ☆☆☆☆☆
 Dread Skelly Charm ★★★★★
 Penta-Heart Pendant ★★★★★
 Royal Jelly Band ★★★★★
- Royal Jelly Band ★★★★★
 Heart Pendant ★★☆☆☆
 Leviathan Blade ★★★★★ (Bound)
 Valiance ★★★★★ (Bound)
 Nitronome ★★★★★ (Bound)
 Azure Guardian Helm ★★★★★ (Bound)
 Azure Guardian Armor ★★★★★ (Bound)
 Aegis ★★★★★ (Bound)
 Heavy Demo Helm ★★★★☆ (Bound)
 Heavy Demo Suit ★★★★☆ (Bound)
 Master Blaster ★★★★☆ (Bound)
 Master Blast Bomb ★★★★☆ (Bound)
 Plasma Capacitor ★★★★☆ (Bound)
 Mighty Cobalt Helm ★★★★☆ (Bound)
 Mighty Cobalt Armor ★★★★☆ (Bound)
 Elemental Hood ★★★☆☆
 Elemental Cloak ★★★☆☆
 Emberbreak Helm ★☆☆☆☆ (Bound)
 Primal Spark x96
 Grim Spark x22
 Forge Spark x49
 Frumious Fang x38
 Bark Module x8
 Jelly Gem x90
 Almirian Seal x12
 Krogmo Coin x2
 Echo Stone: Gloaming Wildwoods
 Hatch Handle
 Medal of Monstrous Merit
 Recon Module: Gloaming Wildwoods
- Recon Module: Ironclaw Munitions Factory
- Recon Module: Royal Jelly Palace
- Recon Module: Firestorm Citadel
- Recon Module: The Gauntlet
- Recon Module: Entrance to the Core
These are the items I'm looking for.
 Cautery Sword ★★★☆☆
 Argent Peacemaker ★★★★★
 Umbra Driver ★★★★★
 Dark Briar Barrage ★★★★★
 Shivermist Buster ★★★★★
 Radiant Sun Shards ★★★★☆
 Crown of the Fallen ★★★★★
 Grey Feather Cowl ★★★★★
 Miracle Hood ★★★★☆
 Seraphic Helm ★★★★☆
 Armor of the Fallen ★★★★★
 Grey Feather Mantle ★★★★★
 Miracle Cloak ★★★★☆
 Seraphic Mail ★★★★☆
 Dread Skelly Shield ★★★★★
 Sinister Skelly Shield ★★★★☆
 Cool Glasses
 Toasty Canteen
 Twilight Aura
Other Random Crap
Monster attack types/resistances/weaknesses:
| Monster Type | Damage Type | Weak To | Neutral To | Strongly Resistant To |
|---|---|---|---|---|
| |
|
|
|
|
| |
|
|
|
|
| |
|
|
|
|
| |
|
|
|
|
| |
|
|
|
|
| |
|
|
|
|
I have this memorized, but I put it here in case anyone else needs to know.
Monsters that annoy me:
- Reasons coming soonish.
- Aahhh, the majestic Greaver. The way they float around gracefully and effortlessly is very beautiful. The way that they race towards you is slightly less so. They're bearable in Tier one and two, but Tier three Greavers are nothing short of a pain in the buttcheeks. The little bullets they launch are annoying as hell when your shield is broken, and they've always just annoyed me.
- The charge is annoying when they shoot at you from the bottom of the screen. Aside from that, I like them. The attack alone is enough to get them a spot in this list, though.
![]()
![]()
![]()
Art n' Stuff n' Stuff
Below are some screenshots I've taken and art I've made. Enjoy!


I waved goodbye to Basil as a stepped onto the elevator and was knocked off my feet with its first jolt. I wasn't hurt or anything, but by the time I got up, the elevator stopped. It appeared I was in some forest. It was dark and I could hear the barks of wolvers and gun puppies alike. Knowing it would be dangerous, I drew my prized Hot Edge sword. It wasn't very good, but it was my best.
Suddenly I heard a beep from inside my helm and a message popped up in my visor. It was a message from Kora, the intelligence agent back at HQ. The message basically said, "Hey, you're in a new scary area, so try not to die. There's a recon module somewhere in that forest, so you need to bring it back. Oh, and by the way, there's a massive monster in there that can rip you to shreds. It's name is Snarby!" Fun. I closed the message and went on.I hadn't gotten very far when a few wolvers jumped at me from the bushes. I dispatched them easily, despite what Brinks may have told you already. I continued farther into the forest, which was starting to look more terrifying by the minute. I even caught a glimpse of the monster once or twice, only seeing it for a second before it burrowed into the ground. All I could see of it was its six glowing, red eyes.