Difference between revisions of "Supply Depot"
From SpiralKnights
m (→Sales: the items on sale really change too often to be worth tracking on the wiki. in addition, the time required for the page refresh means the sale listed is almost never up to date anyway) |
(updating links to images) |
||
| (16 intermediate revisions by 6 users not shown) | |||
| Line 1: | Line 1: | ||
| − | [[Image: | + | [[Image:Supply_depot.png|thumb|right|The Supply Depot]] |
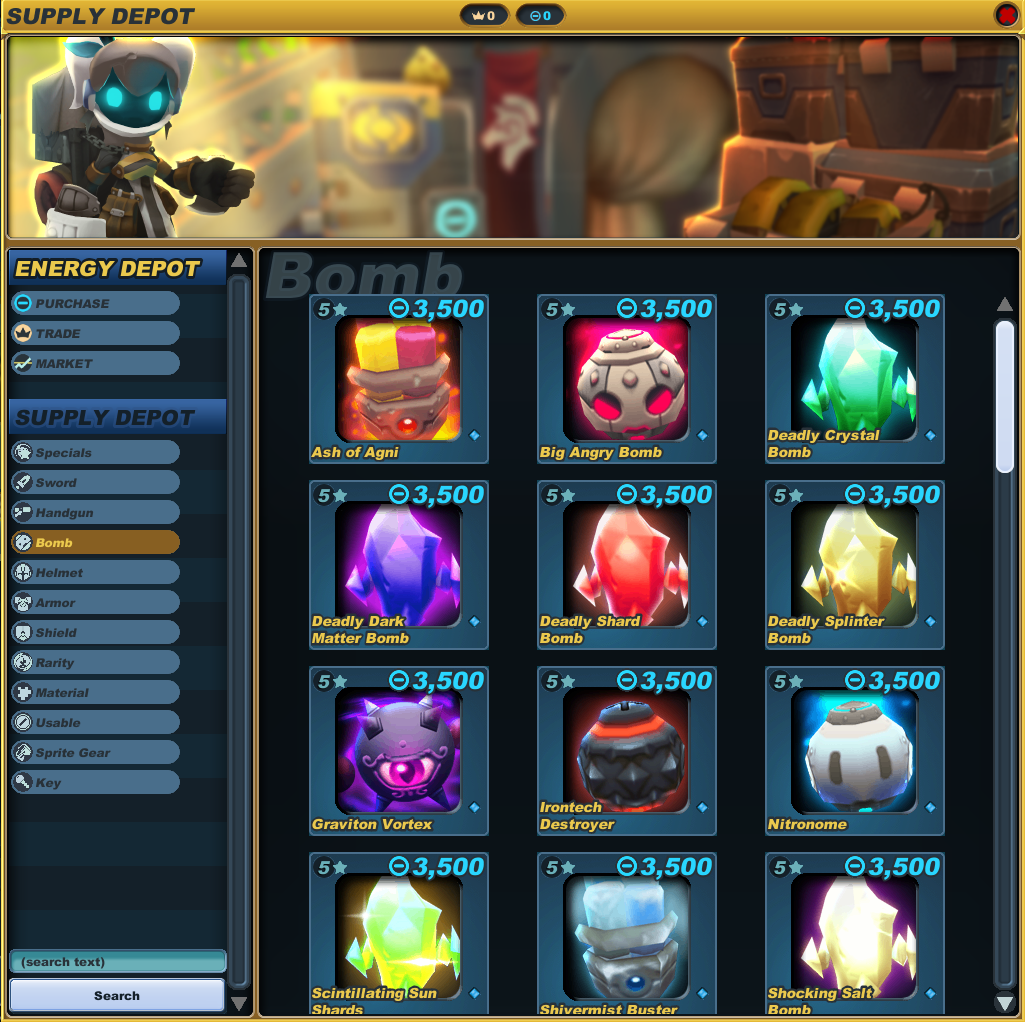
| − | The '''Supply Depot''' | + | The '''Supply Depot''' is a place where players can purchase items with [[energy]]. This includes [[:Category:Gear|gear]], some [[material]]s, [[usable|upgrades]], and [[weapons]]. Players can also access the [[Energy Depot]]. The Supply Depot is available to all players as soon as they reach the [[Rescue Camp]] (Rank 1-1). It is accessible from the mission interface, the [[User_interface#Top_right|activities]] panel to the right of the game client, by talking to [[Kozma]], the Spiral Quartermaster, or clicking the '''K key'''. |
| − | + | '''NOTE''': Weapons and gear purchased from the Supply Depot are ''[[bound]]'' on purchase. Some special items may be purchased unbound, so be sure to check the tool-tip before purchasing. | |
| − | + | == Specials == | |
| − | + | [[File:SpiralKnights News 125.png|thumb|right|A [[News]] image for "Flash Sales."]] | |
| − | The | + | The "[[File:Icon-specials.png|13px]] specials" section of the Supply Depot displays featured items, some of which might be available for a discounted price. The normal price will be slashed out, with the lower price displayed directly below the normal price. In certain cases these items are not normally be available from the Supply Depot - this is especially true for "Flash Sales." Some items for these sales might not show "discount" behavior - they will not have slashed prices. |
| − | + | ||
| − | + | "Flash Sales" (or "Sale" for short) are periods of time during which different items are available for purchase - sometimes one at a time, a few, or several at once. These items will show up in the "specials" section of the Supply Depot. Flash Sales usually feature accessories, gear, and various other items which were previously only available via relevant [[Prize Box]]es or other transient events, including previous Flash Sales. Sometimes items are introduced to the game with a Flash Sale, as with the [[Gatecrasher Helm]] and many others. Flash Sales can also feature discounts on regularly available items, such as [[Fire Crystal]]s. In relation to the Flash Sale, each item or group of items is available for purchase for a short period of time, usually a few hours, after which they are removed and other items are put up for sale. The entire Flash Sale occurrence can last a few days. Such timing details, as well as the entire Flash Sale occurrence, are typically announced on the forums [http://forums.spiralknights.com/en/node/92682 like this]. These sales are non-[[:Category:Promotions|promotional]] and are not directly associated with [[:Category:Events|events]]. | |
| + | |||
| + | Due to the very brief nature of these sales, players might lack knowledge of what went on sale when. The [[Supply Depot Sale]] page contains a list of known sale occurrences and more details about sales. | ||
==Wares== | ==Wares== | ||
| + | [[Image:Supply depot rarity.png|thumb|right|Rarities]] | ||
[[Image:Supply depot usables.png|thumb|right|Usables]] | [[Image:Supply depot usables.png|thumb|right|Usables]] | ||
[[Image:Supply depot keys.png|thumb|right|Keys]] | [[Image:Supply depot keys.png|thumb|right|Keys]] | ||
| − | + | Items always available to knights of all ranks: | |
| − | Items available to knights of all ranks: | + | |
{| cellpadding="5" cellspacing="2" style="background-color: transparent;" | {| cellpadding="5" cellspacing="2" style="background-color: transparent;" | ||
| − | |||
| − | |||
| − | |||
| − | |||
| − | |||
| − | |||
| − | |||
| − | |||
| − | |||
| − | |||
| − | |||
| − | |||
| − | |||
| − | |||
| − | |||
|- | |- | ||
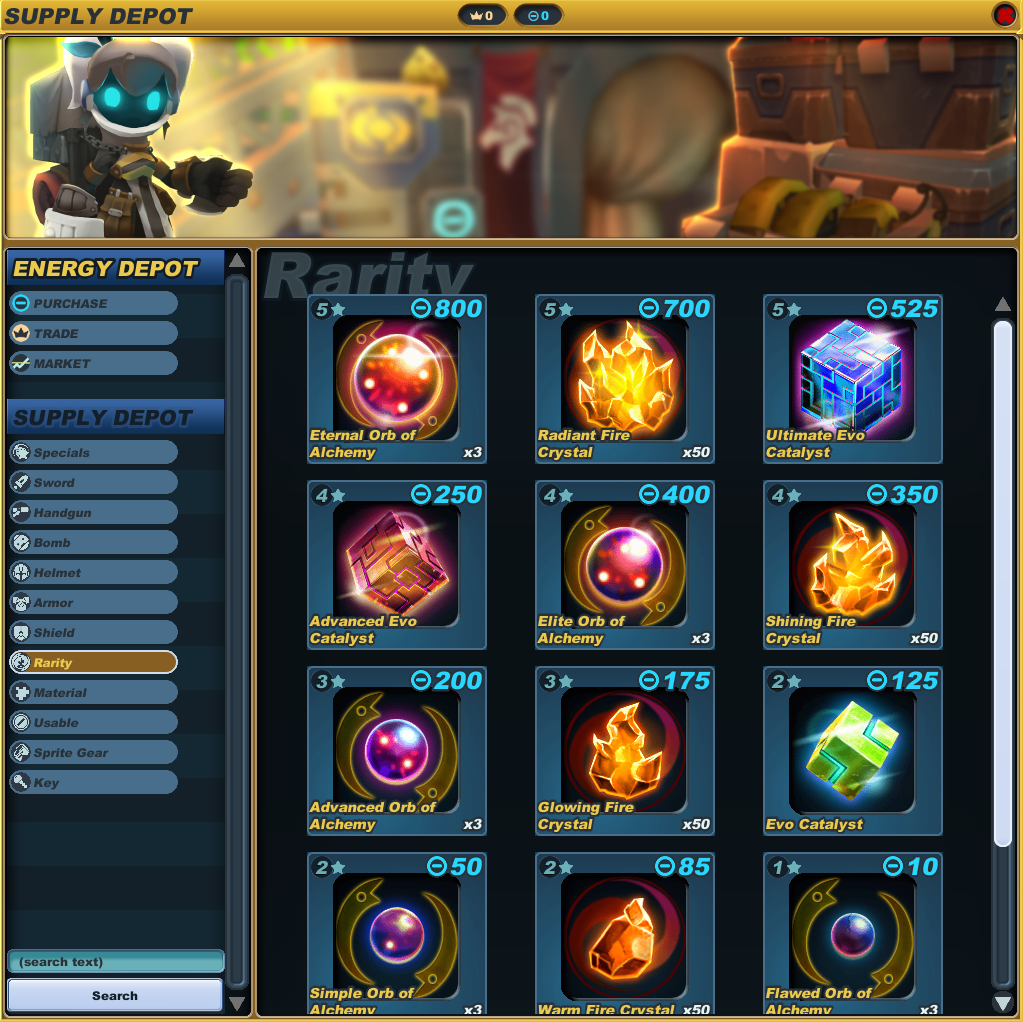
! bgcolor="#93add4" align="left" | Rarity - (General) | ! bgcolor="#93add4" align="left" | Rarity - (General) | ||
! bgcolor="#93add4" | Energy | ! bgcolor="#93add4" | Energy | ||
| + | ! bgcolor="#93add4" | Availability | ||
|- | |- | ||
| bgcolor="#f5f5ff" | [[file:Rarity-Spark of Life.png|36px]] [[Rarity#Spark of Life|Spark of Life]] x10 | | bgcolor="#f5f5ff" | [[file:Rarity-Spark of Life.png|36px]] [[Rarity#Spark of Life|Spark of Life]] x10 | ||
| bgcolor="#f5f5ff" align="right" | 200 | | bgcolor="#f5f5ff" align="right" | 200 | ||
| + | | bgcolor="#f5f5ff" align="center" | [[Haven]] | ||
| + | |- | ||
| + | | bgcolor="#f5f5ff" | [[file:Rarity-Spark of Life.png|36px]] [[Rarity#Spark of Life|Spark of Life]] | ||
| + | | bgcolor="#f5f5ff" align="right" | 50 | ||
| + | | bgcolor="#f5f5ff" align="center" | [[Clockworks|Expedition]] | ||
|- | |- | ||
! bgcolor="#93add4" align="left" | Rarity - (Evo Catalysts) | ! bgcolor="#93add4" align="left" | Rarity - (Evo Catalysts) | ||
! bgcolor="#93add4" | Energy | ! bgcolor="#93add4" | Energy | ||
| + | ! bgcolor="#93add4" | Availability | ||
|- | |- | ||
| − | | bgcolor="#f5f5ff" | [[file:Rarity- | + | | bgcolor="#f5f5ff" | [[file:Rarity-Evo_Catalyst_icon.png|36px]] [[Rarity#Evo_Catalyst|Evo Catalyst]] |
| bgcolor="#f5f5ff" align="right" | 125 | | bgcolor="#f5f5ff" align="right" | 125 | ||
| + | | bgcolor="#f5f5ff" align="center" | Always | ||
|- | |- | ||
| − | | bgcolor="#f5f5ff" | [[file:Rarity-Advanced | + | | bgcolor="#f5f5ff" | [[file:Rarity-Advanced Evo_Catalyst_icon.png|36px]] [[Rarity#Advanced_Evo_Catalyst|Advanced Evo Catalyst]] |
| bgcolor="#f5f5ff" align="right" | 250 | | bgcolor="#f5f5ff" align="right" | 250 | ||
| + | | bgcolor="#f5f5ff" align="center" | Always | ||
|- | |- | ||
| − | | bgcolor="#f5f5ff" | [[file:Rarity-Ultimate | + | | bgcolor="#f5f5ff" | [[file:Rarity-Ultimate Evo_Catalyst_icon.png|36px]] [[Rarity#Ultimate_Evo_Catalyst|Ultimate Evo Catalyst]] |
| bgcolor="#f5f5ff" align="right" | 525 | | bgcolor="#f5f5ff" align="right" | 525 | ||
| + | | bgcolor="#f5f5ff" align="center" | Always | ||
|- | |- | ||
! bgcolor="#93add4" align="left" | Rarity - (Fire Crystals) | ! bgcolor="#93add4" align="left" | Rarity - (Fire Crystals) | ||
! bgcolor="#93add4" | Energy | ! bgcolor="#93add4" | Energy | ||
| + | ! bgcolor="#93add4" | Availability | ||
|- | |- | ||
| − | | bgcolor="#f5f5ff" | [[file:Rarity-Warm | + | | bgcolor="#f5f5ff" | [[file:Rarity-Warm Fire_Crystal_icon.png|36px]] [[Rarity#Fire_Crystal|Warm Fire Crystal]] x50 |
| bgcolor="#f5f5ff" align="right" | 85 | | bgcolor="#f5f5ff" align="right" | 85 | ||
| + | | bgcolor="#f5f5ff" align="center" | Always | ||
|- | |- | ||
| − | | bgcolor="#f5f5ff" | [[file:Rarity-Glowing | + | | bgcolor="#f5f5ff" | [[file:Rarity-Glowing Fire_Crystal_icon.png|36px]] [[Rarity#Fire_Crystal|Glowing Fire Crystal]] x50 |
| bgcolor="#f5f5ff" align="right" | 175 | | bgcolor="#f5f5ff" align="right" | 175 | ||
| + | | bgcolor="#f5f5ff" align="center" | Always | ||
|- | |- | ||
| − | | bgcolor="#f5f5ff" | [[file:Rarity-Shining | + | | bgcolor="#f5f5ff" | [[file:Rarity-Shining Fire_Crystal_icon.png|36px]] [[Rarity#Fire_Crystal|Shining Fire Crystal]] x50 |
| bgcolor="#f5f5ff" align="right" | 350 | | bgcolor="#f5f5ff" align="right" | 350 | ||
| + | | bgcolor="#f5f5ff" align="center" | Always | ||
|- | |- | ||
| − | | bgcolor="#f5f5ff" | [[file:Rarity-Radiant | + | | bgcolor="#f5f5ff" | [[file:Rarity-Radiant Fire_Crystal_icon.png|36px]] [[Rarity#Fire_Crystal|Radiant Fire Crystal]] x50 |
| bgcolor="#f5f5ff" align="right" | 700 | | bgcolor="#f5f5ff" align="right" | 700 | ||
| + | | bgcolor="#f5f5ff" align="center" | Always | ||
|- | |- | ||
! bgcolor="#93add4" align="left" | Rarity - (Orbs of Alchemy) | ! bgcolor="#93add4" align="left" | Rarity - (Orbs of Alchemy) | ||
! bgcolor="#93add4" | Energy | ! bgcolor="#93add4" | Energy | ||
| + | ! bgcolor="#93add4" | Availability | ||
|- | |- | ||
| − | | bgcolor="#f5f5ff" | [[file:Rarity-Flawed | + | | bgcolor="#f5f5ff" | [[file:Rarity-Flawed Orb_of_Alchemy_icon.png|36px]] [[Rarity#Flawed_Orb_of_Alchemy|Flawed Orb of Alchemy]] x3 |
| bgcolor="#f5f5ff" align="right" | 10 | | bgcolor="#f5f5ff" align="right" | 10 | ||
| + | | bgcolor="#f5f5ff" align="center" | Always | ||
|- | |- | ||
| − | | bgcolor="#f5f5ff" | [[file:Rarity-Simple | + | | bgcolor="#f5f5ff" | [[file:Rarity-Simple Orb_of_Alchemy_icon.png|36px]] [[Rarity#Simple_Orb_of_Alchemy|Simple Orb of Alchemy]] x3 |
| bgcolor="#f5f5ff" align="right" | 50 | | bgcolor="#f5f5ff" align="right" | 50 | ||
| + | | bgcolor="#f5f5ff" align="center" | Always | ||
|- | |- | ||
| − | | bgcolor="#f5f5ff" | [[file:Rarity-Advanced | + | | bgcolor="#f5f5ff" | [[file:Rarity-Advanced Orb_of_Alchemy_icon.png|36px]] [[Rarity#Advanced_Orb_of_Alchemy|Advanced Orb of Alchemy]] x3 |
| bgcolor="#f5f5ff" align="right" | 200 | | bgcolor="#f5f5ff" align="right" | 200 | ||
| + | | bgcolor="#f5f5ff" align="center" | Always | ||
|- | |- | ||
| − | | bgcolor="#f5f5ff" | [[file:Rarity-Elite | + | | bgcolor="#f5f5ff" | [[file:Rarity-Elite Orb_of_Alchemy_icon.png|36px]] [[Rarity#Elite_Orb_of_Alchemy|Elite Orb of Alchemy]] x3 |
| bgcolor="#f5f5ff" align="right" | 400 | | bgcolor="#f5f5ff" align="right" | 400 | ||
| + | | bgcolor="#f5f5ff" align="center" | Always | ||
|- | |- | ||
| − | | bgcolor="#f5f5ff" | [[file:Rarity-Eternal | + | | bgcolor="#f5f5ff" | [[file:Rarity-Eternal Orb_of_Alchemy_icon.png|36px]] [[Rarity#Eternal_Orb_of_Alchemy|Eternal Orb of Alchemy]] x3 |
| bgcolor="#f5f5ff" align="right" | 800 | | bgcolor="#f5f5ff" align="right" | 800 | ||
| + | | bgcolor="#f5f5ff" align="center" | Always | ||
| + | |- | ||
| + | ! bgcolor="#93add4" align="left" | Material | ||
| + | ! bgcolor="#93add4" | Energy | ||
| + | ! bgcolor="#93add4" | Availability | ||
| + | |- | ||
| + | | bgcolor="#f5f5ff" | [[file:Crafting-Reset_Star.png|36px]] [[Material#Reset_Star|Reset Star]] | ||
| + | | bgcolor="#f5f5ff" align="right" | 2000 | ||
| + | | bgcolor="#f5f5ff" align="center" | Always | ||
|- | |- | ||
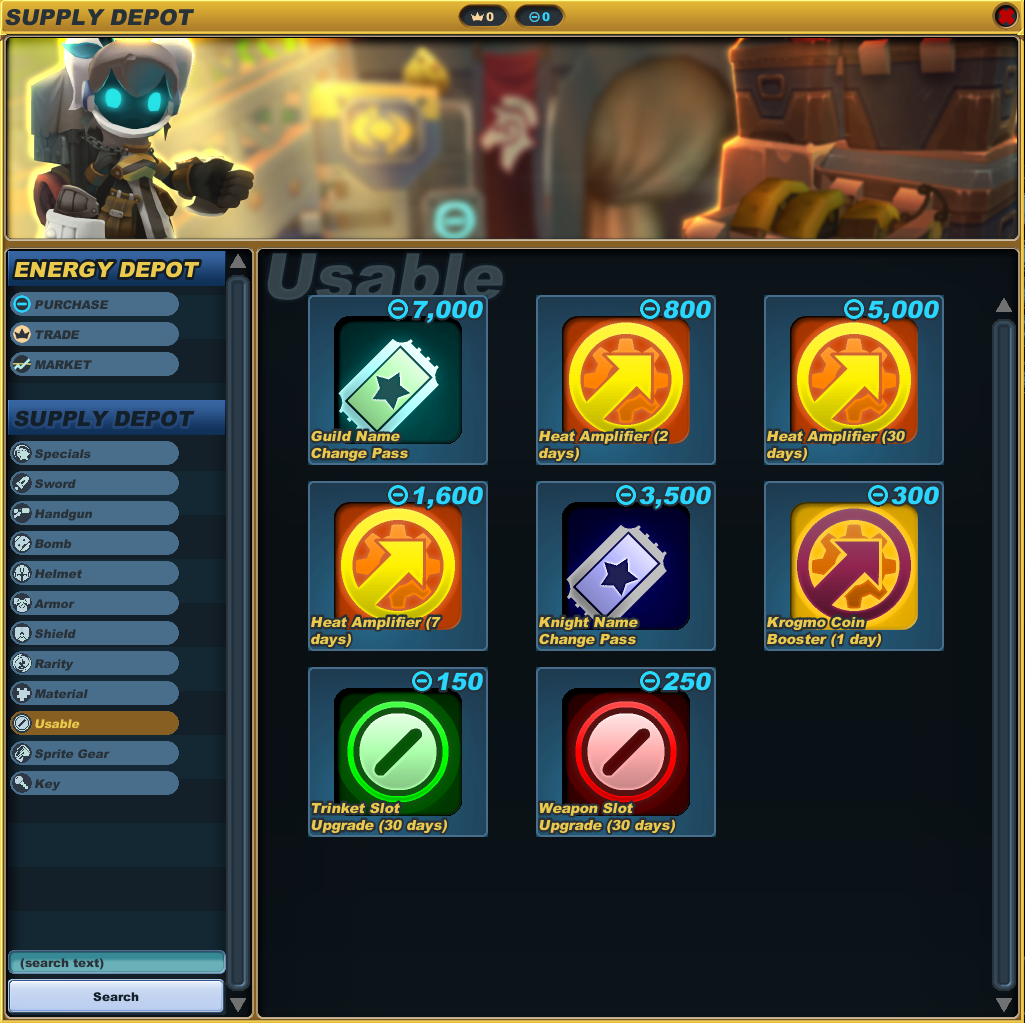
! bgcolor="#93add4" align="left" | Usables | ! bgcolor="#93add4" align="left" | Usables | ||
! bgcolor="#93add4" | Energy | ! bgcolor="#93add4" | Energy | ||
| + | ! bgcolor="#93add4" | Availability | ||
|- | |- | ||
| bgcolor="#f5f5ff" | [[file:Usable-Heat_Amplifier.png|36px]] [[Usable#Heat Amplifier|Heat Amplifier (2 Days)]] | | bgcolor="#f5f5ff" | [[file:Usable-Heat_Amplifier.png|36px]] [[Usable#Heat Amplifier|Heat Amplifier (2 Days)]] | ||
| bgcolor="#f5f5ff" align="right" | 800 | | bgcolor="#f5f5ff" align="right" | 800 | ||
| + | | bgcolor="#f5f5ff" align="center" | Always | ||
|- | |- | ||
| bgcolor="#f5f5ff" | [[file:Usable-Krogmo_Coin_Booster.png|36px]] [[Usable#Krogmo Coin Booster|Krogmo Coin Booster (24 Hours)]] | | bgcolor="#f5f5ff" | [[file:Usable-Krogmo_Coin_Booster.png|36px]] [[Usable#Krogmo Coin Booster|Krogmo Coin Booster (24 Hours)]] | ||
| bgcolor="#f5f5ff" align="right" | 300 | | bgcolor="#f5f5ff" align="right" | 300 | ||
| + | | bgcolor="#f5f5ff" align="center" | Always | ||
|- | |- | ||
| bgcolor="#f5f5ff" | [[file:Usable-Trinket_Slot_Upgrade.png|36px]] [[Usable#Trinket Slot Upgrade|Trinket Slot Upgrade (30 Days)]] | | bgcolor="#f5f5ff" | [[file:Usable-Trinket_Slot_Upgrade.png|36px]] [[Usable#Trinket Slot Upgrade|Trinket Slot Upgrade (30 Days)]] | ||
| bgcolor="#f5f5ff" align="right" | 150 | | bgcolor="#f5f5ff" align="right" | 150 | ||
| + | | bgcolor="#f5f5ff" align="center" | Always | ||
|- | |- | ||
| bgcolor="#f5f5ff" | [[file:Usable-Weapon_Slot_Upgrade.png|36px]] [[Usable#Weapon Slot Upgrade|Weapon Slot Upgrade (30 Days)]] | | bgcolor="#f5f5ff" | [[file:Usable-Weapon_Slot_Upgrade.png|36px]] [[Usable#Weapon Slot Upgrade|Weapon Slot Upgrade (30 Days)]] | ||
| bgcolor="#f5f5ff" align="right" | 250 | | bgcolor="#f5f5ff" align="right" | 250 | ||
| + | | bgcolor="#f5f5ff" align="center" | Always | ||
| + | |- | ||
| + | | bgcolor="#f5f5ff" | [[file:Usable-Guild_Name_Change_Pass.png|36px]] [[Name Change Pass|Guild Name Change Pass]] | ||
| + | | bgcolor="#f5f5ff" align="right" | 7000 | ||
| + | | bgcolor="#f5f5ff" align="center" | Always | ||
| + | |- | ||
| + | | bgcolor="#f5f5ff" | [[file:Usable-Knight_Name_Change_Pass.png|36px]] [[Name Change Pass|Knight Name Change Pass]] | ||
| + | | bgcolor="#f5f5ff" align="right" | 3500 | ||
| + | | bgcolor="#f5f5ff" align="center" | Always | ||
|- | |- | ||
! bgcolor="#93add4" align="left" | Sprite Gear | ! bgcolor="#93add4" align="left" | Sprite Gear | ||
! bgcolor="#93add4" | Energy | ! bgcolor="#93add4" | Energy | ||
| + | ! bgcolor="#93add4" | Availability | ||
|- | |- | ||
| bgcolor="#f5f5ff" | [[file:Icon-Drakon Pod.png|36px]] [[Usable#Sprite Gear|Drakon Pod]] | | bgcolor="#f5f5ff" | [[file:Icon-Drakon Pod.png|36px]] [[Usable#Sprite Gear|Drakon Pod]] | ||
| bgcolor="#f5f5ff" align="right" | 2100 | | bgcolor="#f5f5ff" align="right" | 2100 | ||
| + | | bgcolor="#f5f5ff" align="center" | Always | ||
|- | |- | ||
| bgcolor="#f5f5ff" | [[file:Icon-Maskeraith Pod.png|36px]] [[Usable#Sprite Gear|Maskeraith Pod]] | | bgcolor="#f5f5ff" | [[file:Icon-Maskeraith Pod.png|36px]] [[Usable#Sprite Gear|Maskeraith Pod]] | ||
| bgcolor="#f5f5ff" align="right" | 2100 | | bgcolor="#f5f5ff" align="right" | 2100 | ||
| + | | bgcolor="#f5f5ff" align="center" | Always | ||
|- | |- | ||
| bgcolor="#f5f5ff" | [[file:Icon-Seraphynx Pod.png|36px]] [[Usable#Sprite Gear|Seraphynx Pod]] | | bgcolor="#f5f5ff" | [[file:Icon-Seraphynx Pod.png|36px]] [[Usable#Sprite Gear|Seraphynx Pod]] | ||
| bgcolor="#f5f5ff" align="right" | 2100 | | bgcolor="#f5f5ff" align="right" | 2100 | ||
| + | | bgcolor="#f5f5ff" align="center" | Always | ||
| + | |- | ||
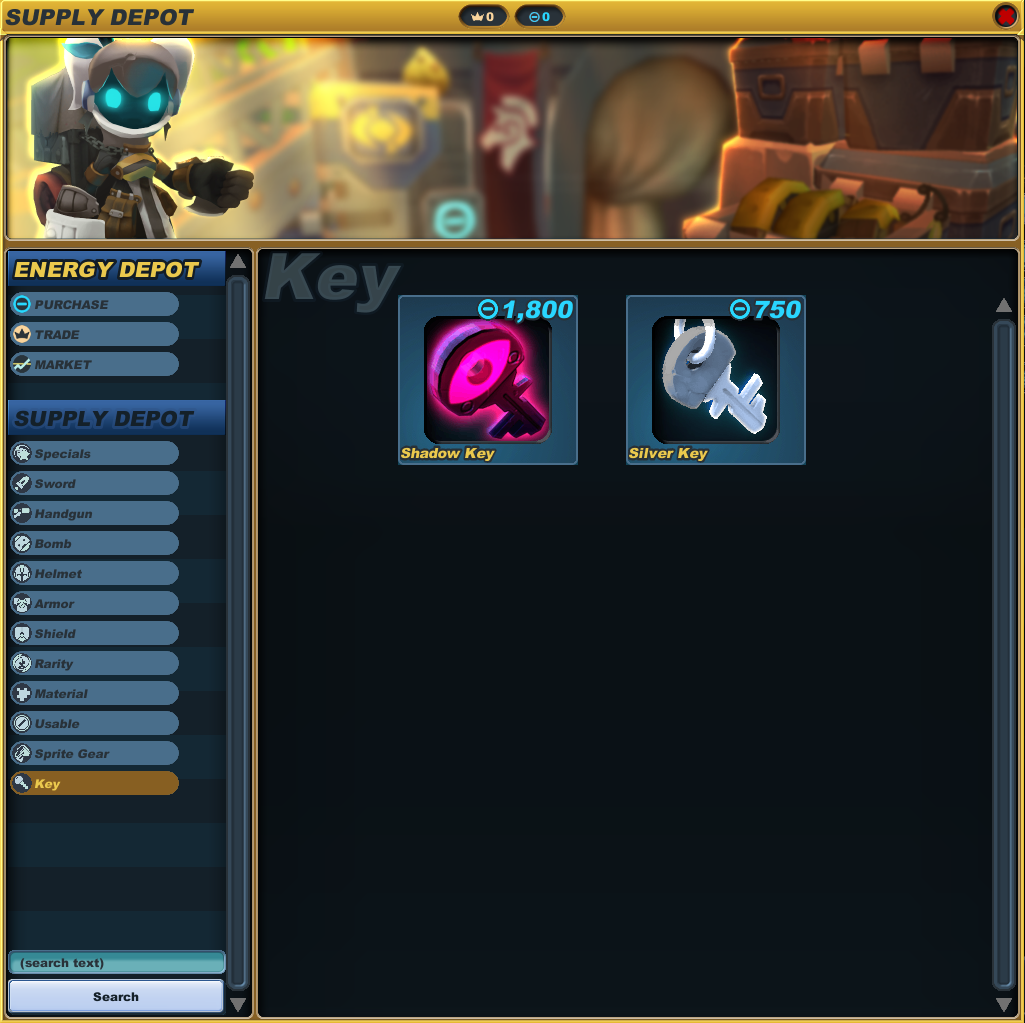
| + | ! bgcolor="#93add4" align="left" | Keys | ||
| + | ! bgcolor="#93add4" | Energy | ||
| + | ! bgcolor="#93add4" | Availability | ||
| + | |- | ||
| + | | bgcolor="#f5f5ff" | [[file:Key-Silver Key icon.png|36px]] [[Key|Silver Key]] | ||
| + | | bgcolor="#f5f5ff" align="right" | 750 | ||
| + | | bgcolor="#f5f5ff" align="center" | Always | ||
| + | |- | ||
| + | | bgcolor="#f5f5ff" | [[file:Key-Shadow Key icon.png|36px]] [[Key|Shadow Key]] | ||
| + | | bgcolor="#f5f5ff" align="right" | 1800 | ||
| + | | bgcolor="#f5f5ff" align="center" | Always | ||
|} | |} | ||
===Ranking Up=== | ===Ranking Up=== | ||
| Line 130: | Line 175: | ||
{{showhide|Items available at Rank 5-2, all of which are 3-star quality and cost 500 Energy|content= | {{showhide|Items available at Rank 5-2, all of which are 3-star quality and cost 500 Energy|content= | ||
| − | *'''Swords''': {{Equip|Fireburst Brandish|16}}, {{Equip|Iceburst Brandish|16}}, {{Equip| | + | *'''Swords''': {{Equip|Fireburst Brandish|16}}, {{Equip|Iceburst Brandish|16}}, {{Equip|Nightblade|16}}, {{Equip|Rigadoon|16}}, {{Equip|Swift Flourish|16}} |
*'''Handguns''': {{Equip|Magnus|16}}, {{Equip|Shadowtech Alchemer Mk II|16}}, {{Equip|Voltech Alchemer Mk II|16}} | *'''Handguns''': {{Equip|Magnus|16}}, {{Equip|Shadowtech Alchemer Mk II|16}}, {{Equip|Voltech Alchemer Mk II|16}} | ||
*'''Bombs''': {{Equip|Deconstructor|16}}, {{Equip|Fiery Vaporizer Mk II|16}}, {{Equip|Graviton Charge|16}}, {{Equip|Sun Shards|16}}, {{Equip|Toxic Vaporizer Mk II|16}} | *'''Bombs''': {{Equip|Deconstructor|16}}, {{Equip|Fiery Vaporizer Mk II|16}}, {{Equip|Graviton Charge|16}}, {{Equip|Sun Shards|16}}, {{Equip|Toxic Vaporizer Mk II|16}} | ||
Latest revision as of 08:42, 28 February 2015
The Supply Depot is a place where players can purchase items with energy. This includes gear, some materials, upgrades, and weapons. Players can also access the Energy Depot. The Supply Depot is available to all players as soon as they reach the Rescue Camp (Rank 1-1). It is accessible from the mission interface, the activities panel to the right of the game client, by talking to Kozma, the Spiral Quartermaster, or clicking the K key.
NOTE: Weapons and gear purchased from the Supply Depot are bound on purchase. Some special items may be purchased unbound, so be sure to check the tool-tip before purchasing.
Contents
[hide]Specials

The "![]() specials" section of the Supply Depot displays featured items, some of which might be available for a discounted price. The normal price will be slashed out, with the lower price displayed directly below the normal price. In certain cases these items are not normally be available from the Supply Depot - this is especially true for "Flash Sales." Some items for these sales might not show "discount" behavior - they will not have slashed prices.
specials" section of the Supply Depot displays featured items, some of which might be available for a discounted price. The normal price will be slashed out, with the lower price displayed directly below the normal price. In certain cases these items are not normally be available from the Supply Depot - this is especially true for "Flash Sales." Some items for these sales might not show "discount" behavior - they will not have slashed prices.
"Flash Sales" (or "Sale" for short) are periods of time during which different items are available for purchase - sometimes one at a time, a few, or several at once. These items will show up in the "specials" section of the Supply Depot. Flash Sales usually feature accessories, gear, and various other items which were previously only available via relevant Prize Boxes or other transient events, including previous Flash Sales. Sometimes items are introduced to the game with a Flash Sale, as with the Gatecrasher Helm and many others. Flash Sales can also feature discounts on regularly available items, such as Fire Crystals. In relation to the Flash Sale, each item or group of items is available for purchase for a short period of time, usually a few hours, after which they are removed and other items are put up for sale. The entire Flash Sale occurrence can last a few days. Such timing details, as well as the entire Flash Sale occurrence, are typically announced on the forums like this. These sales are non-promotional and are not directly associated with events.
Due to the very brief nature of these sales, players might lack knowledge of what went on sale when. The Supply Depot Sale page contains a list of known sale occurrences and more details about sales.
Wares
Items always available to knights of all ranks:
| Rarity - (General) | Energy | Availability |
|---|---|---|
| |
200 | Haven |
| |
50 | Expedition |
| Rarity - (Evo Catalysts) | Energy | Availability |
| |
125 | Always |
| |
250 | Always |
| |
525 | Always |
| Rarity - (Fire Crystals) | Energy | Availability |
| |
85 | Always |
| |
175 | Always |
| |
350 | Always |
| |
700 | Always |
| Rarity - (Orbs of Alchemy) | Energy | Availability |
| |
10 | Always |
| |
50 | Always |
| |
200 | Always |
| |
400 | Always |
| |
800 | Always |
| Material | Energy | Availability |
| |
2000 | Always |
| Usables | Energy | Availability |
| |
800 | Always |
| |
300 | Always |
| |
150 | Always |
| |
250 | Always |
| |
7000 | Always |
| |
3500 | Always |
| Sprite Gear | Energy | Availability |
| |
2100 | Always |
| |
2100 | Always |
| |
2100 | Always |
| Keys | Energy | Availability |
| |
750 | Always |
| |
1800 | Always |
Ranking Up
Historical notes
- The Supply Depot was implemented in game on release 2012-02-22
- Kozma opens the Supply Depot on release 2012-02-29
- The Rarity section in the Supply Depot was implemented in game on release 2013-07-30


