Difference between revisions of "User:Abatheguy"
From SpiralKnights
(more to 'Recipe-ology', more intro data, renamed 'Tips' to 'Knowledge Share', minor fixes) |
m (wiki wide changes - updating icon names here for you.) |
||
| (25 intermediate revisions by 2 users not shown) | |||
| Line 1: | Line 1: | ||
{{SKWindow | {{SKWindow | ||
| − | | width = | + | | width = 650px |
| margin = 0px 0px 10px 10px | | margin = 0px 0px 10px 10px | ||
| align = right | | align = right | ||
| title = Abatheguy | | title = Abatheguy | ||
| body = | | body = | ||
| − | {{SKWindow/EmptyCell|[[Image: | + | {{SKWindow/EmptyCell|[[Image:AbatheguyPic2.png|300px]]|center||1|8}} |
| − | + | ||
{{SKWindow/Cell|'''Player Name:'''|}} | {{SKWindow/Cell|'''Player Name:'''|}} | ||
{{SKWindow/Cell|Abatheguy|}} | {{SKWindow/Cell|Abatheguy|}} | ||
{{SKWindow/NewRow}} | {{SKWindow/NewRow}} | ||
| − | {{SKWindow/Cell|''' | + | {{SKWindow/Cell|'''AKA:'''|}} |
| − | {{SKWindow/Cell|Aba, | + | {{SKWindow/Cell|Aba, Guy}} |
{{SKWindow/NewRow}} | {{SKWindow/NewRow}} | ||
{{SKWindow/Cell|'''Knight Rank:'''|}} | {{SKWindow/Cell|'''Knight Rank:'''|}} | ||
| − | {{SKWindow/Cell|Vanguard}} | + | {{SKWindow/Cell|Vanguard (10-1)}} |
{{SKWindow/NewRow}} | {{SKWindow/NewRow}} | ||
| − | {{SKWindow/Cell|'''Guild:'''|}} | + | {{SKWindow/Cell|'''Guild & Rank:'''|}} |
| − | {{SKWindow/Cell|[[Exalt]] | + | {{SKWindow/Cell|[[Exalt]], Officer}} |
| − | + | ||
| − | + | ||
| − | + | ||
{{SKWindow/NewRow}} | {{SKWindow/NewRow}} | ||
{{SKWindow/Cell|'''Player Since:'''|}} | {{SKWindow/Cell|'''Player Since:'''|}} | ||
{{SKWindow/Cell|January 2012}} | {{SKWindow/Cell|January 2012}} | ||
{{SKWindow/NewRow}} | {{SKWindow/NewRow}} | ||
| + | {{SKWindow/Cell|'''Playstyle:'''|}} | ||
| + | {{SKWindow/Cell|Defensive Weaponizer}} | ||
| + | {{SKWindow/NewRow}} | ||
| + | {{SKWindow/Cell|'''Weapons of Choice:'''|}} | ||
| + | {{SKWindow/Cell|Brandishes, Antiguas, Vaporizer Bombs<br>}} | ||
| + | {{SKWindow/NewRow}} | ||
| + | {{SKWindow/Cell|'''Battle Sprite<br>of Choice:'''|}} | ||
| + | {{SKWindow/Cell|Mew-Dabadee (Seraphynx)}} | ||
}} | }} | ||
| − | |||
==Yearn to Learn== | ==Yearn to Learn== | ||
| − | I was introduced to Spiral Knights by a long-time friend. It remains the only MMORPG I play. Every day, I seem to learn something new about the game. Trying to acquire the best equipment suited for me to defeat every type of monster and avoid heavy damage and status ailments. Finding out what each SK-specific acronym I don't know stands for. Identifying the best prices to sell materials and equipment at the auction house. Yielding the best attacking strategy in limited spaces. But most of all, it's all about learning to become a team player in any situation. Though I still do noobish things in my execution, indeed "knowing is half the battle." ([http://en.wikipedia.org/wiki/G.I._Joe G.I. Joe]) | + | I was introduced to Spiral Knights by a long-time friend in my spades league. It remains the only MMORPG I play. Every day, I seem to learn something new about the game. Trying to acquire the best equipment suited for me to defeat every type of monster and avoid heavy damage and status ailments. Finding out what each SK-specific acronym I don't know stands for. Identifying the best prices to sell materials and equipment at the auction house. Yielding the best attacking strategy in limited spaces. But most of all, it's all about learning to become a team player in any situation. Though I still do noobish things in my execution, indeed "knowing is half the battle." ([http://en.wikipedia.org/wiki/G.I._Joe G.I. Joe]) |
Thus, the purpose of my SK User Wiki page is to be a learning experience for you and me. Me: learning how to create my own Wiki page using the templates and tutorials available. You: learning some key tips that I have learned so far while playing Spiral Knights, while having the incentive to create your own Wiki page. Enjoy what knowledge I have to offer in the coming days. | Thus, the purpose of my SK User Wiki page is to be a learning experience for you and me. Me: learning how to create my own Wiki page using the templates and tutorials available. You: learning some key tips that I have learned so far while playing Spiral Knights, while having the incentive to create your own Wiki page. Enjoy what knowledge I have to offer in the coming days. | ||
| Line 35: | Line 38: | ||
If you see an error in my Wiki, you can discuss it via the discussion tab rather than directly edit my page (as any Wiki page can be edited). Some of the info I yield are confirmed via personal experiences playing Sprial Knights (e.g. I actually won a Mod Calibrator in the Prize Wheel one instance) while some are "scientific guesses" based on trends and what I overheard in those experiences. As this is the Internet, please keep everything in good taste. | If you see an error in my Wiki, you can discuss it via the discussion tab rather than directly edit my page (as any Wiki page can be edited). Some of the info I yield are confirmed via personal experiences playing Sprial Knights (e.g. I actually won a Mod Calibrator in the Prize Wheel one instance) while some are "scientific guesses" based on trends and what I overheard in those experiences. As this is the Internet, please keep everything in good taste. | ||
| − | '''Thanks and enjoy my Wiki page! :)''' | + | '''Thanks for visiting and enjoy my Wiki page! :)''' |
| + | |||
| + | <br> | ||
| + | ==In Future Wiki Updates== | ||
| + | <ul><li>Determine new topics for the Knowledge Share section.</li> | ||
| + | <li>Add more links to Wiki-editing tutorials and resources in the How-to-Wiki Resources section.</li> | ||
| + | <li>Suggest information to be put on this page! (Use the Discussion tab above!)</li></ul> | ||
| + | |||
| + | ==How-to-Wiki Resources== | ||
| + | <ul><li>[[User Page Tutorial]] by Xephyris</li> | ||
| + | <li>[[SpiralKnights:Style guide]]</li> | ||
| + | <li>[https://en.wikipedia.org/wiki/Wikipedia:Tutorial Wikipedia:Tutorial] - Editing tutorial on the original Wikipedia</li></ul> | ||
| + | <br> | ||
==Knowledge Share== | ==Knowledge Share== | ||
| − | {{showhide|Rare Materials|width= | + | {{showhide|Rare Materials|width=900px|content= |
| − | Many monsters drop [[Material|materials]] upon defeat. However, there are some "rare" materials that are not dropped by monsters and are obtainable by other means: as a prize box drop, as a prize wheel prize, bought from certain vendors via tokens, earned from specific missions, and so on. This section covers such materials. | + | Many monsters drop [[Material|materials]] upon defeat. However, there are some "rare" materials that are not dropped by monsters and are obtainable by other means: as a prize box drop, as a prize wheel prize, bought from certain vendors via tokens, earned from specific missions, and so on. This section covers such materials. A majority of these materials can also be sold or bought at a [[Auction House]]; given the difficulty and time to obtain these materials, auction prices may be expensive. |
{{SKWindow | {{SKWindow | ||
| width = 100% | | width = 100% | ||
| Line 76: | Line 91: | ||
{{SKWindow/Cell| [[Celestial Ore]]<br>{{star|5}} }} | {{SKWindow/Cell| [[Celestial Ore]]<br>{{star|5}} }} | ||
{{SKWindow/Cell| <ul> <li>The Sanctuary after completing the [[Shadow_Lair#Royal_Jelly_Palace|Shadow Lair Royal Jelly Palace]].</li></ul>}} | {{SKWindow/Cell| <ul> <li>The Sanctuary after completing the [[Shadow_Lair#Royal_Jelly_Palace|Shadow Lair Royal Jelly Palace]].</li></ul>}} | ||
| − | {{SKWindow/Cell| {{Equip|Ice Queen Mail}} {{Equip|Ice Queen Crown}}<br>{{Equip|Heavenly Iron Helm}} }} | + | {{SKWindow/Cell| {{Equip|Ice Queen Mail}} {{Equip|Ice Queen Crown}}<br>{{Equip|Heavenly Iron Helm}} }} |
{{SKWindow/NewRow}} | {{SKWindow/NewRow}} | ||
| Line 82: | Line 97: | ||
{{SKWindow/Cell| [[Gremlonium]]<br>{{star|5}} }} | {{SKWindow/Cell| [[Gremlonium]]<br>{{star|5}} }} | ||
{{SKWindow/Cell| <ul> <li>The Sanctuary after completing the [[Shadow_Lair#Ironclaw_Munitions_Factory|Shadow Lair Ironclaw Munitions Factory]].</li></ul>}} | {{SKWindow/Cell| <ul> <li>The Sanctuary after completing the [[Shadow_Lair#Ironclaw_Munitions_Factory|Shadow Lair Ironclaw Munitions Factory]].</li></ul>}} | ||
| − | {{SKWindow/Cell| {{Equip|Mercurial Demo Suit}} {{Equip|Mercurial Demo Helm}}<br>{{Equip|Heavenly Iron Armor}} }} | + | {{SKWindow/Cell| {{Equip|Mercurial Demo Suit}} {{Equip|Mercurial Demo Helm}}<br>{{Equip|Heavenly Iron Armor}} }} |
{{SKWindow/NewRow}} | {{SKWindow/NewRow}} | ||
| Line 88: | Line 103: | ||
{{SKWindow/Cell| [[Maiden's Tear]]<br>{{star|5}} }} | {{SKWindow/Cell| [[Maiden's Tear]]<br>{{star|5}} }} | ||
{{SKWindow/Cell| <ul> <li>The Sanctuary after completing the [[Shadow_Lair#Firestorm_Citadel|Shadow Lair Firestorm Citadel]].</li></ul>}} | {{SKWindow/Cell| <ul> <li>The Sanctuary after completing the [[Shadow_Lair#Firestorm_Citadel|Shadow Lair Firestorm Citadel]].</li></ul>}} | ||
| − | {{SKWindow/Cell| {{Equip|Almirian Crusader Armor}} {{Equip|Almirian Crusader Helm}}<br>{{Equip|Arcane Salamander Suit}} {{Equip|Arcane Salamander Mask}} }} | + | {{SKWindow/Cell| {{Equip|Almirian Crusader Armor}} {{Equip|Almirian Crusader Helm}}<br>{{Equip|Arcane Salamander Suit}} {{Equip|Arcane Salamander Mask}} }} |
{{SKWindow/NewRow}} | {{SKWindow/NewRow}} | ||
| Line 112: | Line 127: | ||
{{SKWindow/NewRow}} | {{SKWindow/NewRow}} | ||
| − | {{SKWindow/Cell| [[File:Guild. | + | {{SKWindow/Cell| [[File:Guild icon.png|20px]] '''[[Guild Hall|Guild Halls]]''' are included in the purchase of a guild; various [[furniture]] can be purchased or crafted for your guild.|||4}} |
{{SKWindow/NewRow}} | {{SKWindow/NewRow}} | ||
| Line 118: | Line 133: | ||
{{SKWindow/Cell| [[Snarbostuffing]]<br>{{star|5}} }} | {{SKWindow/Cell| [[Snarbostuffing]]<br>{{star|5}} }} | ||
{{SKWindow/Cell| <ul><li>[[Brinks]] for 12 [[Frumious Fang (Token)|Frumious Fangs]].</li></ul>}} | {{SKWindow/Cell| <ul><li>[[Brinks]] for 12 [[Frumious Fang (Token)|Frumious Fangs]].</li></ul>}} | ||
| − | {{SKWindow/Cell|Using the [[Armero Alchemy Machine]]:<br>[[File:Furniture- | + | {{SKWindow/Cell|Using the [[Armero Alchemy Machine]]:<br>[[File:Furniture-Frumious_Fang_icon.png|35px]] [[Frumious Fang (Furniture)]]}} |
{{SKWindow/NewRow}} | {{SKWindow/NewRow}} | ||
{{SKWindow/Cell| [[File:Crafting-Jelly_Glue.png|40px]] |center}} | {{SKWindow/Cell| [[File:Crafting-Jelly_Glue.png|40px]] |center}} | ||
{{SKWindow/Cell| [[Jelly Glue]]<br>{{star|5}} }} | {{SKWindow/Cell| [[Jelly Glue]]<br>{{star|5}} }} | ||
| − | {{SKWindow/Cell| <ul><li> | + | {{SKWindow/Cell| <ul><li>Brinks for 15 [[Jelly Gem (Token)|Jelly Gems]].</li></ul>}} |
| − | {{SKWindow/Cell| [[File:Furniture- | + | {{SKWindow/Cell| [[File:Furniture-Jelly_Gem_icon.png|35px]] [[Jelly Gem (Furniture)]]}} |
{{SKWindow/NewRow}} | {{SKWindow/NewRow}} | ||
{{SKWindow/Cell| [[File:Crafting-Schemer_Scrap.png|40px]] |center}} | {{SKWindow/Cell| [[File:Crafting-Schemer_Scrap.png|40px]] |center}} | ||
{{SKWindow/Cell| [[Schemer Scrap]]<br>{{star|5}} }} | {{SKWindow/Cell| [[Schemer Scrap]]<br>{{star|5}} }} | ||
| − | {{SKWindow/Cell| <ul><li> | + | {{SKWindow/Cell| <ul><li>Brinks for 18 [[Bark Module (Token)|Bark Modules]].</li></ul>}} |
{{SKWindow/Cell| [[File:Furniture-Roarmulus_Blueprints_icon.png|35px]] [[Roarmulus Blueprints]]}} | {{SKWindow/Cell| [[File:Furniture-Roarmulus_Blueprints_icon.png|35px]] [[Roarmulus Blueprints]]}} | ||
| Line 135: | Line 150: | ||
{{SKWindow/Cell| [[File:Crafting-Dark_Ember.png|40px]] |center}} | {{SKWindow/Cell| [[File:Crafting-Dark_Ember.png|40px]] |center}} | ||
{{SKWindow/Cell| [[Dark Ember]]<br>{{star|5}} }} | {{SKWindow/Cell| [[Dark Ember]]<br>{{star|5}} }} | ||
| − | {{SKWindow/Cell| <ul><li> | + | {{SKWindow/Cell| <ul><li>Brinks for 25 [[Almirian Seal (Token)|Almirian Seals]].</li></ul>}} |
| − | {{SKWindow/Cell| [[File:Furniture- | + | {{SKWindow/Cell| [[File:Furniture-Almirian_Seal_icon.png|35px]] [[Almirian Seal (Furniture)]]}} |
{{SKWindow/NewRow}} | {{SKWindow/NewRow}} | ||
| Line 144: | Line 159: | ||
{{SKWindow/Cell| [[File:Crafting-Kat_Tribe_Fetish.png|40px]] |center}} | {{SKWindow/Cell| [[File:Crafting-Kat_Tribe_Fetish.png|40px]] |center}} | ||
{{SKWindow/Cell| [[Kat Tribe Fetish]]<br>{{star|4}} }} | {{SKWindow/Cell| [[Kat Tribe Fetish]]<br>{{star|4}} }} | ||
| − | {{SKWindow/Cell| <ul><li>[[Montague]] for 50 [[Token#Ancient_Page|Ancient Pages]].</li></ul>}} | + | {{SKWindow/Cell| <ul><li>[[Montague]] for 50 [[Token#Ancient_Page|Ancient Pages]].</li> |
| + | <li>Prize wheel.</li></ul>}} | ||
{{SKWindow/Cell| Using the [[Moorcroft Alchemy Machine]]:<br>[[File:Equipment-Kat_Eye_Mask_icon.png|40px]] 6 distinct [[Kat]] [[Moorcroft Alchemy Machine|Helmets]]}} | {{SKWindow/Cell| Using the [[Moorcroft Alchemy Machine]]:<br>[[File:Equipment-Kat_Eye_Mask_icon.png|40px]] 6 distinct [[Kat]] [[Moorcroft Alchemy Machine|Helmets]]}} | ||
| Line 156: | Line 172: | ||
<li>[[Treasure box|Treasure Box]] | <li>[[Treasure box|Treasure Box]] | ||
<li>[[Prize wheel|Prize Wheel]]</ul>}} | <li>[[Prize wheel|Prize Wheel]]</ul>}} | ||
| − | {{SKWindow/Cell| Using any regular [[Alchemy machine|Alchemy Machine]]:<br>{{Equip|Cautery Sword}} {{Equip|Crest of Almire}}<br>{{Equip|Shocking Salt Bomb}} series}} | + | {{SKWindow/Cell| Using any regular [[Alchemy machine|Alchemy Machine]]:<br>{{Equip|Cautery Sword}} {{Equip|Crest of Almire}}<br>{{Equip|Shocking Salt Bomb}} series}} |
{{SKWindow/NewRow}} | {{SKWindow/NewRow}} | ||
| Line 170: | Line 186: | ||
}} | }} | ||
| − | {{showhide|Recipe-ology|width= | + | {{showhide|Recipe-ology|width=900px|content= |
| − | While some of the low-star gear can be obtained by purchase, the key method to obtain almost every piece of gear is by [[crafting]]. To craft, you need to acquire [[Recipes]]. Once acquired and learned, each recipe details the materials, the energy, the crowns, and lower-star gear needed to craft your gear. The main benefit of crafting is to have a small chance of obtaining [[Unique Variant|Unique Variants]], which | + | While some of the low-star gear can be obtained by purchase, the key method to obtain almost every piece of gear is by [[crafting]]. To craft, you need to acquire [[Recipes]]. Once acquired and learned, each recipe details the materials, the energy, the crowns, and any lower-star gear needed to craft your gear. The main benefit of crafting is to have a small chance of obtaining [[Unique Variant|Unique Variants]], which are boosted stats for the crafted gear. Do note that not every piece of gear can be crafted because no recipe for them exists; thus, these pieces of gear can only be obtained by directly purchasing them via a [[Vendor]] or the [[Auction House]]. |
Recipes may be obtained in a multitude of ways:<ul> | Recipes may be obtained in a multitude of ways:<ul> | ||
| Line 182: | Line 198: | ||
<li>The [[Vise Alchemy Machine]] crafts Mask of Seerus helmets using fragments rewarded from defeating [[Warmaster Seerus]].</li> | <li>The [[Vise Alchemy Machine]] crafts Mask of Seerus helmets using fragments rewarded from defeating [[Warmaster Seerus]].</li> | ||
<li>The [[Armero Alchemy Machine]] crafts Boss Trophy [[furniture]] in the Guild Hall. A lot of materials and crowns are required per crafting.</li> | <li>The [[Armero Alchemy Machine]] crafts Boss Trophy [[furniture]] in the Guild Hall. A lot of materials and crowns are required per crafting.</li> | ||
| − | <li>The [[Moorcroft Alchemy Machine]] crafts upgrades to [[Kat]] Hood | + | <li>The [[Moorcroft Alchemy Machine]] crafts upgrades to [[Kat]] Hood helmets using [[Kat Tribe Fetish]], both purchased from [[Montague]].</li> |
</ul> | </ul> | ||
</li> | </li> | ||
| Line 188: | Line 204: | ||
<li>A few '''[[Vendors]]''' carry recipes, either a set list or at random. These vendors include:<ul> | <li>A few '''[[Vendors]]''' carry recipes, either a set list or at random. These vendors include:<ul> | ||
<li>[[Sullivan]] has recipes covering five distinct alchemy lines, purchasable via [[Krogmo Coins]]. Only these recipes can be attained by Sullivan.</li> | <li>[[Sullivan]] has recipes covering five distinct alchemy lines, purchasable via [[Krogmo Coins]]. Only these recipes can be attained by Sullivan.</li> | ||
| − | <li>[[Vatel]] has 1- and 2-star recipes for sale, which are randomly set each day. (A | + | <li>[[Vatel]] has 1- and 2-star recipes for sale, which are randomly set each day. (A random set can also be found via Basil on each visit to the Tier 1 Clockwork Terminial.)</li> |
<li>[[Basil]] is a traveling merchant that can be found in two places.<ul> | <li>[[Basil]] is a traveling merchant that can be found in two places.<ul> | ||
<li>[[Clockwork Terminal|Clockwork Terminals]] where he has random pieces of gear for sale depending on the [[Tier]] he is situated in.</li> | <li>[[Clockwork Terminal|Clockwork Terminals]] where he has random pieces of gear for sale depending on the [[Tier]] he is situated in.</li> | ||
| − | <li>[[Mission]] lobbies where he has a set of gear available depending on the current mission.</li> | + | <li>[[Mission]] lobbies where he has a set of gear available for sale depending on the current mission.</li> |
</ul> | </ul> | ||
| − | Several recipes can only be initially attained by Basil; | + | Several recipes can only be initially attained by Basil; to obtain these recipes, knights go on "recipe runs" where they reach the [[Clockwork Terminal]] in hope of finding them (which are randomly set per visit). ''Click on '''Recipe-ology: Basil-Only Recipes''' for a complete list of recipes that can only be obtained via Basil.''</li> |
</ul> | </ul> | ||
| − | </li></ul> | + | </li> |
| + | <li>Some recipes may be obtained upon completing specific '''[[Missions]]'''. Unless you need them urgently, there is no need to purchase them. ''Click on '''Recipe-ology: Mission-Reward Recipes''' for a complete list of recipes that can be obtained as rewards from completing specific missions.''</li> | ||
| + | </ul> | ||
| + | |||
| + | }} | ||
| + | |||
| + | {{showhide|Recipe-ology: Basil-Only Recipes|width=900px|content= | ||
| + | Below is a list of alchemy paths which include upgrade recipes that can only be purchased via the vendor [[Basil]] in the proper [[Clockwork Terminal]]. Recipes that include a [[mission]] list denote mission lobbies where Basil also has that recipe. | ||
{{SKWindow | {{SKWindow | ||
| title = Basil-only Recipes | | title = Basil-only Recipes | ||
| width = 100% | | width = 100% | ||
| body = | | body = | ||
| − | {{SKWindow/Cell|''' | + | {{SKWindow/Cell|'''Series'''|||||50px}} {{SKWindow/Cell|'''Precursor Item'''|||||150px}} {{SKWindow/Cell|'''Upgrade Recipes Purchased from Basil Only'''|||3|}} |
| − | {{SKWindow/Cell| | + | |
{{SKWindow/NewRow}} | {{SKWindow/NewRow}} | ||
| − | {{SKWindow/Cell|''' | + | {{SKWindow/Cell|'''Edge'''||||2}} |
| − | {{SKWindow/Cell| | + | {{SKWindow/Cell|{{Equip|Hot Edge}} }} |
| + | {{SKWindow/Cell|{{Recipe_Icon|sword|Searing Edge|16}}<br>{{star|2}}||top}} | ||
{{SKWindow/NewRow}} | {{SKWindow/NewRow}} | ||
| − | {{SKWindow/Cell| | + | {{SKWindow/Cell|{{Equip|Static Edge}} }} |
| − | {{SKWindow/Cell| | + | {{SKWindow/Cell|{{Recipe_Icon|sword|Shocking Edge|16}}<br>{{star|2}}||top}} |
| + | |||
{{SKWindow/NewRow}} | {{SKWindow/NewRow}} | ||
| − | {{SKWindow/Cell|''' | + | {{SKWindow/Cell|'''Scarlet'''||||1}} |
| − | {{SKWindow/Cell|Scarlet Shield}} | + | {{SKWindow/Cell| [[File:Equipment-Scarlet Shield icon.png|36px]] None}} |
| + | {{SKWindow/Cell|{{Recipe_Icon|shield|Scarlet Shield |16}}<br>{{star|3}}||top}} | ||
| + | |||
{{SKWindow/NewRow}} | {{SKWindow/NewRow}} | ||
| − | {{SKWindow/Cell|''' | + | {{SKWindow/Cell|'''Breaker'''||||4}} |
| − | {{SKWindow/Cell| | + | {{SKWindow/Cell| [[File:Equipment-Firebreak Armor icon.png|27px]] [[File:Equipment-Firebreak Helm icon.png|27px]] [[File:Equipment-Firebreak Shield icon.png|27px]]<br>[[list of sets|Firebreak Set]] }} |
| + | {{SKWindow/Cell|{{Recipe_Icon|armor|Blazebreak Armor|16}}<br>{{star|3}} | ||
| + | <ul><li>High Temp Hostages (6-1)</li></ul>||top}} | ||
| + | {{SKWindow/Cell|{{Recipe_Icon|helmet|Blazebreak Helm|16}}<br>{{star|3}} | ||
| + | <ul><li>High Temp Hostages (6-1)</li></ul>||top}} | ||
| + | {{SKWindow/Cell|{{Recipe_Icon|shield|Blazebreak Shield|16}}<br>{{star|3}} | ||
| + | <ul><li>High Temp Hostages (6-1)</li></ul>||top}} | ||
{{SKWindow/NewRow}} | {{SKWindow/NewRow}} | ||
| − | {{SKWindow/Cell| | + | {{SKWindow/Cell|[[File:Equipment-Icebreaker Armor icon.png|27px]] [[File:Equipment-Icebreaker Helm icon.png|27px]] [[File:Equipment-Icebreaker Shield icon.png|27px]]<br>[[list of sets|Icebreaker Set]] }} |
| − | {{SKWindow/Cell| | + | {{SKWindow/Cell|{{Recipe_Icon|armor|Blizzbreaker Armor|16}}<br>{{star|3}}||top}} |
| + | {{SKWindow/Cell|{{Recipe_Icon|helmet|Blizzbreaker Helm|16}}<br>{{star|3}}||top}} | ||
| + | {{SKWindow/Cell|{{Recipe_Icon|shield|Blizzbreaker Shield|16}}<br>{{star|3}}||top}} | ||
{{SKWindow/NewRow}} | {{SKWindow/NewRow}} | ||
| − | {{SKWindow/Cell| | + | {{SKWindow/Cell|[[File:Equipment-Volt Breaker Armor icon.png|27px]] [[File:Equipment-Volt Breaker Helm icon.png|27px]] [[File:Equipment-Volt Breaker Shield icon.png|27px]]<br>[[list of sets|Volt Breaker Set]] }} |
| − | {{SKWindow/Cell| | + | {{SKWindow/Cell|{{Recipe_Icon|armor|Surge Breaker Armor|16}}<br>{{star|3}}||top}} |
| + | {{SKWindow/Cell|{{Recipe_Icon|helmet|Surge Breaker Helm|16}}<br>{{star|3}}||top}} | ||
| + | {{SKWindow/Cell|{{Recipe_Icon|shield|Surge Breaker Shield|16}}<br>{{star|3}}||top}} | ||
{{SKWindow/NewRow}} | {{SKWindow/NewRow}} | ||
| − | {{SKWindow/Cell|' | + | {{SKWindow/Cell|Note: the recipes for these items' 1- and 2-star counterparts can be purchased from Vatel and Basil.|||4}} |
| − | + | ||
| − | }} | + | |
| + | {{SKWindow/NewRow}} | ||
| + | {{SKWindow/Cell|'''Graviton'''||||1}} | ||
| + | {{SKWindow/Cell| [[File:Equipment-Graviton Charge icon.png|36px]] None}} | ||
| + | {{SKWindow/Cell|{{Recipe_Icon|bomb|Graviton Charge|16}}<br>{{star|3}} | ||
| + | <ul><li>The Sovereign Slime (5-2)</li><li>Oper Crimson Hammer (T2)</li></ul>||top}} | ||
| + | {{SKWindow/Cell|{{Recipe_Icon|bomb|Graviton Bomb|16}}<br>{{star|4}}||top}} | ||
| + | {{SKWindow/Cell|{{Recipe_Icon|bomb|Graviton Vortex|16}}<br>{{star|5}} | ||
| + | <ul><li>Oper Crimson Hammer (T3)</li></ul>||top}} | ||
| − | |||
| − | |||
| − | |||
| + | {{SKWindow/NewRow}} | ||
| + | {{SKWindow/Cell|'''Frumious Fang'''||||3}} | ||
| + | {{SKWindow/Cell| {{Equip|Snarble Barb}} }} | ||
| + | {{SKWindow/Cell|{{Recipe_Icon|sword|Twisted Snarble Barb|16}}<br>{{star|3}}||top}} | ||
| + | {{SKWindow/Cell|{{Recipe_Icon|sword|Dark Thorn Blade|16}}<br>{{star|4}}||top}} | ||
| + | {{SKWindow/Cell|{{Recipe_Icon|sword|Barbarous Thorn Blade|16}}<br>{{star|5}}||top}} | ||
| + | {{SKWindow/NewRow}} | ||
| + | {{SKWindow/Cell| {{Equip|Spine Cone}} }} | ||
| + | {{SKWindow/Cell|{{Recipe_Icon|bomb|Twisted Spine Cone|16}}<br>{{star|3}}||top}} | ||
| + | {{SKWindow/Cell|{{Recipe_Icon|bomb|Spike Shower|16}}<br>{{star|4}}||top}} | ||
| + | {{SKWindow/Cell|{{Recipe_Icon|bomb|Dark Briar Barrage|16}}<br>{{star|5}}||top}} | ||
| + | {{SKWindow/NewRow}} | ||
| + | {{SKWindow/Cell| {{Equip|Bristling Buckler}} }} | ||
| + | {{SKWindow/Cell|{{Recipe_Icon|shield|Twisted Targe|16}}<br>{{star|3}}||top}} | ||
| + | {{SKWindow/Cell|{{Recipe_Icon|shield|Dark Thorn Shield|16}}<br>{{star|4}}||top}} | ||
| + | {{SKWindow/Cell|{{Recipe_Icon|shield|Barbarous Thorn Shield|16}}<br>{{star|5}}||top}} | ||
| + | |||
| + | {{SKWindow/NewRow}} | ||
| + | {{SKWindow/Cell|'''Jelly Gem'''||||4}} | ||
| + | {{SKWindow/Cell| {{Equip|Sealed Sword}} ||||2}} | ||
| + | {{SKWindow/Cell|{{Recipe_Icon|sword|Avenger|16}}<br>{{star|4}}||top}} | ||
| + | {{SKWindow/Cell|{{Recipe_Icon|sword|Divine Avenger|16}}<br>{{star|5}}||top}} | ||
| + | {{SKWindow/NewRow}} | ||
| + | {{SKWindow/Cell|{{Recipe_Icon|sword|Faust|16}}<br>{{star|4}}||top}} | ||
| + | {{SKWindow/Cell|{{Recipe_Icon|sword|Gran Faust|16}}<br>{{star|5}}||top}} | ||
| + | {{SKWindow/NewRow}} | ||
| + | {{SKWindow/Cell| {{Equip|Antigua}} ||||2}} | ||
| + | {{SKWindow/Cell|{{Recipe_Icon|handgun|Silversix|16}}<br>{{star|4}}||top}} | ||
| + | {{SKWindow/Cell|{{Recipe_Icon|handgun|Argent Peacemaker|16}}<br>{{star|5}}||top}} | ||
| + | {{SKWindow/NewRow}} | ||
| + | {{SKWindow/Cell|{{Recipe_Icon|handgun|Blackhawk|16}}<br>{{star|4}}||top}} | ||
| + | {{SKWindow/Cell|{{Recipe_Icon|handgun|Sentenza|16}}<br>{{star|5}}||top}} | ||
| + | |||
| + | {{SKWindow/NewRow}} | ||
| + | {{SKWindow/Cell|'''Bark Module'''||||8}} | ||
| + | {{SKWindow/Cell| {{Equip|Pulsar}} ||||2}} | ||
| + | {{SKWindow/Cell|{{Recipe_Icon|handgun|Kilowatt Pulsar|16}}<br>{{star|3}}||top}} | ||
| + | {{SKWindow/Cell|{{Recipe_Icon|handgun|Gigawatt Pulsar|16}}<br>{{star|4}}||top}} | ||
| + | {{SKWindow/Cell|{{Recipe_Icon|handgun|Polaris|16}}<br>{{star|5}}||top}} | ||
| + | {{SKWindow/NewRow}} | ||
| + | {{SKWindow/Cell|{{Recipe_Icon|handgun|Heavy Pulsar|16}}<br>{{star|3}}||top}} | ||
| + | {{SKWindow/Cell|{{Recipe_Icon|handgun|Radiant Pulsar|16}}<br>{{star|4}}||top}} | ||
| + | {{SKWindow/Cell|{{Recipe_Icon|handgun|Supernova|16}}<br>{{star|5}}||top}} | ||
| + | {{SKWindow/NewRow}} | ||
| + | {{SKWindow/Cell| {{Equip|Catalyzer}} ||||2}} | ||
| + | {{SKWindow/Cell|{{Recipe_Icon|handgun|Industrial Catalyzer|16}}<br>{{star|3}}||top}} | ||
| + | {{SKWindow/Cell|{{Recipe_Icon|handgun|Volatile Catalyzer|16}}<br>{{star|4}}||top}} | ||
| + | {{SKWindow/Cell|{{Recipe_Icon|handgun|Neutralizer|16}}<br>{{star|5}}||top}} | ||
| + | {{SKWindow/NewRow}} | ||
| + | {{SKWindow/Cell|{{Recipe_Icon|handgun|Toxic Catalyzer|16}}<br>{{star|3}}||top}} | ||
| + | {{SKWindow/Cell|{{Recipe_Icon|handgun|Virulent Catalyzer|16}}<br>{{star|4}}||top}} | ||
| + | {{SKWindow/Cell|{{Recipe_Icon|handgun|Biohazard|16}}<br>{{star|5}}||top}} | ||
| + | {{SKWindow/NewRow}} | ||
| + | {{SKWindow/Cell| {{Equip|Static Capacitor}} ||||1}} | ||
| + | {{SKWindow/Cell|{{Recipe_Icon|bomb|Lightning Capacitor|16}}<br>{{star|3}}||top}} | ||
| + | {{SKWindow/Cell|{{Recipe_Icon|bomb|Plasma Capacitor|16}}*<br>{{star|4}}||top}} | ||
| + | {{SKWindow/Cell|{{Recipe_Icon|bomb|Voltaic Tempest|16}}<br>{{star|5}}||top}} | ||
| + | {{SKWindow/NewRow}} | ||
| + | {{SKWindow/Cell| {{Equip|Quicksilver Helm}} ||||1}} | ||
| + | {{SKWindow/Cell|{{Recipe_Icon|helmet|Charged Quicksilver Helm|16}}<br>{{star|4}} | ||
| + | <ul><li>Vicious and Viscous (7-2)</li></ul>||top}} | ||
| + | {{SKWindow/Cell|{{Recipe_Icon|helmet|Mercurial Helm|16}}<br>{{star|5}}||top}} | ||
| + | {{SKWindow/NewRow}} | ||
| + | {{SKWindow/Cell| {{Equip|Quicksilver Mail}} ||||1}} | ||
| + | {{SKWindow/Cell|{{Recipe_Icon|armor|Charged Quicksilver Mail|16}}<br>{{star|4}} | ||
| + | <ul><li>Vicious and Viscous (7-2)</li></ul>||top}} | ||
| + | {{SKWindow/Cell|{{Recipe_Icon|armor|Mercurial Mail|16}}<br>{{star|5}}||top}} | ||
| + | {{SKWindow/NewRow}} | ||
| + | {{SKWindow/Cell|Note: a Plasma Capacitor recipe is rewarded and bound to you for completing The Great Escape (8-2) mission.|||4}} | ||
| + | |||
| + | {{SKWindow/NewRow}} | ||
| + | {{SKWindow/Cell|'''Almirian Seal'''||||1}} | ||
| + | {{SKWindow/Cell| {{Equip|Blackened Crest}} }} | ||
| + | {{SKWindow/Cell|{{Recipe_Icon|shield|Crest of Almire|16}}<br>{{star|5}}||top}} | ||
| + | |||
| + | }} | ||
| + | |||
| + | }} | ||
| + | |||
| + | {{showhide|Recipe-ology: Mission-Reward Recipes|width=900px|content= | ||
| + | Below is a list of alchemy paths which include upgrade recipes that can be obtained by completing the respective [[mission]]. Note that these recipes are rewarded once and are bound to you when rewarded. | ||
{{SKWindow | {{SKWindow | ||
| title = Mission Reward Recipes | | title = Mission Reward Recipes | ||
| width = 100% | | width = 100% | ||
| body = | | body = | ||
| − | {{SKWindow/Cell|''' | + | {{SKWindow/Cell|'''Series'''|||||50px}} {{SKWindow/Cell|'''Precursor Item'''|||||150px}} {{SKWindow/Cell|'''Recipes from Mission Rewards'''|||3|}} |
| − | {{SKWindow/Cell||}} | + | |
{{SKWindow/NewRow}} | {{SKWindow/NewRow}} | ||
| − | {{SKWindow/Cell|''' | + | {{SKWindow/Cell|'''Breaker'''||||1}} |
| − | {{SKWindow/Cell||}} | + | {{SKWindow/Cell|None|}} |
| + | {{SKWindow/Cell|{{Recipe_Icon|armor|Emberbreak Armor|16}}<br>{{star|1}} | ||
| + | <ul><li>Alien Ooze (3-1)</li></ul>||top}} | ||
| + | {{SKWindow/Cell|{{Recipe_Icon|helmet|Emberbreak Helm|16}}<br>{{star|1}} | ||
| + | <ul><li>Alien Ooze (3-1)</li></ul>||top}} | ||
| + | {{SKWindow/Cell|{{Recipe_Icon|shield|Emberbreak Shield|16}}<br>{{star|1}} | ||
| + | <ul><li>Toy Soldiers (3-1)</li></ul>||top}} | ||
| + | |||
{{SKWindow/NewRow}} | {{SKWindow/NewRow}} | ||
| − | {{SKWindow/Cell|'''Calibur | + | {{SKWindow/Cell|'''Calibur/<br>Blaster/<br>Blast Bomb'''||||1}} |
| − | {{SKWindow/Cell|}} | + | {{SKWindow/Cell| {{Equip|Calibur}}<br>{{Equip|Blaster}}<br>{{Equip|Blast Bomb}}||||1}} |
| + | {{SKWindow/Cell|{{Recipe_Icon|sword|Tempered Calibur|16}}<br>{{Recipe_Icon|handgun|Super Blaster|16}}<br>{{Recipe_Icon|bomb|Super Blast Bomb|16}}<br>{{star|3}} | ||
| + | <ul><li>Rise or Fall (5-2)</li></ul>||top}} | ||
| + | {{SKWindow/Cell|{{Recipe_Icon|sword|Ascended Calibur|16}}<br>{{Recipe_Icon|handgun|Master Blaster|16}}<br>{{Recipe_Icon|bomb|Master Blast Bomb|16}}<br>{{star|4}} | ||
| + | <ul><li>Sewer Stash (6-2)</li></ul>||top}} | ||
| + | {{SKWindow/Cell|{{Recipe_Icon|sword|Leviathan Blade|16}}<br>{{Recipe_Icon|handgun|Valiance|16}}<br>{{Recipe_Icon|bomb|Nitronome|16}}<br>{{star|5}} | ||
| + | <ul><li>Becoming a Champion (8-2)</li></ul>||top}} | ||
| + | |||
{{SKWindow/NewRow}} | {{SKWindow/NewRow}} | ||
| − | {{SKWindow/Cell|''' | + | {{SKWindow/Cell|'''Cobalt/<br>Defender'''||||1}} |
| − | {{SKWindow/Cell|}} | + | {{SKWindow/Cell| {{Equip|Cobalt Armor}}<br>{{Equip|Cobalt Helm}}<br>{{Equip|Defender}}||||1}} |
| + | {{SKWindow/Cell|{{Recipe_Icon|armor|Solid Cobalt Armor|16}}<br>{{Recipe_Icon|helmet|Solid Cobalt Helm|16}}<br>{{Recipe_Icon|shield|Great Defender|16}}<br>{{star|3}} | ||
| + | <ul><li>Time Enough at Last (5-2)</li></ul>||top}} | ||
| + | {{SKWindow/Cell|{{Recipe_Icon|armor|Mighty Cobalt Armor|16}}<br>{{Recipe_Icon|helmet|Mighty Cobalt Helm|16}}<br>{{Recipe_Icon|shield|Mighty Defender|16}}<br>{{star|4}} | ||
| + | <ul><li>Whip & Mishandling (6-2)</li></ul>||top}} | ||
| + | {{SKWindow/Cell|{{Recipe_Icon|armor|Azure Guardian Armor|16}}<br>{{Recipe_Icon|helmet|Azure Guardian Helm|16}}<br>{{Recipe_Icon|shield|Aegis|16}}<br>{{star|5}} | ||
| + | <ul><li>Becoming a Champion (8-2)</li></ul>||top}} | ||
| + | |||
{{SKWindow/NewRow}} | {{SKWindow/NewRow}} | ||
| − | {{SKWindow/Cell|''' | + | {{SKWindow/Cell|'''Tech Alchemer'''|}} |
| − | {{SKWindow/Cell|}} | + | {{SKWindow/Cell| {{Equip|Shadowtech Alchemer Mk II}}||||1}} |
| + | {{SKWindow/Cell|{{Recipe_Icon|handgun|Shadow Driver|16}}{{star|4}} | ||
| + | <ul><li>Rotting Metropolis (8-2)</li></ul>||top}} | ||
| + | |||
{{SKWindow/NewRow}} | {{SKWindow/NewRow}} | ||
| − | {{SKWindow/Cell|''' | + | {{SKWindow/Cell|'''Vaporizer'''|}} |
| − | {{SKWindow/Cell| | + | {{SKWindow/Cell| {{Equip|Lightning Capacitor }}||||1}} |
| − | {{ | + | {{SKWindow/Cell|{{Recipe_Icon|bomb|Plasma Capacitor|16}}{{star|4}} |
| − | {{SKWindow/Cell| | + | <ul><li>The Great Escape (8-2)</li></ul>||top}} |
| − | {{ | + | |
{{SKWindow/NewRow}} | {{SKWindow/NewRow}} | ||
| − | {{SKWindow/Cell|'''Autogun | + | {{SKWindow/Cell|'''Autogun'''|}} |
| − | {{SKWindow/Cell|}} | + | {{SKWindow/Cell| {{Equip|Needle Shot }}||||1}} |
| + | {{SKWindow/Cell|{{Recipe_Icon|handgun|Strike Needle|16}}{{star|4}} | ||
| + | <ul><li>An Occurrence at<br>Owlite Keep (9-1)</li></ul>||top}} | ||
}} | }} | ||
}} | }} | ||
| + | <br> | ||
| + | |||
| + | ==Current Arsenal== | ||
| + | As of '''October 31, 2013'''. | ||
| + | {{SKWindow | ||
| + | | width = 750px | ||
| + | | title = Tier 3 Arsenal | ||
| + | | margin = 0px 0px 0px 0px | ||
| + | | body = | ||
| + | {{SKWindow/NewRow}} | ||
| + | {{SKWindow/Cell| | ||
| + | {{showhide|Swords|width=350px|content = | ||
| + | :{{Equip|Acheron}} {{star|5|color=000040}} | ||
| + | :{{Equip|Barbarous Thorn Blade}} {{star|5|color=000040}} | ||
| + | :{{Equip|Divine Avenger}} {{star|5|color=000040}} | ||
| + | :{{Equip|Fang of Vog}} {{star|5|color=000040}} | ||
| + | :{{Equip|Glacius}} {{star|5|color=000040}} | ||
| + | :{{Equip|Gran Faust}} {{star|5|color=000040}} | ||
| + | :{{Equip|Lionheart Honor Blade}} {{star|5|color=000040}} | ||
| + | :{{Equip|Warmaster Rocket Hammer}} {{star|5|color=000040}} | ||
| + | }} | ||
| + | {{showhide|Handguns|width=350px|content = | ||
| + | :{{Equip|Argent Peacemaker}} {{star|5|color=000040}} | ||
| + | :{{Equip|Blitz Needle}} {{star|5|color=000040}} | ||
| + | :{{Equip|Polaris}} {{star|5|color=000040}} | ||
| + | :{{Equip|Sentenza}} {{star|5|color=000040}} | ||
| + | :{{Equip|Firo Driver}} {{star|4|color=000040}} | ||
| + | :{{Equip|Master Blaster}} {{star|4|color=000040}} | ||
| + | :{{Equip|Mega Magnus}} {{star|4|color=000040}} | ||
| + | }} | ||
| + | {{showhide|Bombs|width=350px|content = | ||
| + | :{{Equip|Dark Briar Barrage}} {{star|5|color=000040}} | ||
| + | :{{Equip|Dark Retribution}} {{star|5|color=000040}} | ||
| + | :{{Equip|Obsidian Crusher}} {{star|5|color=000040}} | ||
| + | :{{Equip|Shivermist Buster}} {{star|5|color=000040}} | ||
| + | :{{Equip|Voltaic Tempest}} {{star|5|color=000040}} | ||
| + | :{{Equip|Master Blast Bomb}} {{star|4|color=000040}} | ||
| + | }} | ||
| + | {{showhide|Trinkets|width=350px|content = | ||
| + | :{{Equip|Dread Skelly Charm}} {{star|5|color=000040}} x 2 | ||
| + | :{{Equip|Pure White Laurel}} {{star|5|color=000040}} | ||
| + | :{{Equip|Radiant Crystal Pin}} {{star|5|color=000040}} | ||
| + | :{{Equip|Royal Jelly Band}} {{star|5|color=000040}} | ||
| + | :{{Equip|Saintly Silver Amulet}} {{star|5|color=000040}} | ||
| + | :{{Equip|Sizzling Hearthstone Pendant}} {{star|5|color=000040}} | ||
| + | :{{Equip|Soaking Wetstone Pendant}} {{star|5|color=000040}} | ||
| + | :{{Equip|Wyrmwood Bracelet}} {{star|5|color=000040}} | ||
| + | :{{Equip|Tetra-Heart Pendant}} {{star|4|color=000040}} | ||
| + | }}||top}} | ||
| + | {{SKWindow/Cell| | ||
| + | {{showhide|Helmets|width=350px|content = | ||
| + | :{{Equip|Divine Veil}} {{star|5|color=000040}} | ||
| + | :{{Equip|Skolver Cap}} {{star|5|color=000040}} | ||
| + | :{{Equip|Snarbolax Cap}} {{star|5|color=000040}} | ||
| + | :{{Equip|Vog Cub Cap}} {{star|5|color=000040}} | ||
| + | :{{Equip|Charged Quicksilver Helm}} {{star|4|color=000040}} | ||
| + | :{{Equip|Mighty Cobalt Helm}} {{star|4|color=000040}} | ||
| + | }} | ||
| + | {{showhide|Armor|width=350px|content = | ||
| + | :{{Equip|Azure Guardian Armor}} {{star|5|color=000040}} | ||
| + | :{{Equip|Dread Skelly Suit}} {{star|5|color=000040}} | ||
| + | :{{Equip|Ice Queen Mail}} {{star|5|color=000040}} | ||
| + | :{{Equip|Mercurial Demo Suit}} {{star|5|color=000040}} | ||
| + | :{{Equip|Skolver Coat}} {{star|5|color=000040}} | ||
| + | :{{Equip|Vog Cub Coat}} {{star|5|color=000040}} | ||
| + | :{{Equip|Ash Tail Coat}} {{star|4|color=000040}} | ||
| + | :{{Equip|Charged Quicksilver Mail}} {{star|4|color=000040}} | ||
| + | }} | ||
| + | {{showhide|Shields|width=350px|content = | ||
| + | :{{Equip|Aegis}} {{star|5|color=000040}} | ||
| + | :{{Equip|Ancient Plate Shield}} {{star|5|color=000040}} | ||
| + | :{{Equip|Crest of Almire}} {{star|5|color=000040}} | ||
| + | :{{Equip|Dread Skelly Shield}} {{star|5|color=000040}} | ||
| + | :{{Equip|Exalted Honor Guard}} {{star|5|color=000040}} | ||
| + | :{{Equip|Grey Owlite Shield}} {{star|5|color=000040}} | ||
| + | }} | ||
| + | {{showhide|Artifacts|width=350px|content = | ||
| + | :[[File:Artifact-Recon_Module.png|32px]] [[Recon Module]]: Gloaming Wildwoods | ||
| + | :[[File:Artifact-Recon_Module.png|32px]] Recon Module: Royal Jelly Palace | ||
| + | :[[File:Artifact-Recon_Module.png|32px]] Recon Module: Ironclaw Munitions Factory | ||
| + | :[[File:Artifact-Recon_Module.png|32px]] Recon Module: Firestorm Citadel | ||
| + | :[[File:Artifact-Recon_Module.png|32px]] Recon Module: The Gauntlet | ||
| + | :[[File:Artifact-Recon_Module.png|32px]] Recon Module: Entrance to the Core | ||
| + | :[[File:Artifact-Echo_Stone.png|32px]] [[Echo Stone]]: Gloaming Wildwoods | ||
| + | :[[File:Artifact-Echo_Stone.png|32px]] Echo Stone: Royal Jelly Palace | ||
| + | }}||top}} | ||
| + | }} | ||
| + | |||
| + | <br> | ||
| − | == | + | ==Photo Gallery== |
| − | [ | + | View more of my Spiral Knights screenshots on my [http://steamcommunity.com/id/abatheguy/screenshots/?appid=99900&sort=newestfirst&browsefilter=myfiles&view=imagewall Steam Community Screenshot Wall]. |
| − | + | <gallery widths=400px heights=200px perrow=2> | |
| + | Image:AbaPG AbacabDuke.jpg|Abacab is better than Duke. (A Genesis band reference.) | ||
| + | Image:AbaPG AllGreens.jpg |I'm blue. Got a green on the fly, got a green on the fly... ♫ | ||
| + | Image:AbaPG Corenundrum.jpg|A Core-nundrum, indeed! (First visit to the Core.) | ||
| + | Image:AbaPG ICanSeeMyHouse.jpg|Haven humor in the Garrison. | ||
| + | Image:AbaPG OneEyedEaters.jpg|Gorgos: the one-eyed, four-horned, flyin' purple people eaters. | ||
| + | Image:AbaPG WhereNoGuy.jpg|Where no guy named Aba has gone before (until then)! | ||
| + | </gallery> | ||
Latest revision as of 13:38, 11 August 2015
| |||||||||||||||||
|

Contents
Yearn to Learn
I was introduced to Spiral Knights by a long-time friend in my spades league. It remains the only MMORPG I play. Every day, I seem to learn something new about the game. Trying to acquire the best equipment suited for me to defeat every type of monster and avoid heavy damage and status ailments. Finding out what each SK-specific acronym I don't know stands for. Identifying the best prices to sell materials and equipment at the auction house. Yielding the best attacking strategy in limited spaces. But most of all, it's all about learning to become a team player in any situation. Though I still do noobish things in my execution, indeed "knowing is half the battle." (G.I. Joe)
Thus, the purpose of my SK User Wiki page is to be a learning experience for you and me. Me: learning how to create my own Wiki page using the templates and tutorials available. You: learning some key tips that I have learned so far while playing Spiral Knights, while having the incentive to create your own Wiki page. Enjoy what knowledge I have to offer in the coming days.
If you see an error in my Wiki, you can discuss it via the discussion tab rather than directly edit my page (as any Wiki page can be edited). Some of the info I yield are confirmed via personal experiences playing Sprial Knights (e.g. I actually won a Mod Calibrator in the Prize Wheel one instance) while some are "scientific guesses" based on trends and what I overheard in those experiences. As this is the Internet, please keep everything in good taste.
Thanks for visiting and enjoy my Wiki page! :)
In Future Wiki Updates
- Determine new topics for the Knowledge Share section.
- Add more links to Wiki-editing tutorials and resources in the How-to-Wiki Resources section.
- Suggest information to be put on this page! (Use the Discussion tab above!)
How-to-Wiki Resources
- User Page Tutorial by Xephyris
- SpiralKnights:Style guide
- Wikipedia:Tutorial - Editing tutorial on the original Wikipedia
Many monsters drop materials upon defeat. However, there are some "rare" materials that are not dropped by monsters and are obtainable by other means: as a prize box drop, as a prize wheel prize, bought from certain vendors via tokens, earned from specific missions, and so on. This section covers such materials. A majority of these materials can also be sold or bought at a Auction House; given the difficulty and time to obtain these materials, auction prices may be expensive.
| ||||||||||||||||||||||||||||||||||||||||||||||||||||||||||||||||||||||||||||||||||||||||||||||||
| ||||||||||||||||||||||||||||||||||||||||||||||||||||||||||||||||||||||||||||||||||||||||||||||||
While some of the low-star gear can be obtained by purchase, the key method to obtain almost every piece of gear is by crafting. To craft, you need to acquire Recipes. Once acquired and learned, each recipe details the materials, the energy, the crowns, and any lower-star gear needed to craft your gear. The main benefit of crafting is to have a small chance of obtaining Unique Variants, which are boosted stats for the crafted gear. Do note that not every piece of gear can be crafted because no recipe for them exists; thus, these pieces of gear can only be obtained by directly purchasing them via a Vendor or the Auction House.
Recipes may be obtained in a multitude of ways:- The Hall of Heroes has a majority of the recipes via nine different Vendors. These recipes automatically bind to you upon purchase. Reaching specific missions allows you to purchase higher-star recipes (e.g. reaching Mission 4-1 allows you to purchase recipes up to 2 stars).
- Several Special Alchemy Machines store their own recipes, thus allowing you to craft at these machines without having to purchase the recipe itself. (Materials, crowns, energy, and lower-star gear are still required to craft.) The gear that can be crafted on these machines can only be crafted via these machines. These alchemy machines are specifically located somewhere in Haven or in the Clockworks.
- The Krogmo Alchemy Machine crafts all Heart Pendant and Module Trinkets using Enamorocks and Mod Calibrators purchased from Sullivan.
- The Sanctuary Alchemy Machine crafts unique 5-star helmets and armor using materials gathered in The Sanctuary itself.
- The Vise Alchemy Machine crafts Mask of Seerus helmets using fragments rewarded from defeating Warmaster Seerus.
- The Armero Alchemy Machine crafts Boss Trophy furniture in the Guild Hall. A lot of materials and crowns are required per crafting.
- The Moorcroft Alchemy Machine crafts upgrades to Kat Hood helmets using Kat Tribe Fetish, both purchased from Montague.
- A few Vendors carry recipes, either a set list or at random. These vendors include:
- Sullivan has recipes covering five distinct alchemy lines, purchasable via Krogmo Coins. Only these recipes can be attained by Sullivan.
- Vatel has 1- and 2-star recipes for sale, which are randomly set each day. (A random set can also be found via Basil on each visit to the Tier 1 Clockwork Terminial.)
- Basil is a traveling merchant that can be found in two places.
- Clockwork Terminals where he has random pieces of gear for sale depending on the Tier he is situated in.
- Mission lobbies where he has a set of gear available for sale depending on the current mission.
- Some recipes may be obtained upon completing specific Missions. Unless you need them urgently, there is no need to purchase them. Click on Recipe-ology: Mission-Reward Recipes for a complete list of recipes that can be obtained as rewards from completing specific missions.
Below is a list of alchemy paths which include upgrade recipes that can only be purchased via the vendor Basil in the proper Clockwork Terminal. Recipes that include a mission list denote mission lobbies where Basil also has that recipe.
Below is a list of alchemy paths which include upgrade recipes that can be obtained by completing the respective mission. Note that these recipes are rewarded once and are bound to you when rewarded.
| |||||||||||||||||||||||||||||
| |||||||||||||||||||||||||||||
Current Arsenal
As of October 31, 2013.
| ||
|
Photo Gallery
View more of my Spiral Knights screenshots on my Steam Community Screenshot Wall.
Abacab is better than Duke. (A Genesis band reference.)
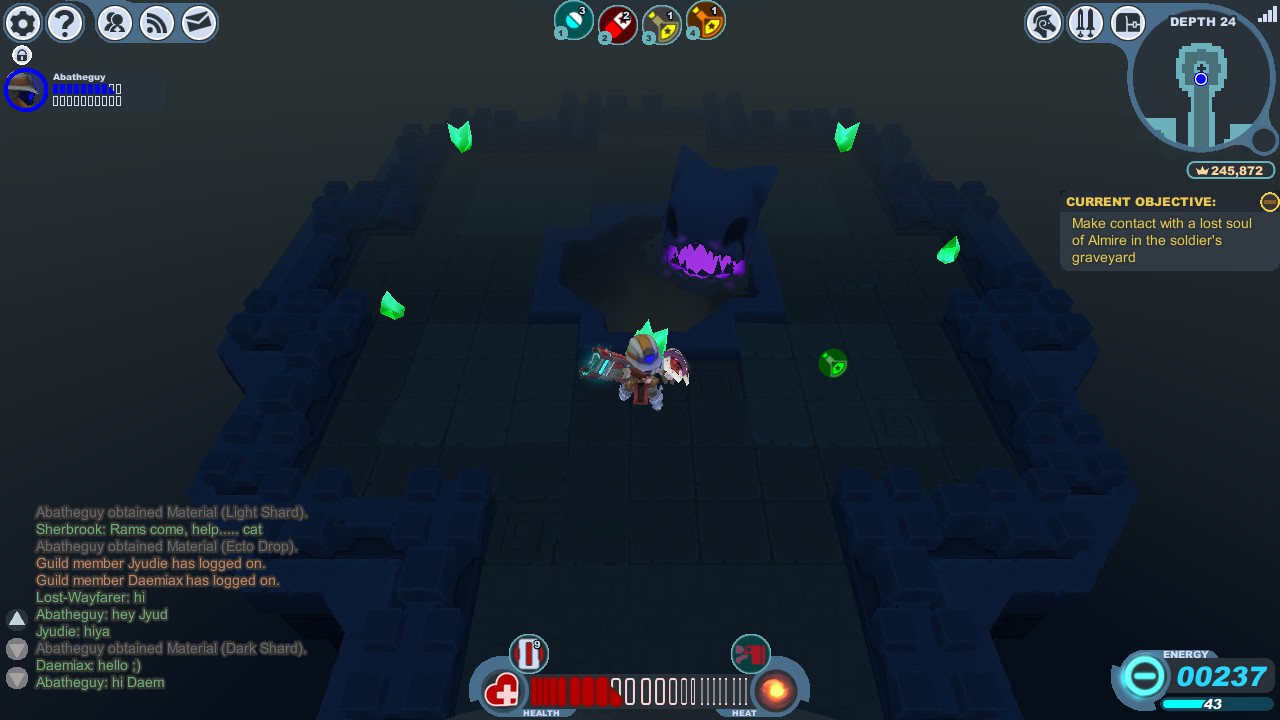
I'm blue. Got a green on the fly, got a green on the fly... ♫
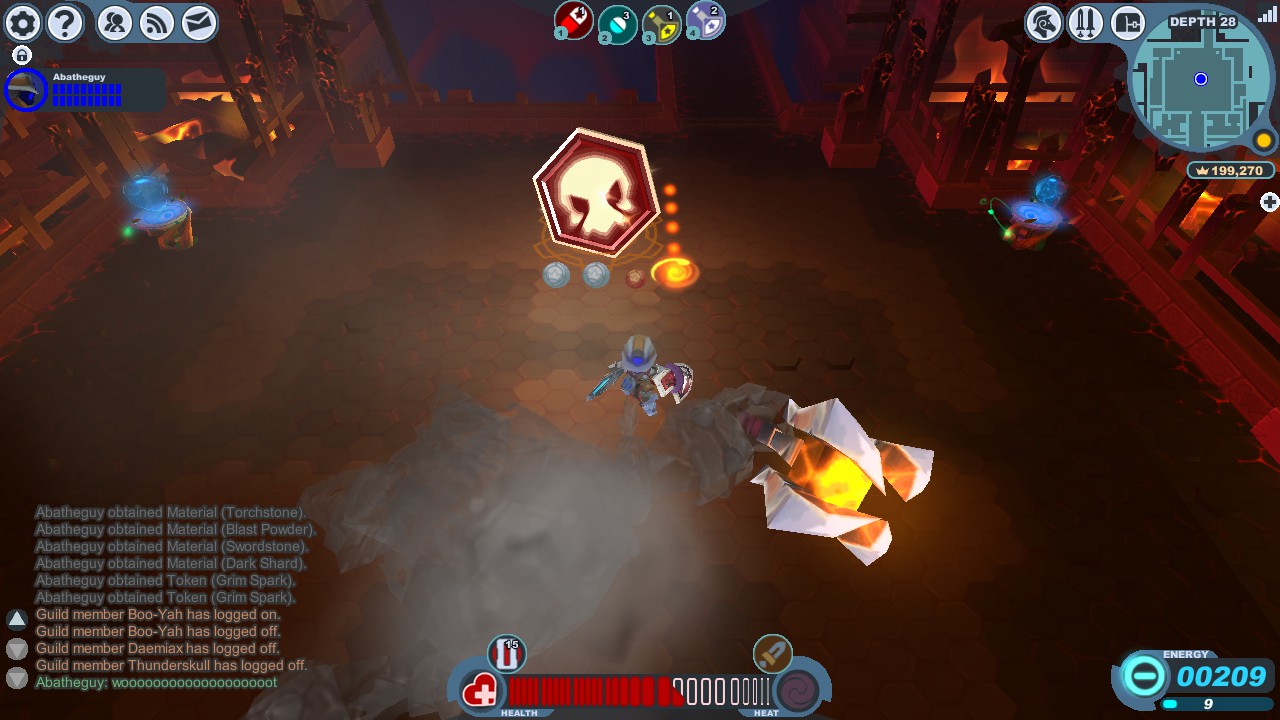
A Core-nundrum, indeed! (First visit to the Core.)

Haven humor in the Garrison.
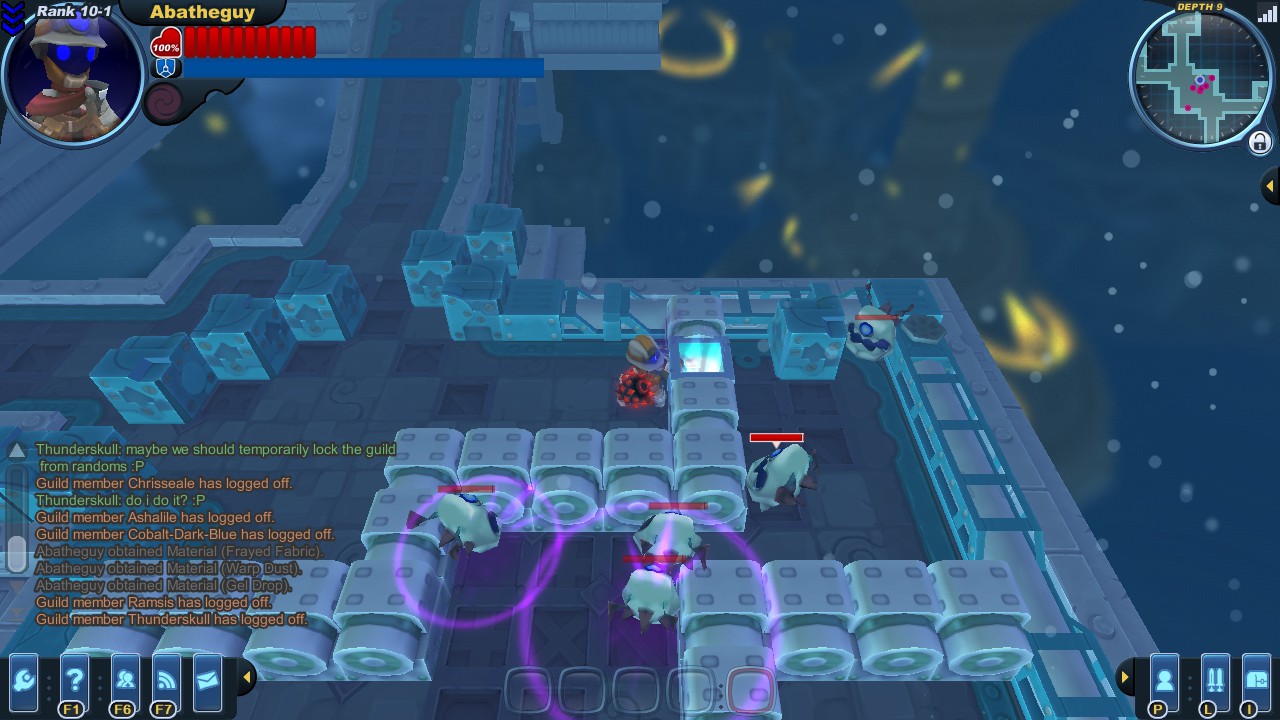
Gorgos: the one-eyed, four-horned, flyin' purple people eaters.
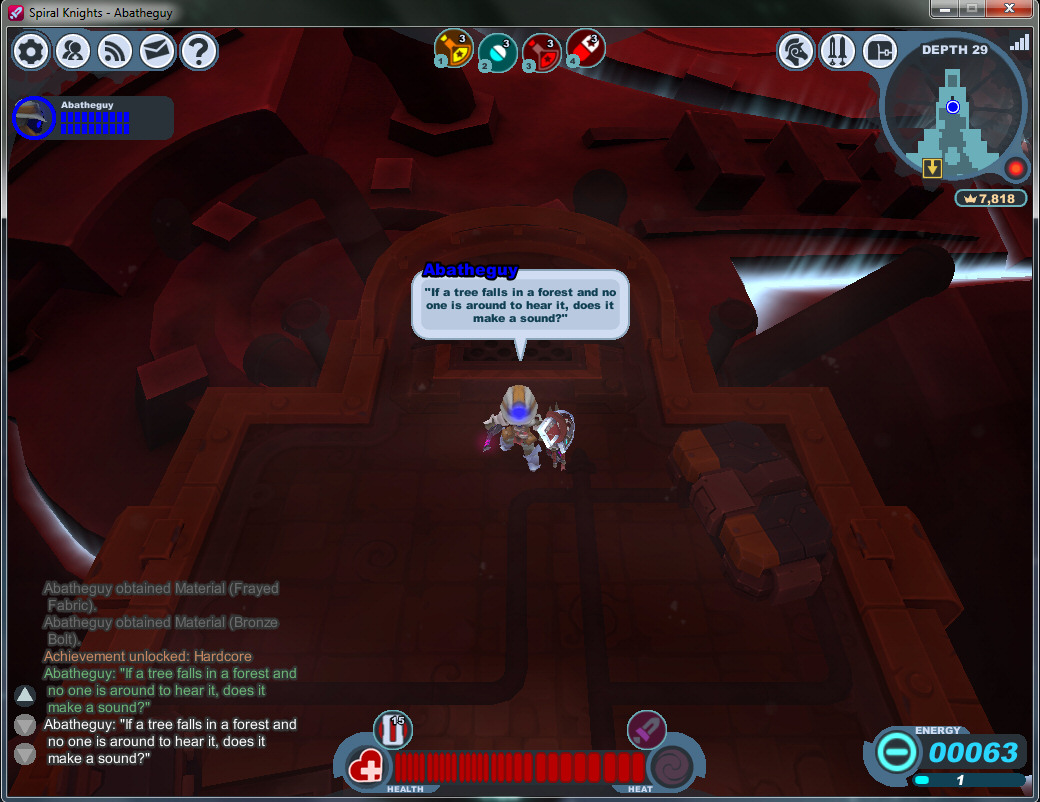
Where no guy named Aba has gone before (until then)!


