Difference between revisions of "User:MacaroonBomb"
From SpiralKnights
MacaroonBomb (Talk | contribs) |
m (old icon) |
||
| (13 intermediate revisions by 2 users not shown) | |||
| Line 1: | Line 1: | ||
{{SKWindow | {{SKWindow | ||
| width = 250px | | width = 250px | ||
| + | | margin = 0px 0px 10px 10px | ||
| align = right | | align = right | ||
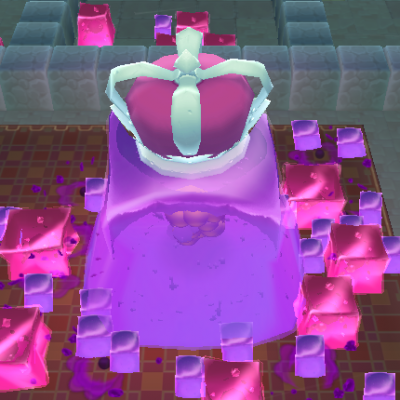
| − | + | | title = {{{name|Kellnox - Gyratic Paladin}}} | |
| − | | title = {{{name| | + | |
| body = | | body = | ||
{{SKWindow/NewRow}} | {{SKWindow/NewRow}} | ||
| − | {{SKWindow/EmptyCell|[[File:Kellnox.png]]}} | + | {{SKWindow/EmptyCell|[[File:Kellnox.png]]|center||2}} |
{{SKWindow/NewRow}} | {{SKWindow/NewRow}} | ||
| − | {{SKWindow/Cell|''' | + | {{SKWindow/Cell|'''Aliases/nicknames:'''|||2}} |
| − | + | ||
| − | + | ||
| − | + | ||
| − | + | ||
{{SKWindow/Cell|Kellnox, Kell, Kellnose, Kellogs, Kelly (ლ(ಠ益ಠლ)), Snaggles, Mike, Darryl|||2}} | {{SKWindow/Cell|Kellnox, Kell, Kellnose, Kellogs, Kelly (ლ(ಠ益ಠლ)), Snaggles, Mike, Darryl|||2}} | ||
{{SKWindow/NewRow}} | {{SKWindow/NewRow}} | ||
{{SKWindow/Cell|'''Joined:'''|||2}} | {{SKWindow/Cell|'''Joined:'''|||2}} | ||
{{SKWindow/Cell|06/16/2011|||2}} | {{SKWindow/Cell|06/16/2011|||2}} | ||
| + | {{SKWindow/NewRow}} | ||
| + | {{SKWindow/Cell|'''Tier clearance:'''|||2}} | ||
| + | {{SKWindow/Cell|Tier 3/Shadow Lair Level 3 clearance|||2}} | ||
{{SKWindow/NewRow}} | {{SKWindow/NewRow}} | ||
{{SKWindow/Cell|'''Guild:'''|||2}} | {{SKWindow/Cell|'''Guild:'''|||2}} | ||
| Line 24: | Line 23: | ||
{{SKWindow/Cell|Guild Master|||2}} | {{SKWindow/Cell|Guild Master|||2}} | ||
{{SKWindow/NewRow}} | {{SKWindow/NewRow}} | ||
| − | {{SKWindow/Cell|''' | + | {{SKWindow/Cell|'''Lockdown class:'''|||2}} |
| − | {{SKWindow/Cell| | + | {{SKWindow/Cell|Recon|||2}} |
{{SKWindow/NewRow}} | {{SKWindow/NewRow}} | ||
| − | {{SKWindow/Cell|''' | + | {{SKWindow/Cell|'''Mission rank:'''|||2}} |
| + | {{SKWindow/Cell|Vanguard|||2}} | ||
{{SKWindow/NewRow}} | {{SKWindow/NewRow}} | ||
| − | {{SKWindow/Cell|''' | + | {{SKWindow/Cell|'''Prestige:'''|||2}} |
| − | + | {{SKWindow/Cell|20,425|||2}} | |
| − | {{SKWindow/Cell| | + | |
{{SKWindow/NewRow}} | {{SKWindow/NewRow}} | ||
{{SKWindow/Cell|'''Personal color:'''|||2}} | {{SKWindow/Cell|'''Personal color:'''|||2}} | ||
| Line 37: | Line 36: | ||
{{SKWindow/NewRow}} | {{SKWindow/NewRow}} | ||
{{SKWindow/Cell|'''Eyes:'''|||2}} | {{SKWindow/Cell|'''Eyes:'''|||2}} | ||
| − | {{SKWindow/Cell|[[File:Usable- | + | {{SKWindow/Cell|[[File:Usable-Cheeky Eyes icon.png|Cheeky|35px]]|||2}} |
{{SKWindow/NewRow}} | {{SKWindow/NewRow}} | ||
{{SKWindow/Cell|'''Height:'''|||2}} | {{SKWindow/Cell|'''Height:'''|||2}} | ||
| − | {SKWindow/Cell|[[File:Usable-Normal Height Modifier.png|Normal|35px]]| | + | {{SKWindow/Cell|[[File:Usable-Normal Height Modifier.png|Normal|35px]]|||2}} |
| − | + | ||
| − | + | ||
| − | + | ||
| − | + | ||
| − | + | ||
}} | }} | ||
| − | + | I'M GONNA OVERHAUL THIS AND THE GYRAV PAGE SOON I SWEAR | |
| − | Last updated | + | Last updated 3/7/13. |
== Kellnox == | == Kellnox == | ||
| − | I'm a Tier 3 knight | + | I'm a Tier 3 knight who's been around for a while, and constantly taking breaks for other games ([[curse]] you Darksiders, Skyrim, and Skyward Sword!! D:). I'm a co-GM of the Gyro Avengers guild, and do stuff with furniture in the Adventure is Delicious SK blog on Tumblr. I also love thinking up ideas to make the game more fun, such as designing [[bosses]] and [[weapons]]. |
| − | |||
My links! | My links! | ||
Steam: http://steamcommunity.com/profiles/76561198046698171/ | Steam: http://steamcommunity.com/profiles/76561198046698171/ | ||
| + | |||
| + | Tumblr: http://kellnox.tumblr.com/ | ||
| + | |||
| + | AiD Tumblr: http://spiralsnipes.tumblr.com/ | ||
DeviantArt: http://kellnox.deviantart.com/ | DeviantArt: http://kellnox.deviantart.com/ | ||
| − | Youtube: http://www.youtube.com/user/paperoization/ | + | Youtube: http://www.youtube.com/user/paperoization/videos?view=0&flow=grid (ignore the U MAD? background, I haven't figured out how to change it for years) |
== Fun == | == Fun == | ||
| − | I like | + | Aside from the ever-obvious Clockworks and Missions, I like hanging out with guild members, lounging around in [[Haven]], Lockdown, Blast Network, doing basically nothing in the [[Advanced Training Hall]] ([[File:Equipment-Dread Venom Striker icon.png|35px|Dread Venom Striker]] + [[File:Equipment-Vog Cub Cap icon.png|35px|Vog Cub Cap]] + [[File:Equipment-Vog Cub Coat icon.png|35px|Vog Cub Coat]] + [[File:Equipment-Swiftstrike Buckler icon.png|35px|Swiftstrike Buckler]] = :D), running in circles, and exploring the wide world of the internet. |
| − | + | ||
| − | + | ||
| − | + | ||
---- | ---- | ||
| Line 79: | Line 73: | ||
== Gameplay == | == Gameplay == | ||
| − | I generally play Spiral Knights with a window at 1024x600x32 60Xz and | + | I generally play Spiral Knights with a window at 1024x600x32 60Xz and high graphics. |
My most used controls are set as: | My most used controls are set as: | ||
| Line 113: | Line 107: | ||
*[[File:Monster-Love Puppy.png|40px]] [[Gun Puppy|Love Puppy]] | *[[File:Monster-Love Puppy.png|40px]] [[Gun Puppy|Love Puppy]] | ||
*[[File:Monster-Golden Bog Wisp.png|40px]] [[Wisp|Golden Bog Wisp]] | *[[File:Monster-Golden Bog Wisp.png|40px]] [[Wisp|Golden Bog Wisp]] | ||
| + | *[[File:Monster-Golden Storm Wisp.png|40px]] [[Wisp|Golden Storm Wisp]] | ||
*[[File:Monster-Golden Volcanic Wisp.png|40px]] [[Wisp|Golden Volcanic Wisp]] | *[[File:Monster-Golden Volcanic Wisp.png|40px]] [[Wisp|Golden Volcanic Wisp]] | ||
*[[File:Monster-Golden Winter Wisp.png|40px]] [[Wisp|Golden Winter Wisp]] | *[[File:Monster-Golden Winter Wisp.png|40px]] [[Wisp|Golden Winter Wisp]] | ||
| Line 122: | Line 117: | ||
*[[File:Monster-Rock Jelly Cube.png|40px]] [[Rock Jelly Cube]] | *[[File:Monster-Rock Jelly Cube.png|40px]] [[Rock Jelly Cube]] | ||
*[[File:Monster-Sloom.png|40px]] [[Sloom]] | *[[File:Monster-Sloom.png|40px]] [[Sloom]] | ||
| − | |||
| − | |||
*[[File:Monster-Mewkat.png|40px]] [[Mewkat]] | *[[File:Monster-Mewkat.png|40px]] [[Mewkat]] | ||
}} | }} | ||
| − | {{showhide|[[File:Gate-Gloaming Wildwoods.png|15px]][[File:Gate-Ironclaw Munitions Factory.png|15px]][[File:Gate-Royal Jelly Palace.png|15px]][[File:Gate-Firestorm Citadel.png|15px]] [[Bosses]]|width= 500px|content= | + | {{showhide|[[File:Gate-Gloaming Wildwoods.png|15px]][[File:Gate-Ironclaw Munitions Factory.png|15px]][[File:Gate-Royal Jelly Palace.png|15px]][[File:Gate-Firestorm Citadel.png|15px]] [[Bosses|Bosses and minibosses]]|width= 500px|content= |
| − | + | ||
*[[File:Monster-Razwog.png|50px]] [[Schemer Razwog]] (Successfully solo killed, no damage [on new knight]) | *[[File:Monster-Razwog.png|50px]] [[Schemer Razwog]] (Successfully solo killed, no damage [on new knight]) | ||
| + | *[[File:Monster-Snarbolax.png|50px]] [[Snarbolax]] (Successfully solo killed while taking no damage, also killed using only the mouse, meaning only movement and attack were used) | ||
*[[File:Monster-Warmaster Seerus.png|50px]] [[Warmaster Seerus|Warmaster Seerus (T1)]] (Successfully solo killed, no deaths) | *[[File:Monster-Warmaster Seerus.png|50px]] [[Warmaster Seerus|Warmaster Seerus (T1)]] (Successfully solo killed, no deaths) | ||
*[[File:Monster-Roarmulus_Twins.png|50px]] [[Roarmulus Twins]] (Successfully solo killed, no deaths) | *[[File:Monster-Roarmulus_Twins.png|50px]] [[Roarmulus Twins]] (Successfully solo killed, no deaths) | ||
*[[File:Monster-Royal_Jelly.png|50px]] [[Royal Jelly]] (Successfully solo killed, no deaths) | *[[File:Monster-Royal_Jelly.png|50px]] [[Royal Jelly]] (Successfully solo killed, no deaths) | ||
*[[File:Monster-Warmaster Seerus.png|50px]] [[Warmaster Seerus|Warmaster Seerus (T2)]] (Successfully solo killed, no deaths) | *[[File:Monster-Warmaster Seerus.png|50px]] [[Warmaster Seerus|Warmaster Seerus (T2)]] (Successfully solo killed, no deaths) | ||
| + | *[[File:Monster-Toxilargo.png|40px]] [[Toxilargo]] | ||
| + | *[[File:Monster-Fallen Knight.png|40px]] [[Arkus]] | ||
| + | *[[File:Monster-Giant Toxoil.png|40px]][[File:Monster-Gremlin Incinerator.png|40px]] [[Lichen|Giant Toxoil]] x3 and [[Scorcher|Gremlin Incinerator]] x2 (Successfully solo killed, no deaths) | ||
| + | *[[File:Monster-Margrel.png|50px]] [[Kat|Margel]], but it wasn't my [[Book of Dark Rituals|book]]. | ||
*[[File:Monster-Lord_Vanaduke.png|50px]] [[Lord Vanaduke]] (Successfully killed, no deaths) | *[[File:Monster-Lord_Vanaduke.png|50px]] [[Lord Vanaduke]] (Successfully killed, no deaths) | ||
*[[File:Monster-Warmaster Seerus.png|50px]] [[Warmaster Seerus|Warmaster Seerus (T3)]] (Succesfully killed) | *[[File:Monster-Warmaster Seerus.png|50px]] [[Warmaster Seerus|Warmaster Seerus (T3)]] (Succesfully killed) | ||
*[[File:Monster-Rabid Snarbolax.png|50px]] [[Rabid Snarbolax|Rabid Snarbolaxes]] (Successfully killed) | *[[File:Monster-Rabid Snarbolax.png|50px]] [[Rabid Snarbolax|Rabid Snarbolaxes]] (Successfully killed) | ||
*[[File:Monster-Ice Queen.png|50px]] [[Ice Queen]] (Successfully killed) | *[[File:Monster-Ice Queen.png|50px]] [[Ice Queen]] (Successfully killed) | ||
| + | *[[File:Monster-Red Roarmulus Twins.png|50px]] [[Red Roarmulus Twins]] (Successfully killed) | ||
| + | *[[File:Monster-Darkfire Vanaduke.png|50px]] [[Darkfire Vanaduke]] (Successfully killed) | ||
}} | }} | ||
| Line 163: | Line 162: | ||
Oceanus | Oceanus | ||
| + | |||
| + | Hyperion | ||
| + | |||
| + | Coriolis | ||
| + | |||
| + | |||
Secrets known: | Secrets known: | ||
| − | Stone Grove's Secret Key | + | |
| − | Firestorm Citadel's Mysterious Button | + | Stone Grove's Secret Key: In the Aurora Isles - Stone Grove level, after the first room with the jellies, there is a "bridge" with some three-hit blocks above. One of them contains a switch that, when activated, spawns a few wolvers and a key. The key is used later in the level, after the following battle. |
| − | + | ||
| − | + | Firestorm Citadel's Mysterious Button: On Depth 27 of FSC, at the top of the first room (with fire blocking the stairs and a statue that needs to be placed), there is a wooden box surrounded by shadow fire. Douse the fire and break the box to reveal a button! This button creates a ghost block after the last battle on this floor on the left side of the stairs leading to the treasure boxes. Shoot at it (You can't really see it, just shoot around that area) to reveal a small pathway that leads to three treasure boxes. | |
| + | |||
| + | The Grand Arsenal's Ghost Blocks: On the third level of OCH, there's a hidden area that is accessed by throwing a pot, vial, or other projectile downwards at some Ghost Blocks, causing some unbreakable blocks to vanish. In this hidden area is a few mines and two red treasure boxes. [[File:OCH hidden area.jpg|250px]] | ||
== Arsenal == | == Arsenal == | ||
| Line 179: | Line 186: | ||
*I'm not just adding my good stuff. This is everything. | *I'm not just adding my good stuff. This is everything. | ||
| − | {{showhide|[[file:icon-sword.png|20px]] [[Sword]] ( | + | {{showhide|[[file:icon-sword.png|20px]] [[Sword]] (29)|width= 500px|content= |
| − | *[[File:Equipment-Acheron icon.png|35px]] [[Acheron]] {{star|5|color=6cb0b9}} (Given to me by Darkbladeofgod as a [[Nightblade]]) | + | *[[File:Equipment-Acheron icon.png|35px]] [[Acheron]] named Unex {{star|5|color=6cb0b9}} (Given to me by Darkbladeofgod as a [[Nightblade]]) |
| − | *[[File:Equipment-Barbarous Thorn Blade icon.png|35px]] [[Barbarous Thorn Blade|Thorn]] {{star|5|color=6cb0b9}} [[file:Unique variant icon.png|25px]] | + | *[[File:Equipment-Barbarous Thorn Blade icon.png|35px]] [[Barbarous Thorn Blade|Thorn]] {{star|5|color=6cb0b9}} [[file:Unique variant icon.png|25px]] Damage Bonus vs. Undead: Medium |
*[[File:Equipment-Divine Avenger icon.png|35px]] [[Divine Avenger]] {{star|5|color=6cb0b9}} [[file:Unique variant icon.png|25px]] Damage Bonus vs. Construct: Low | *[[File:Equipment-Divine Avenger icon.png|35px]] [[Divine Avenger]] {{star|5|color=6cb0b9}} [[file:Unique variant icon.png|25px]] Damage Bonus vs. Construct: Low | ||
*[[File:Equipment-Dread Venom Striker icon.png|35px]] [[Dread Venom Striker]] {{star|5|color=6cb0b9}} [[file:Unique variant icon.png|25px]] Charge Time Reduction: Low | *[[File:Equipment-Dread Venom Striker icon.png|35px]] [[Dread Venom Striker]] {{star|5|color=6cb0b9}} [[file:Unique variant icon.png|25px]] Charge Time Reduction: Low | ||
*[[File:Equipment-Fang of Vog icon.png|35px]] [[Fang of Vog]] {{star|5|color=6cb0b9}} | *[[File:Equipment-Fang of Vog icon.png|35px]] [[Fang of Vog]] {{star|5|color=6cb0b9}} | ||
| − | *[[File:Equipment-Gran Faust icon.png|35px]] [[Gran Faust]] {{star|5|color=6cb0b9}} (Given to me by Takendown as a [[Sealed Sword]], but I paid for the unbinding!) | + | *[[File:Equipment-Gran Faust icon.png|35px]] [[Gran Faust]] named Ibilis {{star|5|color=6cb0b9}} (Given to me by Takendown as a [[Sealed Sword]], but I paid for the unbinding!) |
| + | *[[File:Equipment-Leviathan Blade icon.png|35px]] [[Leviathan Blade]] {{star|5|color=6cb0b9}} (Given to me by Takendown as a [[Calibur]]) | ||
*[[File:Equipment-Voltedge icon.png|35px]] [[Voltedge]] {{star|5|color=6cb0b9}} | *[[File:Equipment-Voltedge icon.png|35px]] [[Voltedge]] {{star|5|color=6cb0b9}} | ||
| − | *[[File:Equipment-Warmaster Rocket Hammer icon.png|35px]] [[Warmaster Rocket Hammer]] {{star|5|color=6cb0b9}} | + | *[[File:Equipment-Warmaster Rocket Hammer icon.png|35px]] [[Warmaster Rocket Hammer]] {{star|5|color=6cb0b9}} [[file:Unique variant icon.png|25px]] Damage Bonus vs. Slime: Medium |
| − | *[[File:Equipment- | + | *[[File:Equipment-Robo Wrecker icon.png|35px]] [[Blazebrand]] {{star|4|color=6cb0b9}} |
*[[File:Equipment-Arc Razor icon.png|35px]] [[Arc Razor]] {{star|3|color=6cb0b9}} | *[[File:Equipment-Arc Razor icon.png|35px]] [[Arc Razor]] {{star|3|color=6cb0b9}} | ||
*[[File:Equipment-Cautery Sword icon.png|35px]] [[Cautery Sword]] {{star|3|color=6cb0b9}} | *[[File:Equipment-Cautery Sword icon.png|35px]] [[Cautery Sword]] {{star|3|color=6cb0b9}} | ||
| Line 205: | Line 213: | ||
*[[File:Equipment-Super Slime Slasher icon.png|35px]] [[Super Slime Slasher]] {{star|1|color=6cb0b9}} [[file:Unique variant icon.png|25px]] Charge Time Reduction: High | *[[File:Equipment-Super Slime Slasher icon.png|35px]] [[Super Slime Slasher]] {{star|1|color=6cb0b9}} [[file:Unique variant icon.png|25px]] Charge Time Reduction: High | ||
*[[File:Equipment-Thwack Hammer icon.png|35px]] [[Thwack Hammer]] {{star|1|color=6cb0b9}} | *[[File:Equipment-Thwack Hammer icon.png|35px]] [[Thwack Hammer]] {{star|1|color=6cb0b9}} | ||
| + | *[[File:Equipment-Robo Wrecker icon.png|35px]] [[Robo Wrecker]] {{star|0|color=6cb0b9}} | ||
*[[File:Equipment-Proto Sword icon.png|35px]] [[Proto Sword]] {{star|0|color=6cb0b9}} | *[[File:Equipment-Proto Sword icon.png|35px]] [[Proto Sword]] {{star|0|color=6cb0b9}} | ||
}} | }} | ||
| − | {{showhide|[[file:icon-handgun.png|20px]] [[Handgun]] ( | + | {{showhide|[[file:icon-handgun.png|20px]] [[Handgun]] (17)|width= 500px|content= |
| − | *[[File:Equipment-Argent Peacemaker icon.png|35px]] [[Argent Peacemaker]] {{star|5|color=6cb0b9}} | + | *[[File:Equipment-Argent Peacemaker icon.png|35px]] [[Argent Peacemaker]] named Azrael {{star|5|color=6cb0b9}} |
| + | *[[File:Equipment-Biohazard icon.png|35px]] [[Biohazard]] {{star|5|color=6cb0b9}} | ||
*[[File:Equipment-Blitz Needle icon.png|35px]] [[Blitz Needle]] {{star|5|color=6cb0b9}} | *[[File:Equipment-Blitz Needle icon.png|35px]] [[Blitz Needle]] {{star|5|color=6cb0b9}} | ||
| + | *[[File:Equipment-Nova Driver icon.png|35px]] [[Nova Driver]] {{star|5|color=6cb0b9}} [[file:Unique variant icon.png|25px]] Damage Bonus vs. Fiend: Low | ||
*[[File:Equipment-Polaris icon.png|35px]] [[Polaris]] {{star|5|color=6cb0b9}} | *[[File:Equipment-Polaris icon.png|35px]] [[Polaris]] {{star|5|color=6cb0b9}} | ||
| − | *[[File:Equipment-Sentenza icon.png|35px]] [[Sentenza]] {{star|5|color=6cb0b9}} | + | *[[File:Equipment-Sentenza icon.png|35px]] [[Sentenza]] named Belphegor {{star|5|color=6cb0b9}} |
| + | *[[File:Equipment-Fiery Pepperbox icon.png |35px]] [[Fiery Pepperbox]] {{star|4|color=6cb0b9}} [[file:Unique variant icon.png|25px]]/[[file:Unique variant icon.png|25px]] Damage Bonus vs. Gremlin: Low/Charge Time Reduction: Low | ||
*[[File:Equipment-Mega Magnus icon.png|35px]] [[Mega Magnus]] {{star|4|color=6cb0b9}} | *[[File:Equipment-Mega Magnus icon.png|35px]] [[Mega Magnus]] {{star|4|color=6cb0b9}} | ||
| − | |||
*[[File:Equipment-Shadow Driver icon.png |35px]] [[Shadow Driver]] {{star|4|color=6cb0b9}} | *[[File:Equipment-Shadow Driver icon.png |35px]] [[Shadow Driver]] {{star|4|color=6cb0b9}} | ||
| + | *[[File:Equipment-Antigua icon.png|35px]] [[Antigua]] {{star|3|color=6cb0b9}} | ||
| + | *[[File:Equipment-Super Blaster icon.png|35px]] [[Super Blaster]] {{star|3|color=6cb0b9}} | ||
*[[File:Equipment-Voltech Alchemer Mk II icon.png|35px]] [[Voltech Alchemer Mk II]] {{star|3|color=6cb0b9}} | *[[File:Equipment-Voltech Alchemer Mk II icon.png|35px]] [[Voltech Alchemer Mk II]] {{star|3|color=6cb0b9}} | ||
| − | |||
| − | |||
*[[File:Equipment-Cryotech Alchemer icon.png|35px]] [[Cryotech Alchemer]] {{star|2|color=6cb0b9}} | *[[File:Equipment-Cryotech Alchemer icon.png|35px]] [[Cryotech Alchemer]] {{star|2|color=6cb0b9}} | ||
*[[File:Equipment-Firotech Alchemer icon.png|35px]] [[Firotech Alchemer]] {{star|2|color=6cb0b9}} | *[[File:Equipment-Firotech Alchemer icon.png|35px]] [[Firotech Alchemer]] {{star|2|color=6cb0b9}} | ||
| − | |||
*[[File:Equipment-Pulsar icon.png|35px]] [[Pulsar]] {{star|2|color=6cb0b9}} | *[[File:Equipment-Pulsar icon.png|35px]] [[Pulsar]] {{star|2|color=6cb0b9}} | ||
*[[File:Equipment-Punch Gun icon.png|35px]] [[Punch Gun]] {{star|0|color=6cb0b9}} | *[[File:Equipment-Punch Gun icon.png|35px]] [[Punch Gun]] {{star|0|color=6cb0b9}} | ||
| Line 227: | Line 237: | ||
}} | }} | ||
| − | {{showhide|[[file:icon-bomb.png|20px]] [[Bomb]] ( | + | {{showhide|[[file:icon-bomb.png|20px]] [[Bomb]] (18)|width= 500px|content= |
*[[File:Equipment-Dark Briar Barrage icon.png|35px]] [[Dark Briar Barrage]] {{star|5|color=6cb0b9}} [[file:Unique variant icon.png|25px]] Damage Bonus vs. Slime: Low | *[[File:Equipment-Dark Briar Barrage icon.png|35px]] [[Dark Briar Barrage]] {{star|5|color=6cb0b9}} [[file:Unique variant icon.png|25px]] Damage Bonus vs. Slime: Low | ||
*[[File:Equipment-Dark Retribution icon.png|35px]] [[Dark Retribution]] {{star|5|color=6cb0b9}} | *[[File:Equipment-Dark Retribution icon.png|35px]] [[Dark Retribution]] {{star|5|color=6cb0b9}} | ||
| + | *[[File:Equipment-Shivermist Buster icon.png|35px]] [[Shivermist Buster]] {{star|5|color=6cb0b9}} | ||
| + | *[[File:Equipment-Voltaic Tempest icon.png|35px]] [[Voltaic Tempest]] {{star|5|color=6cb0b9}} | ||
*[[File:Equipment-Fiery Atomizer icon.png|35px]] [[Fiery Atomizer]] {{star|4|color=6cb0b9}} | *[[File:Equipment-Fiery Atomizer icon.png|35px]] [[Fiery Atomizer]] {{star|4|color=6cb0b9}} | ||
| − | *[[File:Equipment- | + | *[[File:Equipment-Ionized Salt Bomb icon.png|35px]] [[Ionized Salt Bomb]] {{star|4|color=6cb0b9}} |
| + | *[[File:Equipment-Radiant Sun Shards icon.png|35px]] [[Sun Shards]] {{star|4|color=6cb0b9}} [[file:Unique variant icon.png|25px]] Damage Bonus vs. Fiend: Low | ||
*[[File:Equipment-Dark Reprisal Mk II icon.png|35px]] [[Dark Reprisal Mk II]] {{star|3|color=6cb0b9}} | *[[File:Equipment-Dark Reprisal Mk II icon.png|35px]] [[Dark Reprisal Mk II]] {{star|3|color=6cb0b9}} | ||
*[[File:Equipment-Electron Charge icon.png|35px]] [[Electron Charge]] {{star|3|color=6cb0b9}} | *[[File:Equipment-Electron Charge icon.png|35px]] [[Electron Charge]] {{star|3|color=6cb0b9}} | ||
| − | *[[File:Equipment-Graviton Charge icon.png|35px]] [[Graviton Charge]] | + | *[[File:Equipment-Graviton Charge icon.png|35px]] [[Graviton Charge]] named Mammon {{star|3|color=6cb0b9}} |
| − | + | ||
| − | + | ||
*[[File:Equipment-Dark Reprisal icon.png|35px]] [[Dark Reprisal]] {{star|2|color=6cb0b9}} | *[[File:Equipment-Dark Reprisal icon.png|35px]] [[Dark Reprisal]] {{star|2|color=6cb0b9}} | ||
| − | |||
*[[File:Equipment-Toxic Vaporizer icon.png|35px]] [[Toxic Vaporizer]] {{star|2|color=6cb0b9}} | *[[File:Equipment-Toxic Vaporizer icon.png|35px]] [[Toxic Vaporizer]] {{star|2|color=6cb0b9}} | ||
| − | *[[File:Equipment-Cold Snap icon.png|35px]] [[Cold Snap]] {{star|1|color=6cb0b9}} | + | *[[File:Equipment-Cold Snap icon.png|35px]] [[Cold Snap]] {{star|1|color=6cb0b9}} [[file:Unique variant icon.png|25px]] Charge Time Reduction: Medium |
| − | *[[File:Equipment-Firecracker icon.png|35px]] [[Firecracker]] {{star|1|color=6cb0b9}} | + | *[[File:Equipment-Firecracker icon.png|35px]] [[Firecracker]] {{star|1|color=6cb0b9}} [[file:Unique variant icon.png|25px]] Charge Time Reduction: Medium |
*[[File:Equipment-Static Flash icon.png|35px]] [[Static Flash]] {{star|1|color=6cb0b9}} | *[[File:Equipment-Static Flash icon.png|35px]] [[Static Flash]] {{star|1|color=6cb0b9}} | ||
*[[File:Equipment-Static Flash icon.png|35px]] [[Static Flash]] {{star|1|color=6cb0b9}} | *[[File:Equipment-Static Flash icon.png|35px]] [[Static Flash]] {{star|1|color=6cb0b9}} | ||
| − | *[[File:Equipment- | + | *[[File:Equipment-Proto Bomb icon.png|35px]] [[Proto Bomb]] {{star|0|color=6cb0b9}} [[file:Unique variant icon.png|25px]] Charge Time Reduction: High |
| − | + | ||
}} | }} | ||
| Line 263: | Line 272: | ||
*[[File:Equipment-Solid Cobalt Helm icon.png|35px]] [[Solid Cobalt Helm]] {{star|3|color=6cb0b9}} | *[[File:Equipment-Solid Cobalt Helm icon.png|35px]] [[Solid Cobalt Helm]] {{star|3|color=6cb0b9}} | ||
*[[File:Equipment-Jelly Helm icon.png|35px]] [[Jelly Helm]] {{star|2|color=6cb0b9}} | *[[File:Equipment-Jelly Helm icon.png|35px]] [[Jelly Helm]] {{star|2|color=6cb0b9}} | ||
| − | *[[File:Equipment-Magic Hood icon.png|35px]] [[Magic Hood]] {{star|2|color=6cb0b9}} +[[File:Equipment-Cool Headband icon.png|35px|Cool Headband]] [[File:Equipment- | + | *[[File:Equipment-Magic Hood icon.png|35px]] [[Magic Hood]] {{star|2|color=6cb0b9}} +[[File:Equipment-Cool Headband icon.png|35px|Cool Headband]] [[File:Equipment-Military Helm Guards icon.png|35px|Military Helm Guards]]+ |
| − | *[[File:Equipment-Spiral Plate Helm icon.png|35px]] [[Spiral Plate Helm]] {{star|2|color=6cb0b9}}[[File:Equipment-Fractured Mask of Seerus icon.png|35px]] [[Fractured Mask of Seerus]] {{star|1|color=6cb0b9}} | + | *[[File:Equipment-Spiral Plate Helm icon.png|35px]] [[Spiral Plate Helm]] {{star|2|color=6cb0b9}} |
| + | *[[File:Equipment-Fractured Mask of Seerus icon.png|35px]] [[Fractured Mask of Seerus]] {{star|1|color=6cb0b9}} | ||
*[[File:Equipment-Spiral Scale Helm icon.png|35px]] [[Spiral Scale Helm]] {{star|1|color=6cb0b9}} | *[[File:Equipment-Spiral Scale Helm icon.png|35px]] [[Spiral Scale Helm]] {{star|1|color=6cb0b9}} | ||
*[[File:Equipment-Cyclops Cap icon.png|35px]] [[Cyclops Cap]] {{star|0|color=6cb0b9}} | *[[File:Equipment-Cyclops Cap icon.png|35px]] [[Cyclops Cap]] {{star|0|color=6cb0b9}} | ||
| Line 277: | Line 287: | ||
*[[File:Equipment-Heavy Demo Suit icon.png|35px]] [[Heavy Demo Suit]] {{star|4|color=6cb0b9}} +[[File:Equipment-Pumpkin Bomb Bandolier icon.png|35px|Pumpkin Bomb Bandolier]]+ | *[[File:Equipment-Heavy Demo Suit icon.png|35px]] [[Heavy Demo Suit]] {{star|4|color=6cb0b9}} +[[File:Equipment-Pumpkin Bomb Bandolier icon.png|35px|Pumpkin Bomb Bandolier]]+ | ||
*[[File:Equipment-Miracle Cloak icon.png|35px]] [[Miracle Cloak]] {{star|4|color=6cb0b9}} | *[[File:Equipment-Miracle Cloak icon.png|35px]] [[Miracle Cloak]] {{star|4|color=6cb0b9}} | ||
| − | *[[File:Equipment-Seraphic Mail icon.png|35px]] [[Seraphic | + | *[[File:Equipment-Seraphic Mail icon.png|35px]] [[Seraphic Mail]] {{star|4|color=6cb0b9}} |
*[[File:Equipment-Sunset Duster icon.png|35px]] [[Sunset Duster]] {{star|4|color=6cb0b9}} | *[[File:Equipment-Sunset Duster icon.png|35px]] [[Sunset Duster]] {{star|4|color=6cb0b9}} | ||
*[[File:Equipment-Brute Jelly Mail icon.png|35px]] [[Brute Jelly Mail]] {{star|3|color=6cb0b9}} | *[[File:Equipment-Brute Jelly Mail icon.png|35px]] [[Brute Jelly Mail]] {{star|3|color=6cb0b9}} | ||
| Line 292: | Line 302: | ||
}} | }} | ||
| − | {{showhide|[[file:icon-shield.png|20px]] [[Shield]] ( | + | {{showhide|[[file:icon-shield.png|20px]] [[Shield]] (19)|width= 500px|content= |
*[[File:Equipment-Barbarous Thorn Shield icon.png|35px]] [[Barbarous Thorn Shield]] {{star|5|color=6cb0b9}} | *[[File:Equipment-Barbarous Thorn Shield icon.png|35px]] [[Barbarous Thorn Shield]] {{star|5|color=6cb0b9}} | ||
*[[File:Equipment-Crest of Almire icon.png|35px]] [[Crest of Almire]] {{star|5|color=6cb0b9}} | *[[File:Equipment-Crest of Almire icon.png|35px]] [[Crest of Almire]] {{star|5|color=6cb0b9}} | ||
*[[File:Equipment-Grey Owlite Shield icon.png|35px]] [[Grey Owlite Shield]] {{star|5|color=6cb0b9}} [[file:Unique variant icon.png|25px]] Increased Curse Resistance: Low | *[[File:Equipment-Grey Owlite Shield icon.png|35px]] [[Grey Owlite Shield]] {{star|5|color=6cb0b9}} [[file:Unique variant icon.png|25px]] Increased Curse Resistance: Low | ||
| + | *[[File:Equipment-Blackened Crest icon.png|35px]] [[Blackened Crest]] {{star|4|color=6cb0b9}} | ||
*[[File:Equipment-Mighty Defender icon.png|35px]] [[Mighty Defender]] {{star|4|color=6cb0b9}} | *[[File:Equipment-Mighty Defender icon.png|35px]] [[Mighty Defender]] {{star|4|color=6cb0b9}} | ||
*[[File:Equipment-Brute Jelly Shield icon.png|35px]] [[Brute Jelly Shield]] {{star|3|color=6cb0b9}} | *[[File:Equipment-Brute Jelly Shield icon.png|35px]] [[Brute Jelly Shield]] {{star|3|color=6cb0b9}} | ||
| Line 302: | Line 313: | ||
*[[File:Equipment-Bristling Buckler icon.png|35px]] [[Bristling Buckler]] {{star|2|color=6cb0b9}} | *[[File:Equipment-Bristling Buckler icon.png|35px]] [[Bristling Buckler]] {{star|2|color=6cb0b9}} | ||
*[[File:Equipment-Firebreak Shield icon.png|35px]] [[Firebreak Shield]] {{star|2|color=6cb0b9}} | *[[File:Equipment-Firebreak Shield icon.png|35px]] [[Firebreak Shield]] {{star|2|color=6cb0b9}} | ||
| − | *[[File:Equipment-Jelly Shield icon.png|35px]] [[Jelly Shield]] {{star|2|color=6cb0b9}} | + | *[[File:Equipment-Icebreaker Shield icon.png|35px]] [[Icebreaker Shield]] {{star|2|color=6cb0b9}} |
| + | *[[File:Equipment-Jelly Shield icon.png|35px]] [[Jelly Shield]] named Blink {{star|2|color=6cb0b9}} | ||
*[[File:Equipment-Plate Shield icon.png|35px]] [[Plate Shield]] {{star|2|color=6cb0b9}} | *[[File:Equipment-Plate Shield icon.png|35px]] [[Plate Shield]] {{star|2|color=6cb0b9}} | ||
| − | *[[File:Equipment- | + | *[[File:Equipment-Volt Breaker Shield icon.png|35px]] [[Volt Breaker Shield]] {{star|2|color=6cb0b9}} |
*[[File:Equipment-Green Ward icon.png|35px]] [[Green Ward]] {{star|1|color=6cb0b9}} | *[[File:Equipment-Green Ward icon.png|35px]] [[Green Ward]] {{star|1|color=6cb0b9}} | ||
*[[File:Equipment-Green Ward icon.png|35px]] [[Green Ward]] {{star|1|color=6cb0b9}} | *[[File:Equipment-Green Ward icon.png|35px]] [[Green Ward]] {{star|1|color=6cb0b9}} | ||
| − | *[[File:Equipment-Iron Buckler icon.png|35px]] [[Iron Buckler]] {{star|0|color=6cb0b9}} | + | *[[File:Equipment-Iron Buckler icon.png|35px]] [[Iron Buckler]] [[file:Unique variant icon.png|25px]] Increased Stun Resistance: Medium {{star|0|color=6cb0b9}} |
*[[File:Equipment-Proto Shield icon.png|35px]] [[Proto Shield]] {{star|0|color=6cb0b9}} | *[[File:Equipment-Proto Shield icon.png|35px]] [[Proto Shield]] {{star|0|color=6cb0b9}} | ||
}} | }} | ||
| − | {{showhide|[[file:icon-costume.png|20px]] [[Visual Encyclopedia/Equipment/Other|Costume]] ( | + | {{showhide|[[file:icon-costume.png|20px]] [[Visual Encyclopedia/Equipment/Other|Costume]] (14)|width= 500px|content= |
*[[File:Equipment-Authentic Frankenzom Mask icon.png|35px]] [[Authentic Frankenzom Mask]] | *[[File:Equipment-Authentic Frankenzom Mask icon.png|35px]] [[Authentic Frankenzom Mask]] | ||
*[[File:Equipment-Authentic Phantom Mask icon.png|35px]] [[Authentic Phantom Mask]] | *[[File:Equipment-Authentic Phantom Mask icon.png|35px]] [[Authentic Phantom Mask]] | ||
*[[File:Equipment-Authentic Spookat Mask icon.png|35px]] [[Authentic Spookat Mask]] | *[[File:Equipment-Authentic Spookat Mask icon.png|35px]] [[Authentic Spookat Mask]] | ||
*[[File:Equipment-Divine Stranger Hat icon.png|35px]] [[Divine Stranger Hat]] (Given to me by Sypherf) | *[[File:Equipment-Divine Stranger Hat icon.png|35px]] [[Divine Stranger Hat]] (Given to me by Sypherf) | ||
| − | *[[File:Equipment- | + | *[[File:Equipment-Heavenly Guardian Armor icon.png|35px]] [[Heavenly Guardian Armor]] |
| + | *[[File:Equipment-Heavenly Guardian Helm icon.png|35px]] [[Heavenly Guardian Helm]] | ||
| + | *[[File:Equipment-Infernal Guardian Armor icon.png|35px]] [[Infernal Guardian Armor]] | ||
| + | *[[File:Equipment-Infernal Guardian Helm icon.png|35px]] [[Infernal Guardian Helm]] | ||
| + | *[[File:Equipment-Onyx Bombhead Mask icon.png|35px]] [[Onyx Bombhead Mask]] | ||
*[[File:Equipment-Plasmatech Bombhead Mask icon.png|35px]] [[Plasmatech Bombhead Mask]] | *[[File:Equipment-Plasmatech Bombhead Mask icon.png|35px]] [[Plasmatech Bombhead Mask]] | ||
*[[File:Equipment-Plasmatech Demo Suit icon.png|35px]] [[Plasmatech Demo Suit]] | *[[File:Equipment-Plasmatech Demo Suit icon.png|35px]] [[Plasmatech Demo Suit]] | ||
*[[File:Equipment-Prismatic Frosted Helm icon.png|35px]] [[Prismatic Frosted Helm]] | *[[File:Equipment-Prismatic Frosted Helm icon.png|35px]] [[Prismatic Frosted Helm]] | ||
*[[File:Equipment-Spiral Bombhead Mask icon.png|35px]] [[Spiral Bombhead Mask]] | *[[File:Equipment-Spiral Bombhead Mask icon.png|35px]] [[Spiral Bombhead Mask]] | ||
| + | *[[File:Equipment-Steam Knight Mask icon.png|35px]] [[Steam Knight Mask]] +[[File:Equipment-Heavy Wide Vee icon.png|35px|Heavy Wide Vee]]+ | ||
}} | }} | ||
| − | {{showhide|[[file:icon-trinket.png|20px]] [[Trinket]] ( | + | {{showhide|[[file:icon-trinket.png|20px]] [[Trinket]] (13)|width= 500px|content= |
*[[File:Equipment-Dread Skelly Charm icon.png|35px]] [[Dread Skelly Charm]] {{star|5|color=6cb0b9}} | *[[File:Equipment-Dread Skelly Charm icon.png|35px]] [[Dread Skelly Charm]] {{star|5|color=6cb0b9}} | ||
| + | *[[File:Equipment-Dread Skelly Charm icon.png|35px]] [[Dread Skelly Charm]] {{star|5|color=6cb0b9}} | ||
| + | *[[File:Equipment-Elite Quick Strike Module icon.png|35px]] [[Elite Quick Strike Module]] {{star|5|color=6cb0b9}} | ||
*[[File:Equipment-Elite Slash Module icon.png|35px]] [[Elite Slash Module]] {{star|5|color=6cb0b9}} | *[[File:Equipment-Elite Slash Module icon.png|35px]] [[Elite Slash Module]] {{star|5|color=6cb0b9}} | ||
| + | *[[File:Equipment-Penta-Heart Pendant icon.png|35px]] [[Penta-Heart Pendant]] {{star|5|color=6cb0b9}} | ||
*[[File:Equipment-Penta-Heart Pendant icon.png|35px]] [[Penta-Heart Pendant]] {{star|5|color=6cb0b9}} | *[[File:Equipment-Penta-Heart Pendant icon.png|35px]] [[Penta-Heart Pendant]] {{star|5|color=6cb0b9}} | ||
*[[File:Equipment-Purrfect Katnip Pouch icon.png|35px]] [[Purrfect Katnip Pouch]] {{star|5|color=6cb0b9}} | *[[File:Equipment-Purrfect Katnip Pouch icon.png|35px]] [[Purrfect Katnip Pouch]] {{star|5|color=6cb0b9}} | ||
| + | *[[File:Equipment-Purrfect Katnip Pouch icon.png|35px]] [[Purrfect Katnip Pouch]] {{star|5|color=6cb0b9}} | ||
| + | *[[File:Equipment-Radiant Crystal Pin icon.png|35px]] [[Radiant Crystal Pin]] {{star|5|color=6cb0b9}} | ||
*[[File:Equipment-Royal Jelly Band icon.png|35px]] [[Royal Jelly Band]] {{star|5|color=6cb0b9}} | *[[File:Equipment-Royal Jelly Band icon.png|35px]] [[Royal Jelly Band]] {{star|5|color=6cb0b9}} | ||
*[[File:Equipment-Royal Jelly Band icon.png|35px]] [[Royal Jelly Band]] {{star|5|color=6cb0b9}} | *[[File:Equipment-Royal Jelly Band icon.png|35px]] [[Royal Jelly Band]] {{star|5|color=6cb0b9}} | ||
| − | *[[File:Equipment-Slash Module icon.png|35px]] [[Slash Module]] {{star|4|color=6cb0b9}} | + | *[[File:Equipment-Slash Module icon.png|35px]] [[Slash Module]] {{star|4|color=6cb0b9}} |
| − | *[[File:Equipment- | + | *[[File:Equipment-Dewy Wetstone Pendant icon.png|35px]] [[Dewy Wetstone Pendant]] {{star|3|color=6cb0b9}} |
}} | }} | ||
| − | {{showhide|[[File:Icon-recipe.png|20px]] [[Recipe]] ( | + | {{showhide|[[File:Icon-recipe.png|20px]] [[Recipe]] (7)|width= 500px|content= |
| − | + | ||
*[[File:Equipment-Valiance icon.png|35px]] [[Valiance]] {{star|5|color=6cb0b9}} (Bound) | *[[File:Equipment-Valiance icon.png|35px]] [[Valiance]] {{star|5|color=6cb0b9}} (Bound) | ||
| − | |||
*[[File:Equipment-Azure Guardian Helm icon.png|35px]] [[Azure Guardian Helm]] {{star|5|color=6cb0b9}} (Bound) | *[[File:Equipment-Azure Guardian Helm icon.png|35px]] [[Azure Guardian Helm]] {{star|5|color=6cb0b9}} (Bound) | ||
*[[File:Equipment-Azure Guardian Armor icon.png|35px]] [[Azure Guardian Armor]] {{star|5|color=6cb0b9}} (Bound) | *[[File:Equipment-Azure Guardian Armor icon.png|35px]] [[Azure Guardian Armor]] {{star|5|color=6cb0b9}} (Bound) | ||
*[[File:Equipment-Aegis icon.png|35px]] [[Aegis]] {{star|5|color=6cb0b9}} (Bound) | *[[File:Equipment-Aegis icon.png|35px]] [[Aegis]] {{star|5|color=6cb0b9}} (Bound) | ||
*[[File:Equipment-Master Blaster icon.png|35px]] [[Master Blaster]] {{star|4|color=6cb0b9}} (Bound) | *[[File:Equipment-Master Blaster icon.png|35px]] [[Master Blaster]] {{star|4|color=6cb0b9}} (Bound) | ||
| − | |||
| − | |||
| − | |||
| − | |||
*[[File:Equipment-Elemental Hood icon.png|35px]] [[Elemental Hood]] {{star|3|color=6cb0b9}} | *[[File:Equipment-Elemental Hood icon.png|35px]] [[Elemental Hood]] {{star|3|color=6cb0b9}} | ||
*[[File:Equipment-Emberbreak Helm icon.png|35px]] [[Emberbreak Helm]] {{star|1|color=6cb0b9}} (Bound) | *[[File:Equipment-Emberbreak Helm icon.png|35px]] [[Emberbreak Helm]] {{star|1|color=6cb0b9}} (Bound) | ||
| Line 351: | Line 367: | ||
{{showhide|[[file:icon-token.png|20px]] [[Token]] (8)|width= 500px|content= | {{showhide|[[file:icon-token.png|20px]] [[Token]] (8)|width= 500px|content= | ||
| − | *[[File:Token-Primal Spark.png |35px]] Primal Spark | + | *[[File:Token-Primal Spark.png |35px]] Primal Spark x53 |
| − | *[[File:Token-Grim Spark.png |35px]] Grim Spark | + | *[[File:Token-Grim Spark.png |35px]] Grim Spark x81 |
| − | *[[File:Token-Forge Spark.png |35px]] Forge Spark | + | *[[File:Token-Forge Spark.png |35px]] Forge Spark x1 |
| − | *[[File:Token-Frumious Fang.png |35px]] Frumious Fang | + | *[[File:Token-Frumious Fang.png |35px]] Frumious Fang x84 |
| − | *[[File:Token-Bark Module.png |35px]] Bark Module | + | *[[File:Token-Bark Module.png |35px]] Bark Module x54 |
| − | *[[File:Token-Jelly Gem.png |35px]] Jelly Gem | + | *[[File:Token-Jelly Gem.png |35px]] Jelly Gem x96 |
| − | *[[File:Token-Almirian Seal.png |35px]] Almirian Seal | + | *[[File:Token-Almirian Seal.png |35px]] Almirian Seal x11 |
| − | *[[File:Token-Krogmo Coin.png |35px]] Krogmo Coin | + | *[[File:Token-Krogmo Coin.png |35px]] Krogmo Coin x79 |
}} | }} | ||
| − | {{showhide|[[file:icon-artifact.png|20px]] [[Artifact]] ( | + | {{showhide|[[file:icon-artifact.png|20px]] [[Artifact]] (12)|width= 500px|content= |
*[[File:Artifact-Echo Stone.png|35px]] Echo Stone: Gloaming Wildwoods | *[[File:Artifact-Echo Stone.png|35px]] Echo Stone: Gloaming Wildwoods | ||
| + | *[[File:Artifact-Echo Stone.png|35px]] Echo Stone: Ironclaw Munitions Factory | ||
*[[File:Artifact-Echo Stone.png|35px]] Echo Stone: Royal Jelly Palace | *[[File:Artifact-Echo Stone.png|35px]] Echo Stone: Royal Jelly Palace | ||
| + | *[[File:Artifact-Echo Stone.png|35px]] Echo Stone: Firestorm Citadel | ||
*[[File:Artifact-Hatch Handle.png |35px]] Hatch Handle | *[[File:Artifact-Hatch Handle.png |35px]] Hatch Handle | ||
*[[File:Artifact-Medal of Monstrous Merit.png |35px]] Medal of Monstrous Merit | *[[File:Artifact-Medal of Monstrous Merit.png |35px]] Medal of Monstrous Merit | ||
| Line 377: | Line 395: | ||
*[[File:Equipment-Deconstructor Crest icon.png |35px]] Deconstructor Crest | *[[File:Equipment-Deconstructor Crest icon.png |35px]] Deconstructor Crest | ||
*[[File:Equipment-Dismantler Crest icon.png |35px]] Dismantler Crest | *[[File:Equipment-Dismantler Crest icon.png |35px]] Dismantler Crest | ||
| − | |||
*[[File:Equipment-Exorcisor Crest icon.png |35px]] Excorciser Crest | *[[File:Equipment-Exorcisor Crest icon.png |35px]] Excorciser Crest | ||
*[[File:Equipment-Ghostbuster Crest icon.png |35px]] Ghostbuster Crest | *[[File:Equipment-Ghostbuster Crest icon.png |35px]] Ghostbuster Crest | ||
| Line 384: | Line 401: | ||
*[[File:Equipment-Fancy Parrying Blade icon.png |35px]] Fancy Parrying Blade | *[[File:Equipment-Fancy Parrying Blade icon.png |35px]] Fancy Parrying Blade | ||
*[[File:Equipment-Proto Crest icon.png |35px]] Proto Crest | *[[File:Equipment-Proto Crest icon.png |35px]] Proto Crest | ||
| + | *[[File:Equipment-Azure Guardian Crest icon.png |35px]] Azure Guardian Crest | ||
*[[File:Equipment-Vanguard Crest icon.png |35px]] Vanguard Crest | *[[File:Equipment-Vanguard Crest icon.png |35px]] Vanguard Crest | ||
*[[File:Equipment-Vanguard Crest icon.png |35px]] Vanguard Crest | *[[File:Equipment-Vanguard Crest icon.png |35px]] Vanguard Crest | ||
| Line 397: | Line 415: | ||
{{showhide|[[File:Icon-accessory.png|20px]] Seeked [[Accessory]] (3)|width= 510px|content= | {{showhide|[[File:Icon-accessory.png|20px]] Seeked [[Accessory]] (3)|width= 510px|content= | ||
*[[File:Equipment-Cool Glasses icon.png |35px]] Cool Glasses | *[[File:Equipment-Cool Glasses icon.png |35px]] Cool Glasses | ||
| − | *[[File:Equipment- | + | *[[File:Equipment-Shadow Dragon Wings icon.png |35px]] Shadow Dragon Wings |
*[[File:Equipment-Twilight Aura icon.png |35px]] Twilight Aura (MUST. GET. EVENTUALLY. AUFADUJAGFADJGAJGSGJSJGS.) | *[[File:Equipment-Twilight Aura icon.png |35px]] Twilight Aura (MUST. GET. EVENTUALLY. AUFADUJAGFADJGAJGSGJSJGS.) | ||
}} | }} | ||
| − | |||
| − | |||
| − | |||
| − | |||
| − | |||
| − | |||
| − | |||
| − | |||
| − | |||
| − | |||
| − | |||
| − | |||
| − | |||
| − | |||
| − | |||
| − | |||
| − | |||
| − | |||
| − | |||
| − | |||
| − | |||
| − | |||
| − | |||
| − | |||
| − | |||
| − | |||
| − | |||
| − | |||
| − | |||
| − | |||
== Other Random Crap == | == Other Random Crap == | ||
| Line 445: | Line 433: | ||
*[[File:Equipment-Metal Sonic Mask icon.png|35px]] [[Metal Sonic Mask]] | *[[File:Equipment-Metal Sonic Mask icon.png|35px]] [[Metal Sonic Mask]] | ||
| − | |||
*[[File:Equipment-Supernova icon.png|35px]] [[Supernova]] recipe {{star|5|color=6cb0b9}} | *[[File:Equipment-Supernova icon.png|35px]] [[Supernova]] recipe {{star|5|color=6cb0b9}} | ||
| − | *[[File:Equipment- | + | *[[File:Equipment-Crest of Almire icon.png|35px]] [[Crest of Almire]] recipe {{star|5|color=6cb0b9}} |
| + | *[[File:Equipment-Faust icon.png|35px]] [[Faust]] recipe {{star|4|color=6cb0b9}} | ||
| + | *[[File:Equipment-Dark Thorn Shield icon.png|35px]] [[Dark Thorn Shield]] recipe {{star|4|color=6cb0b9}} | ||
*[[File:Equipment-Twisted Targe icon.png|35px]] [[Twisted Targe]] recipe {{star|3|color=6cb0b9}} | *[[File:Equipment-Twisted Targe icon.png|35px]] [[Twisted Targe]] recipe {{star|3|color=6cb0b9}} | ||
| − | *[[File: | + | *[[File:Equipment-Toasty Canteen icon.png |35px]] Toasty Canteen |
| − | *[[File:Equipment- | + | *[[File:Equipment-Toasty Vented Visor icon.png |35px]] Toasty Vented Visor |
| − | + | *[[File:Equipment-Volcanic Spike Mohawk icon.png |35px]] Volcanic Spike Mohawk | |
| − | + | ||
| − | + | ||
| − | + | ||
| − | + | ||
| − | + | ||
| − | + | ||
| − | + | ||
| − | * | + | |
| − | + | ||
| − | [[File: | + | |
| − | + | ||
| − | + | ||
| − | + | ||
| − | + | ||
| − | |||
Latest revision as of 02:53, 7 February 2015
| ||||||||||||||||||||||||||||||||||||||||||||||
| ||||||||||||||||||||||||||||||||||||||||||||||

I'M GONNA OVERHAUL THIS AND THE GYRAV PAGE SOON I SWEAR
Last updated 3/7/13.
Contents
Kellnox
I'm a Tier 3 knight who's been around for a while, and constantly taking breaks for other games (curse you Darksiders, Skyrim, and Skyward Sword!! D:). I'm a co-GM of the Gyro Avengers guild, and do stuff with furniture in the Adventure is Delicious SK blog on Tumblr. I also love thinking up ideas to make the game more fun, such as designing bosses and weapons.
My links!
Steam: http://steamcommunity.com/profiles/76561198046698171/
Tumblr: http://kellnox.tumblr.com/
AiD Tumblr: http://spiralsnipes.tumblr.com/
DeviantArt: http://kellnox.deviantart.com/
Youtube: http://www.youtube.com/user/paperoization/videos?view=0&flow=grid (ignore the U MAD? background, I haven't figured out how to change it for years)
Fun
Aside from the ever-obvious Clockworks and Missions, I like hanging out with guild members, lounging around in Haven, Lockdown, Blast Network, doing basically nothing in the Advanced Training Hall (![]() +
+ ![]() +
+ ![]() +
+ ![]() = :D), running in circles, and exploring the wide world of the internet.
= :D), running in circles, and exploring the wide world of the internet.
66%.
Gameplay
I generally play Spiral Knights with a window at 1024x600x32 60Xz and high graphics.
My most used controls are set as:
Move: Left click and WSAD
Attack: Right click
Change weapon: Scroll wheel :D
Shield: X
Pickups: 1, 2, 3, and 4
Auto-Target: Left shift
Arsenal: I
Loadouts: L
Self-inspect: P
Social tab <3: F6
Achievements
I've put the rare monsters I've seen at the top so it doesn't overlap with the Arsenal tab.
 Schemer Razwog (Successfully solo killed, no damage [on new knight])
 Snarbolax (Successfully solo killed while taking no damage, also killed using only the mouse, meaning only movement and attack were used)
 Warmaster Seerus (T1) (Successfully solo killed, no deaths)
 Roarmulus Twins (Successfully solo killed, no deaths)
 Royal Jelly (Successfully solo killed, no deaths)
- Warmaster Seerus (T2) (Successfully solo killed, no deaths)
 Toxilargo
 Arkus
Arkus
 Giant Toxoil x3 and Gremlin Incinerator x2 (Successfully solo killed, no deaths)
 Margel, but it wasn't my book.
 Lord Vanaduke (Successfully killed, no deaths)
- Warmaster Seerus (T3) (Succesfully killed)
 Rabid Snarbolaxes (Successfully killed)
 Ice Queen (Successfully killed)
 Red Roarmulus Twins (Successfully killed)
 Darkfire Vanaduke (Successfully killed)


 Fiery Atomizer ★★★★☆
 Firebreak Armor ★★☆☆☆
 Plate Shield ★★☆☆☆
 Skelly Shield ★★☆☆☆
 Toxic Vaporizer ★★☆☆☆
 Crystal Bomb ★★☆☆☆
 Scale Shield ★☆☆☆☆
 Iron Buckler ☆☆☆☆☆
I don't really have any achievements (Example: I was not the first player to, say, get a Gran Faust), unless you include the possibility of being the first knight (along with Kirbz) to see a scenario room or the in-game ones (of which I have all! :D).
GMs seen:
Oceanus
Hyperion
Coriolis
Secrets known:
Stone Grove's Secret Key: In the Aurora Isles - Stone Grove level, after the first room with the jellies, there is a "bridge" with some three-hit blocks above. One of them contains a switch that, when activated, spawns a few wolvers and a key. The key is used later in the level, after the following battle.
Firestorm Citadel's Mysterious Button: On Depth 27 of FSC, at the top of the first room (with fire blocking the stairs and a statue that needs to be placed), there is a wooden box surrounded by shadow fire. Douse the fire and break the box to reveal a button! This button creates a ghost block after the last battle on this floor on the left side of the stairs leading to the treasure boxes. Shoot at it (You can't really see it, just shoot around that area) to reveal a small pathway that leads to three treasure boxes.
The Grand Arsenal's Ghost Blocks: On the third level of OCH, there's a hidden area that is accessed by throwing a pot, vial, or other projectile downwards at some Ghost Blocks, causing some unbreakable blocks to vanish. In this hidden area is a few mines and two red treasure boxes. 
Arsenal
My entire arsenal is listed below. (Hit the "show" button!)
- I'm not just adding my good stuff. This is everything.
 Acheron named Unex ★★★★★ (Given to me by Darkbladeofgod as a Nightblade)
 Thorn ★★★★★
  Damage Bonus vs. Undead: Medium
 Divine Avenger ★★★★★ Damage Bonus vs. Construct: Low
 Dread Venom Striker ★★★★★ Charge Time Reduction: Low
 Fang of Vog ★★★★★
 Gran Faust named Ibilis ★★★★★ (Given to me by Takendown as a Sealed Sword, but I paid for the unbinding!)
 Leviathan Blade ★★★★★ (Given to me by Takendown as a Calibur)
 Voltedge ★★★★★
 Warmaster Rocket Hammer ★★★★★ Damage Bonus vs. Slime: Medium
 Blazebrand ★★★★☆
 Arc Razor ★★★☆☆
 Cautery Sword ★★★☆☆
 Rigadoon ★★★☆☆
 Sealed Sword ★★★☆☆
 Stable Rocket Hammer ★★★☆☆
 Calibur ★★☆☆☆
 Searing Edge ★★☆☆☆
 Troika ★★☆☆☆
 Wrench Wand ★★☆☆☆
 Bolted Blade ★☆☆☆☆
 Hot Edge ★☆☆☆☆ Damage Bonus vs. Construct: High
 Prototype Rocket Hammer ★☆☆☆☆
 Rugged Robo Wrecker ★☆☆☆☆
 Static Edge ★☆☆☆☆ Attack Bonus Increased: Low
 Super Slime Slasher ★☆☆☆☆ Charge Time Reduction: High
 Thwack Hammer ★☆☆☆☆
- Robo Wrecker ☆☆☆☆☆
 Proto Sword ☆☆☆☆☆
 Argent Peacemaker named Azrael ★★★★★
 Biohazard ★★★★★
 Blitz Needle ★★★★★
 Nova Driver ★★★★★ Damage Bonus vs. Fiend: Low
 Polaris ★★★★★
 Sentenza named Belphegor ★★★★★
 Fiery Pepperbox ★★★★☆ / Damage Bonus vs. Gremlin: Low/Charge Time Reduction: Low
 Mega Magnus ★★★★☆
 Shadow Driver ★★★★☆
 Antigua ★★★☆☆
 Super Blaster ★★★☆☆
 Voltech Alchemer Mk II ★★★☆☆
 Cryotech Alchemer ★★☆☆☆
 Firotech Alchemer ★★☆☆☆
 Pulsar ★★☆☆☆
 Punch Gun ☆☆☆☆☆
 Proto Gun ☆☆☆☆☆
 Dark Briar Barrage ★★★★★ Damage Bonus vs. Slime: Low
 Dark Retribution ★★★★★
 Shivermist Buster ★★★★★
 Voltaic Tempest ★★★★★
- Fiery Atomizer ★★★★☆
 Ionized Salt Bomb ★★★★☆
 Sun Shards ★★★★☆ Damage Bonus vs. Fiend: Low
 Dark Reprisal Mk II ★★★☆☆
 Electron Charge ★★★☆☆
 Graviton Charge named Mammon ★★★☆☆
 Dark Reprisal ★★☆☆☆
- Toxic Vaporizer ★★☆☆☆
 Cold Snap ★☆☆☆☆ Charge Time Reduction: Medium
 Firecracker ★☆☆☆☆ Charge Time Reduction: Medium
 Static Flash ★☆☆☆☆
- Static Flash ★☆☆☆☆
 Proto Bomb ☆☆☆☆☆ Charge Time Reduction: High
 Mercurial Demo Helm ★★★★★ Increased Shadow Defence: Low
 Perfect Mask of Seerus ★★★★★ Increased Elemental Defence: Low
 Skolver Cap ★★★★★
 Snarbolax Cap ★★★★★
 Vog Cub Cap ★★★★★
 Miracle Hood ★★★★☆
 Seraphic Helm ★★★★☆
 Sunset Stetson ★★★★☆
 Brute Jelly Helm ★★★☆☆
 Chroma Mask ★★★☆☆
 Quicksilver Helm ★★★☆☆
 Scary Skelly Mask ★★★☆☆
 Solid Cobalt Helm ★★★☆☆
 Jelly Helm ★★☆☆☆
 Magic Hood ★★☆☆☆ +
 +
+
 Spiral Plate Helm ★★☆☆☆
 Fractured Mask of Seerus ★☆☆☆☆
 Spiral Scale Helm ★☆☆☆☆
 Cyclops Cap ☆☆☆☆☆
 Spiral Sallet ☆☆☆☆☆
 Skolver Coat ★★★★★ +
 +
+
 Snarbolax Coat ★★★★★ Increased Elemental Defence: Medium
 Vog Cub Coat ★★★★★
 Charged Quicksilver Mail ★★★★☆
 Heavy Demo Suit ★★★★☆ +
 +
+
 Miracle Cloak ★★★★☆
 Seraphic Mail ★★★★☆
 Sunset Duster ★★★★☆
 Brute Jelly Mail ★★★☆☆
 Chroma Suit ★★★☆☆
 Scary Skelly Suit ★★★☆☆ Increased Stun Resistance: Low
 Solid Cobalt Armor ★★★☆☆ +
 +
+
- Firebreak Armor ★★☆☆☆
 Jelly Mail ★★☆☆☆
 Spiral Plate Mail ★★☆☆☆
 Spiral Scale Mail ★☆☆☆☆
 Fencing Jacket ☆☆☆☆☆
 Vitasuit ☆☆☆☆☆
 Spiral Brigandine ☆☆☆☆☆
 Barbarous Thorn Shield ★★★★★
 Crest of Almire ★★★★★
 Grey Owlite Shield ★★★★★ Increased Curse Resistance: Low
 Blackened Crest ★★★★☆
 Mighty Defender ★★★★☆
 Brute Jelly Shield ★★★☆☆
 Scary Skelly Shield ★★★☆☆
 Swiftstrike Buckler ★★★☆☆
 Bristling Buckler ★★☆☆☆
 Firebreak Shield ★★☆☆☆
 Icebreaker Shield ★★☆☆☆
 Jelly Shield named Blink ★★☆☆☆
- Plate Shield ★★☆☆☆
 Volt Breaker Shield ★★☆☆☆
 Green Ward ★☆☆☆☆
- Green Ward ★☆☆☆☆
- Iron Buckler Increased Stun Resistance: Medium ☆☆☆☆☆
 Proto Shield ☆☆☆☆☆
 Authentic Frankenzom Mask
 Authentic Phantom Mask
 Authentic Spookat Mask
 Divine Stranger Hat (Given to me by Sypherf)
 Heavenly Guardian Armor
 Heavenly Guardian Helm
 Infernal Guardian Armor
 Infernal Guardian Helm
 Onyx Bombhead Mask
 Plasmatech Bombhead Mask
 Plasmatech Demo Suit
 Prismatic Frosted Helm
 Spiral Bombhead Mask
 Steam Knight Mask +
 +
+
 Dread Skelly Charm ★★★★★
- Dread Skelly Charm ★★★★★
 Elite Quick Strike Module ★★★★★
 Elite Slash Module ★★★★★
 Penta-Heart Pendant ★★★★★
- Penta-Heart Pendant ★★★★★
 Purrfect Katnip Pouch ★★★★★
- Purrfect Katnip Pouch ★★★★★
 Radiant Crystal Pin ★★★★★
 Royal Jelly Band ★★★★★
- Royal Jelly Band ★★★★★
 Slash Module ★★★★☆
 Dewy Wetstone Pendant ★★★☆☆
 Valiance ★★★★★ (Bound)
 Azure Guardian Helm ★★★★★ (Bound)
 Azure Guardian Armor ★★★★★ (Bound)
 Aegis ★★★★★ (Bound)
 Master Blaster ★★★★☆ (Bound)
 Elemental Hood ★★★☆☆
 Emberbreak Helm ★☆☆☆☆ (Bound)
 Primal Spark x53
 Grim Spark x81
 Forge Spark x1
 Frumious Fang x84
 Bark Module x54
 Jelly Gem x96
 Almirian Seal x11
 Krogmo Coin x79
 Echo Stone: Gloaming Wildwoods
- Echo Stone: Ironclaw Munitions Factory
- Echo Stone: Royal Jelly Palace
- Echo Stone: Firestorm Citadel
 Hatch Handle
 Medal of Monstrous Merit
 Recon Module: Gloaming Wildwoods
- Recon Module: Ironclaw Munitions Factory
- Recon Module: Royal Jelly Palace
- Recon Module: Firestorm Citadel
- Recon Module: The Gauntlet
- Recon Module: Entrance to the Core
 Deconstructor Crest
 Dismantler Crest
 Excorciser Crest
 Ghostbuster Crest
 Liquifier Crest
 Predator Crest
 Fancy Parrying Blade
 Proto Crest
 Azure Guardian Crest
 Vanguard Crest
- Vanguard Crest
 Stunning Crest
These are the items I'm looking for.
 Cool Glasses
 Shadow Dragon Wings
 Twilight Aura (MUST. GET. EVENTUALLY. AUFADUJAGFADJGAJGSGJSJGS.)
Other Random Crap
Monster attack types/resistances/weaknesses:
| Monster Type | Damage Type | Weak To | Neutral To | Strongly Resistant To |
|---|---|---|---|---|
| |
|
|
|
|
| |
|
|
|
|
| |
|
|
|
|
| |
|
|
|
|
| |
|
|
|
|
| |
|
|
|
|
I have this memorized, but I put it here in case anyone else needs to know.
For Sale!
 Metal Sonic Mask
 Supernova recipe ★★★★★
- Crest of Almire recipe ★★★★★
 Faust recipe ★★★★☆
 Dark Thorn Shield recipe ★★★★☆
 Twisted Targe recipe ★★★☆☆
 Toasty Canteen
 Toasty Vented Visor
 Volcanic Spike Mohawk
![]()
![]()
![]()
Art n' Stuff n' Stuff
Below are some screenshots I've taken and art I've made. Enjoy!


I waved goodbye to Basil as a stepped onto the elevator and was knocked off my feet with its first jolt. I wasn't hurt or anything, but by the time I got up, the elevator stopped. It appeared I was in some forest. It was dark and I could hear the barks of wolvers and gun puppies alike. Knowing it would be dangerous, I drew my prized Hot Edge sword. It wasn't very good, but it was my best.
Suddenly I heard a beep from inside my helm and a message popped up in my visor. It was a message from Kora, the intelligence agent back at HQ. The message basically said, "Hey, you're in a new scary area, so try not to die. There's a recon module somewhere in that forest, so you need to bring it back. Oh, and by the way, there's a massive monster in there that can rip you to shreds. It's name is Snarby!" Fun. I closed the message and went on.
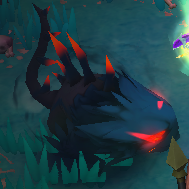
I hadn't gotten very far when a few wolvers jumped at me from the bushes. I dispatched them easily, despite what Brinks may have told you already. I continued farther into the forest, which was starting to look more terrifying by the minute. I even caught a glimpse of the monster once or twice, only seeing it for a second before it burrowed into the ground. All I could see of it was its six glowing, red eyes.
(This stinks. :D)