Difference between revisions of "Exploration"
From SpiralKnights
Leafblader (Talk | contribs) (Caged Knight Locations) |
|||
| (88 intermediate revisions by 12 users not shown) | |||
| Line 1: | Line 1: | ||
| − | + | One of the tasks for knights is '''exploration''' of the [[Clockworks]] by joining in [[party|parties]] going down through [[gate]]s. While in the Clockworks, knights will encounter many interesting things. | |
| − | One of the tasks for knights is '''exploration''' of the [[Clockworks]] by joining in [[party|parties]] going down through [[gate]]s. While in the | + | |
| − | + | Use the [[mini map]] to detect monsters and areas. Utilize the icons of [[Gate Map]]s to predict what might be encountered while exploring. | |
| − | + | ||
| − | + | ||
| − | == | + | == Map Features == |
| − | + | There are many wonders to witness on Cradle. The clockworks is a dynamic place, so certain objects might be found in abundance in some areas, while others are only found in a few or even a single area. An area can have different numbers of these objects than were encountered previously in that area, forcing players to pay attention to their surroundings. | |
| − | + | ||
| − | + | Many entities encountered are interactive, while others are not. [[:File:Scenario Room-Wolver Den 3.png|Stone carvings can obscure switches, but are not themselves interactive]]. Below are lists of entities that are either interactive, and/or have a dynamic effect on the player. Other entities that are simply aesthetic, or are more complex and linked to elsewhere on this page, are not included in these lists. | |
| − | + | The names in this list are mostly colloquial, though some do have an official name that appears if the entity is targeted. | |
| − | + | ||
| − | === | + | ===Carried=== |
| − | {{ | + | The following entities can be picked up by the player and carried to another location. They are either set down or thrown. If the player takes direct damage, the entity will be dropped. |
| + | {{ExplorationList/Start}} | ||
| − | + | {{ExplorationList | |
| − | {{ | + | |name = Clay Pot |
| + | |notes = A pot for smashing. Throw it to hit switches, or just to have fun smashing. | ||
| − | + | A common sight in the clockworks, these pots serve as a means to complete many puzzles, a lucky break for knights who neglect to bring long-range projectiles. | |
| − | + | }} | |
| − | === | + | {{ExplorationList |
| − | + | |name = Cursed Nature Sprite | |
| + | |imgfix = Monster-Sprite-Cursed | ||
| + | |notes = A cursed [[Nature Sprite]]. Carry it to a purifying area, or splash it with a water pot. | ||
| − | + | Found in [[Firestorm Citadel]] and the {{mission|Shadowplay}}. | |
| − | + | }} | |
| − | = | + | {{ExplorationList |
| − | + | |name = Ember | |
| + | |notes = Throw them at a candle to light it. Encountered in {{location|Candlestick Keep||1.2}} areas and {{location|Shroud of the Apocrea|The Grasping Plateau|1.3}}. Unlike water pots, they do not have an artistic generator, simply using a respawn pad. | ||
| + | }} | ||
| − | == | + | {{ExplorationList |
| − | + | |name = Fire Pot | |
| + | |notes = A pot containing a self-igniting substance. Throw it at something to set it on [[fire]]! | ||
| − | + | Low danger: you can set your friends on fire if you're not careful. | |
| − | + | }} | |
| − | == | + | {{ExplorationList |
| − | + | |name = Gold Key | |
| + | |notes = A large golden key. It unlocks a Gold Gate somewhere. | ||
| + | }} | ||
| − | == | + | {{ExplorationList |
| − | + | |name = Heavy Statue | |
| + | |notes = A large heavy statue. Put it on a pressure pad somewhere in the area, or use it to block monsters. | ||
| + | }} | ||
| − | = | + | {{ExplorationList |
| − | + | |name = Oil Pot | |
| − | + | |notes = A pot containing flammable oil. Throw it at something to break it - this will spill oil everywhere. Set that oil on [[fire]]! | |
| − | + | ||
| − | + | ||
| − | + | ||
| − | + | Low danger: you can set your friends on fire if you're not careful. | |
| − | + | Many areas containing oil pots seem to be mostly populated by enemies that are immune to fire. | |
| − | + | }} | |
| − | + | ||
| − | = | + | {{ExplorationList |
| − | + | |name = Water Pot | |
| + | |notes = A glob of water generated from a water well. Use it to put out a fire pit or shadow fire in the area. Encountered in the same areas that water wells are, though water pots without a "bowl" or "well" are encountered in {{mission|Compound 42}}. | ||
| + | }} | ||
| − | == | + | {{ExplorationList |
| − | + | |name = Bomb Shell | |
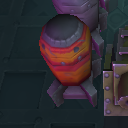
| − | + | |notes = A 1x1 rocket-like object that can be thrown. Explodes on impact. | |
| − | + | ||
| − | + | ||
| − | + | First seen {{???}} | |
| − | + | ||
| − | + | Can be encountered in the {{mission|Compound 42}}, {{mission|The Ancient Generator}}, {{mission|The Phantom Mask}}, and {{mission|Shocking Sentient Sentries}}. Also encountered in a 5-point [[Lockdown]] map. | |
| − | + | }} | |
| − | + | {{Table/End}} | |
| − | + | ||
| − | + | {{clearleft}} | |
| − | + | ||
| − | + | ||
| − | + | ||
| − | === | + | ===Enemy Aid=== |
| − | + | The following entities directly aid enemies in some way. | |
| − | + | {{ExplorationList/Start}} | |
| − | + | ||
| − | + | ||
| − | + | {{ExplorationList | |
| + | |name = Grim Totem | ||
| + | |notes = 1x1 object that pulses with eerie purple light. | ||
| − | + | Grim Totems will resurrect any nearby [[Zombies]] killed within its radius. These totems cannot be destroyed, but (if they can be reached) they can be carried by the player to another location to allow for easier zombie slaying. | |
| − | + | }} | |
| − | + | {{ExplorationList | |
| − | + | |name = Swarm Source | |
| − | + | |imgfix = Monster-Swarm Source | |
| − | + | |notes = The source of an expanding shadowy field that slows players down and buffs the defense of monsters. As it takes damage, the field will decrease in size. With enough damage the field will disappear and the source won't generate the field for a while. | |
| − | + | First seen with {{release|2011-10-19}}. | |
| − | + | }} | |
| − | + | {{ExplorationList | |
| − | {{ | + | |name = Healing Totem |
| − | + | |notes = A strange device holding a mineral-like object. It will heal nearby enemies. They can be destroyed, but are on fast spawner pads in these areas. The colors seem to reflect the [[Tier]] in which the totem is located, a behavior akin to the the similar objects in [[Mender|gremlin mender]] wands. Tier 1: greenish yellow. Tier 2: Orange. Tier 3: Purple. | |
| − | + | Can be encountered in certain fiendish arcade areas during the [[March of the Tortodrones]] event. Several are encountered in {{mission|Shadowplay}}. | |
| − | + | ||
| − | + | ||
| − | + | First seen 26 February 2014. | |
| − | + | }} | |
| − | + | {{Table/End}} | |
| − | + | ||
| − | + | ||
| − | + | {{clearleft}} | |
| − | {{ | + | |
| − | + | ||
| − | + | ===Hazards=== | |
| + | The following entities will harm or hinder the player in some way, usually severely. A few will also harm nearby monsters. | ||
| − | + | {{ExplorationList/Start}} | |
| − | + | ||
| − | + | {{ExplorationList | |
| + | |name = Brambles | ||
| + | |notes = A tangle of plants with grey thorns that will damage the player if touched. | ||
| + | }} | ||
| − | + | {{ExplorationList | |
| − | + | |name = Brambles (Poison) | |
| − | + | |notes = A tangle of plants with green thorns that will damage and possibly poison the player if touched. | |
| − | + | }} | |
| − | + | ||
| − | + | ||
| − | + | ||
| − | = | + | |
| − | + | ||
| − | + | {{ExplorationList | |
| − | + | |name = Explosive Block | |
| − | + | |notes = 1x1 light-emitting blocks that explode violently if struck, hurting both knights and monsters alike. | |
| − | + | Stuttering [[Mecha Knight]]s will trigger these. | |
| + | }} | ||
| − | == | + | {{ExplorationList |
| − | + | |name = Fire Trap | |
| + | |notes = Fire periodically rises from a grate. Players can walk across inactive traps and not take damage from the hazards within. | ||
| − | + | This hazard deals significant damage if touched while active, and is very likely to set players on [[fire]]. | |
| − | + | }} | |
| − | + | ||
| − | + | ||
| − | + | ||
| − | == | + | {{ExplorationList |
| − | + | |name = Fire Pit | |
| − | + | |notes = A very hazardous batch of fire. Encountered in the {{mission|Compound 42}}, {{mission|Crossing the Chasm}}, {{mission|Terminal Meltdown}}, {{mission|Legion of Almire}}, {{mission|Operation Crimson Hammer}}, {{location|Shroud of the Apocrea|The Grasping Plateau|1.3}}, and certain [[Lockdown]] maps. Can be put out with a water pot, if one is available. | |
| − | + | ||
| − | + | ||
| − | + | ||
| − | + | ||
| − | + | It is similar to the shadow fire encountered in the Firestorm Citadel, but does not have the same sinister pinkish coloration near the base. | |
| − | + | }} | |
| − | + | ||
| − | + | {{ExplorationList | |
| + | |name = Freeze Trap | ||
| + | |notes = Frigid air periodically rises from a grate. Players can walk across inactive traps and not take damage from the hazards within. | ||
| − | + | This trap deals significant damage if touched while active, and has a very high chance to [[freeze]] players. | |
| − | + | ||
| − | + | This freeze is likely lasting, so this trap will slowly kill most knights, even if they are caught at full health. If your allies are trapped on this grate, free them immediately by breaking the ice that binds them. Very low level traps can be explored with impunity if the player has high enough freeze resistance. | |
| − | + | }} | |
| − | + | ||
| − | + | ||
| − | + | ||
| − | + | ||
| − | + | ||
| − | + | ||
| − | + | {{ExplorationList | |
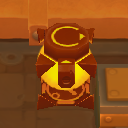
| − | + | |name = Orbital Chain | |
| − | + | |notes = A dangerous chain orbits a fixed point. There are several variations in length, status type, and orbit speed of this hazard that can be encountered. | |
| − | + | ||
| − | = | + | |
| − | + | ||
| − | A | + | |
| − | + | There are spots between each orb in a chain where the player can avoid damage as the chain passes by, but these are usually hard to utilize, so it's best to just avoid the chain. | |
| − | + | }} | |
| − | + | ||
| − | === Shadow Fire === | + | {{ExplorationList |
| − | [[File:Exploration- | + | |name = Poison Trap |
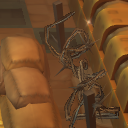
| − | + | |notes = Noxious fumes periodically rise from this grate. Players can walk across inactive traps and not take damage from the hazards within. | |
| − | + | ||
| − | + | This trap deals significant damage if touched while active, and is very likely to [[poison]] players. | |
| − | + | }} | |
| − | + | ||
| − | * [[Compound | + | {{ExplorationList |
| − | + | |name = Respawn Pad | |
| − | * [[ | + | |notes = A tile that perpetually produces entities. The respawn rate can be different speeds in different areas, and this rate is somewhat indicated by the speed of the rotating arrows. As a rule of thumb, if there is a pad with nothing on top of it in the first place, it will spawn a monster. If it did have something on top, it will spawn whatever that thing was (usually). Don't idle on these pads - your knight can get a bit hurt when blocks respawn. Instead, avoid it or shield on it to block the spawn. This is handy to help your friends get through areas while carrying things. |
| + | |||
| + | If it is a monster spawner, usually shielding over it will prevent the enemy from spawning, but this doesn't work for all spawners. | ||
| + | }} | ||
| + | |||
| + | {{ExplorationList | ||
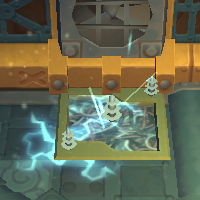
| + | |name = Shock Trap | ||
| + | |notes = Exposed wires periodically surge with power. Players can walk across inactive grates and not take damage from the hazards within. | ||
| + | |||
| + | This trap deals significant damage if touched while active, and is very likely to [[shock]] players. | ||
| + | }} | ||
| + | |||
| + | {{ExplorationList | ||
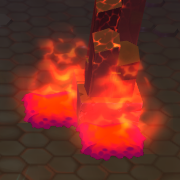
| + | |name = Shadow Fire | ||
| + | |notes = A very hazardous batch of fire very frequently encountered in the [[Firestorm Citadel]]. Put it out with a water pot - you'll need to help the [[Nature Sprite|nature sprite]]s to have access to water. Frequently called "lava" or "spirit fire" by the community, and referred to as shadow fire by nature sprites. | ||
| + | }} | ||
| + | |||
| + | {{ExplorationList | ||
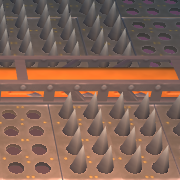
| + | |name = Spike Trap | ||
| + | |notes = Conical spikes periodically rise up from the round holes in the floor. They inflict a large amount of [[Damage##Piercing_Damage|piercing]] damage. Players can walk across inactive grates and not take damage from the hazards within. | ||
| + | |||
| + | A rare version of this trap inflicts stun instead of dealing damage. This phenomenon can be encountered in the kat nest of the {{mission|Purr Terror}} and certain [[Lockdown]] maps. | ||
| + | }} | ||
| + | |||
| + | {{ExplorationList | ||
| + | |name = Timed Explosive Block | ||
| + | |notes = 1x1 light-emitting blocks that count down from 3 and then explode violently if struck, hurting both knights and monsters alike. | ||
| + | |||
| + | Stuttering [[Mecha Knight]]s will trigger these. | ||
| + | }} | ||
| + | |||
| + | {{ExplorationList | ||
| + | |name = Wheel Launcher | ||
| + | |notes = {{main|Wheel Launcher}} | ||
| + | |||
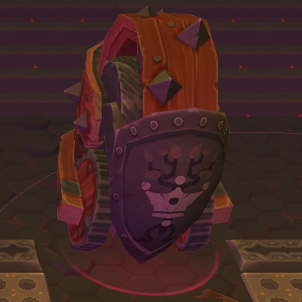
| + | An armored device that periodically spits out a large wheel. This wheel crushes players and monsters alike, pushing them in front of it for yet more crushing. Unlike other exploration entities, it has weaknesses and resistances similar to the [[Construct]] monster family. Destroy it from behind, or block the wheel with a Cursed Nature Sprite, Heavy Statue, or Grim Totem, if any are available. | ||
| + | |||
| + | Encountered in the [[Firestorm Citadel]], the {{mission|Grinchlin Assault!}}, and [[Mysterious Room]]s during [[Winterfest]]. | ||
| + | }} | ||
| + | |||
| + | {{ExplorationList | ||
| + | |name = Rocket Block | ||
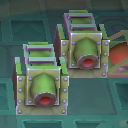
| + | |notes = A block that periodically launches an explosive missile. Try to turn them off with a green missile button. | ||
| + | |||
| + | Encountered in the [[Ironclaw Munitions Factory]], {{mission|Operation Crimson Hammer}}, [[Danger Rooms]], and certain [[Compound]] areas. | ||
| + | |||
| + | First seen with {{release|2011-07-06}}. | ||
| + | }} | ||
| + | |||
| + | {{ExplorationList | ||
| + | |name = Unused Rocket | ||
| + | |notes = When hit, they will flash and then explode, dealing damage in a 2 tile radius. They do not damage nearby Empty Rockets. | ||
| + | |||
| + | Encountered in the [[Ironclaw Munitions Factory]] and the {{mission|Operation Crimson Hammer}}. | ||
| + | |||
| + | First seen with {{release|2011-07-06}}. | ||
| + | }} | ||
| + | |||
| + | {{ExplorationList | ||
| + | |name = Barbed Wire | ||
| + | |notes = Hazardous tangles of wire. | ||
| + | |||
| + | Can be encountered in the {{mission|Operation Crimson Hammer}}, certain [[Compound]] areas, and [[Arena#Gallery|rank mission arenas]]. | ||
| + | }} | ||
| + | |||
| + | {{ExplorationList | ||
| + | |name = Landmine | ||
| + | |notes = A hidden bomb that is activated by a player walking nearby. The bomb is not visible, but it's marked by distinctive tiles of a darker hue. Its fuse length is similar to that of Gremlin Demo bomb. Encountered in the {{mission|Operation Crimson Hammer}} and rare [[Compound]] segments. | ||
| + | }} | ||
| + | |||
| + | {{ExplorationList | ||
| + | |name = Fire Launcher | ||
| + | |notes = This block periodically spits out a long trail of fire. Some can be turned off. | ||
| + | |||
| + | Encountered in {{mission|Compound 42}}, {{mission|Crossing the Chasm}}, and {{mission|Crimson Chaos}}. | ||
| + | }} | ||
| + | |||
| + | {{ExplorationList | ||
| + | |name = Barbed Hedgehog | ||
| + | |notes = Hazardous caltrop-shaped barriers that can be removed with a single hit. | ||
| + | |||
| + | Can be encountered in {{mission|Shocking Sentient Sentries}}, {{mission|Crimson Chaos}}, and {{mission|A Gremlin in Knead}}. | ||
| + | }} | ||
| + | |||
| + | {{ExplorationList | ||
| + | |name = Falling Mush | ||
| + | |notes = A glop of slop randomly falls from heights above, landing with a loud plop. This causes a small area to be difficult to traverse for 15 seconds. Players and monsters alike have reduced movement speed while in the affected area. | ||
| + | |||
| + | Encountered in {{mission|Grinchlin Assault!}} and [[Mysterious Room]]s during [[Winterfest]]. | ||
| + | |||
| + | First seen 11 December 2013. | ||
| + | }} | ||
| + | |||
| + | {{ExplorationList | ||
| + | |name = Misery Block | ||
| + | |notes = A family of 1x1 unbreakable spike blocks that deal high damage if touched. | ||
| + | |||
| + | These are often found in large numbers during certain [[event]]s and/or in dangerous areas. Can be encountered in the {{mission|Breaking in the Recruits}}, {{mission|Crimson Chaos}}, {{mission|Shadowplay}}, {{mission|Grinchlin Assault!}}, and [[Mysterious Room]]s during the [[March of the Tortodrones]] and [[Winterfest]] events. | ||
| + | |||
| + | First seen 11 December 2013. | ||
| + | }} | ||
| + | |||
| + | {{ExplorationList | ||
| + | |name = Mush Block | ||
| + | |notes = A family of 1x1 breakable blocks that break into a pile of mush. This mush lingers for a while and will significantly hinder movement speed. | ||
| + | |||
| + | These are often found in clusters. Ice slush and chilled frosting "mush" can be encountered in the {{mission|Grinchlin Assault!}} and {{mission|A Gremlin in Knead}}, respectively. | ||
| + | |||
| + | First seen 11 December 2013. | ||
| + | }} | ||
| + | |||
| + | {{ExplorationList | ||
| + | |name = Red Searchlight | ||
| + | |notes = Similar to aesthetic searchlights found elsewhere in the clockworks. [[:File:Exploration-Red Searchlight Pool.png|These have a red tint and make a round pool of light on the ground]]. If the player walks into this lit area, several missiles will fall from above. | ||
| + | |||
| + | Found in the {{mission|The Collector}} and {{mission|Crimson Chaos}}. | ||
| + | |||
| + | First seen with {{release|2013-07-30}}. | ||
| + | }} | ||
| + | |||
| + | {{ExplorationList | ||
| + | |name = Super Explosive Block | ||
| + | |notes = A blast block that generates several explosive globs when destroyed (even when removed via ghost block). Globs are similar to the ones generated by defeated [[Blast Cube]]s, a type of slime. | ||
| + | |||
| + | Can be encountered during the [[March of the Tortodrones]] event, in [[Treasure Vault]]s and in the {{mission|Shadowplay}}. | ||
| + | |||
| + | First seen 26 February 2014. | ||
| + | }} | ||
| + | |||
| + | {{ExplorationList | ||
| + | |name = Vortex Block | ||
| + | |notes = A strange block that generates a relatively harmless vortex for a short time when struck. The vortex affects both knights and monsters. | ||
| + | |||
| + | Low danger: it can potentially drag knights through hazards or keep them in range of enemy fire. | ||
| + | |||
| + | Can be encountered during the [[March of the Tortodrones]] event and {{mission|Shadowplay}}. | ||
| + | |||
| + | First seen 26 February 2014. | ||
| + | }} | ||
| + | |||
| + | {{ExplorationList | ||
| + | |name = Timed Super Explosive Block | ||
| + | |notes = A blast block that counts down and then generates several explosive globs when destroyed. | ||
| + | |||
| + | Globs are similar to the ones generated by defeated [[Blast Cube]]s, a type of slime. | ||
| + | |||
| + | Can be encountered during the [[March of the Tortodrones]] event in certain fiendish arcade areas as well as the related prestige mission. | ||
| + | |||
| + | First seen 26 February 2014. | ||
| + | }} | ||
| + | |||
| + | {{ExplorationList | ||
| + | |name = Swarm Spikes | ||
| + | |notes = A malignant tangle of spikes hidden in the floor that respond to the presence of knights, similar to a landmine. They will spike up a moment or two after you step where they are - don't linger too long in one spot or follow the footsteps of friends. | ||
| + | |||
| + | Encountered in [[Core]] areas. | ||
| + | |||
| + | First seen with {{release|2015-05-13}}. | ||
| + | }} | ||
| + | |||
| + | {{ExplorationList | ||
| + | |name = Echo Block | ||
| + | |notes = Reflects any damage/status it receives. ''They give as good as they get.'' | ||
| + | |||
| + | Encountered in [[Treasure Vault]]s. | ||
| + | |||
| + | First seen with {{release|2019-06-27}}. | ||
| + | }} | ||
| + | |||
| + | {{Table/End}} | ||
| + | |||
| + | {{clearleft}} | ||
| + | |||
| + | ===Loot Yielding=== | ||
| + | The following entities, unless otherwise specified, will yield a [[crowns|crown]] of some value, a [[heart]], or nothing when broken. | ||
| + | |||
| + | {{ExplorationList/Start}} | ||
| + | |||
| + | {{ExplorationList | ||
| + | |name = Breakable Tombstone | ||
| + | |notes = A 1x1 object that can be broken with a single hit. A crown of some value will drop. | ||
| + | |||
| + | These grave markers are encountered in [[Graveyard]] areas. Nonbreakable versions will not have glowing green cracks. Some gravestones (breakable or not) have a mound of soil near them. Keep an eye on these - a mound might spawn a zombie as you approach, or as you walk away. | ||
| + | |||
| + | Breakable Tombstones in {{location|Shroud of the Apocrea|The Grasping Plateau|1.3}} are similar to spawners, containing either [[Lost Soul#Freed Soul|Soul]]s, [[Pale Scarab]]s, [[Freezing Bombie]]s, or nothing. | ||
| + | }} | ||
| + | |||
| + | {{ExplorationList | ||
| + | |name = Bucket | ||
| + | |notes = Break for a chance to find minor loot. | ||
| + | |||
| + | Always encountered in [[Ironclaw Munitions Factory]] and {{mission|Operation Crimson Hammer}}. Certain [[Clockwork Tunnels]] and [[Scenario Room]]s have them as well. The bucket in the [[core]] terminal was removed for [http://forums.spiralknights.com/en/node/109061#comment-988367 unknown reasons]. | ||
| + | }} | ||
| + | |||
| + | {{ExplorationList | ||
| + | |name = Bush | ||
| + | |notes = Break for a chance to find minor loot. | ||
| + | |||
| + | These plants have a much lower drop rate than other loot-yielding breakables, usually yielding nothing. They have a very small chance of dropping a single crown. | ||
| + | |||
| + | Vividly colored versions are encountered in [[Compound]]s. | ||
| + | }} | ||
| + | |||
| + | {{ExplorationList | ||
| + | |name = Fence | ||
| + | |notes = Break for a chance to find minor loot. | ||
| + | |||
| + | Encountered in the [[Firestorm Citadel]]. | ||
| + | }} | ||
| + | |||
| + | {{ExplorationList | ||
| + | |name = Hydrant | ||
| + | |notes = Break for a chance to find minor loot. | ||
| + | |||
| + | Encountered in [[Concrete Jungle]], [[Devilish Drudgery]], and [[Dark City]] areas. | ||
| + | }} | ||
| + | |||
| + | {{ExplorationList | ||
| + | |name = Light | ||
| + | |namefix = Lamp | ||
| + | |notes = Break for a chance to find minor loot. Short or tall varieties can be encountered. | ||
| + | |||
| + | Encountered in arcade [[Arena]]s, [[Firestorm Citadel]], and [[Scarlet Fortress]] areas. | ||
| + | }} | ||
| + | |||
| + | {{ExplorationList | ||
| + | |name = Mailbox | ||
| + | |notes = Break for a chance to find minor loot. | ||
| + | |||
| + | Encountered in [[Concrete Jungle]], [[Devilish Drudgery]], and [[Dark City]] areas. | ||
| + | }} | ||
| + | |||
| + | {{ExplorationList | ||
| + | |name = Plant | ||
| + | |notes = Break for a chance to find minor loot. | ||
| + | |||
| + | Plants can be found on almost any level with grass. They are found in abundance in [[Aurora Isles]] and [[Jigsaw Valley]] areas. | ||
| + | |||
| + | The [[Potted Plant]] furniture for decorating [[Guild Hall]]s has a similar appearance. | ||
| + | }} | ||
| + | |||
| + | {{ExplorationList | ||
| + | |name = Tome Stack | ||
| + | |notes = Break for a chance to find minor loot. | ||
| + | |||
| + | Found in {{location|Candlestick Keep||1.2}} and {{location|Scarlet Fortress||1.2}} areas. Not all stacks are breakable. | ||
| + | |||
| + | [[Tome Stack]] furniture items are similar. | ||
| + | |||
| + | First seen with {{release|2011-09-06}}. | ||
| + | }} | ||
| + | |||
| + | {{ExplorationList | ||
| + | |name = Antique Chair | ||
| + | |notes = Break for a chance to find minor loot. | ||
| + | |||
| + | Found in {{location|Candlestick Keep||1.2}} areas. Not all seats are breakable. | ||
| + | |||
| + | [[Antique Chair]] furniture items are similar. | ||
| + | |||
| + | First seen with {{release|2011-09-06}}. | ||
| + | }} | ||
| + | |||
| + | {{ExplorationList | ||
| + | |name = Cabinet | ||
| + | |notes = Break open for a chance to find minor loot. | ||
| + | |||
| + | Encountered in certain [[Compound]] areas. | ||
| + | }} | ||
| + | |||
| + | {{Table/End}} | ||
| + | |||
| + | {{clearleft}} | ||
| + | |||
| + | ===Mechanisms=== | ||
| + | The following entities will cause a change when triggered, are connected to something that causes a change, or simply an integral part of the clockworks. They usually play important roles in puzzles. Others are obstacles that need to be overcome. | ||
| + | |||
| + | {{ExplorationList/Start}} | ||
| + | |||
| + | {{ExplorationList | ||
| + | |name = Button | ||
| + | |notes = A round red button that triggers a change. They are usually connected to doors. Other buttons trigger monster spawns. | ||
| + | }} | ||
| + | |||
| + | {{ExplorationList | ||
| + | |name = Crystal Block | ||
| + | |notes = A family of 1x1 crystalline blocks that break each other if one of them is broken, as long as they are touching (a chain) and are the same color. | ||
| + | |||
| + | Single blocks are often used to conceal mechanisms such as buttons. | ||
| + | }} | ||
| + | |||
| + | {{ExplorationList | ||
| + | |name = Force Field | ||
| + | |notes = Attacks performed through this type of barrier will not inflict damage. | ||
| + | |||
| + | Many force fields are one-way, and often protect players at the start of a level. Others protect NPCs in the field, or make certain puzzles a bit complicated. | ||
| + | |||
| + | Tier 3 [[Wolver]]s can burrow past these barriers. Some monsters can [[glitch]] past a force field as well, witnessed often with the sun scarabs in {{mission|Shadowplay}}. | ||
| + | }} | ||
| + | |||
| + | {{ExplorationList | ||
| + | |name = Lift Barrier | ||
| + | |notes = These barriers will generate pinkish-purple X's and prevent progress if the player has an item lifted over their head, hence the name "lift barrier." They are indicated by a strip on the ground decorated with a few X's (these X's also light up when the barrier is active), and most generate between two poles, but they can appear without visible poles. | ||
| + | |||
| + | Because the barrier is specific per individual player, other party members are not hindered as long as they are not carrying anything. Monsters can pass through as well. | ||
| + | }} | ||
| + | |||
| + | {{ExplorationList | ||
| + | |name = Door | ||
| + | |notes = A barred barrier blocking progress. Find a button or a switch to progress. | ||
| + | }} | ||
| + | |||
| + | {{ExplorationList | ||
| + | |name = Monster Door | ||
| + | |notes = An angry-looking door that seems to have a [[Game Face]]. Time to get your game on and defeat monsters in the area to progress. | ||
| + | }} | ||
| + | |||
| + | {{ExplorationList | ||
| + | |name = Energy Door | ||
| + | |notes = A door blocking progress. Open it with [[energy]]. | ||
| + | |||
| + | {{opinion/small}}: It is usually not frugal to open these. Some blocked areas are not entirely behind walls - try popping the boxes with a ranged weapon or [[pickup]] to see if it's worth it! [[Danger Room]]s are usually worth fighting through, if they're in a depth that has drops the player desires. | ||
| + | }} | ||
| + | |||
| + | {{ExplorationList | ||
| + | |name = Gold Door | ||
| + | |notes = A door wrapped in golden chains blocking progress. Find and carry a Gold Key to the door, then put the key down close to the door to progress. | ||
| + | }} | ||
| + | |||
| + | {{ExplorationList | ||
| + | |name = Padlocked Door | ||
| + | |notes = A door that must be hacked open by a [[Recon Knight]]. They are found in a few rank mission floors where [[Caged Knight]]s must be rescued. | ||
| + | }} | ||
| + | |||
| + | {{ExplorationList | ||
| + | |name = Ghost Block | ||
| + | |notes = 1x1 light-emitting blue blocks with symbols on the sides. | ||
| + | |||
| + | Most types of blocks connected to a ghost block by at least one other block (a connective chain) will poof away if said ghost block is destroyed. | ||
| + | |||
| + | Careful! This poofing property also applies to [[Treasure Box]]es! This plays a role in several minor puzzles. | ||
| + | }} | ||
| + | |||
| + | {{ExplorationList | ||
| + | |name = Party Button | ||
| + | |notes = A large red button where all players in the party should gather. Activating a Party Button is mandatory for progression, with only a few exceptions. | ||
| + | }} | ||
| + | |||
| + | {{ExplorationList | ||
| + | |name = Pressure Pad | ||
| + | |notes = 1x1 plates that activate when something heavy is on top. Find a Heavy Statue somewhere in the area or stand on it. | ||
| + | }} | ||
| + | |||
| + | {{ExplorationList | ||
| + | |name = Switch | ||
| + | |notes = A round switch that will allow or deny access. | ||
| + | *Yellow/Purple indicate that the switch can be toggled, or that the switch is on a timer. | ||
| + | *Red/Green indicate the switch can only be hit once. Green means it can't be struck again - it has been activated. | ||
| + | }} | ||
| + | |||
| + | {{ExplorationList | ||
| + | |name = Button (Rocket) | ||
| + | |notes = A round green button with a rocket symbol. It turns off rocket blocks in the [[Ironclaw Munitions Factory]], {{mission|Operation Crimson Hammer}}, and certain [[Compound]] areas. | ||
| + | }} | ||
| + | |||
| + | {{ExplorationList | ||
| + | |name = Lever | ||
| + | |notes = A lever attached to a large round gear that will raise or lower purple or yellow "toggle walls" in the [[Ironclaw Munitions Factory]] when struck. | ||
| + | }} | ||
| + | |||
| + | {{ExplorationList | ||
| + | |name = Pressure Pad (Heavy Statue) | ||
| + | |notes = 1x1 plates that only activate when a Heavy Statue is placed on top. Find one somewhere in the area. | ||
| + | |||
| + | Can be found in {{location|Shroud of the Apocrea|The Grasping Plateau|1.3}} and the {{mission|Breaking in the Recruits}}. | ||
| + | |||
| + | Was likely introduced with {{release|2013-10-23}}. | ||
| + | }} | ||
| + | |||
| + | {{ExplorationList | ||
| + | |name = Gun Block | ||
| + | |notes = A 1x1 launcher that sends off a rocket when attacked. The light on top changes color: | ||
| + | *Green: can be hit to launch a rocket. | ||
| + | *Red: a rocket is active, reloading another rocket - will not activate if hit. | ||
| + | *Yellow: can only be activated if hit by a rocket. | ||
| + | |||
| + | Can be encountered in the {{mission|Crimson Chaos}}. | ||
| + | |||
| + | First seen with {{release|2015-02-11}}.{{clear}} | ||
| + | }} | ||
| + | |||
| + | {{ExplorationList | ||
| + | |name = Unbreakable Crystal Block | ||
| + | |notes = A family of 1x1 crystalline blocks that break each other if one of them is broken, as long as they are touching (a chain) and are the same color. | ||
| + | |||
| + | This type cannot be destroyed unless a regular crystal block of the same color is touching them. | ||
| + | |||
| + | Can be encountered in the {{mission|Crimson Chaos}}. | ||
| + | |||
| + | First seen with {{release|2015-02-11}}. | ||
| + | }} | ||
| + | |||
| + | {{ExplorationList | ||
| + | |name = One Time Pressure Pad | ||
| + | |notes = Requires all to be depressed at the same time, but don’t need to remain down in order to activate a door. | ||
| + | |||
| + | Encountered in [[Treasure Vault]]s areas. | ||
| + | |||
| + | First seen with {{release|2019-06-27}}. | ||
| + | }} | ||
| + | |||
| + | {{Table/End}} | ||
| + | |||
| + | {{clearleft}} | ||
| + | |||
| + | ===Miscellaneous=== | ||
| + | This list consists of entities that can be interacted with, but don't really fall into other categories. | ||
| + | |||
| + | {{ExplorationList/Start}} | ||
| + | |||
| + | {{ExplorationList | ||
| + | |name = Block | ||
| + | |notes = A family of basic 1x1 blocks can be broken by a single damaging attack of any kind. Aesthetic variations can be encountered in different areas. | ||
| + | |||
| + | Perhaps they are meant to be large bits of rubble, junk, or debris, as they seem to be more aesthetic features than obstacles most of the time. | ||
| + | }} | ||
| + | |||
| + | {{ExplorationList | ||
| + | |name = Stone Block | ||
| + | |notes = Ghost blocks will remove these blocks. A family of 1x1 boulders that can be broken with three hits. Rarely, hitting a boulder might disturb a hidden [[Rock Jelly]]. | ||
| + | }} | ||
| + | |||
| + | {{ExplorationList | ||
| + | |name = Unbreakable Block | ||
| + | |notes = Ghost Blocks will remove these blocks. A family of 1x1 blocks that cannot be broken by regular attacks. Aesthetic variations can be encountered in different areas. | ||
| + | |||
| + | With {{release|2013-04-03}} art for the default variation was changed. | ||
| + | }} | ||
| + | |||
| + | {{ExplorationList | ||
| + | |name = Empty Rocket | ||
| + | |notes = Empty Rockets must be hit twice to be broken. | ||
| + | |||
| + | Encountered in [[Ironclaw Munitions Factory]] and {{mission|Operation Crimson Hammer}}. | ||
| + | }} | ||
| + | |||
| + | {{ExplorationList | ||
| + | |name = Hedgehog | ||
| + | |notes = Caltrop-shaped barriers that must be struck three times to be removed. | ||
| + | |||
| + | Encountered in {{mission|Operation Crimson Hammer}} and [[Arena#Gallery|rank mission arenas]]. | ||
| + | }} | ||
| + | |||
| + | {{ExplorationList | ||
| + | |name = Ice Barrier | ||
| + | |notes = A 1x1 ice barrier that blocks player progress. Monsters can move through them without hindrance. Can be broken with three hits. Most seem to expire on their own after several minutes. They appear in rows in certain areas and can be generated repeatedly by [[Maulos]]. They have a similar appearance to [[Tundralisk]] spit. | ||
| + | |||
| + | Encountered in {{mission|Heart of Ice}}. | ||
| + | |||
| + | First seen with {{release|2012-08-01}}. | ||
| + | }} | ||
| + | |||
| + | {{Table/End}} | ||
| + | |||
| + | {{clearleft}} | ||
| − | + | ===Player Aid=== | |
| + | The following entities directly aid the player in some way, with no other obvious purposes. Some are even placed by [[NPC]]s. | ||
| − | + | {{ExplorationList/Start}} | |
| − | + | ||
| − | + | {{ExplorationList | |
| + | |name = Caged Knight | ||
| + | |notes = A large cage imprisoning an [[NPC]] knight in need of rescuing. Break the cage by attacking it three times. The freed NPC is then able to assist the player in battle. No need to worry about these tough knights after they're out, if they take enough damage, they'll just sit down for a bit and get up on their own eventually. | ||
| − | + | Encountered in {{mission|Faith in Armor}}, {{mission|Rescues and Recycling}}, {{mission|High Temperature Hostages}}, {{mission|The Great Escape}}, {{mission|Scared to Death}} and {{mission|White Collar Captives}}. | |
| + | }} | ||
| − | {{ | + | {{ExplorationList |
| + | |name = Energy Mecha Knight | ||
| + | |notes = A [[Mecha Knight]] that will fight by your side if provided with 5 [[energy]]. This entity is similar to the one produced by using a [[Mecha Knight Kit]] pickup. Kits don't require energy and are found randomly. | ||
| − | + | {{Showhide|Combat Details|content= | |
| − | + | It is equipped with its own [[Tempered Calibur]] and [[Great Defender]]. It is unaffected by traps and repaired by mechanisms that heal enemies. It will fight [[monster]]s until either it takes too much damage or the player finishes the level. It is unable to take the elevator with the party and stays behind. | |
| − | + | Low danger: It occasionally stutters with shock, this can have adverse effects on nearby players. Its attacks normally cause an obnoxious amount of knockback with sub-par damage, so use it as a decoy, if at all. | |
| − | + | ||
| − | + | {{Opinion/Small}}: The benefits of activating this entity are not worth 5 energy. Players usually only activate these "for fun." | |
| + | }} | ||
| − | + | {{Showhide|Locations|content= | |
| − | + | Energy Mecha Knights can be found in: | |
| − | + | ||
| − | + | ||
* [[Deconstruction Zone]]s | * [[Deconstruction Zone]]s | ||
* [[Grand Arsenal]] | * [[Grand Arsenal]] | ||
| Line 229: | Line 669: | ||
* [[Ghosts in the Machine]]: Dry Dock | * [[Ghosts in the Machine]]: Dry Dock | ||
* [[Compounds]] levels in [[Scenario Rooms]] | * [[Compounds]] levels in [[Scenario Rooms]] | ||
| + | }} | ||
| − | + | }} | |
| − | + | {{ExplorationList | |
| − | + | |name = Mecha Turret | |
| − | + | |notes = {{main|Mecha Turret}} | |
| − | + | A turret that fires a laser beam, damaging enemies. Some require 5 [[energy]] to activate, others are activated by using an [[Auto Turret Kit]], and others are already ready to rumble. Kits don't require energy and are found randomly, though they expire after several minutes of use and can be destroyed by monsters. | |
| − | + | ||
| − | + | ||
| − | + | ||
| − | + | ||
| − | + | ||
| − | == | + | {{Opinion/Small}}: The benefits of activating Energy Mecha Turrets are not worth 5 energy. Players usually only activate these "for fun." |
| − | '' | + | |
| + | }} | ||
| + | |||
| + | {{ExplorationList | ||
| + | |name = Heart Generator | ||
| + | |notes = A tile that restores your knight's HP if you stand on top of it. The heal rate can be fast or slow in different areas. | ||
| + | |||
| + | They can be found in the [[Advanced Training Hall]], certain [[Lockdown]] maps, [[Subtowns]], in between [[Arena]]s, before [[Boss]]es, and very slow spawners can be found in the [[Firestorm Citadel]]. | ||
| + | }} | ||
| + | |||
| + | {{ExplorationList | ||
| + | |name = Heart Generator (Blue) | ||
| + | |notes = A tile that restores your knight's HP if you stand on top of it. It also cures [[status]], indicated by its [[Remedy Capsule]]-like coloration. | ||
| + | |||
| + | They can be found in the [[Private Training Hall]] and the locker rooms of [[Lockdown]] matches. | ||
| + | }} | ||
| + | |||
| + | {{ExplorationList | ||
| + | |name = Information | ||
| + | |namefix = Information Module | ||
| + | |notes = A module containing information about the area. | ||
| + | |||
| + | A box full of inactive information modules can be seen next to [[Brinks]] in the [[Haven Bazaar]]. | ||
| + | }} | ||
| + | |||
| + | {{ExplorationList | ||
| + | |name = Danger | ||
| + | |namefix = Danger Module | ||
| + | |notes = A module warning about perils ahead. Some mark dangerous areas. Others contain messages. | ||
| + | }} | ||
| + | |||
| + | {{ExplorationList | ||
| + | |name = Echo Stone | ||
| + | |notes = An [[Echo Stone]] contains significant information about [[Cradle]] and [[The Swarm]]. They can be "listened to" via the [[File:Icon-artifact.png|16px|link=Artifact]] [[Artifact]] section of the player's [[arsenal]] after acquisition. This has a unique interface. Found in [[The Sanctuary]]. <br><br> First seen with {{release|2011-10-19}}. | ||
| + | }} | ||
| + | |||
| + | {{ExplorationList | ||
| + | |name = Monstrous Codex | ||
| + | |notes = A module containing information about a specific [[monster]], usually a [[boss]]. | ||
| + | }} | ||
| + | |||
| + | {{ExplorationList | ||
| + | |name = Recon Module | ||
| + | |notes = A [[Recon Module]] contains vital information and/or small bits of stories. They can be read via the [[File:Icon-artifact.png|16px|link=Artifact]] [[Artifact]] section of the player's [[arsenal]] after acquisition. | ||
| + | }} | ||
| + | |||
| + | {{ExplorationList | ||
| + | |name = Water Well | ||
| + | |notes = Generates water pots. Encountered in the {{location|Firestorm Citadel||1.2}} and {{location|Shroud of the Apocrea|The Grasping Plateau|1.3}}. A version of this entity in {{mission|Operation Crimson Hammer}} will not generate more water pots. Standing in the grassy area around wells associated with [[Nature Sprite]]s will cure the player's [[status|status ailments]]. | ||
| + | }} | ||
| + | |||
| + | {{ExplorationList | ||
| + | |name = Beast Bell | ||
| + | |notes = A bell left by NPCs to aid in combat. Active ones play an important role in the [[Gloaming Wildwoods]] and using one correctly is required to defeat the [[Snarbolax]]. One can be seen in the northern area of the [[Lab]]. | ||
| + | |||
| + | Hit it to ring it - any [[wolver]]s or [[Dust Bunny|bunnies]] in range will be inflicted with [[Stun|stun]]. | ||
| + | |||
| + | First seen with {{release|2011-06-02}}. | ||
| + | }} | ||
| + | |||
| + | {{ExplorationList | ||
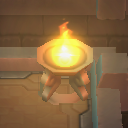
| + | |name = Candle (Unlit) | ||
| + | |namefix = Candle | ||
| + | |notes = Find and throw an ember onto a candle to light it. [[:File:Exploration-Candle (Yellow).png|Yellow candles]] will stay lit for around 30 seconds. [[:File:Exploration-Candle (Blue).png|Blue candles]] will stay lit forever. Lighting a candle provides light as well as a safe area from [[Grimalkin]] in keeps. This area tends to be much larger for yellow candles. Some candles will trigger mechanisms when lit and/or when their light expires. | ||
| + | |||
| + | Encountered in: {{location|Candlestick Keep||1.2}} areas, rarely in [[:File:Scenario Room-Graveyard 7.png|this Graveyard scenario room]], and occasionally in {{location|Shroud of the Apocrea|The Grasping Plateau|1.3}} as part of a puzzle. | ||
| + | |||
| + | First seen with {{release|2011-09-06}}. | ||
| + | }} | ||
| + | |||
| + | {{Table/End}} | ||
| + | |||
| + | {{clearleft}} | ||
| + | |||
| + | ===Spawners=== | ||
| + | The following entities will spawn monsters. Some will spawn continuously or only once. | ||
| + | |||
| + | {{ExplorationList/Start}} | ||
| + | |||
| + | {{ExplorationList | ||
| + | |name = Grave Mound | ||
| + | |notes = A suspicious mound of soil that might spawn a [[zombie]] as you approach, or as you walk away. They are guaranteed to be encountered in [[Graveyard]] areas, but not {{location|Shroud of the Apocrea|The Grasping Plateau|1.3}}. During the [[Dark Harvest Festival]], they might spawn a [[Grim Scarab]] instead of a zombie. | ||
| + | }} | ||
| + | |||
| + | {{ExplorationList | ||
| + | |name = Monster Cage | ||
| + | |notes = 1x1 object that releases a random [[monster]] when broken. | ||
| + | |||
| + | {{Showhide|Locations|content= | ||
| + | Certain types of [[Danger Room|danger room]]s feature monster cages. | ||
| + | |||
| + | Some areas contain hidden cages that have the appearance of breakable blocks. | ||
| + | |||
| + | The "med cache" boxes in the eastern area of the second floor of [[Ghosts in the Machine]] are actually monster cages containing constructs. | ||
| + | |||
| + | Players can always find monster cages in: | ||
| + | :[[Gloaming Wildwoods]] | ||
| + | :[[Shadow Lair]]: [[Gloaming Wildwoods]] | ||
| + | :[[Jigsaw Valley/Perimeter Promenade II|Jigsaw Valley: ''Perimeter Promenade II'']] | ||
| + | :[[Scarlet Fortress|Scarlet Fortress: ''Cravat Hall'' (''I - III'')]] | ||
| + | }} | ||
| + | |||
| + | {{Caged Monsters}} | ||
| + | |||
| + | {{Opinion/Small}} It would be best to break these with a ranged weapon or bomb, because monsters that come out will usually attack immediately. | ||
| + | }} | ||
| + | |||
| + | {{ExplorationList | ||
| + | |name = Swarm Portal | ||
| + | |imgfix = Monster-Swarm Portal | ||
| + | |notes = Allows the entry of [[swarm]] entities. Any swarm-infected monster above these dark portals will have their defenses increased until they are invulnerable. | ||
| + | |||
| + | Encountered in the [[Unknown Passage]]. | ||
| + | |||
| + | First seen with {{release|2011-10-19}}. | ||
| + | }} | ||
| + | |||
| + | {{ExplorationList | ||
| + | |name = Bunker | ||
| + | |notes = An armored point of entry for [[Gremlin]] forces protected by barbed wire. Permanently disable it by shooting or throwing something into the door. Disabled bunkers appear damaged and the entrance is blocked by a hazardous fire pit. | ||
| + | |||
| + | First seen with {{release|2012-02-29}}. | ||
| + | |||
| + | Encountered in {{mission|Operation Crimson Hammer}}. | ||
| + | }} | ||
| + | |||
| + | {{ExplorationList | ||
| + | |name = Busted Floor | ||
| + | |notes = A suspicious hole in the floor. Usually, nasty mini monsters ([[Dust Bunny|Dust Bunnies]], [[Glop Drop]]s, or [[Scarab]]s) will crawl out and make a fuss. | ||
| + | |||
| + | It is a special monster spawner frequently encountered in [[Compound]]s. Variations (single tile, decorated) are seen in other areas. | ||
| + | |||
| + | First seen with {{release|2012-05-09}}. | ||
| + | }} | ||
| + | |||
| + | {{ExplorationList | ||
| + | |name = Fiend Gate | ||
| + | |notes = A suspicious sigil that continuously spawns what appears to be a portal. Fiends come through it into battle. | ||
| + | |||
| + | Destroy this portal whenever it appears to reduce the flood of fiendish forces. | ||
| + | |||
| + | First seen 26 February 2014. | ||
| + | }} | ||
| + | |||
| + | {{ExplorationList | ||
| + | |name = Burrow | ||
| + | |notes = A hole in the floor. [[Wolver]]s will occasionally come out. | ||
| + | |||
| + | First seen with {{release|2015-02-11}}. Encountered in the {{mission|Breaking in the Recruits}}. | ||
| + | }} | ||
| + | |||
| + | {{ExplorationList | ||
| + | |name = Swarm Sphere | ||
| + | |notes = A peculiar black sphere encountered somewhat frequently in areas of the [[Core]]. Be careful, it will spawn a monster corrupted by [[The Swarm]] if struck, similar to the [[Monster Cage]]. | ||
| + | |||
| + | Encountered in [[Core]] areas. | ||
| + | |||
| + | First seen with {{release|2015-05-13}}. | ||
| + | }} | ||
| + | |||
| + | {{ExplorationList | ||
| + | |name = Monster Garage | ||
| + | |notes = A garage shaped block that spawns a bunch of [[Drop]]s off of it. ''Because Drops can be unruly when hanging out with friends, they’re sometimes forced to live in a garage.'' | ||
| + | |||
| + | Encountered in [[Treasure Vault]]s areas. | ||
| + | |||
| + | First seen with {{release|2019-06-27}}. | ||
| + | }} | ||
| + | |||
| + | {{Table/End}} | ||
| + | |||
| + | {{clearleft}} | ||
| + | |||
| + | ==General Exploration== | ||
| + | === Items === | ||
| + | Items are frequently dropped from map features, monsters, and treasure boxes. Rarely, they are simply on the ground waiting to be picked up. | ||
| + | {{main|Consumables}} | ||
| + | {{main|Crafting}} | ||
| + | {{main|Minerals}} | ||
| + | {{main|Pickups}} | ||
| + | |||
| + | === Monsters === | ||
| + | {{main|Monster}} | ||
| + | Monsters are the denizens that reside within the ever-changing halls of the Clockworks. There are currently six "families" of monsters found within the Clockworks; [[Beast]]s, [[Fiend]]s, [[Undead]], [[Construct]]s, [[Gremlin]]s and [[Slime]]s. Each family (besides Gremlins) has at least two different "species" with varying methods of attacks. | ||
| + | |||
| + | === NPCs === | ||
| + | {{main|NPC}} | ||
| + | Occasionally, the player will encounter friendly NPCs in the field, or need to rescue NPCs before resuming exploration. | ||
| + | |||
| + | === Treasure Boxes === | ||
| + | {{main|Treasure box}} | ||
| + | A lucky find! Treasure boxes always contain goodies such as [[crowns|coins]], [[Token#Treasure_Box_Tokens|token]]s, [[heat]], [[pickup]]s or, on rare occasions, tier-based [[equipment]] for the knight to loot. They come in red and green varieties, with the red ones being more rewarding (and less often found) than the green ones. | ||
| − | + | ===World=== | |
| + | {{main|Geography}} | ||
| + | {{main|Scenario Room}} | ||
| − | + | The appearance of the area the player is exploring will be different depending on a variety of factors. In general, deeper depths are darker unless the area is contained in a giant sphere with moon or sun bulbs, as with [[Lichenous Lair]]s, [[Wolver Den]]s, and a few other areas. The floor, walls, and many entities will change color according to the [[stratum|status theme]]. Many areas will also have relevant weather conditions. The [[Theme (Guild Hall)|Theme]] and [[Environment (Guild Hall)|Environment]] of a [[Guild Hall]] can be changed to mimic some of these appearances. | |
| − | + | ||
| − | == | + | ==See Also== |
| − | * | + | *[[Mission]] |
| − | + | ||
| − | + | ||
[[Category:Terminology]] | [[Category:Terminology]] | ||
| − | [[Category: | + | [[Category:Exploration|*]] |
Latest revision as of 20:37, 18 June 2020
One of the tasks for knights is exploration of the Clockworks by joining in parties going down through gates. While in the Clockworks, knights will encounter many interesting things.
Use the mini map to detect monsters and areas. Utilize the icons of Gate Maps to predict what might be encountered while exploring.
Contents
Map Features
There are many wonders to witness on Cradle. The clockworks is a dynamic place, so certain objects might be found in abundance in some areas, while others are only found in a few or even a single area. An area can have different numbers of these objects than were encountered previously in that area, forcing players to pay attention to their surroundings.
Many entities encountered are interactive, while others are not. Stone carvings can obscure switches, but are not themselves interactive. Below are lists of entities that are either interactive, and/or have a dynamic effect on the player. Other entities that are simply aesthetic, or are more complex and linked to elsewhere on this page, are not included in these lists.
The names in this list are mostly colloquial, though some do have an official name that appears if the entity is targeted.
Carried
The following entities can be picked up by the player and carried to another location. They are either set down or thrown. If the player takes direct damage, the entity will be dropped.
| Example | Name | Notes |
|---|---|---|
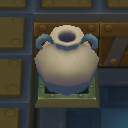
| Clay Pot
|
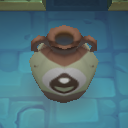
A pot for smashing. Throw it to hit switches, or just to have fun smashing.
A common sight in the clockworks, these pots serve as a means to complete many puzzles, a lucky break for knights who neglect to bring long-range projectiles. | |
| Cursed Nature Sprite
|
A cursed Nature Sprite. Carry it to a purifying area, or splash it with a water pot.
Found in Firestorm Citadel and the 10-2 | |
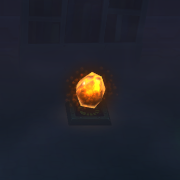
| Ember
|
Throw them at a candle to light it. Encountered in Candlestick Keep areas and The Grasping Plateau. Unlike water pots, they do not have an artistic generator, simply using a respawn pad. | |
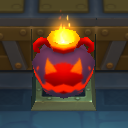
| Fire Pot
|
A pot containing a self-igniting substance. Throw it at something to set it on fire!
Low danger: you can set your friends on fire if you're not careful. | |
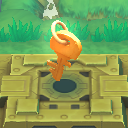
| Gold Key
|
A large golden key. It unlocks a Gold Gate somewhere. | |
| Heavy Statue
|
A large heavy statue. Put it on a pressure pad somewhere in the area, or use it to block monsters. | |
| Oil Pot
|
A pot containing flammable oil. Throw it at something to break it - this will spill oil everywhere. Set that oil on fire!
Low danger: you can set your friends on fire if you're not careful. Many areas containing oil pots seem to be mostly populated by enemies that are immune to fire. | |
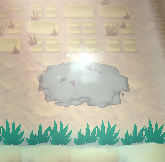
| Water Pot
|
A glob of water generated from a water well. Use it to put out a fire pit or shadow fire in the area. Encountered in the same areas that water wells are, though water pots without a "bowl" or "well" are encountered in | |
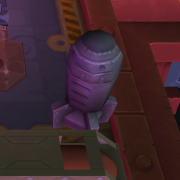
| Bomb Shell
|
A 1x1 rocket-like object that can be thrown. Explodes on impact.
First seen ??? Can be encountered in the |
Enemy Aid
The following entities directly aid enemies in some way.
| Example | Name | Notes |
|---|---|---|
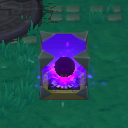
| Grim Totem
|
1x1 object that pulses with eerie purple light.
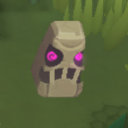
Grim Totems will resurrect any nearby Zombies killed within its radius. These totems cannot be destroyed, but (if they can be reached) they can be carried by the player to another location to allow for easier zombie slaying. | |
| Swarm Source
|
The source of an expanding shadowy field that slows players down and buffs the defense of monsters. As it takes damage, the field will decrease in size. With enough damage the field will disappear and the source won't generate the field for a while.
First seen with release 2011-10-19. | |
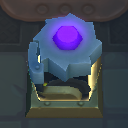
| Healing Totem
|
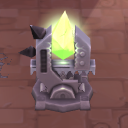
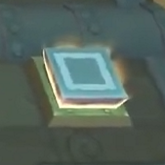
A strange device holding a mineral-like object. It will heal nearby enemies. They can be destroyed, but are on fast spawner pads in these areas. The colors seem to reflect the Tier in which the totem is located, a behavior akin to the the similar objects in gremlin mender wands. Tier 1: greenish yellow. Tier 2: Orange. Tier 3: Purple.
Can be encountered in certain fiendish arcade areas during the March of the Tortodrones event. Several are encountered in 10-2 First seen 26 February 2014. |
Hazards
The following entities will harm or hinder the player in some way, usually severely. A few will also harm nearby monsters.
| Example | Name | Notes |
|---|---|---|
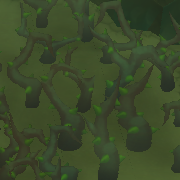
| Brambles
|
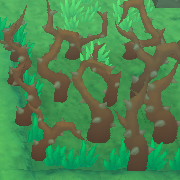
A tangle of plants with grey thorns that will damage the player if touched. | |
| Brambles (Poison)
|
A tangle of plants with green thorns that will damage and possibly poison the player if touched. | |
| Explosive Block
|
1x1 light-emitting blocks that explode violently if struck, hurting both knights and monsters alike.
Stuttering Mecha Knights will trigger these. | |
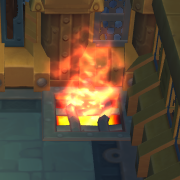
| Fire Trap
|
Fire periodically rises from a grate. Players can walk across inactive traps and not take damage from the hazards within.
This hazard deals significant damage if touched while active, and is very likely to set players on fire. | |
| Fire Pit
|
A very hazardous batch of fire. Encountered in the It is similar to the shadow fire encountered in the Firestorm Citadel, but does not have the same sinister pinkish coloration near the base. | |
| Freeze Trap
|
Frigid air periodically rises from a grate. Players can walk across inactive traps and not take damage from the hazards within.
This trap deals significant damage if touched while active, and has a very high chance to freeze players. This freeze is likely lasting, so this trap will slowly kill most knights, even if they are caught at full health. If your allies are trapped on this grate, free them immediately by breaking the ice that binds them. Very low level traps can be explored with impunity if the player has high enough freeze resistance. | |
| Orbital Chain
|
A dangerous chain orbits a fixed point. There are several variations in length, status type, and orbit speed of this hazard that can be encountered.
There are spots between each orb in a chain where the player can avoid damage as the chain passes by, but these are usually hard to utilize, so it's best to just avoid the chain. | |
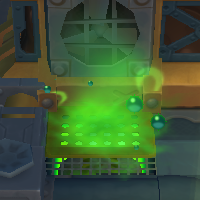
| Poison Trap
|
Noxious fumes periodically rise from this grate. Players can walk across inactive traps and not take damage from the hazards within.
This trap deals significant damage if touched while active, and is very likely to poison players. | |
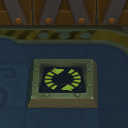
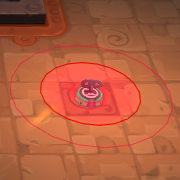
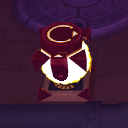
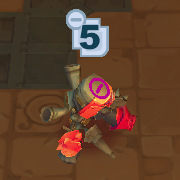
| Respawn Pad
|
A tile that perpetually produces entities. The respawn rate can be different speeds in different areas, and this rate is somewhat indicated by the speed of the rotating arrows. As a rule of thumb, if there is a pad with nothing on top of it in the first place, it will spawn a monster. If it did have something on top, it will spawn whatever that thing was (usually). Don't idle on these pads - your knight can get a bit hurt when blocks respawn. Instead, avoid it or shield on it to block the spawn. This is handy to help your friends get through areas while carrying things.
If it is a monster spawner, usually shielding over it will prevent the enemy from spawning, but this doesn't work for all spawners. | |
| Shock Trap
|
Exposed wires periodically surge with power. Players can walk across inactive grates and not take damage from the hazards within.
This trap deals significant damage if touched while active, and is very likely to shock players. | |
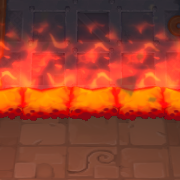
| Shadow Fire
|
A very hazardous batch of fire very frequently encountered in the Firestorm Citadel. Put it out with a water pot - you'll need to help the nature sprites to have access to water. Frequently called "lava" or "spirit fire" by the community, and referred to as shadow fire by nature sprites. | |
| Spike Trap
|
Conical spikes periodically rise up from the round holes in the floor. They inflict a large amount of piercing damage. Players can walk across inactive grates and not take damage from the hazards within.
A rare version of this trap inflicts stun instead of dealing damage. This phenomenon can be encountered in the kat nest of the | |
| Timed Explosive Block
|
1x1 light-emitting blocks that count down from 3 and then explode violently if struck, hurting both knights and monsters alike.
Stuttering Mecha Knights will trigger these. | |
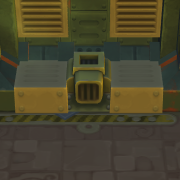
| Wheel Launcher
|
Main article: Wheel Launcher
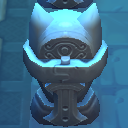
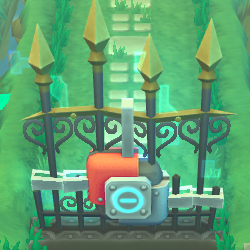
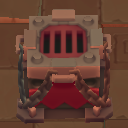
An armored device that periodically spits out a large wheel. This wheel crushes players and monsters alike, pushing them in front of it for yet more crushing. Unlike other exploration entities, it has weaknesses and resistances similar to the Construct monster family. Destroy it from behind, or block the wheel with a Cursed Nature Sprite, Heavy Statue, or Grim Totem, if any are available. Encountered in the Firestorm Citadel, the | |
| Rocket Block
|
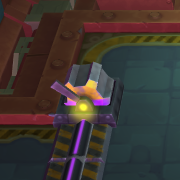
A block that periodically launches an explosive missile. Try to turn them off with a green missile button.
Encountered in the Ironclaw Munitions Factory, First seen with release 2011-07-06. | |
| Unused Rocket
|
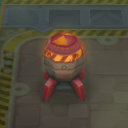
When hit, they will flash and then explode, dealing damage in a 2 tile radius. They do not damage nearby Empty Rockets.
Encountered in the Ironclaw Munitions Factory and the First seen with release 2011-07-06. | |
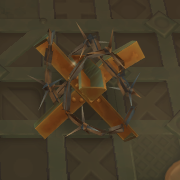
| Barbed Wire
|
Hazardous tangles of wire.
Can be encountered in the | |
| Landmine
|
A hidden bomb that is activated by a player walking nearby. The bomb is not visible, but it's marked by distinctive tiles of a darker hue. Its fuse length is similar to that of Gremlin Demo bomb. Encountered in the | |
| Fire Launcher
|
This block periodically spits out a long trail of fire. Some can be turned off.
Encountered in | |
| Barbed Hedgehog
|
Hazardous caltrop-shaped barriers that can be removed with a single hit.
Can be encountered in 4-3 | |
| Falling Mush
|
A glop of slop randomly falls from heights above, landing with a loud plop. This causes a small area to be difficult to traverse for 15 seconds. Players and monsters alike have reduced movement speed while in the affected area.
Encountered in First seen 11 December 2013. | |
| Misery Block
|
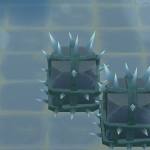
A family of 1x1 unbreakable spike blocks that deal high damage if touched.
These are often found in large numbers during certain events and/or in dangerous areas. Can be encountered in the 10-1 First seen 11 December 2013. | |
| Mush Block
|
A family of 1x1 breakable blocks that break into a pile of mush. This mush lingers for a while and will significantly hinder movement speed.
These are often found in clusters. Ice slush and chilled frosting "mush" can be encountered in the First seen 11 December 2013. | |
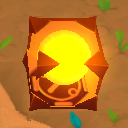
| Red Searchlight
|
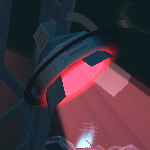
Similar to aesthetic searchlights found elsewhere in the clockworks. These have a red tint and make a round pool of light on the ground. If the player walks into this lit area, several missiles will fall from above.
Found in the 2-3 First seen with release 2013-07-30. | |
| Super Explosive Block
|
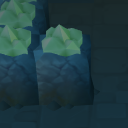
A blast block that generates several explosive globs when destroyed (even when removed via ghost block). Globs are similar to the ones generated by defeated Blast Cubes, a type of slime.
Can be encountered during the March of the Tortodrones event, in Treasure Vaults and in the 10-2 First seen 26 February 2014. | |
| Vortex Block
|
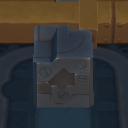
A strange block that generates a relatively harmless vortex for a short time when struck. The vortex affects both knights and monsters.
Low danger: it can potentially drag knights through hazards or keep them in range of enemy fire. Can be encountered during the March of the Tortodrones event and 10-2 First seen 26 February 2014. | |
| Timed Super Explosive Block
|
A blast block that counts down and then generates several explosive globs when destroyed.
Globs are similar to the ones generated by defeated Blast Cubes, a type of slime. Can be encountered during the March of the Tortodrones event in certain fiendish arcade areas as well as the related prestige mission. First seen 26 February 2014. | |
| Swarm Spikes
|
A malignant tangle of spikes hidden in the floor that respond to the presence of knights, similar to a landmine. They will spike up a moment or two after you step where they are - don't linger too long in one spot or follow the footsteps of friends.
Encountered in Core areas. First seen with release 2015-05-13. | |
| Echo Block
|
Reflects any damage/status it receives. They give as good as they get.
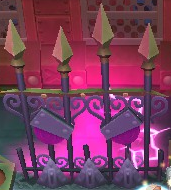
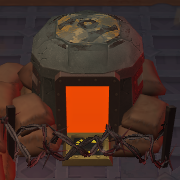
Encountered in Treasure Vaults. First seen with release 2019-06-27. |
Loot Yielding
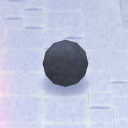
The following entities, unless otherwise specified, will yield a crown of some value, a heart, or nothing when broken.
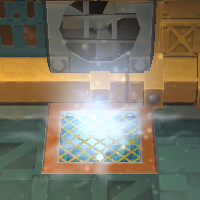
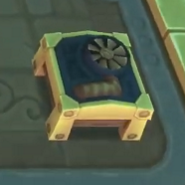
| Example | Name | Notes |
|---|---|---|
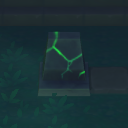
| Breakable Tombstone
|
A 1x1 object that can be broken with a single hit. A crown of some value will drop.
These grave markers are encountered in Graveyard areas. Nonbreakable versions will not have glowing green cracks. Some gravestones (breakable or not) have a mound of soil near them. Keep an eye on these - a mound might spawn a zombie as you approach, or as you walk away. Breakable Tombstones in The Grasping Plateau are similar to spawners, containing either Souls, Pale Scarabs, Freezing Bombies, or nothing. | |
| Bucket
|
Break for a chance to find minor loot.
Always encountered in Ironclaw Munitions Factory and | |
| Bush
|
Break for a chance to find minor loot.
These plants have a much lower drop rate than other loot-yielding breakables, usually yielding nothing. They have a very small chance of dropping a single crown. Vividly colored versions are encountered in Compounds. | |
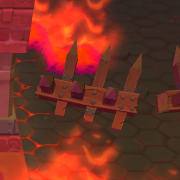
| Fence
|
Break for a chance to find minor loot.
Encountered in the Firestorm Citadel. | |
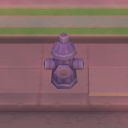
| Hydrant
|
Break for a chance to find minor loot.
Encountered in Concrete Jungle, Devilish Drudgery, and Dark City areas. | |
| Lamp
|
Break for a chance to find minor loot. Short or tall varieties can be encountered.
Encountered in arcade Arenas, Firestorm Citadel, and Scarlet Fortress areas. | |
| Mailbox
|
Break for a chance to find minor loot.
Encountered in Concrete Jungle, Devilish Drudgery, and Dark City areas. | |
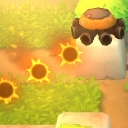
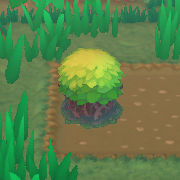
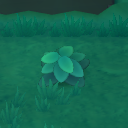
| Plant
|
Break for a chance to find minor loot.
Plants can be found on almost any level with grass. They are found in abundance in Aurora Isles and Jigsaw Valley areas. The Potted Plant furniture for decorating Guild Halls has a similar appearance. | |
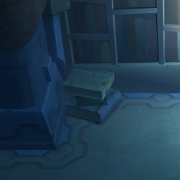
| Tome Stack
|
Break for a chance to find minor loot.
Found in Candlestick Keep and Scarlet Fortress areas. Not all stacks are breakable. Tome Stack furniture items are similar. First seen with release 2011-09-06. | |
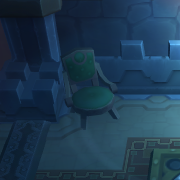
| Antique Chair
|
Break for a chance to find minor loot.
Found in Candlestick Keep areas. Not all seats are breakable. Antique Chair furniture items are similar. First seen with release 2011-09-06. | |
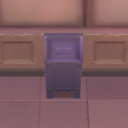
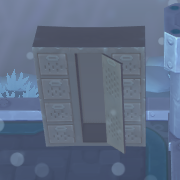
| Cabinet
|
Break open for a chance to find minor loot.
Encountered in certain Compound areas. |
Mechanisms
The following entities will cause a change when triggered, are connected to something that causes a change, or simply an integral part of the clockworks. They usually play important roles in puzzles. Others are obstacles that need to be overcome.
| Example | Name | Notes |
|---|---|---|
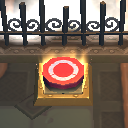
| Button
|
A round red button that triggers a change. They are usually connected to doors. Other buttons trigger monster spawns. | |
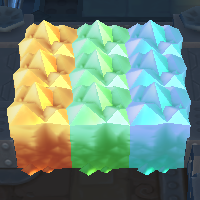
| Crystal Block
|
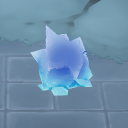
A family of 1x1 crystalline blocks that break each other if one of them is broken, as long as they are touching (a chain) and are the same color.
Single blocks are often used to conceal mechanisms such as buttons. | |
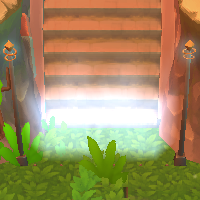
| Force Field
|
Attacks performed through this type of barrier will not inflict damage.
Many force fields are one-way, and often protect players at the start of a level. Others protect NPCs in the field, or make certain puzzles a bit complicated. Tier 3 Wolvers can burrow past these barriers. Some monsters can glitch past a force field as well, witnessed often with the sun scarabs in 10-2 | |
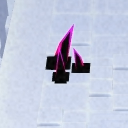
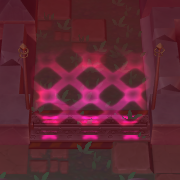
| Lift Barrier
|
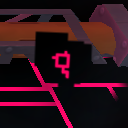
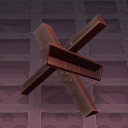
These barriers will generate pinkish-purple X's and prevent progress if the player has an item lifted over their head, hence the name "lift barrier." They are indicated by a strip on the ground decorated with a few X's (these X's also light up when the barrier is active), and most generate between two poles, but they can appear without visible poles.
Because the barrier is specific per individual player, other party members are not hindered as long as they are not carrying anything. Monsters can pass through as well. | |
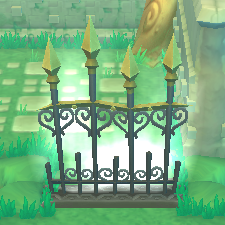
| Door
|
A barred barrier blocking progress. Find a button or a switch to progress. | |
| Monster Door
|
An angry-looking door that seems to have a Game Face. Time to get your game on and defeat monsters in the area to progress. | |
| Energy Door
|
A door blocking progress. Open it with energy.
| |
| Gold Door
|
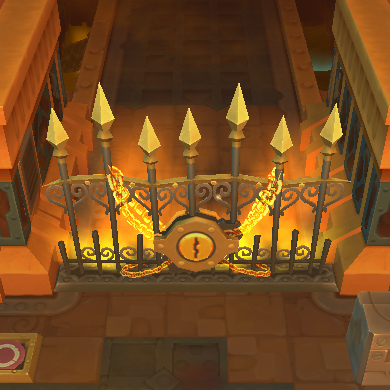
A door wrapped in golden chains blocking progress. Find and carry a Gold Key to the door, then put the key down close to the door to progress. | |
| Padlocked Door
|
A door that must be hacked open by a Recon Knight. They are found in a few rank mission floors where Caged Knights must be rescued. | |
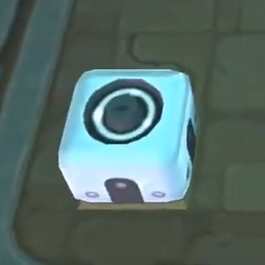
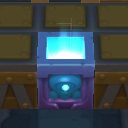
| Ghost Block
|
1x1 light-emitting blue blocks with symbols on the sides.
Most types of blocks connected to a ghost block by at least one other block (a connective chain) will poof away if said ghost block is destroyed. Careful! This poofing property also applies to Treasure Boxes! This plays a role in several minor puzzles. | |
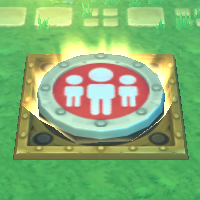
| Party Button
|
A large red button where all players in the party should gather. Activating a Party Button is mandatory for progression, with only a few exceptions. | |
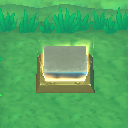
| Pressure Pad
|
1x1 plates that activate when something heavy is on top. Find a Heavy Statue somewhere in the area or stand on it. | |
| Switch
|
A round switch that will allow or deny access.
| |
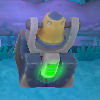
| Button (Rocket)
|
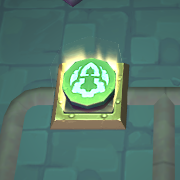
A round green button with a rocket symbol. It turns off rocket blocks in the Ironclaw Munitions Factory, | |
| Lever
|
A lever attached to a large round gear that will raise or lower purple or yellow "toggle walls" in the Ironclaw Munitions Factory when struck. | |
| Pressure Pad (Heavy Statue)
|
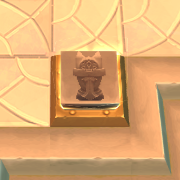
1x1 plates that only activate when a Heavy Statue is placed on top. Find one somewhere in the area.
Can be found in The Grasping Plateau and the 10-1 Was likely introduced with release 2013-10-23. | |
| Gun Block
|
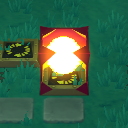
A 1x1 launcher that sends off a rocket when attacked. The light on top changes color:
Can be encountered in the 10-1 | |
| Unbreakable Crystal Block
|
A family of 1x1 crystalline blocks that break each other if one of them is broken, as long as they are touching (a chain) and are the same color.
This type cannot be destroyed unless a regular crystal block of the same color is touching them. Can be encountered in the 10-1 First seen with release 2015-02-11. | |
| One Time Pressure Pad
|
Requires all to be depressed at the same time, but don’t need to remain down in order to activate a door.
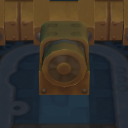
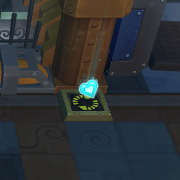
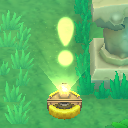
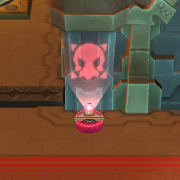
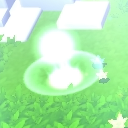
Encountered in Treasure Vaults areas. First seen with release 2019-06-27. |
Miscellaneous
This list consists of entities that can be interacted with, but don't really fall into other categories.
| Example | Name | Notes |
|---|---|---|
| Block
|
A family of basic 1x1 blocks can be broken by a single damaging attack of any kind. Aesthetic variations can be encountered in different areas.
Perhaps they are meant to be large bits of rubble, junk, or debris, as they seem to be more aesthetic features than obstacles most of the time. | |
| Stone Block
|
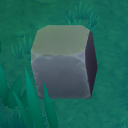
Ghost blocks will remove these blocks. A family of 1x1 boulders that can be broken with three hits. Rarely, hitting a boulder might disturb a hidden Rock Jelly. | |
| Unbreakable Block
|
Ghost Blocks will remove these blocks. A family of 1x1 blocks that cannot be broken by regular attacks. Aesthetic variations can be encountered in different areas.
With release 2013-04-03 art for the default variation was changed. | |
| Empty Rocket
|
Empty Rockets must be hit twice to be broken.
Encountered in Ironclaw Munitions Factory and | |
| Hedgehog
|
Caltrop-shaped barriers that must be struck three times to be removed.
Encountered in | |
| Ice Barrier
|
A 1x1 ice barrier that blocks player progress. Monsters can move through them without hindrance. Can be broken with three hits. Most seem to expire on their own after several minutes. They appear in rows in certain areas and can be generated repeatedly by Maulos. They have a similar appearance to Tundralisk spit.
Encountered in First seen with release 2012-08-01. |
Player Aid
The following entities directly aid the player in some way, with no other obvious purposes. Some are even placed by NPCs.
| Example | Name | Notes |
|---|---|---|
| Caged Knight
|
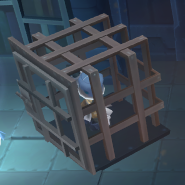
A large cage imprisoning an NPC knight in need of rescuing. Break the cage by attacking it three times. The freed NPC is then able to assist the player in battle. No need to worry about these tough knights after they're out, if they take enough damage, they'll just sit down for a bit and get up on their own eventually.
Encountered in 3-2 | |
| Energy Mecha Knight
|
A Mecha Knight that will fight by your side if provided with 5 energy. This entity is similar to the one produced by using a Mecha Knight Kit pickup. Kits don't require energy and are found randomly.
Combat Details
It is equipped with its own Tempered Calibur and Great Defender. It is unaffected by traps and repaired by mechanisms that heal enemies. It will fight monsters until either it takes too much damage or the player finishes the level. It is unable to take the elevator with the party and stays behind. Low danger: It occasionally stutters with shock, this can have adverse effects on nearby players. Its attacks normally cause an obnoxious amount of knockback with sub-par damage, so use it as a decoy, if at all. Locations
Energy Mecha Knights can be found in: | |
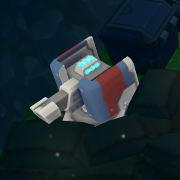
| Mecha Turret
|
Main article: Mecha Turret
A turret that fires a laser beam, damaging enemies. Some require 5 energy to activate, others are activated by using an Auto Turret Kit, and others are already ready to rumble. Kits don't require energy and are found randomly, though they expire after several minutes of use and can be destroyed by monsters.
| |
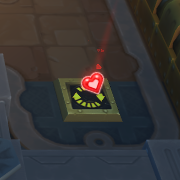
| Heart Generator
|
A tile that restores your knight's HP if you stand on top of it. The heal rate can be fast or slow in different areas.
They can be found in the Advanced Training Hall, certain Lockdown maps, Subtowns, in between Arenas, before Bosses, and very slow spawners can be found in the Firestorm Citadel. | |
| Heart Generator (Blue)
|
A tile that restores your knight's HP if you stand on top of it. It also cures status, indicated by its Remedy Capsule-like coloration.
They can be found in the Private Training Hall and the locker rooms of Lockdown matches. | |
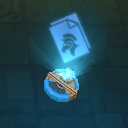
| Information Module
|
A module containing information about the area.
A box full of inactive information modules can be seen next to Brinks in the Haven Bazaar. | |
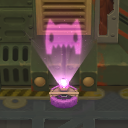
| Danger Module
|
A module warning about perils ahead. Some mark dangerous areas. Others contain messages. | |
| Echo Stone
|
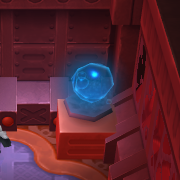
An Echo Stone contains significant information about Cradle and The Swarm. They can be "listened to" via the First seen with release 2011-10-19. | |
| Monstrous Codex
|
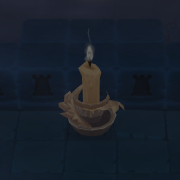
A module containing information about a specific monster, usually a boss. | |
| Recon Module
|
A Recon Module contains vital information and/or small bits of stories. They can be read via the | |
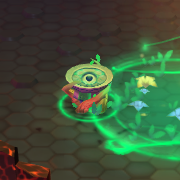
| Water Well
|
Generates water pots. Encountered in the Firestorm Citadel and The Grasping Plateau. A version of this entity in | |
| Beast Bell
|
A bell left by NPCs to aid in combat. Active ones play an important role in the Gloaming Wildwoods and using one correctly is required to defeat the Snarbolax. One can be seen in the northern area of the Lab.
Hit it to ring it - any wolvers or bunnies in range will be inflicted with stun. First seen with release 2011-06-02. | |
| Candle
|
Find and throw an ember onto a candle to light it. Yellow candles will stay lit for around 30 seconds. Blue candles will stay lit forever. Lighting a candle provides light as well as a safe area from Grimalkin in keeps. This area tends to be much larger for yellow candles. Some candles will trigger mechanisms when lit and/or when their light expires.
Encountered in: Candlestick Keep areas, rarely in this Graveyard scenario room, and occasionally in The Grasping Plateau as part of a puzzle. First seen with release 2011-09-06. |
Spawners
The following entities will spawn monsters. Some will spawn continuously or only once.
| Example | Name | Notes |
|---|---|---|
| Grave Mound
|
A suspicious mound of soil that might spawn a zombie as you approach, or as you walk away. They are guaranteed to be encountered in Graveyard areas, but not The Grasping Plateau. During the Dark Harvest Festival, they might spawn a Grim Scarab instead of a zombie. | |
| Monster Cage
|
1x1 object that releases a random monster when broken.
Locations
Certain types of danger rooms feature monster cages. Some areas contain hidden cages that have the appearance of breakable blocks. The "med cache" boxes in the eastern area of the second floor of Ghosts in the Machine are actually monster cages containing constructs. Players can always find monster cages in: Monsters that don't spawn from Monster Cages
| |
| Swarm Portal
|
Allows the entry of swarm entities. Any swarm-infected monster above these dark portals will have their defenses increased until they are invulnerable.
Encountered in the Unknown Passage. First seen with release 2011-10-19. | |
| Bunker
|
An armored point of entry for Gremlin forces protected by barbed wire. Permanently disable it by shooting or throwing something into the door. Disabled bunkers appear damaged and the entrance is blocked by a hazardous fire pit.
First seen with release 2012-02-29. Encountered in | |
| Busted Floor
|
A suspicious hole in the floor. Usually, nasty mini monsters (Dust Bunnies, Glop Drops, or Scarabs) will crawl out and make a fuss.
It is a special monster spawner frequently encountered in Compounds. Variations (single tile, decorated) are seen in other areas. First seen with release 2012-05-09. | |
| Fiend Gate
|
A suspicious sigil that continuously spawns what appears to be a portal. Fiends come through it into battle.
Destroy this portal whenever it appears to reduce the flood of fiendish forces. First seen 26 February 2014. | |
| Burrow
|
A hole in the floor. Wolvers will occasionally come out.
First seen with release 2015-02-11. Encountered in the 10-1 | |
| Swarm Sphere
|
A peculiar black sphere encountered somewhat frequently in areas of the Core. Be careful, it will spawn a monster corrupted by The Swarm if struck, similar to the Monster Cage.
Encountered in Core areas. First seen with release 2015-05-13. | |
| Monster Garage
|
A garage shaped block that spawns a bunch of Drops off of it. Because Drops can be unruly when hanging out with friends, they’re sometimes forced to live in a garage.
Encountered in Treasure Vaults areas. First seen with release 2019-06-27. |
General Exploration
Items
Items are frequently dropped from map features, monsters, and treasure boxes. Rarely, they are simply on the ground waiting to be picked up.
Monsters
Monsters are the denizens that reside within the ever-changing halls of the Clockworks. There are currently six "families" of monsters found within the Clockworks; Beasts, Fiends, Undead, Constructs, Gremlins and Slimes. Each family (besides Gremlins) has at least two different "species" with varying methods of attacks.
NPCs
Occasionally, the player will encounter friendly NPCs in the field, or need to rescue NPCs before resuming exploration.
Treasure Boxes
A lucky find! Treasure boxes always contain goodies such as coins, tokens, heat, pickups or, on rare occasions, tier-based equipment for the knight to loot. They come in red and green varieties, with the red ones being more rewarding (and less often found) than the green ones.
World
The appearance of the area the player is exploring will be different depending on a variety of factors. In general, deeper depths are darker unless the area is contained in a giant sphere with moon or sun bulbs, as with Lichenous Lairs, Wolver Dens, and a few other areas. The floor, walls, and many entities will change color according to the status theme. Many areas will also have relevant weather conditions. The Theme and Environment of a Guild Hall can be changed to mimic some of these appearances.
